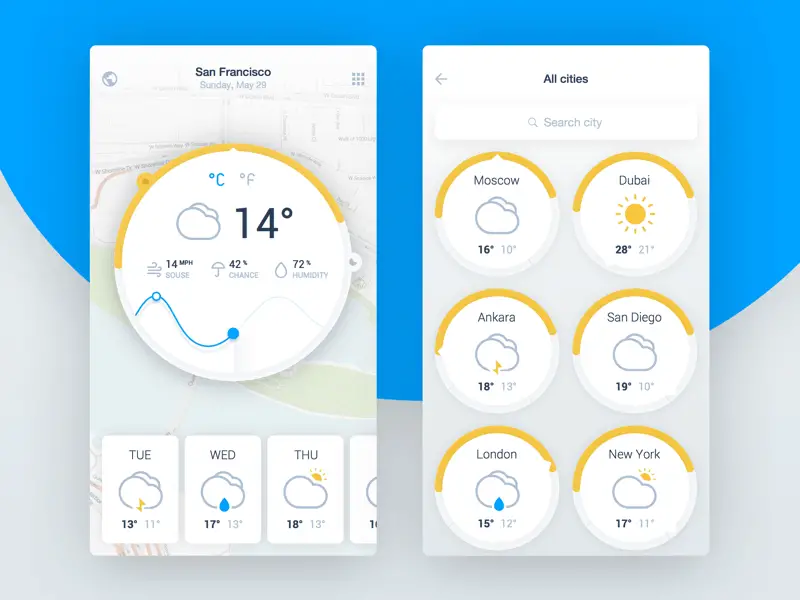
When we all make plans for holidays, there’s one thing we are most interested in: weather. It’s summer, it’s hot, the water feels amazing today, but how about tomorrow? Today we have put together a steamy list of weather mobile app design for your inspiration, even if you are on holiday!
Let’s think what mobile apps you use every day? The most popular widely used everyday apps are Camera, photo editing apps, email app, social media apps, and without a doubt a weather app. Although it’s not always 100% precis as a clock, the weather app can still guide us when planning the next day or week.
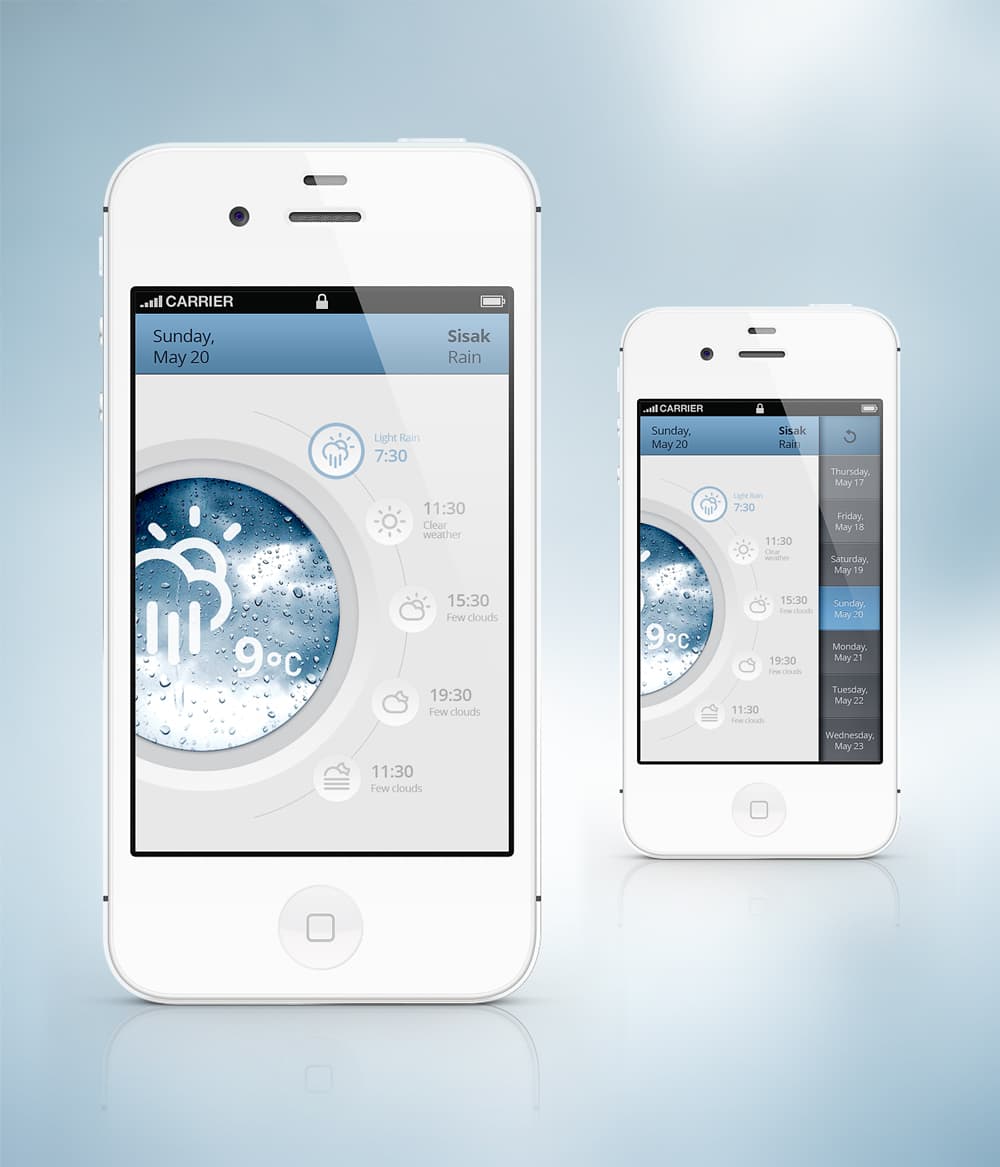
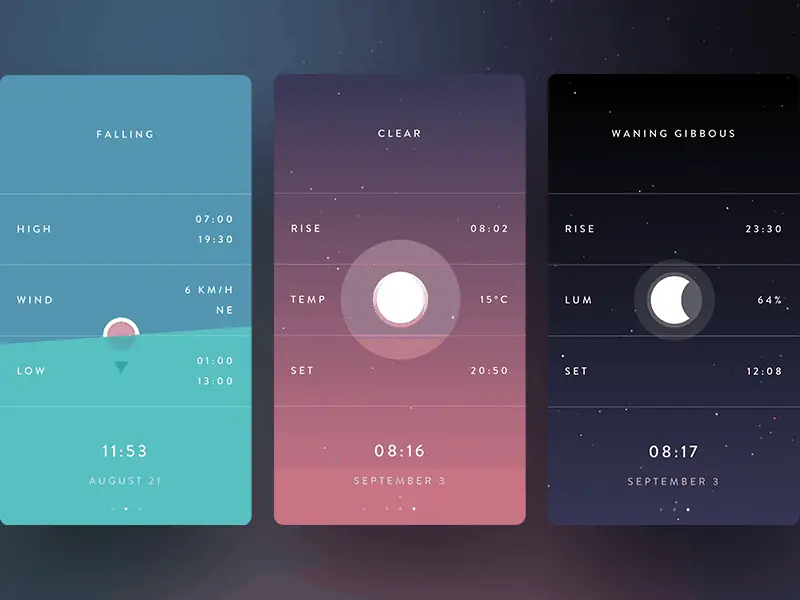
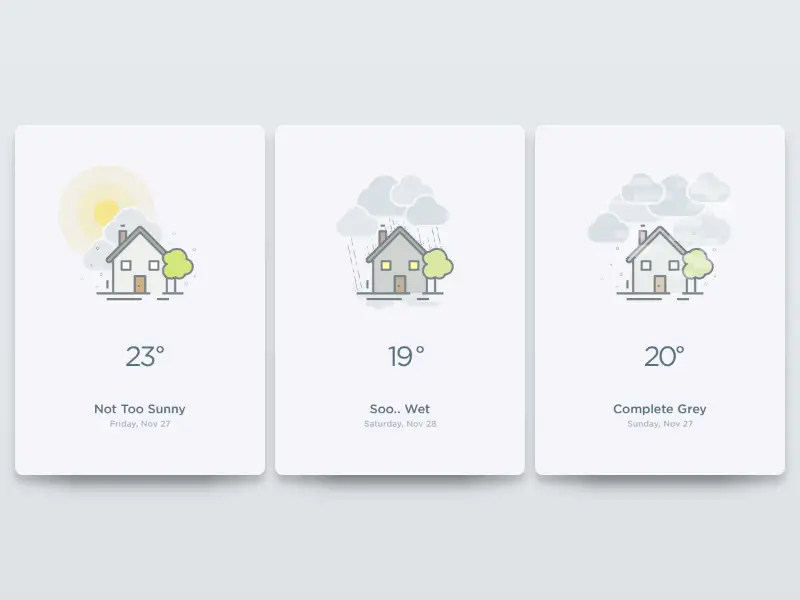
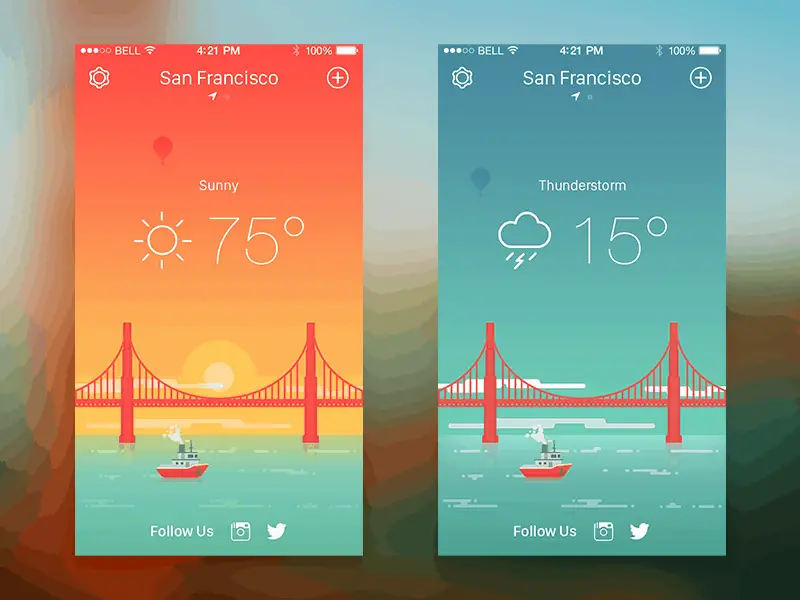
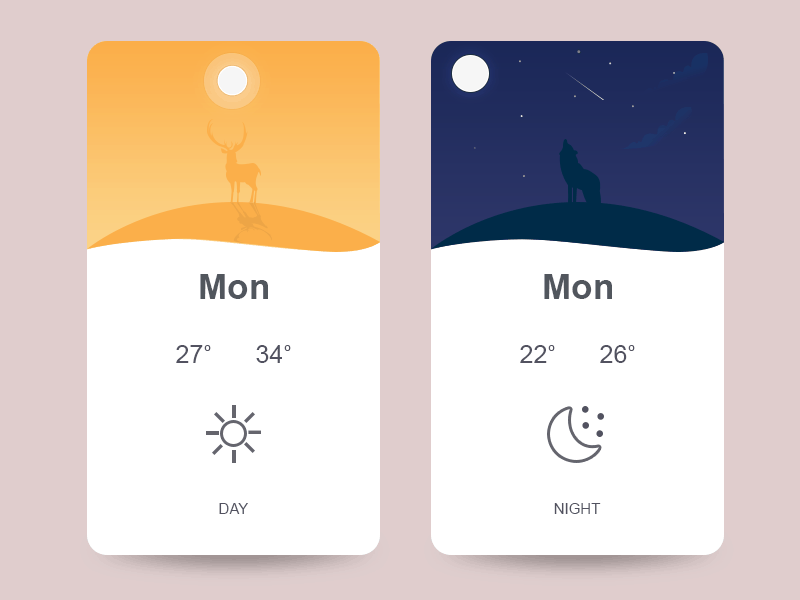
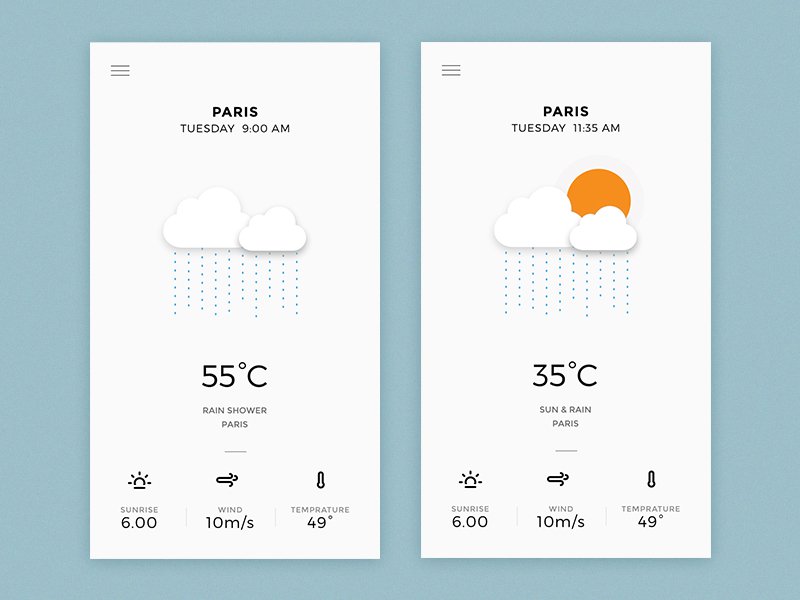
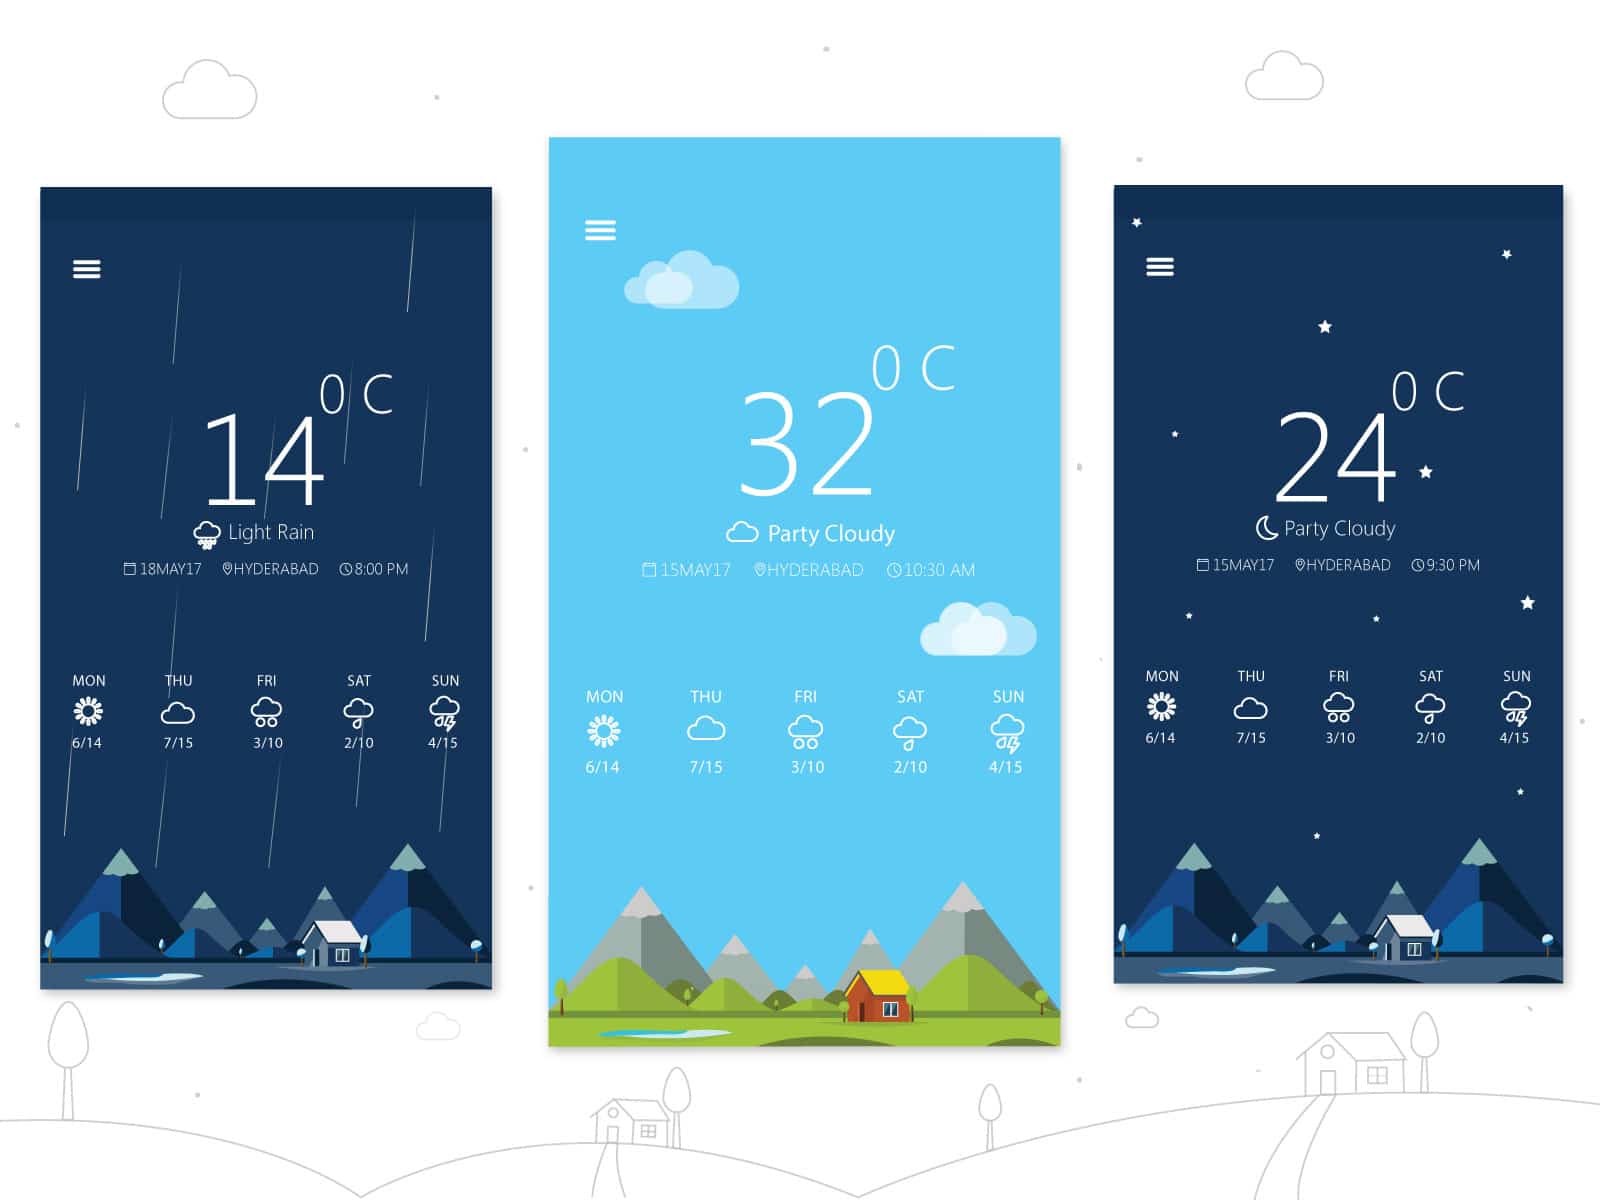
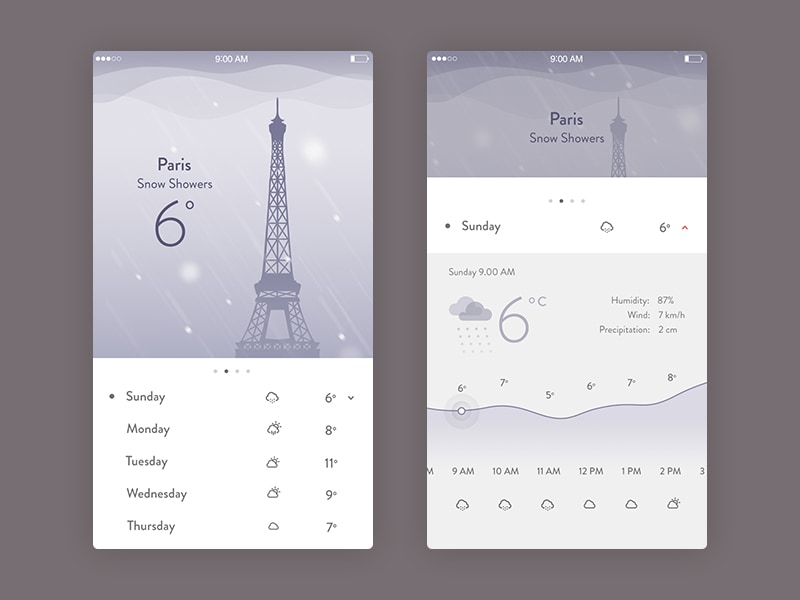
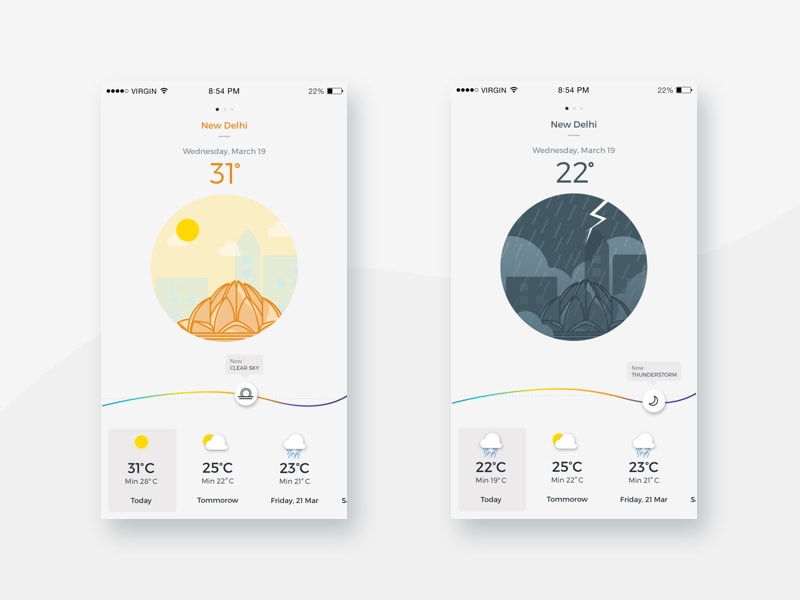
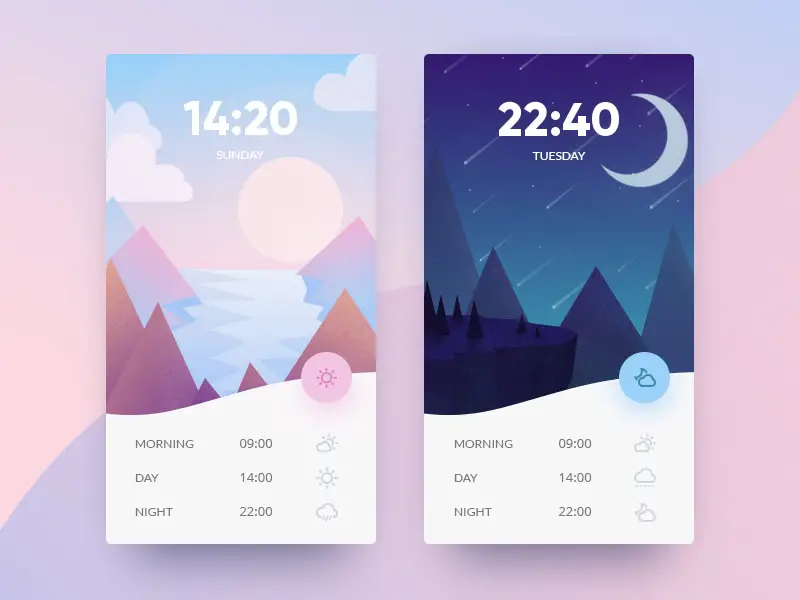
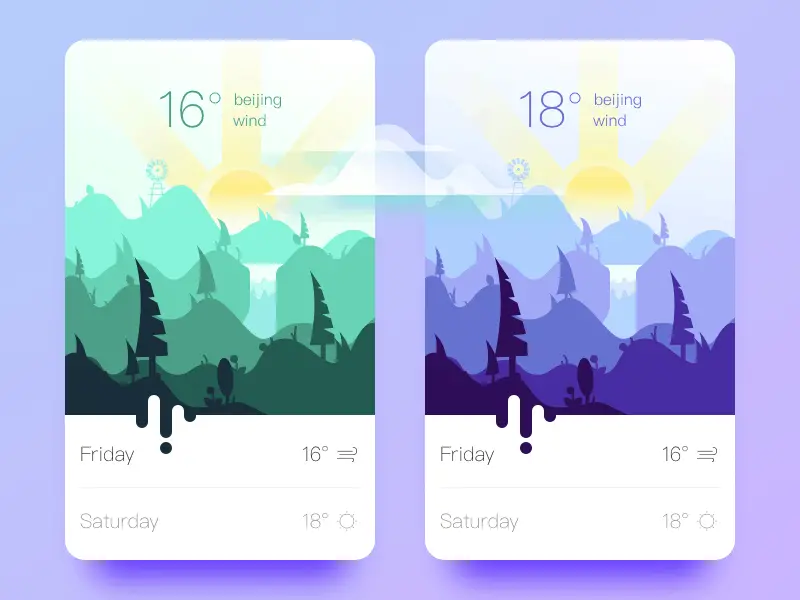
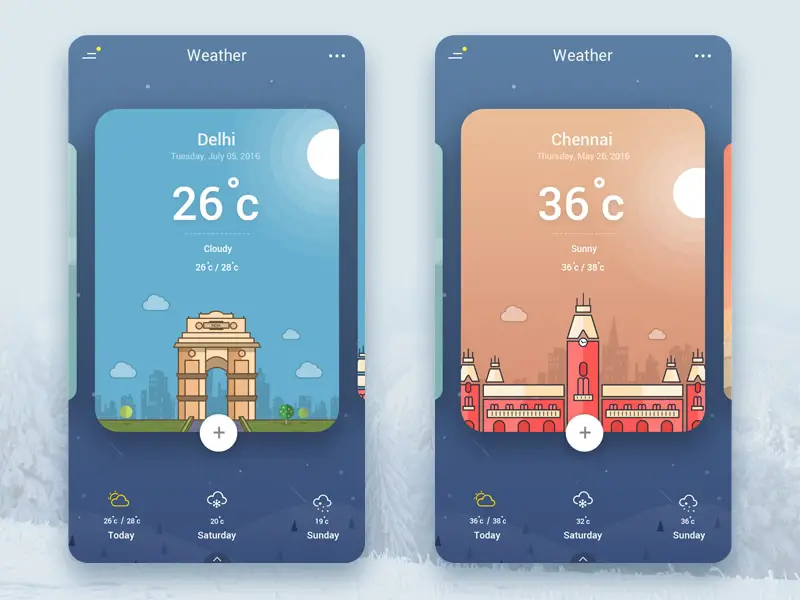
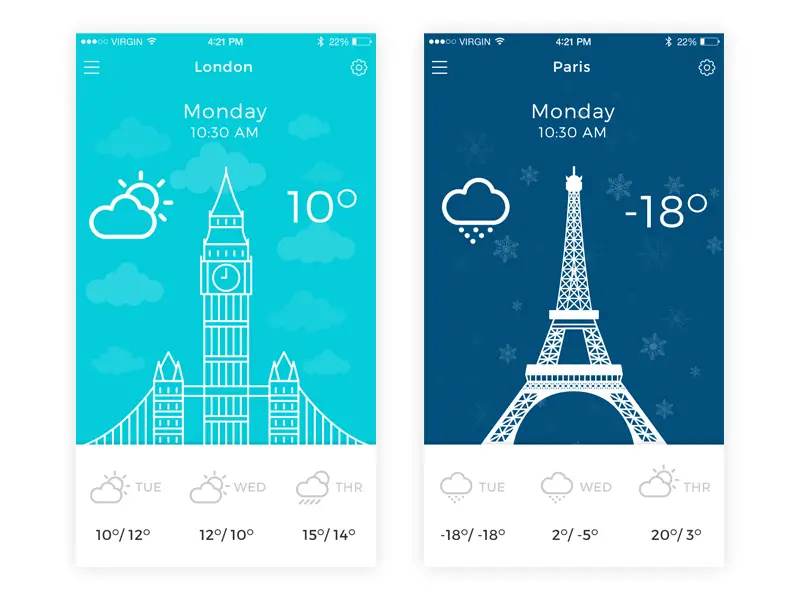
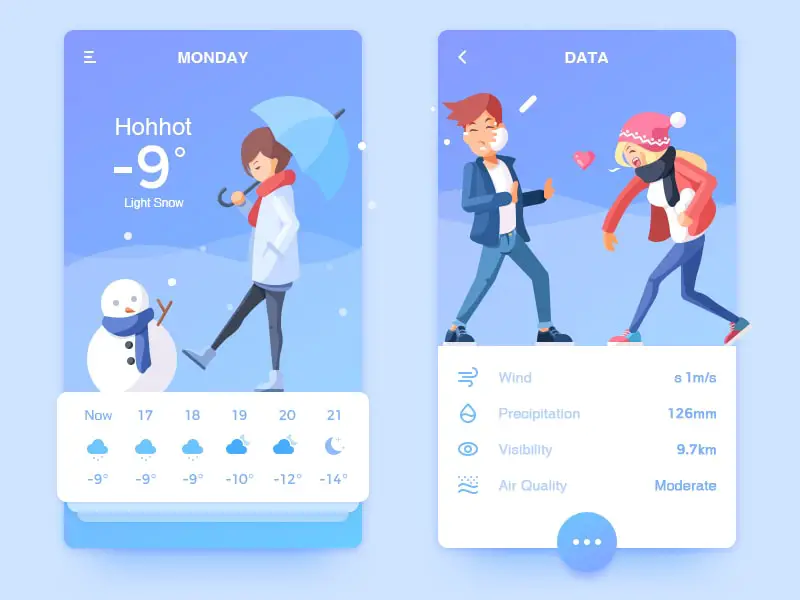
These days designers try their best to make a weather app not only useful but beautiful and colorful. Some designers use cities and their attractions to show weather for a certain area.
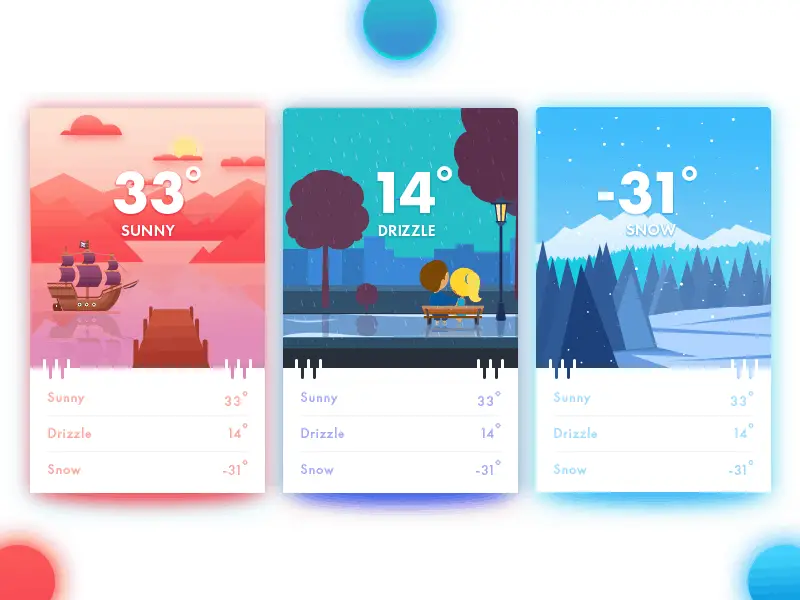
Sometimes, they choose a background for the app depending on weather conditions, it could be sunny, cloudy, rainy, and snowy. Besides, there are some apps with amazing animations, for example, when objects appear or thunderstorm shines in the background. Scroll down to see our collection of inspirational weather app designs and concepts.
We wholeheartedly hope that you enjoying and found useful this article. We try every day to shed a light on the things that could make a difference in the life of you, our designer readers. We also invite you to share this article with whom you thing could benefit from it. This way will help us continue writing about meaningful information, resources, and news for you all.
A good designer is constantly learning new tricks on how to apply different effects to a photo or built a form from scratch. Some of you may search for various tutorials just to improve your skills, or maybe you need to know some specific technique for your current project.
In any case, on this list, we have handpicked 20 latest graphic design tutorials to take your skills to a whole new level.
Here you’ll see Photoshop and Illustrator tutorials on how to create a movie poster from an image, apply endless photo effect, create geometric pattern and text effect, build a retro logo, and much more.
In a nutshell, a preprocessor is a computer program that modifies data to conform with the input requirements of another program. For CSS, a preprocessor is a scripting language that extends the capabilities of regular CSS with variables, nested rules, functions, and logical blocks.
The Beacon API is a JavaScript-based Web API for sending small amounts of data from the browser to the web server without waiting for a response. In this article, we’ll look at what that can be useful for, what makes it different from familiar techniques like XMLHTTPRequest (‘Ajax’), and how you can get started using it.
If you know why you want to use Beacon already, feel free to jump directly to the Getting Started section.
What Is The Beacon API For?
The Beacon API is used for sending small amounts of data to a server without waiting for a response. That last part is critical and is the key to why Beacon is so useful — our code never even gets to see a response, even if the server sends one. Beacons are specifically for sending data and then forgetting about it. We don’t expect a response and we don’t get a response.
Think of it like a postcard sent home when on vacation. You put a small amount of data on it (a bit of “Wish you were here” and “The weather’s been lovely”), put it in the mailbox, and you don’t expect a response. No one sends a return postcard saying “Yes, I do wish I was there actually, thank you very much!”
For modern websites and applications, there’s a number of use cases that fall very neatly into this pattern of send-and-forget.
Tracking Stats And Analytics Data
The first use case that comes to mind for most people is analytics. Big solutions like Google Analytics might give a good overview of things like page visits, but what if we wanted something more customized? We could write some JavaScript to track what’s happening in a page (maybe how a user interacts with a component, how far they’ve scrolled to, or which articles have been displayed before they follow a CTA) but we then need to send that data to the server when the user leaves the page. Beacon is perfect for this, as we’re just logging the data and don’t need a response.
There’s no reason we couldn’t also cover the sort of mundane tasks often handled by Google Analytics, reporting on the user themselves and the capability of their device and browser. If the user has a logged in session, you could even tie those stats back to a known individual. Whatever data you gather, you can send it back to the server with Beacon.
Debugging And Logging
Another useful application for this behavior is logging information from your JavaScript code. Imagine you have a complex interactive component on your page that works perfectly for all your tests, but occasionally fails in production. You know it’s failing, but you can’t see the error in order to begin debugging it. If you can detect a failure in the code itself, you could then gather up diagnostics and use Beacon to send it all back for logging.
In fact, any logging task can usefully be performed using Beacon, be that creating save-points in a game, collecting information on feature use, or recording results from a multivariate test. If it’s something that happens in the browser that you want the server to know about, then Beacon is likely a contender.
Can’t We Already Do This?
I know what you’re thinking. None of this is new, is it? We’ve been able to communicate from the browser to the server using XMLHTTPRequest for more than a decade. More recently we also have the Fetch API which does much the same thing with a more modern promise-based interface. Given that, why do we need the Beacon API at all?
The key here is that because we don’t get a response, the browser can queue up the request and send it without blocking execution of any other code. As far as the browser is concerned, it doesn’t matter if our code is still running or not, or where the script execution has got to, as there’s nothing to return it can just background the sending of the HTTP request until it’s convenient to send it.
That might mean waiting until CPU load is lower, or until the network is free, or even just sending it right away if it can. The important thing is that the browser queues the beacon and returns control immediately. It does not hold things up while the beacon sends.
To understand why this is a big deal, we need to look at how and when these sorts of requests are issued from our code. Take our example of an analytics logging script. Our code may be timing how long the users spend on a page, so it becomes critical that the data is sent back to the server at the last possible moment. When the user goes to leave a page, we want to stop timing and send the data back home.
Typically, you’d use either the unload or beforeunload event to execute the logging. These are fired when the user does something like following a link on the page to navigate away. The trouble here is that code running on one of the unload events can block execution and delay the unloading of the page. If unloading of the page is delayed, then the loading next page is also delayed, and so the experience feels really sluggish.
Keep in mind how slow HTTP requests can be. If you’re thinking about performance, typically one of the main factors you try to cut down on is extra HTTP requests because going out to the network and getting a response can be super slow. The very last thing you want to do is put that slowness between the activation of a link and the start of the request for the next page.
Beacon gets around this by queuing the request without blocking, returning control immediately back to your script. The browser then takes care of sending that request in the background without blocking. This makes everything much faster, which makes users happier and lets us all keep our jobs.
Getting Started
So we understand what Beacon is, and why we might use it, so let’s get started with some code. The basics couldn’t be simpler:
let result = navigator.sendBeacon(url, data);
The result is boolean, true if the browser accepted and queued the request, and false if there was a problem in doing so.
Using navigator.sendBeacon()
navigator.sendBeacon takes two parameters. The first is the URL to make the request to. The request is performed as an HTTP POST, sending any data provided in the second parameter.
The data parameter can be in one of several formats, all if which are taken directly from the Fetch API. This can be a Blob, a BufferSource, FormData or URLSearchParams — basically any of the body types used when making a request with Fetch.
I like using FormData for basic key-value data as it’s uncomplicated and easy to read back.
// URL to send the data to
let url = '/api/my-endpoint';

// Create a new FormData and add a key/value pair
let data = new FormData();
data.append('hello', 'world');

let result = navigator.sendBeacon(url, data);

if (result) {
  console.log('Successfully queued!');
} else {
  console.log('Failure.');
}
Browser Support
Support in browsers for Beacon is very good, with the only notable exceptions being Internet Explorer (works in Edge) and Opera Mini. For most uses, that should be fine, but it’s worth testing for support before trying to use navigator.sendBeacon.
That’s easy to do:
if (navigator.sendBeacon) {
  // Beacon code
} else {
  // No Beacon. Maybe fall back to XHR?
}
If Beacon isn’t available and your request is important, you could fall back to a blocking method such as XHR. Depending on your audience and purpose, you might equally choose to not bother.
An Example: Logging Time On A Page
To see this in practice, let’s create a basic system to time how long a user stays on a page. When the page loads we’ll note the time, and when the user leaves the page we’ll send the start time and current time to the server.
As we only care about time spent (not the actual time of day) we can use performance.now() to get a basic timestamp as the page loads:
let startTime = performance.now();
If we wrap up our logging into a function, we can call it when the page unloads.
let logVisit = function() {
  // Test that we have support
  if (!navigator.sendBeacon) return true;

  // URL to send the data to, e.g.
  let url = '/api/log-visit';

  // Data to send
  let data = new FormData();
  data.append('start', startTime);
  data.append('end', performance.now());
  data.append('url', document.URL);

  // Let's go!
  navigator.sendBeacon(url, data);
};
Finally, we need to call this function when the user leaves the page. My first instinct was to use the unload event, but Safari on a Mac seems to block the request with a security warning, so beforeunload works just fine for us here.
When the page unloads (or, just before it does) our logVisit() function will be called and provided the browser supports the Beacon API our beacon will be sent.
(Note that if there is no Beacon support, we return true and pretend it all worked great. Returning false would cancel the event and stop the page unloading. That would be unfortunate.)
Considerations When Tracking
As so many of the potential uses for Beacon revolve around tracking of activity, I think it would be remiss not to mention the social and legal responsibilities we have as developers when logging and tracking activity that could be tied back to users.
GDPR
We may think of the recent European GDPR laws as they related to email, but of course, the legislation relates to storing any type of personal data. If you know who your users are and can identify their sessions, then you should check what activity you are logging and how it relates to your stated policies.
Often we don’t need to track as much data as our instincts as developers tell us we should. It can be better to deliberately not store information that would identify a user, and then you reduce your likelihood of getting things wrong.
DNT: Do Not Track
In addition to legal requirements, most browsers have a setting to enable the user to express a desire not to be tracked. Do Not Track sends an HTTP header with the request that looks like this:
DNT: 1
If you’re logging data that can track a specific user and the user sends a positive DNT header, then it would be best to follow the user’s wishes and anonymize that data or not track it at all.
In PHP, for example, you can very easily test for this header like so:
if (!empty($_SERVER['HTTP_DNT'])) {
  // User does not wish to be tracked ...
}
In Conclusion
The Beacon API is a really useful way to send data from a page back to the server, particularly in a logging context. Browser support is very broad, and it enables you to seamlessly log data without negatively impacting the user’s browsing experience and the performance of your site. The non-blocking nature of the requests means that the performance is much faster than alternatives such as XHR and Fetch.
If you’d like to read more about the Beacon API, the following sites are worth a look.
UX is a crucial component of modern web design, and users’ expectations are constantly shifting. Though we cannot see into the future, changes made throughout the last decade indicate that adjusting for user needs has never been more crucial. To get ahead in the ever-changing mobile app sphere, designers have to be proactive at all times.
Let the following 7 UX trends be your guide to help prep for both the present and the future of UX design:
1. Journey Simplification
Users typically engage with websites or applications with a specific intention in mind, which they want to achieve as soon as possible. The most user-friendly applications and websites strive to simplify a user’s journey with time-saving designs. The essence of such designs is that they reduce the number of steps users have to take in order to achieve their goal. This should be done by presenting applicable information in an easy-to-use format and providing a smooth navigational flow. A time-saving design can incorporate several key aspects, including:
Linear Design. Linear design is a structured journey containing an established layout for beginning-middle-end points. It enables users to do one action at a time at each point in their journey. The consistent flow helps viewers discern how much time is necessary to complete the task.
Anticipatory Design. An anticipatory design attempts to recognize a user’s needs to swiftly and efficiently accommodate them. It reduces the chances of friction that make it difficult for users to complete their intentions.
Progressive Disclosure. If your website or application contains a lot of information, you might want to adopt a progressive disclosure technique to enhance user experience. Progressive disclosure makes information visible solely when users need it, which ensures viewers are not bombarded with information or distracted by content that is irrelevant to their goal.
Context-Based Information. Displaying only the most relevant information specific to user context is instrumental in creating an optimal user experience.
2. Focus on Content
Properly organized and readily available content is key to making websites and mobile applications appealing to their expected users. Recent trends concentrate on eliminating unnecessary distractions and instead, shining the spotlight on what is truly relevant: content.
Creating content-centered experiences involves either using a design highlighting content or having the content itself frame the design. Your ultimate goal should be to ensure there is nothing obstructing a user’s exposure to your website or application’s content. Designers typically begin by removing excessive visible clutter, which helps them concentrate on the essence of the message they want to convey. Visual features of this design strategy include:
Precise Visual Order. A well-ordered design facilitates and expedites a user’s ability to comprehend content. Powerful visual signals, such as using dissimilar colors for call-to-action links, are great means of guiding a user’s focus on specific interactive features and significant information.
Operative Decluttering. Eliminating irrelevant and otherwise useless details helps magnify important information, creating a more concentrated experience.
Whitespace. Increasing the amount of space between content grants it room to breathe and dramatically enhances a user’s experience.
3. Improved Personalization
Personalization is a technique embedded within the strategy of time-saving designs. Understanding the importance of the shift from creating generic experiences to individually targeted experiences is an aspect of UX that deserves extra emphasis. As businesses look for new means of crafting individualized brand experiences, the effort to understand the wants and needs of users on a deeper level continues to develop.
With the help of individualized data and advances in machine learning, technology is becoming capable of adjusting automatically for specific users. One of the most popular models of individualization seen in contemporary applications and websites is the incorporation of personalized recommendations based on user behaviors. These suggestions improve the chances that a user will take action when they visit your site. Among the many techniques to enhance personalization, the following methods are some of the most common:
Basing Content on User Location. Because many people use their digital devices while on the road, websites and applications should use the device’s area data to present content related to the user’s geographical location. As a result, the information presented is personalized to the environment surrounding each user.
Specific User Interface. A major goal of personalization will be adjusting the layout of a website or application based on the individual needs of a certain user. Following how a user interacts with a digital device and what issues they encounter, in conjunction with their specific data, is a goldmine of information. With it, applications and websites will be able to decide how to adapt the site for the user.
4. Humanization
Due to the impact of technology such as touch and voice recognition on smartphones and other digital devices, people now expect to interact with digital products in the way they would typically interact with another human. This means designers should start striving to create websites and applications that offer a more human experience for users.
The popularity of humanizing digital experience is correlated to connecting with user emotions. The key to humanizing digital experiences is by allowing users to feel connected to their devices in an emotional way. Different ways designers are attempting to provide consistent reactions and humanize the digital experience include:
Sharing emotions with face recognition
Micro-interactions
Creating natural means of interacting with apps
Mimicking emotions in feedback
5. Biometric Authentication
Applications and websites can make identity verification easier by replacing conventional means of entry. As bio-metric technology becomes more available it will be capable of recognizing a person’s identity based on particular characteristics. This will create an effortless authentication process for users.
Instead of having to manage an assortment of passwords for different websites and applications, biometrics can verify users with facial or voice recognition or fingerprints. This is an advancement with the potential to bolster security for businesses and users.
6. Video Content
The trend of video content is becoming increasingly vital in creating the optimal user experience. Designers can maximize the potential of their video content by keeping the following tips in mind:
Adjust for Portrait Frame. Since mobile phones are used in portrait orientation almost 100% of the time, all video content, and content in general, should be adjusted for this frame.
Adjust Video for Short Attention Spans. Modern means of displaying important information must be timely. With the use of formatting methods such as 360-degree videos and Facebook live, designers can present crucial information in a convenient manner.
HD Images and Videos. Providing a full-screen experience is essential, but so is providing top-quality images and videos. The quality of the videos on your website or application will have a major influence on user experience, so ensure images and videos are not pixelated and appear in HD.
7. Voice-Based Interaction
As the hardware devices we use to access the web become more streamlined, so should the UX. The latest smart phones, tablets and even laptops are losing more and more buttons every generation. This progression has caused UX to go through one unique development: voice user interface (VUI).
VUIs have become integrated in most major technology, such as products from Google, Amazon, Apple, and Microsoft. A large percentage of web searches are done by voice, with the number projected to rise throughout 2018. With your users almost definitely using tech from one of these innovative VUI pioneers, it might be a good idea to see how your website can benefit from adapting.
WordPress doesn’t offer any kind of notification system. All you can use is the wp_mail() function, but all of the settings have to be hardcoded, or else you have to create a separate settings screen to allow the user tweak the options. It takes many hours to write a system that is reliable, configurable and easy to use. But not anymore. I’ll show you how to create your own notification system within minutes with the free Notification plugin. By notification, I mean any kind of notification. Most of the time, it will be email, but with the plugin we’ll be using, you can also send webhooks and other kinds of notifications.
While creating a project for one of my clients, I encountered this problem I’ve described. The requirement was to have multiple custom email alerts with configurable content. Instead of hardcoding each and every alert, I decided to build a system. I wanted it to be very flexible, and the aim was to be able to code new scenarios as quickly as possible.
The code I wrote was the start of a great development journey. It turned out that the system I created was flexible enough that it could work as a separate package. This is how the Notification plugin was born.
Suppose you want to send an email about a user profile being updated by one of your website’s members. WordPress doesn’t provide that functionality, but with the Notification plugin, you can create such an email in minutes. Or suppose you want to synchronize your WooCommerce products with third-party software by sending a webhook to a separate URL every time a new product is published. That’s easy to do with the plugin, too.
Lessons Learned While Developing WordPress Plugins
Good plugin development and support lead to more downloads. More downloads mean more money and a better reputation. Learn how you can develop good-quality products with seven golden rules. ?
In this article, you’ll learn how to integrate the plugin in your own application and how to create an advanced WordPress notification system more quickly and easily than ever.
In this article, we’ll cover:
how to install the plugin,
the idea behind the plugin and its architecture,
creating a custom scenario for notifications,
creating the action (step 1 of the process),
creating the trigger (step 2 of the process),
creating the custom notification type,
how to enable white-label mode and bundle the plugin in your package.
Installing The Plugin
To create your own scenarios, you are going to need the Notification plugin. Just install it from the WordPress.org repository in your WordPress dashboard, or download it from the GitHub repository.
Later in the article, you’ll learn how to hide this plugin from your clients and make it work as an integrated part of your plugin or theme.
The Idea Of The Plugin
Before going into your code editor, you’ll need to know what the plugin’s architecture looks like. The plugin contains many various components, but its core is really a few abstract classes.
The main components are:
The notification This could be an email, webhook, push notification or SMS.
The trigger This is what sends the notification. It’s effectively the WordPress action.
The merge tag This is a small portion of the dynamic content, like {post_title}.
To give you a better idea of how it all plays together, you can watch this short video:
The core of the Notification plugin is really just an API. All of the default triggers, like Post published and User registered are things built on top of that API.
Because the plugin was created for developers, adding your own triggers is very easy. All that’s required is a WordPress action, which is just a single line of code and a class declaration.
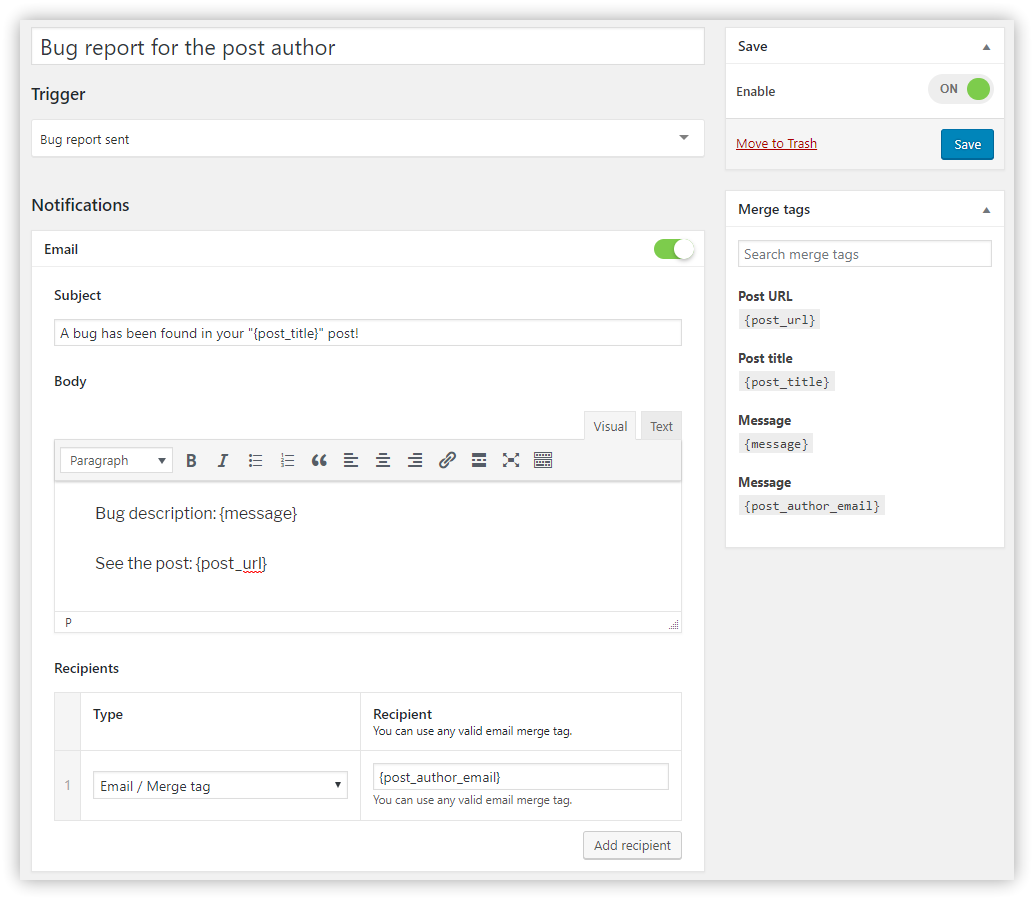
Custom Scenario
Let’s devise a simple scenario. We’ll add a text area and button to the bottom of each post, allowing bugs in the article to be reported. Then, we’ll trigger the notification upon submission of the form.
For simplicity, let’s make it a static form, but there’s no problem putting the action in an AJAX handler, instead of in the wp_mail() function.
Let’s create the form.
The Form
add_filter( 'the_content', 'report_a_bug_form' );
function report_a_bug_form( $content ) {

    // Display the form only on posts.
    if ( ! is_single() ) {
        return $content;
    }

    // Add the form to the bottom of the content.
    $content .= '<form action="' . admin_url( 'admin-post.php' ) . '" method="POST">
        <input type="hidden" name="post_id" value="' . get_ID() . '">
        <input type="hidden" name="action" value="report_a_bug">
        <textarea name="message" placeholder="' . __( 'Describe what's wrong...', 'reportabug' ) . '"></textarea>
        <button>' . __( 'Report a bug', 'reportabug' ) . '</button>
    </div>';

    return $content;

}
Please note that many components are missing, like WordPress nonces, error-handling and display of the action’s result, but these are not the subject of this article. To better understand how to handle these actions, please read the article mentioned above.
Preparing The Action
To trigger the notification, we are going to need just a single action. This doesn’t have to be a custom action like the one below. You can use any of the actions already registered in WordPress core or another plugin.
The Form Handler And Action
add_action( 'admin_post_report_a_bug', 'report_a_bug_handler' );
add_action( 'admin_post_nopriv_report_a_bug', 'report_a_bug_handler' );
function report_a_bug_handler() {

    do_action( 'report_a_bug', $_POST['post_id'], $_POST['message'] );

    // Redirect back to the article.
    wp_safe_redirect( get_permalink( $_POST['post_id'] ) );
    exit;

}
You can read more on how to use the admin-post.php file in the WordPress Codex.
This is all we need to create a custom, configurable notification. Let’s create the trigger.
Registering The Custom Trigger
The trigger is just a simple class that extends the abstract trigger. The abstract class does all of the work for you. It puts the trigger in the list, and it handles the notifications and merge tags.
Let’s start with the trigger declaration.
Minimal Trigger Definition
class ReportBug extends BracketSpaceNotificationAbstractsTrigger {

    public function __construct() {

        // Add slug and the title.
        parent::__construct(
            'reportabug',
            __( 'Bug report sent', 'reportabug' )
        );

        // Hook to the action.
        $this->add_action( 'report_a_bug', 10, 2 );

    }

    public function merge_tags() {}

}
All you need to do is call the parent constructor and pass the trigger slug and nice name.
Then, we can hook into our custom action. The add_action method is very similar to the add_action() function; so, the second parameter is the priority, and the last one is the number of arguments. Only the callback parameter is missing because the abstract class does that for us.
Having the class, we can register it as our new trigger.
register_trigger( new ReportBug() );
This is now a fully working trigger. You can select it from the list when composing a new notification.
Although the trigger is working and we can already send the notification we want, it’s not very useful. We don’t have any way to show the recipient which post has a bug and what the message is.
This would be the time, then, to register some merge tags and set up the trigger context with the action parameters we have: the post ID and the message.
To do this, we can add another method to the trigger class. This is the action callback, where we can catch the action arguments.
Handling Action Arguments
public function action( $post_ID, $message ) {

    // If the message is empty, don't send any notifications.
    if ( empty( $message ) ) {
        return false;
    }

    // Set the trigger properties.
    $this->post    = get_post( $post_ID );
    $this->message = $message;

}
Note the return false; statement. If you return false from this method, the trigger will be stopped, and no notification will be sent. In our case, we don’t want a notification to be submitted with an empty message. In the real world, you’d want to validate that before the form is sent.
Then, we just set the trigger class’ properties, the complete post object and the message. Now, we can use them to add some merge tags to our trigger. We can just fill the content of the merge_tags method we declared earlier.
This will add four merge tags, all ready to use while a notification is being composed.
The merge tag is an instance of a special class. You can see that there are many types of these tags, and we are using them depending on the value that is returned from the resolver. You can see all merge tags in the GitHub repository.
All merge tags are added via the add_merge_tag method, and they require the config array with three keys:
slug The static value that will be used in the notification (i.e. {post_url}).
name The translated label for the merge tag.
resolver The function that replaces the merge tag with the actual value.
The resolver doesn’t have to be the closure, as in our case, but using it is convenient. You can pass a function name as a string or an array if this is a method in another class.
In the resolver function, only one argument is available: the trigger class instance. Thus, we can access the properties we just set in the action method and return the value we need.
And that’s all! The merge tags are not available to use with our trigger, and we can set up as many notifications of the bug report as we want.
The Notification plugin offers not only custom triggers, but also custom notification types. The plugin ships with two types, email and webhook, but it has a simple API to register your own notifications.
It works very similarly to the custom trigger: You also need a class and a call to one simple function to register it.
I’m showing only an example; the implementation will vary according to the system you wish to integrate. You might need to include a third-party library and call its API or operate in WordPress’ file system, but the guide below will set you up with the basic process.
Let’s start with a class declaration:
class CustomNotification extends BracketSpaceNotificationAbstractsNotification {

    public function __construct() {

        // Add slug and the title.
        parent::__construct(
            'custom_notification',
            __( 'Custom Notification', 'textdomain' )
        );

    }

    public function form_fields() {}

    public function send( BracketSpaceNotificationInterfacesTriggerable $trigger ) {}

}
In the constructor, you must call the parent’s class constructor and pass the slug and nice name of the notification.
The form_fields method is used to create a configuration form for notifications. (For example, the email notification would have a subject, body, etc.)
The send method is called by the trigger, and it’s where you can call the third-party API that you wish to integrate with.
Next, you have to register it with the register_notification function.
register_trigger( new CustomNotification() );
The Notification Form
There might be a case in which you have a notification with no configuration fields. That’s fine, but most likely you’ll want to give the WordPress administrator a way to configure the notification content with the merge tags.
That’s why we’ll register two fields, the title and the message, in the form_fields method. It looks like this:
public function form_fields() {

    $this->add_form_field( new BracketSpaceNotificationDefaultsFieldInputField( array(
        'label'       => __( 'Title', 'textdomain' ),
        'name'        => 'title',
        'resolvable'  => true,
        'description' => __( 'You can use merge tags', 'textdomain' ),
    ) ) );

    $this->add_form_field( new BracketSpaceNotificationDefaultsFieldTextareaField( array(
        'label'       => __( 'Message', 'textdomain' ),
        'name'        => 'message',
        'resolvable'  => true,
        'description' => __( 'You can use merge tags', 'textdomain' ),
    ) ) );

}
As you can see, each field is an object and is registered with the add_form_field method. For the list of all available field types, please visit the GitHub repository.
Each field has the translatable label, the unique name and a set of other properties. You can define whether the field should be resolved with the merge tags with the resolvable key. This means that when someone uses the {post_title} merge tag in this field, it will be changed with the post’s actual title. You can also provide the description field for a better user experience.
At this point, your custom notification type can be used in the plugin’s interface with any available trigger type.
In order to make it really work, we have to use the send method in our notification class declaration. This is the place where you can write an API call or use WordPress’ file system or any WordPress API, and do whatever you like with the notification data.
This is how you can access it:
public function send( BracketSpaceNotificationInterfacesTriggerable $trigger ) {

    $title   = $this->data['title'];
    $message = $this->data['message'];

    // @todo Write the integration here.

}
At this point, all of the fields are resolved with the merge tags, which means the variables are ready to be shipped.
That gives you endless possibilities to integrate WordPress with any service, whether it’s your local SMS provider, another WordPress installation or any external API you wish to communicate with.
White Labeling And Bundling The Plugin
It’s not ideal to create a dependency of a plugin that can be easily deactivated and uninstalled. If you are building a system that really requires the Notification plugin to be always available, you can bundle the plugin in your own code.
If you’ve used the Advanced Custom Fields plugin before, then you are probably familiar with the bundling procedure. Just copy the plugin’s files to your plugin or theme, and invoke the plugin manually.
The Notification plugin works very similarly, but invoking the plugin is much simpler than with Advanced Custom Fields.
Just copy the plugin’s files, and require one file to make it work.
The plugin will figure out its location and the URLs.
But bundling the plugin might not be enough. Perhaps you need to completely hide that you are using this third-party solution. This is why the Notification plugin comes with a white-label mode, which you can activate at any time.
It also is enabled as a single call to a function:
notification_whitelabel( array(
    // Admin page hook under which the Notifications will be displayed.
    'page_hook'       => 'edit.php?post_type=page',
    // If display extensions page.
    'extensions'      => false,
    // If display settings page.
    'settings'        => false,
    // Limit settings access to user IDs.
    // This works only if settings are enabled.
    'settings_access' => array( 123, 456 ),
) );
By default, calling this function will hide all of the default triggers.
Using both techniques, white labeling and bundling, will completely hide any references to the plugin’s origin, and the solution will behave as a fully integrated part of your system.
Conclusion
The Notification plugin is an all-in-one solution for any custom WordPress notification system. It’s extremely easy to configure, and it works out of the box. All of the triggers that are registered will work with any notification type, and if you have any advanced requirements, you can save some time by using an existing extension.
If you’d like to learn more details and advanced techniques, go to the documentation website.
I’m always open to new ideas, so if you have any, you can reach out to me here in the comments, via the GitHub issues or on Twitter.
My story is a success story of a kind — the kind that involves redefining success. For me, that makes it worth telling. Let’s start from (almost) the beginning.
Pepsi CEO Indra Nooyi gets four hours.
Fashion designer Tom Ford logs just three.
Angela Ahrendts, Apple’s VP of Retail, says she gets a headache after six. Sleep is a huge topic in startup circles.
Lately, the when, how, and how much is constantly debated and dissected.
And while leaders like Nooyi, Ford and Ahrendts are among “the Sleepless Elite” who thrive on just a few hours each night …
Indeed, Singapore is where we are today is by Design. Nothing can take this away from us. As Mr. Lee said, our founding fathers did a great job in understanding and defining problems, generate solutions, prototype, test, and review. All these steps are key pillars of any proven Design Thinking process.
While Design Thinking is a proven process to move forward, the “ingredients” driving the context for this process are now very different. I would argue that we have a far more difficult job today than our founding fathers. The irony being that Singapore’s successes may ultimately hold us back.
SG100: Incremental improvements or Radical change?
A few years ago, we celebrated our 50 years of independence. Will the next 50 years (SG100) be more of the same as we have now? Or is there a need for a radical change that will take us towards a better future?
Actually, many of the solutions and policies our founders created then were radical and different. Fortunately, most of the policies proved to be right thereby making life better for many citizens and forming the country we know today. But are these solutions still relevant in today’s context?
If we decide that change is required how are we going to better understand our enabling factors and roadblocks so that we can better frame the problems to be solved?
A Better Framework to Contextualise Problems
Whenever innovators try to create impactful change, we tend to frame our challenges through three lenses: “things we own”, “things we do”, and “things we measure ourselves by”.
“Things we own” are assets we build, buy and/or make. For example, if we want a future in sustainable energy, how can we invest deeply in this future without jeopardising the value we have created in Jurong Island’s oil refinery activities? How can we create a credible “Smart Nation” when the majority of our homes do not have the wiring/wireless infrastructure to enable this? On a smaller scale, you might wonder if a universal payment system like Allipay or WeChat Pay will happen in Singapore when we have invested so much in a “state of the art” credit card infrastructure both in our pockets and in retail shops. It is hard to let things go when so much effort has been taken, or so many livelihoods depend on it.
Our processes and culture dictate the “things we do”. How can we solve wicked problems highlighted by Mr Lee in having to raise fares in public transport? Especially, when civil servants fall under intense criticism and scrutiny? If daring to “fail” is a hallmark of creativity, then how can we expect the various government agencies dare to make a difference? Won’t our “Kiasu” (Hokkien for cannot lose out) and “Kiasi” (Hokkien for afraid to die) culture lead us down a path of mediocrity as we just end up preferring the status quo rather than exploring a new unknown.
Finally, the “things we measure ourselves by” implies how we measure success. Most of the time this is related to money. If you had a very well paying job, would you consider changing it even if it will be obsolete in a few years? For example, could banks give up relationship managers when there seems to be a future in Robo-Investing? In a Singapore context, the analogy would perhaps be our GDP. If we refer to the Singapore Statistics, the manufacturing sector (the largest contributor to our GDP) declined to 19.2% in 2017 from a high of 28.2% in 2004. This was something we last experienced in the early 1970’s! We struggle against other countries with a much lower cost base and an amazing capacity to learn. How do we rethink Singapore’s economic engines when our largest contributor to our GDP could hold us at bay?
Keep Moving Forward
I agree with the Prime Minister; by using Design Thinking the possibilities are endless for our beloved country, but we must also be aware what is holding us back from truly reimagining what the future could be.
I leave you a final analogy. I hate to use Apple but everyone gets it. Apple was struggling in a world of computing giants. Under the strong leadership of one man, the company became a huge success. Apple’s current CEO has many of the same problems as we have as a nation. So what should Apple do? Perhaps our answer is not that foreign after all.
I love to hear what you think about this post, so let us have a conversation by leaving your comments and feedback below.
This article was originally posted on LinkedIn on April 28, 2018.