Archive

Archive for November, 2020

Branding 101: How to Get Your Design Business Online

November 26th, 2020 No comments

You’ve named your business. You’ve sorted out the visual branding piece. Now, it’s time to get your business online so you can start making money.

In this post, we’re going to look at where your web design business needs to set up shop online and how to get it up and running quickly.

Step 1: Set Up Your Website

As a web designer or developer, having a website is non-negotiable.

Not only does a website provide prospective clients with all the information they need about you, it can help you automate many of those annoying tasks that get in the way of your actual paid work.

So, let’s start here:

Buy Your Domain Name

If you haven’t done so already, use the business name generator exercise to come up with a domain name. You then have a couple of options for buying it.
To Do:

  • Buy it from a domain name provider like GoDaddy or Domain.com;
  • Or buy it from your web hosting company;
  • Check the next step to see which option makes the most sense for you.

Choose a CMS

Use the same CMS as the one you’ll use to build your clients’ sites. That way, clients don’t wonder why you’d use something like Squarespace for your site, but then recommend WordPress for theirs, for example.

To Do:

  • If you use a self-hosted CMS (like WordPress, Drupal, or Joomla), hold on this until you purchase your web hosting;
  • If you use a hosted CMS (like Wix, Squarespace, or Shopify), you won’t need to do the next step. Instead, just sign up for your website builder and buy your domain name now.

Buy Your Web Hosting

If you’re wondering what the difference is between the various types of web hosting, read this post.

Basically, this is what you’re looking for:

  • A hosting company with a good reputation that provides expert and timely support;
  • An affordable starter plan — either shared or cloud hosting;
  • Server locations near you (at the very least, in the same country as you);
  • Top-notch security features at the server level as well as the physical hosting facility;
  • Caching and other speed optimizations built into the server and on-site equipment;
  • Compatibility with your CMS (look for one-click install, too).

Also, look for add-ons like SSL certificates, CDNs, and, of course, a free domain name.

To Do:

  • Sign up for the hosting plan you want along with your domain name and SSL certificate (this is a must for SEO);
  • Install your CMS from the control panel once you’re ready to go.

Build Your Website

Ultimately, you have two goals here:

  1. To build a website that convinces prospective clients that you’re the real deal;
  2. To build a website that prospects would want for themselves.

So, there’s no need to go crazy with outlandish features or futuristic animations and design. Keep it simple. Keep it neat. And give prospects an honest portrayal of who you are, and what you can do for them.

Design It

The first thing to do is take all that work you did to create your visual branding and use it to design your website.

If you’re building a WordPress website, consider starting with one of these multipurpose themes.

Build Out the Pages You Need

A theme will automatically create the pages you need (most of them, anyway). If you’re not sure which ones to start with, these are the ones your prospects are going to be looking for:

You may also want to add separate pages for Testimonials and Case Studies once you’ve accumulated enough of them to show off. For now, you can include samples of your work in the Portfolio page and testimonials on the Home page.

Fill in the Content

Even if writing isn’t your strong suit, that’s okay. So long as the content you write for your site is free of spelling and grammar errors, your prospective clients are going to focus on what you’re telling them, not on how proficient a writer you are.

That said, if you’re nervous about this piece of your website, here are some tips to help you out:

1. Be concise, it’s not just minimal design that goes over well with modern audiences. Minimal copy does, too.

2. Be transparent. Tell prospects what exactly they can expect when they work with you and why your web design services are going to be different from the competition.

3. Consumers don’t trust companies that use meaningless buzzwords and make empty claims. Instead, focus on writing about the real and very competitive skills you have. According to research from NIDO Student, these are the skills employers look for when hiring a designer:

4. Let your images tell some of the story for you. Just make sure you use (or create) images that will impress your audience.

5. After you’ve written your content, take a step back and tackle the structure and formatting from a designer’s POV.

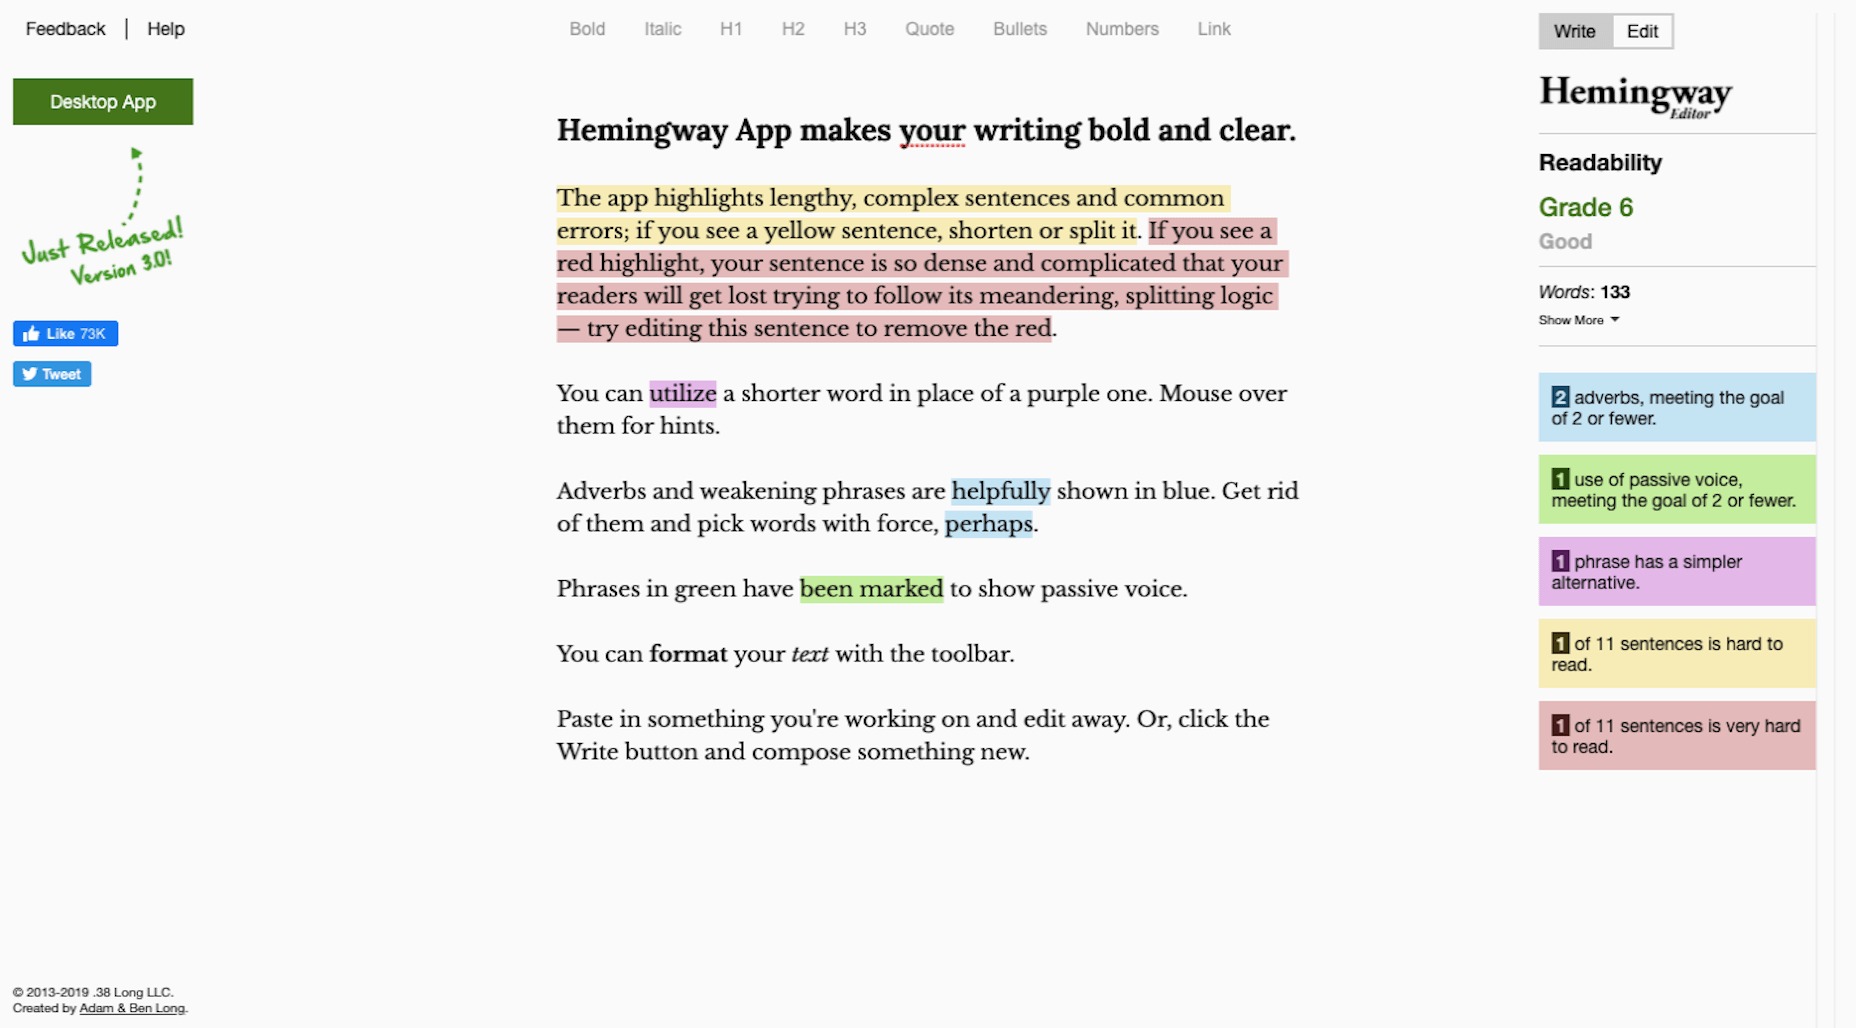
6. Before you hit the “Publish” button, run your copy through Hemingway Editor to ensure your content is error-free.
Add the Right Features

When I talk about features, I’m referring to anything outside the main design and content on your website. These are usually sales and marketing tools like:

  • Chatbot/live chat
  • Contact forms
  • Pop-ups or notification banners
  • Discovery call scheduler
  • Cookies consent notice

Only add the features you absolutely need. In other words, the features that will automate the marketing and sales tasks you’d otherwise have to manage on your own.

Step 2: Optimize Your Website for Search Engines

Search engine optimization (SEO) is a very important part of the work you do to get your business online. Here’s why:

After you launch your business and website, the next thing you’re going to focus on is getting clients. This can take a lot of work as you pore over the following resources for referrals and leads:

  • Your existing contact list (i.e. family, friends, old employers, colleagues, etc.);
  • Freelance job boards;
  • Industry-specific job boards;
  • Social media posts, pages, and groups;
  • Google search results for “we’re hiring”;
  • And so on…

And when you’re not busy cold-emailing prospective clients or talking to them on the phone, you’re probably going to be working on your business’ processes. Running a business is very time-consuming.

So, what happens when you finally start working on website projects? It’s not like the client search ends there. It’s an ongoing thing. Which is why your website needs to be optimized for search.
Once your site gets indexed by Google and starts to generate authority, your pages will rank better and the increased visibility will start generating leads without you having to actively make the first move.

SEO is a huge topic, so I’m not going to cover it here. However, the links below will do a good job of guiding you towards your next steps.

To Do:

Step 3: Get Active on Social Media

Your website is going to play a lot of roles:

  • Digital business card;
  • Authority builder;
  • Marketing vehicle;
  • Sales platform;
  • Content marketer.

But there’s one very critical thing it can’t do and that’s directly converse with your audience and grow your network. This is why you need to spend time building out your social media once your website is good to go.

As for which social media platforms to use (as there are way too many), here are my thoughts:

Become an authority on Twitter.

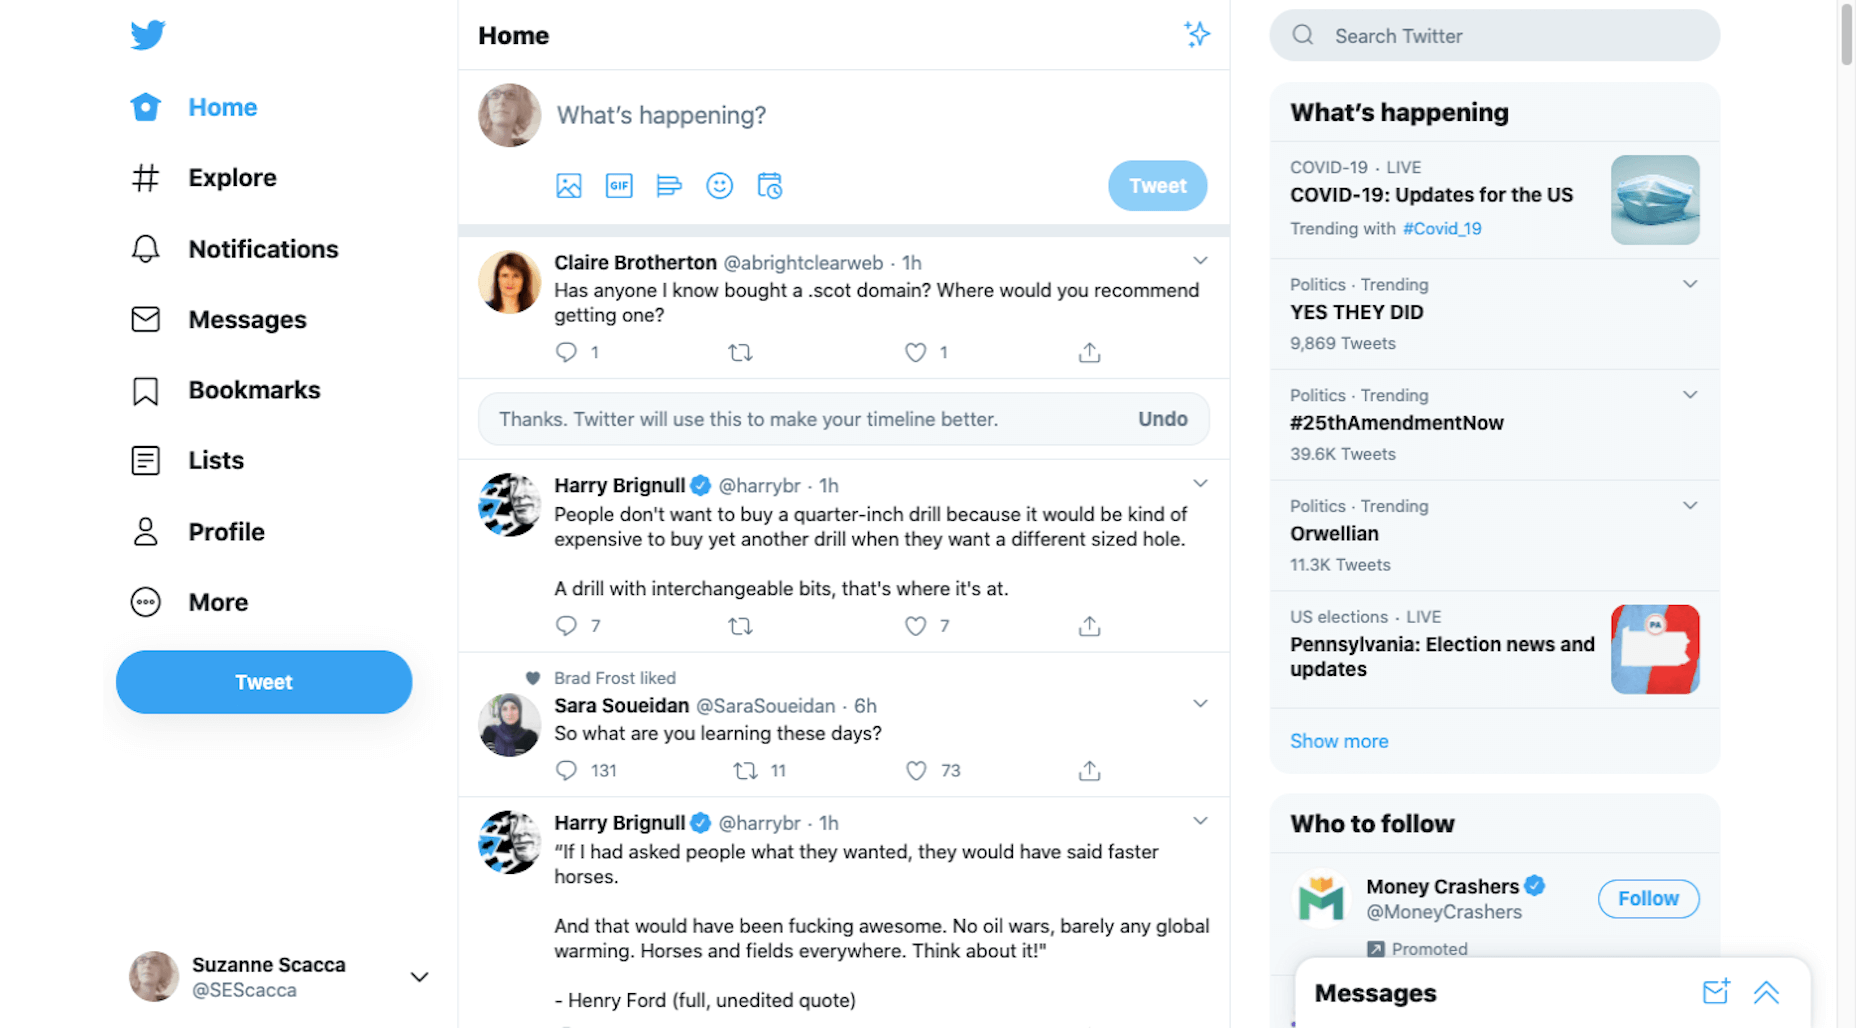
Twitter is a good place to share daily thoughts and interesting content you’ve found on the web.

Get discovered on LinkedIn.

LinkedIn is useful because it’s another place to get noticed by potential employers, so make sure your relevant work experience and portfolio are up-to-date.

Connect with other creatives on Facebook.

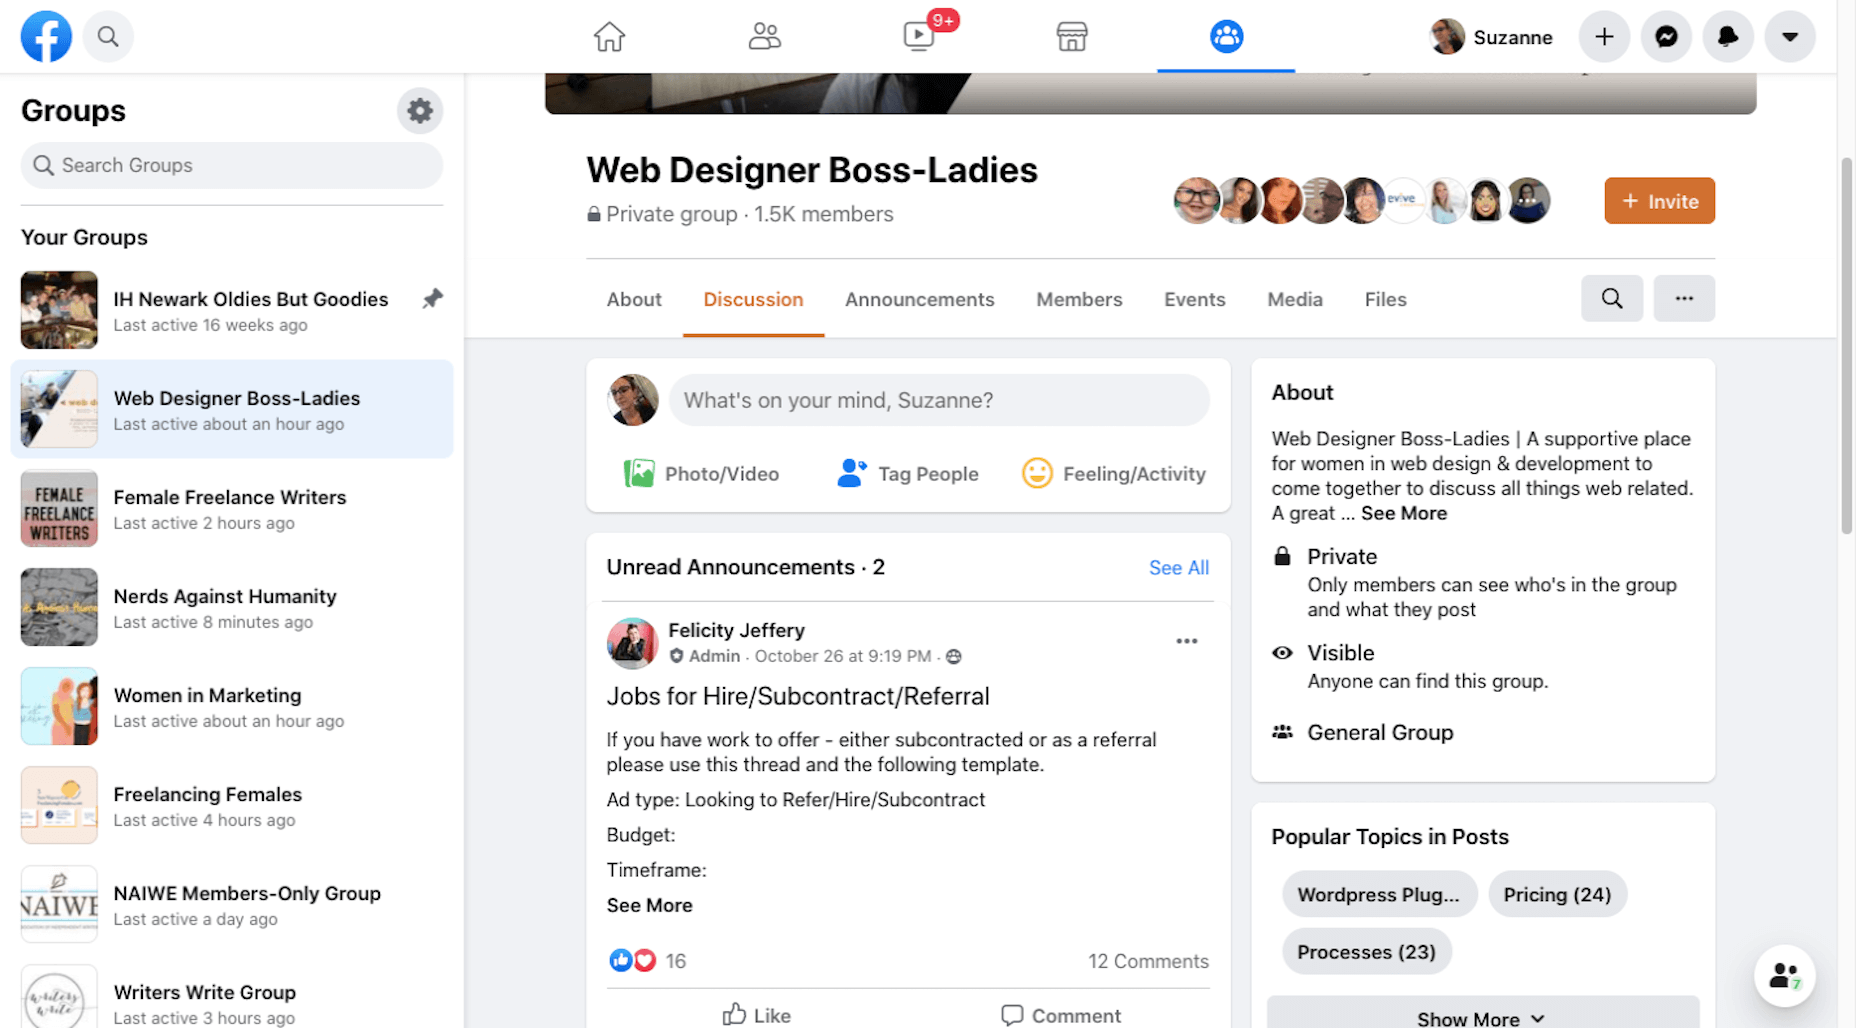
It’s really hard to get noticed on Facebook unless you pay to play. Instead, use it to find groups that you can turn to for support, referrals, and brainstorming.

Share your work on Dribbble.

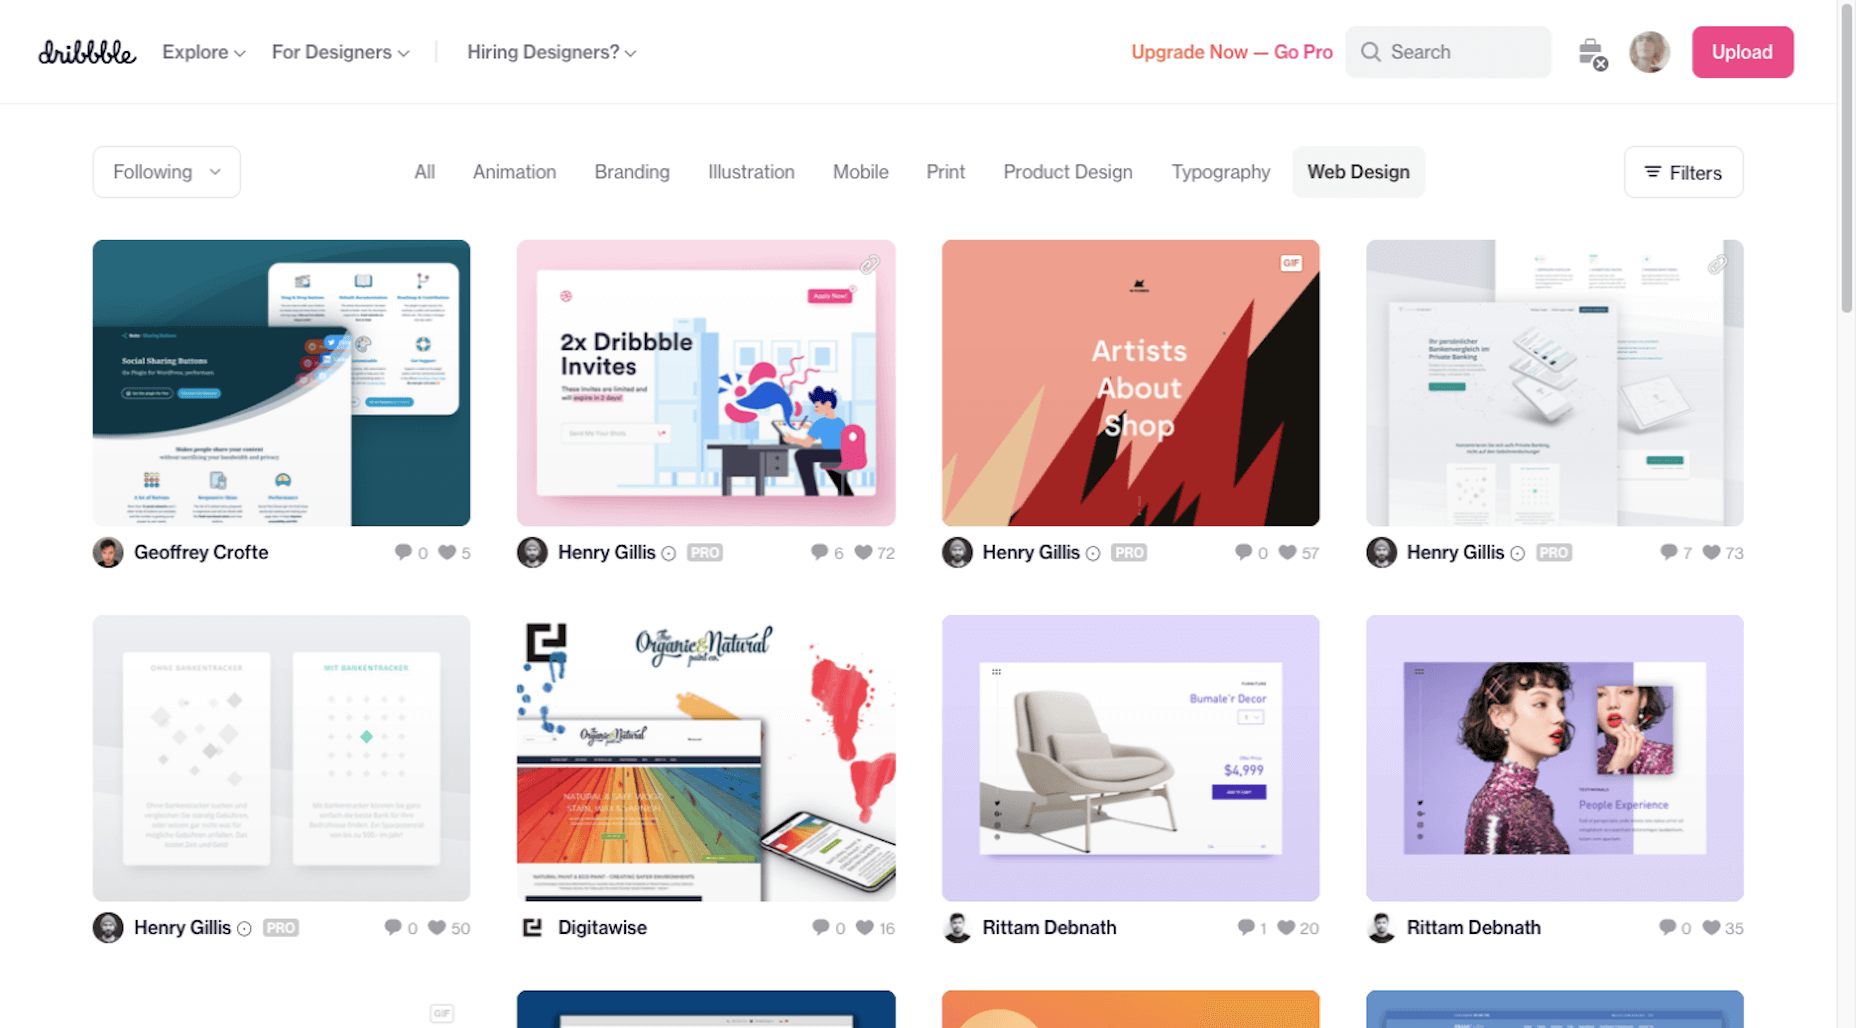
While you could use Instagram or Pinterest to show off your work, you might get more traction on a design-specific platform like Dribbble. Serve as inspiration for others and potentially get discovered by prospects looking for designers there.

Down the line you might decide to expand your business into recurring revenue opportunities like online courses. In that case, a platform like YouTube would be great. For now, focus your efforts on the main ones above.

To Do:

  • Create your social media accounts;
  • Brand them to match your website — both the visual component as well as the bio;
  • Start sharing content on a regular basis. You can automate sharing with a social media management tool, but remember to log in at least a couple times a week so you can engage with others, too;
  • Be careful not to commit these social media faux pas.

Wrap-Up

I realize this is a ton of information to throw at you. However, if you want to get your new business online and for it to succeed, you need to maximize the opportunities that are available to you.

I hope this three-part guide to starting a new business has been helpful. If you have any questions on the tips provided along the way, let me know in the comments.

Featured image via Pexels.
Source

Categories: Designing, Others Tags:

Tailwind versus BEM

November 25th, 2020 No comments

Some really refreshing technological comparison writing from Eric Bailey. Like, ya know, everything in life, we don’t have to hate or love everything. Baby bear thinking, I like to say. There are benefits and drawbacks. Every single bullet point here is well-considered and valid. I really like the first in each section, so I’ll quote those as a taste here:

Tailwind Benefit: “The utility CSS approach creates an API-style approach to thinking about CSS, which helps many developers work with it.”

Tailwind Drawback: “You need to learn Tailwind class names in addition to learning CSS property names to figure out the visual styling you want. Tailwind is reliant on, and will be outlived by CSS, so it is more long-term beneficial to focus on CSS’ capabilities directly.”

BEM Benefit: “BEM will allow you to describe any user interface component you can dream up in a flexible, extensible way. As it is an approach to encapsulate the full range of CSS properties, it will allow you to style things Tailwind simply does not have classes for—think highly art directed experiences.”

BEM Drawback: “BEM runs full-tilt into one of the hardest problems in computer science—naming things. You need to not only describe your component, but also all its constituent parts and their states.”


And remember, these certainly aren’t the only two choices on the block. I covered my thoughts on some other approaches here.

Direct Link to ArticlePermalink


The post Tailwind versus BEM appeared first on CSS-Tricks.

You can support CSS-Tricks by being an MVP Supporter.

Categories: Designing, Others Tags:

Considerations for Making a CSS Framework

November 25th, 2020 No comments

Around eight months ago, I started building a framework which would eventually go on to become Halfmoon. I made a post on this very website announcing the launch of the very first version. Halfmoon has been billed as a Bootstrap alternative with a built-in dark mode feature, that is especially good when it comes to building dashboards and tools. All of this still applies to the framework.

However, today I would like to talk about an area of the framework that is a bit understated. I believe our industry as a whole seriously underestimates the value of customization and user personalization, i.e. users being able to set their own design preferences. Chris has written before about knowing who a design system is made for, pointing out a spectrum of flexibility depending on who a system is meant to help.

But it’s more than design systems. Let’s talk about how Halfmoon addresses these issues because they’re important considerations for knowing which framework works best for your specific needs.

Dashboard built using Halfmoon

Who is Halfmoon for?

Before diving in, let’s address an important question: Is Halfmoon the right framework for you? Here’s a list of questions to help you answer that:

  • Are you building a dashboard, tool, or even a documentation website? Halfmoon has many unique components and features that are specific to these use cases.
  • Are you familiar with Bootstrap’s class names, but wish that the design was a bit more premium-looking?
  • Does your users want or expect a dark mode on your website?
  • Do you dislike dependencies? Halfmoon does not use jQuery, and also has no build process involving CSS preprocessors. Everything is pure, vanilla CSS and JavaScript.
  • Are you tired of dealing with complex build systems and front-end tooling? This ties in to the previous point. Personally, I find it difficult to deal with front-end tooling and build processes. As mentioned above, Halfmoon has no build process, so you just pull in the files (local, CDN, or npm), and start building.

If you answered yes to any (or all) of these questions, you should probably give Halfmoon a try. It is important to note however, that Halfmoon is not a UI component library for React/Vue/Angular, so you shouldn’t go into it expecting that. Moreover, if you are more fond of purely utility driven development, then Tailwind CSS is a better option for you. When it comes to CSS utilities, Halfmoon takes a middle of the road approach – there are utilities plus semantic classes for common components.

Using CSS custom properties

First, let’s get the easy stuff out of the way. CSS custom properties are incredible, and I expect them to completely replace preprocessor variables in the future. Browser support is already at a solid ~96%, and with Internet Explorer being phased out by Microsoft, they are expected to become a standard feature.

Halfmoon is built entirely using CSS variables because they provide a huge degree of customization. Now, you might immediately think that all this means is that there are a few custom properties for colors sprinkled in there, but it’s more than that. In fact, there are over 1,500 global variables in Halfmoon. Almost everything can be customized by overriding a property. Here’s a nifty example from the docs:

Halfmoon customization using CSS variables
Swapping out a few custom property values opens up a ton of possibilities in Halfmoon, whether it’s theming things for a brand, or tweaking the UI to get just the right look.

That’s what we’re talking about here when it comes to customization: does the system still stand up and work well if the person using it overrides anything. I have written extensively about this (and much more) in the official Halfmoon docs page.

Variables aren’t a new concept to frameworks. Many frameworks actually use Sass or Less variables and have done so for quite a while. That’s still a good and effective way to establish a customizable experience. But at the same time, those will lock into a preprocessor (which, again, doesn’t have to be a bad thing). By relying instead on CSS custom properties — and variable-izing all the things — we are relying on native CSS, and that doesn’t require any sort of build dependency. So, not only can custom properties make it easier to customize a framework, but they are much more flexible in terms of the tech stack being used.

There is a balance to be had. I know I suggested creating variables for everything, but it can be equally tough to manage and maintain scores and scores of variables (just like anything else in the codebase). So, lean heavily on variables to make a framework or design system more flexible, but also be mindful of how much flexibility you need to provide and whether adding another variable is part of that scope.

Deciding what components to include

When it comes to building a CSS framework, deciding what components to include is a big part of that ordeal. Of course, for a developer working on a passion project, you want to include everything. But that is simply not feasible, so a few decisions were made on my part.

As of right now, Halfmoon has most of the components you can find in similar frameworks such as Bootstrap or Bulma. These frameworks are great and widely used, so they are a good frame of reference. However, as I have mentioned already, a unique thing about Halfmoon is the focus on building tools and dashboards on the web. This niche, if you could call it that, has led me to build some unique components and features:

  • 5 different types of sidebars, with built-in toggle and overlay handlers. Sidebars are very important for most dashboards and tools (and a pain to get right), so this was a no brainer.
  • 2 different types of navbars. There is one that sticks to the bottom of the page, which can be used to great effect for action buttons. Think about the actions that pop up when you select items on data-table. You could place those action buttons here.
  • Omni-directional dropdowns (with 12 different placements, 3 for each direction).
  • Beautiful form components.
  • Built-in keyboard shortcut system, with an easy way to declare new ones for your tool.
  • Tons of utilities. Of course, this is not comparable to Tailwind CSS, but Halfmoon has enough responsive utility classes to handle a lot of use cases right out of the box.

Moreover, the built-in dark mode, huge customizability, and the standard look and feel to the components, should all work together to make Halfmoon a great tool for building web tools and dashboards. And I am hopefully nowhere close to being done! The next updates will bring in a form validator (demo video), more form components, multi-select component, date and time picker, data-table component, etc.

So what is exactly missing from Halfmoon? Well the most obvious ones are tabs, list group, and spinners. But all of these are planned to be added in v1.2.0, which is the next update. There are also other missing components such as carousels, tree navigation, avatars, etc, which are slightly out of scope.

Providing user preferences

Giving end users the ability to set their preferences is often overlooked by frameworks. Things like setting the font size of an article, or whether to use a dark or light theme. In some ways, it’s sort of funny, because the web is catching up to what operating systems have allowed users to do for decades.

Here are some examples of user personalization on the web:

  1. Being able to select your preferred color mode. And, even better, the website automatically saves and respects your preference when the page is loaded. Or better yet, looking at your operating system preferences and automatically accommodating them.
  2. Setting the default size of elements. Especially font size. A small font might look good in a design, but allowing users to set their ideal font size makes the content actually readable. Technically, every modern browser has an option to zoom into content, but that is often unwieldy, and does not actually save your settings.
  3. Setting the compactness of elements. For example, some people prefer large padding with rounded corners, while others find it a waste of space, instead preferring a tighter UI. Sort of like how Gmail lets you decide whether you want a lot of breathing room in your inbox or make it as small and tight as possible to see more content.
  4. Setting the primary color on the website. While this is entirely cosmetic, it is still charming to be able to set your favorite color on every button and link on a website.
  5. Enabling a high contrast mode. Someone pointed this out to me on GitHub. Apparently, many (and I mean many) CSS frameworks often fail the minimum contrast recommended between foreground and background colors on common elements, such as buttons. That list includes Halfmoon. This is often a tradeoff, because overly contrastive elements often look worse (purely in terms of aesthetic). User personalization can allow you to turn on a high contrast mode, if you have difficulty with the default contrast.

Allowing for user personalizations can be really difficult to pull off — especially for a framework — because that would could mean swapping out huge parts of CSS to accommodate the different personalization settings and combinations. However, with a framework like Halfmoon (i.e. built entirely using CSS variables), this becomes trivial as CSS variables can be set and changed on run-time using JavaScript, like so:

// Get the <html> tag (for reading and setting variables in global scope)
var myElement = document.documentElement;

// Read CSS variable
getComputedStyle(myElement).getPropertyValue("--variable-name");

// Set CSS variable
myElement.style.setProperty("--variable-name", "value");

Therefore, user personalization can be implemented using Halfmoon in the following way:

  • The user sets a preference. That basically means a variable value gets changed. The variable is set with JavaScript (as shown above), and the new value is stored in a cookie or local storage.
  • When the user comes back to the website, their preferences are retrieved and set using JavaScript (again, as shown above) once the page is loaded.

Here are visual examples to really hammer the point home.

Setting and saving the default font size

In the example above, whenever the range slider is changed, the variable --base-font-size is updated to the slider’s value. This is great for people who prefer larger text. As explained in the previous section, this new value can be saved in a cookie or local storage, and the next time the user visits the website, the user preference can be set on page load.

Setting the compactness of content

Compact theme using CSS variables
Because there are CSS custom properties used as utilities, like spacing and borders, we can remove or override them easily to create a more compact or expanded component layout.

Only two variables are updated in this example to go from an expanded view to a compact one:

  • --content-and-card-spacing changed from 3rem (30px) to 2rem (20px).
  • --card-border-radius changed from 0.4rem (4px) to 0.2rem (2px).

For a real life scenario, you could have a dropdown that asks the user whether they prefer their content to be Default or Compact, and choosing one would obviously set the above CSS variables to theme the site. Once again, this could be saved and set on page load when the user visits the website on their next session.

Wait, but why?

Even with all the examples I have shown so far, you may still be asking why is this actually necessary. The answer is really simple: one size does not fit all. In my estimate, around half of the population prefers a dark UI, while the other half prefers light. Similarly, people have wild variations about the things they like when it comes to design. User personalization is a form of improving the UX, because it lets the user choose what they prefer. This may not be so important on a landing page, but when it comes to a tool or dashboard (that one has to use for a long time to get something done), having a UI that can be personalized is a boon to productivity. And knowing that is what Halfmoon is designed to do makes it ideal for these types of use cases.

Moreover, you know how people often complain that websites made with a certain framework (eg Bootstrap) all look the same? This is a step toward making sure that websites built with Halfmoon will always look distinct, so that the focus is on the website and content itself, and not on the framework that was used to build it.

Again, I am not saying that everything should be allowed to be personalized. But knowing who the framework is for and what it is designed to do helps make it clear what should be personalized.

Looking ahead

I strongly feel that flexibility for customization and accounting for user preferences are often overlooked on the web, especially in the framework landscape. That’s what I’m trying to address with Halfmoon.

In the future, I want to make it a lot easier for developers to implement user preferences, and also promote diversity of design with new templates and themes. That said, here are some things on the horizon for Halfmoon:

  • A form validator (demo video)
  • New components, including range sliders, tabs and spinners
  • High contrast mode user preference
  • Multi-select component (like Select2, only without jQuery)
  • A date and time picker
  • A data-table component
  • A GUI-based form builder
  • More themes and templates

You can, of course, learn more about Halfmoon in the documentation website, and if you want to follow the project, you can give it a star on GitHub.


The post Considerations for Making a CSS Framework appeared first on CSS-Tricks.

You can support CSS-Tricks by being an MVP Supporter.

Categories: Designing, Others Tags:

Four Software Development KPIs That Matter Today

November 25th, 2020 No comments

It’s essential every software engineering team must keep track of their performance through a set of selected indicators called KPIs.

Before going into further details, you need to understand what KPI is.

What is KPI?

KPI Stands for Key Performance Indicators. It is a measurable value through the performance of a business organization can be gauged. It is used to keep track of how efficiently organizations are achieving their goals and objectives.

High-level KPIs are set to measure the overall business performance; on the other hand, low-level KPIs focus on department processes such as HR, marketing, sales, customer support, etc.

Significance of KPIs in Software Development Space

KPIs are valuable assets of any business organization. Most of the recognized Software Development Companies blindly set their KPIs, and later on, they fail to deliver a product on time. At that time, it becomes sturdy to identify what causes the problem.

This usually happens because they overlook the importance of setting the right KPIs.

When developing a strategy for setting KPIs, every team should primarily focus on their business objectives, plan how they can be achieved and which necessary actions are required to be taken to achieve them.

To highlight the importance of KPIs in a crystal-clear, let’s take an example.

You’re leading a project where no KPI metrics are tracked. It will become really strenuous for you to track the performance of your team.

Well, the truth is, if any organization wants to achieve its business goals optimally, they need to make sure that your developed software meets all the requirements. To do so, it’s imperative to set KPI engineering metrics and integrate them into the product development process.

Setting up KPIs for your software development team makes it easier to deliver quality products and avoid missing deadlines. You’ll get a productive team capable of delivering fantastic quality products.

Now let’s dive in to find out more software development KPIs.

Four Software Development KPIs that matter today

Sprint Burndown

Software teams organize their software development tasks into sprints. This KPI is set to measure how much work your team has completed in a sprint.

Advantages of Sprint Burndown KPI

  • A sprint burndown helps teams to identify any roadblocks that can affect their performance.
  • Measuring sprint burndown helps in checking whether your team is on track to meet the forecast.
  • A sprint breakdown chart can facilitate managing the progress of your team. During the development process, if your team realizes it cannot achieve their sprint goal, they can take necessary actions to keep their performance on the track.

Sprint Burndown Charts have two-axis, x, and y. The x-axis represents time, while the y-axis represents the remaining work.

Time can be measured in story points or hours.

There are no hard and fast rules. You set your statistics according to your business requirements.

The main goal is to complete all the tasks before the sprint ends.

You can use tools like Jira Sprint Breakdown to develop charts to measure your team’s workflow efficiently.

Cycle Time

It is a software development KPI that measures how much time your team spends working on a particular task. Product Owners and Scrum Masters use Cycle Time charts to track the development process and control it.

Advantages of Cycle Time KPI

  • It provides detailed information regarding the overall team performance.
  • It helps in estimating the time it will take to complete future tasks.
  • You can easily identify any slowdowns and bottlenecks that can affect the workflow.

Cycle time is equal to the end date (when a team completes a task) minus the start date (when the team starts working).

To explain this further, let’s take an example.

If a team starts working on January 20 and finishes the work on January 30, then the cycle time is nine days.

Your team can substitute days with even sprints if they work efficiently.

Team Velocity

Team Velocity, another software development KPI, helps in measuring the amount of work your team does during a sprint. The amount of work a team does is measured in hours or story points.

Through velocity, product owners can calculate how efficiently through backlog a team can work. The velocity index varies from team to team. It’s not a good idea to adopt another team’s velocity.

Let’s take an example. Being a product owner, you want to complete 200 story points in the backlog. You know that your team is capable of completing 100 story points per iteration.

Knowing that it’s easier for you to predict to complete 200 story points means that the team needs two iterations to complete the work.

Advantages of Team Velocity KPI

  • It’s pretty helpful for prediction.
  • With its help, product owners can plan future sprints.
  • It helps in understanding if the team is facing any issue or if your recommended changes are implemented.

Cumulative Flow

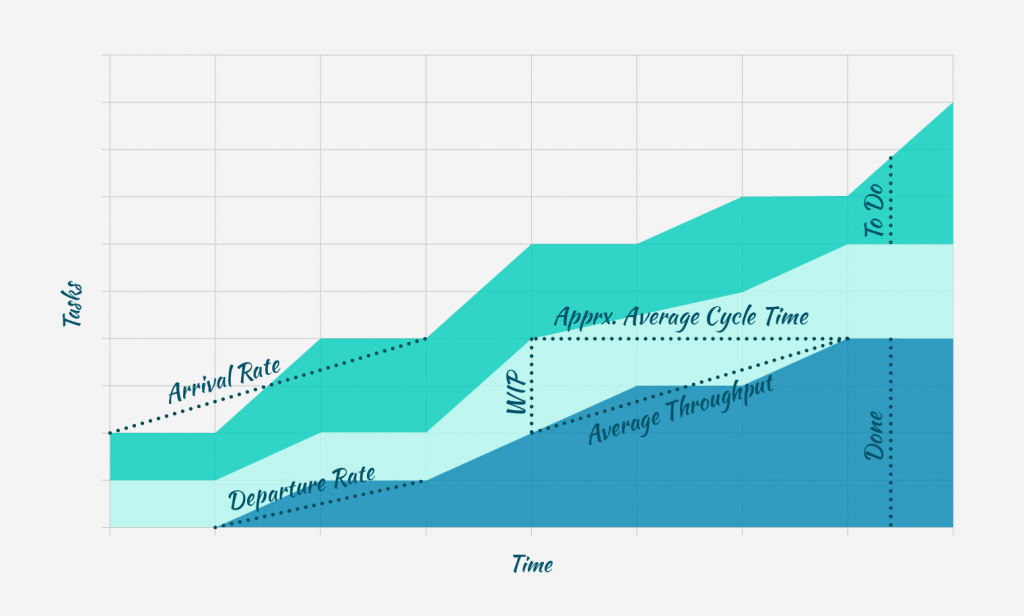
Cumulative Flow KPI helps in visualizing the workflow of your software development team. It helps in keeping track of tickets shifting from one to another status during the development process.

Using Cumulative flow charts helps in visualizing the three most essential software engineering metrics.

  • Cycle time
  • Work in progress
  • Throughput

Advantages of Cumulative Flow KPI

  • Cumulative flow also helps to identify bottlenecks.
  • It is useful for the team because it helps to ensure the consistency of workflow.
  • It showcases the stability of workflow.

Through cumulative flow charts, it’s easier to comprehend how development processes can be made more predictable.

Summing Up

Sprint Burndown, Cycle Time, Team Velocity, and Cumulative Flow are those four most essential KPIs that matter in the software development space.

For favorable outcomes, it’s essential to measure team performance through these software engineering KPIs.

You’ll be able to manage your team and get detailed insights into the development process.

It’s not essential to only implement those we’ve discussed. You can always look out for other software development KPIs necessary and suitable for your software development team.

If you’re tired of dealing with low-quality products, code failures, and missing deadlines, start implementing the software development KPIs and put a forever full stop on a vicious cycle of failures.

Categories: Others Tags:

Nonprofit Advocacy in 2021: 4 Best Practices

November 25th, 2020 No comments

Advocacy is a common way for nonprofits to show their stance on relevant public issues in order to advance their mission, increase their fundraising, and deepen relationships with supporters.

Nonprofits generally conduct advocacy campaigns through strategic outreach initiatives, hosting events, sharing petitions, and mobilizing supporters to raise awareness with phone calls, texts, and online messages.

As 2020 comes to a close, nonprofit advocacy and its importance have increased dramatically. COVID-19 and its economic impact have forced many organizations to work from home and pause in-person engagements, bringing an additional strain to your finances and fundraising efforts. Additionally, the US Presidential election has intensified discussions on public policy and other major ongoing social issues. Nonprofits have big roles to play when it comes to shaping the conversation, guiding policy, and mobilizing constituents.

Given the need for social distancing, the increased dependence on virtual engagement, and limited budgets, advocacy can be a meaningful and efficient way to support your cause and forge stronger connections with your advocates.

Nonprofit advocacy is all about building relationships with supporters and empowering them to drive your mission forward. And, prioritizing supporter engagement, and how you can empower them is always good practice if you want to build a solid foundation of long-term and genuine support in 2021.

To ensure you’re doing all you can for your nonprofit advocacy campaign, especially amid all of today’s challenges, here are some best practices to get you started:

  1. Invest in integrated software.
  2. Use a multichannel marketing strategy.
  3. Empower your advocates with the best resources.
  4. Keep your entire advocacy campaign branded.

Public issues around COVID-19, its economic impact, policy decisions at all levels, and the election are all weighing heavily on your community’s shoulders this year. Nonprofit advocacy is the perfect opportunity to tap into the passion of your supporters and highlight those issues that matter the most to your mission. Let’s begin.

1. Invest in integrated software.

Your nonprofit advocacy campaign is based on rallying support and ensuring a long-term impact on your community. Traditionally, this can be done with in-person events. These bring together advocates to help spread awareness of the issue and how it relates to your main mission.

However, this is no longer the case. Due to the global pandemic plaguing our everyday lives, you likely have to pivot your efforts to more digital means in order to stay within health and safety guidelines. That’s why it’s so crucial that you invest in capable, integrated software.

As outlined in the Mobilize guide to advocacy software, “an advocacy software solution is a platform or tool used by mission-based organizations to garner public support for a cause or policy.” This can either be one comprehensive system or made up of individual tools. In general, your advocacy solutions should be able to handle every aspect of your campaign, including:

  • Planning the campaign
  • Facilitating peer-to-peer recruitment
  • Marketing the campaign through email or social media
  • Sharing and creating petitions
  • Launching and facilitating phone or text banks
  • Creating and managing virtual events, as well as empowering your advocates to lead localized events

The tasks above are just some of the common ways you can mobilize your supporters and turn them into advocates without having to meet face-to-face. However, the results of all these engagements hold little value if you can’t view and generate insights from the data as a whole.

With an integrated solution, your database, email platform, fundraising software, and any other advocacy tools can not only share data but also compile it for your team to analyze comprehensive reports and streamline your advocacy efforts.

For example, as soon as new supporters engage with your advocacy campaign, their contact information can be stored in your CRM and then automatically populated in new email communications and other outreach methods to keep them engaged.

2. Use a multichannel marketing strategy.

Now that you have the right tools to pull off your nonprofit advocacy efforts, you need to let these efforts be known. The best way to do that is by developing a multichannel marketing strategy. With most nonprofit work and supporter engagement happening online, how you market your advocacy campaign and reach out to prospects is more important than ever.

What is a multichannel marketing campaign? Multichannel marketing involves promoting your mission and advocacy efforts through more than one outlet or channel in order to engage more supporters and funnel them towards a specific action. You should look to the marketing channels that you’ve found success with in the past and brainstorm ways you can utilize them to tell a story that engages supporters and connects the campaign to your cause.

Some common marketing channels to leverage are:

  • Email communications
  • Blog posts and news on websites
  • Social media posts
  • News press releases
  • Peer-to-peer engagement
  • Text message alerts

All the materials and content you produce in the channels above should come together to complete a picture of why supporting the cause you’re advocating for is so important. This story should end with the user completing the specific action you want.

For instance, let’s say you want to lead users to sign a petition. First, consider your nonprofit email marketing efforts. Use any newsletters or communications to implement call-to-actions that lead readers to your website and other points of engagement, like social media connections.

You can then use your most active social media accounts to post engaging videos about your cause and continue directing users back to your main website.

On your website, you should then have a dedicated landing page for your advocacy campaign so that supporters know exactly what you’re working towards and how they can contribute to your mission. From there you can embed or link to a petition that advocates can sign to show support.

At each touchpoint in this process, you engage readers more deeply and pick up more traffic along the way. With a well-developed multichannel strategy pointing towards a specific target action, you can see considerable results over time.

3. Empower your advocates with the best resources.

Your advocates are more than just your supporters. In some ways, they are directly representing your organization and what you stand for. While this can be an extremely effective way to deepen your ties with advocates and reach new audiences, it can get a little tricky if the advocate doesn’t quite know what they’re talking about.

That’s why it’s important to empower your advocates with the best possible resources in advance.

For instance, your advocates and other online supporters should be trained in exactly what you’re advocating for. Provide them with:

  • Training courses to introduce advocates to your organization, mission, and the campaign at hand.
  • Email templates to help them communicate your mission and work with others.
  • Phone call scripts for those helping with phone banking.
  • Educational content to ensure that advocates are fully updated on the aspects of what you’re advocating for.
  • Additional resources to uncover new opportunities, like a searchable corporate philanthropy database so that advocates can research their eligibility for matching support. For example, here’s how Mercy Corps makes it easy to check for matching gift eligibility.

Connecting your supporters with additional resources like these can be relatively low-cost ways to maximize the reach of your campaign and possibly boost incoming donations in the process. Even providing a fairly simple weekly roundup of recent news related to your cause can be invaluable for keeping everyone in-the-loop.

4. Keep your entire advocacy campaign branded.

Nonprofit advocacy campaigns are logistically complex— there are a number of tasks to facilitate, actions you want to be completed, and advocates to keep track of. It’s important that throughout it all, your entire advocacy campaign is branded to your organization.

Focusing on your brand is crucial for spreading awareness of your mission. This gets people talking about your organization and your past accomplishments. When you continue to emphasize your nonprofit’s work and the connection to the cause you’re advocating for, supporters and prospects will begin to link the two in their minds.

Additionally, establishing your brand and incorporating it throughout all advocacy activities can help build the relationship supporters have with your brand. As soon as they see your logo or mission statement, they automatically know the organization behind the cause.

For instance, make sure to customize any forms your supporters interact with during your advocacy campaign. This can include contact forms, virtual event registrations, online petitions, and your online donation form. Using branded graphics, your logo, or adding specific fields are common ways to brand your forms.

You should also clearly brand any of the marketing materials you release. If you post on social media, make sure your brand is clearly displayed. This way, if advocates want to share the post with their own network, your brand and overall mission is still effectively shared.


These best practices can be used to strengthen any advocacy strategy, but are especially useful in light of the challenges this past year has brought. A focus on the software you use and how you engage with advocates online is crucial if you want to spread the word about your mission and accomplish the tasks at hand.

Throughout it all, your advocacy efforts should be based on the relationships you build with supporters. The stronger those are, the more likely they’ll advocate for your cause to others. Any strategies and tactics you put in place should aim to support that goal.

Categories: Others Tags:

8 Smart Ways to Onboard Customer Service Employees

November 25th, 2020 No comments

The biggest onboarding mistake you can make as an employer is to fail to prepare for your new hires before they arrive.

This disorganized onboarding process leaves a bad taste of your company’s perception and indicates that you don’t value your new employees.

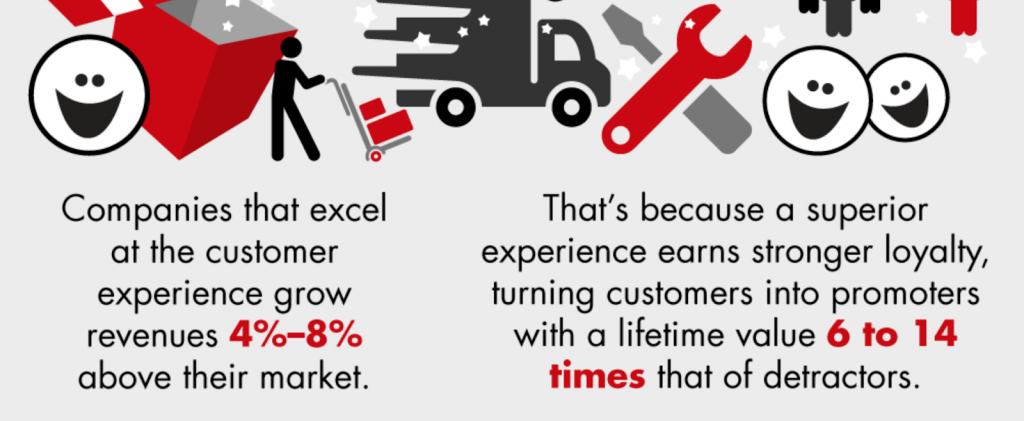
In this post, I will show you eight smart ways to onboard customer service employees so that you can consistently grow your market revenue by four to eight percent, as reported by Bain & Company.

Source: Bain & Company

Before we get into the nitty-gritty, you must first understand why you need to onboard your new customer service employees.

Why You Must Onboard Customer Service Employees

A Microsoft Survey, shows that about 56% of consumers globally have stopped doing business with a brand due to poor customer service.

What this means is that irrespective of the industry you operate in, having responsive and responsible customer service is important. So preparing your employees in that regard is healthy for your business.

You must onboard your customer service employees so they:

1. Know about your product/service

Customer support employees must know what comprises your product and services, and be able to explain it in simple terms.

They should be good at troubleshooting popular support issues and resolve requests on their own. That way, they don’t misinform or come unqualified to your customers.

2. Interact professionally with customers

Some customer service employees are smart but they lack the simple composure and decorum to interact with customers.

Ensure that your new hire understands the best practices of communicating with clients on different channels. They should also have empathy and a tone that represents your brand effectively.

3. Understand your support workflow

If your customer service employee doesn’t know how to handle specific issues, it may escalate to a bigger problem and send the customer away.

Knowing how the support workflow, triaging process, and the company’s guiding policy could save your company from potential lawsuits and bankruptcy.

4. Know the importance of consistency

When a customer service employee is consistent with his approach and tone, customers feel comfortable to open up to them.

Ensure that your customer service team gives similar responses to similar problems.

This will help you understand that your customers are satisfied and are getting good ratings and responses to any questions they have raised.

5.Know the importance of responsiveness

The speed and quality at which your customer service employee responds to the customers are important. It will show that your company is quick to help its customers.

Even if the responses are not readily available, giving the customer a feeling that you’re always there at their service is healthy for customer loyalty.

No customer will wait seven days for an email response; the customer will be frustrated and might unsubscribe from your service. Being responsive via email, phone, and across all social media channels is what every business needs.

Customer service employees who understand these needs are the ones who earn stronger customer loyalty, turn them into promoters with lifetime value, and save the company’s resources.

What Should New Customer Service Employees Learn?

With a clear understanding of the customer service lifecycle, knowing the product and how to communicate it, and minding customers’ emotions, your customer service employee should also learn technical skills.

They should be able to effectively solve technical problems by being acquainted with technical skills like data analysis, social media experience, coding and programming, project management, and technical writing.

The customer service employee should understand the functionalities of help desk software and ticketing systems, all-in-one inbox for multi-channel support, and self-service knowledge base.

They should also be able to share an in-box to help the team collaborate and solve requests, self-serve support to let customers solve product issues on their terms, and be able to organize tickets to assign conversations to specific reps manually and/or automatically.

What Happens When Your Customer Service Employees are Efficient

When your customer service is top-notch, your business grows in people, practice, and revenue. You’ll get:

1. More customers

By satisfying existing customers, you indirectly bring in more. This is because satisfied customers are likely to share their experiences with friends and families. That way, you increase the number of people who buy from you.

This excellent word of mouth can be turned into great reviews on social media, review websites, and testimonials on your website.

Leveraging this will help you build an impactful online presence, position your company as a thought leader in the industry, and reach more potential customers.

2. Increased revenue

More customers equal more revenue for your company. You’ll experience a boost in sales, and have enough for product innovation, marketing, improved technology, hire more experienced employees, and scale your organization.

3. Improved workplace

When the company becomes profitable due to better customer experience, increased sales and better practices, the workplace environment becomes calm for employees to focus on individual tasks.

Ready to Onboard Customer Service Employees? Here are 8 Smart Ways to Do So

Now that you know why you must onboard your customer service employees, what they should learn, and what you stand to gain if they are efficient, let’s head right into the eight smart ways to onboard customer service employees.

1. Start with a simple overview of your business

Before you begin to onboard new employees, start by highlighting the simple overview of your organization. This will involve the values, mission, practices and policies that your brand represents.

This understanding clarifies your customers’ assumptions and redirects your team’s vision of the organization. Because your customer service directly represents the company, they should be empowered to communicate your brand in the best language.

As a part of this process, visionary leaders help their new hires to intercept the organizational values with their drive, so that they can be confident in developing their careers, actualizing the company’s purpose, and they’ll be more encouraged to communicate the brand purpose.

By doing this, your customers will be familiar with your brand and they’ll be loyal to uphold your company standards and values.

2. Create a knowledge base

Employee training is good, but topping up employee knowledge is better. You may not realize this until a knowledge base solves a problem that takes ages.

A standard knowledge base software will include your company’s guiding principles, success metrics, best practices, how payroll works, tips to answer customer questions quickly, and every knowledge to help them thrive in your workplace.

It is a must for every customer service process. This is because it entrusts the new customer service employee with an array of information about the customers and products, and enhances a smoother customer experience.

So, create a detailed knowledge base that allows your new hires to keep up with product/service updates and codify their tasks. You can be creative with it by including information details by department and job role.

A report by Gartner says that by improving the availability of contextual knowledge to employees and customers, organizations can reduce the time it takes to resolve a problem by twenty to eighty percent.

3. Create a customer success employee playbook

A customer success playbook encompasses how your employees’ and customers’ interact for a successful experience.

It should be a unique guide that accommodates how your new hires will orientate your customers based on their segmentation. It should also include your company’s standard operating procedures and customer journey milestones.

For instance, if you create a separate playbook for each discrete and logical customer segment, you’ll achieve a high customer satisfaction rate by solving customers’ problems.

That way, your new customer service employee will properly understand what your brand represents and will be able to help customers achieve their personal or business goals.

4. Set attainable goals

Expecting your new customer service employee to attend to a certain number of customers daily might not be feasible. Don’t draw them too thin. Instead set realistic and attainable goals to put them on the right track.

For instance, a customer service employee might encounter a blocker client who needs a re-explanation on an issue, or a caller asking questions which the customer agent cannot answer. These two situations will require more than the expected time, so using the number of daily calls as KPIs for a customer service employee might seem unattainable.

The right approach is to ensure that your goal is written and explained in advance so your new hires know what to do. This way, they will be satisfied and encouraged to feel success at every milestone.

Examining and identifying likely challenges and the impact these challenges have on the work a customer service employee does is critical for goal setting.

5. Organize a robust training program

If you need your new hires to learn quickly and have smoother working experience, organize robust training to help them learn. This will prevent customers from being switched between reps due to lack of knowledge of the problem.

The robust training program should have a section where experienced support team members share their most common requirements and train new hires on how to handle similar situations.

Before the onboarding, you should also document the detailed experience of your customer service team members and use it to train the new hire.

Ask them to share their most compelling messages and campaigns, difficult and exciting requests and how they troubleshoot and help the customer.

This way, they are likely to mention each of your products and state what they do, and new hires can learn and get clarification by asking questions.

6. Develop a feedback channel

Develop an effective onboarding activity by getting feedback to understand how your new hire responds and learn how to better their learning experience.

This listening culture could be adopted via e-mail communication, or other feedback platforms like Slack, Basecamp, Trello or Asana. E-mail is one of the easiest support channels for organizations to interact and gather feedback, and it’s free to key into.

With it you can have a transparent engagement and make an employee become a part of a wider ecosystem of idea sharing and reputation building. This will remove the attitude of working in silos, and improve customer experience through employee collaboration.

By incorporating feedback from new customer service employees, companies can create a nimble and agile process, innovate better products and achieve customer overall success.

7. Initiate customer/stakeholder interaction

The communication between the new customer service employee and their team leader is important in the onboarding journey.

This will help you build trust in the sight of your customers because when a new employee doesn’t know or missed an update, he’s likely to cover up and say something else to the customer. That would cause mistrust if the customer found that it’s untrue.

This interaction should start immediately so that new customer service employees don’t become wary when they need help responding to complex questions.

The employee onboarding process becomes effective when new hires continue learning as they grow into their role.

8. Study customer satisfaction rate

When your new customer service employee begins to support customers by handling live tickets and interacting in real-time, you should monitor the feedback the customers provide to know where they can improve.

This support ticket comments, call recordings, and satisfaction ratings can be reviewed by the team lead or experienced team member.

By consistently monitoring this activity, new hires will become experienced in no time. Next, you can introduce a shadow process where new hires watch experienced team members as they respond to dissatisfied customers.

Conclusion

Replacing employees is expensive so being proactive in getting the best possible value from new employees will benefit your company.

Onboard your employees by creating a knowledge base. Then set attainable goals and organize training programs for them. Crown the process by starting with a simple overview of your business., initiating customer-employee interaction, and monitoring customer satisfaction rate.

This way, you will be able to guide new customer service employees into high-performance individuals and gradually help them understand what you expect from them.


Photo by Arlington Research on Unsplash

Categories: Others Tags:

Black Friday – Cloudways Offers 40% OFF for 4 Months on All Plans

November 25th, 2020 No comments

Cloudways has now been serving customers for almost a decade now, but since this year is different, we’re doing everything to go all out in helping our users get the best out of their online business.

So this BFCM, in addition to all the other deals we’re listing, we have a killer deal on our hosting platform. So whether you’re a new player or an existing online business owner ready to sell as ice cream does on a hot day in California, we’ll help you brace for the Big Day(s)!

The Best-Ever Managed Hosting Offer
What does 40% OFF for the next four-month on Cloudways sound like? A dream.

Signup for a new Cloudways account using the promo code BFCM2020 and get exactly that: 40% OFF for the next four months. The offer is valid for all new users till 2nd December 2020.

Cloudways gives you an exceptional hosting experience by offering freedom of choice, flexibility, 24/7/365 support, and transparent pricing so you always know what you’re paying for.

Avail the Offer Now:
Promo code: BFCM2020
Offer: 40% OFF for 4 months (Promo will be applied on first 4 invoices)
Validity: From 23rd November till 2 December
Website: https://www.cloudways.com/en/

Categories: Others Tags:

Rendering Spectrum

November 25th, 2020 No comments

Here are the big categories of rendering websites:

  • Client: ship a

    and let a JavaScript template render all of it.

  • Static: pre-render all the HTML.
  • Server: let a live server process requests and generate the HTML response.

They are not mutually exclusive.

  • A website could statically pre-render 75% of it’s pages (say, blog posts), but the other 25% have a server respond to (say, forums).
  • A website could statically pre-render all the pages, but have a couple of empty
    s in there that have client-side rendered content in them (e.g. a dynamically generated menu based on the logged-in user).
  • A website could be primarily server-rendered, but has caching in front of it such that it behaves statically.
  • A website could render statically, but then “hydrate” itself into an entirely client-rendered site.
  • A website could be a mix of server and static rendering, but have dynamic parts similar to client-side rendering, but actually happen in an edge function, so it ends up more like server-side rendering.

Next.js is interesting in that it can do all three. Here’s Tim Neutkens in a recent interview:

Next.js allows you to pre-render pages. It creates HTML on a server at build time with static site generation or uses run-time rendering on the server side. Next allows you to do a hybrid of those. Unlike most other frameworks, you are not bound by, oh, I’m going to build my app completely statically generated. Instead, you’re allowed to have some pages be server-side rendered and some pages be statically generated.

In the new release we make it possible to update these statically generated pages without having to run a new build, rebuilding your whole app.

Cool. Love to see that happening at the framework level. Seems like having to go all-in on one rendering style isn’t practical for a lot of sites.

Client rendering is the most flexible, but comes with all these serious downsides like worse performance, worse reliability, more strain on devices, bad SEO, etc. Static pre-rendering is the most robust, speedy, and secure, but is the most limited. Edge functions on top of static is starting to open doors, but server-rendering is the classic mix of flexibility and speed that has dominated the web for good reason.

Client rendering also opens the door for that “SPA” (Single Page App) feel. I still like that, personally. I like the no-page-refresh feel. It’s makes a site feel snappy and opens the door for page transitions. Gatsby is famous for popularizing hydration, where you get the pre-rendered static bonus, but then the upgrade into SPA as the JavaScript downloads.

I’d love to see the web get to the point where we get all that “good feel” bonus of an SPA without actually having to build an SPA. It’s notable when frameworks provide SPA feels without having to manage much of that yourself, but still, something is managing it and that something is a bunch of JavaScript.

Tom MacWright wrote about that recently in his “If not SPAs, What?” post. Some of today’s alternatives:

Turbolinkswhat is the bare minimum you need to do to get the SPA experience without any cooperation from your application?

Turbolinks is like… click link, click is intercepted, Ajax request for new page is made, JavaScript flops out the content on the page with the new content. Super easy to implement, but it’s still JavaScript, and not particularly intelligent about sending less data across the wire.

barba.js and instant.page are alternative approaches to the same sort of problem.

Barba is all about getting page transitions going (more detail on that concept). instant.page is all about pre-loading/rendering pages right before you click then, so even though you get a page refresh, it feels less intrusive (particularly with paint holding). Both are cool, but not quite one-to-one replacements for an SPA. (Even with paint holding, pre-rendering, and lightweight pages, I still don’t think the experience is quite a smooth as an SPA. For example, you still get the page loading spinner.)

So… is the anything else cooking? Kinda. There is . Possibly too simplified, but here goes: portals are like iframes. They can even be visually displayed just like an iframe. That means the rendering of the URL in the portal is already done. Then you can “promote” the portal to be the active page, and even animate the portal itself while doing so.

I don’t hate it. I can imagine someone building a turbolinks-like library on portals so they are “easy to use” and make a site more SPA-like.

Still, animating a rectangle into position isn’t often what is desired from animated page transitions. Just look at Sarah’s “Native-Like Animations for Page Transitions on the Web” article. That’s what the people want (at least the possibility of it). That’s why Jeremy said not portals the other day when he cheekily said that “[m]ost single page apps are just giant carousels.” He also points to Jake’s navigation-transitions proposal from a few years back.

I love this proposal. It focuses on user needs. It also asks why people reach for JavaScript frameworks instead of using what browsers provide. People reach for JavaScript frameworks because browsers don’t yet provide some functionality: components like tabs or accordions; DOM diffing; control over styling complex form elements; navigation transitions. The problems that JavaScript frameworks are solving today should be seen as the R&D departments for web standards of tomorrow. (And conversely, I strongly believe that the aim of any good JavaScript framework should be to make itself redundant.)

So what’s the best rendering method? Whatever works best for you, but perhaps a hierarchy like this makes some general sense:

  1. Static HTML as much as you can
  2. Edge functions over static HTML so you can do whatever dynamic things
  3. Server generated HTML what you have to after that
  4. Client-side render only what you absolutely have to

The post Rendering Spectrum appeared first on CSS-Tricks.

You can support CSS-Tricks by being an MVP Supporter.

Categories: Designing, Others Tags:

How to Load Fonts in a Way That Fights FOUT and Makes Lighthouse Happy

November 24th, 2020 No comments

A web font workflow is simple, right? Choose a few nice-looking web-ready fonts, get the HTML or CSS code snippet, plop it in the project, and check if they display properly. People do this with Google Fonts a zillion times a day, dropping its tag into the .

Let’s see what Lighthouse has to say about this workflow.

Stylesheets in the have been flagged by Lighthouse as render-blocking resources and they add a one-second delay to render? Not great.

We’ve done everything by the book, documentation, and HTML standards, so why is Lighthouse telling us everything is wrong?

Let’s talk about eliminating font stylesheets as a render-blocking resource, and walk through an optimal setup that not only makes Lighthouse happy, but also overcomes the dreaded flash of unstyled text (FOUT) that usually comes with loading fonts. We’ll do all that with vanilla HTML, CSS, and JavaScript, so it can be applied to any tech stack. As a bonus, we’ll also look at a Gatsby implementation as well as a plugin that I’ve developed as a simple drop-in solution for it.

What we mean by “render-blocking” fonts

When the browser loads a website, it creates a render tree from the DOM, i.e. an object model for HTML, and CSSOM, i.e. a map of all CSS selectors. A render tree is a part of a critical render path that represents the steps that the browser goes through to render a page. For browser to render a page, it needs to load and parse the HTML document and every CSS file that is linked in that HTML.

Here’s a fairly typical font stylesheet pulled directly from Google Fonts:

@font-face {
  font-family: 'Merriweather';
  src: local('Merriweather'), url(https://fonts.gstatic.com/...) format('woff2');
}

You might be thinking that font stylesheets are tiny in terms of file size because they usually contain, at most, a few @font-face definitions. They shouldn’t have any noticeable effect on rendering, right?

Let’s say we’re loading a CSS font file from an external CDN. When our website loads, the browser needs to wait for that file to load from the CDN and be included in the render tree. Not only that, but it also needs to wait for the font file that is referenced as a URL value in the CSS @font-face definition to be requested and loaded.

Bottom line: The font file becomes a part of the critical render path and it increases the page render delay.

Critical render path delay when loading font stylesheet and font file
(Credit: web.dev under Creative Commons Attribution 4.0 License)

What is the most vital part of any website to the average user? It’s the content, of course. That is why content needs to be displayed to the user as soon as possible in a website loading process. To achieve that, the critical render path needs to be reduced to critical resources (e.g. HTML and critical CSS), with everything else loaded after the page has been rendered, fonts included.

If a user is browsing an unoptimized website on a slow, unreliable connection, they will get annoyed sitting on a blank screen that’s waiting for font files and other critical resources to finish loading. The result? Unless that user is super patient, chances are they’ll just give up and close the window, thinking that the page is not loading at all.

However, if non-critical resources are deferred and the content is displayed as soon as possible, the user will be able to browse the website and ignore any missing presentational styles (like fonts) — that is, if they don’t get in the way of the content.

Optimized websites render content with critical CSS as soon as possible with non-critical resources deferred. A font switch occurs between 0.5s and 1.0s on the second timeline, indicating the time when presentational styles start rendering.

The optimal way to load fonts

There’s no point in reinventing the wheel here. Harry Roberts has already done a great job describing an optimal way to load web fonts. He goes into great detail with thorough research and data from Google Fonts, boiling it all down into a four-step process:

  • Preconnect to the font file origin.
  • Preload the font stylesheet asynchronously with low priority.
  • Asynchronously load the font stylesheet and font file after the content has been rendered with JavaScript.
  • Provide a fallback font for users with JavaScript turned off.

Let’s implement our font using Harry’s approach:

<!-- https://fonts.gstatic.com is the font file origin -->
<!-- It may not have the same origin as the CSS file (https://fonts.googleapis.com) -->
<link rel="preconnect"
      href="https://fonts.gstatic.com"
      crossorigin />


<!-- We use the full link to the CSS file in the rest of the tags -->
<link rel="preload"
      as="style"
      href="https://fonts.googleapis.com/css2?family=Merriweather&display=swap" />


<link rel="stylesheet"
      href="https://fonts.googleapis.com/css2?family=Merriweather&display=swap"
      media="print" onload="this.media='all'" />


<noscript>
  <link rel="stylesheet"
        href="https://fonts.googleapis.com/css2?family=Merriweather&display=swap" />
</noscript>

Notice the media="print" on the font stylesheet link. Browsers automatically give print stylesheets a low priority and exclude them as a part of the critical render path. After the print stylesheet has been loaded, an onload event is fired, the media is switched to a default all value, and the font is applied to all media types (screen, print, and speech).

Lighthouse is happy with this approach!

It’s important to note that self-hosting the fonts might also help fix render-blocking issues, but that is not always an option. Using a CDN, for example, might be unavoidable. In some cases, it’s beneficial to let a CDN do the heavy lifting when it comes to serving static resources.

Even though we’re now loading the font stylesheet and font files in the optimal non-render-blocking way, we’ve introduced a minor UX issue…

Flash of unstyled text (FOUT)

This is what we call FOUT:

Why does that happen? To eliminate a render-blocking resource, we have to load it after the page content has rendered (i.e. displayed on the screen). In the case of a low-priority font stylesheet that is loaded asynchronously after critical resources, the user can see the moment the font changes from the fallback font to the downloaded font. Not only that, the page layout might shift, resulting in some elements looking broken until the web font loads.

The best way to deal with FOUT is to make the transition between the fallback font and web font smooth. To achieve that we need to:

  • Choose a suitable fallback system font that matches the asynchronously loaded font as closely as possible.
  • Adjust the font styles (font-size, line-height, letter-spacing, etc.) of the fallback font to match the characteristics of the asynchronously loaded font, again, as closely as possible.
  • Clear the styles for the fallback font once the asynchronously loaded font file has has rendered, and apply the styles intended for the newly loaded font.

We can use Font Style Matcher to find optimal fallback system fonts and configure them for any given web font we plan to use. Once we have styles for both the fallback font and web font ready, we can move on to the next step.

Merriweather is the font and Georgia is the fallback system font in this example. Once the Merriweather styles are applied, there should be minimal layout shifting and the switch between fonts should be less noticeable.

We can use the CSS font loading API to detect when our web font has loaded. Why that? Typekit’s web font loader was once one of the more popular ways to do it and, while it’s tempting to continue using it or similar libraries, we need to consider the following:

  • It hasn’t been updated for over four years, meaning that if anything breaks on the plugin side or new features are required, it’s likely no one will implement and maintain them.
  • We are already handling async loading efficiently using Harry Roberts’ snippet and we don’t need to rely on JavaScript to load the font.

If you ask me, using a Typekit-like library is just too much JavaScript for a simple task like this. I want to avoid using any third-party libraries and dependencies, so let’s implement the solution ourselves and try to make it is as simple and straightforward as possible, without over-engineering it.

Although the CSS Font Loading API is considered experimental technology, it has roughly 95% browser support. But regardless, we should provide a fallback if the API changes or is deprecated in the future. The risk of losing a font isn’t worth the trouble.

The CSS Font Loading API can be used to load fonts dynamically and asynchronously. We’ve already decided not to rely on JavaScript for something simple as font loading and we’ve solved it in an optimal way using plain HTML with preload and preconnect. We will use a single function from the API that will help us check if the font is loaded and available.

document.fonts.check("12px 'Merriweather'");

The check() function returns true or false depending on whether the font specified in the function argument is available or not. The font size parameter value is not important for our use case and it can be set to any value. Still, we need to make sure that:

  • We have at least one HTML element on a page that contains at least one character with web font declaration applied to it. In the examples, we will use the   but any character can do the job as long it’s hidden (without using display: none;) from both sighted and non-sighted users. The API tracks DOM elements that have font styles applied to them. If there are no matching elements on a page, then the API isn’t be able to determine if the font has loaded or not.
  • The specified font in the check() function argument is exactly what the font is called in the CSS.

I’ve implemented the font loading listener using CSS font loading API in the following demo. For example purposes, loading fonts and the listener for it are initiated by clicking the button to simulate a page load so you can see the change occur. On regular projects, this should happen soon after the website has loaded and rendered.

CodePen Embed Fallback

Isn’t that awesome? It took us less than 30 lines of JavaScript to implement a simple font loading listener, thanks to a well-supported function from the CSS Font Loading API. We’ve also handled two possible edge cases in the process:

  • Something goes wrong with the API, or some error occurs preventing the web font from loading.
  • The user is browsing the website with JavaScript turned off.

Now that we have a way to detect when the font file has finished loading, we need to add styles to our fallback font to match the web font and see how to handle FOUT more effectively.

CodePen Embed Fallback

The transition between the fallback font and web font looks smooth and we’ve managed to achieve a much less noticeable FOUT! On a complex site, this change would result in a fewer layout shifts, and elements that depend on the content size wouldn’t look broken or out of place.

What’s happening under the hood

Let’s take a closer look at the code from the previous example, starting with the HTML. We have the snippet in the element, allowing us to load the font asynchronously with preload, preconnect, and fallback.

<body class="no-js">
  <!-- ... Website content ... -->
  <div aria-visibility="hidden" class="hidden" style="font-family: '[web-font-name]'">
      /* There is a non-breaking space here here */
  </div>
  <script> 
    document.getElementsByTagName("body")[0].classList.remove("no-js");
  </script>
</body>

Notice that we have a hardcoded .no-js class on the element, which is removed the moment the HTML document has finished loading. This applies webfont styles for users with JavaScript disabled.

Secondly, remember how the CSS Font Loading API requires at least one HTML element with a single character to track the font and apply its styles? We added a

with a   character that we are hiding from both sighted and non-sighted users in an accessible way, since we cannot use display: none;. This element has an inlined font-family: 'Merriweather' style. This allows us to smoothly switch between the fallback styles and loaded font styles, and make sure that all font files are properly tracked, regardless of whether they are used on the page or not.

Note that the   character is not showing up in the code snippet but it is there!

The CSS is the most straightforward part. We can utilize the CSS classes that are hardcoded in the HTML or applied conditionally with JavaScript to handle various font loading states.

body:not(.wf-merriweather--loaded):not(.no-js) {
  font-family: [fallback-system-font];
  /* Fallback font styles */
}


.wf-merriweather--loaded,
.no-js {
  font-family: "[web-font-name]";
  /* Webfont styles */
}


/* Accessible hiding */
.hidden {
  position: absolute; 
  overflow: hidden; 
  clip: rect(0 0 0 0); 
  height: 1px;
  width: 1px; 
  margin: -1px;
  padding: 0;
  border: 0; 
}

JavaScript is where the magic happens. As described previously, we are checking if the font has been loaded by using the CSS Font Loading API’s check() function. Again, the font size parameter can be any value (in pixels); it’s the font family value that needs to match the name of the font that we’re loading.

var interval = null;


function fontLoadListener() {
  var hasLoaded = false;


  try {
    hasLoaded = document.fonts.check('12px "[web-font-name]"')
  } catch(error) {
    console.info("CSS font loading API error", error);
    fontLoadedSuccess();
    return;
  }
  
  if(hasLoaded) {
    fontLoadedSuccess();
  }
}


function fontLoadedSuccess() {
  if(interval) {
    clearInterval(interval);
  }
  /* Apply class names */
}


interval = setInterval(fontLoadListener, 500);

What’s happening here is we’re setting up our listener with fontLoadListener() that runs at regular intervals. This function should be as simple as possible so it runs efficiently within the interval. We are using the try-catch block to handle any errors and catch any issues so that web font styles still apply in the case of a JavaScript error so that the user doesn’t experience any UI issues.

Next, we’re accounting for when the font successfully loads with fontLoadedSuccess(). We need to make sure to first clear the interval so the check doesn’t unnecessarily run after it. Here we can add class names that we need in order to apply the web font styles.

And, finally, we are initiating the interval. In this example, we’ve set it up to 500ms, so the function runs twice per second.

Here’s a Gatsby implementation

Gatsby does a few things that are different compared to vanilla web development (and even the regular create-react-app tech stack) which makes implementing what we’ve covered here a bit tricky.

To make this easy, we’ll develop a local Gatsby plugin, so all code that is relevant to our font loader is located at plugins/gatsby-font-loader in the example below.

Our font loader code and config will be split across the three main Gatsby files:

  • Plugin configuration (gatsby-config.js): We’ll include the local plugin in our project, list all local and external fonts and their properties (including the font name, and the CSS file URL), and include all preconnect URLs.
  • Server-side code (gatsby-ssr.js): We’ll use the config to generate and include preload and preconnect tags in the HTML using setHeadComponents function from Gatsby’s API. Then, we’ll generate the HTML snippets that hide the font and include them in HTML using setPostBodyComponents.
  • Client-side code (gatsby-browser.js): Since this code runs after the page has loaded and after React starts up, it is already asynchronous. That means we can inject the font stylesheet links using react-helmet. We’ll also start a font loading listener to deal with FOUT.

You can check out the Gatsby implementation in the following CodeSandbox example.

I know, some of this stuff is complex. If you just want a simple drop-in solution for performant, asynchronous font loading and FOUT busting, I’ve developed a gatsby-omni-font-loader plugin just for that. It uses the code from this article and I am actively maintaining it. If you have any suggestions, bug reports, or code contributions, feel free to submit them on on GitHub.

Conclusion

Content is perhaps the most component to a user’s experience on a website. We need to make sure content gets top priority and loads as quickly as possible. That means using bare minimum presentation styles (i.e. inlined critical CSS) in the loading process. That is also why web fonts are considered non-critical in most cases — the user can still consume the content without them — so it’s perfectly fine for them to load after the page has rendered.

But that might lead to FOUT and layout shifts, so the font loading listener is needed to make a smooth switch between the fallback system font and the web font.

I’d like to hear your thoughts! Let me know in the comments how are you tackling the issue of web font loading, render-blocking resources and FOUT on your projects.


References


The post How to Load Fonts in a Way That Fights FOUT and Makes Lighthouse Happy appeared first on CSS-Tricks.

You can support CSS-Tricks by being an MVP Supporter.

Categories: Designing, Others Tags: