Using the fieldset and legend elements
July 25th, 2016
No comments
Leonie Watson:
You should use the
Direct Link to Article — Permalink
Using the fieldset and legend elements is a post from CSS-Tricks
Leonie Watson:
You should use the
Direct Link to Article — Permalink
Using the fieldset and legend elements is a post from CSS-Tricks
Direct Link to Article — Permalink
A Code Review, Or Yet Another Reason to Love the Web is a post from CSS-Tricks

I got frustrated of not being able to tell the tabs apart as I was working on stuff. So this is my so-dumb-it’s-smart solution.
The only hitch in my gittyup was that I had to add it to .gitignore, which untracked the file, which deletes it, and had to manually slip it back onto the server. Although it looks like there are smarter ways.
Give Your Development Domain a Different Favicon Than Production is a post from CSS-Tricks

There’s a lot of overlap in the biggest design themes of July. In many of the examples below, you’ll see that multiple trends are used in many of the examples. That’s because many of the trends are simple techniques that can be added to almost any type of design.
This is a showcase of micro-trends. What’s particularly nice about these small-scale trends is that you can use (or remove) them without having to do a full-scale redesign. They can serve as little tweaks to help you freshen up a page for a short time with an on-trend element.
Here’s what’s trending in design this month:
Color overlays are a visually interesting way to draw the eye when the art is less than stellar. It can be a good way to add color and intrigue to a plain photo, stock imagery or add color when the image is lacking that certain spark.
Use of color overlays varies greatly. While bright colors are one of the most popular options, a muted or sepia overlay can change the mood of a project or add just the right vintage feel, such as with the Lyrix website, below.
When it comes to color overlay, solid colors are typically the most popular option. Bright colors are common and many of the same hues that are popular with other design trends such as flat and material design are commonly used. (Here’s that layering of trends mentioned in the intro.)
Finally, when thinking about a color overlay, consider a gradient, duotone or multi-color effect. This technique can work particularly well with an image that’s easily identifiable or with imagery that’s flat on its own, such as the photo for NYC Pride, below. The reason you are drawn into the website design is the bright color overlay, not the image itself.
(Note with NYC Pride’s website, in particular, that another trend is making a comeback—the gradient. More gradients are starting to show up in design projects and we’ll look at this trend in greater detail next month.)


For a while logos were one of the most dominant elements in a website design. Designers were using oversized version of brand names and logotypes to create interesting aesthetics.
Now they are taking to opposite approach.
Logos are being used smaller than ever. But that’s not the only commonality when it comes to the way small logos are being used. They also appear in the same location in almost every example of this trend – the top left corner.
The placement is not that surprising. The top left is a common logo placement location in website design and has been for some time due the the idea that users will read the site from top left to right in an F-shaped pattern.
What is surprising is how small the logos actually are in relationship to the rest of the design. In some instances, these logos are designed to symmetrically match the hamburger menu icon. So they are exceptionally small.
The Brave People logo, for example below, is only slightly larger than the menu icon and is designed to look almost like an icon in itself, with white novelty text inside a black box. What’s nice about this technique is that it gives the rest of the images and text on the canvas plenty of room to be showcased. Brave People uses plenty of video snippets and layered boxes of information to draw users through the website design. Having a small logo helps the eyes stay in the right place and move through the content with ease.
Coats uses a similar concept, balancing the tiny logo on side of the screen and the menu icon on the other. The design further carries the concept of the logo in iconography throughout the site so the user always has a visual reminder of what website they are on.


“Made you look!”
That’s what many of the hero images and videos on websites are screaming as you land on them. Images that are odd, unusual or just require a little thought are becoming a popular way to draw users in and keep them on the website for a longer time period.
You want to understand what is happening in the image or whether that’s a dog or wolf (Instynct, below), what an out of place element means (Bullhorn, below) or what is going to happen next as in the video painting for Nachume Miller (below).
So what makes a make-you-look image? It has to be different and interesting. It has to be high quality and contain a visual that you don’t see every day. The visual should make you wonder about something, ask a question or desire to learn more.
The image or video will grab your attention and hold it just a bit longer than a picture of a cheeseburger on the McDonald’s website. It’s that element of surprise or whimsy or wonder that makes it something users can turn away from. When you go back to it, or watch the entirety of a video loop or just can’t get the image out of your head, then you know it will make others look as well. (Go big and bold, or go home!)


It’s fun to see multiple trend converge as many of these websites exemplify. Tiny logos might be one of the elements that most dominant right now. It’s one of those things you might not even notice until you start looking for it, and then you notice this concept being used everywhere.
Plus, it really gives the design some room for other elements by getting the logo out of the way, which is why is works in combination with other trends so very well.
What trends are you loving (or hating) right now? I’d love to see some of the websites that you are fascinated with. Drop me a link on Twitter; I’d love to hear from you.
| Lifetime Access to ALL WP & HTML Themes from TeslaThemes – only $59! |
|

|
|
As a developer, I work a lot with e-commerce websites and, as a result, with a lot of payment gateways. I’m fortunate that I get to work on many different projects for different clients, each with its own unique challenges. I have, therefore, found myself working with a lot of different payment gateways over the years, from the more familiar ones like PayPal and Stripe to some lesser known ones.

While I love the variety of my work, I generally find working with payment gateways to be frustrating. I’m sure I’m not alone in this opinion! For many payment gateways, the documentation is poorly written, lengthy and, at times, difficult to find.
The post Testing Credit-Card Numbers In E-Commerce Checkouts (Cheat Sheet) appeared first on Smashing Magazine.

Visitor interaction is an important means to determine user happiness. And that is the key to win loyal customers. Especially those that practice e-commerce, taking care of an online shop know how important a “direct connection” to their customers and visitors aka potential clients is. WebEngage allows you to add forms for simple feedback, as well as complex surveys to your website with little effort, but supported by extensive statistics. On top of that, WebEngage sets up meaningful user profiles that tell you a lot about your website’s visitors.
Setting up and using WebEngage is as easy as it gets. You simply need to add a snippet with a bit of JavaScript to your website’s source text. The snippet is provided by the tool as soon as you enter your website’s domain. You can choose whether you want a simple feedback form or a complex survey using the WebEngage user interface. Additional markup or integration of source code is not required.
Once you’ve implemented the snippet, a classic feedback form is displayed on your website. In the bottom right corner of the page, a button labeled “Feedback” will appear. Clicking it opens the form which your visitors can then use to easily leave a message for you.

Simple Feedback Form
You can choose the amount and labels of the input fields yourself. Here, you also decide whether you want it to be an optional or a mandatory input field. Aside from typical input and selection fields, you can also add rating fields, where your website’s visitors can rate your site from a range of one to five stars.
You can also use the feedback form to help your visitors deal find their way through your website, or let them inform you about errors on your website. To do that, users can take a screenshot very easily, and send it to you alongside other information.
The basic layout, text, frame, and background color is defined via the service’s user interface as well. If you decide on the paid “Professional” plan, you also get access to the CSS of the form, and adjust it to entirely match your website’s design.
If you purchase the “Enterprise” plan, you can choose the appearance of a response email that’s sent to the user, as well as the appearance of the email directed to you.
While you can only create one feedback form for your website, there is no limit for surveys. There are both ready-to-use, and empty templates available. The surveys are divided into classic on-site surveys that are attached to the side of the page, as well as on-site modals that are placed above a page’s content. The latter of the two is more suitable for larger surveys that require more space.

Simple Survey
There are certain mobile modals, as well as off-site surveys that lead to an external page via link. Whatever you choose, creating surveys is easy. Using the intuitive user interface, you can add questions and define how these questions have to be answered. You can leave the input field empty, predefine answer options, or allow multiple answers.

Interface for the Creation of Survey Questions
Dropdown lists, ratings, and matrices, as well as file uploads are possible. Additionally, you can mark every question as obligatory. For every survey, you are able to display a welcome and thank-you message at the beginning and the end of the survey.
Maybe your survey is not aimed at all of your visitors, but only at a certain target audience. The targeting allows you to define the audience that you want to display the survey to. This way, you can decide who participates in the survey depending on the used device – desktop, smartphone, or tablet -, the operation system, or the browser.
Maybe you want new or only returning visitors to be able to participate. This can be set, as well as the geographical origin of the users. Here, you don’t only choose from countries, but also from regions (e.g. the states in the U.S.), and cities. Additionally, you can limit the target group to certain origin addresses. That means, that you can display the survey only to visitors that came from Facebook, for example.

Statistics on Surveys
With all of these individually definable attributes, you can set up a very specific target group for your survey. Apart from the target audience, you can also choose on what pages of your website the survey will be displayed. You can set a URL or a URL area. You are also able to make the display of the survey dependant on whether a certain cookie is stored or not.
In short, the setting options are very extensive, and very easy to use at that. Activating or deactivating each survey is just as simple, by the way. Thanks to the detailed statistics, you always have an exact overview of how often your survey was displayed, how often users attempted to, and how often users actually completed it.
Of course, you receive detailed statistics and diagrams on the invididual results. These statistics reports are also available as a PDF file. This way, you can find out how many questions were answered, and where the participants originated from.
Similar to how you create surveys, you can also build notifications for your website. For that, there’s a gallery with predefined templates that make users aware of certain offers or services, for example. However, you can also work without a template, by choosing one of nine generic types. There are different modals, banners, and stickers to choose from which are, in some cases, placed at the side of the page, and in others laid over the page’s content.

Gallery With Notification Templates
Just pick a title and a text, as well as a call-to-action link for each notification. You can define the size, placement, and orientation of the notification, as well as the used theme. WebEngage comes with ten themes that allow you to display your notifications differently.
When it comes to notifications, you have the same targeting options as you do for surveys. Additionally, you can choose when a notification is displayed. For example, you could opt for the message only being posted after a certain scrolling position has been reached, or after the user has been on the page for a certain amount of time.
It’s also possible to only display a notification during a particular time of day.
Aside from using them on websites, you can also use surveys and notifications in native Android and iOS apps. To do so, you need to enter the app’s package name as well as the key for “Google Cloud Messaging” for Android apps. For iOS apps, you have to upload the respective certificate.

Notifications in Native Android and iOS Apps
Subsequently, there are particular templates for surveys and notifications available for Android and iOS. Partially, these are similar to the ones available for the web.
Apart from the “ordinary” notifications that are displayed within the app, you can also create push notifications for the info bar of smartphones or tablets. This way, you can make users aware of individual offers outside of opened apps.
Aside from the simple statistics on individual feedbacks, surveys, and notifications, Insights also gives you the option to request information on visitors from WebEngage. For that, a profile that collects and stores information is created for each user. This includes the geographical origin of the user, the used operating system, the used browser, as well as the display resolution.

User Profile With Available Information
The IP address and the date of the first and latest visit of your website are stored and displayed in the profile. The Insights also tell you how many active users you had in the past, and whether your visitors were new or returning ones.
Use the WebEngage SDK to manually add further attributes to the profile. For example, when using WebEngage in an online shop, automatically add the name, and email adress of signed up users to the user profile.
webengage.user.identify("john.doe@johndoe.com);
webengage.user.setAttribute({
  "we_first_name": "John",
  "we_last_name": "Doe",
});
You can create your own statistic evaluations to get a detailed overview of your visitors by creating so-called segments. Using segments, you can choose which users, what behavior, and which used technique you want to evaluate.

Setting Up Segments for an Individual Evaluation
This allows you to narrow down the users to a region, a country, or even a city. It’s also possible to focus on returning visitors, or users that were on your website during a specific period of time.
When it comes to behavior, you can evaluate users that looked at, or completed surveys. This gives you a good overview on what types of users participated in the surveys a lot or rarely, and whether they finished them or not.
Finally, you have the option to limit your segment to certain devices like desktop or web, respectively, as well as iOS and Android. To do so, exclude the used browser as a criterion.

Statistics About my Segment
Once customized, you’ll receive an individual statistic for each segment that you created.
WebEngage provides easy and efficient ways of directly interacting with your website’s visitors. Reel in feedback, conduct surveys and inform your clients about recent offers. The free “personal” plan provides many options for that, as long as you don’t see more than 10,000 visitors per month.

Free and Paid Plans
Outside of that, there are three paid plans, starting at 499 dollars a month. Aside from more monthly users, additional features are available. These include the customization of forms and notifications, as well as the option to conduct A/B tests.
Those that don’t run a large online shop will already find many useful options to improve their shop in the “Personal” plan. Currently, an email service that allows you to contact your customers by mail is in beta stage. A messaging service to send push notifications to your clients is in the making.
(dpe)
Every geek goes through a phase where they discover emulation. It’s practically a rite of passage.
I think I spent most of my childhood – and a large part of my life as a young adult – desperately wishing I was in a video game arcade. When I finally obtained my driver’s license, my first thought wasn’t about the girls I would take on dates, or the road trips I’d take with my friends. Sadly, no. I was thrilled that I could drive myself to the arcade any time I wanted.
My two arcade emulator builds in 2005 satisfied my itch thoroughly. I recently took my son Henry to the California Extreme expo, which features almost every significant pinball and arcade game ever made, live and in person and real. He enjoyed it so much that I found myself again yearning to share that part of our history with my kids – in a suitably emulated, arcade form factor.
Down the rabbit hole I went again:
I discovered that emulation builds are so much cheaper and easier now than they were when I last attempted this a decade ago. Here’s why:
The ascendance of Raspberry Pi has single-handedly revolutionized the emulation scene. The Pi is now on version 3, which adds critical WiFi and Bluetooth functionality on top of additional speed. It’s fast enough to emulate N64 and PSX and Dreamcast reasonably, all for a whopping $35. Just download the RetroPie bootable OS on a $10 32GB SD card, slot it into your Pi, and … well, basically you’re done. The distribution comes with some free games on it. Add additional ROMs and game images to taste.
Chinese all-in-one JAMMA cards are available everywhere for about $90. Pandora’s Box is one “brand”. These things are are an entire 60-in-1 to 600-in-1 arcade on a board, with an ARM CPU and built-in ROMs and everything … probably completely illegal and unlicensed, of course. You could buy some old broken down husk of an arcade game cabinet, anything at all as long as it’s a JAMMA compatible arcade game – a standard introduced in 1985 – with working monitor and controls. Plug this replacement JAMMA box in, and bam: you now have your own virtual arcade. Or you could build or buy a new JAMMA compatible cabinet; there are hundreds out there to choose from.
Cheap, quality arcade size IPS LCDs of 18-23″. The CRTs I used in 2005 may have been truer to old arcade games, but they were a giant pain to work with. They’re enormous, heavy, and require a lot of power. Viewing angle and speed of refresh are rather critical for arcade machines, and both are largely solved problems for LCDs at this point, which are light, easy to work with, and sip power for $100 or less.
Add all that up – it’s not like the price of MDF or arcade buttons and joysticks has changed substantially in the last decade – and what we have today is a console and arcade emulation wonderland! If you’d like to go down this particular rabbit hole with me, bear in mind that I’ve just started, but I do have some specific recommendations.
Get a Raspberry Pi starter kit. I recommend this particular starter kit, which includes the essentials: a clear case, heatsinks – you definitely want small heatsinks on your 3, ftop dissipate almost 4 watts under full load – and a suitable power adapter. That’s $50.
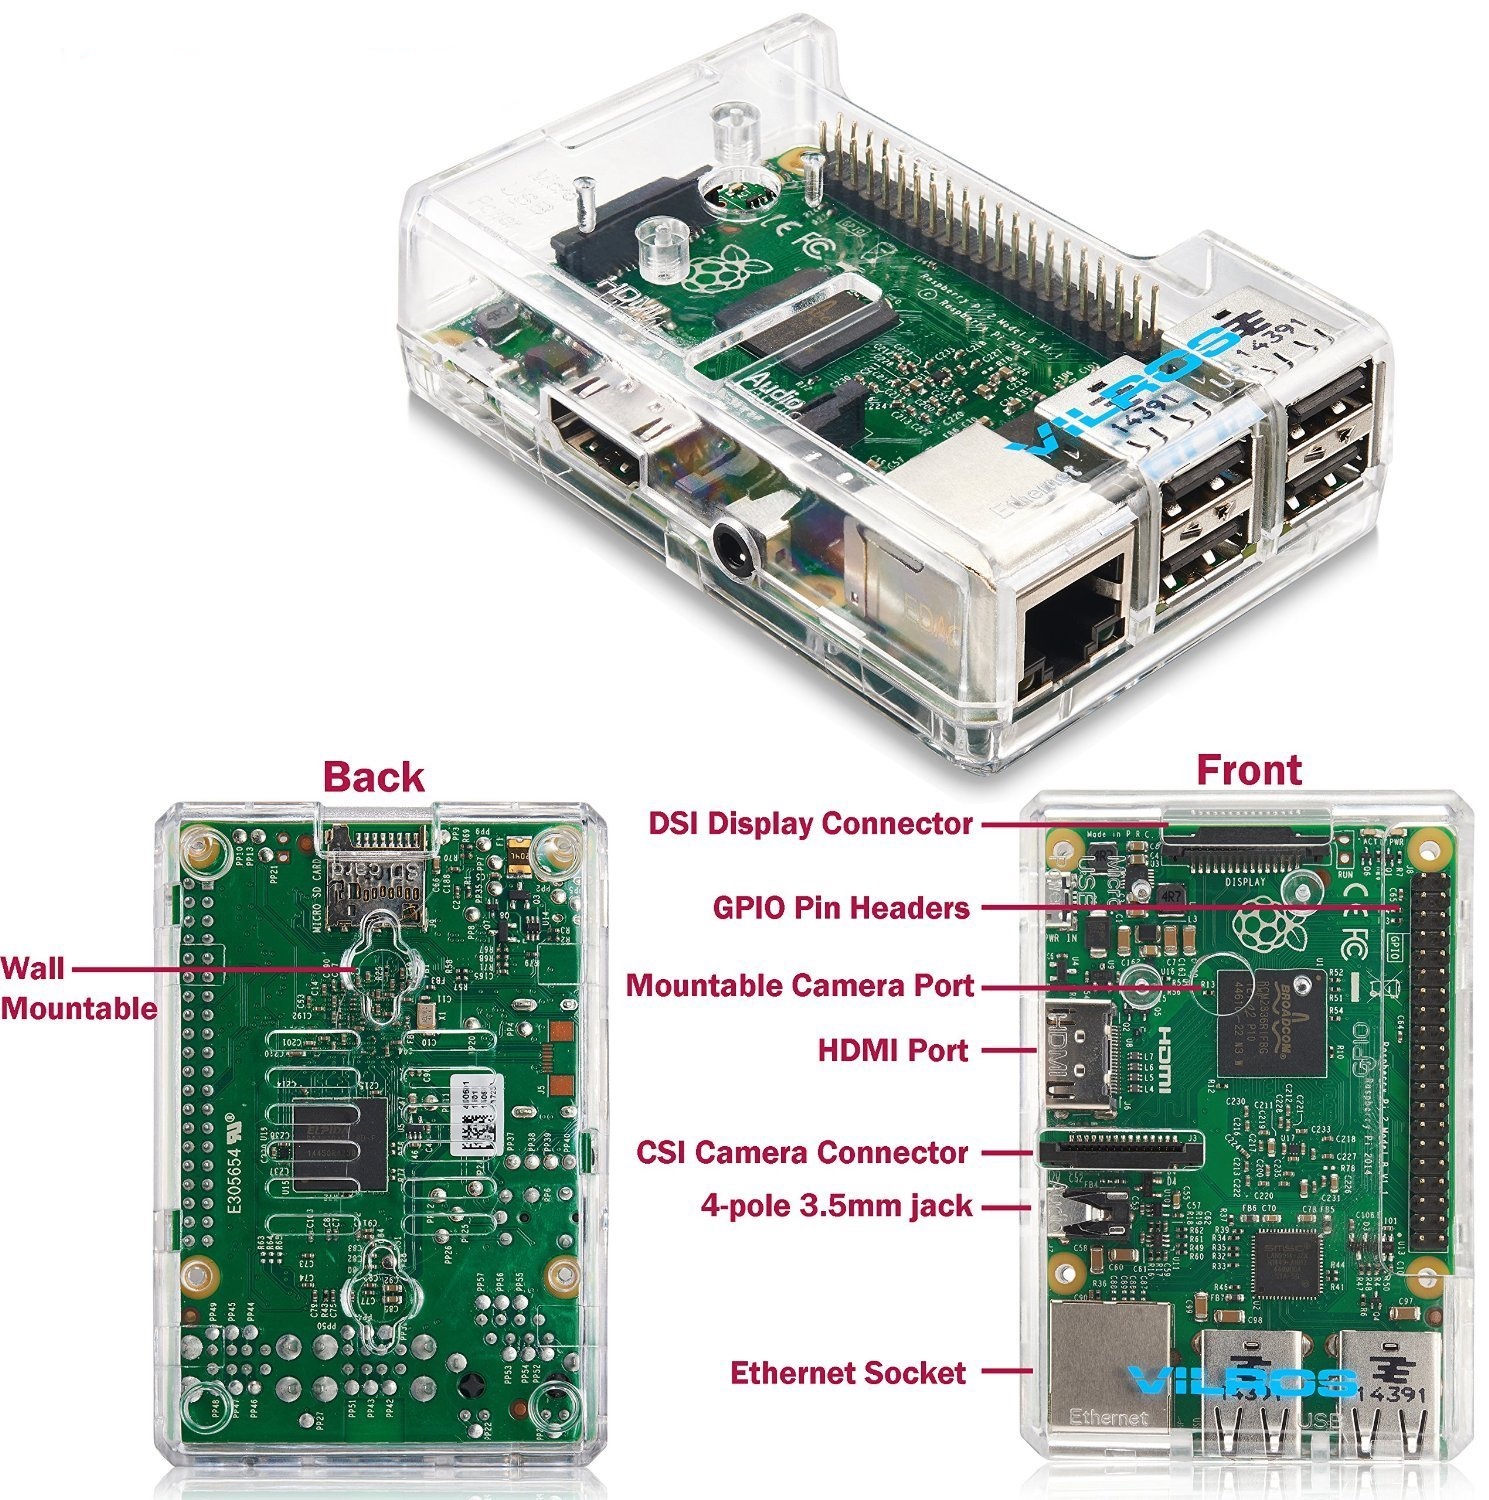
Get a quality SD card. The primary “drive” on your Pi will be the SD card, so make it a quality one. Based on these excellent benchmarks, I recommend the Sandisk Extreme 32GB or Samsung Evo+ 32GB models for best price to peformance ratio. That’ll be about $15, tops.
Download and install the bootable RetroPie image on your SD card. It’s amazing how far this project has come since 2013, it is now about as close to plug and play as it gets for free, open source software. The install is, dare I say … “easy”?
Decide how much you want to build. At this point you have a fully functioning emulation brain for well under $100 which is capable of playing literally every significant console and arcade game created prior to 1995. Your 1985 self is probably drunk with power. It is kinda awesome. Stop doing the Safety Dance for a moment and ask yourself these questions:
What controls do you plan to plug in via the USB ports? This will depend heavily on which games you want to play. Beyond the absolute basics of joystick and two buttons, there are Nintendo 64 games (think analog stick(s) required), driving games, spinner and trackball games, multiplayer games, yoke control games (think Star Wars), virtual gun games, and so on.
What display to you plan to plug in via the HDMI port? You could go with a tiny screen and build a handheld emulator, the Pi is certainly small enough. Or you could have no display at all, and plan to plug in via HDMI to any nearby display for whatever gaming jamboree might befall you and your friends. I will say that, for whatever size you plan to build, more display is better. Absolutely go as big as you can in the allowed form factor, though the Pi won’t effectively use much more than a 1080p display maximum.
How much space do you want to dedicate to the box? Will it be portable? You could go anywhere from ultra-minimalist – a control box you can plug into any HDMI screen with a wireless controller – to a giant 40″ widescreen stand up arcade machine with room for four players.
What’s your budget? We’ve only spent under $100 at this point, and great screens and new controllers aren’t a whole lot more, but sometimes you want to build from spare parts you have lying around, if you can.
Do you have the time and inclination to build this from parts? Or do you prefer to buy it pre-built?
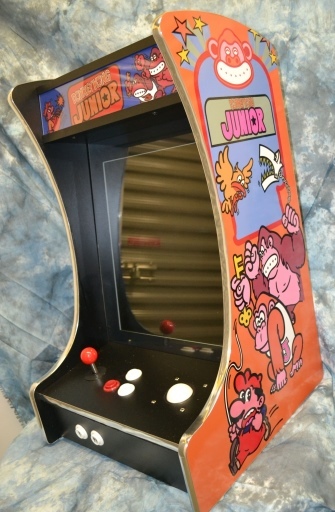
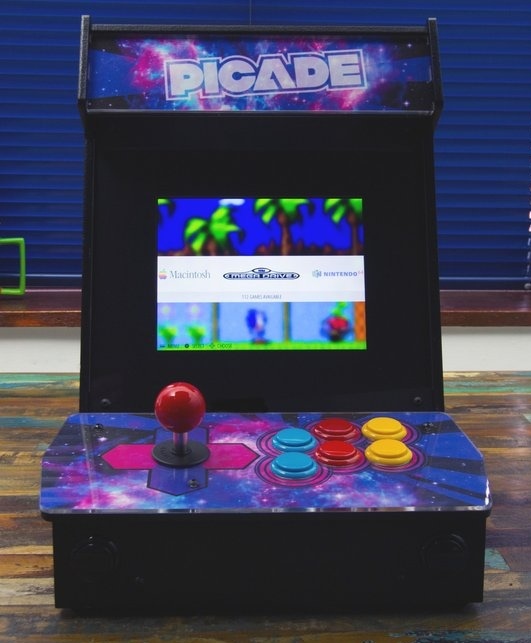
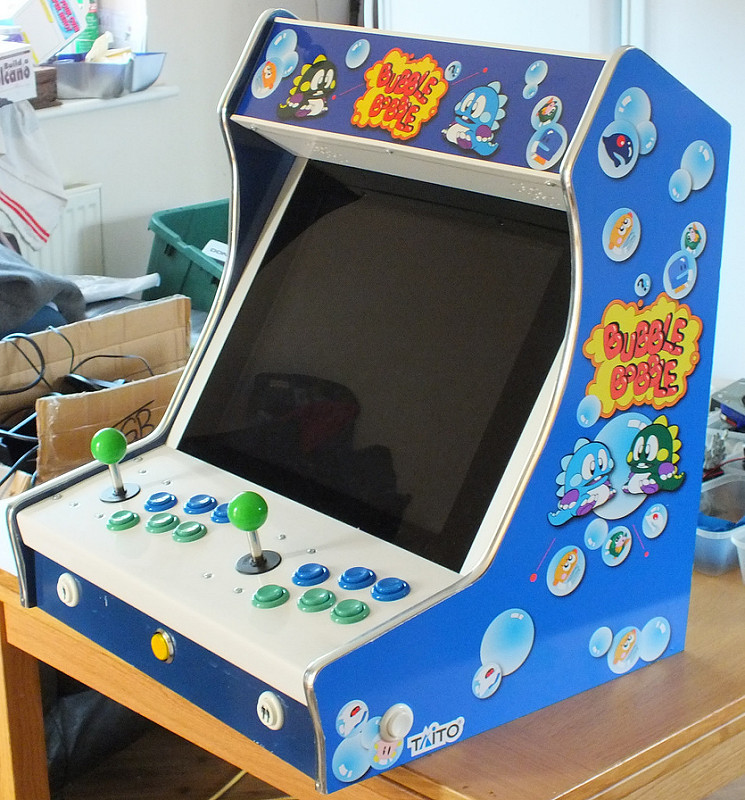
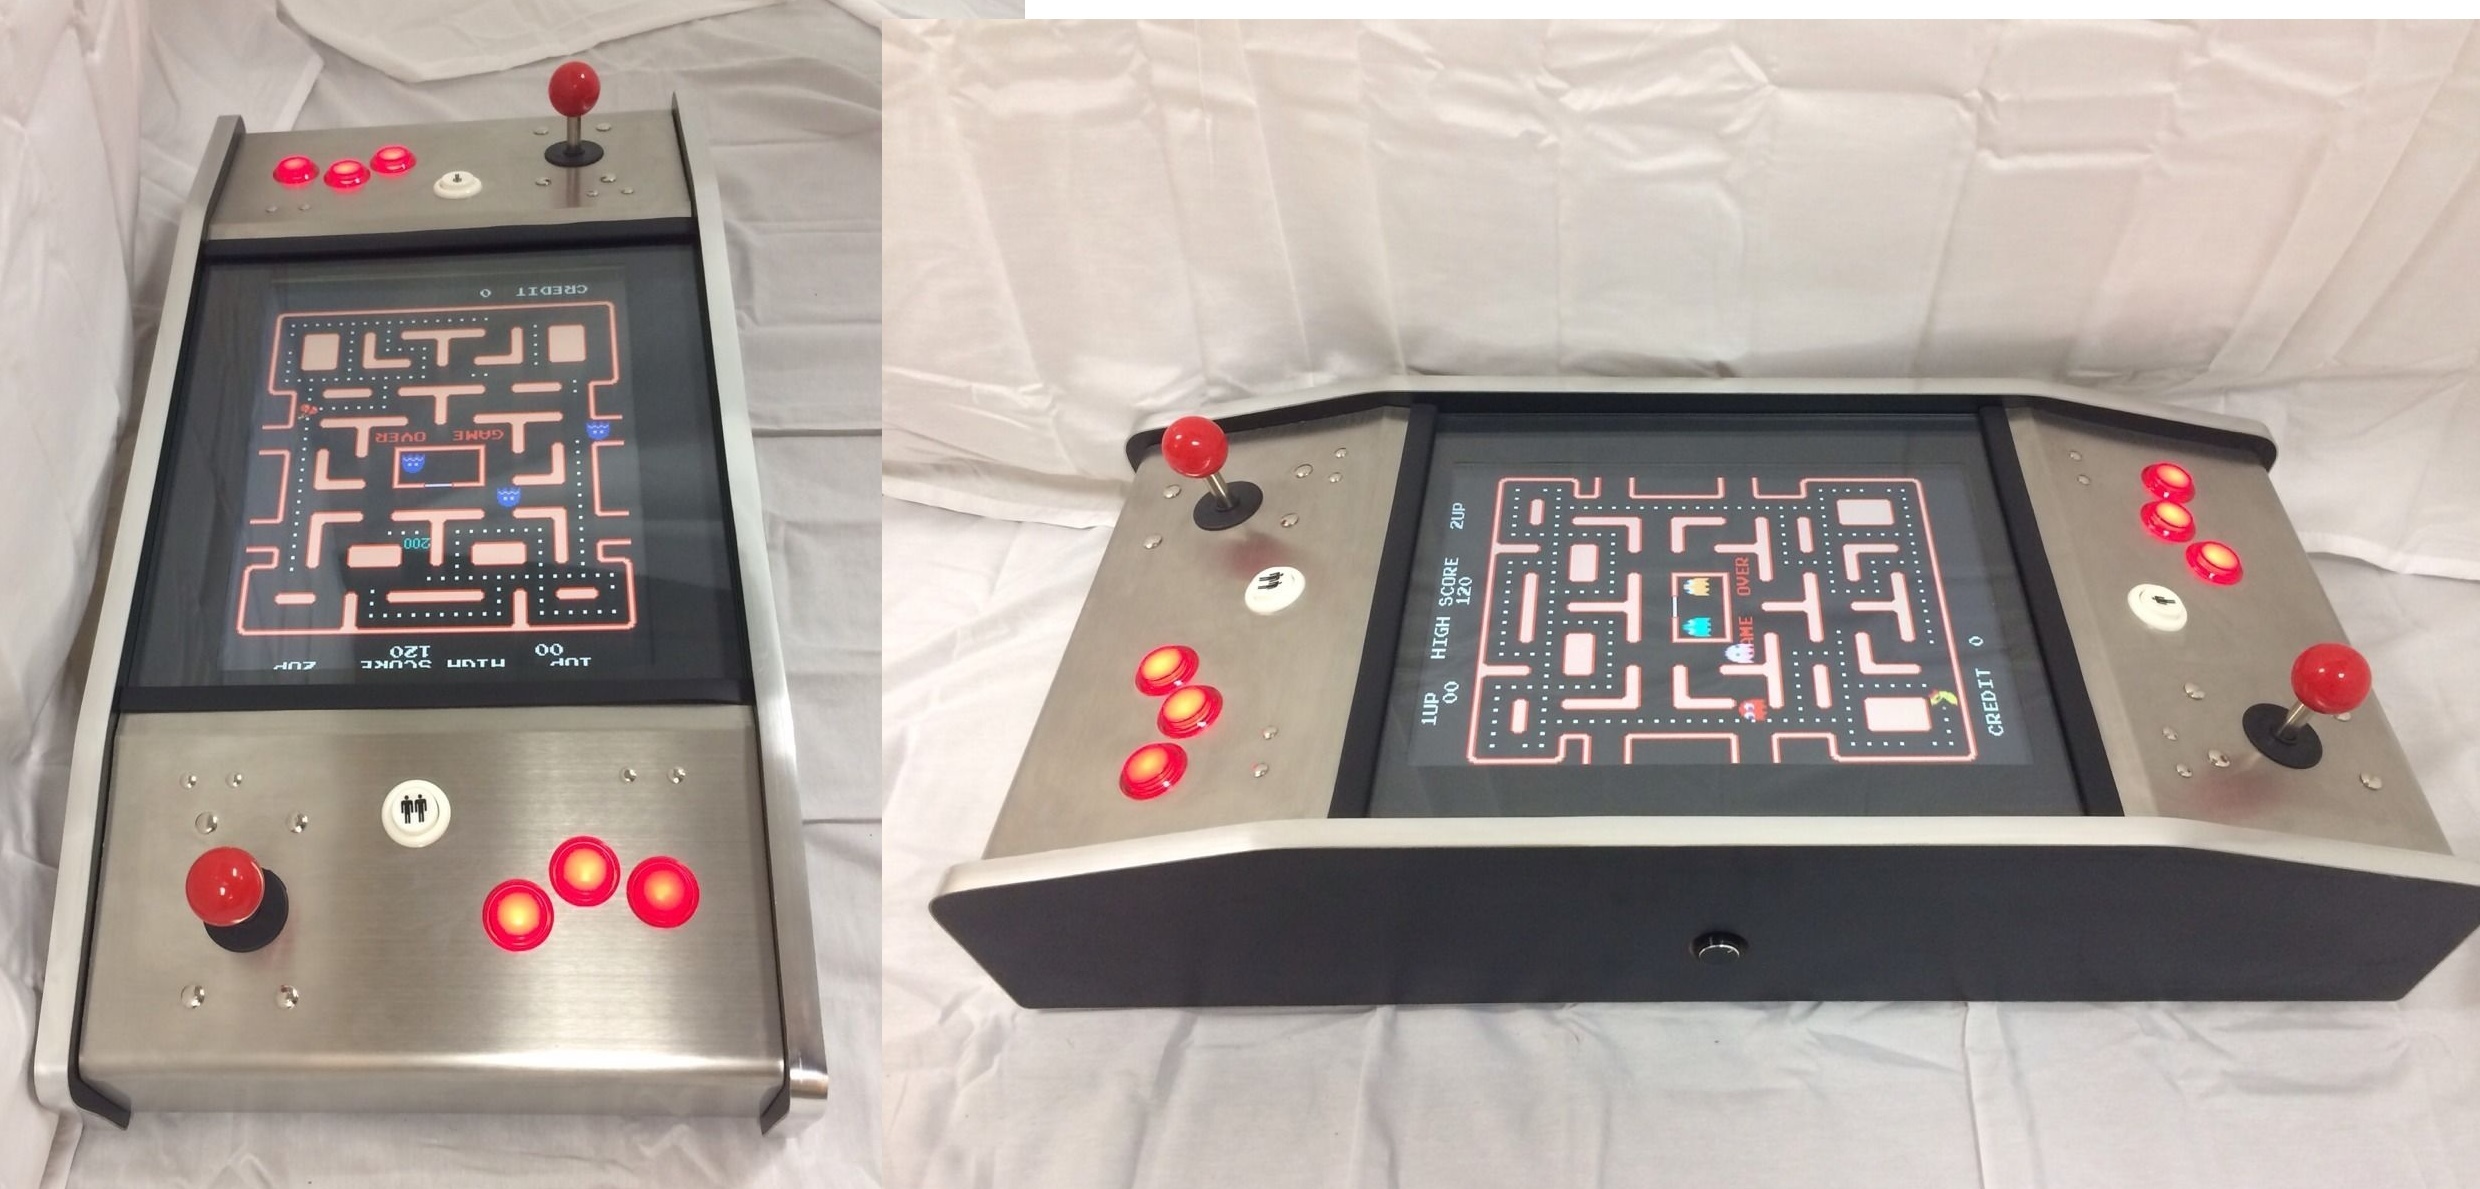
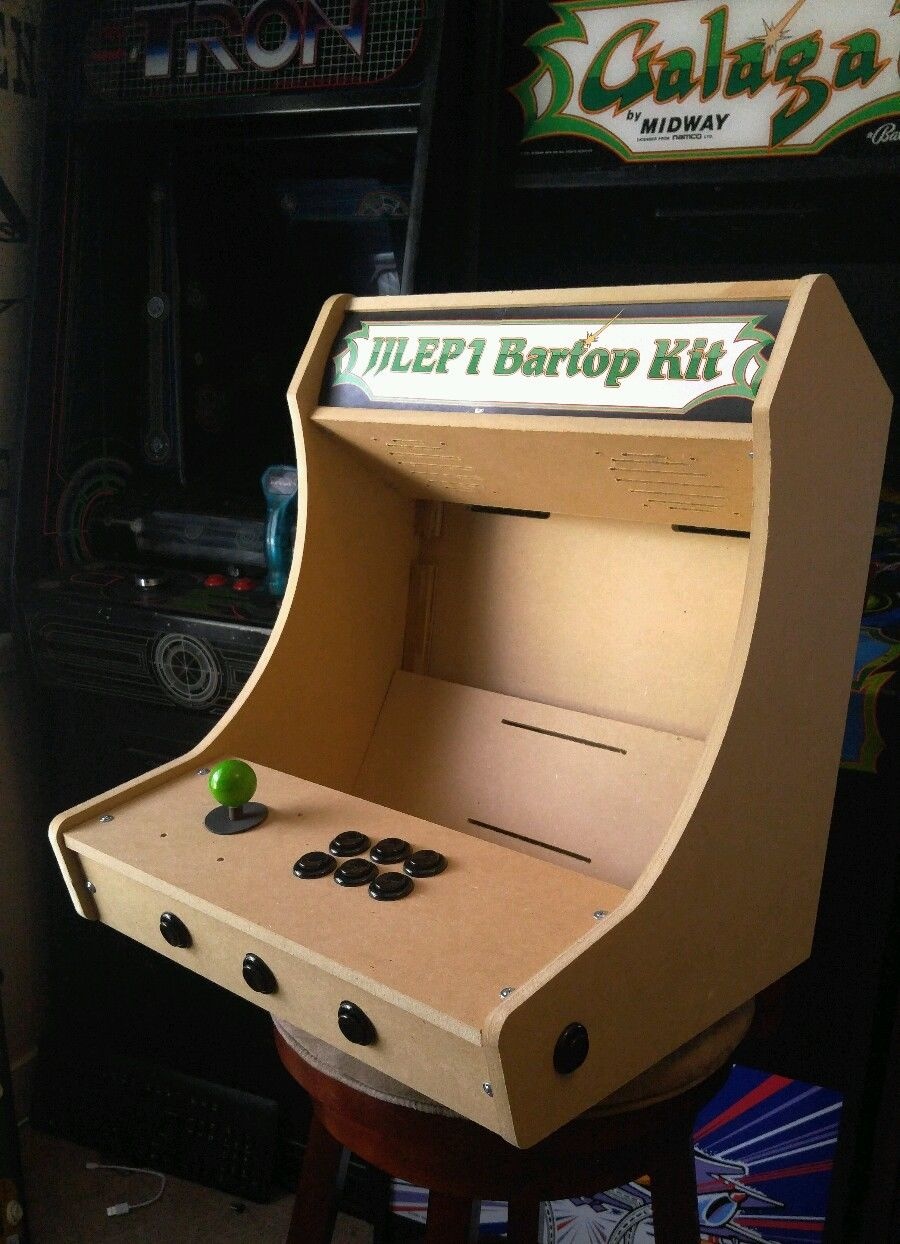
These are all your calls to make. You can get some ideas from the pictures I posted at the top of this blog post, or search the web for “Raspberry Pi Arcade” for lots of other ideas.
As a reasonable starting point, I can definitely recommend the Build-Your-Own-Arcade kits from Retro Built Games. From $330 for full kit, to $90 for just the wood case.
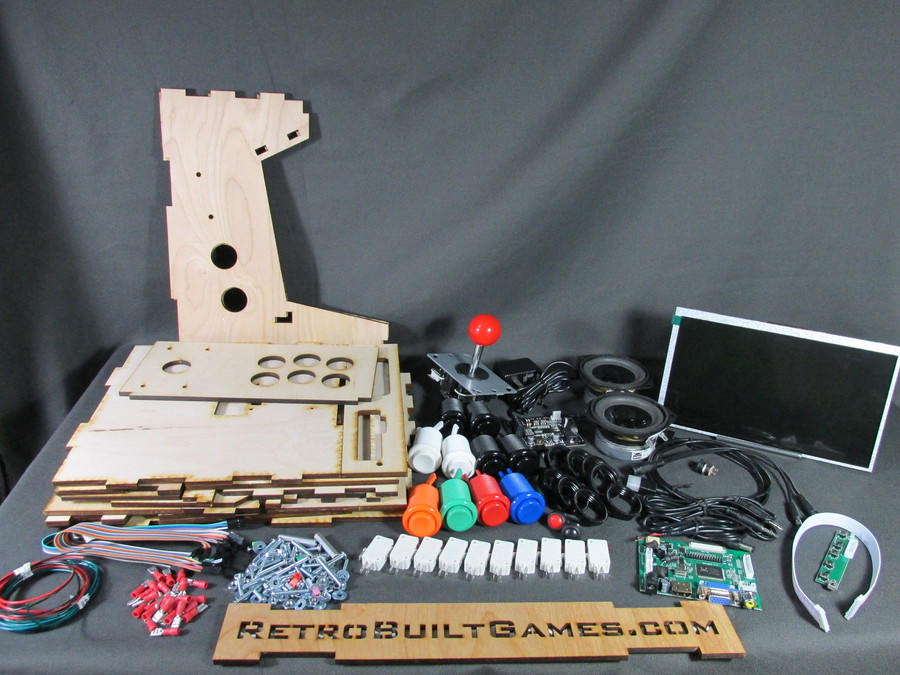
You could also buy the arcade controls alone for $75, and build out (or buy) a case to put them in.

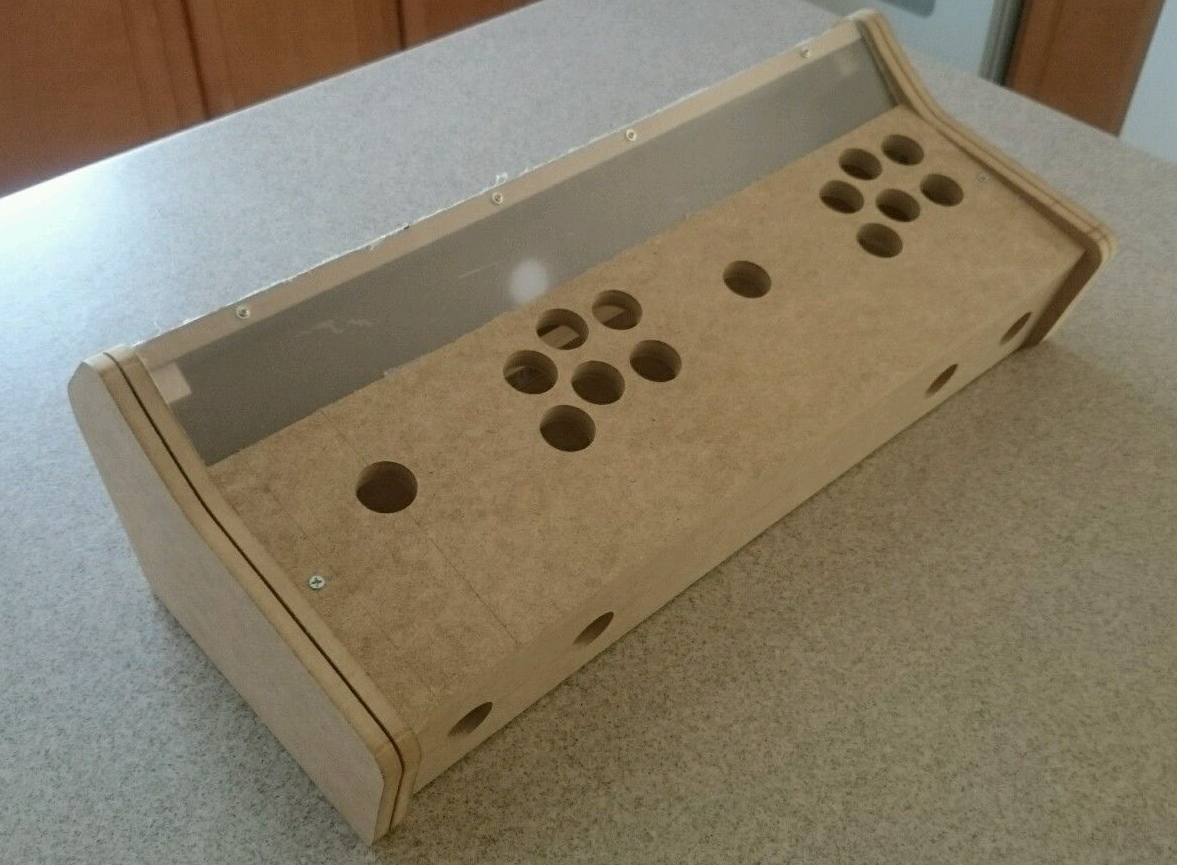
My “mainstream” recommendation is a bartop arcade. It uses a common LCD panel size in the normal horizontal orientation, it’s reasonably space efficient and somewhat portable, while still being comfortably large enough for two players if that’s what you want. That’ll be about $100 to $300 depending on options.
I remember spending well over $1,500 to build my old arcade cabinets. I’m excited that it’s no longer necessary to invest that much time, effort or money to successfully revisit our arcade past.
Thanks largely to the Raspberry Pi 3 and the RetroPie project, this is now a simple Maker project you can (and should!) take on in a weekend with a friend or family. For a budget of $100 to $300 (maybe $500 if you want to get extra fancy) you can have a pretty great classic arcade and classic console emulation experience. That’s way better than I was doing in 2005, even adjusting for inflation.
| [advertisement] At Stack Overflow, we put developers first. We already help you find answers to your tough coding questions; now let us help you find your next job. |

Every week users submit a lot of interesting stuff on our sister site Webdesigner News, highlighting great content from around the web that can be of interest to web designers.
The best way to keep track of all the great stories and news being posted is simply to check out the Webdesigner News site, however, in case you missed some here’s a quick and useful compilation of the most popular designer news that we curated from the past week.
Note that this is only a very small selection of the links that were posted, so don’t miss out and subscribe to our newsletter and follow the site daily for all the news.


Want more? No problem! Keep track of top design news from around the web with Webdesigner News.
| Massive Discounts on Stock Photos – 84% off! |
|
Each month, we look for the most beautiful, fresh, and above all else, free WordPress themes for your blog revamp. This month is very generous when it comes to newly published templates for our favorite CMS. We have found a couple of very appealing themes that can freshen up and embellish your website from now on. Have fun while discovering the new themes.
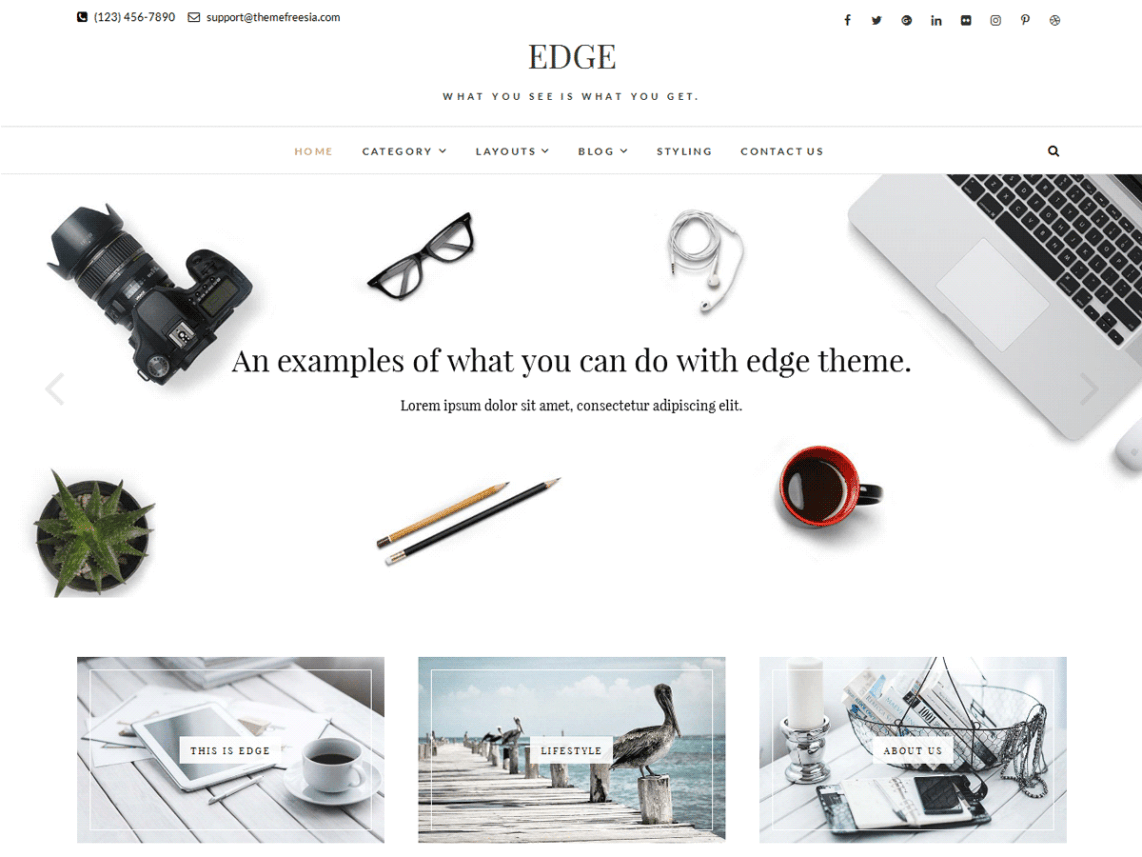
Edge is to be considered a blogging theme and lets you customize the background, the header, and the logo. On top of that, it comes with plenty of options in the WordPress Theme Customizer. This way, everyone should be able to adjust bits and pieces to form their favorite design. Edge is also an interesting theme for photographers.

Smartr is a theme for a broad scope of use cases. However, it was mainly created as a theme for business or freelance websites. The theme offers many customization options. Colors, logo, background, and navigation are adjustable, and all Google Fonts can be used.
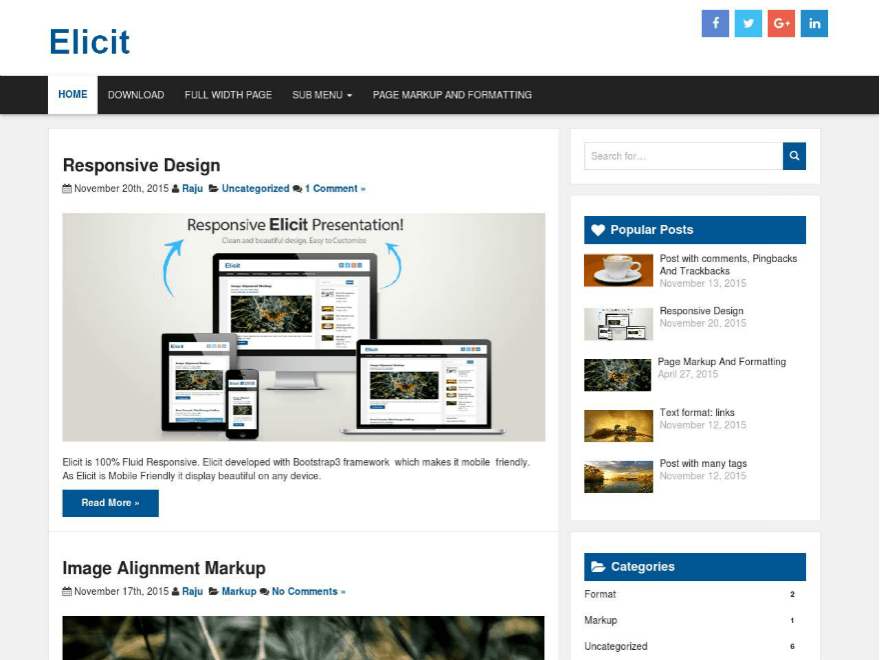
Elicit is a suitable theme for personal blogs, portfolio, travel, and photography websites. The background, the colors, as well as the headers, are customizable. Five widget areas and a custom widget for social networks round off the features of this theme.
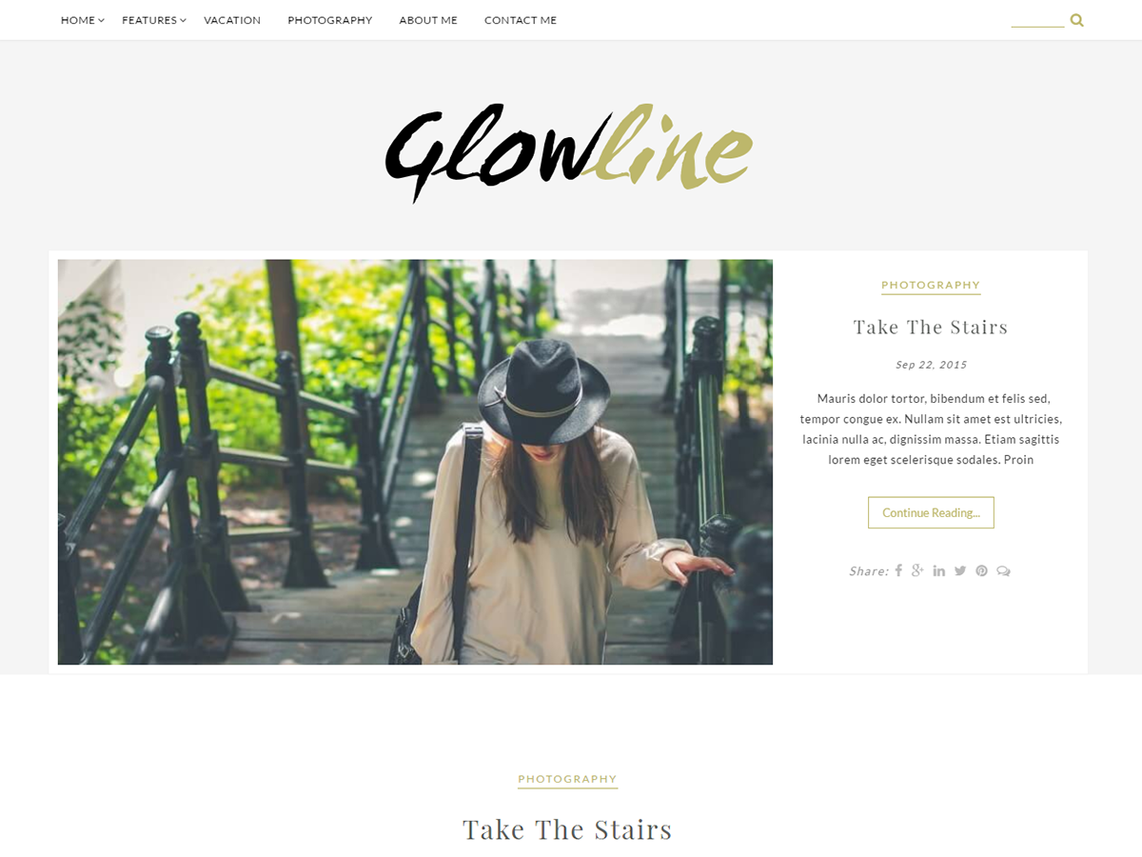
Glowline is praised as being a blog theme, but should also leave a good impression as a portfolio or photography website. You’re able to adjust the colors and the logo, and a slider for the landing page is included as well. The design may be considered bold.
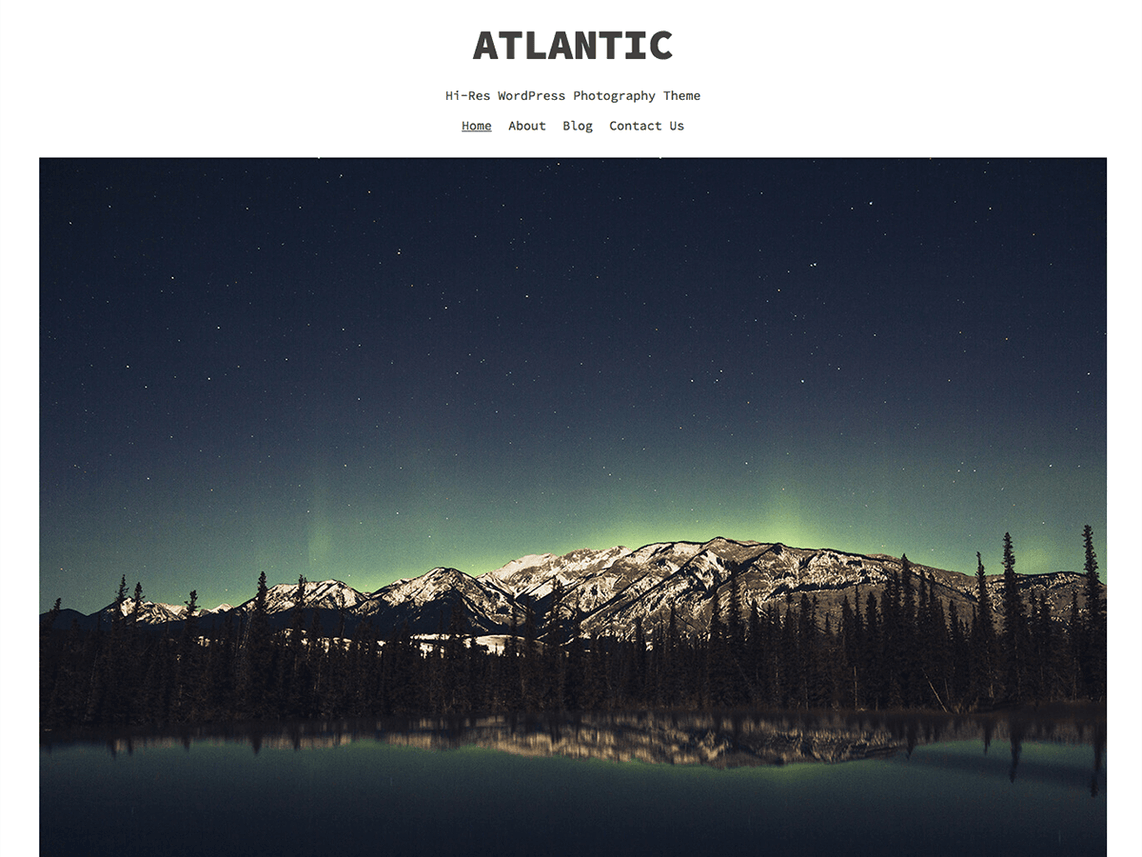
Atlantic is a minimalistic theme for the optimal presentation of images. The theme is a good choice for photographers that want to show off their photos in large formats.

Blogpost Lite is a theme for magazines, portfolios, and personal blogs with an interesting way of presenting content. Supposedly, many things can be adjusted using the theme customization. However, there is not detailed information on that.
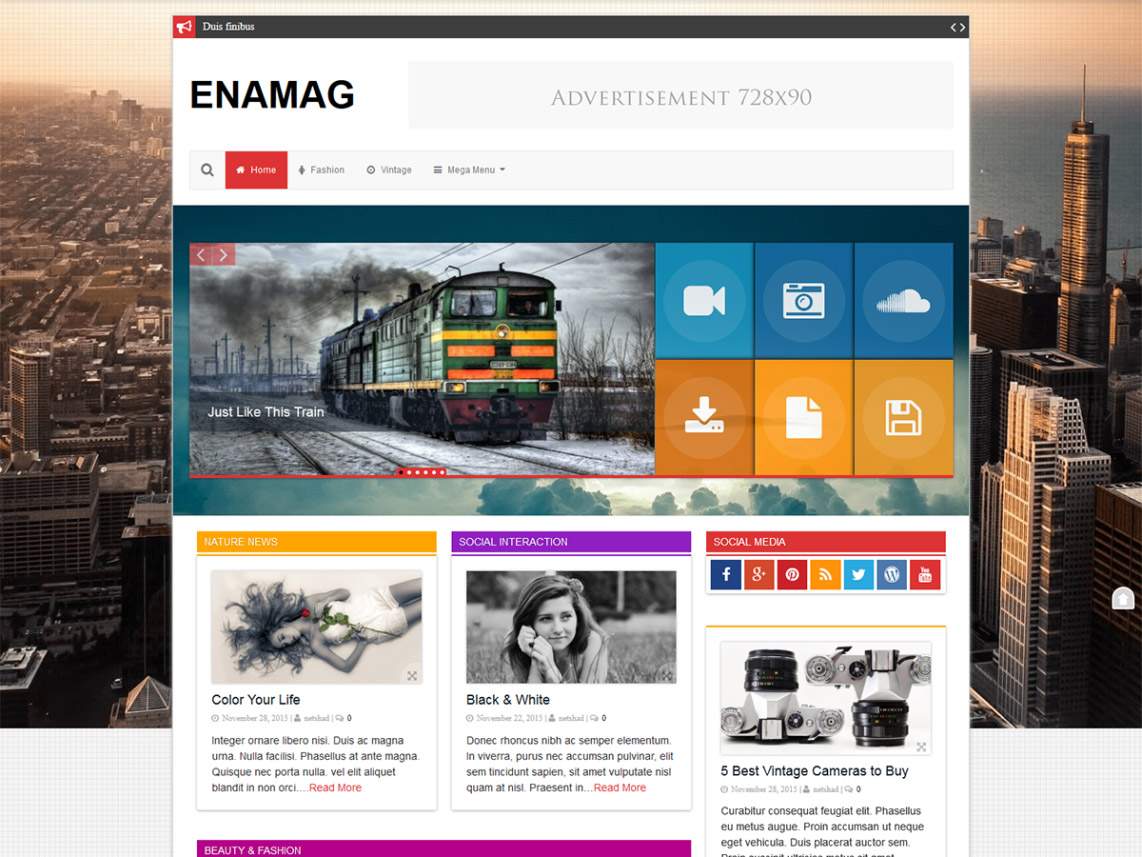
Enamag is a theme appropriate for magazines and news websites. It should also suit a personal blog. You get to influence the general layout, as well as the colors. You are also able to add a full-screen background image, and edit the logo and favicon.
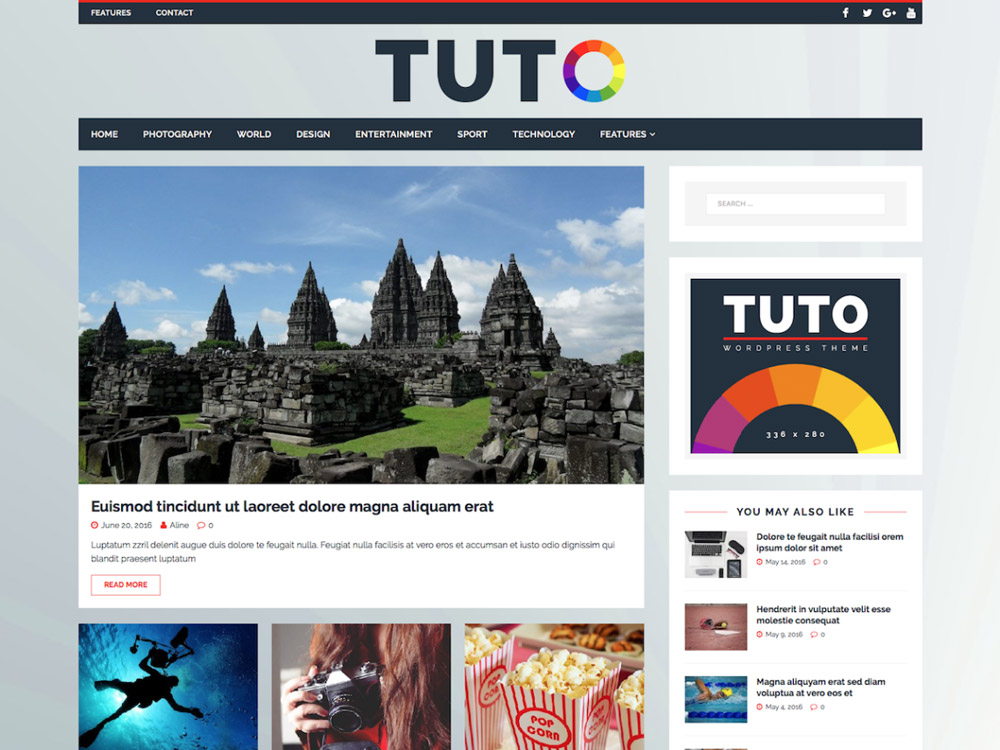
Tuto is a magazine theme by MH Themes. Moreover, it’s a perfect fit for all websites that focus on content. Adjust header, colors, as well as the background. You get to choose between two general layouts for the articles and determine a lot of other settings.
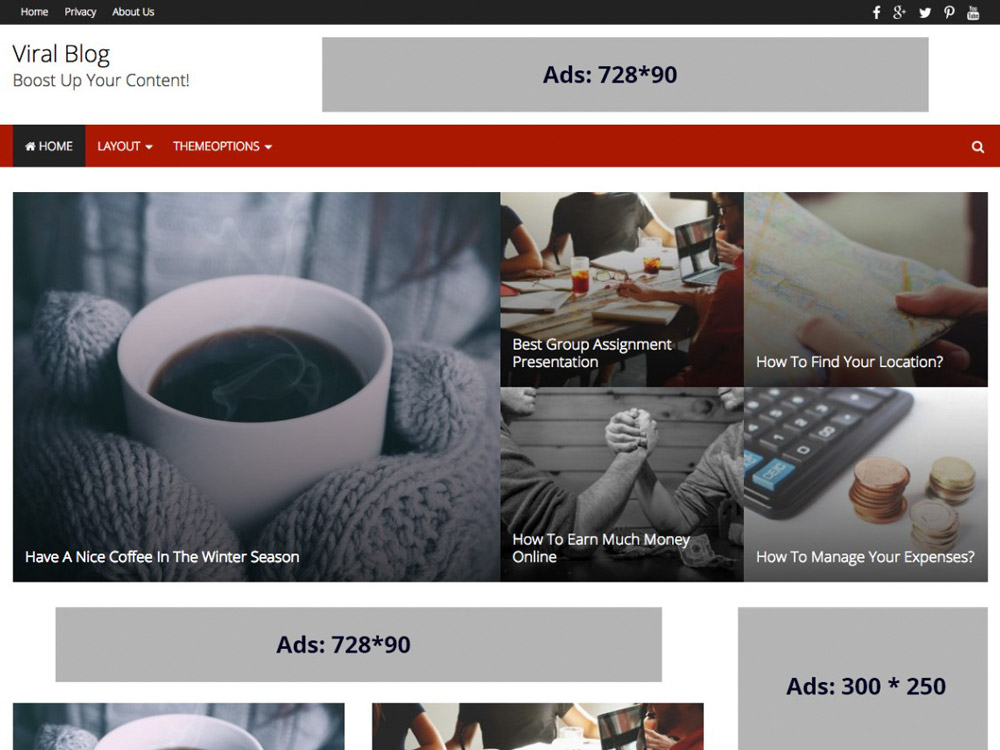
ViralBlog aims to be a professional blog theme that is meant to be a perfect choice for webmasters with lots of content. Homepage design options are included, and supposedly, the theme is optimized for speed and SEO.
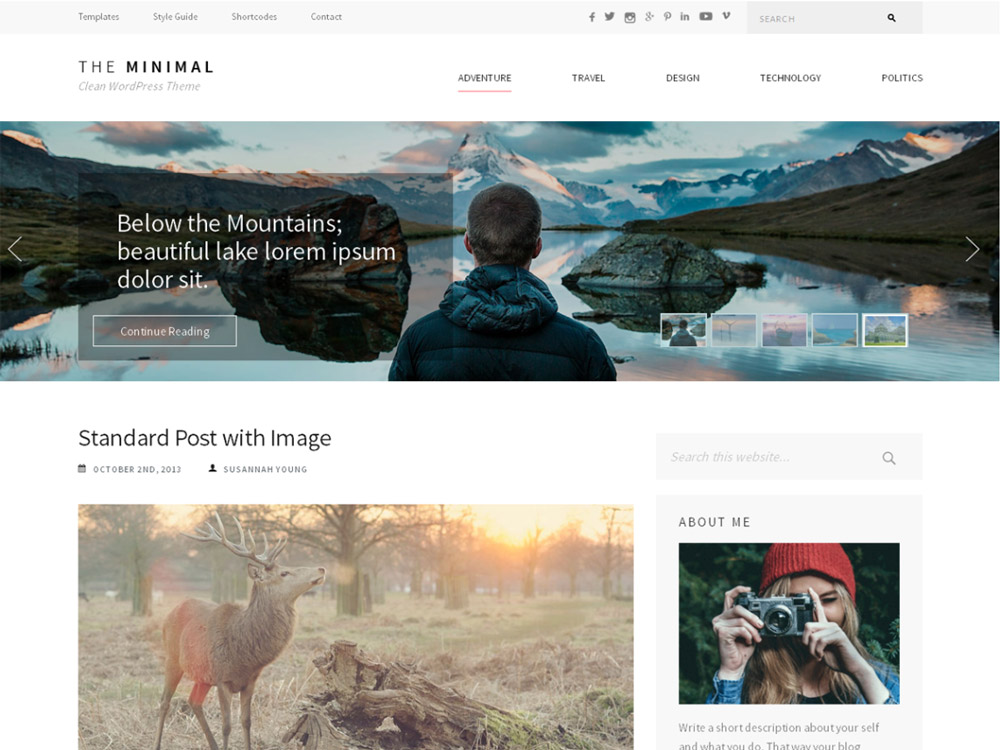
When using The Minimal, expect a theme for professional blogs, magazines, and photography websites. Four custom widgets, the option to adjust the logo, and two-page layouts round off the picture.
(dpe)

Every week we feature a set of comics created exclusively for WDD.
The content revolves around web design, blogging and funny situations that we encounter in our daily lives as designers.
These great cartoons are created by Jerry King, an award-winning cartoonist who’s one of the most published, prolific and versatile cartoonists in the world today.
So for a few moments, take a break from your daily routine, have a laugh and enjoy these funny cartoons.
Feel free to leave your comments and suggestions below as well as any related stories of your own…


Can you relate to these situations? Please share your funny stories and comments below…
| eBook: The Creative’s Guide to Freelancing by Jake Jorgovan – $12! |
