Archive

Archive for November, 2022

10 Key Principles of User-Centered Design

November 30th, 2022 No comments

Many firms’ design and development decisions are increasingly oriented toward human-centered innovation. Instead of rushing goods to market, these firms are using a user-centered design approach.

Design and development teams build high-performing digital products or websites that uniquely meet customers’ demands by concentrating on the user experience. After all, a good web design is helpful in boosting the business reputation or user experience.

This post will define user-centered design, discuss its fundamental principles, and describe the user-centered design process.

What Is User-Centered Design?

To create an enjoyable solution to a problem, user-centered design is a collection of iterative design processes concentrating on the user’s needs at each step. In UCD, the expectations, objectives, and preferences of the user significantly impact design decisions.

Additionally, users are actively involved in the entire process from start to finish. User-centered design principles encourage designers to create products with users rather than just for them. This strategy typically includes user research, interviews, usability testing, and a massive amount of feedback gathering.

UCD Requires Four Fundamental Components:

  • Visibility: Can people see what your website is about and how to utilize it the moment they land on your page?
  • Availability: Is your website user-friendly? Can they swiftly locate information? They should be able to find call-to-action buttons, menus, filters, and search choices with ease.
  • Legibility: Is the text simple to read for users?
  • Language: Is the language simple to grasp for users? Do you avoid using industry jargon in your UX authoring, which might lead to confusion and hesitation?

What Is The Significance Of UCD?

User experience is important in product design, especially in digital products such as app design, web and interface design, and marketing. Customers want their lives to be simplified. A website, app, or product exists to fulfill a consumer. Hence its success is determined by their interaction with it.

The following are some of the advantages of a user-centered design strategy for a business:

  • Customers keep coming back for more
  • There would be an increase in sales
  • Creating polished, efficient, and widely available goods
  • Understanding challenges thoroughly to provide suitable solutions
  • Customers and teams working together
  • Avoiding typical blunders
  • Enhancing Competitiveness
  • Assisting them in comprehending their market

It offers consumers the following advantages:

  • Making their life easier
  • Fulfilling their desires
  • Companies making them feel heard and understood
  • Making them feel important in the creation of things they use
  • Providing answers to challenges they were unaware they had or could not imagine solutions to

Let’s dig in to learn more about the advantages of UCD.

Businesses can benefit from using the user-centered design approach in various ways. As you incorporate this into your web development, you can enjoy the following four main advantages.

1. Prevent Project Failure

Your company might find it simpler to incorporate improvements and ensure your product is in line with actual user needs if you have a continuous feedback process assessing how customers react to your product, like a website.

Customers feel like their needs are better represented in the finished product, which can increase engagement and strengthen the bond with the company.

2. Improve ROI

This method produces products that more accurately reflect user expectations. The procedure also lessens mistakes made by website users, for instance. When combined, these factors motivate users to convert from leads to paying clients, boosting return on investment.

3. Increase Development Efficiency

In user-centered design, the objectives of the various team members are aligned. This can help clarify the best course of action for all parties involved. A more targeted, goal-oriented development process may be encouraged by the regular evaluation process.

Additionally, businesses can engage stakeholders and explain how their efforts and methodologies will improve customer interactions by using an iterative life cycle during product development.

4. Up The Level Of Competition

Customers will more fully appreciate what you offer, improve their engagement with your product or website, and be more likely to purchase from you if your product is created with their needs and expectations in mind.

As a result, this may increase your ability to compete in your sector.

5. KPIs Are Included

Given your user needs and business objectives, how do you move from the first to the second? You can measure key performance indicators with this in mind once you know what user needs are essential for the overall goals.

For instance, productivity may be the focus of office software, shopper activity may be the focus of sales tools, and retention rates may be the focus of other apps. All of these are necessary steps toward achieving business values like profit and revenue.

Human-Centered Design Versus User-Centered Design

There is a significant difference between humans and users. Simply put, all users are humans; however, not all humans will use your product. Therefore, you must thoroughly understand your target market to produce a successful user-centered design.

Detailed research should be done on the problems and goals of your users. Then, talk to them and give them several chances to offer feedback. By doing this, you’ll create a user persona that is complete and that you can use to determine the priorities for your design.

It’s critical to understand that different user groups may have additional requirements, levels of technical expertise, and expectations for using products like the one you’ve made.

What crucial guidelines or principles should designers consider when adopting a user-centric design?

The Process Of User-Centered Design

Certain fundamental principles underpin user-centered design. While the development process is always iterative, no explicit methods for implementation are specified. The approach can be implemented in either a waterfall or an agile environment.

1. Contextualization

The first step is to analyze the environment in which users will use the product. What are the intended applications of the product for future users? Teams working on projects can get answers by watching and talking to potential users.

2. Outlining The Prerequisites

Specifying the requirements for the new product is the second step. In this step, user requirements are described while considering corporate needs.

3. Design

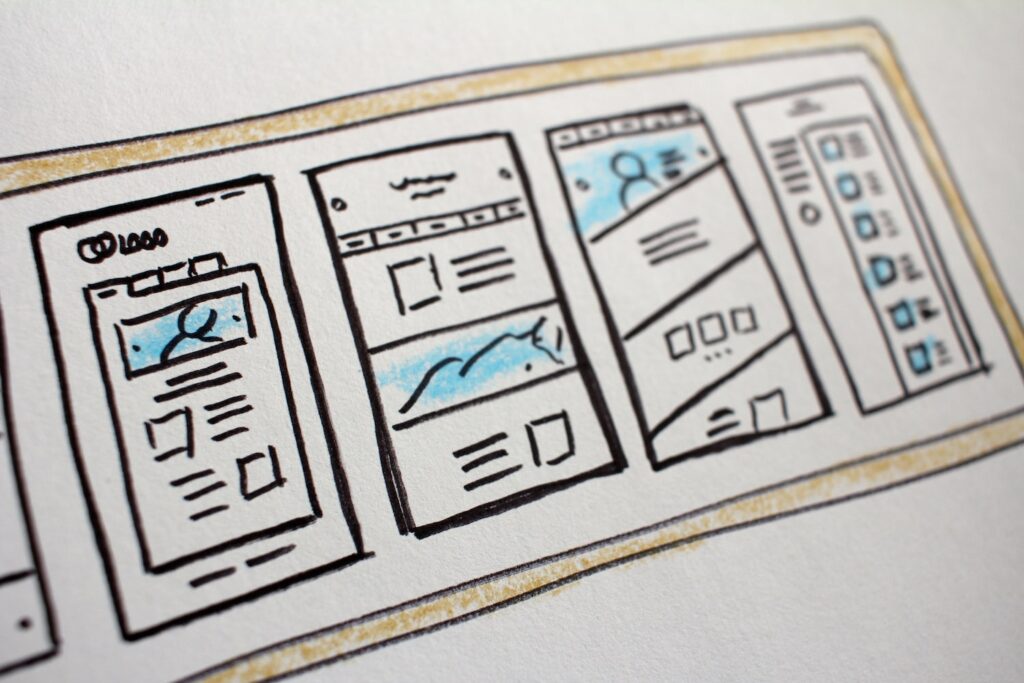
Once the requirements are established, the actual design process can begin. Designers typically start by producing a straightforward prototype, like one made of paper, then move on to digital wireframes and a finished prototype.

4. Analysis

The project team solicits feedback from potential users after creating a prototype. This is typically done for digital applications through in-depth user testing and qualitative research.

Do surveys and tests evaluate user satisfaction, effectiveness, and efficiency? With the new information, the project team goes back to step 2 or step 3 of the design process to improve the product. Once the user feedback is satisfied, these iterations continue while taking into account corporate frameworks (time and costs).

Top 10 User-Centered Design Principles

Principles of user-centered design attempt to guarantee that usability is the primary priority throughout the development process. These principles, if successfully followed, will ensure that user experience is fulfilled not just during the initial introduction of a product but also during its use.

Furthermore, each of the following principles may be tailored to match the specific requirements and interaction demands of any product.

1. Use Simple Language

Professional Web Designer strives to provide the most readable discourse for the user while creating a product. This involves clarifying vocabulary, eliminating jargon, and simply providing information pertinent to the work.

Presenting users with irrelevant information throughout their use of the product taints its usefulness. Furthermore, basic language helps the user finish the work without being overwhelmed or confused.

2. Feedback

Users expect a reaction to all of their actions. This might involve modifying the look of the screen after completing an activity. If the job is finished after some time, it should display a loading page to notify the user that the task is in process.

Keeping the user informed throughout the process reassures them and keeps them on track with their job.

3. Maintaining Consistency

Keeping the product consistent is essential in ensuring an ideal user experience. Consistency affects how customers approach a product, and the time it takes to learn how to use it.

From the start of the project until its completion, the consistent philosophy underpinning the UCD process should be maintained. If the interface design needs to be updated, it is critical to maintaining consistency across new features to stay beneficial to the user.

4. Give The Complete User Control

Consumers are already aware of their requirements. They should be able to use a product with minimal effort and depend on the product’s help to accomplish the rest.

By removing the effort from the job, the user can do it quickly while keeping control of their activities.

5. Describe The Situation

Before developing a product, the designer must first investigate the ideal user and their wants. The designers can gain a comprehensive sense of some of the issues these people experience by studying their lifestyles.

Many of these observations are conducted through interviews. These interviews provide the designer with information on the exact goals that users want to attain and how they want to achieve them.

6. Examine the Design

Designers undertake usability testing with actual users of their product at this stage in the UCD process. This stage provides designers with insight into how consumers will interact with the product and how to modify it to suit them better.

It is advised that this stage be completed as quickly as feasible. The sooner customers provide input, the faster designers can comprehend their product from the user’s perspective.

7. Create Designs That Are Specific To The Needs Of The User

The design team must examine the distinctive features of their intended demographic as well as frequent real-world activities while beginning the design process. Furthermore, the product should be appropriate for the environment in which it will be utilized the most.

Making a product that needs a lot of work from the user reduces its usability and usefulness, ultimately defeating the objective of UCD.

8. The Design Process Is Iterative

Because user-centered design is based on putting the user first, the product team should constantly be working to improve the user experience. By introducing changes gradually, you will gain a better understanding of your target audience.

9. Adequate Navigational Tools

An essential component of the user experience is the capability to navigate between pages of your website and return to the previous one. Make sure users know where they are on your website and how to leave any pages they don’t want to see.

Customers can better understand how to navigate your page by giving them features like a navigation map, for instance. Make it simple for customers to change their order without leaving the current page if they buy clothing and discover they need a different size once they reach the checkout page.

10. Unflawed System

Customers should find it easy to navigate between your website’s pages and accomplish their goals. If they make a mistake, be there to help them fix it so they can achieve their goal.

The form may ask for specific, essential fields, such as the square footage, and may also include a gentle reminder or an alert that appears if the user accidentally leaves a required field blank.

Customers may feel more comfortable responding to your prompts and participating in a conversation if you ask questions one at a time and offer automated responses for each response.

Wrapping Up

User-centered design is more than just making a good product. It goes further than that. You demonstrate your motivations and intentions by putting your users in the spotlight. You’re demonstrating that it’s not all about meeting deadlines or turning a profit. Instead, you’re telling your users that you understand what they want and prioritize their needs.

It should come as no surprise that the most effective teams are user-centric. Knowing your customer is essential for success in any industry, including design. Create products that put the user first, and you will create products that people will love.

You can build a more robust, user-friendly website that is better equipped to respond to user needs and expectations by incorporating the User Centered Design process into your product design. However, it’s crucial to collaborate with a specialist who can apply these techniques and produce the result you’ve envisioned.


Featured image by pch.vector on Freepik

Source

The post 10 Key Principles of User-Centered Design first appeared on Webdesigner Depot.

Categories: Designing, Others Tags:

Using The New Constrained Layout In WordPress Block Themes

November 30th, 2022 No comments

One of the main goals of the WordPress Site Editor (and, yes, that is now the “official” name) is to move basic block styling from CSS to structured JSON. JSON files are machine-readable, which makes it consumable by the JavaScript-based Site Editor for configuring a theme’s global styles directly in WordPress.

It’s not all the way there yet! If we look at the Twenty Twenty-Two (TT2) default theme, there were two main unresolved issues: styling interactions (like :hover, :active, :focus), and the margins and padding of layout containers. You can see how those were temporarily fixed in the TT2 style.css file rather than making it into the theme.json file.

WordPress 6.1 fixed those issues and what I want to do is look specifically at the latter. Now that we have JSON-ified styles for the margins and padding of layout containers, that opens us up to more flexible and robust ways to define spacing in our theme layouts.

What kind of spacing are we talking about?

First off, we already have root-level padding which is a fancy way of describing padding on the element. That’s nice because it ensures consistent spacing on an element that is shared on all pages and posts.

But there’s more to it because now we have a way for blocks to bypass that padding and align themselves full-width. That’s thanks to padding-aware alignments which is a new opt-in feature in theme.json. So, even if you have root-level padding, you can still allow, say, an image (or some other block) to break out and go full-width.

That gets us to another thing we get: constrained layouts. The idea here is that any blocks nested in the layout respect the layout’s content width — which is a global setting — and do not flow outside of it. We can override that behavior on a block-by-block basis with alignments, but we’ll get to that.

Let’s start with…

Root-level padding

Again, this isn’t new. We’ve had the ability to set padding on the element in theme.json since the experimental Gutenberg plugin introduced it in version 11.7. We set it on the styles.spacing object, where we have margin and padding objects to define the top, right, bottom, and left spacing on the body:

{
  "version": 2,
  "styles": {
    "spacing": {
      "margin": {
        "top": "60px",
        "right": "30px",
        "bottom": "60px",
        "left": "30px"
      },
      "padding": {
        "top": "30px",
        "right": "30px",
        "bottom": "30px",
        "left": "30px"
      }
    }
  }
}

This is a global setting. So, if we were to crack open DevTools and inspect the element, we would see these CSS styles:

body {
  margin-top: 60px;
  margin-right: 30px;
  margin-bottom: 60px;
  margin-left: 30px;
  padding-top: 30px;
  padding-right: 30px;
  padding-bottom: 30px;
  padding-left: 30px;
}

Cool. But herein lies the issue of how in the world we can allow some blocks to break out of that spacing to fill the full screen, edge-to-edge. That’s why the spacing is there, right? It helps prevent that from happening!

But there are indeed plenty of cases where you might want to break out of that spacing on a one-off instance when working in the Block Editor. Say we plop an Image block on a page and we want it to go full-width while the rest of the content respects the root-level padding?

Enter…

Padding-aware alignments

While attempting to create the first default WordPress theme that defines all styles in the theme.json file, lead designer Kjell Reigstad illustrates the challenging aspects of breaking out of root-level padding in this GitHub issue.

Root-level padding prevents blocks from taking up the full viewport width (left). But with padding-aware alignments, some blocks can “opt-out” of that spacing and take up the full viewport width (right). (Image credit: Kjell Reigstad)

New features in WordPress 6.1 were created to address this issue. Let’s dig into those next.

useRootPaddingAwareAlignments

A new useRootPaddingAwareAlignments property was created to address the problem. It was actually first introduced in the Gutenberg plugin v13.8. The original pull request is a nice primer on how it works.

{
  "version": 2,
  "settings": {
    "appearanceTools": true,
    "useRootPaddingAwareAlignments": true,
    // etc.
  },

Right off the bat, notice that this is a feature we have to opt into. The property is set to false by default and we have to explicitly set it to true in order to enable it. Also notice that we have appearanceTools set to true as well. That opts us into UI controls in the Site Editor for styling borders, link colors, typography, and, yes, spacing which includes margin and padding.

Setting appearanceTools set to true automatically opts blocks into margin and padding without having to set either settings.spacing.padding or setting.spacing.margin to true.

When we do enable useRootPaddingAwareAlignments, we are provided with custom properties with root padding values that are set on the element on the front end. Interestingly, it also applies the padding to the .editor-styles-wrapper class so the spacing is displayed when working in the back-end Block Editor. Pretty cool!

I was able to confirm those CSS custom properties in DevTools while digging around.

Enabling useRootPaddingAwareAlignments also applies left and right padding to any block that supports the “content” width and “wide” width values in the Global Styles image above. We can also define those values in theme.json:

{
  "version": 2,
  "settings": {
    "layout": {
      "contentSize": "640px",
      "wideSize": "1000px"
    }
  }
}

If the Global Styles settings are different than what is defined in theme.json, then the Global Styles take precedence. You can learn all about managing block theme styles in my last article.

  • contentSize is the default width for blocks.
  • wideSize provides a “wide” layout option and establishes a wider column for blocks to stretch out.

So, that last code example will give us the following CSS:

/* The default content container */
.wp-container-[id] > * {
  max-width: 640px;
  margin-left: auto !important;
  margin-right: auto !important;
}

/* The wider content container */
.wp-container-[id] > .alignwide {
  max-width: 1000px;
}

[id] indicates a unique number automatically generated by WordPress.

But guess what else we get? Full alignment as well!

.wp-container-[id] .alignfull {
  max-width: none;
}

See that? By enabling useRootPaddingAwareAlignments and defining contentSize and wideSize, we also get a full alignment CSS class for a total of three container configurations for controlling the width of blocks that are added to pages and posts.

This applies to the following layout-specific blocks: Columns, Group, Post Content, and Query Loop.

Block layout controls

Let’s say we add any of those aforementioned layout-specific blocks to a page. When we select the block, the block settings UI offers us new layout settings based on the settings.layout values we defined in theme.json (or the Global Styles UI).

We’re dealing with very specific blocks here — ones that can have other blocks nested inside. So, these Layout settings are really about controlling the width and alignment of those nested blocks. The “Inner blocks use content width” setting is enabled by default. If we toggle it off, then we have no max-width on the container and the blocks inside it go edge-to-edge.

If we leave the toggle on, then nested blocks will adhere to either the contentWidth or wideWidth values (more on that in a bit). Or we can use the numeric inputs to define custom contentWidth and wideWidth values in this one-off instance. That’s great flexibility!

Wide blocks

The settings we just looked are set on the parent block. Once we’ve nested a block inside and select it, we have additional options in that block to use the contentWidth, wideWidth, or go full-width.

This Image block is set to respect the contentWidth setting, labeled “None” in the contextual menu, but can also be set to wideWidth (labeled “Wide width”) or “Full width”.

Notice how WordPress multiplies the root-level padding CSS custom properties by -1 to create negative margins when selecting the “Full width” option.

The .alignfull class sets negative margins on a nested block to ensure it takes up the full viewport width without conflicting with the root-level padding settings.

Using a constrained layout

We just covered the new spacing and alignments we get with WordPress 6.1. Those are specific to blocks and any nested blocks within blocks. But WordPress 6.1 also introduces new layout features for even more flexibility and consistency in a theme’s templates.

Case in point: WordPress has completely restructured its Flex and Flow layout types and gave us a constrained layout type that makes it easier to align block layouts in themes using the content width settings in the Site Editor’s Global Styles UI.

Flex, Flow, and Constrained layouts

The difference between these three layout types is the styles that they output. Isabel Brison has an excellent write-up that nicely outlines the differences, but let’s paraphrase them here for reference:

  • Flow layout: Adds vertical spacing between nested blocks in the margin-block direction. Those nested blocks can also be aligned to the left, right, or center.
  • Constrained layout: Same exact deal as a Flow layout, but with width constraints on nested blocks that are based on the contentWidth and wideWidth settings (either in theme.json or Global Styles).
  • Flex layout: This was unchanged in WordPress 6.1. It uses CSS Flexbox to create a layout that flows horizontally (in a row) by default, but can flow vertically as well so blocks stack one on top of another. Spacing is applied using the CSS gap property.

This new slate of layout types creates semantic class names for each layout:

Semantic layout class Layout type Supported blocks
.is-layout-flow Flow layout Columns, Group, Post Content, and Query Loop.
.is-layout-constrained Constrained layout Columns, Group, Post Content, and Query Loop.
.is-layout-flex Flex layout Columns, Buttons, Social Icons

Justin Tadlock has an extensive write-up on the different layout types and semantic classes, including use cases and examples.

Updating your theme to support constrained layouts

If you’re already using a block theme of your own making, you’re going to want to update it to support constrained layouts. All it takes is swapping out a couple of things in theme.json:

{
  "version": 2,
  "settings": {
    "layout": {
      "type": "constrained", // replaces `"inherit": true`
      "type": "default", // replaces `"inherit": false`
    }
  }
}

These are recently released block themes that have enabled spacing settings with useRootPaddingAwareAlignments and have an updated theme.json file that defines a constrained layout:

Theme Root-level padding Constrained layout features
TT3 Source code Source codeTemplates
ProWP Source code Source codeTemplates
Triangulate Source code Source codeTemplates
Oaknut Source code Source codeTemplates
Loudness Source code Source codeTemplates
Pixl Source code Source codeTemplates
Block Canvas Source code Source code, Templates
Rainfall Source code Source codeTemplates

Disabling layout styles

The base layout styles are default features that ship in WordPress 6.1 Core. In other words, they’re enabled right out of the box. But we can disable them if we need to with this little snippet in functions.php:

// Remove layout styles.
add_theme_support( 'disable-layout-styles' );

Big warning here: disabling support for the default layout types also removes all of the base styling for those layouts. That means you’ll need to roll your own styles for spacing, alignments, and anything else needed to display content in different template and block contexts.

Wrapping up

As a great fan of full-width images, the new contained WordPress 6.1 layout and padding aware alignment features are two of my most favorites yet. Taken together with other tools including, better margin and padding control, fluid typography, and updated List and Quote blocks, among others, is solid proof that WordPress is moving towards a better content creation experience.

Now, we have to wait and look at how the imagination and creativity of ordinary designers and content creators use these incredible tools and take it to a new level.

Because of the site editor development iterations in progress, we should always anticipate a difficult path ahead. However, as an optimist, I am eager to see what will happen in the upcoming version of WordPress 6.2. Some of the thing, that I am keeping a close eye on are things like features being considered for inclusion, support for sticky positioning, new layout class names for inner block wrappers, updated footer alignment options, and adding constrained and flow layout options to Cover blocks.

This GitHub issues #44720 lists the layout related discussions slated for WordPress 6.2.

Additional resources

I consulted and referenced a lot of sources while digging into all of this. Here’s a big ol’ list of things I found helpful and think you might enjoy as well.

Tutorials

WordPress posts

GitHub pull requests and issues


Using The New Constrained Layout In WordPress Block Themes originally published on CSS-Tricks, which is part of the DigitalOcean family. You should get the newsletter.

Categories: Designing, Others Tags:

Endings And New Beginnings (December 2022 Desktop Wallpapers Edition)

November 30th, 2022 No comments

2022 is slowly but surely coming to an end. And, well, could there be a better way to welcome the last few weeks of the year than with some beautiful, wintery desktop wallpapers? To get you in the right mood for December (and the holiday season, if you’re celebrating), artists and designers from across the globe once again got their ideas bubbling and created desktop wallpapers to sweeten up the month.

All wallpapers in this post are created with love and come in versions with and without a calendar for December 2022 — so no matter if you want to count down the days to the last deadline of the year or prefer to keep things rather minimalistic, we’ve got you covered. At the end of this post, we also compiled some December goodies from our wallpapers archives that are too good to be forgotten. Maybe you’ll spot one of your almost-forgotten favorites in there, too? Enjoy!

  • You can click on every image to see a larger preview,
  • We respect and carefully consider the ideas and motivation behind each and every artist’s work. This is why we give all artists the full freedom to explore their creativity and express emotions and experience through their works. This is also why the themes of the wallpapers weren’t anyhow influenced by us but rather designed from scratch by the artists themselves.
  • Submit a wallpaper!
    Did you know that you could get featured in our next wallpapers post, too? We are always looking for creative talent.

Winter Coziness At Home

“Winter coziness that we all feel when we come home after spending some time outside or when we come to our parental home to celebrate Christmas inspired our designers. Home is the place where we can feel safe and sound, so we couldn’t help ourselves but create this calendar. You can find more designs in our post.” — Designed by MasterBundles from Ukraine.

Christmas Reindeer

“Thinking about the holiday season, it is impossible to appreciate all the colors that bring joy. Here, we combined Rudolph the Red-Nosed Reindeer with some Christmas cheer!” — Designed by Suu Ng from Portland, OR, USA.

December As A Gift

“Illuminate your problems with Christmas lights and watch them shrink with every twinkle. During the last month of the year, top your concerns with some candy cane and pretend they’re tasty sweets. December is all about endings and beginnings, so gift yourself resilience for the things yet to end and patience for the things to come.” — Designed by LibraFire from Serbia.

Bat Christmas

Designed by Ricardo Gimenes from Sweden.

Grumpy Santa

“Ho ho ho Christmas is near. PopArt has prepared a December calendar that exudes warmth and smells like gingerbread cookies. Our Santa may look a little grumpy, but be sure he brings the best gifts. Whispering: ‘When the time comes, look under your Christmas tree.’ PopArt Studio wishes you a Merry Christmas!” — Designed by PopArt Studio from Serbia.

Hot Hot Hot!

Designed by Ricardo Gimenes from Sweden.

Winter Forest Friend

“Today’s walk in the forest is a special one! Today you will make a new friend. Follow me into the forest and walk slowly. The weather is amazing today, isn’t it? The snowflakes seem soft and the snow is fresh and puffy! There are colourful speckles of light dancing all around us and the air feels so fresh. Oh wait… there he is! Look ahead! Yes, there he is, our special forest friend that only comes out during winter! Say hello to Franklin, the fluffy polar bear! He loves Christmas and he has some wonderful winter stories to share with you!” — Designed by Creative Pinky from the Netherlands.

Oldies But Goodies

Ready for a trip back in time? Below you’ll find a selection of December wallpapers from our archives. Please note that these designs don’t come with a calendar.

Dear Moon, Merry Christmas

“Please visit the Vladstudio website if you like my works!” — Designed by Vlad Gerasimov from Georgia.

On To The Next One

“Endings intertwined with new beginnings, challenges we rose to and the ones we weren’t up to, dreams fulfilled and opportunities missed. The year we say goodbye to leaves a bitter-sweet taste, but we’re thankful for the lessons, friendships, and experiences it gave us. We look forward to seeing what the new year has in store, but, whatever comes, we will welcome it with a smile, vigor, and zeal.” — Designed by PopArt Studio from Serbia.

Anonymoose

Designed by Ricardo Gimenes from Sweden.

The House On The River Drina

“Since we often yearn for a peaceful and quiet place to work, we have found inspiration in the famous house on the River Drina in Bajina Bašta, Serbia. Wouldn’t it be great being in nature, away from the civilization, swaying in the wind and listening to the waves of the river smashing your house, having no neighbors to bother you? Not sure about the Internet, though…” — Designed by PopArt Studio from Serbia.

Cardinals In Snowfall

“During Christmas season, in the cold, colorless days of winter, Cardinal birds are seen as symbols of faith and warmth. In the part of America I live in, there is snowfall every December. While the snow is falling, I can see gorgeous Cardinals flying in and out of my patio. The intriguing color palette of the bright red of the Cardinals, the white of the flurries and the brown/black of dry twigs and fallen leaves on the snow-laden ground fascinates me a lot, and inspired me to create this quaint and sweet, hand-illustrated surface pattern design as I wait for the snowfall in my town!” — Designed by Gyaneshwari Dave from the United States.

December Through Different Eyes

“As a Belgian, December reminds me of snow, coziness, winter, lights, and so on. However, in the Southern Hemisphere, it is summer at this time. With my illustration, I wanted to show the different perspectives on December. I wish you all a Merry Christmas and Happy New Year!” — Designed by Jo Smets from Belgium.

Enchanted Blizzard

“A seemingly forgotten world under the shade of winter glaze hides a moment where architecture meets fashion and change encounters steadiness.” — Designed by Ana Masnikosa from Belgrade, Serbia.

Ninja Santa

Designed by Elise Vanoorbeek from Belgium.

Silver Winter

Designed by Violeta Dabija from Moldova.

King Of Pop

Designed by Ricardo Gimenes from Sweden.

Abstract Winter

“Winter is cold and dark up here in the north.” Designed by Terese Brännström from Sweden.

Catch Your Perfect Snowflake

“This time of year, people tend to dream big and expect miracles. Let your dreams come true!” Designed by Igor Izhik from Canada.

Winter Garphee

“Garphee’s flufiness glowing in the snow.” Designed by Razvan Garofeanu from Romania.

Cozy

“December is all about coziness and warmth. Days are getting darker, shorter, and colder. So a nice cup of hot cocoa just warms me up.” — Designed by Hazuki Sato from Belgium.

Christmas Woodland

Designed by Mel Armstrong from Australia.

Getting Hygge

“There’s no more special time for a fire than in the winter. Cozy blankets, warm beverages, and good company can make all the difference when the sun goes down. We’re all looking forward to generating some hygge this winter, so snuggle up and make some memories.” — Designed by The Hannon Group from Washington D.C.

Winter Wonderland

“‘Winter is the time for comfort, for good food and warmth, for the touch of a friendly hand and for a talk beside the fire: it is the time for home.’ (Edith Sitwell) — Designed by Dipanjan Karmakar from India.

The Southern Hemisphere Is Calling

“Santa’s tired of winter (and the North Pole) and is flying to the southern part of the globe to relax a little bit. He deserves a little vacation, don’t you think?” — Designed by Ricardo Gimenes from Sweden.

Cold Outside

“In December it is cold outside, so cute giraffe with scarf. Winter in Africa.” — Designed by Kim Lemin from Belgium.

Christmas Time

Designed by Sofie Keirsmaekers from Belgium.

Joy To The World

“Joy to the world, all the boys and girls now, joy to the fishes in the deep blue sea, joy to you and me.” — Designed by Morgan Newnham from Boulder, Colorado.

Ice Flowers

“I took some photos during a very frosty and cold week before Christmas.” Designed by Anca Varsandan from Romania.

Christmas Cookies

“Christmas is coming and a great way to share our love is by baking cookies.” — Designed by Maria Keller from Mexico.

Tongue Stuck On Lamppost

Designed by Josh Cleland from the United States.

Winter Morning

“Early walks in the fields when the owls still sit on the fences and stare funny at you.” — Designed by Bo Dockx from Belgium.

Coming Home

“December is undoubtedly the family month. As a civil engineer I worked abroad, and this was the only month we were guaranteed to return home to be with our families. I tried to represent this in my illustration, using, naturally, my namesake: Rudolph, the red-nosed reindeer. Even he has the right…” — Designed by Rodolfo Henriques from Portugal.

Dream What You Want To Do

“The year will end, hope the last month, you can do what you want to do, seize the time, cherish yourself, expect next year we will be better!” — Designed by Hong Zi-Qing from Taiwan.

It’s What’s Inside That Counts

“Family, friends, memories and environment inspired me so much in creating a wallpaper. Ideas for artworks sometimes come out of the blue, so this time, it’s inspired by my beautiful, naughty niece, Shammy. Ho ho ho! Christmas renews our youth by stirring out our wonder, and wondering in it are born our art!” — Designed by Marina Etuci from Malaysia, now residing in Taiwan.

Categories: Others Tags:

More Than “Slapping Paint on a Website”

November 29th, 2022 No comments

I’m a sucker for anything about front-end job titles.

Anselm Hannemann:

CSS evolved and we’re beyond the point where everyone can just do it as a side interest. We all can learn it and build amazing stuff with it, but using it wisely and correctly in a large-scale context isn’t an easy job anymore. It deserves people whose work is to focus on that part of the code.

Anselm is partly in responding to Sacha Greif’s “Is There Too Much CSS Now?” and the overall sentiment that CSS has a much higher barrier to entry for those learning it today than it did, say, in the CSS3 days. Back then, there was a super direct path to see the magic of CSS. Rachel Andrew perfectly captures that magic feeling in a prescient post from 2019:

There is something remarkable about the fact that, with everything we have created in the past 20 years or so, I can still take a complete beginner and teach them to build a simple webpage with HTML and CSS, in a day. […] We just need a text editor and a few hours. This is how we make things show up on a webpage.

That’s the real entry point here […]

“HTML, CSS and our vanishing industry entry points”

Rachel is speaking to the abstraction of frameworks on top of vanilla CSS (and HTML) but you might as well tack big, shiny, and fairly new features on there, like CSS grid, flexbox, container queries, cascade layers, custom properties, and relational pseudo-classes, to name a few. Not that those are abstractions, of course. There’s just a lot to learn right now, whether you’ve been writing CSS for 20 days or 20 years.

But back to Anselm’s post. Do we need to think about CSS as more than just, you know, styling things? I often joke that my job is slapping paint on websites to make them pretty. But, honestly, I know it’s a lot more than that. We all know it’s more than that.

Maybe CSS is an industry in itself. Think of all the possible considerations that have to pass through your brain when writing CSS rules. Heck, Ahmad Shadeed recently shared all the things his brain processes just to style a Hero component. CSS touches so much of the overall user experience — responsiveness, accessibility, performance, cross-browser, etc. — that it clearly goes well beyond “slapping paint on websites”. So far beyond that each of those things could be someone’s full-time gig, depending on the project.

So, yes, CSS has reached a point where I could imagine seeing “CSS Engineer” on some job board. As Anselm said, “[CSS] deserves people whose work is to focus on that part of the code.” Seen that way, it’s not so hard to imagine front-end development as a whole evolving into areas of specialization, just like many other industries.


More Than “Slapping Paint on a Website” originally published on CSS-Tricks, which is part of the DigitalOcean family. You should get the newsletter.

Categories: Designing, Others Tags:

3 Essential Design Trends, December 2022

November 28th, 2022 No comments

As we head into the final month of 2022, plenty of new ideas and website design trends are still emerging. The evolution throughout the year has been exciting and designed to help website designers and developers create greater engagement and interactivity while pushing the envelope. These trends are no exception.

Here’s what’s trending in design this month.

1. Video Game Inspiration

That space where reality and virtual reality merge is popular for website design. Trending are design elements and themes with a pseudo-video game style that looks interactive, somewhat real, and much imagined.

These websites can have a variety of looks and themes but have a few key elements in common:

  • Plenty of animation
  • Interactive elements, real or perceived
  • Fast motion that puts the user in the scene
  • ”Unreal elements” such as the bat-skull for Mythical Games
  • Dark color schemes
  • Often lack traditional navigation or calls to action so that the “game” is the whole screen
  • Leading text or design elements to help you move through interactions

Each of these examples takes a similar but different approach with their video-game-inspired design styles.

Adidas uses a three-dimensional trio of people in flight to get you interested in jobs at their animation studio. The point of view makes you feel part of the action, but traditional design elements, such as navigation, help you know what to do next.

Mutant Stand looks like an old-school video game and moves between a home screen with navigational elements to more of an in-game experience. The motion creates an interactive feel even before you dive into the design.

Mythical Games is an actual gaming website design, so you would expect video game inspiration here. Interestingly, this site takes the most subtle approach, although the design elements of fantasy are strong here.

2. Difficult Typography

Sometimes website design trends can be tough to explain. That’s the case with this one, where designers are experimenting with very difficult typography styles. What’s difficult about the text in these projects is readability.

Difficult typography is somewhat subjective but is emphasized by designs that have a lot of words. The reading challenge extends to mobile design, particularly when these fonts are smaller and can present even greater readability issues.

There are a lot of different styles and combinations of typefaces that can cause readability challenges. Some of the most common for website design include:

  • Condensed or thin typefaces
  • Unusual character styles or strokes
  • Modern or thick serifs
  • Old world styles
  • Scripts or cursive styles

All of this, though, is somewhat in the eye of the beholder. While these examples all present some reading challenges, the designs are still interesting and visually sound. Whether to make these font choices is a personal choice, but you should pay attention to your audience base and website analytics to make sure it works for you.

Here’s where you probably see a lot of this trend outside of website design. Pay attention to the typefaces used for World Cup broadcasts. Difficult typefaces are paired for all on-screen text elements.

Kakeru Yagou uses an interesting modern serif with a bit of a tilted style. As a logotype, the typography works pretty well. It is when there’s a lot to read that the challenge comes into play.

Abymes Numerique uses a condensed typeface in an all-caps style. Either of these options alone might create less of a readability concern than when paired.

Think Dance uses an incredibly interesting but difficult typeface for the two keywords on its website. They do an excellent job by using only two words and pairing them with easy-to-read options everywhere else. But it still takes a minute to think about and comprehend the words, so you can argue the effectiveness of the font choice.

3. Avatars

Already popular on social media platforms such as Snapchat and Facebook, avatars are having a pretty big moment in website design as well. The big difference is that website avatars aren’t just cartoon heads, they can include full-body designs and animated effects.

Avatars can have an extremely personal look and feel, such as when they are used for portfolio websites or be more character-oriented. Both are an excellent way to use faces and incorporate somewhat of a personal element when you don’t have the right photography for the job or want a greater element of whimsy in the design.

Simona Nikolova uses an oversized avatar for her portfolio site. She pairs it with her name to create a connection with users, and the style shows her creativity as well. An avatar is a good way to “show yourself” in a portfolio without the privacy concerns that might come with an actual photo.

Byte Trading uses “Lego-style” avatars to get you interested enough to “enter” the website. Each avatar moves and changes clothing to get you ready to enter the website for the crypto marketplace. Avatars are a popular option for crypto and NFT websites.

Pomelo Paradigm uses three-dimensional avatars to create scenes throughout its website. These created characters help explain what the company does and interactions people should have with the design. They have very human looks, and you almost don’t miss that they aren’t actual photographs.

Conclusion

As we head into a new year, what website design trends are you most excited for? Do you plan to try new things with projects in the new year? Hopefully, these trends give you some ideas and jumpstart that inspiration heading into 2023.

Source

The post 3 Essential Design Trends, December 2022 first appeared on Webdesigner Depot.

Categories: Designing, Others Tags:

Newer Things to Know About Good Ol’ HTML Lists

November 28th, 2022 No comments

HTML lists are boring. They don’t do much, so we don’t really think about them despite how widely used they are. And we’re still able to do the same things we’ve always done to customize them, like removing markers, reversing order, and making custom counters.

There are, however, a few “newer” things — including dangers — to know when using lists. The dangers are mostly minor, but way more common than you might think. We’ll get to those, plus some new stuff we can do with lists, and even new ways to approach old solutions.

To clarify, these are the HTML elements we’re talking about:

  • Ordered lists
    1. Unordered lists
      • Description lists
      • Interactive lists

      Ordered lists, unordered lists, and interactive lists contain list items (

    2. ) which are displayed according to what kind of list we’re dealing with. An ordered list (
        ) displays numbers next to list items. Unordered lists (

          ) and menu elements (

          ) displays bullet points next to list items. We call these “list markers” and they can even be styled using the ::marker pseudo-element. Description lists use description terms (

          ) and description details (

          ) instead of

        • and don’t have list markers. They‘re supposed to be used to display metadata and glossaries, but I can’t say I’ve ever seen them in the wild.

          CodePen Embed Fallback

          Let’s start off with the easy stuff — how to correctly (at least in my opinion) reset list styles. After that, we’ll take a look at a couple of accessibility issues before shining a light on the elusive

          element, which you may be surprised to learn… is actually a type of list, too!

          Resetting list styles

          Browsers automatically apply their own User Agent styles to help with the visual structure of lists right out of the box. That can be great! But if we want to start with a blank slate free of styling opinions, then we have to reset those styles first.

          For example, we can remove the markers next to list items pretty easily. Nothing new here:

          /* Zap all list markers! */
          ol, ul, menu {
            list-style: none;
          }

          But modern CSS has new ways to help us target specific list instances. Let’s say we want to clear markers from all lists, except if those lists appear in long-form content, like an article. If we combine the powers of newer CSS pseudo-class functions :where() and :not(), we can isolate those instances and allow the markers in those cases:

          /* Where there are lists that are not articles where there are lists... */
          :where(ol, ul, menu):not(article :where(ol, ul, menu)) {
            list-style: none;
          }

          Why use :where() instead of :is()? The specificity of :where() is always zero, whereas :is() takes the specificity of the most specific element in its list of selectors. So, using :where() is a less forceful way of overriding things and can be easily overridden itself.

          UA styles also apply padding to space a list item’s content from its marker. Again, that’s a pretty nice affordance right out of the box in some cases, but if we’re already removing the list markers like we did above, then we may as well wipe out that padding too. This is another case for :where():

          :where(ol, ul, menu) {
            padding-left: 0; /* or padding-inline-start */
          }

          OK, that’s going to prevent marker-less list items from appearing to float in space. But we sort of tossed out the baby with the bathwater and removed the padding in all instances, including the ones we previously isolated in an

          . So, now those lists with markers sorta hang off the edge of the content box.

          CodePen Embed Fallback

          Notice that UA styles apply an extra 40px to the

          element.

          So what we want to do is prevent the list markers from “hanging” outside the container. We can fix that with the list-style-position property:

          CodePen Embed Fallback

          Or not… maybe it comes down to stylistic preference?

          Newer accessibility concerns with lists

          Unfortunately, there are a couple of accessibility concerns when it comes to lists — even in these more modern times. One concern is a result of applying list-style: none; as we did when resetting UA styles.

          In a nutshell, Safari does not read ordered and unordered lists styled with list-style: none as actual lists, like when navigating content with a screen reader. In other words, removing the markers also removes the list’s semantic meaning. The fix for this fix it to apply an ARIA list role on the list and a listitem role to the list items so screen readers will pick them up:

          <ol style="list-style: none;" role="list">
            <li role="listItem">...</li>
            <li role="listItem">...</li>
            <li role="listItem">...</li>
          </ol>
          
          <ul style="list-style: none;" role="list">
            <li role="listItem">...</li>
            <li role="listItem">...</li>
            <li role="listItem">...</li>
          </ul>

          Oddly, Safari considers this to be a feature rather than a bug. Basically, users would report that screen readers were announcing too many lists (because developers tend to overuse them), so now, only those with role="list" are announced by screen readers, which actually isn’t that odd after all. Scott O’Hara has a detailed rundown of how it all went down.

          A second accessibility concern isn’t one of our own making (hooray!). So, you know how you’re supposed to add an aria-label to

          elements without headings? Well, it sometimes makes sense to do the same with a list that doesn’t contain a heading element that helps describe the list.

          <!-- This list is somewhat described by the heading -->
          <section>
            <h2>Grocery list</h2>
            <ol role="list">
               <!-- ... -->
            </ol>
          </section>
          
          <!-- This list is described by the aria-label -->
          <ol role="list" aria-label="Grocery list">
            <!-- ... -->
          </ol>

          You absolutely don’t have to use either method. Using a heading or an ARIA label is just added context, not a requirement — be sure to test your websites with screen readers and do what offers the best user experience for the situation.

          In somewhat related news, Eric Bailey wrote up an excellent piece on why and how he considers aria-label to be a code smell.

          Wait,

          is a list, too?

          OK, so, you’re likely wondering about all of the

          elements that I’ve been slipping into the code examples. It’s actually super simple; menus are unordered lists except that they’re meant for interactive items. They’re even exposed to the accessibility tree as unordered lists.

          In the early days of the semantic web, I mistakenly believed that menus were like

Benefits of HARO for Journalists

November 28th, 2022 No comments

If you are a journalist, chances are you have a lot of deadlines, work on a tight schedule, and looking for a way to make your research process easier and faster. HARO might be your best option if you need high-quality sources to complete your story as soon as possible.

As listed on HARO’s website, media outlets using their services include Reuters, Time, Wall Street Journal, New York Times, ABC, and others. As you can see, many impressive legacy media names are using this platform. 

But how does HARO work precisely, and how can it help journalists? Let’s find out more. 

Crash Course: What Is HARO?

HARO is short for “Help a Reporter Out” – an online service for journalists to get the necessary feedback for their news coverage and for experts to get valuable media coverage. This platform is owned by Cision, a global provider of PR and marketing intelligence.

HARO is helpful for journalists because it enables them to connect with experts in the fields relevant to their reporting. This platform connects stories with sources to save effort on both sides, so both industry experts and journalists get the most out of it. It’s a win-win.

How HARO Works

All you have to do to start with HARO is sign-up, provide all the necessary information about yourself, and you are ready to go.

Once your account on HARO is all set up, you will be able to post a query and wait for the responses to arrive. Sources receive queries via email three times a day. Once relevant sources receive and see your question, they can contact you and send you a pitch. From there, you can decide which ones you want to use and which you’ll toss away.

HARO was initially created for journalists, but now bloggers, content writers, and influencers can also use it to get in touch with expert sources. This platform is also useful for brands since they want to connect with reputable media outlets to get their name out there.

If you’re a journalist and are still unsure about this service, you can always learn more about HARO’s pros and cons to make an informed decision. For this article, we’ve listed seven key ways HARO service can assist you in your journalistic endeavors. 

 Provides Access to Trusted Sources

Companies are always looking for ways to gain high-quality backlinks to their websites since it is one of the best ways to grow their business by ranking better in search engines. That’s why businesses won’t risk putting their company’s goals in jeopardy. Also, getting covered by highly trusted, established media outlets helps them reach wider audiences and advance their brand image and awareness.

That is why people answering queries always try their best to provide you with valuable information. HARO also has strict standards and a vetting process regarding sources, so you can be assured that your journalistic integrity stays intact. 

According to their website, sources must have proven competence in a topic relevant to the query they are responding to. Furthermore, they must thoroughly clarify why they are a subject matter expert before making their pitch if it is not obvious from their title or the company they work for. 

Simplifies the Search for Knowledge

Sometimes you need answers to specific questions. It can be challenging to reach out to someone new with these questions or know whether any of your existing contacts have the information you need. That’s why sending out a HARO query might be your best ticket to finding what you need to complete your task. 

No matter how peculiar your question might be, you’ll likely find someone who can answer it quickly since many users are constantly looking for journalistic queries.

Builds Relationships

As previously mentioned, HARO benefits both sides of the aisle – journalists and sources get the best out of their cooperation. Journalists get more insight into their topics, while company leaders raise brand awareness by gaining media coverage.

HARO is also beneficial for you as a journalist to build relevant relationships inside the industry. Getting in contact with expert sources gives you an opportunity to network and find amazing people you can cooperate with on future projects. 

By building long-lasting and trusting relationships with people who provide you with unique quotes and information, you can gain access to the best industry news whenever you need it.

Builds Authority and Credibility

Readers want well-researched and authentic content. It’s always a good idea to back your story up with facts. With the sea of information out there and countless media sources publishing new stories daily, it is essential to stand out and position yourself as a relevant source. That’s where HARO can help you. 

You build up your journalistic authority and credibility with relevant quotations from industry thought leaders. 

Various Options to Choose From

HARO helps journalists connect to more sources than they would otherwise have access to. You’ll probably receive at least 50 pitches in the first few hours when you send out a query. The number of pitches can go up to hundreds on the same day if you work for an outlet with a high domain ranking. 

Sometimes, that can be overwhelming, as it takes a lot of time to sift through all the pitches and pick out the best ones. Overall though, it is good to have multiple options. That way, you can filter out pitches based on their relevance and get the one that works the best for your story.

Budget Friendly

Using HARO, journalists can create an account and get answers to their queries without spending a fortune. 

If you’re on a tight budget, getting uncostly access to quality sources is the way to go.

Saves Time

Journalism is a perfect mix of research and writing abilities. However, if you are someone who likes to spend more time crafting and perfecting your articles, HARO is a great way to save up some of your precious time.

This platform allows you to spend more time writing and less time looking for sources. That way, you can dedicate your efforts to the thing you love doing most without that much hassle. 

Wrapping It Up

HARO opens you up to a large pool of opportunities and perspectives from all walks of life. Remember to stay critical and examine all sources well to find the right fit.

Now that you know about HARO and all the benefits it can provide you, you can upgrade your journalistic skills and provide your readers with the best sources and well-researched, thoughtful stories.

The post Benefits of HARO for Journalists appeared first on noupe.

Categories: Others Tags:

Download Free Xmas Illustrations Today

November 25th, 2022 No comments

Tis (almost) the season to be jolly, and with Christmas Day just one month away, it’s high time to start putting together your Winter holiday promotions.

Today, we want to share some incredible free Xmas illustrations. There are several greetings card-style designs that are just perfect for sending to customers as part of an email campaign. You’ll also find dozens of Christmas-themed items that can be combined to create your own seasonal illustrations for websites, emails, and print promotions.

It’s never too late to spread some goodwill by wishing your contacts the compliments of the season. So download these illustrations for free and get started today.

You may use these illustrations for personal and commercial purposes. You MUST add a link to our site www.webdesignerdepot.com wherever you use these illustrations online. If you use them for print, you must clearly credit us somewhere in your product with written text crediting our website www.webdesignerdepot.com. If you can’t or don’t want to add a link to our site, please contact us for a special commercial license that doesn’t require any kind of linking or attribution. Licensing fees start at only $15, but may be more expensive on certain situations. Please reach out for more details. These files cannot be distributed in any shape or form on their own.

Download the WDD Xmas illustrations for free.

Source

The post Download Free Xmas Illustrations Today first appeared on Webdesigner Depot.

Categories: Designing, Others Tags:

8 Quick Ways to Update an Outdated Website

November 25th, 2022 No comments

Entrepreneurship demands substantial time and focus. There are so many responsibilities to take care of that it’s easy to fall into a “set it and forget it” mindset when it comes to your website. Unfortunately, this is a quick way to lose the attention of potential clients and customers. 

Think of your website as a digital business card. This is the first stop for someone interested in the services or products you offer. Additionally, search engines favor websites that are well maintained and up to date. That means you’re likely to appear higher in search results for keywords that pertain to your business.

If you’re in a highly competitive industry (think real estate or sales), it’s essential to put your best foot forward. The more clicks you get, the more likely you are to drum up new business. Ready to get to work? Here are eight quick ways to improve your website today. 

1. Update Your Design to Reflect Current Trends

Like anything else, web trends come and go as technology improves. The design of your website should reflect today’s style. 

This should include a user-friendly navigation bar and several different pages or sections that explain who you are, the services you provide, and the best way to get in touch. A digital portfolio that demonstrates your expertise is also helpful to have. 

While an eye-catching color palette or custom graphics are beneficial, the most important part of website design is having clean and concise formatting. 

2. Start a Blog

Blogging is no longer considered a diary for YouTubers and other online personalities. Maintaining a high-quality blog with relevant industry information is one of the best forms of digital marketing. 

According to search engine data, having a blog on your website increases your chances of ranking higher by a staggering 434%.

While it may feel like a daunting task, use your expert knowledge to produce content that will inform. Average blog posts fall somewhere between 1,000 and 2,000 words, but there are many ways to simplify the process. Posts in the form of lists perform well, making it easy to provide results-driven content. 

3. Take Advantage of SEO Practices

SEO stands for “search engine optimization.” Although the term focuses on website traffic, SEO is customer-centric. It enables us to better understand what people are searching for and the types of content they prefer to engage with. 

Although you can hire an SEO professional to assist with keyword research and analytics, there are several free and low-cost tools available. Keywords are phrases that people search for if they’re browsing businesses like yours. Using the right keywords thoughtfully will help your website rank higher in a search. 

Be sure to end each blog post with a powerful CTA (call-to-action). This is a short phrase that encourages your audience to take a certain step. Whether this is making an appointment or a purchase, it typically includes a clickable link. Most marketing professionals also encourage making your CTA easy to find with bold fonts, contrast colors, or a button. 

4. Include Visual Multimedia and Tools

Gone are the days of long blocks of text and a simple stock photo. Websites have come a long way, and today, they’re interactive and highly dependent on multimedia. 

Whether your industry lends itself to video or other forms of imagery, look for opportunities to create an engaging experience for your website visitors. 

For example, a real estate agent may choose to incorporate a user-friendly commission calculator. A retailer may use interactive shopping cart buttons to engage with customers browsing for items.

5. Check for Responsiveness and Speed 

Slow websites can instantly distract from even the greatest content. If users find it difficult to move across the various sections of your website, they’re more likely to close the browser. Click through your pages and ensure they’re responsive and loading in a timely manner.

In addition to engaging people instantly, a faster website will appear higher in search engines. Again, modern technology makes it imperative to keep up with trends and usefulness.

6. Make It Mobile Friendly

We all spend more time on our phones than ever before. When people visit your website from a mobile device, can they navigate with ease? If not, you risk losing their attention before they even find the information they need. 

A professional web designer can work with you to create a website that has the right formatting across the board, regardless of device type. If you’re looking to do it on your own, there are templates available through providers such as WordPress, Weebly, and Wix. 

7. Capture Visitor Information 

Who are your visitors? What are they looking for? How can you help them? 

These are important questions to answer because it will impact your business, let alone the content you provide.

Give your website visitors a way to stay in touch. For example, request an email address with the promise of special offers or business updates. This can be in the form of a pop-up or a designated box at the bottom of the page. 

Don’t forget to also include links to your various social media pages. This is another great way to stay in touch with your customers or clients. 

8. Monitor Your Competitors 

Keep an eye on the competition to ensure you’re offering the ideal experience for your customers (both on and off your website). 

Identify which companies are like yours and visit their websites from time to time to uncover any new tactics or features. Although you want to stand out, it’s important to know that you’re keeping up with other businesses in your industry. 

Put Your Best Foot Forward

After you’ve revamped your website, it’s important to maintain it. Set a date to review it once per month. This can be a simple run-through to ensure all of your links are working and loading times are optimal. In addition, set an annual review date to freshen your content and build a plan for blog posts and other additions to your website.

The post 8 Quick Ways to Update an Outdated Website appeared first on noupe.

Categories: Others Tags:

Top Three Virtual Assistant Service Providers Worldwide

November 25th, 2022 No comments

Today, businesses are looking for innovative ways to be more competitive and keep growing. Keeping costs low and boosting sales are the two mantras that are being adopted by corporate honcho’s worldwide. 

One of the rising trends that are being increasingly adopted in the current scenario is remote working. While remote working has its challenges in terms of accountability and maintaining an organization’s work culture, it promises immense benefits if adopted correctly. Being available to guide the team members, similar to a physical office is one of the best ways to go ahead, if you want to set up a remote workforce.

What’s also making news in these competitive times is the use of virtual assistants to manage the small, recurring but crucial tasks that take up too much time for business owners and managers. 

Virtual assistants handle small, recurring, and crucial tasks to increase productivity. Moreover, hiring a virtual assistant is less expensive as compared to hiring an employee. You can also save a lot on overhead costs since they are not required to be present physically in an office. 

Many companies offer virtual assistant services, making it difficult to choose the professionals who are best for your business from such a sizable pool.

In this blog, we’ve compiled a list of the best virtual assistant service providers to assist you in your search. But first, let’s define who a virtual assistant is and what their job role entails. 

Who is a Virtual Assistant?

Image Source: Freepik

A virtual assistant is a trained professional who works from the comfort of their own home or office. It’s the same as hiring an employee but with far more flexibility.

Depending on their and your schedules, they may finish their work during regular business hours or at different times throughout the day. They can complete several tasks for your company. They may also assist with more complex tasks typically completed by professionals across industries like marketing or finance.

Your needs will determine the services a virtual assistant offers to your business. Almost all virtual assistants are capable of doing administrative and general tasks.

Virtual assistants can perform the following tasks, among many others:

  • Manage inbox
  • Manage calendar 
  • Schedule appointments
  • Data entry 
  • Online research
  • Coordinate projects
  • Customer support 
  • Manage tools like Dropbox and Google Drive
  • Organize to-do lists
  • Maintain client communications 
  • Assist in event planning
  • Schedule appointments and meetings
  • Maintain Databases
  • Reply to customer queries
  • Maintain records for eCommerce
  • Update and maintain CRM
  • Create presentations
  • Check daily reports /performance parameters set
  • Record minutes of the meeting 
  • Support HR Functions
  • Arrange gifts for clients
  • Coordinate between various departments
  • Record expenses

Their services are simple:

  • You hire a company.
  • You gain access to an assistant who can complete multiple tasks on your behalf.
  • You’ll find yourself with much extra time in your workday.

What You Should Know Before Selecting a Virtual Assistant

Be Specific With Expectations

Establish your business’ unique needs first. Often, you are aware that you require a VA but are unsure of their precise purpose beyond a few jobs. Do not fret, though! Over a few weeks, you will find plenty of tasks to take off your to-do list and give to your assistant. 

Determine the Qualities You Want

Instead of focusing solely on a candidate’s past employment history, the interview process should comprise questions about how they will respond in various situations. 

For example, what would they bring to a team if they were on it? 

How would they react if something unexpected happened? 

Select a communication method and strategy

Adopting a platform and communication style that you both adhere to is among the most important ways to keep lines of communication open. Communication is essential in any relationship; therefore, establishing a process that works for you is crucial. 

Take a Test Run

Since virtual assistants are frequently employed on a month-to-month basis, a trial run or probationary period is simple to set up. A brief test example makes it simple to judge a VA’s attention to detail and critical thinking. The VA can gradually be introduced to routine tasks as well. 

Look for someone familiar with your industry

The ideal virtual assistant know that to assist you in connecting with your audience, they must comprehend the nature of your company. Thanks to this understanding, they can learn about your strategy and contribute in the most valuable ways.

Hiring a virtual assistant is quite similar to hiring any other employee you want to add to your team, with a few minor adjustments. Once you establish a process that you and your assistant are clear on, working with a virtual assistant will change your business and allow you the time to focus on tasks that will make you money.

Coming back to the topic at hand, let’s discuss the top virtual assistant companies worldwide.

Top three virtual assistant companies worldwide

Wishup

Wishup is a pioneer in virtual assistance services. It helps entrepreneurs and small business owners focus on their core tasks and grow their businesses, while its virtual assistants take care of all their administrative and everyday tasks. 

It hires only the top 1% of all applicants and trains them in over 200 skill sets.  Wishup serves 500+ small businesses in the US and has an average service rating of 4.8. It offers Virtual Assistants, Bookkeepers, Software Developers, and Software Testers who work remotely for companies in the US. 

It offers the option of full or part-time virtual assistants depending on the clients needs. Hiring a VA is comparatively easy with Wishup; you can get one on board within a day. 

Benefits of hiring a Wishup virtual assistant;

  • Stringent selection process, so you get to work with the top 1% of talent
  • VAs are trained in 200+ skill sets
  • No-questions-asked replacement/refund policy
  • Onboarding a VA takes less than 24 hours.
  • There are both offshore and US based virtual assistants available.
  • Contracts, insurance, liabilities, and employee benefits are managed by Wishup.

Fancy Hands

From its headquarters in the United States, Fancy Hands provides dedicated virtual assistance to clients worldwide. This straightforward and open virtual assistant service is ideal for those who require regular assistance but do not want to deal with the hassle of a lengthy contract.

Fancy Hands offers two different types of requests. One is a Standard request for 20 minutes of work. These requests work best for projects requiring extensive back-and-forth communication or for research. 

Aside from that, there are Active requests for ongoing tasks. These requests may be carried over to the following month if not used.

Users can also request repetitive tasks scheduled daily, weekly, monthly, or weekday. In addition, users will receive an email from Fancy Hands one day before the request giving them the option to skip or cancel it.

Like most virtual assistant services, Fancy Hands bills a small monthly fee based on the overall volume of requests; however, the business also provides discounted annual rates. In addition, a dedicated virtual assistant can be requested by users, who will be charged per minute and with whom they can communicate using any tools they choose.

Working with Fancy Hands does come with two drawbacks. First, they charge by the minute for their live requests, and second, that the standard requests more extended than 20 minutes require authorization.

Zirtual

For business executives, Zirtual provides specialized virtual assistants with US bases. Because of its relationship-based business model, customers can build enduring relationships with their dedicated assistant, or ZA.

With Zirtual’s flat-rate, monthly, and annual plans, there is no need for a lengthy commitment.

Because of their administrative and technological expertise, its virtual assistants can handle administrative tasks more effectively and quickly, freeing you up to focus on your expertise. Furthermore, all virtual assistants are American citizens with college degrees who live in the United States. 

Based on their prior knowledge, expertise, and interests, Zirtual’s assistants receive additional training in what clients require. 

The skills include scheduling and managing meetings, events, travel, PowerPoint presentations, expenses, and invoices. They also include managing social media, web research, content management, content creation, and website upkeep.

The assistants have completed ongoing training in various tools. After the selection process, you can begin using a virtual assistant within a week.

Wrapping up

A virtual assistant is the key if you want to boost business productivity while saving on your hard-earned money and time.

Once you are ready to welcome a virtual professional into your business and life, follow these steps to hire one:

Determine your needs: What do you need assistance with? Create a list of tasks you want to delegate to a virtual assistant.

Select a VA platform: Look over the virtual assistant platforms mentioned above and select one. A free trial is available on some platforms (like Wishup). Register on their website and schedule a free consultation to get started.

Hire your virtual assistant and collaborate with them: Once you’ve done that, you’ll need to explain to them what needs to be done and how you want them to go about doing it. You won’t have to deal with all the hassles associated with onboarding and training because these professionals are already qualified.

The post Top Three Virtual Assistant Service Providers Worldwide appeared first on noupe.

Categories: Others Tags: