Every week users submit a lot of interesting stuff on our sister site Webdesigner News, highlighting great content from around the web that can be of interest to web designers.
The best way to keep track of all the great stories and news being posted is simply to check out the Webdesigner News site, however, in case you missed some here’s a quick and useful compilation of the most popular designer news that we curated from the past week.
10 Excellent Font Pairing Resources for Designers
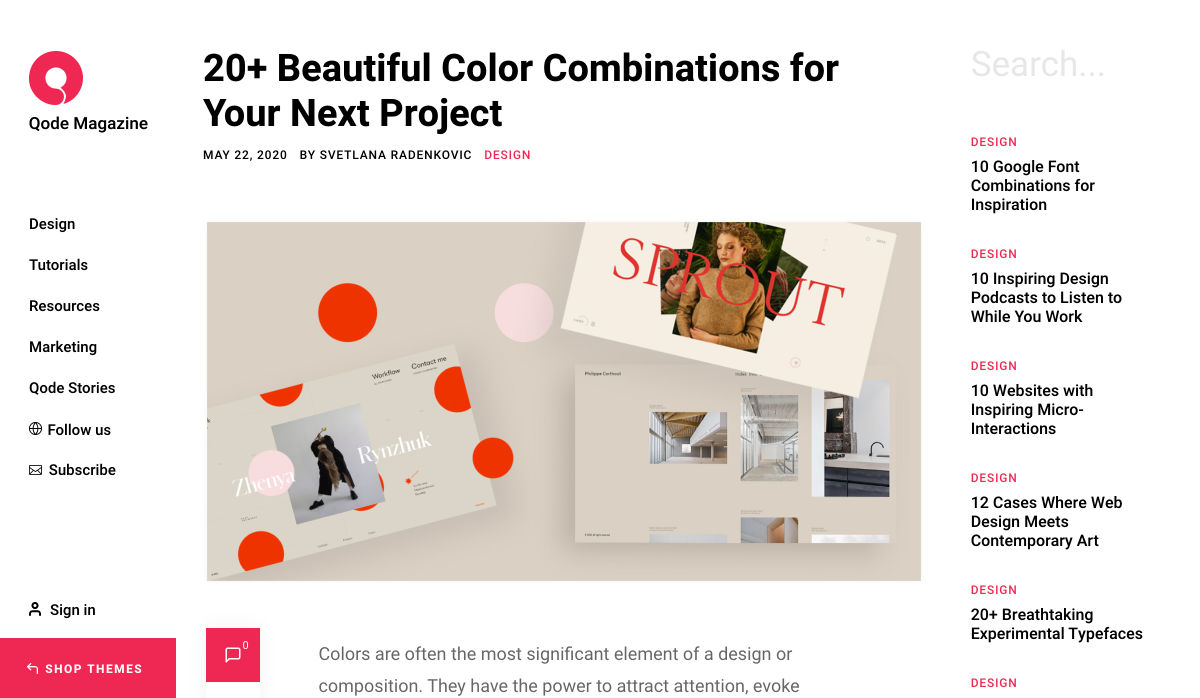
20+ Beautiful Color Combinations for your Next Project
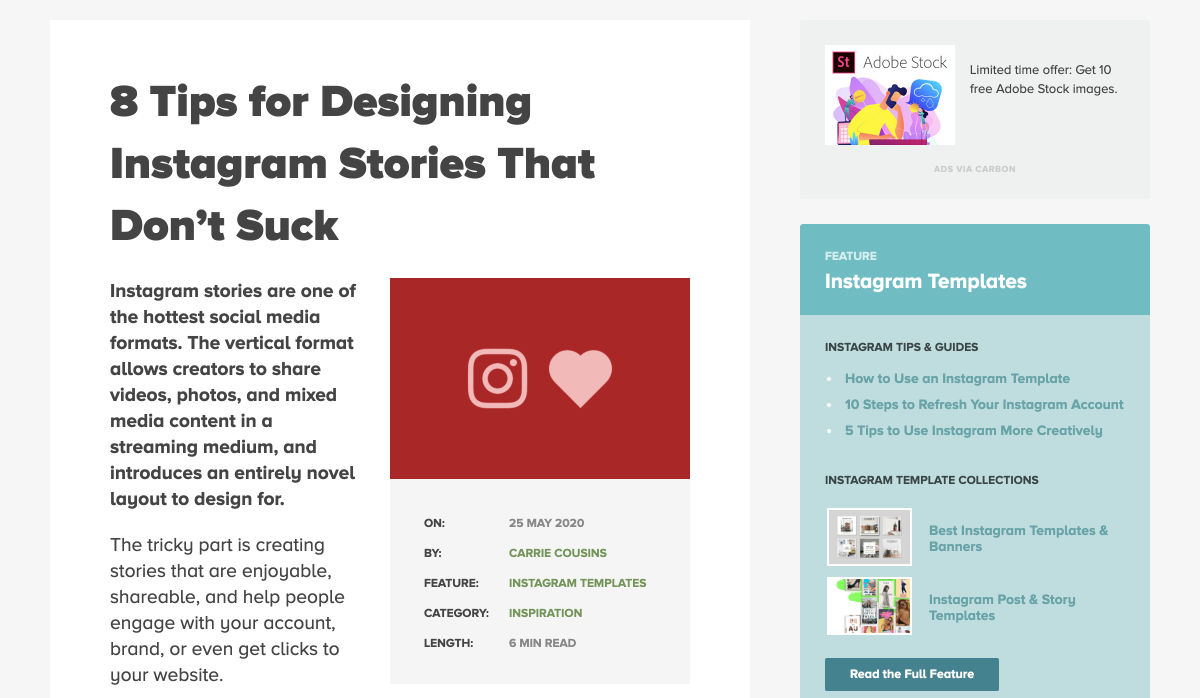
8 Tips for Designing Instagram Stories that Don’t Suck
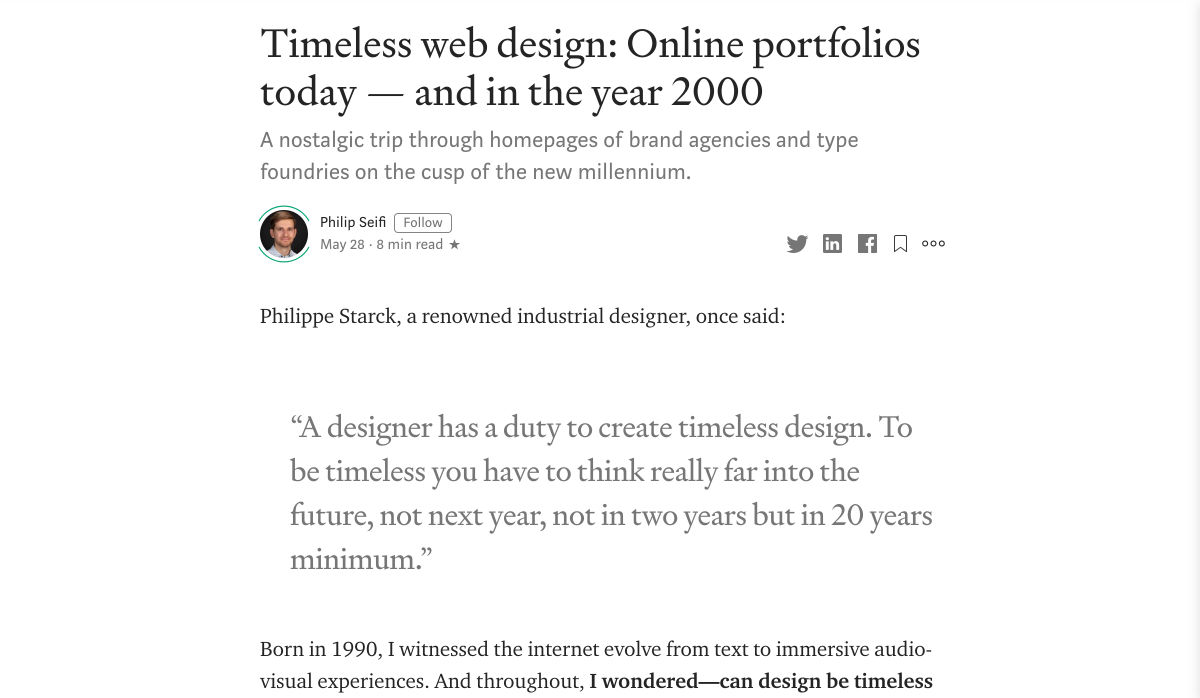
Timeless Web Design: Online Portfolios Today?-?and in the Year 2000
10 Symptoms You Might Be a Designer
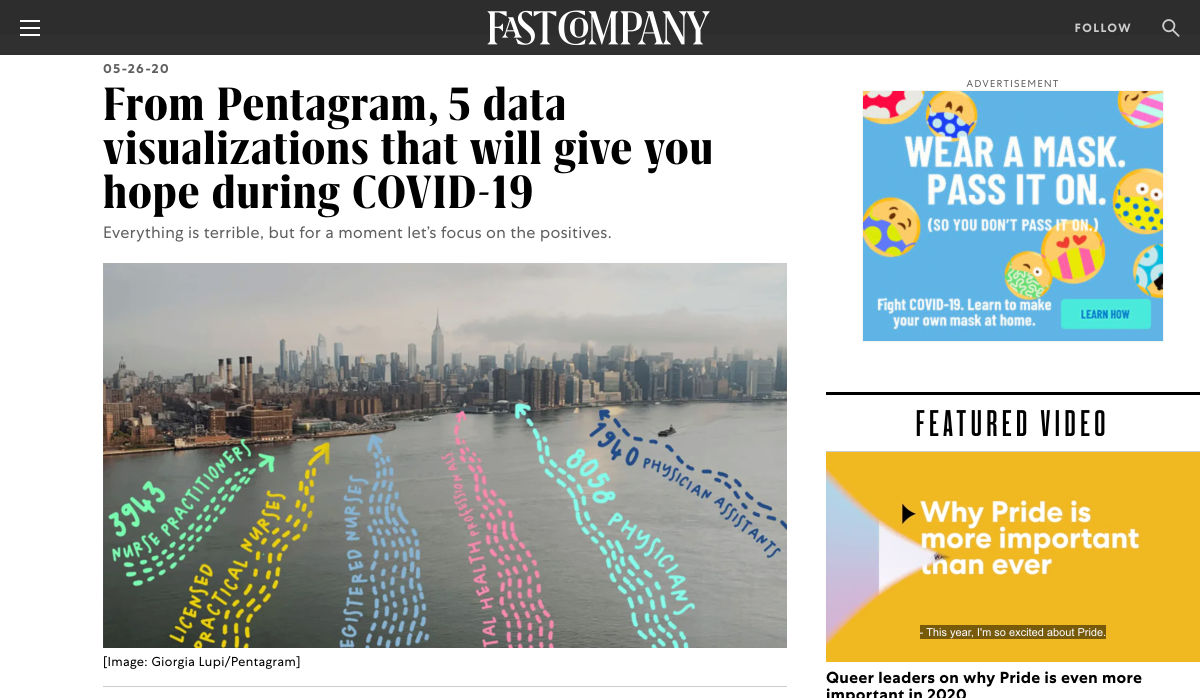
From Pentagram, 5 Data Visualizations that will Give You Hope During COVID-19
10 Design Systems You Must Know in 2020
100 Startup Ideas, from VCs and Founders
37 Inspiring Star Logo Designs
Little UX Crimes: A Collection of Dark Patterns in Design
Creating Modern Color Schemes for Websites (with Examples)
104 Photo Editing Tools You Should Know About
17 Tips for Designing with Type on a Photo
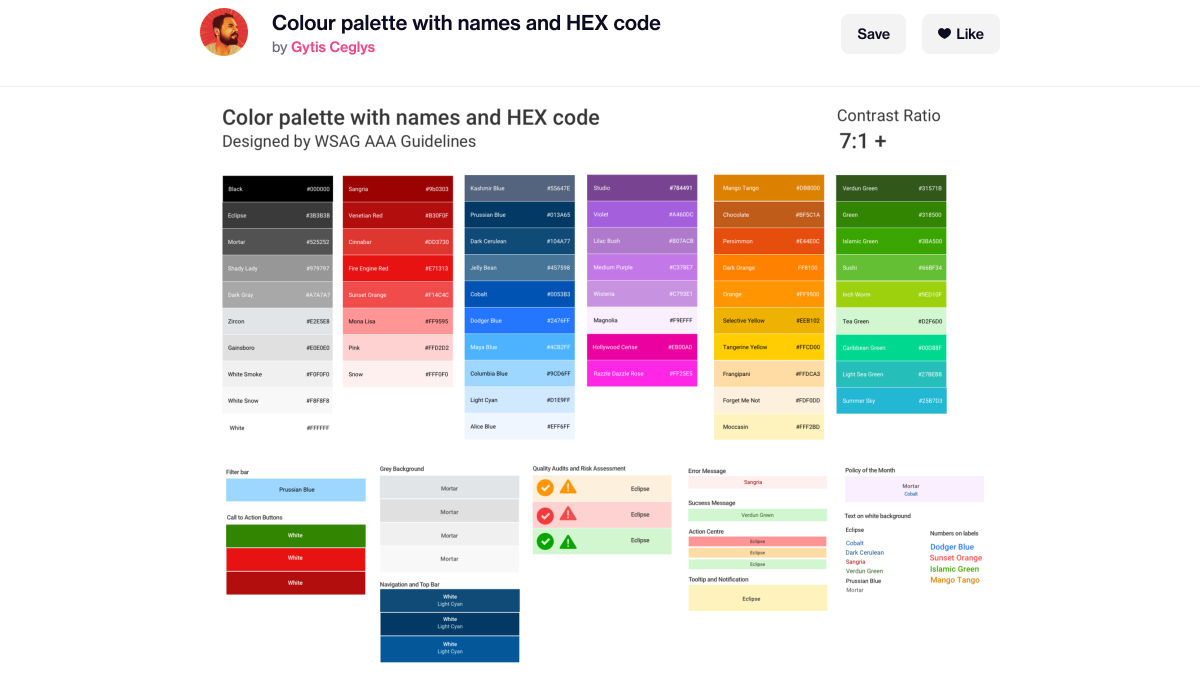
Colour Palette with Names and HEX Code
5+ Great Website Logo Makers for all Purposes
Editmode: Make any Website Editable Inline
Responsive Web Design Turns Ten
A Designer’s Guide to Creating Effective Dashboards
25 Beautifully Designed Ecommerce Website Examples
The Current State of Checkout UX
Pure CSS Oil Painting
Rules for Effective Design Choices
I Wrote a SAAS Product Because the Internet Made Me Believe it’d Make Me Rich
How I Accidentally Built a Tech Startup – Without any Technological Knowledge
How to Stop the Battle Between Product Managers and Designers
Want more? No problem! Keep track of top design news from around the web with Webdesigner News.
There’s an artist in everyone. Some bring their creative ideas to life with digital tools, others capture the perfect moment with a camera or love to grab pen and paper to create little doodles or pieces of lettering. And even if you think you’re far away from being an artist, well, it might just be buried somewhere deep inside of you. So why not explore it?
Since more than nine years already, our monthly wallpapers challenge is the perfect opportunity to do just that: to challenge your creative skills and break out of your routine of meeting deadlines and client expectations for a moment to do something just for fun. Just like you got out your crayons when you were a kid, ending up fully immersed in the creative process.
For this post, artists and designers from across the globe once again took on the challenge and created beautiful and unique wallpapers that are bound to cater for some good vibes on your screens. All of them are available in versions with and without a calendar for June 2020 and can be downloaded for free. And because there can never be too much eye candy, we also added some wallpaper goodies from our archives at the end of this post. A big thank-you to everyone who shared their designs with us — this post wouldn’t exist without you. Enjoy!
All images can be clicked on and lead to the preview of the wallpaper,
We respect and carefully consider the ideas and motivation behind each and every artist’s work. This is why we give all artists the full freedom to explore their creativity and express emotions and experience through their works. This is also why the themes of the wallpapers weren’t anyhow influenced by us but rather designed from scratch by the artists themselves.
Ready to take on the challenge?
The next wallpapers post is already in the making, and, well, we’d be happy to feature your artwork in it, too. So if you have an idea for a July wallpaper, please don’t hesitate to submit it. We’d love to see what you’ll come up with. Join in! ?
Comfort Reading
“We stayed in the house for so long, we had to create our own reading spaces to feel comfortable. Add a cat, some coffee and several books and it’s perfect!” — Designed by Bobby Voicu from Portugal.
“I’ve waited for this summer more than I waited for any other summer since I was a kid. I dream of watermelon, strawberries, and lots of colors.” — Designed by Kate Jameson from the United States.
“In these turbulent times for men, we are witnessing the extraordinary rebirth of nature, especially of the wildlife around the planet. Maybe this situation is a blessing in disguise? Either way, one thing is for sure, this planet is the home that we share with all other forms of life and it is our obligation and sacred duty to protect it.” — Designed by LibraFire from Serbia.
“Chinese, Hindu, Native American… Across mythologies, turtles were seen as carrying the entire planet Earth on their backs. The belief probably stemmed from their long-lasting lives, lending them the wise, ancient quality. On June 16, we celebrate the World Sea Turtle Day when we recognize the importance of these 110 million-year-old creatures, who were even contemporaries to dinosaurs. As little as cleaning up and recycling can do marvels to help preserve these beautiful and exotic creatures.” — Designed by PopArt Studio from Serbia.
“June 21st is a chance to give thanks to our fathers. For all the patience shown through the years from baby steps to feeding, guidance to teaching, they’re by our sides supporting us every step of the way through our lives. So say thanks this June 21st on Fathers Day!” — Designed by Ever Increasing Circles from the United Kingdom.
“There are people in your life who love you and depend on you. Happy people are more productive. The world needs more happy people these days. So be happy for your near and dear ones, for the world.” — Designed by Hitesh Puri from India.
Summer solstice, ice cream, and, not to forget, cats — a lot of big and small things have inspired creatives to design a June wallpaper in all those years we’ve been running our monthly series. Below you’ll find a little best-of from the archives. (Please note that these designs don’t come with a calendar.)
Summer Is Coming
“Imagine a sunny beach and an endless blue sea. Imagine yourself right there. Is it somewhere in Greece? The Mediterranean? North Africa? Now turn around and start wandering through those picturesque, narrow streets. See all those authentic white houses with blue doors and blue windows? Feel the fragrance of fresh flowers? Stop for a second. Take a deep breath. Seize the moment. Breathe in. Breathe out. Now slowly open your eyes. Not quite there yet? Don’t worry. You will be soon! Summer is coming…” — Designed by PopArt Studio from Serbia.
“June 21 marks the longest day of the year for the Northern Hemisphere — and sunsets like these will be getting earlier and earlier after that!” — Designed by James Mitchell from the United Kingdom.
“Summer rains, sunny days and a whole month to enjoy. Dive deep inside your passions and let them guide you.” — Designed by Ana Masnikosa from Belgrade, Serbia.
“I grew up with cats around (and drawing them all the time). They are so funny… one moment they are being funny, the next they are reserved. If you have place in your life for a pet, adopt one today!” — Designed by Karen Frolo from the United States.
“The month shares a vital significance as the International Yoga Day falls on June 21st. The beautiful design depicted brings into limelight the value and aura of the expression. Since we are in a hub of restlessness — an edgy world that longs for a mere breathing moment, it is quite essential to portray and henceforth bring back this art form from the pages of the past. Being a lifestyle choice and a way of exploring oneself, one could say yoga is simply synonymous with tranquility and sound breathing. It is a perspiring practice that evokes inner bliss and nudges us to see the world through a different lens. Hence the image is a collaboration of lifestyle and yoga — the urban yoga — a necessity, much more than just a way.” — Designed by Sweans from India.
“The peak of summer is upon us, and June brings scorching heat to most places in India. Summer season in my state also reminds me of the bird songs, especially the Koel bird. A black bird with a red eye, this bird’s elegant voice rings through the trees on hot summer afternoons. This June, I have created a wallpaper to give life to this experience — the birds singing in scorching heat give us some respite!” — Designed by Anuja from India.
“I made multiple circles overlapping with close distances. The overall drawing looks like a clothing texture, for something you could wear in coming summer. Let’s have a nice summer.” — Designed by Philippe Brouard from France.
“Digging through my old sketches, I found this one I had almost forgotten about… With a little help from Ricardo, the sketch was brought to life in a jiffy! Hope you like it.” — Designed by Iris Lješnjanin from Freiburg, Germany
Please note that we respect and carefully consider the ideas and motivation behind each and every artist’s work. This is why we give all artists the full freedom to explore their creativity and express emotions and experience throughout their works. This is also why the themes of the wallpapers weren’t anyhow influenced by us but rather designed from scratch by the artists themselves.
Thank you to all designers for their participation. Join in next month!
Smashing Newsletter
Every second Tuesday, we send a newsletter with useful techniques on front-end and UX. Subscribe and get Smart Interface Design Checklists PDF in your inbox.
Front-end, design and UX. Sent 2× a month. You can always unsubscribe with just one click.
Increment is a beautiful quarterly magazine (print and web) published by Stripe “about how teams build and operate software systems at scale”. While there is always stuff about making websites in general, this issue is the first focused on front-end¹ development.
I’ve got an article in there: When frontend means full stack. I’ll probably someday port it over here and perhaps add some more context (there were some constraints for print) but I love how it turned out on their site! A taste:
We handle this growing responsibility in different ways. Even though we all technically fall within the same big-tent title, many frontend developers wind up specializing. Often, we don’t have a choice. The term “unicorn” once described the extremely rare person who was good at both frontend and backend development, but these days it’s just as rare to find people skilled at the full spectrum of frontend development. In fact, the term “full stack” has largely come to mean “a frontend developer who does a good amount of the stuff a backend developer used to do.”
The whole issue is chock full of wonderful authors:
Lea Verou’s A user’s guide to CSS variables (TIL that variables can cause infinite loops and that is detected and invalidates all the variables)
Evan You’s The process: Making Vue 3 (Sometimes what drives change in frameworks is the browser’s evolving and making more things possible and more efficient)
Ipsita Agarwal’s Case study: Web components for screen readers (The story of a select component at Slack and the complexity of accessibility)
Safia Abdalla’s On composable modular frontends (“We also need to bring the principles of composable design to the frontend.”)
And the article that is the most right up my alley, Why is CSS . . . the way it is? by Chris Lilley. It’s somehow astonishing, gutwrenching, understandable, and comfortable to know that CSS evolves like any other software project. Sometimes thoughtfully and carefully, and sometimes with a meh, we’ll fix it later.
Once a feature is in place, it’s easier to slightly improve it than to add a new, better, but completely different feature that does the same thing.
This explains, for example, why list markers were initially specified in CSS by expanding the role of float. (The list marker was floated left so the list item text wrapped around it to the right.) That effort was abandoned and replaced by the list-style-position property, whose definition currently has the following, not very confidence-inspiring inline issue: “This is handwavey nonsense from CSS2, and needs a real definition.”
That’s a damn fine collection of writings on front end if you ask me.
A big thank you to Sid Orlando and Molly McArdle who helped me through the process and seem to do a great job running the ship over there.
The issue uses “frontend” throughout, and I appreciate them having a styleguide and being consistent about it. But I can’t bring myself to use it. ?The term “front-end” is correct when used as a compound adjective, and the term “front end” is correct when used as a noun.
Many developers are at least marginally familiar with AWS Lambda functions. They’re reasonably straightforward to set up, but the vast AWS landscape can make it hard to see the big picture. With so many different pieces it can be daunting, and frustratingly hard to see how they fit seamlessly into a normal web application.
The Serverless framework is a huge help here. It streamlines the creation, deployment, and most significantly, the integration of Lambda functions into a web app. To be clear, it does much, much more than that, but these are the pieces I’ll be focusing on. Hopefully, this post strikes your interest and encourages you to check out the many other things Serverless supports. If you’re completely new to Lambda you might first want to check out this AWS intro.
There’s no way I can cover the initial installation and setup better than the quick start guide, so start there to get up and running. Assuming you already have an AWS account, you might be up and running in 5–10 minutes; and if you don’t, the guide covers that as well.
Your first Serverless service
Before we get to cool things like file uploads and S3 buckets, let’s create a basic Lambda function, connect it to an HTTP endpoint, and call it from an existing web app. The Lambda won’t do anything useful or interesting, but this will give us a nice opportunity to see how pleasant it is to work with Serverless.
First, let’s create our service. Open any new, or existing web app you might have (create-react-app is a great way to quickly spin up a new one) and find a place to create our services. For me, it’s my lambda folder. Whatever directory you choose, cd into it from terminal and run the following command:
sls create -t aws-nodejs --path hello-world
That creates a new directory called hello-world. Let’s crack it open and see what’s in there.
If you look in handler.js, you should see an async function that returns a message. We could hit sls deploy in our terminal right now, and deploy that Lambda function, which could then be invoked. But before we do that, let’s make it callable over the web.
Working with AWS manually, we’d normally need to go into the AWS API Gateway, create an endpoint, then create a stage, and tell it to proxy to our Lambda. With serverless, all we need is a little bit of config.
Still in the hello-world directory? Open the serverless.yaml file that was created in there.
The config file actually comes with boilerplate for the most common setups. Let’s uncomment the http entries, and add a more sensible path. Something like this:
functions:
  hello:
    handler: handler.hello
#   The following are a few example events you can configure
#   NOTE: Please make sure to change your handler code to work with those events
#   Check the event documentation for details
    events:
      - http:
        path: msg
        method: get
That’s it. Serverless does all the grunt work described above.
CORS configuration
Ideally, we want to call this from front-end JavaScript code with the Fetch API, but that unfortunately means we need CORS to be configured. This section will walk you through that.
Below the configuration above, add cors: true, like this
That’s the section! CORS is now configured on our API endpoint, allowing cross-origin communication.
CORS Lambda tweak
While our HTTP endpoint is configured for CORS, it’s up to our Lambda to return the right headers. That’s just how CORS works. Let’s automate that by heading back into handler.js, and adding this function:
Before returning from the Lambda, we’ll send the return value through that function. Here’s the entirety of handler.js with everything we’ve done up to this point:
Let’s run it. Type sls deploy into your terminal from the hello-world folder.
When that runs, we’ll have deployed our Lambda function to an HTTP endpoint that we can call via Fetch. But… where is it? We could crack open our AWS console, find the gateway API that serverless created for us, then find the Invoke URL. It would look something like this.
Fortunately, there is an easier way, which is to type sls info into our terminal:
Just like that, we can see that our Lambda function is available at the following path:
Now that we’ve gotten our feet wet, let’s repeat this process. This time, though, let’s make a more interesting, useful service. Specifically, let’s make the canonical “resize an image” Lambda, but instead of being triggered by a new S3 bucket upload, let’s let the user upload an image directly to our Lambda. That’ll remove the need to bundle any kind of aws-sdk resources in our client-side bundle.
Building a useful Lambda
OK, from the start! This particular Lambda will take an image, resize it, then upload it to an S3 bucket. First, let’s create a new service. I’m calling it cover-art but it could certainly be anything else.
sls create -t aws-nodejs --path cover-art
As before, we’ll add a path to our HTTP endpoint (which in this case will be a POST, instead of GET, since we’re sending the file instead of receiving it) and enable CORS:
// Same as before
  events:
    - http:
      path: upload
      method: post
      cors: true
Next, let’s grant our Lambda access to whatever S3 buckets we’re going to use for the upload. Look in your YAML file — there should be a iamRoleStatements section that contains boilerplate code that’s been commented out. We can leverage some of that by uncommenting it. Here’s the config we’ll use to enable the S3 buckets we want:
Note the /* on the end. We don’t list specific bucket names in isolation, but rather paths to resources; in this case, that’s any resources that happen to exist inside your-bucket-name.
Since we want to upload files directly to our Lambda, we need to make one more tweak. Specifically, we need to configure the API endpoint to accept multipart/form-data as a binary media type. Locate the provider section in the YAML file:
For good measure, let’s give our function an intelligent name. Replace handler: handler.hello with handler: handler.upload, then change module.exports.hello to module.exports.upload in handler.js.
Now we get to write some code
First, let’s grab some helpers.
npm i jimp uuid lambda-multipart-parser
Wait, what’s Jimp? It’s the library I’m using to resize uploaded images. uuid will be for creating new, unique file names of the sized resources, before uploading to S3. Oh, and lambda-multipart-parser? That’s for parsing the file info inside our Lambda.
Next, let’s make a convenience helper for S3 uploading:
Lastly, we’ll plug in some code that reads the upload files, resizes them with Jimp (if needed) and uploads the result to S3. The final result is below.
I’m sorry to dump so much code on you but — this being a post about Amazon Lambda and serverless — I’d rather not belabor the grunt work within the serverless function. Of course, yours might look completely different if you’re using an image library other than Jimp.
Let’s run it by uploading a file from our client. I’m using the react-dropzone library, so my JSX looks like this:
<Dropzone
  onDrop={files => onDrop(files)}
  multiple={false}
>
  <div>Click or drag to upload a new cover</div>
</Dropzone>
The onDrop function looks like this:
const onDrop = files => {
  let request = new FormData();
  request.append("fileUploaded", files[0]);


  fetch("https://yb1ihnzpy8.execute-api.us-east-1.amazonaws.com/dev/upload", {
    method: "POST",
    mode: "cors",
    body: request
    })
  .then(resp => resp.json())
  .then(res => {
    if (res.error) {
      // handle errors
    } else {
      // success - woo hoo - update state as needed
    }
  });
};
And just like that, we can upload a file and see it appear in our S3 bucket!
An optional detour: bundling
There’s one optional enhancement we could make to our setup. Right now, when we deploy our service, Serverless is zipping up the entire services folder and sending all of it to our Lambda. The content currently weighs in at 10MB, since all of our node_modules are getting dragged along for the ride. We can use a bundler to drastically reduce that size. Not only that, but a bundler will cut deploy time, data usage, cold start performance, etc. In other words, it’s a nice thing to have.
Fortunately for us, there’s a plugin that easily integrates webpack into the serverless build process. Let’s install it with:
npm i serverless-webpack --save-dev
…and add it via our YAML config file. We can drop this in at the very end:
// Same as before
plugins:
  - serverless-webpack
Naturally, we need a webpack.config.js file, so let’s add that to the mix:
Notice that we’re setting target: node so Node-specific assets are treated properly. Also note that you may need to set the output filename to handler.js. I’m also adding aws-sdk to the externals array so webpack doesn’t bundle it at all; instead, it’ll leave the call to const AWS = require("aws-sdk"); alone, allowing it to be handled by our Lamdba, at runtime. This is OK since Lambdas already have the aws-sdk available implicitly, meaning there’s no need for us to send it over the wire. Finally, the mainFields: ["main"] is to tell webpack to ignore any ESM module fields. This is necessary to fix some issues with the Jimp library.
Now let’s re-deploy, and hopefully we’ll see webpack running.
Now our code is bundled nicely into a single file that’s 935K, which zips down further to a mere 337K. That’s a lot of savings!
Odds and ends
If you’re wondering how you’d send other data to the Lambda, you’d add what you want to the request object, of type FormData, from before. For example:
request.append("xyz", "Hi there");
…and then read formPayload.xyz in the Lambda. This can be useful if you need to send a security token, or other file info.
If you’re wondering how you might configure env variables for your Lambda, you might have guessed by now that it’s as simple as adding some fields to your serverless.yaml file. It even supports reading the values from an external file (presumably not committed to git). This blog post by Philipp Müns covers it well.
Wrapping up
Serverless is an incredible framework. I promise, we’ve barely scratched the surface. Hopefully this post has shown you its potential, and motivated you to check it out even further.
If you’re interested in learning more, I’d recommend the learning materials from David Wells, an engineer at Netlify, and former member of the serverless team, as well as the Serverless Handbook by Swizec Teller
I totally forgot that the Jamstack Conf was this week but thankfully they’ve already published the talks on the Jamstack YouTube channel. I’m really looking forward to sitting down with these over a coffee while I also check out Netlify’s other big release today: Build Plugins.
These are plugins that run whenever your site is building. One example is the A11y plugin that will fail a build if accessibility failures are detected. Another minifies HTML and there’s even one that inlines critical CSS. What’s exciting is that these build plugins are kinda making complex Gulp/Grunt environments the stuff of legend. Instead of going through the hassle of config stuff, build plugins let Netlify figure it all out for you. And that’s pretty neat.
Also, our very own Sarah Drasner wrote just about how to create your first Netlify Build Plugin. So, if you have an idea for something that you could share with the community, then that may be the best place to start.
Last week we had our first Smashing Meets event. A free event across two days and many timezones, with three speakers each day and plenty of chance for attendees to chat and ask questions of the speakers. In addition to brightening your day with a virtual meetup, Meets was a chance for us to test the conference platform we’ll be using for our first Smashing Live conference. So, how did it go?
Three more great talks today at #smashingmeets (one same as yesterday – but a brilliant talk) exciting stuff to come from CSS layout and Speed/Sensor APIs. Can’t wait to give them a try! @smashingmag
With Smashing Meets, we were attempting to bring some of the feel of a community meetup to an online format. We’ve all been missing meeting up, chatting, and hearing from speakers at local events. As Smashing readers live all over the world, we decided to do two events, one which was better suited to US timezones, and another more suited to Europe and Asia.
“What a delightful few hours over both days it was! I had a blast, and I think the experience as a speaker was great. Well done to all the team!”
— Mark Boulton
Across the two days, over 500 attendees heard talks from:
Yiying Lu
Phil Hawksworth
Mark Boulton
Mandy Michael
and me, Rachel Andrew!
As a speaker, I really enjoyed the format. Presenting online can seem a bit strange as you have none of the immediate audience feedback from the faces in front of you. However, after the talk, I moved to a session room to take questions. I was definitely able to answer far more individual questions than I normally can after an in-person talk. Attendees seemed to really enjoy getting to talk to speakers in this way too. One attendee told us in the feedback form:
“I am more likely to ask a question in a chat setting (nerves/shyness keep me from physically asking questions in a conference setting.) It was SO cool to have my question answered and be able to directly interact with the speaker!”
In addition to the Q&A sessions with speakers, we tried other ways to encourage people to interact with other attendees from around the world. We encouraged them to meet our community partners, do challenges, and take part in a quiz. We were pleased to get feedback that some of our attendees picked up on the meetup atmosphere:
“It really felt like a community meetup: laidback, fun and just everyone wanting to have a good time, having the chat along with the talks was fun.”
What Did We Learn?
The attendees certainly seemed to take a lot away from our speakers, but we also learned a lot about running an online event.
We found that, in some ways, online is the same as offline; if we place the experience of our attendees first, we don’t go too far wrong. Good talks by smashing speakers are why people attend. Interactive Sessions are an added value.
Just as with offline events, some people prefer a single track and not missing anything, while others love the idea of picking their favorite things to do. It is possible to make online events social and interactive. It takes work, and a reimagining of how things work in this setting, however as I have found in workshops people are often more keen to chat online than off. The choice of platform is important here too, if the event isn’t to just be one presentation playing after another.
Ultimately, we found the only things people really missed are the snacks and lunches!
Up Next, Smashing Live!
We hope to do another Meets at some point, however, our next event is on a somewhat larger scale. We’ll be taking everything we learned from Meets and using it to make our Smashing Live conference even better. Join us for Smashing Live, a virtual conference with plenty of real-life fun and interaction with new friends from all over the world.
And, of course, a Mystery Speaker, and unlike a regular SmashingConf, where you might spot a likely candidate walking around the venue, it’s going to be pretty hard to work out who they are this time! If you think you know, we’ll be inviting you to guess, and maybe win a prize.
Timings And Practical Things
Smashing Live is on June 9th and 10th, 2020. 11am – 4pm in New York, making it 5pm-10pm in Amsterdam. You can find more timezones on the website.
We have thought a lot about what it means to attend a virtual conference. Feedback from Meets and our workshops tells us that shorter days make more sense than one long day. Many of you are also doing stellar work homeschooling children, taking care of family tasks, and trying to do your regular job all from home. Therefore Live will run for two half days, this also has the advantage of making the content accessible for more timezones. Recordings will be available after the event too, so no-one misses a thing.
A ticket for SmashingLive is USD $225, with a discount for Smashing Members (10% for Members, 25% for Smashers). If you are a member head over to your Member Dashboard for your discount links. For everyone else, book your ticket here.
Workshops
We’ll run online workshops before and after the conference, just as we do at our regular events. The aim is to give attendees the same experience and access to experts as with an in-person workshop, without needing to leave a desk. The workshops are taught live, and you’ll have plenty of chances to ask questions. You save USD $100 if you add a workshop to your conference ticket.
Feedback from our previous workshops has been amazing, and many of them have sold out as we have limited capacity depending on how each expert likes to teach. So don’t delay if you see a favorite on the list.
The whole team thanks you for your support of our events and everything else we’ve been doing since we all ended up in lockdown. We’re happy we have managed to keep the community spirit going, and provide lots of chances to learn from our speakers and each other.
In the previous article of this series, we understudied Models and Associations as they relate to Mirage. I explained that Models allow us to create dynamic mock data that Mirage would serve to our application when it makes a request to our mock endpoints. In this article, we will look at three other Mirage features that allow for even more rapid API mocking. Let’s dive right in!
Note: I highly recommend reading my first two articles if you haven’t to get a really solid handle on what would be discussed here. You could however still follow along and reference the previous articles when necessary.
In a previous article, I explained how Mirage JS is used to mock backend API, now let’s assume we are mocking a product resource in Mirage. To achieve this, we would create a route handler which will be responsible for intercepting requests to a particular endpoint, and in this case, the endpoint is api/products. The route handler we create will return all products. Below is the code to achieve this in Mirage:
import { Server, Model } from 'miragejs';

new Server({
    models: {
      product: Model,
    },

   routes() {
        this.namespace = "api";
        this.get('products', (schema, request) => {
        return schema.products.all()
    })
   }
});
    },
The output of the above would be:
{
  "products": []
}
We see from the output above that the product resource is empty. This is however expected as we haven’t created any records yet.
Pro Tip: Mirage provides shorthand needed for conventional API endpoints. So the route handler above could also be as short as: this.get('/products').
Let’s create records of the product model to be stored in Mirage database using the seeds method on our Server instance:
As you can see above, when our frontend application makes a request to /api/products, it will get back a collection of products as defined in the seeds method.
Using the seeds method to seed Mirage’s database is a step from having to manually create each entry as an object. However, it wouldn’t be practical to create 1000(or a million) new product records using the above pattern. Hence the need for factories.
Factories Explained
Factories are a faster way to create new database records. They allow us to quickly create multiple records of a particular model with variations to be stored in the Mirage JS database.
Factories are also objects that make it easy to generate realistic-looking data without having to seed those data individually. Factories are more of recipes or blueprints for creating records off models.
Creating A Factory
Let’s examine a Factory by creating one. The factory we would create will be used as a blueprint for creating new products in our Mirage JS database.
import { Factory } from 'miragejs'

new Server({
    // including the model definition for a better understanding of what's going on
    models: {
        product: Model
    },
    factories: {
        product: Factory.extend({})
    }
})
From the above, you’d see we added a factories property to our Server instance and define another property inside it that by convention is of the same name as the model we want to create a factory for, in this case, that model is the product model. The above snippet depicts the pattern you would follow when creating factories in Mirage JS.
Although we have a factory for the product model, we really haven’t added properties to it. The properties of a factory can be simple types like strings, booleans or numbers, or functions that return dynamic data as we would see in the full implementation of our new product factory below:
import { Server, Model, Factory } from 'miragejs'

new Server({
    models: {
        product: Model
    },

   factories: {
      product: Factory.extend({
        name(i) {
          //  i is the index of the record which will be auto incremented by Mirage JS
          return `Awesome Product ${i}`; // Awesome Product 1, Awesome Product 2, etc.
        },
        price() {
          let minPrice = 20;
          let maxPrice = 2000;
          let randomPrice =
            Math.floor(Math.random() * (maxPrice - minPrice + 1)) + minPrice;
          return `$ ${randomPrice}`;
        },
        category() {
          let categories = [
            'Electronics',
            'Computing',
            'Fashion',
            'Gaming',
            'Baby Products',
          ];
          let randomCategoryIndex = Math.floor(
            Math.random() * categories.length
          );
          let randomCategory = categories[randomCategoryIndex];
          return randomCategory;
        },
         rating() {
          let minRating = 0
          let maxRating = 5
          return Math.floor(Math.random() * (maxRating - minRating + 1)) + minRating;
        },
      }),
    },
})
In the above code snippet, we are specifying some javascript logic via Math.random to create dynamic data each time the factory is used to create a new product record. This shows the strength and flexibility of Factories.
Let’s create a product utilizing the factory we defined above. To do that, we call server.create and pass in the model name (product) as a string. Mirage will then create a new record of a product using the product factory we defined. The code you need in order to do that is the following:
new Server({
    seeds(server) {
        server.create("product")
    }
})
Pro Tip: You can run console.log(server.db.dump()) to see the records in Mirage’s database.
A new record similar to the one below was created and stored in the Mirage database.
With a factory in place, we can use another method on the server object called createList. This method allows for the creation of multiple records of a particular model by passing in the model name and the number of records you want to be created. Below is it’s usage:
server.createList("product", 10)
Or
server.createList("product", 1000)
As you’ll observe, the createList method above takes two arguments: the model name as a string and a non-zero positive integer representing the number of records to create. So from the above, we just created 500 records of products! This pattern is useful for UI testing as you’ll see in a future article of this series.
Fixtures
In software testing, a test fixture or fixture is a state of a set or collection of objects that serve as a baseline for running tests. The main purpose of a fixture is to ensure that the test environment is well known in order to make results repeatable.
Mirage allows you to create fixtures and use them to seed your database with initial data.
Note: It is recommended you use factories 9 out of 10 times though as they make your mocks more maintainable.
Creating A Fixture
Let’s create a simple fixture to load data onto our database:
The above data is automatically loaded into the database as Mirage’s initial data. However, if you have a seeds function defined, Mirage would ignore your fixture with the assumptions that you meant for it to be overridden and instead use factories to seed your data.
Fixtures In Conjunction With Factories
Mirage makes provision for you to use Fixtures alongside Factories. You can achieve this by calling server.loadFixtures(). For example:
 fixtures: {
    products: [
      { id: 1, name: "iPhone 7" },
      { id: 2, name: "Smart TV" },
      { id: 3, name: "Pressing Iron" },
    ],
  },

  seeds(server) {
    // Permits both fixtures and factories to live side by side
    server.loadFixtures()

    server.create("product")
  },
Fixture files
Ideally, you would want to create your fixtures in a separate file from server.js and import it. For example you can create a directory called fixtures and in it create products.js. In products.js add:
Then in server.js import and use the products fixture like so:
import products from './fixtures/products';
 fixtures: {
    products,
 },
I am using ES6 property shorthand in order to assign the products array imported to the products property of the fixtures object.
It is worthy of mention that fixtures would be ignored by Mirage JS during tests except you explicitly tell it not to by using server.loadFixtures()
Factories vs. Fixtures
In my opinion, you should abstain from using fixtures except you have a particular use case where they are more suitable than factories. Fixtures tend to be more verbose while factories are quicker and involve fewer keystrokes.
Serializers
It’s important to return a JSON payload that is expected to the frontend hence serializers.
A serializer is an object that is responsible for transforming a **Model** or **Collection** that’s returned from your route handlers into a JSON payload that’s formatted the way your frontend app expects.
To work with Mirage JS serializers, you’d have to choose which built-in serializer to start with. This decision would be influenced by the type of JSON your backend would eventually send to your front-end application. Mirage comes included with the following serializers:
JSONAPISerializer
This serializer follows the JSON:API spec.
ActiveModelSerializer
This serializer is intended to mimic APIs that resemble Rails APIs built with the active_model_serializer gem.
RestSerializer
The RestSerializer is Mirage JS “catch all” serializer for other common APIs.
Serializer Definition
To define a serialize, import the appropriate serializer e.g RestSerializer from miragejs like so:
import { Server, RestSerializer } from "miragejs"
Then in the Server instance:
new Server({
  serializers: {
    application: RestSerializer,
  },
})
The RestSerializer is used by Mirage JS by default. So it’s redundant to explicitly set it. The above snippet is for exemplary purposes.
Let’s see the output of both JSONAPISerializer and ActiveModelSerializer on the same route handler as we defined above
JSONAPISerializer
import { Server, JSONAPISerializer } from "miragejs"
new Server({
  serializers: {
    application: JSONAPISerializer,
  },
})
You’ll notice that productCategory has been transformed to product_category which conforms to the active_model_serializer gem of the Ruby ecosystem.
Customizing Serializers
Mirage provides the ability to customize a serializer. Let’s say your application requires your attribute names to be camelcased, you can override RestSerializer to achieve that. We would be utilizing the lodash utility library:
You made it! Hopefully, you’ve got a deeper understanding of Mirage via this article and you’ve also seen how utilizing factories, fixtures, and serializers would enable you to create more production-like API mocks with Mirage. Look out for the next part of this series.
Product and design teams make a lot of decisions. Early on in the development of a product, they will be thinking about features — such as what the product should do, and how each feature should work. Later on, those decisions become more nuanced — such as ‘what should this button say? Each decision introduces an element of risk — if a bad decision is made, it will reduce the chance for the product to be successful.
The people making these decisions rely on a variety of information sources to improve the quality of their decision This includes intuition, an understanding of the market, as well as an understanding of user behavior. Of these, the most valuable source of information to put evidence behind decisions is understanding our users.
Being armed with an understanding of the appropriate user research methods can be very valuable when developing new products. This article will cover some appropriate methods and advice on when to deploy them.
A Process For Developing Successful Products
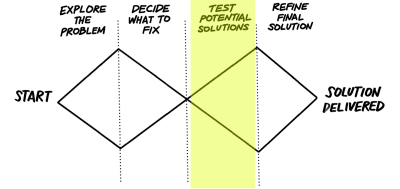
The double diamond is a model created by the UK’s Design Council which describes a process for making successful products. It describes taking time to understand a domain, picking the right problem to solve, and then exploring potential ideas in that space. This should prove that the product is solving real problems for users and that the implementation of the product works for users.
The design council’s Double Diamond model (Large preview)
To succeed at each stage of the process requires understanding some information about your users. Some of the information we might want to understand from users when going through the process is as follows:
Some research questions appropriate for each stage (Large preview)
Each stage has some user research methods that are best suited to uncovering that information. In this article, we’ll refer to the double diamond to highlight the appropriate research method throughout product development.
Diamond 1: Exploring The Problem And Deciding What To Fix
The first diamond describes how to come up with a suitable problem that a new product or feature should fix. It requires understanding what problems users have, and prioritizing them to focus on a high-value area. This avoids the risk of building something that no-one is going to use.
The most effective way of understanding the problem is to get true first-hand experience of users performing real tasks in context. This is best done by applying ethnographic and observational methods to identify the range of problems that exist, then prioritizing them using methods such as surveys.
Double Diamond Phase
Appropriate Method
Why?
Explore the problem
Ethnographic and Observational studies
Gives deep insight into what problems people have that can inspire product decisions
Decide what to fix
Surveys
Discovers how representative problems are, and helps prioritise them
We’ll review each method, in turn, to describe why it’s appropriate.
Explore The Problem With Ethnographic And Observational Methods
The first phase of the double diamond is to ‘explore the problem’. User research can build up an understanding of how people act in the real world and the problems they face. This allows the problem space to be fully explored.
This valuable behavioral information is only uncovered only by watching people do real tasks and asking them questions to uncover their motivations and issues. Doing early qualitative research will help identify the problems that people have. These problems can inspire product ideas, features, and help teams understand how to successfully solve user’s problems. This information will also help disregard poor product ideas by revealing that there is no real need for it. This leads to a more useful product being developed and increasing the chance of success.
The most appropriate methods for doing this are ethnographic. This can include diary studies, where a user’s interaction with the subject matter is captured over a number of weeks. This reveals issues that wouldn’t turn up in a single session or that people wouldn’t remember to talk about in a lab-based interview.
This isn’t the only way of uncovering this kind of in-depth information though. Other suitable observational methods include watching people use existing software or products, both in the lab or in the wild. These are quicker and easier to run than diary studies, but are limited to only capturing a single interaction or what the participant will remember when prompted. For some subject matters, this might be enough (e.g. navigating an online shop can be done and explored in a single session). More complex interactions over time, such as behavior with fitness trackers, would be more sensible to track as a diary study.
Decide What To Fix With Surveys
The second half of the first diamond comes next. Having understood real user’s contexts and what problems they have, these can then be documented and prioritized to ‘decide what to fix’.
This prioritization will be done by product managers who take into account many factors, such as “what do we have the technical ability to do” and “what meets our business goals”. However, user research can also add valuable information by uncovering the size of the issues users have. Surveys are a sensible approach for this, informed by the true understanding of user behavior uncovered in the earlier studies. This allows teams to size the uncovered issues and reveal how representative the behaviors discovered are.
Combining quantitative methods with generative user research studies help inspire early decisions about what a product should do. For example, Spotify’s discovery work on how people consume music analyzed primary research fieldwork to create personas and inform their development work. This allows a team to complete the first diamond with a clear understanding of what problem their product is trying to solve.
Diamond 2: Test And Refine Potential Solutions
The second diamond describes how to end up on a successful implementation of a product to fix the problem. Having decided which problem to fix, research can then explore different ways of fixing that problem, and help refine the best method.
Double Diamond Phase
Appropriate Method
Why?
Test potential solutions
Moderated usability testing
Creates a deep understanding of why the solution works, to inform iteration
Refine final solution
Unmoderated usability testing
Can get quick results on small questions, such as with the UI
Test Potential Solutions With Moderated Usability Testing
The second diamond in the double diamond design process starts with evaluating a variety of solutions in order to decide the best possible implementation of a product. To achieve this with rigor requires usability testing — creating representative prototypes and then observing if users can successfully complete tasks using them.
This kind of study takes time to do properly, and attention on each individual’s user experience to understand what causes the behavior that is observed during usability testing. A moderated session, with the researcher present, can ask probing questions to uncover things that participants won’t articulate unprompted such as “what are you thinking currently” or “ why did you decide to do that?”. These kinds of studies reveal more data when a moderator is able to ask participants these questions, and avoids missing the opportunity to gather more data from each study, which can be used to evaluate and iterate the product. A single moderated research session potentially reveals more useful information than a series of unmoderated tests.
This kind of in-depth exploration of the problem has been a key part of AirBNB’s early success. In 2009 the company was close to bankruptcy and desperate to understand why people were not booking rooms. By spending time with users reviewing the ads on their website, they were able to uncover that the pictures were the problem. This then allowed them to focus their iteration on the process for gathering photos of rooms, which put them on the path for changing hotel booking forever. As the global pandemic changes people’s behavior with holidays in the future, in-depth qualitative research will be essential as they continue to adapt to new challenges.
This doesn’t mean that the moderator has to be in the same room as the participant. Often it can be very valuable to find participants who are geographically remote, and avoid over-sampling people who live in major cities, which is often where research teams are based. Screen sharing software, such as google hangouts or zoom can make remote sessions possible, while still having the session run live with a moderator.
Refine Final Solution With Unmoderated Usability Testing
The final stage of the double diamond describes refining the final solution, which can require a lot of small iterative tests. A shortcut to the deep insight from moderated testing is remote unmoderated research. This includes tools like usertesting.com which allow teams to put their software in front of users with little effort. By sending a website URL to their panel of users, they send back videos of their participants using the website and commenting on their experience.
This method can be popular because it is quick (multiple sessions can run simultaneously without a moderator present) and cheap (participants aren’t paid a huge amount to take part). Because of this, it is often considered an appropriate tool by companies looking to start doing user research, however, care needs to be taken.
This method has constraints which means that it’s only sensible for later on in the design process. Because the participants on these kinds of websites are all people who test multiple websites regularly, they become increasingly different to a normal user. This changes their behavior while using websites and makes it dangerous to draw conclusions from their behavior about what other users would understand or do. This is called a sampling bias — creating a difference between ‘real’ users, and the users being tested.
Because of these risks, these studies may be most appropriate late in development, testing content or UI changes, when the risks of getting decisions wrong are much lower. Iterative studies ensure that users understand what has been created, and are able to use it in the way the designer intended. An example of this is the iterative usability testing the UK’s Government Digital Service ran to ensure citizens could successfully identify themselves and access government services.
After The Double Diamond
As we’ve covered, it is important to select the right method to de-risk product decisions before launch. When a product is launched, it will be immediately obvious whether there is an audience for it, and whether people understand and can use the product — both through how well the product sells, and through reviews and customer feedback.
Nevertheless, launching the right product doesn’t mean that the opportunity for research is over. New opportunities to explore real user behavior will continue to inspire adding or removing features, or changes to how the product works.
Double Diamond Phase
Appropriate Method
Why?
Solution delivered
Analytics + moderated usability testing combined
Inform future updates post-launch with qualitative and quantitative insight.
Combining some of the methods we’ve described previously with new data from analytics will continue to drive high-quality decision making.
Research After The Solution Is Delivered With Analytics
Post-launch analytics are an important part of building a complete understanding of the behavior of users.
Analytics will reveal what people are doing on a website. However, this information is most valuable when combined with understanding why that behavior is occurring. It is also important to be aware that analytics are only seeing a short section of a user’s experience, the part that happens on your website and their whole end-to-end journey also includes a lot of things that happened off the site, or in the real world. Building a research strategy that combines insight from analytics with an understanding of motivations from qualitative studies is a powerful combination to inform decision making.
This requires close collaboration between the analytics team and the user research team — regular community events, skills sharing and project updates will create awareness of the priorities of each team, the type of research questions they can support one another with and identify opportunities to work together, leading to a stronger combined team.
Optimize Your Research Process
In this article, we’ve covered some appropriate methods to use to inform product development. However, there can still be resistance to running the right kind of study.
New research teams may be asked to cut corners. This can include suggesting participants who are convenient, such as friends, without taking the time to screen them to ensure they represent real users. This can be suggested by colleagues who are unaware of the risks caused by taking decisions based on unrepresentative research.
In addition to running research studies, a researcher has to be an educator and advocate for running the right kind of studies and help their colleagues understand the differences in quality between the type of information gathered from different research methods. Presentations, roadshows, and creating posters are some techniques that can help achieve this.
Incorporating user research into decision making can be quite radical at some organizations, particularly those with a history of deferring to client wishes or listening to the highest-paid person in the room. A lot of hard work and creativity are needed to bring about change in how people work. This requires understanding the decision maker’s current incentives, and describing the benefits of research in a way that shows how it makes their life easier.
If an organization understands and accepts why running studies using appropriate methods it shows a real desire for improving the quality of decision making within the organization. This is an encouraging sign that a new research team has the potential to be successful.
The next step for new researchers will be to establish the logistics of running research, including creating a research process, building out the tools and software needed, and identifying the highest priority research questions for your organization. There is a lot of great guidance from the research community on techniques to do this, for example, the work being done by the research ops community.
Core Web Vitals is what Google is calling a a new collection of three web performance metrics:
LCP: Largest Contentful Paint
FID: First Input Delay
CLS: Cumulative Layout Shift
These are all measurable. They aren’t in Lighthouse (e.g. the Audits tab in Chrome DevTools) just yet, but sounds like that’s coming up soon. For now, an open source library will get you the numbers. There is also a browser extension (that feels pretty alpha as you have to install it manually).
That’s all good to me. I like seeing web performance metrics evolve into more meaningful numbers. I’ve spent a lot of time in my days just doing stuff like reducing requests and shrinking assets, which is useful, but kind of a side attack to web performance. These metrics are what really matter because they are what users actually see and experience.
The bigger news came today though in that they are straight up telling us: Core Web Vitals matter for your SEO:
Today, we’re building on this work and providing an early look at an upcoming Search ranking change that incorporates these page experience metrics. We will introduce a new signal that combines Core Web Vitals with our existing signals for page experience to provide a holistic picture of the quality of a user’s experience on a web page.
Straight up, these numbers matter for SEO (or they will soon).
And they didn’t bury the other lede either:
As part of this update, we’ll also incorporate the page experience metrics into our ranking criteria for the Top Stories feature in Search on mobile, and remove the AMP requirement from Top Stories eligibility.
AMP won’t be required for SERP carousel thing, which was the #1 driver of AMP adoption. I can’t wait to see my first non-AMP page up there! I know some features will be unavailable, like the ability to swipe between stories (because that relies on things like the Google AMP cache), but whatever, bring it on. Let AMP just be a thing people use because they want to not because they have to.