When introducing width and height I explain that by default width takes as much horizontal space as it can, while height takes as little vertical space as possible. This leads to a discussion of these two opposed models that I excerpt below.
My question is: which names do I give to these models?
I definitely don’t like inside-out and outside-in — they make my head spin. I think I’m gonna vote for extrinsic and intrinsic size. I hear those terms thrown around a lot more lately and the fact that they match the specs is something I like. At the same time, I do feel like context-based and content-based are maybe a smidge more clear, but since they are already abstracted and made up, might as well go with the abstracted and made up term that already has legs.
The other day I was working on a blog where each post has a custom color attached to it for a little dose of personality. The author gets to pick that color in the CMS when they’re writing the post. Just a super-light layer of art direction.
To make that color show up on the front end, I wrote the value right into an inline style attribute on the
element. My templates happened to be in Liquid, but this would look similar in other templating languages:
{% for post in posts %}
<article style="background: {{post.custom_color}}">
  <h1>{{post.title}}</h1>
  {{content}}
</article>
{% endfor %}
No problem there. But then I thought, “Wouldn’t it be nice if the custom color only showed up when when hovering over the article card?” But you can’t write hover styles in a style attribute, right?
My first idea was to leave the style attribute in place and write CSS like this:
Eventually, I decided I could use a style attribute to get the color value from the CMS, but instead of applying it right away, store it as a CSS variable:
Now that the color value is saved as a CSS variable, there are all kinds of other things we can do with it. For instance, we could make all links in the post appear in the custom color:
article a {
  color: var(--custom_color);
}
And because the variable is scoped to the
element, it won’t affect anything else on the page. We can even display multiple posts on the same page where each one renders in its own custom color.
CodePen Embed Fallback
Browser support for CSS variables is pretty deep, with the exception of Internet Explorer. Anyway, just a neat little trick that might come in handy if you find yourself working with light art direction in a CMS, as well as a reminder of just how awesome CSS variables can be.
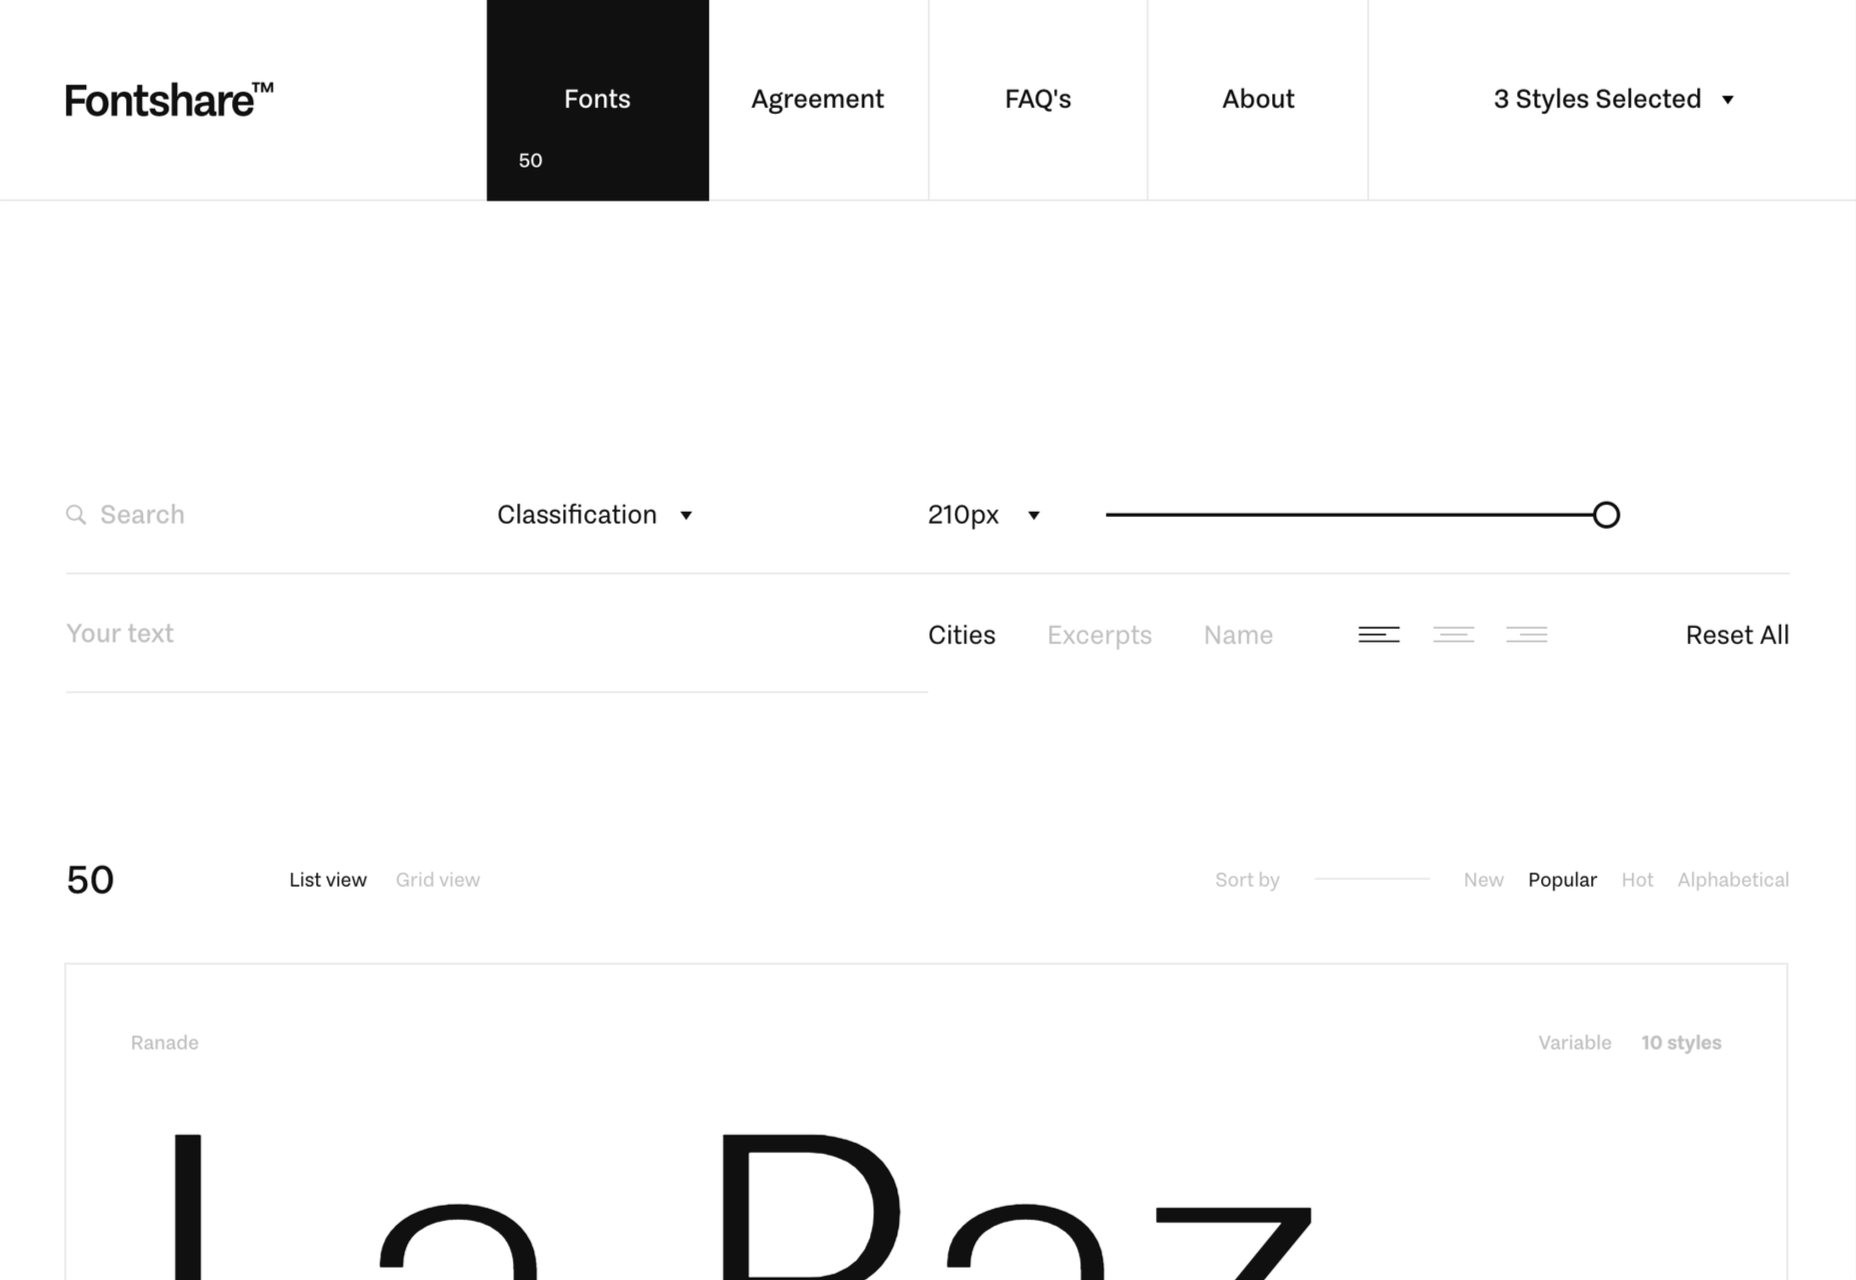
ITF (the Indian Type Foundry) has launched a brand new font service to bring beautiful typography to every business for free.
The service, named Fontshare, will be familiar to anyone who has used Google Fonts. Browse the fonts list, pick out the styles you want, and add them to your site.
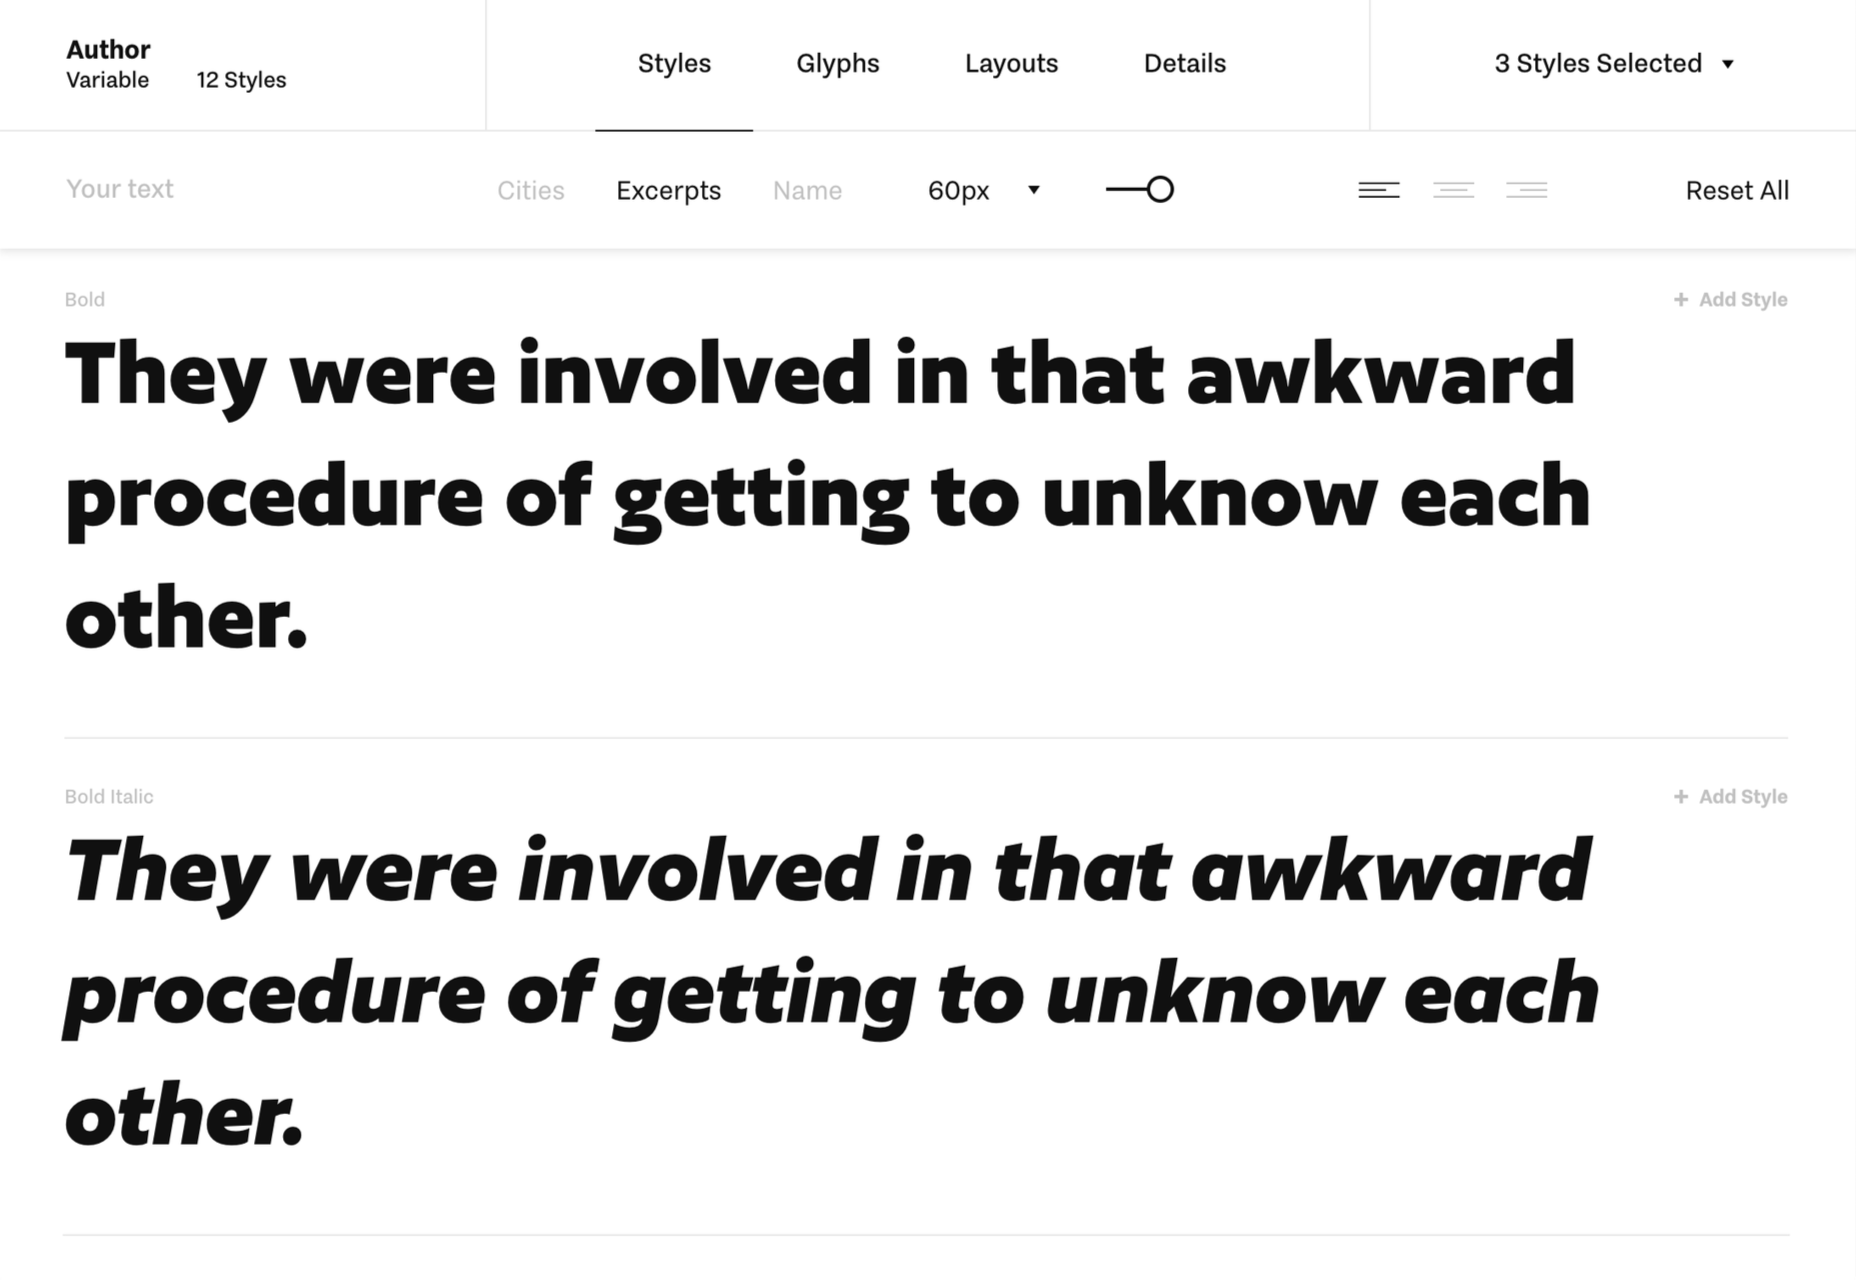
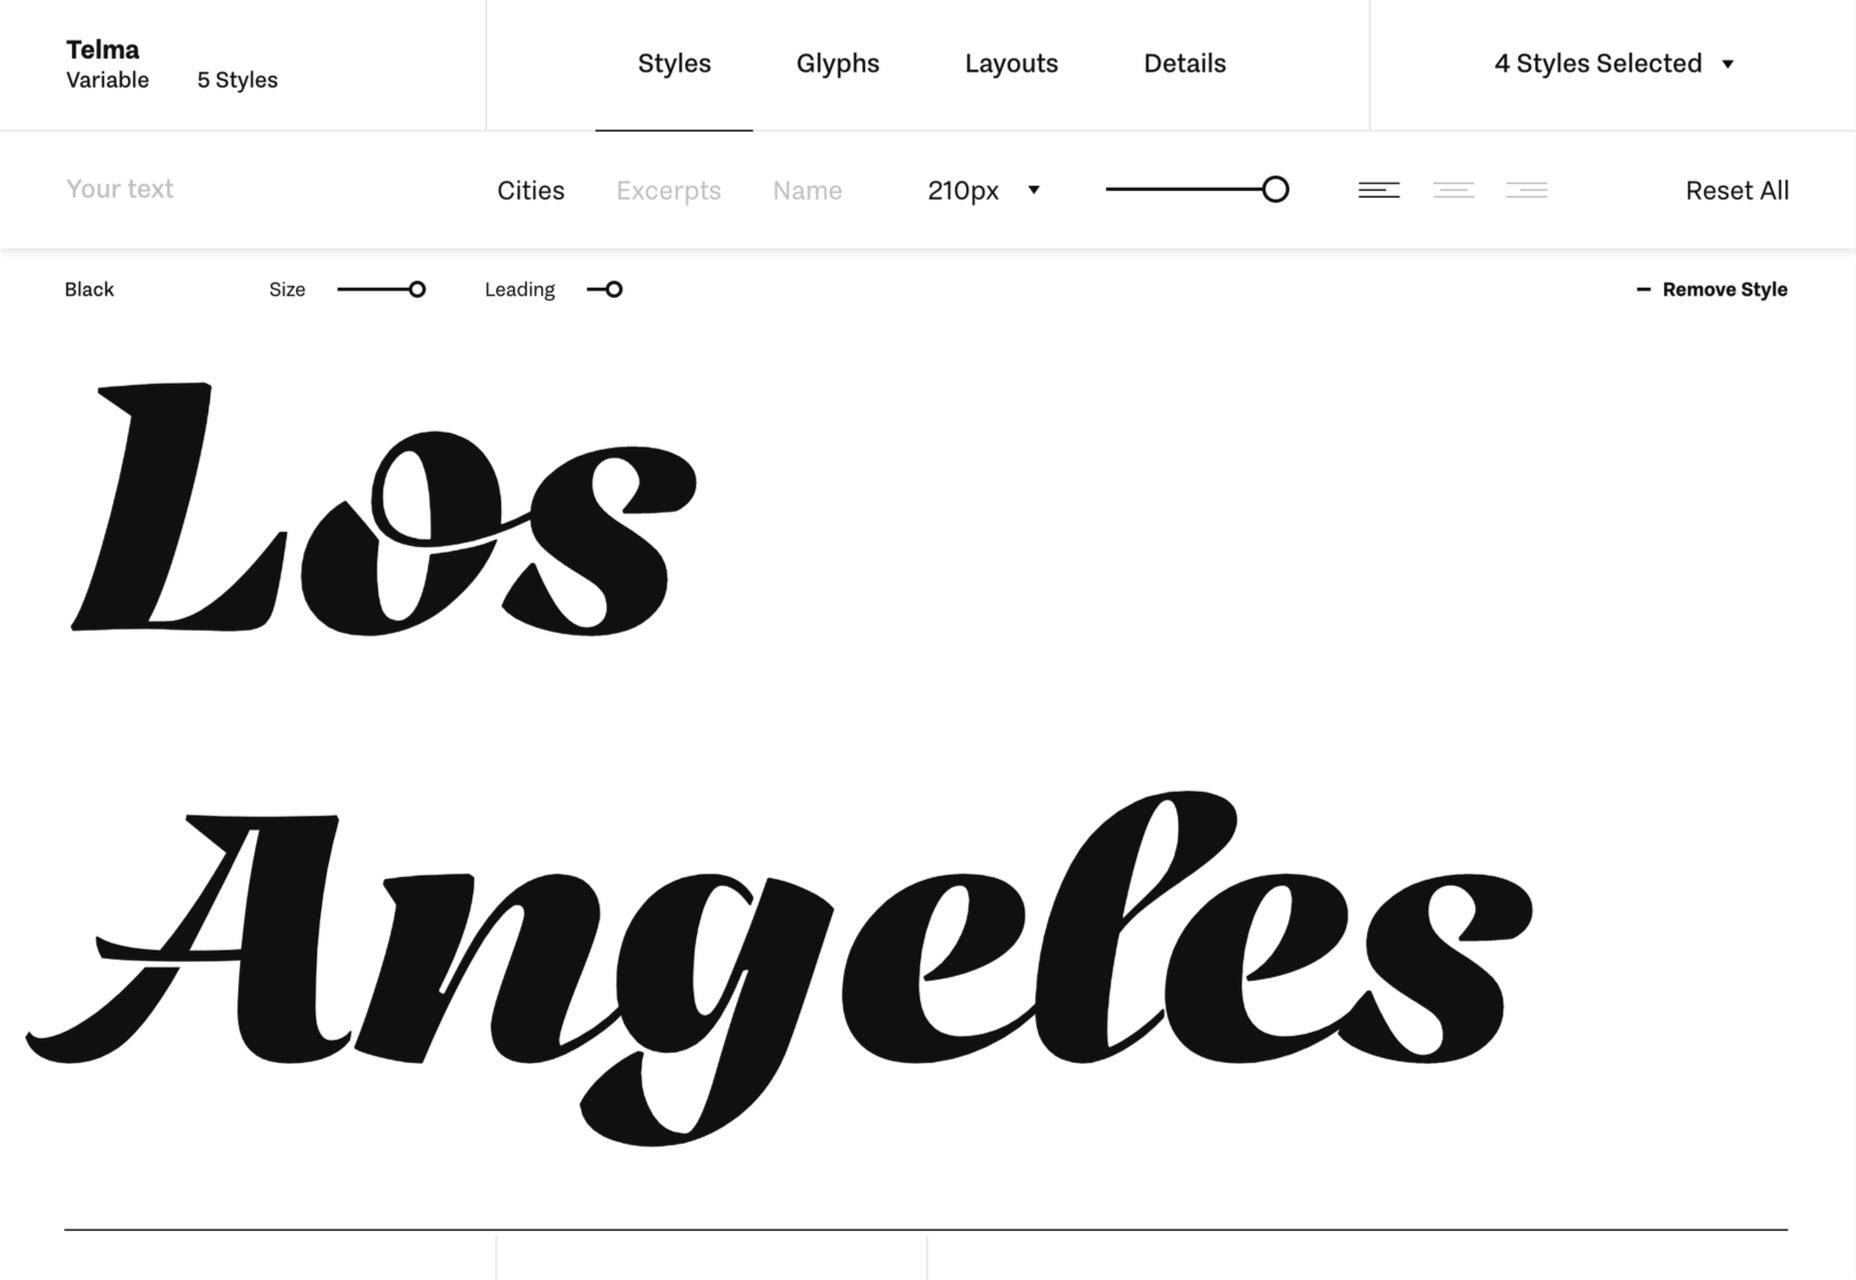
It’s a well-designed site; there are several options for browsing, list or grid views, editable sample text, and even a type layout tester.
There are two embedding options available, you can link to Fontshare’s API, or you can download the fonts in OTF, WOFF, and WOFF2 formats for self-hosting — considering the so-far untested nature of Fontshare’s CDN, the latter option is safer until the service has run for a few months.
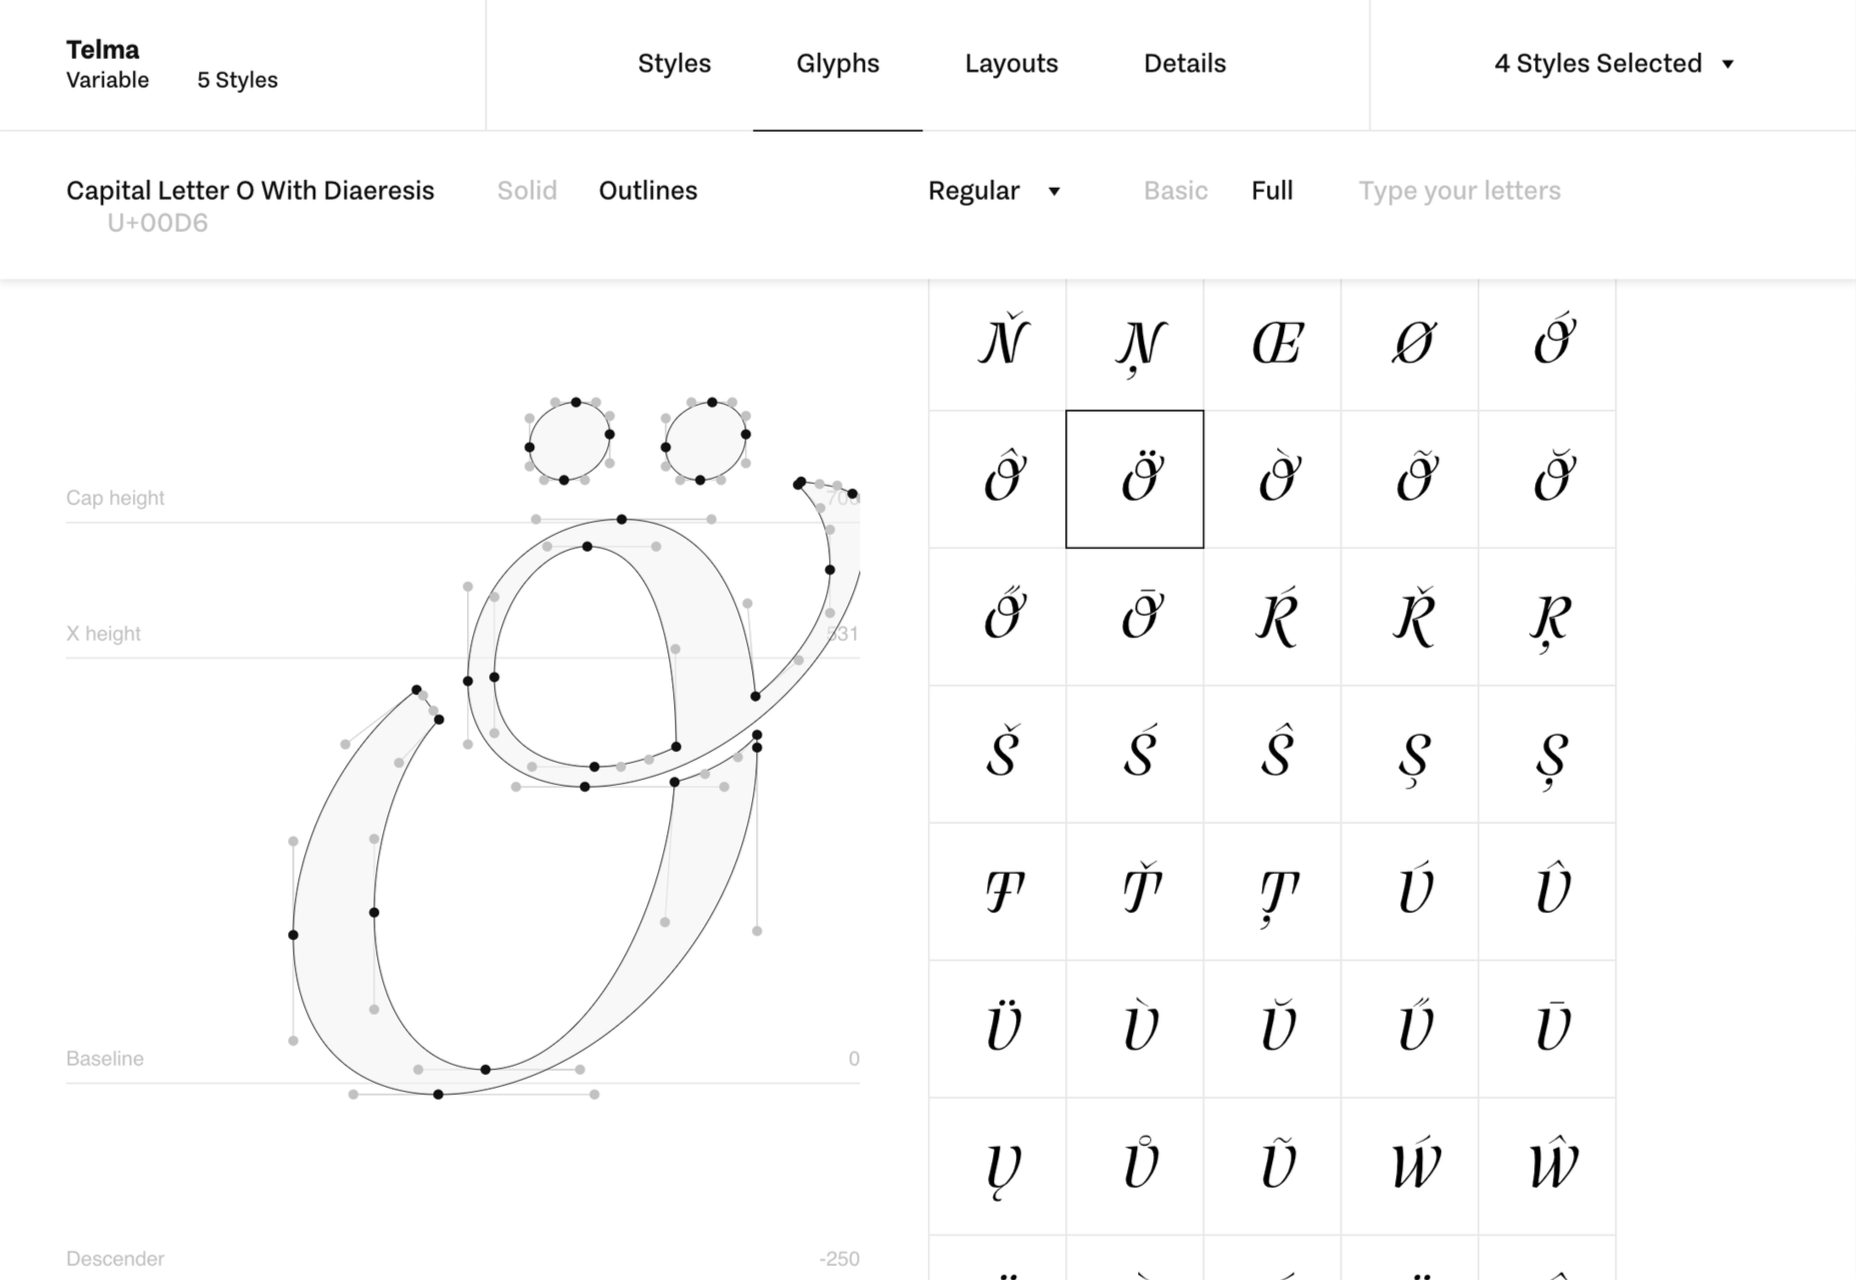
All of the fonts on Fontshare are owned by ITF, and there are no plans to extend the service to cover other foundries. As a result, there are far fewer fonts available than on Google Fonts. However, the fonts’ quality is consistently excellent and higher than many proffered by Google’s service. ITF is so confident in its craftsmanship that letters are presented with their outlines so you can examine their curves.
Fontshare currently boasts 50 typefaces, and moving forward, ITF has pledged to make 25% of its Latin typefaces available for free. It’s an extremely generous gesture and one that can only benefit the design community.
In this article, we walk through building out a full-stack real-time and completely serverless application that allows you to create polls! All of the app’s static bits (HTML, CSS, JS, & Media) will be hosted and globally distributed via the GitHub Pages CDN (Content Delivery Network). All of the data and dynamic requests for data (i.e., the back end) will be globally distributed and stateful via the Macrometa GDN (Global Data Network).
Macrometa is a geo-distributed stateful serverless platform designed from the ground up to be lightning-fast no matter where the client is located, optimized for both reads and writes, and elastically scalable. We will use it as a database for data collection and maintaining state and stream to subscribe to database updates for real-time action.
We will be using Gatsby to manage our app and deploy it to Github Pages. Let’s do this!
Intro
This demo uses the Macrometa c8db-source-plugin to get some of the data as markdown and then transform it to HTML to display directly in the browser and the Macrometa JSC8 SKD to keep an open socket for real-time fun and manage working with Macrometa’s API.
Once you’re logged in to Macrometa create a document collection called markdownContent. Then create a single document with title and content fields in markdown format. This creates your data model the app will be using for its static content.
Here’s an example of what the markdownContent collection should look like:
{
  "title": "## Real-Time Polling Application",
  "content": "Full-Stack Geo-Distributed Serverless App Built with GatsbyJS and Macrometa!"
}
content and title keys in the document are in the markdown format. Once they go through gatsby-source-c8db, data in title is converted to
, and content to
.
Now create a second document collection called polls. This is where the poll data will be stored.
In the polls collection each poll will be stored as a separate document. A sample document is mentioned below:
Your Macrometa login details, along with the collection to be used and markdown transformations, has to be provided in the application’s gatsby-config.js like below:
Under password you will notice that it says process.env.MM_PW, instead of putting your password there, we are going to create some .env files and make sure that those files are listed in our .gitignore file, so we don’t accidentally push our Macrometa password back to Github. In your root directory create .env.development and .env.production files.
You will only have one thing in each of those files: MM_PW=''
Running the app locally
We have the frontend code already done, so you can fork the repo, set up your Macrometa account as described above, add your password as described above, and then deploy. Go ahead and do that and then I’ll walk you through how the app is set up so you can check out the code.
In the terminal of your choice:
Fork this repo and clone your fork onto your local machine
Run npm install
Once that’s done run npm run develop to start the local server. This will start local development server on http://localhost: and the GraphQL server at http://localhost:/___graphql
How to deploy app (UI) on GitHub Pages
Once you have the app running as expected in your local environment simply run npm run deploy!
Gatsby will automatically generate the static code for the site, create a branch called gh-pages, and deploy it to Github.
Now you can access your site at .github.io/tutorial-jamstack-pollingapp
If your app isn‘t showing up there for some reason go check out your repo’s settings and make sure Github Pages is enabled and configured to run on your gh-pages branch.
Walking through the code
First, we made a file that loaded the Macrometa JSC8 Driver, made sure we opened up a socket to Macrometa, and then defined the various API calls we will be using in the app. Next, we made the config available to the whole app.
After that we wrote the functions that handle various front-end events. Here’s the code for handling a vote submission:
No marketer can ignore social media. As of early 2020, 51% of the world’s population is using one or more channels and spending a combined time of 1 million years on various platforms every day. That number has only risen thanks to the pandemic.
Social media platforms give you a great way to share your brand, vision, and products with the world, but you need a little help. You may have a lot of followers on your chosen channel(s), but there are many more out there who have never heard of your business. That’s why you need people to share your posts and help spread your business far and wide.
However, organic engagement with social media posts has been dropping for years. For Facebook, the engagement rate fell from 0.16% in 2018 to 0.09% in 2019, and on Instagram, the rate dropped from 1.73% to 1.6%. You can no longer assume that timely topics and fascinating content are enough to kick your post off to many different feeds and timelines.
It’s hard to buck the trend, but it’s still doable. There are tactics you can employ which will encourage more people to share your posts. Here are 7 ways to boost social shares and drive brand awareness.
1. Sharpen your graphics
Images drive shares, but there are a lot of them competing for eye space, so you need to sharpen your visual game. Most people use social media on their phones, so make sure that images don’t get cut off at the wrong point in the preview, any text on your graphics is legible on a small screen, and the user can zoom in and out easily. A social graphics tool helps you create attractive social media graphics that tick all these boxes, draw the eye, and entice the viewer to click “share.”
2. Include more video
Video is the top-performing content type, with social media users saying they are twice as likely to share video content than to share any other kind. Short videos are particularly popular today as people have short attention spans, and platforms like Instagram Stories, Facebook Stories, and TikTok all encourage video snippets. No one expects social video to be polished and perfect, which makes it even easier to shoot a few minutes of video and post it on your account.
3. Embrace emojis
Emoji use rose massively during the past year, with 1 out of every 5 tweets containing at least one emoji, increasing from 14.8% in August 2018. Emojis are becoming accepted even from business accounts and professionals, and even from people who aren’t Gen Z. Emojis help increase your posts’ shareability, because they shorten and break up blocks of text and make your content more easily scannable, without sacrificing nuance or dulling the message.
4. Respond to sharers
Simple good manners can make all the difference. When someone shares your post, say a quick “thank you” or just drop a reaction onto it. When customers get a response from sharing your content, they feel that your business cares about what they do and their involvement online. Remember that marketing is all about building a relationship. Responding to your sharers strengthens the connection they’ll feel to your brand and makes them a lot more likely to do it again.
5. Get the timing right
No one will share your social media posts if they don’t see them. The trouble is that every single social media platform is flooded with content that keeps pouring onto it all the time. If your post goes live at the wrong moment, it could easily get buried under a wave of later posts. Avoid this by using social media tools to identify when your followers are active on each channel, and then scheduling your posts for a specific time of the day or the week to make sure you don’t miss the window of opportunity.
6. Ride the trends
When your social media posts are relevant to the biggest trending topics of the day — or hour, or minute — it significantly raises the chances that people will share them onwards. Keep on top of the main trends that are relevant to your industry, and/or find ways to tie your brand into the biggest issues of the moment, so that you can produce interesting and timely content while interest is at a peak.
7. Make it worth the share
A cute meme might make a user pause their scroll and crack a smile, but is it valuable enough for a share? Users know that the content they share affects their own social capital, so they’ll promote posts that genuinely help, entertain, or inspire. Produce content that communicates useful information, shows a heart-warming story of kindness and giving, or brightens everybody’s day, so that people feel that they’ll be providing value themselves when they share it on.
Your social media posts can rise above the rest
It is possible for your social media posts to buck the trend of lagging engagement and drive shares, as long as you craft them well. By including emojis, video, timely content, and valuable information, posting at optimal times, refining your social media graphics, and engaging with people who do hit share, you’ll encourage your followers to share more of your content and boost your reach much further afield.
Creating a recognizable, memorable brand is challenging for nearly any business. Branding can make or break a company. If your brand is forgettable, you can kiss your customers goodbye.
The stakes are high for creating a winning brand. However, web design companies have little-to-no room for error for their personal company’s own brand.
Would you hire a web designer that didn’t have an engaging site with a cohesive brand? Probably not. Bringing brands to life through site design is why their clients hire them. If their brand is poor, what does it say about their service?
That’s why branding for web designers is critical. But where should you start? Perhaps you’ve finished your business registration and now you’re wondering how to put the best foot forward to acquire customers.
In this post, I’ll cover exactly what you need to do to create a winning brand for your design business. Before I dive in, let’s take a look at the core components of a brand.
The Core Components of a Brand
A brand is your logo, name, mission, and product differentiator coupled with customer perception. It isn’t enough to just have a flashy logo and consider that your brand.
You need to infuse your values, mission, and overall identity into every aspect of your business. If you do, your brand will make your company distinct and set you apart from competitors.
This isn’t easy, and many companies often fail to execute a comprehensive, cohesive brand. Where should you start?
Focus on these core components:
Design — This includes your logo, colors, font style
Messaging — This includes your tone and copywriting style
Customer Experience — This includes your buyers’ journey
Your brand is all-encompassing. It includes parts of your design, messaging, and customer experience all wrapped into one.
That’s why you need to carefully build it with each of those in mind at every step.
Let’s take a look at the three critical steps for creating a brand for your design business.
1. Start with your mission and values
Think about your company’s mission and values. What stands out?
Your brand identity should be formed with these ideals at its core. These elements will inform every aspect of your brand.
From your brand’s design to the overarching tone in all your messaging, everything should point back to your mission and values.
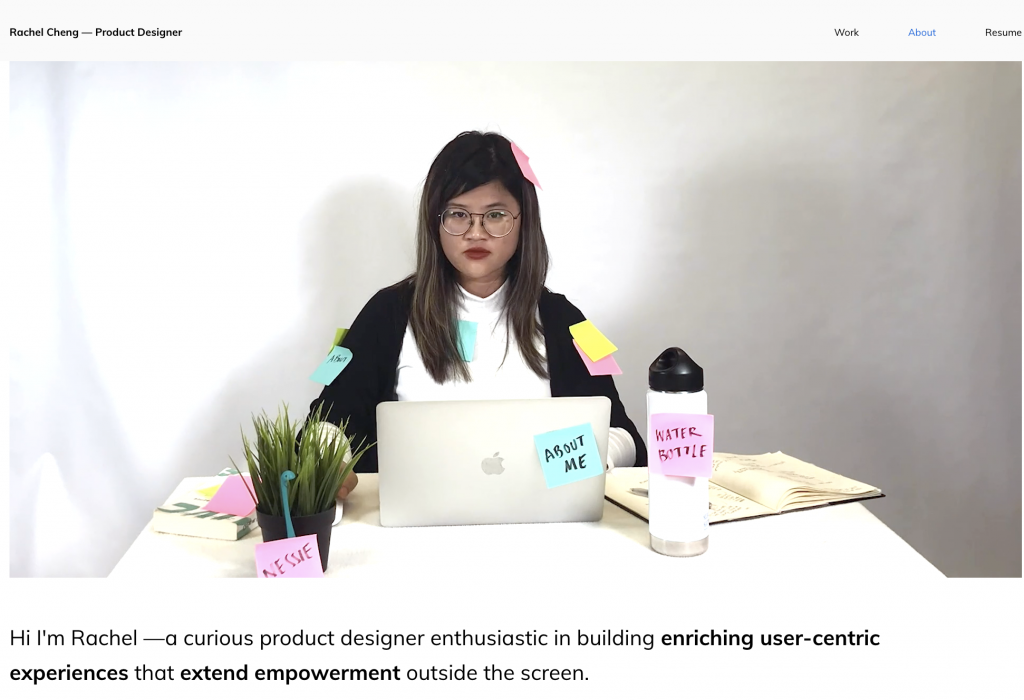
Take Rachel Cheng for example. Her mission as a designer is to “use design as a gateway to translate problems into empowering humanistic opportunities.”
Rachel’s website places an emphasis on the art of the human touch through her imagery and messaging. She has a looping GIF of herself playing on her About page, and she leverages casual copy as if she is speaking directly to you.
In this way, she is bringing her brand of “empowering humanistic opportunities” to life.
This is just one example of how vision plays a role in brand. Let’s take a look at how your brand identity comes to life through design.
2. Create meaningful design elements
Now that you know what your company stands for, it is time to consider how you can portray that through iconic design elements.
These should include:
Logo
Brand colors
Font styles
Website
When you’re designing those elements, consider how you can visually depict your mission statement throughout your value chain.
Logo creation can be daunting, but don’t fret if logo design isn’t your specialty.
There’s always time to learn new skills to bring your brand to life, even if it’s something outside of your degree or background with online universities. Some logos are simple and still effective, too.
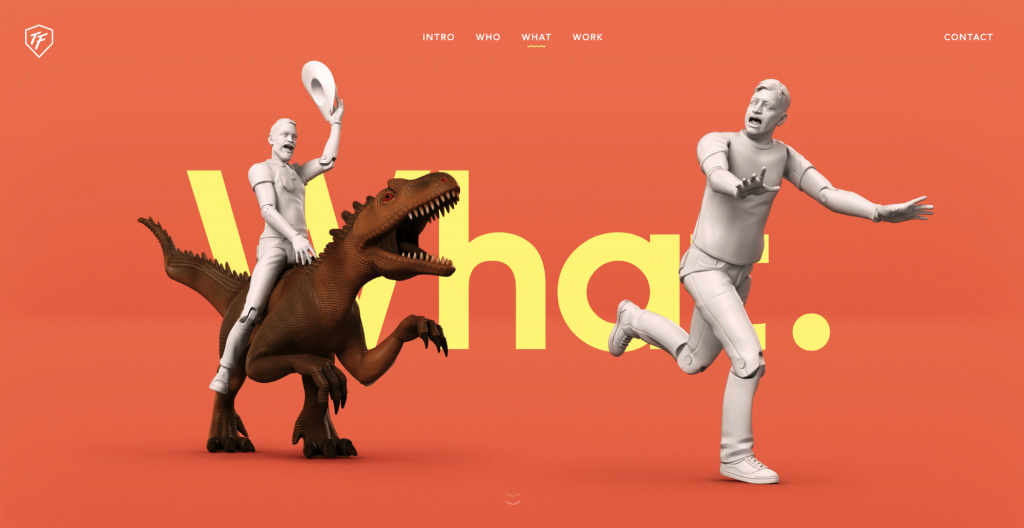
For example, Toy Fight is a design agency that partners with brands to “create exciting and meaningful experiences.”
Thus, they needed to make their brand “exciting and meaningful.” They seem to have accomplished that from the moment you visit their site:
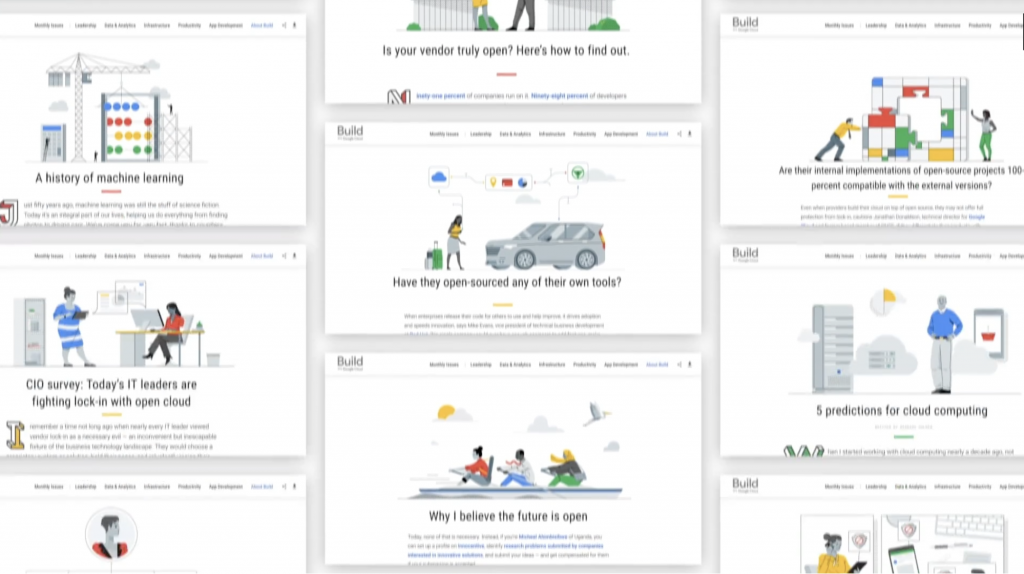
The video showcases Bynd’s clients as well as the agency’s overall brand with prominent features of their logo, fonts, and colors.
This is an excellent way to tie together your brand with your work and highlight existing business at the same time.
Making it memorable
It isn’t enough to just create a website to feature your existing work. You need to create a brand and bring it to life on your site.
To accomplish this, focus on the design, messaging and customer experience. Start with your values, create meaningful design elements, and share the right content in the right tone. Then, channel your brand through all aspects of your customer experience.
By doing so, you’ll create a memorable and unforgettable business that will attract and resonate with your target clients.
Current circumstances have been challenging for all of us, but they’ve also provided opportunities.
This is most apparent in the realms of eLearning and app development. Traditional students need new platforms to continue their studies, and businesses of all types are trying to keep their heads above water in a socially distant world.
Whether dealing with the transition to a remote work environment or managing the logistics of higher learning in a post-COVID world, education is at the root of all needs. This provides an opportunity for in-house developers and freelancers alike.
But, before you go all out to create a learning management system (LMS) of your own, it’s important to map out the steps for a successful process and launch.
What is an LMS?
Learning management systems are part educational and part analytical. They are digital learning hubs that provide the means to teach, train, and test. But, they also provide educators with the methods to track and analyze user data and connect with their audience. These platforms are used to some extent by government organizations, employers, and educators throughout the world to provide access to education and training.
If you’re considering LMS development, now is an ideal time to jump on this bandwagon. There is no expectation that this platform will lose its relevance any time soon.
However, if you want to do it successfully, you need a plan for success.
Sailing Through the Development Process in 7 Easy Steps
Every application development process is individual. Some of us are great collaborators while others work better in isolation. Regardless of the size of your team or the type of application, this set of standard best practices will provide you with a framework for success.
1. Create a Budget
Before you do anything else, you need to get an accurate handle on available resources and budget shortfalls moving forward. Will you need to outsource portions of your app build or purchase new software? How will you manage the launch, and how much money should you budget toward marketing?
The answers to these questions will give you a good idea of how much you have to work with, where you’ll need additional funding and the best ways to allocate these resources.
Do you know how much it will cost to develop your application? Some estimates put that figure at about $80,000 for a native mobile app with wide distribution, while a web-based eLearning platform can run as little as $1,000 from concept to launch.
Your goals, purpose, and reach will ultimately determine the cost, but don’t try to skimp on design, security, or functionality if you want your app to be successful and perform as intended. One useful tool for budgeting and cost is an app calculator.
2. Put Your Team Together
Even those developers who code alone in a rarefied environment rely on a team at some point. For example, not all developers are great with front-end design, and few of us are marketing geniuses.
Solid app development depends on talent, and no developer is an island. The bigger the app and launch, the more people will be required to contribute to its success.
If you’re working within an organization to create a training app, many of your team members are already in place. However, you may still need to designate an eLearning specialist to create the curriculum, a marketing expert to promote the app, an L&D administrator to ensure that all components match your mission, and a project manager to track and manage all of the many moving parts. Unless you’re doing all of the codings yourself, you’ll also need an IT team to handle the actual design and build.
3. Determine the Scope and Goals
The scale of your budget and team will depend partially on the expected scope and reach of your application. Are you building an in-house app for staff onboarding purposes or a learning system that’s intended for wide distribution over a number of platforms and organizations? What is the purpose of your app, and who are its ideal users? Design with these metrics in mind.
It’s also important to set up a realistic timeline for each phase. For example, what percentage of the app will be completed within six weeks, what is your launch deadline, and how does the timeline breakdown affect your build?
4. Design With Security in Mind
DevSecOps are no longer a niche specialty. Remote environments mean a wider threat matrix and more possible entry points for cybercriminals. Every developer and web designer should build security into the application.
In addition to secure coding, use whatever developer tools are available to ensure that your build puts data security analysis a priority at every phase of the app creation.
5. Have Some Content Ready for Rollout
Once your app is built, the content will be the single most important component of its success. You don’t want to wait until launch to develop a curriculum or fill in any blanks with rushed content.
Many of these questions will be answered when you determine the scope and goal of your LMS, but you’ll need to have at least the bare bones of your content ready before you roll out your app. Any details can be tweaked during the testing phase to ensure that the bulk of your content is in place before you launch.
6. Determine a Platform
Chances are that your app will require more resources to scale and run securely than the average hobby blog. The platform will affect access and your ability to ramp up operations. Large organizations will probably have private servers, hybrid cloud setups, and more resources than a freelance developer or a small business.
Whether your LMS is an upgrade with legacy data to migrate or a completely new platform will also affect things like database support and access as well as security. You’ll most likely need to store user data and provide different levels of access to admins, instructors, and students or staff.
7. Build Interest and Excitement
Unless your LMS is a required part of staff training, you’ll want to build excitement and interest leading up to your launch. Creating a marketing and information plan through a subscriber list and social media engagement are standard marketing in the information age.
You could also create a free trial phase so your target audience can test out your app. This will hopefully create some buzz and provide social proof that can be leveraged for marketing purposes.
Successful Testing and Launch
For an app to be successful, it needs to be tested thoroughly prior to launch. There are two types of testing that are essential.
The first is pen testing to ensure that your app is secure at all access points and databases. Current best practices mandate that apps are designed with security in mind rather than taking this as an afterthought. This is where developer tools and platforms that provide a live staging area will come in handy.
The second type of testing is A/B testing. This is an essential part of digital marketing that is often overlooked. In order for your app to be functional and reach the target market, all design elements must be evaluated by actual users.
Why is that?
For one thing, you want your application to be useful and functional. Second, search engines evaluate websites by the quality of user experience. You can’t just rely on SEO to reach your intended audience. If your app is slow to load, difficult to navigate, or there is no value to its content, you’re wasting your time and the user’s.
Final Thoughts
While eLearning has become increasingly popular over the past few years, current circumstances make learning management systems an essential platform for organizations of all types. Whether you’re onboarding staff, retraining for a remote environment, or trying to prevent educational gaps for your students, an LMS is a way to go.
Our goal is to provide developers and business leaders with a road map for success. By following the above guidelines and best practices, you’ll help ensure a smooth development process from conception to launch.
Close to two billion people shopped online last year. And with the pandemic quickly changing shopping habits, the number is set to increase even more in 2021 and beyond.
Because of that, it’s not surprising that online sales are booming and that as many as 24 million eCommerce stores are operating right now.
But at the same time, it means that companies have a harder time standing out. And that can have an impact on the value of the business and its ability to grow consistently.
And the biggest problem most online stores face is not a lack of marketing channels. Instead, it’s usually poor business practices that make the store very hard to sell.
So, if you’re thinking, “how to sell my website?”, you will need to know where to find the right buyers and also how to make your website more appealing. Looking at other websites for sale can help you gain a better understanding of how successful sites look at first glance, but it’s equally important how the online store is structured from the business side.
And that means you should not only focus on the marketing side but also make sure that you implement the best practices of running an online business that will make it truly sustainable in the long term.
Let’s explore some of the key strategies you should consider below.
Create a Technical Document Knowledge Base
Managing and working with documents is an inseparable part of running a business, both online and offline. Whether you’re running a software solution, an eCommerce store, or any other type of business, you will need to find a way to handle documents while also keeping them secure.
These tools can help store and securely access a wide variety of documents, especially technical resources such as source code, which must be protected.
But what should you look for in a good solution?
Well, one of the key considerations is access control. You want your team to be able to retrieve the documents they need quickly. Still, there also have to be security features that prevent unauthorized access and allow tracking of any changes to the documents.
Since documents will likely be edited and worked on, the interface needs to be convenient as well. It should provide intuitive and comprehensive writing and editing experience for your team and include features they need to work efficiently.
Finally, depending on your team’s size, you will also need to consider which pricing plan will work best in your situation. Some solutions offer per-user pricing, which can quickly add up if you have a large team that needs access.
Most companies believe that their customer data is secure and that what they’re doing is enough. Up to the point that it isn’t. And then, these companies are forced to deal with the aftermath of situations like these, which can forever damage a company’s reputation.
But the good news is that if you take an honest and proactive approach, you can minimize the risks associated with data security and privacy, which your customers will surely appreciate.
The first step of keeping hackers at bay is regularly updating the tools and software you might be using. And at the same time, carefully evaluating the provider’s reputation and whether you can trust them to store your customer data.
You should also consider using a dedicated server that’s used by your business only. Many companies also use advanced encryption for adding an extra layer of protection for sensitive data.
Simultaneously, you should implement the best cybersecurity practices and educate your employees on the critical steps they should follow when handling data or accessing documents.
Protecting data is a process that takes time and effort, but as you become more familiar with what it takes and offer adequate protection to your data, your customers will start to appreciate that as one of the key benefits of working with you.
Use Data to Make Informed Decisions
Today’s companies have access to more data than ever before. And while that offers tremendous potential, that data will only be useful if you actually use it and apply the insights you gain to running the business.
That’s why employing a data-driven decision-making process can be one of the biggest difference-makers for your business.
Instead of making decisions based on intuition or subjective experiences, you can look at any problem from a data-based perspective, analyze similar situations in the past, and determine the outcomes that are the most likely to generate the desired result.
For instance, if you want to promote a new product, you could analyze data from previous launches and identify what worked best and which strategies didn’t produce the necessary outcomes.
Then, you could focus the majority of your efforts on the most promising approaches, maximizing your resources and increasing the likelihood of success.
As you collect more data and follow a data-driven approach, your team will start adopting it as well, which will dramatically increase the success rate in most situations.
Listen to Your Customers
As a business, your success is largely dependent on your ability to engage and convert your audience. While that sounds simple enough, many companies are afraid to reach out and communicate with their customers. Instead, they’re trying to guess what they prefer and basically operate in the dark.
Many aren’t sure how to establish a connection to their audience, with most insights being limited to support queries and online reviews.
However, there are plenty of opportunities for learning more about your customers, no matter the size of your business.
One of the most effective ways to learn more about your audience’s needs is to sit down and talk with your best customers in an interview. Sure, organizing a customer interview takes effort, but there probably isn’t a better way to gain direct insights about what they want, why they chose to work with you, and what you could do better.
Additionally, surveys or even on-site polls can be a great supplementary strategy that helps answer specific questions or learn more about who the people on the other side of the screen might be.
If you have a social media presence, you should also try to be more engaged in the conversations that your followers are having. By responding to comments, trying to solve problems, and even encouraging conversations through posts, you can not only gain insights but also showcase a more human side of your company.
Final Words
Running a successful online business takes more than just attracting new customers; you must also know how to run the business side if you want your business to be successful and appealing to buyers if you decide to sell down the road.
With the strategies listed above, you will be setting your business up for long-term success and mitigating some of the biggest risks faced by online businesses today.
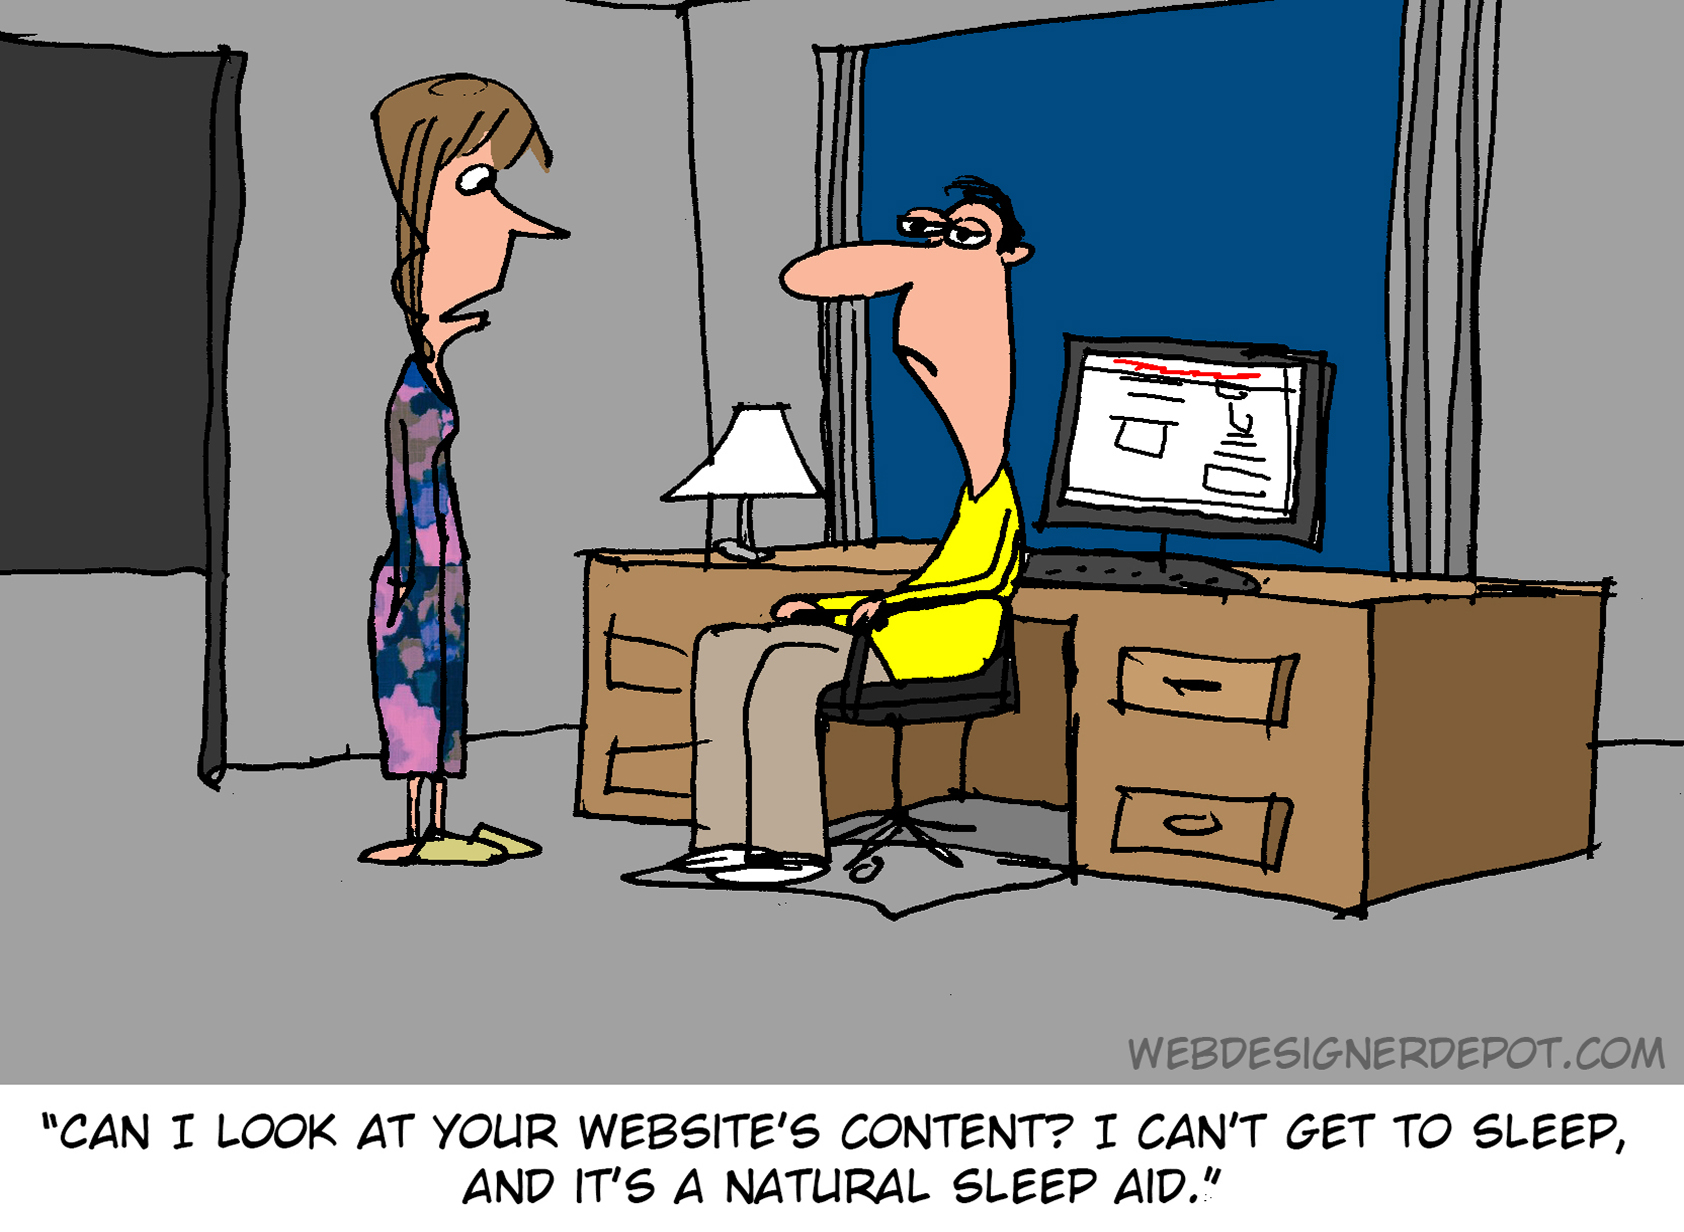
Every month we feature a set of comics created exclusively for WDD.
The content revolves around web design, blogging and funny situations that we encounter in our daily lives as designers.
These great cartoons are created by Jerry King, an award-winning cartoonist who’s one of the most published, prolific and versatile cartoonists in the world today.
So for a few moments, take a break from your daily routine, have a laugh and enjoy these funny cartoons!