Website engagement hacks help a great deal in engaging users and increasing conversions. The strategies to improve online engagement include many different activities that can have a positive result on the overall user experience of your website.
Metrics To Track User Engagement
(source: Pixabay)
There are multiple metrics that can help to measure engagement. Here are few of the most important ones:
1. Bounce Rate:
This metric defines how many users leave the website without interacting with it. The lower the bounce rate, the more engaging your site is. If you have a very high bounce rate maybe people cannot find what they were looking for on your website or they might find better information somewhere else so they leave immediately.
2. Time On Website:
This metric shows how long users stay on your website. It’s crucial because if people spend lots of time on your site, it means there are relevant contents and things to learn from it. Tracking this metric will help you engage visitors better by understanding what kinds of content they appreciate most.
3. Returning Visitors:
This metric represents people who come back to your website and browse it again. Website engagement strategies include tools that help you to better engage returning visitors and that encourage them even more for next visits.
What is website engagement?
Website engagement usually refers to the process of encouraging users’ engagement with contents on a web page, such as by adding social media buttons or displaying comments sections on blog posts.
Website engagement can also refer to encouraging user interaction with other parts of the website through features like quizzes or surveys.
Top Website Engagement Hacks You Should Know
So, let us explore 10 Website Engagement Hacks to use today:
1. Add Social Media Buttons To Your Website
(Source: Pixabay)
Social media buttons are the easiest way for users to share your content with their network or follow you on social media platforms. Once you have noticed an increase in traffic from these shares, consider offering something special only to those who followed through the links provided by you.
This could be a discount code, free premium access, or a simple invitation to give feedback about the site’s features. Remember that sharing is not going to influence anything unless users feel rewarded for it.
2. Website Popups
Website popups are one of the most known ways to improve your site’s conversions. Website popup example that evokes curiosity, can be used in re-engagement efforts or help with boosting sales by offering alternative payment options (for instance customers who did not pay using PayPal could get the option to pay using a credit card).
Website popups should be subtle and short enough to leave visitors no other choice but to interact if they want to exit the page. Website popup examples like this one work because you don’t need more than 10 seconds’ worth of attention span from users while providing useful information at the same time (such as coupons, marketing campaigns, etc.).
3. Make Your Website Responsive
(source: Pixabay)
Having a responsive website can help you to engage more customers. Website responsiveness is especially important for e-commerce websites since users are expecting the same experience everywhere they are browsing or shopping online.
Make sure your site responds nicely on different devices so avoid building one website version for every device, instead focus on providing tablets and mobile users with simplified interface options that will improve their browsing experience.
Website responsiveness examples like this one include offering a single version of content that is easily readable on all devices. A responsive website makes it accessible to a larger audience.
4. Website Countdown Timers
Website countdown timers have shown to be effective at increasing conversions during sale events by encouraging visitors to buy before time runs out.
Website countdown timers can also be used as re-engagement efforts – for instance, if there is some promotion running only for the next 48 hours you could include a counter on your website with this information in order to encourage users to act before it’s too late.
Website countdown timers offer serious motivation in taking action fast in order to get an attractive discount or benefit upfront.
5. Website Scrolling Mechanic
Website scrolling mechanics are helpful for showing additional content based on the user’s behavior and preferences, these usually appear right after first landing on a certain web page and can be used as re-engagement efforts (for instance showcasing free premium content if the first 3 articles were read by visitors).
Website scrolling provides further insight into customers’ browsing behavior and allows marketers to identify what exactly needs to be improved so that more customers would convert.
6. Website Reviews
Website reviews are one of the most popular ways for marketers to understand their targets’ needs and interests, website reviews can be either product or service related, but they are definitely one of the best re-engagement efforts these days – especially if they are coming from people who have shown some interest in your brand online.
Website review shows trustworthiness to website visitors by showing targeted testimonials straight from people who were actually using services provided by you.
7. Include Video Tutorials On Your Website
(Source: Pixabay)
As video content is very engaging (users love videos nowadays) it would only make sense to include them on your website in order to engage more users and increase conversions at the same time.
User-friendly video tutorials are especially important for website usability since there is no better way of guiding your customers to use your website or services.
Website videos help visitors a visual guide to using the site, by breaking down things into easier steps and it’s always better than written instructions that are hard to follow.
8. Website Navigation & Flow Improvement
Website navigation improvement is all about customer-focused experience which can significantly increase conversions if handled carefully. Website navigation is an often overlooked part of every website design process that needs constant adjustments in order to match business objectives with customer expectations.
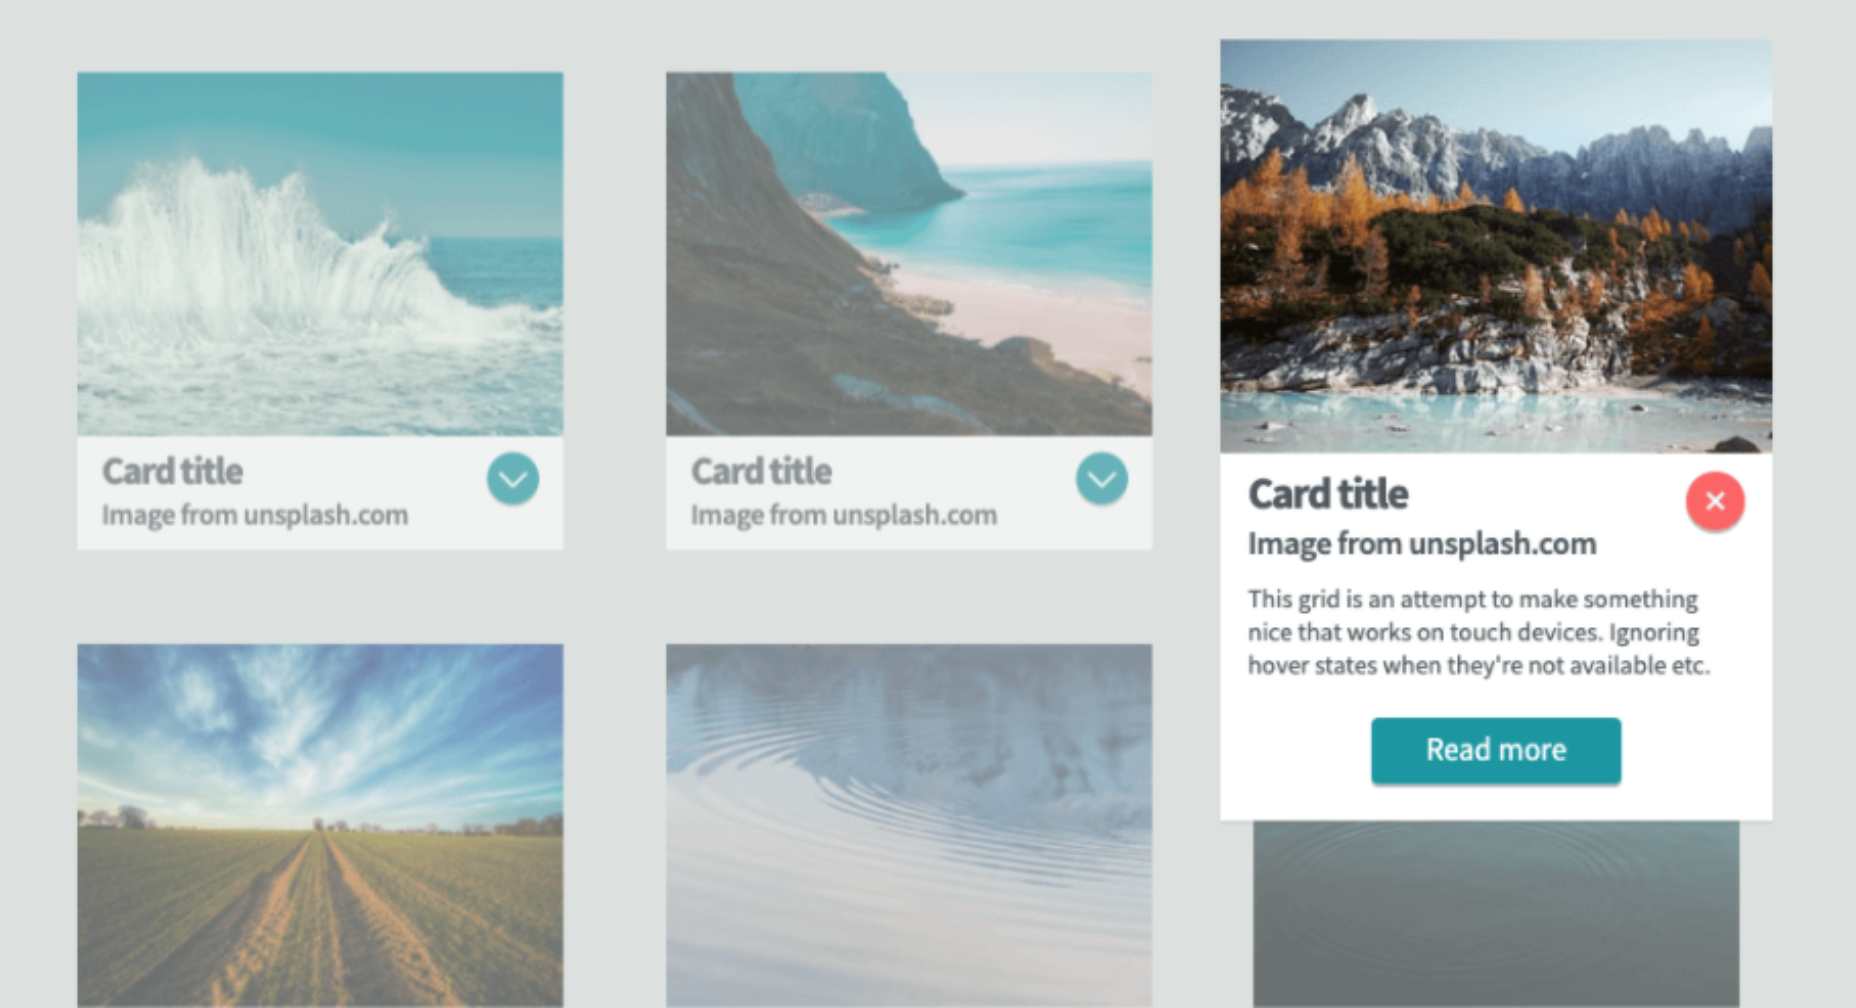
Website navigation example with color coding helps users understand where they are on the web page, what other options are available and how to return back easily if needed.
Website flow improvement is all about creating a smooth browsing experience for your visitors and it’s especially important when trying to increase conversions.
Website flow improvement (including quick and easy registration and checkout process) can help you make the website buying process as fast as possible which increases conversion rates without actually annoying users with troublesome sign-up procedures.
9. Product Screenshots
Product screenshots are helpful in providing additional information to certain web pages. They usually appear on the home page, feature pages, or product detail pages.
Product screenshots offer clear insight into a company’s credibility by showing real-world numbers that definitely improve website trustworthiness and show true popularity of certain brands online.
10. Include FAQs
Website FAQ (Frequently Asked Questions) is another way of engaging users on a website. Website FAQs are helpful for improving website navigation and user experience since they provide answers to the question that visitors might have about a specific web page or product.
The FAQ’s section helps customers understand what you offer without forcing them to go through the entire web page every time they visit your site.
What is Your Favourite Hack?
We have explained some of the best hacks to improve website engagement that can give you better metrics and business revenues.
Now it’s your turn to implement these tips on your website or online store to grow your business. Let us know in the comments below how these hacks have helped in meeting your goals.
With all the marketing aplomb of basement-coders worldwide, NFTs were named with an acronym that does little to clarify their utility.
You probably know by now that NFT stands for Non-Fungible Token; what is perhaps less clear is what “Fungible” actually means; in this context, it means interchangeable.
Consider an ounce of platinum. That platinum is fungible, meaning it can be exchanged for any other ounce of platinum. Now consider a piece of jewelry made from one ounce of platinum. That jewelry is not interchangeable with any other ounce of platinum; it has the same core materials, but it has unique characteristics that may be artistically valuable, such as shape, or craft. The jewelry is non-fungible.
The letter that actually matters in NFT is T for Token. Tokens are little chunks of a blockchain that is a universally agreed dataset. You don’t need to know how it works any more than you need to understand how a computer processor works; you just need to know it’s in there.
Like any new technology, NFTs are surrounded by propaganda, counter-propaganda, skepticism, evangelism, and Facebook-confusion. In this post, we’ll look at some of the common misconceptions so you can develop an informed opinion.
1. NFTs Are Bad For The Environment
We’ll tackle this one first because it’s the classic argument leveled against anything in the crypto-space, whether Bitcoin or NFTs, and it’s nonsensical.
The root of this myth is that cryptocurrency transactions use vast amounts of electricity, the generation of which is terrible for the environment. The answer is threefold:
Firstly, electricity is used to run computers that maintain a blockchain, such as Ethereum. The blockchain is maintained whether NFTs are minted (registered) or not.
Secondly, NFTs tend to be minted on blockchains like Ethereum that are moving to less resource-intensive models, blockchains like Solana that already have less resource-intensive models, or blockchains like Algorand that are already carbon-neutral.
Lastly, the fact is that electricity is not inherently planet-killing. Renewables like solar and wind are perfectly capable of powering the grid; it’s just that power companies make higher profits by burning fossil fuels. That swanky new electric car you’ve bought so you can drive guilt-free is fuelled with fossil fuels on the power company’s end (and that’s before you consider the damage done getting those minerals out of the ground).
Until the computer you’re using is solar-powered, repairable, and upgradable, anything digital is terrible for the environment; NFTs are as bad, but no more so, than anything digital.
2. NFTs Are Just [Insert Patronizing Economic Metaphor Here]
NFTs, and crypto in general, are frequently referred to as a Ponzi Scheme. In the 1920s, Charles Ponzi duped investors into handing over cash. Returns were paid to early investors with the income from new investors. Early investors made a lot of money, and later investors lost everything.
One of the key characteristics of a Ponzi Scheme is that it’s a confidence trick that presents itself as low-risk. NFTs as an investment are widely understood to be high-risk. Calling NFTs a Ponzi Scheme is an excellent way of letting people know you don’t know what a Ponzi Scheme is.
In the 17th century, the price of tulip bulbs reached astronomical proportions. The Dutch tulip trade was a complex economic investment system that eventually collapsed, thanks in part to a global pandemic. Ever since, Tulpenmanie (Tulip Mania, in English) has been a byword for an economic bubble.
NFTs are frequently linked to Tulip Mania, thanks partly to the prices and the expectation (or hope) that the market will collapse. However, if you drive through the Netherlands today, you’ll see vast fields of tulips. They’re not being grown because they’re worthless.
While demand may fluctuate, it doesn’t fluctuate as much as media hysteria implies. And ultimately, tulips are nice.
3. You Can Buy And Sell NFTs
This is where pedantry plays a role. You cannot buy and sell NFTs; NFTs are the vehicle by which you conduct transactions for digital (or, in some cases, physical) goods and services.
If you have software installed on your computer, you probably have a license key. The license key identifies you as holding certain rights over that software, such as being allowed to use it to produce digital goods of your own. The license key is how the company identifies you as the individual to whom it has sold those rights.
NFTs are license keys for digital goods that are recorded on a blockchain instead of being held in a single database.
4. NFTs Can Be Easily Copied
When I was a kid in the 90s, I would record music off the radio with a tape player. I’d make mix-tapes and give them away. I was, in every literal sense, pirating music. And it wasn’t just me; home-taping kept the cassette industry going for decades past its use-by date. Despite this, the music industry did not collapse.
Art is even easier to copy than music because there’s no risk of a vapid DJ wittering over the intro to I Wanna Be Adored.
On my morning commute, I pass a shop that sells art prints. Around 80% are screen prints of Marilyn Monroe. They are original prints made by an artist and sold for not inconsiderable amounts. Not one of those pieces diminishes the quality, importance, or financial value of Andy Warhol’s Marilyn Monroe prints in New York’s MoMA.
The difference is that MoMA’s Warhols have provenance — they can be tracked to a time and place and authenticated as by Warhol. Precisely the same provenance that NFTs provide digital artists.
5. You Can Get Rich From NFTs
Earning money, potentially a vast amount of money, is one of the main driving factors behind the boom in NFTs.
But the truth is that while it is possible to make a lot of money — some NFTs sell for millions of dollars — most NFTs sell for a modest amount.
If you are an accomplished artist with original ideas, you may make money from selling your art as NFTs. If you are an accomplished trader capable of recognizing quality, you may make money from buying and selling NFTs. However, very few people get rich.
6. NFT Resale Rights Undermine Value
NFTs have many potential uses, but the earliest adoption has been in digital art. The main economic benefit to artists is not just an easy way to sell their art but a widely accepted royalty system in which the original artist receives a commission every time the artwork is resold. It represents the ongoing investment the artist is making by continuing to produce and promote their work.
It might seem a strange way to approach ownership, but resale rights are not new in the art world. In the EU and the UK, the resale rights of artists are legally recognized. In France, the legal rights of the artist or the artist’s descendants to be compensated from the sale of artwork have been established in law for over a century.
Despite high-profile artists like Robert Rauschenberg fighting for resale rights, and legislation in New York and California supporting the concept, resale rights are still not recognized in the US.
NFTs introduce a fairer system that grants the same rights to all artists, that Europeans already enjoy.
7. NFTs Are Worthless
Anything with value, whether physical currency, NFTs, or a block of wood, only has value because two or more people agree it has value.
The most expensive baseball card in the world is reportedly a mint-condition Honus Wagner, priced at $3m. It might be hard to understand why anyone would pay $3m for a piece of cardboard with an image of a 1950s sportsman on it, but apparently, someone would.
All goods, all the things we spend money on, are worth what we agree they are worth. To me, a tulip bulb is worth more than a baseball card, but who knows, perhaps you don’t like tulips.
There are plenty of flaws in the systems that use NFTs, and there are plenty of detractors, but if you want to create and sell artwork and someone wants to buy it from you, NFTs are an excellent way of facilitating that transaction.
Have you ever wondered why users do not complete certain actions on your website or why you don’t see enough conversions? The reason might be a need for a website redesign – or a poorly designed user journey.
A user journey maps out all steps that a user takes when interacting with your software product. Its ultimate goal is to naturally lead the user towards completing a certain goal and this is why the user journey design is so important. Unfortunately, many business owners do not take it seriously enough which results in low conversions and low user engagement. So how do you craft an engaging and intuitive user journey? This article aims to shed light on the issue.
What exactly is a user journey and why does it matter so much?
As already stated, a user journey is a path that a user takes when interacting with a product in order to reach a specific goal. This process starts from the first point of interaction (i.e. launching an app) and includes all actions that a user performs (browsing, interacting, selecting categories, etc.) until the goal is complete.
Think of a user journey as a map that shows how exactly a user behaves when interacting with a product. Of course, you can never predict one’s behavior with 100% accuracy but by studying your target audience, you can get a pretty solid understanding of what your users want and how they expect to achieve it.
So why is user journey design so important? Here are the core reasons:
A good user journey boosts user experience: if a product has intuitive navigation and does not cause any confusion, users will most likely become more interested and engaged. This, in turn, promotes conversions as they’ll be more motivated to complete them.
A detailed user journey uncovers any blind spots: it may reveal some weak areas in your app’s design that you have not noticed before.
A user journey helps make the app’s design more interactive: for example, by knowing the main touchpoints, you can adjust the design correspondingly.
The main components of a user journey
One of the biggest misconceptions that one can make about a user journey is that it consists of user actions only. This misconception, in turn, leads to poorly designed user journeys that users do not wish to follow.
The first step in creating an intuitive and user-friendly user journey is listing down and understanding its main components. They are:
Your buying persona or your target audience: who is the person that you target?
User interaction: are you mapping out a real or an anticipated interaction?
Journey stages: what steps/stages does a user go through until the goal is reached?
Emotions and thoughts: what emotions does a user feel at each stage of the journey?
Touchpoints: what are the main points of interaction between a user and a product?
Yes, all these things need to be considered when creating a detailed and efficient user journey. Now, let’s dissect the process step by step.
The process of creating a user journey
When you approach a user journey design without a thorough plan, chances are high the user journey will make users stumble on their way. Hence, it is vital to follow the steps that we listed below to make sure you covered all aspects of the user journey creation.
Set your primary goal
The first thing that you need to think about is the goal that you want to achieve. It may be a bigger number of conversions, better user engagement, or an increased number of product downloads. Whatever your goal is, it will be your base for outlining a user journey and you will be building the touchpoints around this goal.
Define your target audience
The next step to take is to actually define who your audience is. Here is where you might face some hidden rocks.
The thing is, you might be having several target audiences and that’s completely fine. Note though, that every target group will need its own unique user journey so make sure to invest time and resources into designing them.
Once you determine whether you want to build a user journey for one or several user groups, you’ll need to create a comprehensive profile of your perfect user. We highly recommend not to rely on your intuition solely and to question real users instead. In this way, you’ll get a solid understanding of their online behavior, their most acute needs, things that motivate them to continue the interaction, and things that set them off.
Define user goals, expectations, and pain points
After you understand who your target users are, it’s time to define what they want from your product, what they expect from it, and what problem the product can help them solve. You will use these findings as a base to make the journey from point A to point B as smooth as possible while also paying attention to users’ emotions during the process. This leads us to the next point.
Identify users’ emotions
Throughout the interaction with your product, users feel a range of emotions, from excitement to frustration. Your task here is to identify (and partially predict), what kind of emotion each step of the user journey evokes.
For example, if your current user journey is not user-friendly and causes confusion, it will leave users frustrated and even angry, thus decreasing their motivation to complete a conversion. By knowing what emotions the stages of a user journey cause, you will be able to adjust these stages and improve the overall experience.
Identify touchpoints
Touchpoints are the points of interaction between a user and your product. Examples include:
As you see, in all these examples a user somehow interacts with your business and gets something in return. Touchpoints play a major role in leading a user towards completing a conversion, so you need to list down all touchpoints in your user journey and analyze how users actually interact with them. Do they interact with all touchpoints and if not, then what might be the reason?
Identify the steps that a user takes
When users interact with your product, they perform a sequence of certain tasks, for example:
Find (they come across your product for the first time)
Explore (users browse your product and check the available features)
Use (they make a decision and proceed to make a conversion)
Follow-up (users leave their feedback on the product).
This is a very simplistic outline of a possible list of user actions but it gives a good idea about the way a user starts and finishes using the product. By knowing these actions, you can correlate them with the following points:
Doing: what does a user do during each step, i.e. during the “find” stage?
Thinking: what does a user think about? It may be “I need to order lunch from the nearest restaurant”, meaning, you need to analyze what kind of an objective a user sets.
Feeling: this directly relates to the emotions that we talked about earlier.
Touchpoints: identify touchpoints that are available to a user at a certain step, i.e. during the “explore” stage.
Opportunities: what kind of opportunities does your product offer to the current user needs? I.e., during the “explore” stage, how can your UI convince the user to proceed?
This may sound overwhelming and it’s not obligatory to perform such deep analysis but it will undoubtedly help you better understand your target audience and how to fulfill their needs in the most effective manner.
Tips to enhance your user journey
To sum up, here are several tips that can help you improve your current or future user journey and ensure users complete it without skipping any steps:
Define and outline all possible obstacles that prevent users from completing a journey and/or interacting with touchpoints;
Define KPIs to achieve: a certain percentage of conversions or a certain number of sales;
Take the journey yourself and see whether it’s as smooth as you think and whether the website design supports it;
Choose the user journey map format that suits your company the best.
And don’t forget to constantly test your ideas with real users and collect their feedback. Last but not least: remember that a user journey is not a constant but rather something that is changing so you’ll need to review it from time to time, especially as your product grows and evolves.
Every day design fans submit incredible industry stories to our sister-site, Webdesigner News. Our colleagues sift through it, selecting the very best stories from the design, UX, tech, and development worlds and posting them live on the site.
The best way to keep up with the most important stories for web professionals is to subscribe to Webdesigner News or check out the site regularly. However, in case you missed a day this week, here’s a handy compilation of the top curated stories from the last seven days. Enjoy!”
Being able to understand Node continues to be an important skill if you’re a front-end developer. Deno has arrived as another way to run JavaScript outside the browser, but the huge ecosystem of tools and software built with Node mean it’s not going anywhere anytime soon.
If you’ve mainly written JavaScript that runs in the browser and you’re looking to get more of an understanding of the server side, many articles will tell you that Node JavaScript is a great way to write server-side code and capitalize on your JavaScript experience.
I agree, but there are a lot of challenges jumping into Node.js, even if you’re experienced at authoring client-side JavaScript. This article assumes you’ve got Node installed, and you’ve used it to build front-end apps, but want to write your own APIs and tools using Node.
For a beginners explanation of Node and npm you can check out Jamie Corkhill’s “Getting Started With Node” on Smashing Magazine.
Asynchronous JavaScript
We don’t need to write a whole lot of asynchronous code on the browser. The most common usage of asynchronous code on the browser is fetching data from an API using fetch (or XMLHttpRequest if you’re old-school). Other uses of async code might include using setInterval, setTimeout, or responding to user input events, but we can get pretty far writing JavaScript UI without being asynchronous JavaScript geniuses.
If you’re using Node, you will nearly always be writing asynchronous code. From the beginning, Node has been built to leverage a single-threaded event loop using asynchronous callbacks. The Node team blogged in 2011 about how “Node.js promotes an asynchronous coding style from the ground up.” In Ryan Dahl’s talk announcing Node.js in 2009, he talks about the performance benefits of doubling down on asynchronous JavaScript.
The asynchronous-first style is part of the reason Node gained popularity over other attempts at server-side JavaScript implementations such as Netscape’s application servers or Narwhal. However, being forced to write asynchronous JavaScript might cause friction if you aren’t ready for it.
Setting up an example
Let’s say we’re writing a quiz app. We’re going to allow users to build quizes out of multichoice questions to test their friends’ knowledge. You can find a more complete version of what we’ll build at this GitHub repo. You could also clone the entire front-end and back-end to see how it all fits together, or you can take a look at this CodeSandbox (run npm run start to fire it up) and get an idea of what we’re making from there.
The quizzes in our app will consist of a bunch of questions, and each of these questions will have a number of answers to choose from, with only one answer being correct.
We can hold this data in an SQLite database. Our database will contain:
A table for quizzes with two columns:
an integer ID
a text title
A table for questions with three columns:
an integer ID
body text
An integer reference matching the ID of the quiz each question belongs to
A table for answers with four columns:
an integer ID
body text
whether the answer is correct or not
an integer reference matching the ID of the question each answer belongs to
SQLite doesn’t have a boolean data type, so we can hold whether an answer is correct in an integer where 0 is false and 1 is true.
First, we’ll need to initialize npm and install the sqlite3 npm package from the command line:
npm init -y
npm install sqlite3
This will create a package.json file. Let’s edit it and add:
"type":"module"
To the top-level JSON object. This will allow us to use modern ES6 module syntax. Now we can create a node script to set up our tables. Let’s call our script migrate.js.
// migrate.js

import sqlite3 from "sqlite3";

let db = new sqlite3.Database("quiz.db");
    db.serialize(function () {
      // Setting up our tables:
      db.run("CREATE TABLE quiz (quizid INTEGER PRIMARY KEY, title TEXT)");
      db.run("CREATE TABLE question (questionid INTEGER PRIMARY KEY, body TEXT, questionquiz INTEGER, FOREIGN KEY(questionquiz) REFERENCES quiz(quizid))");
      db.run("CREATE TABLE answer (answerid INTEGER PRIMARY KEY, body TEXT, iscorrect INTEGER, answerquestion INTEGER, FOREIGN KEY(answerquestion) REFERENCES question(questionid))");
      // Create a quiz with an id of 0 and a title "my quiz"
      db.run("INSERT INTO quiz VALUES(0,"my quiz")");
      // Create a question with an id of 0, a question body
      // and a link to the quiz using the id 0
      db.run("INSERT INTO question VALUES(0,"What is the capital of France?", 0)");
      // Create four answers with unique ids, answer bodies, an integer for whether
      // they're correct or not, and a link to the first question using the id 0
      db.run("INSERT INTO answer VALUES(0,"Madrid",0, 0)");
      db.run("INSERT INTO answer VALUES(1,"Paris",1, 0)");
      db.run("INSERT INTO answer VALUES(2,"London",0, 0)");
      db.run("INSERT INTO answer VALUES(3,"Amsterdam",0, 0)");
  });
db.close();
I’m not going to explain this code in detail, but it creates the tables we need to hold our data. It will also create a quiz, a question, and four answers, and store all of this in a file called quiz.db. After saving this file, we can run our script from the command line using this command:
node migrate.js
If you like, you can open the database file using a tool like DB Browser for SQLite to double check that the data has been created.
Changing the way you write JavaScript
Let’s write some code to query the data we’ve created.
Create a new file and call it index.js .To access our database, we can import sqlite3, create a new sqlite3.Database, and pass the database file path as an argument. On this database object, we can call the get function, passing in an SQL string to select our quiz and a callback that will log the result:
// index.js
import sqlite3 from "sqlite3";

let db = new sqlite3.Database("quiz.db");

db.get(`SELECT * FROM quiz WHERE quizid  = 0`, (err, row) => {
  if (err) {
    console.error(err.message);
  }
  console.log(row);
  db.close();
});
Running this should print { quizid: 0, title: 'my quiz' } in the console.
How not to use callbacks
Now let’s wrap this code in a function where we can pass the ID in as an argument; we want to access any quiz by its ID. This function will return the database row object we get from db.
Here’s where we start running into trouble. We can’t simply return the object inside of the callback we pass to db and walk away. This won’t change what our outer function returns. Instead, you might think we can create a variable (let’s call it result) in the outer function and reassign this variable in the callback. Here is how we might attempt this:
// index.js
// Be warned! This code contains BUGS
import sqlite3 from "sqlite3";

function getQuiz(id) {
  let db = new sqlite3.Database("quiz.db");
  let result;
  db.get(`SELECT * FROM quiz WHERE quizid  = ?`, [id], (err, row) => {
    if (err) {
      return console.error(err.message);
    }
    db.close();
    result = row;
  });
  return result;
}
console.log(getQuiz(0));
If you run this code, the console log will print out undefined! What happened?
We’ve run into a disconnect between how we expect JavaScript to run (top to bottom), and how asynchronous callbacks run. The getQuiz function in the above example runs like this:
We declare the result variable with let result;. We haven’t assigned anything to this variable so its value is undefined.
We call the db.get() function. We pass it an SQL string, the ID, and a callback. But our callback won’t run yet! Instead, the SQLite package starts a task in the background to read from the quiz.db file. Reading from the file system takes a relatively long time, so this API lets our user code move to the next line while Node.js reads from the disk in the background.
Our function returns result. As our callback hasn’t run yet, result still holds a value of undefined.
SQLite finishes reading from the file system and runs the callback we passed, closing the database and assigning the row to the result variable. Assigning this variable makes no difference as the function has already returned its result.
Passing in callbacks
How do we fix this? Before 2015, the way to fix this would be to use callbacks. Instead of only passing the quiz ID to our function, we pass the quiz ID and a callback which will receive the row object as an argument.
Here’s how this looks:
// index.js
import sqlite3 from "sqlite3";
function getQuiz(id, callback) {
  let db = new sqlite3.Database("quiz.db");
  db.get(`SELECT * FROM quiz WHERE quizid  = ?`, [id], (err, row) => {
    if (err) {
       console.error(err.message);
    }
    else {
       callback(row);
    }
    db.close();
  });
}
getQuiz(0,(quiz)=>{
  console.log(quiz);
});
That does it. It’s a subtle difference, and one that forces you to change the way your user code looks, but it means now our console.log runs after the query is complete.
Callback hell
But what if we need to do multiple consecutive asynchronous calls? For instance, what if we were trying to find out which quiz an answer belonged to, and we only had the ID of the answer.
First, I’m going to refactor getQuiz to a more general get function, so we can pass in the table and column to query, as well as the ID:
Unfortunately, we are unable to use the (more secure) SQL parameters for parameterizing the table name, so we’re going to switch to using a template string instead. In production code you would need to scrub this string to prevent SQL injection.
function get(params, callback) {
  // In production these strings should be scrubbed to prevent SQL injection
  const { table, column, value } = params;
  let db = new sqlite3.Database("quiz.db");
  db.get(`SELECT * FROM ${table} WHERE ${column} = ${value}`, (err, row) => {
    callback(err, row);
    db.close();
  });
}
Another issue is that there might be an error reading from the database. Our user code will need to know whether each database query has had an error; otherwise it shouldn’t continue querying the data. We’ll use the Node.js convention of passing an error object as the first argument of our callback. Then we can check if there’s an error before moving forward.
Let’s take our answer with an id of 2 and check which quiz it belongs to. Here’s how we can do this with callbacks:
// index.js
import sqlite3 from "sqlite3";

function get(params, callback) {
  // In production these strings should be scrubbed to prevent SQL injection
  const { table, column, value } = params;
  let db = new sqlite3.Database("quiz.db");
  db.get(`SELECT * FROM ${table} WHERE ${column} = ${value}`, (err, row) => {
    callback(err, row);
    db.close();
  });
}

get({ table: "answer", column: "answerid", value: 2 }, (err, answer) => {
  if (err) {
    console.log(err);
  } else {
    get(
      { table: "question", column: "questionid", value: answer.answerquestion },
      (err, question) => {
        if (err) {
          console.log(err);
        } else {
          get(
            { table: "quiz", column: "quizid", value: question.questionquiz },
            (err, quiz) => {
              if (err) {
                console.log(err);
              } else {
                // This is the quiz our answer belongs to
                console.log(quiz);
              }
            }
          );
        }
      }
    );
  }
});
Woah, that’s a lot of nesting! Every time we get an answer back from the database, we have to add two layers of nesting — one to check for an error, and one for the next callback. As we chain more and more asynchronous calls our code gets deeper and deeper.
We could partially prevent this by using named functions instead of anonymous functions, which would keep the nesting lower, but make our code our code less concise. We’d also have to think of names for all of these intermediate functions. Thankfully, promises arrived in Node back in 2015 to help with chained asynchronous calls like this.
Promises
Wrapping asynchronous tasks with promises allows you to prevent a lot of the nesting in the previous example. Rather than having deeper and deeper nested callbacks, we can pass a callback to a Promise’s then function.
First, let’s change our get function so it wraps the database query with a Promise:
// index.js
import sqlite3 from "sqlite3";
function get(params) {
  // In production these strings should be scrubbed to prevent SQL injection
  const { table, column, value } = params;
  let db = new sqlite3.Database("quiz.db");

  return new Promise(function (resolve, reject) {
    db.get(`SELECT * FROM ${table} WHERE ${column} = ${value}`, (err, row) => {
      if (err) {
        return reject(err);
      }
      db.close();
      resolve(row);
    });
  });
}
Now our code to search for which quiz an answer is a part of can look like this:
That’s a much nicer way to handle our asynchronous code. And we no longer have to individually handle errors for each call, but can use the catch function to handle any errors that happen in our chain of functions.
We still need to write a lot of callbacks to get this working. Thankfully, there’s a newer API to help! When Node 7.6.0 was released, it updated its JavaScript engine to V8 5.5 which includes the ability to write ES2017 async/await functions.
When you have a function that returns a Promise, you can use the await keyword before calling it, and it will prevent your code from moving to the next line until the Promise is resolved. As we’ve already refactored the get() function to return a promise, we only need to change our user-code:
This looks much more familiar to code that we’re used to reading. Just this year, Node released top-level await. This means we can make this example even more concise by removing the printQuizFromAnswer() function wrapping our get() function calls.
Now we have concise code that will sequentially perform each of these asynchronous tasks. We would also be able to simultaneously fire off other asynchronous functions (like reading from files, or responding to HTTP requests) while we’re waiting for this code to run. This is the benefit of all the asynchronous style.
As there are so many asynchronous tasks in Node, such as reading from the network or accessing a database or filesystem. It’s especially important to understand these concepts. It also has a bit of a learning curve.
Using SQL to its full potential
There’s an even better way! Instead of having to worry about these asynchronous calls to get each piece of data, we could use SQL to grab all the data we need in one big query. We can do this with an SQL JOIN query:
// index.js
import sqlite3 from "sqlite3";

function quizFromAnswer(answerid, callback) {
  let db = new sqlite3.Database("quiz.db");
  db.get(
    `SELECT *,a.body AS answerbody, ques.body AS questionbody FROM answer a
    INNER JOIN question ques ON a.answerquestion=ques.questionid
    INNER JOIN quiz quiz ON ques.questionquiz = quiz.quizid
    WHERE a.answerid = ?;`,
    [answerid],
    (err, row) => {
      if (err) {
        console.log(err);
      }
      callback(err, row);
      db.close();
    }
  );
}
quizFromAnswer(2, (e, r) => {
  console.log(r);
});
This will return us all the data we need about our answer, question, and quiz in one big object. We’ve also renamed each body column for answers and questions to answerbody and questionbody to differentiate them. As you can see, dropping more logic into the database layer can simplify your JavaScript (as well as possibly improve performance).
If you’re using a relational database like SQLite, then you have a whole other language to learn, with a whole lot of different features that could save time and effort and increase performance. This adds more to the pile of things to learn for writing Node.
Node APIs and conventions
There are a lot of new node APIs to learn when switching from browser code to Node.js.
Any database connections and/or reads of the filesystem use APIs that we don’t have in the browser (yet). We also have new APIs to set up HTTP servers. We can make checks on the operating system using the OS module, and we can encrypt data with the Crypto module. Also, to make an HTTP request from node (something we do in the browser all the time), we don’t have a fetch or XMLHttpRequest function. Instead, we need to import the https module. However, a recent pull request in the node.js repository shows that fetch in node appears to be on the way! There are still many mismatches between browser and Node APIs. This is one of the problems that Deno has set out to solve.
We also need to know about Node conventions, including the package.json file. Most front-end developers will be pretty familiar with this if they’ve used build tools. If you’re looking to publish a library, the part you might not be used to is the main property in the package.json file. This property contains a path that will point to the entry-point of the library.
There are also conventions like error-first callbacks: where a Node API will take a callback which takes an error as the first argument and the result as the second argument. You could see this earlier in our database code and below using the readFile function.
import fs from 'fs';

fs.readFile('myfile.txt', 'utf8' , (err, data) => {
  if (err) {
    console.error(err)
    return
  }
  console.log(data)
})
Different types of modules
Earlier on, I casually instructed you to throw "type":"module" in your package.json file to get the code samples working. When Node was created in 2009, the creators needed a module system, but none existed in the JavaScript specification. They came up with Common.js modules to solve this problem. In 2015, a module spec was introduced to JavaScript, causing Node.js to have a module system that was different from native JavaScript modules. After a herculean effort from the Node team we are now able to use these native JavaScript modules in Node.
Unfortunately, this means a lot of blog posts and resources will be written using the older module system. It also means that many npm packages won’t use native JavaScript modules, and sometimes there will be libraries that use native JavaScript modules in incompatible ways!
Other concerns
There are a few other concerns we need to think about when writing Node. If you’re running a Node server and there is a fatal exception, the server will terminate and will stop responding to any requests. This means if you make a mistake that’s bad enough on a Node server, your app is broken for everyone. This is different from client-side JavaScript where an edge-case that causes a fatal bug is experienced by one user at a time, and that user has the option of refreshing the page.
Security is something we should already be worried about in the front end with cross-site scripting and cross-site request forgery. But a back-end server has a wider surface area for attacks with vulnerabilities including brute force attacks and SQL injection. If you’re storing and accessing people’s information with Node you’ve got a big responsibility to keep their data safe.
Conclusion
Node is a great way to use your JavaScript skills to build servers and command line tools. JavaScript is a user-friendly language we’re used to writing. And Node’s async-first nature means you can smash through concurrent tasks quickly. But there are a lot of new things to learn when getting started. Here are the resources I wish I saw before jumping in:
“Minimum Viable Product,” or “MVP,” is a concept of agile development and business growth. With a minimum viable product, you focus on creating the simplest, most basic version of your product, web application, or code possible.
Minimum viable products include just enough features to attract early adopters and validate your idea in the early stages of the development lifecycle. Choosing an MVP workflow can be particularly valuable in the software environment because it helps teams receive, learn from, and respond to feedback as quickly as possible.
The question is, how exactly do you define the “minimum” in MVP? How do you know if your MVP creation is basic enough while still being “viable”?
Defining the Minimum Viable Product: An Introduction
The concept of “Minimum Viable Product” comes from the Lean Start-up Methodology, introduced byEric Ries. The purpose of MVP is to help companies quickly create versions of a product while collecting validated insights from customers for each iteration. Companies may choose to develop and release minimum viable products because they want to:
Introduce new products into the market as quickly as possible;
Test an idea with real users before committing a large budget to product development;
Create a competitive product with the use of frequent upgrades;
Learn what resonates with the target market of the company;
Explore different versions of the same product.
Aside from allowing your company to validate an idea for a product without building the entire concept from scratch, an MVP can also reduce the demand on a company’s time and resources. This is why so many smaller start-ups with limited budgets use the MVP and lean production strategy to keep costs as low as possible.
Defining an MVP: What your Minimum Viable Product Isn’t
When you’re building a Minimum Viable Product, you’re concentrating on developing only the most “essential” features that need to be in that product. For instance, you might be building a shoppingapp for a website. For the app to be “viable,” it would need to allow customers to search through products and add them to a basket or shopping cart. The app would also need a checkout feature and security components.
However, additional functionality, like the ability to send questions about an item to a customer service team or features that allow clients to add products to a “wish list,” may not be necessary straight away. Part of defining a minimum viable product is understanding what it isn’t. For instance, an MVP is not:
A prototype: Prototypes are often mentioned alongside MVPs because they can help with early-stage product validation. However, prototypes are generally not intended for customers to use. The “minimum” version of a viable product still needs to be developed enough for clients and users to put it to the test and provide feedback.
A minimum marketable product: An MVP is a learning vehicle that allows companies to create various iterations of an item over time. However, a minimum marketable product is a complete item, ready to sell, with features or “selling points” the company can highlight to differentiate the item from the competition.
Proof of concept: This is another similar but distinct idea from MVP. Proof of concept items test an idea you have to determine whether it’s attainable. There usually aren’t any customers involved in this process. Instead, companies create small projects to assess business solutions’ technical capabilities and feasibility. You can sometimes use a proof of concept before moving on to an MVP.
Finding the Minimum in your MVP
When finding the “minimum” in a minimum viable product, the primary challenge is ensuring the right balance. Ideally, you need your MVP to be as essential, cost-effective, and straightforward as possible so that you can create several iterations in a short space of time. The simpler the product, the easier it is to adapt it, roll it out to your customers, and learn from their feedback.
However, developers and business leaders shouldn’t get so caught up focusing on the “Minimum” part of Minimum Viable Product that they forget the central segment: “Viable”; your product still needs to achieve a specific purpose.
So, how do you find the minimum in your MVP?
1. Decide on Your Goal or Purpose
First, you’ll need to determine what your product needs to do to be deemed viable. What goal or target do you hope to achieve with your new product? For instance, in the example we mentioned above, where you’re creating an ecommerce shopping app, the most basic thing the app needs to do is allow customers to shop for and purchase items on a smartphone.
Consider the overall selling point of your product or service and decide what the “nice to haves” are, compared to the essential features. For instance,your AR app needs to allow people to interact with augmented digital content on a smartphone, but it may not need to work with all versions of the latest AR smart glasses.
2. Make a List of Features
Once you know the goal or purpose of your product, the next step is to make a list of features or capabilities you can rank according to importance. You can base your knowledge of what’s “most important” for your customers by looking at things like:
Competitor analysis: What do your competitors already offer in this category, and where are the gaps in their service or product?
User research: Which features or functionalities are most important to your target audience? How can you make your solution stand out from the crowd?
Industry knowledge: As an expert in your industry, you should have some basic understanding of what it will take to make your product “usable.”
3. Create Your Iterations
Once you’ve defined your most important features, the next stage is simply building the simplest version of your product. Build the item according to what you consider to be its most essential features and ask yourself whether it’s serving its purpose.
If your solution seems to be “viable,” you can roll it out to your target audience or a small group of beta testers to get their feedback and validate the offering. Use focus groups and market interviews to collect as much information as possible about what people like or dislike.
Using your feedback, you can begin to implement changes to your “minimum” viable product to add more essential features or functionality.
Understanding the “Minimum Viable Product”
Minimum viable products are evident throughout multiple industries and markets today – particularly in the digitally transforming world. For instance, Amazon might be one of the world’s most popular online marketplaces today, but it didn’t start that way. Instead, Jeff Bezos began purchasing books from distributors and shipping them to customers every time his online store received an order to determine whether the book-selling landscape would work.
When Foursquare first began, it had only one feature. People could check-in at different locations and win badges. The gamification factor was what made people so excited about using the service. Other examples include:
Groupon: Groupon is a pretty huge discount and voucher platform today, operating in companies all around the world. However, it started life as a simple minimum viable product promoting the services of local businesses and offering exclusive deals for a short time. Now Groupon is constantly evolving and updating its offerings.
Airbnb: Beginning with the use of the founders’ own apartment, Airbnb became a unicorn company giving people the opportunity to list places for short-term rental worldwide. The founders rented out their own apartment to determine whether people would consider staying in someone else’s home before eventually expanding.
Facebook: Upon release, Facebook was a simple social media tool used for connecting with friends. Profiles were basic, and all members were students of Harvard University. The idea quickly grew and evolved into a global social network. Facebook continues to learn from the feedback of its users and implement new features today.
Creating Your Minimum Viable Product
Your definition of a “minimum viable product” may not be the same as the definition chosen by another developer or business leader. The key to success is finding the right balance between viability – and the purpose of your product, and simplicity – or minimizing your features.
Start by figuring out what your product simply can’t be without, and gradually add more features as you learn and gain feedback from your audience. While it can be challenging to produce something so “minimalistic” at first, you need to be willing to release those small and consistent iterations if you want to leverage all the benefits of an MVP.
Suppose you can successfully define the meaning of the words “Minimum” and “Viable” simultaneously with your new product creations. In that case, the result should be an agile business, lean workflows, and better development processes for your entire team.
No matter how big or small your company is, getting tasks done is a lot easier if you have a formal structure in place. Thanks to project management tools, it’s now super easy to give structure to tasks as simple as ordering new printer paper to those as complex as leading a sales team.
And while the number of project management tools has been growing daily, the one thing that hasn’t changed is the human element. It’s as easy as ever to make mistakes that no tool in the world can fix.
Here are our top mistakes that you may be making in your project management strategy and how to fix them.
Scope creep
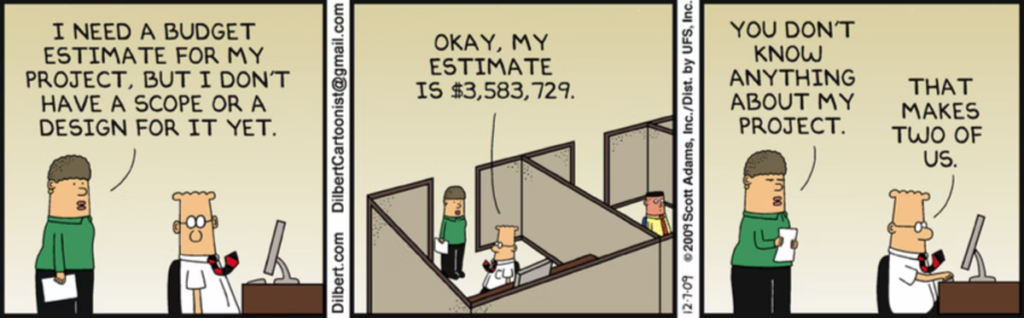
You may have heard of the term before but you don’t know what it means. Scope creep is when you agree on a certain project under certain conditions, and then you start working, only to realize that there’s no way to achieve what you promised.
For example, I’ve had many situations where I agreed on writing a set of blog posts for a client in a period of one month. When the work starts, the client asks for new sections, images, product comparisons, keyword optimization, and all of that with four different rounds of revisions.
Source: Dilbert
This happens in project management too – you promise to deliver a certain amount of work in a certain amount of time and conditions change – which is normal.
To avoid scope creep, make sure you analyze the entire situation before the work starts. What changes could happen, who will do the work, what the manager (client) might ask for, and anticipate this in advance.
If you need 7 days to get the work done, state that you’ll finish in 10. If you do end up finishing in 7, you’ll look great in the eyes of your manager or client. If things get complicated, you’ll have 3 days of room to work with.
If you’re pitching potential clients, it’s a good idea to lay out all the details in your business proposal before the work starts. That way, they know exactly what they get and they’ll sign for those conditions too. A great proposal template helps a long way here.
Lack of metrics to measure success
What gets measured, gets improved. As a project manager, you’ll often consider a completed project a good one and leave it at that. After all, if the task is complete, there’s no need to look into it further, right?
In reality, it’s much better if you keep things under control.
One of the keys to our great internal organization is that everyone gets their own set of KPIs for success, on the level of the:
Company
Department
Team
Individual employee
That way, everyone has a set of common targets to reach but they also have their own personal goals for which they are most responsible. If the targets at the very top level of the company don’t get hit, you can look from the top to bottom to see where the bottlenecks are and how to remove them.
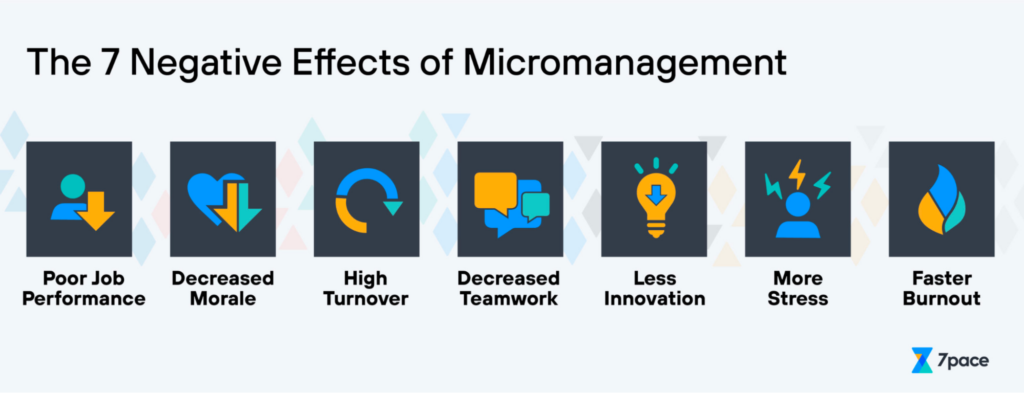
Micromanaging a team of experts
As a project manager, you should know the strengths and weaknesses of your team. Before each new project, you should have a good idea of who the right person is for a job so it can be done quickly and efficiently.
Once the job starts, the worst possible thing that you can do is check into progress with your team members every once in a while, just to make sure that they’re doing their job. Once you start micromanaging, you risk upsetting your teammates and actually slowing the progress down instead of doing the opposite.
There are two key conditions for preventing micromanagement.
The first one is hiring great people and assigning the right people for the right job. If you know an expert is working on a task, there is no need to check their work diligently.
The second condition is setting realistic goals and following up on them as the job is complete. For example, we have a designer whose goal for the week is to finish up 4 pages within one workweek. Instead of checking daily on the mockups, we just check on Friday if the work is done and whether they need some extra time or help.
While remote work and the lack of a physical office have made micromanaging more difficult, there are still ways it can happen. Thanks to a variety of messaging and project management tools, it’s easy to go overboard in monitoring employee progress. Simply let great people do great work and worry about the results.
Inefficient communication
I realize that this can be a broad term, but hear me out. Communication is one of the foundations of great project management, and the diversity of communication channels nowadays is a blessing and a curse at the same time.
On the one hand, you can send someone a Slack message, email them, send them a voice message, tag them in a Trello card or Notion, assign them something in Google Docs… You name it.
On the other hand, trying to find a message in all those channels becomes a nightmare. We faced two issues:
Finding who sent a message and where
Determining what the most important messages were
To prevent this from happening, we agreed on a set of rules. We determined which channels will be used for what type of messages and who the stakeholders are.
The most important internal messages go in Slack as announcements. Task-related messages go in our project management tool while important customer-facing messages go in emails. Chit-chat and informal communication go in personal Slack messages and channels.
This saves a ton of time and makes it much easier to manage projects. We know when a notification comes in how urgent it is and what needs to be done about it. Moreover, we know immediately where to look for a message if we need it for reference. With unified communications becoming omnipresent, effective communication will become crucial in the future.
Wrapping up
On the surface, it may seem like managing projects is easier than ever before. With a (mostly) remote workforce, great talent from all over the world, and a variety of tools to use, it appears that project management is a walk in the park. Regardless of how advanced the tools get, it’s important to keep in mind that you’re working with humans at the end of the day. This is how you’ll avoid the biggest project management strategy mistakes easily.
As we saw above, the gzipped file weighs in at 33.4KB, which isn’t bad at all. Unfortunately, when we peek into DevTool’s Font tab, things get a little worse.
Yikes. 757KB just for font files. For 54 icons.
While font files are not as
Font Awesome is an incredibly popular icon library. Unfortunately, it’s somewhat easy to use in a way that results in less-than-ideal performance. By subsetting Font Awesome, we can remove any unused glyphs from the font files it provides. This will reduce the number of bytes transmitted over the wire, and improve performance.
Let’s subset fonts together in a Font Awesome project to see the difference it makes. As we go, I’ll assume you’re importing the CSS file Font Awesome provides, and using its web fonts to display icons.
Let’s set things up
For the sake of demonstration, I have nothing but an HTML file that imports Font Awesome’s base CSS file. To get a reasonable sample of icons, I’ve listed out each one that I use on one of my side projects.
Here’s what our HTML file looks like in the browser before subsetting fonts:
Here’s a look at DevTool’s Network tab to see what’s coming down.
Now let’s see how many bytes our font files take to render all that.
Here’s our base case
We want to see what the most straightforward, least performant use of Font Awesome looks like. In other words, we want the slowest possible implementation with no optimization. I’m importing the all.min.css file Font Awesome provides.
As we saw above, the gzipped file weighs in at 33.4KB, which isn’t bad at all. Unfortunately, when we peek into DevTool’s Font tab, things get a little worse.
Yikes. 757KB just for font files. For 54 icons.
While font files are not as expensive a resource for your browser to handle as JavaScript, those are still bytes your browser needs to pull down, just for some little icons. Consider that some of your users might be browsing your site on mobile, away from a strong or fast internet connection.
First attempt using PurifyCSS
Font Awesome’s main stylesheet contains definitions for literally thousands of icons. But what if we only need a few dozen at most? Surely we could trim out the unneeded stuff?
There are many tools out there that will analyze your code, and remove unused styles from a stylesheet. I happen to be using PurifyCSS. While this library isn’t actively maintained anymore, the idea is the same, and in the end, this isn’t the solution we’re looking for. But let’s see what happens when we trim our CSS down to only what’s needed, which we can do with this script:
And when we load that newly built CSS file, our CSS bytes over the wire drop quite a bit, from 33KB to just 7.1KB!
But unfortunately, our other Font Awesome font files are unchanged.
What happened? PurifyCSS did its job. It indeed removed the CSS rules for all the unused icons. Unfortunately, it wasn’t capable of reaching into the actual font files to trim down the glyphs, in addition to the CSS rules.
If only there was a tool like PurifyCSS that handles font files…
Subsetters to the rescue!
There are, of course, tools that are capable of removing unused content from font files, and they’re called subsetters. A subsetter analyzes your webpage, looks at your font files, and trims out the unused characters. There are a bunch of tools for subsetting fonts out there, like Zach Leatherman’s Glyphhanger. As it turns out, subsetting Font Awesome is pretty straightforward because it ships its own built-in subsetters. Let’s take a look.
Subsetting fonts automatically
The auto subsetting and manual subsetting tools I’m about to show you require a paid Font AwesomePro subscription.
Font Awesome allows you to set up what it calls kits, which are described in the Font Awesome docs as a “knapsack that carries all the icons and awesomeness you need in a neat little lightweight bundle you can sling on the back of your project with ease.” So, rather than importing any and every CSS file, a kit gives you a single script tag you can add to your HTML file’s , and from there, the kit only sends down the font glyphs you actually need from the font file.
Creating a kit takes about a minute. You’re handed script tag that looks something like this:
When the script loads, we now have no CSS files at all, and the JavaScript file is a mere 4KB. Let’s look again at the DevTools Fonts tab to see which font files are loaded now that we’ve done some subsetting.
We’ve gone from 757KB down to 331KB. That’s a more than 50% reduction. But we can still do better than that, especially if all we’re rendering is 54 icons. That’s where Font Awesome’s manual font subsetter comes into play.
Subsetting fonts manually
Wouldn’t it be nice if Font Awesome gave us a tool to literally pick the exact icons we wanted, and then provide a custom build for that? Well, they do. They don’t advertise this too loudly for some reason, but they actually have a desktop application exactly for subsetting fonts manually. The app is available to download from their site — but, like the automatic subsetter, this app requires a paid Font Awesome subscription to actually use.
Search the icons, choose the family, add what you want, and then click the big blue Build button. That’s really all it takes to generate a custom subset of Font Awesome icons.
Once you hit the button, Font Awesome will ask where it should save your custom build, then it dumps a ZIP file that contains everything you need. In fact, the structure you’ll get is exactly the same as the normal Font Awesome download, which makes things especially simple. And naturally, it lets you save the custom build as a project file so you can open it back up later to add or remove icons as needed.
We’ll open up DevTools to see the final size of the icons we’re loading, but first, let’s look at the actual font files themselves. The custom build creates many different types, depending on what your browser uses. Let’s focus on the .woff2 files, which is what Chrome loads. The same light, regular, duotone, solid, and brand files that were there before are still in place, except this time no file is larger than 5KB… and that’s before they’re gzipped!
And what about the CSS file? It slims down to just 8KB. With gzip, it’s only 2KB!
Here’s the final tally in DevTools:
Before we go, take a quick peek at those font filenames. The fa-light-300.woff2 font file is still there, but the others look different. That’s because I’m usingVite here, and it decided to automatically inline the font files into the CSS, since they’re so tiny.
That’s why our CSS file looks a little bigger in the DevTools Network tab than the 2KB we saw before on disk. The tradeoff is that most of those font “files” from above aren’t files at all, but rather Base64-encoded strings embedded right in this CSS file, saving us additional network requests.
All that said, Vite is inlining many different font formats that the browser will never use. But overall it’s a pretty small number of bytes, especially compared to what we were seeing before.
Before leaving, if you’re wondering whether that desktop font subsetting GUI tool comes in a CLI that can integrate with CI/CD to generate these files at build time, the answer is… not yet. I emailed the Font Awesome folks, and they said something is planned. That’ll allow users to streamline their build process if and when it ships.
As you’ve seen, using something like Font Awesome for icons is super cool. But the default usage might not always be the best approach for your project. To get the smallest file size possible, subsetting fonts is something we can do to trim what we don’t need, and only serve what we do. That’s the kind of performance we want, especially when it comes to loading fonts, which have traditionally been tough to wrangle.
In the first quarter of 2021, Google Play had almost 3.5 million apps, and App Store – more than 2,2 million. It means that while users don’t have to limit their demand, developers struggle to keep up with the competitive edge. The way to the client’s heart is long and tedious: you should perfect everything about your app, and the icon isn’t an exception. That’s what we are going to discuss in the article – how to make an ideal icon?
What Is an App Icon?
Let’s start from the very beginning – an app icon definition. It’s a small, usually square image on your home screen, by tapping on which you call out an app. It’s extremely important as it should be eye-catching to grab the users’ attention and tune your brand identity at the same time.
Sometimes, an app icon is mistakenly perceived as a brand logo. While this can be true, both are actually very much different in terms of approach to work, design process and tools, metrics.
Why Should You Bother About an App Icon?
That’s probably one of the most popular questions since an app icon seems to be too small to be significant – it’s just a tiny image, after all. In reality, the user’s brain will process this image much faster than the name of your app. It means that if the icon fails to attract attention, the chance of user acquisition drops.
We are sure that icons are of utmost importance when it comes to App Store Optimization (ASO) because it helps to build a rapport between a user and an application. No one has ever suffered from an appealing wrapping as books are judged by their covers. Only a few focus on app mechanics and features, neglecting its design.
So, we can say that an app icon contributes to establishing an emotional connection with the target audience, which in turn leads to an increased number of downloads. Besides this, with a beautiful wrap, you can count on a competitive advantage in the App Stores due to a positive first impression.
4 Steps on the Way to a Stellar App Icon
Although you should pay specific attention to an app icon design, the whole process isn’t rocket science. You should proceed with four steps only.
1. Identify a Design Idea
You can’t just implement the first icon idea that came to your mind. You need to embed the tiny image into your brand concept. Here are three golden rules that will guide you:
Be customer-oriented. The colors and patterns should reflect your target audience if you wish to use an icon as a powerful marketing tool.
Be true to yourself. Don’t confuse users by copying someone else. You may provoke negative associations and alienate users in the end.
Be eloquent. Speak with the icon. Let it tell users more about you, your app, and your offer. Descriptive keywords that you will present in the form of symbols are one way to do this.
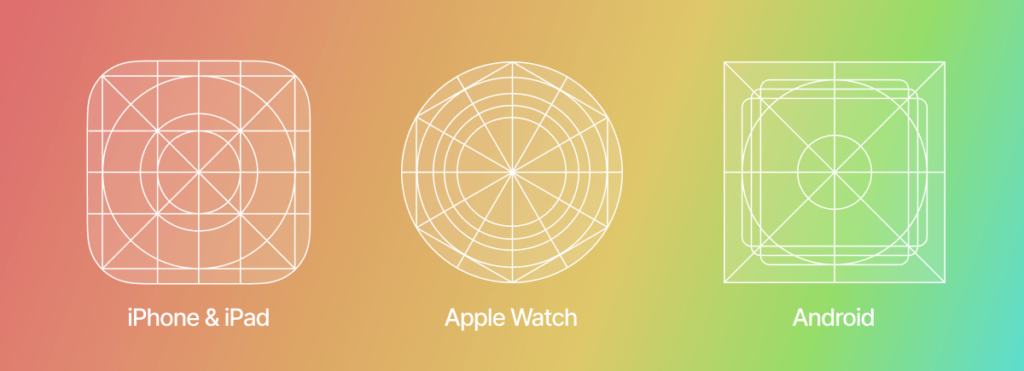
2. Study the Platforms Requirements
Besides attractiveness and brand identity, your app icon should meet the app stores standards in terms of patterns, resolutions, styles, layouts, etc. All the guidelines are present on “ Design for Android” and “iOS Human Interface Guidelines”. While they are pretty different, there is no need to create two designs. You can merely adapt one according to the technical requirements.
Now that you have everything ready, it’s time to let your creative spirit out. The design stage is one of the key steps as your job is to express beauty in a tiny image. Otherwise, according to Comscore, 20 percent of millennials will delete your app.
To facilitate the task for you, we have prepared six design tips:
3.1. Don’t forget about scalability
The icon is like the face of your app: it will represent the app everywhere and anywhere. However, the icon size varies from store to store. That’s why you need to ensure it is optimized so that the image quality isn’t lost. You can test different sizes with the Appsparky tool.
3.2. Don’t overdo
You may be tempted to make your icon sophisticated, but it’s not a winning strategy. Too many details on a small image diffuse the focus. That’s why you should adhere to a minimalistic approach and reduce the number of symbols as much as possible.
Such an approach allows you to be clear with your audience about what you want to express. Our advice is to choose one symbol and stick to it. This way, your icon will be easy to comprehend.
3.3. Don’t stay under the radar
Here we are speaking about uniqueness. Users should recognize your icon, ideally as easily as they do with McDonald’s or Facebook. In such a case, your brand has managed to build an emotional connection, which is a driver of improved brand awareness and customer loyalty.
What is more, if your icon is unique, you are ahead of your competitors. Those who try to imitate them, however, risk unintentionally promoting rival applications and lose the connection with the target audience.
3.4. Don’t ignore colors
One thing that interacts directly with the user’s subconsciousness is colors. These three pieces of advice are for you to consider when thinking about which shades to use:
Be bold. Catch the attention with the right color. For instance, you can follow the successful examples and use blue with red and white. But don’t overdo with contrasting colors: two are more than enough.
Be branded. You need to tell a cohesive story, and colors play a major role here. Use branded shades only.
Be aesthetic. A beautiful icon is a sure way to success. That’s why you need to find those colors that appeal to your audience and look good on different backgrounds.
3.5. Don’t use a lot of text
A lot of words won’t do you any good because the app icon is too small for users to read it. Instead, it’s better to speak with symbols. You can leave only very short texts or letters. Look how Skype features “S” and Facebook “F”: their icons are branded, recognizable, and easy to comprehend.
3.6. Don’t neglect your essence
A good icon is one that isn’t only beautiful but also informative. It should describe what your app is about. That’s why e-commerce apps feature a shopping cart, reading apps – books, music apps – a music note, etc.
While it may seem too primitive for you, users are likely to easily grasp the idea of the app. Remember: simplicity is key as it allows your audience to quickly comprehend and process the image.
Music apps’ icons
To make sure that you have designed a brilliant icon, you need to test it. Typically, you will have several options to try. You can assess the success by:
Setting up a focus group. Use an A/B testing approach: show two different designs to two separate focus groups made up of your target audience. Ask the people if the icon matches your app’s concept and if it’s beautiful or not. You may also present several icons, competitors’ ones included, and let the users choose the best one. You can turn for feedback to Google Experiments’ (Android solutions) or Facebook’s communities. If you are on a budget, conduct the research among your friends, employees, and family.
Conducting a technical test. Besides assessing attractiveness for users, you also need to check if the icon is optimized for different mobile devices and if the image is good regardless of its size.
Tools to Create an App Icon
Here are the tools for you to use to design your ideal app icon:
Graphic Editors like Adobe Photoshop or Adobe Illustrator – offer extensive functionality to implement even the wildest ideas.
Design Apps like Adobe XD, Sketch, Figma – similar to the previous ones in terms of functionality but also mostly preferred by UI/UX designers.
Online graphic designers like Canva, Appicon, Font Awesome, Logaster, Iconsflow – beginner-friendly, offering simple navigation and templates.
Speak With Your Icon
In the era of brands, when consumers seek authenticity, a brand icon is more than just an image to click on to run an app. It’s the embodiment of your application, its nature, and its essence. It’s a powerful tool that helps you to build the very first connection with a user who can potentially become your brand ambassador. Therefore, never save neither your time nor your money when it comes to an app icon.
Did you know that webinars do not only build brand awareness but can also bring you sales to your product/service? However, attracting the audience’s attention and making them stick till the end is entirely up to the content you share during the webinar.
Since the emergence of webinars has caused the ripple effect, every individual, brand, and the tech giant has started hosting webinars across various domains. Thus, standing out and connecting with the right target audience has become more difficult than ever.
So, we’ve brainstormed and listed 5 ways to create content that attracts and keeps your audience’s attention intact.
1. Organize Value-first webinars
When you conduct webinars, providing value to the audience brings sales and not your product/service. People sign up for a webinar and invest one to two hours to learn something new. If your product or service is new in the market, discuss the pain points of your customers first, and then tell them how your product or service solves them. But, if there are many people who already use your product but stand clueless about a specific set of features, conduct a webinar to help them find answers.
To know if you’re addressing their pain points,
Listen to your customer conversations.
Follow your target audience or look-alikes on social media and understand what they struggle with.
This will help you to understand their most unanswered problems. So, when your webinar gives them the solution to that, they come flocking to learn about it and your product becomes their top-of-the-mind solution.
2. Bring Guests Who Bring Value
People are no longer hooked to the PPT slideshow for a 45 mins session followed by a Q&A session. So, even when you have the most beautiful-looking slides ever, people will not pay attention, stay till the end or be interested in your product.
That’s exactly why you have to bring in industry leaders, experts, or anyone who knows what they’re talking about. Bringing a guest from outside of your brand can help you in different ways:
Your audience will be more interested to learn from people who have tested the waters and made it to the shore
You can tap into the guests’ audience
You can build brand authority as the guest—an expert in the industry will become an advocate of your brand during the pre-promotions & post-marketing activities.
You might have figured it out by now—the conversational style webinars are the best way to keep your audience hooked till the end.
As Lakshman from Vmaker, who has hosted more than ten guests from different industries, says,” The remote culture has left us with “screen fatigue”. Staring at the screen during webinars does not motivate the audience anymore. It annoys them. So, conversational-style webinars are my pick when I put value first”
3. Interactive Webinars For The Win
The remote etiquette of making everyone included in the webinar is essential but often most looked over. Even though the host & guest share the stage, the audience runs the show here. The audience retention rate drops dead low if they don’t feel “included” in the webinars or any online events.
Here’s how you can keep the audience engaged till the end:
Begin the webinar a few minutes early and ask your audience to introduce themselves in the comments/chat section. (If your audience is from across the globe, ask them to drop the countries they’re from & their time-zones)
Run quick polls and share the results with them.
Before you pitch your product, ask the audience how they’re solving the problem (without using your product)
Take questions from your audience in between and not hold the entire set for the last.
Acknowledge them by their first name. This is non-negotiable.
When webinars start to feel like the group discussions that people used to have in their colleges, the audience decides to stay till the end.
4. Add personality, not just a pitch
Webinars, no matter if it’s a community-only or a global one, will have a product plug. Your audience will know that the host or the guest will talk about the product during the webinar, but they don’t listen to it when you promote it directly.
Instead, add your brand personality to the pitch.
Is your messaging across the content channel humor and humanized tone? Add it.
Did any of your recent social media posts/reel make some noise? Loop that in.
Have you received the most heart touching customer feedback ever? Play that recording.
Selling the solution by tying the social proof of your product with it is definitely a hit! Adding the sales pitch in between the webinar is the buried-in-the-backyard technique, but an answer to their problem which puts your brand as a credible solution is evergreen.
5. Send The Webinar Recording Via Emails
According to Venture Harbour, sharing the recorded videos post the webinar has increased the registration rate to 42.46%, which is twice the original rate. Not only does making the webinar videos available on-demand increase the sign-up rate, but also increases brand awareness and adds up to the lead conversion rate.
Most webinars happen mid-week and the recordings help people to catch up on the session if they had missed out due to work that keeps them on their toes. Thanks to remote work!
You can use a simple and cost-effective screen recording software like Vmaker to record videos of the webinars without any hiccups or glitches in between the sessions. You can then email the recording to the registrants within 12 to 18 hours of the webinar. With Vmaker and its advanced analytics suite, you can find out the number of people who’ve actually watched the recordings after clicking on the link.
This will help you to track the success rate of the webinar from the sign-up to sending the on-demand videos.
Here’s the TL;DR for the skimmers:
If you’re hosting the webinar for your brand, make sure to put the goal of increasing the sales in the back seat and give the head start to value-first content. The best bet to make your content valuable is by addressing the “pain point(s)” of your target audience.
Then, start reaching out to the potential guests that your audience would love to learn from. With the internet connecting us, it’s not as difficult as it used to be. It’s an added advantage! Also, the audience will have a chance to interact more with your brand.
From the sign-ups to the “Thank you” slide on the webinars, you have the opportunity to convert them from the audience seat to the customers’, if you can hit every touchpoint right. So, here’s how you can leverage the power of webinars in your style in 2022 and convert the warm leads into sizzling hot leads aka customers.