As a consequence of understanding the dollar value of their time, many company leaders and CEOs can gradually acquire an unspoken air of unapproachability. Of course, most do not consciously keep their employees at an emotional distance. Instead, they unwittingly project an aura that can cause others to think twice before opening their mouths or sending an email.
This was true long before anyone knew anything about Covid-19. Sadly, when employees began to flee office buildings and take up a lifestyle of remote work, the problem of perceived management unapproachability in many cases only got worse.
As more and more businesses move into 2022 by adopting a hybrid model of in-person/remote workforces, business leaders are increasingly in need of inviting — and even welcoming — a restructuring of their communication practices. If that causes some to balk at increased expense, it might help to remind them that Covid-19 only exposed a pre-existing problem.
As you consider the ways in which your company may need to retool its management practices so that in-person and remote workers are on level terrain when it comes to their own perceived value, here are four categories to help you discern where a tune-up is recommended.
1. Project confidence in all of your employees.
The first barrier to break down is any perception that management places primary value on its in-person workers, over and above their remote workforce. If anything, many business leaders found that their employees became even more productive once they were freed of commuting, cubicle farms, and office politics.
Send out brief, encouraging messages to all of your employees, regardless of location. If one of your remote workers brought in additional business, send them a quick thank-you card by mail. The extra effort required to send out a personalized greeting card means more than you might imagine. Celebrate your in-person wins in person, perhaps by briefly calling staff together and setting up a Zoom call for interested remote workers to join in.
Above all, be on the lookout for any signs that your workforce is splintering along in-person/remote lines. When you convey an equitable approach as you celebrate, coach, and yes, discipline, you are setting the tone for others. You’ll have solid ground upon which to stand if you do find that remote workers are being marginalized or left out of decision-making.
2. Make yourself readily available, albeit with good boundaries.
Sometimes it helps to attack the problem of perceived unapproachability by dismantling in advance the possibility of someone claiming that you weren’t available. At a basic level, ensuring that you have secure home wifi is a good first step. Add an email signature to “broadcast” to every employee the best ways to reach you, but remember points of contact with employees should never be a “one and done” sort of practice.
In addition to making your availabilities widely known by all, you might consider dropping a personal line to one or two employees each day. Something short and simple — “Hey, I know that client deadline is coming up and I just wanted to make myself available to you if needed.” — can make all the difference. Employees stay motivated when they perceive that you are not only aware of their pressures but checking in to make sure they’re OK.
In addition to short, employee-specific notes, emails, texts, and phone calls, consider setting up an advanced calendaring app and allow others to grab snippets of your time as they feel they are in need. If an employee is struggling in isolation, you want that to be something they themselves chose rather than a byproduct of them not being able to interact with you as needed.
3. Train yourself to distinguish between a failure and a snafu.
Did that client deadline get missed because a staff member did not bother to attend a critical Zoom call…or because no one thought to make sure that a remote employee was invited? Obviously, in our new era of managing a hybrid workforce, business leaders must be more diligent than ever in terms of conducting a thorough, accurate post-mortem on company failures.
This one is admittedly tough. When things go wrong at work, many of us experience a sudden adrenaline rush of negative emotions. It can be tempting to think that we know exactly why something went haywire and act quickly. However, it’s only common sense to think that dispersing our workforce between a central location and all over the internet might bring some previously unconsidered factors into play. Best to move slowly with any after-action.
The two primary things any savvy manager will do is to 1) invest adequate time in finding out what truly happened, and 2) determine if processes and procedures need to be tweaked. Many may resist the investment of time, but failing to uncover the root cause is more or less an invitation for the problem to recur. Where did the project fall apart? Who (or what) bears primary responsibility? Honest mistake…or something that requires disciplinary action?
4. Initiate shorter points of contact, but more of them.
Finally, the development of a well-oiled in-person/remote workforce will require more frequent interaction with staff but each of those interactions will need to be targeted, concise, and straight to the point. It’s commonly accepted that you will get more accomplished in a meeting of four to five people than you will in a room of 20. Instead of working a 40-point agenda once a month, set up times for five-minute phone calls to individuals or a 15-20 minute meeting online with three or four.
Similar to making yourself more available and approachable for employees to initiate contact, you will want to “force your newfound approachability on them” with brief points of contact throughout the workweek. Doing so will require sensitivity to the needs and personalities of your staff, of course. Some will welcome seeing you every day, others will max out their comfort level talking to you once a week.
As you intentionally interact more frequently and for shorter intervals of time, you’ll save money on widely-attended staff meetings and get to know your people better over the course of time. As you begin to appreciate each employee better, you’ll develop a keener sense as to how you can make them feel more valued and appreciated. Whether remote or in-person, everyone wants to feel important. When they do, productivity tends to gain even more traction.
The year is 2022. Some people might say that emails are an archaic method of communication, but it couldn’t be further from the truth.
In the business world, emails are still going extremely strong and used for a variety of purposes, including sales, marketing, content promotion, link building, email affiliate marketing and so on.
There are three main challenges that email outreach people face: spam filters, bounce rates, and people simply ignoring their emails.
The solutions to all of these problems are somewhat interconnected, but today we will be focusing on some strategies that can help you reduce your email bounce rates and improve deliverability.
1. Set Up Proper Authentication For Your Email Domain
First off, if you rely on cold emails for any of your business processes, it is essential to set up proper authentication.
This helps to prevent spammers from spoofing your email address and sending messages from your domain.
DomainKeys Identified Mail (DKIM) is a cryptographic authentication method used to verify the email sender’s identity. DKIM allows email receivers to verify that an email was sent by a trusted party and not spoofed.
Domain-based Message Authentication, Reporting, and Conformance (DMARC) is a policy that allows email receivers to determine the level of authentication and security that should be applied to email messages from your domain.
DMARC also allows email senders to receive reports on the messages that are sent from their domain.
Just using these three protocols for your email domain will dramatically improve your deliverability and ensure that your pitches don’t automatically get flagged as spam.
2. Do Not Purchase Email Lists
The first reason is that email lists are often outdated, meaning that the email addresses on the list may no longer be active.
The second reason is that email lists may contain a lot of invalid email addresses, which can lead to a lot of bounces and decreased deliverability. The third reason is that email lists may be illegally obtained, which can lead to legal trouble.
This doesn’t mean that you can’t use your own email lists, however. If you do keep an email list of your own, you should regularly clean it up.
There are a few ways to clean your email list for email outreach. One way is to use an email verification tool to check for invalid email addresses.
Another way is to remove email addresses that have bounced or that have been unsubscribed from your list. You can also remove email addresses that are not associated with a valid domain name.
3. Include A Professional Email Signature
When you are emailing a company, it can be helpful to have their physical address included in your email signature. This way, if the recipient wants to reach out to the company in person, they will have the information they need.
Additionally, if the company is looking for new customers, they may be more likely to reach out to businesses that have a physical address listed in their email signature.
This much is obvious, really. But did you know that an email signature with a physical address is actually a legal requirement by the FTC? In addition to a physical address, your email should also always include an option to opt-out or unsubscribe from further communications.
4. Avoid Images And Attachments In Cold Emails
Images and attachments can be blocked by email providers, which can prevent your email from being delivered or seen. Instead, try to embed content in email. Additionally, many people disable image loading in their email client to save on data usage or to protect their privacy, which can also prevent them from seeing your email.
A lot of scam emails send attachments or pictures to people out of the blue, so if your initial email to a person includes one of these things, it’s very likely to go directly into the spam folder.
Now, there’s nothing wrong with using attachments or images after a person has already replied to you and they expect it.
5. Avoid Spam Words
Spam words are words that are often associated with spam emails, such as “free,” “money,” “discount,” and “sale”. Email subjects, such as “get your best dedicated server”, “flat 20% discount on all shirts”, or “flash sale – hurry up”, are bound to land your emails in the spam folder.
However, these are just a few of the most obvious spam word examples. Nowadays, spam filters have a huge dictionary with hundreds, if not thousands, of words and phrases.
It is impossible to keep all of them in mind when composing your cold emails. Some words that don’t necessarily sound spammy to you might actually trigger spam filters, causing your pitch to never even be seen by your recipient.
One thing you can do before hitting “send” is run your email copy through a spam checker. There’s plenty of these available on the Internet, and it only takes a few seconds to do it, so there’s really no reason for you to ignore this step, especially if your deliverability is on the line.
The same goes for general grammar and spelling mistakes: having these within your email copy makes you look unprofessional, and can even trigger spam filters on top of that.
6. Warm Up Your Emails
An email warmup solution is a tool or service that helps you increase the chances that your email marketing messages will be delivered to the inboxes of your subscribers.
It does this by gradually increasing the number of messages that are sent to each subscriber’s inbox over a period of time. This allows the email service providers (ESPs) to get to know your sending patterns and determine that your messages are not spam.
Some email warmup solutions, such as Lemwarm work in a simple but genius way: they connect you to a system of their users, and send emails to them on your behalf. On the recipient’s end, the tool automatically replies to your email.
If your email lands in their spam folder, it also automatically marks it as not spam. This process increases your overall email engagement rates and improves your sender reputation.
Mermaid diagrams and flowcharts have been gaining traction, especially with GitHub’s announcement that they are natively supported in Markdown. Let’s take a look at what they are, how to use them, and just as importantly: why.
Just like you might want to embed your CodePen demo directly in your documentation source, having your diagrams and charts live adjacent to your text helps prevent them from rotting — that is, drifting out of sync with the state of your document. Just as unhelpful, obsolete, or otherwise misleading comments in your code can be objectively worse than no comments, the same goes for diagrams.
Mermaid diagrams pair well with Jamstack and static site generators, which continue to grow in popularity. The pairing is natural. While Mermaid diagrams aren’t Markdown-exclusive, they are Markdown-inspired. Using the same markup abstractions Markdown provides to notate code, Mermaid can be represented the same to output diagrams and flowcharts. And Markdown is to Jamstack and static sites as peanut butter is to jelly.
If your site is authored in Markdown, processed into HTML, and you have enough control to add a bit of custom JavaScript, then you can use the ideas we’re covering in this article to fit your own needs and implement diagrams with Mermaid conveniently alongside the rest of your Markdown. Is “diagrams-as-code” a term yet? It should be.
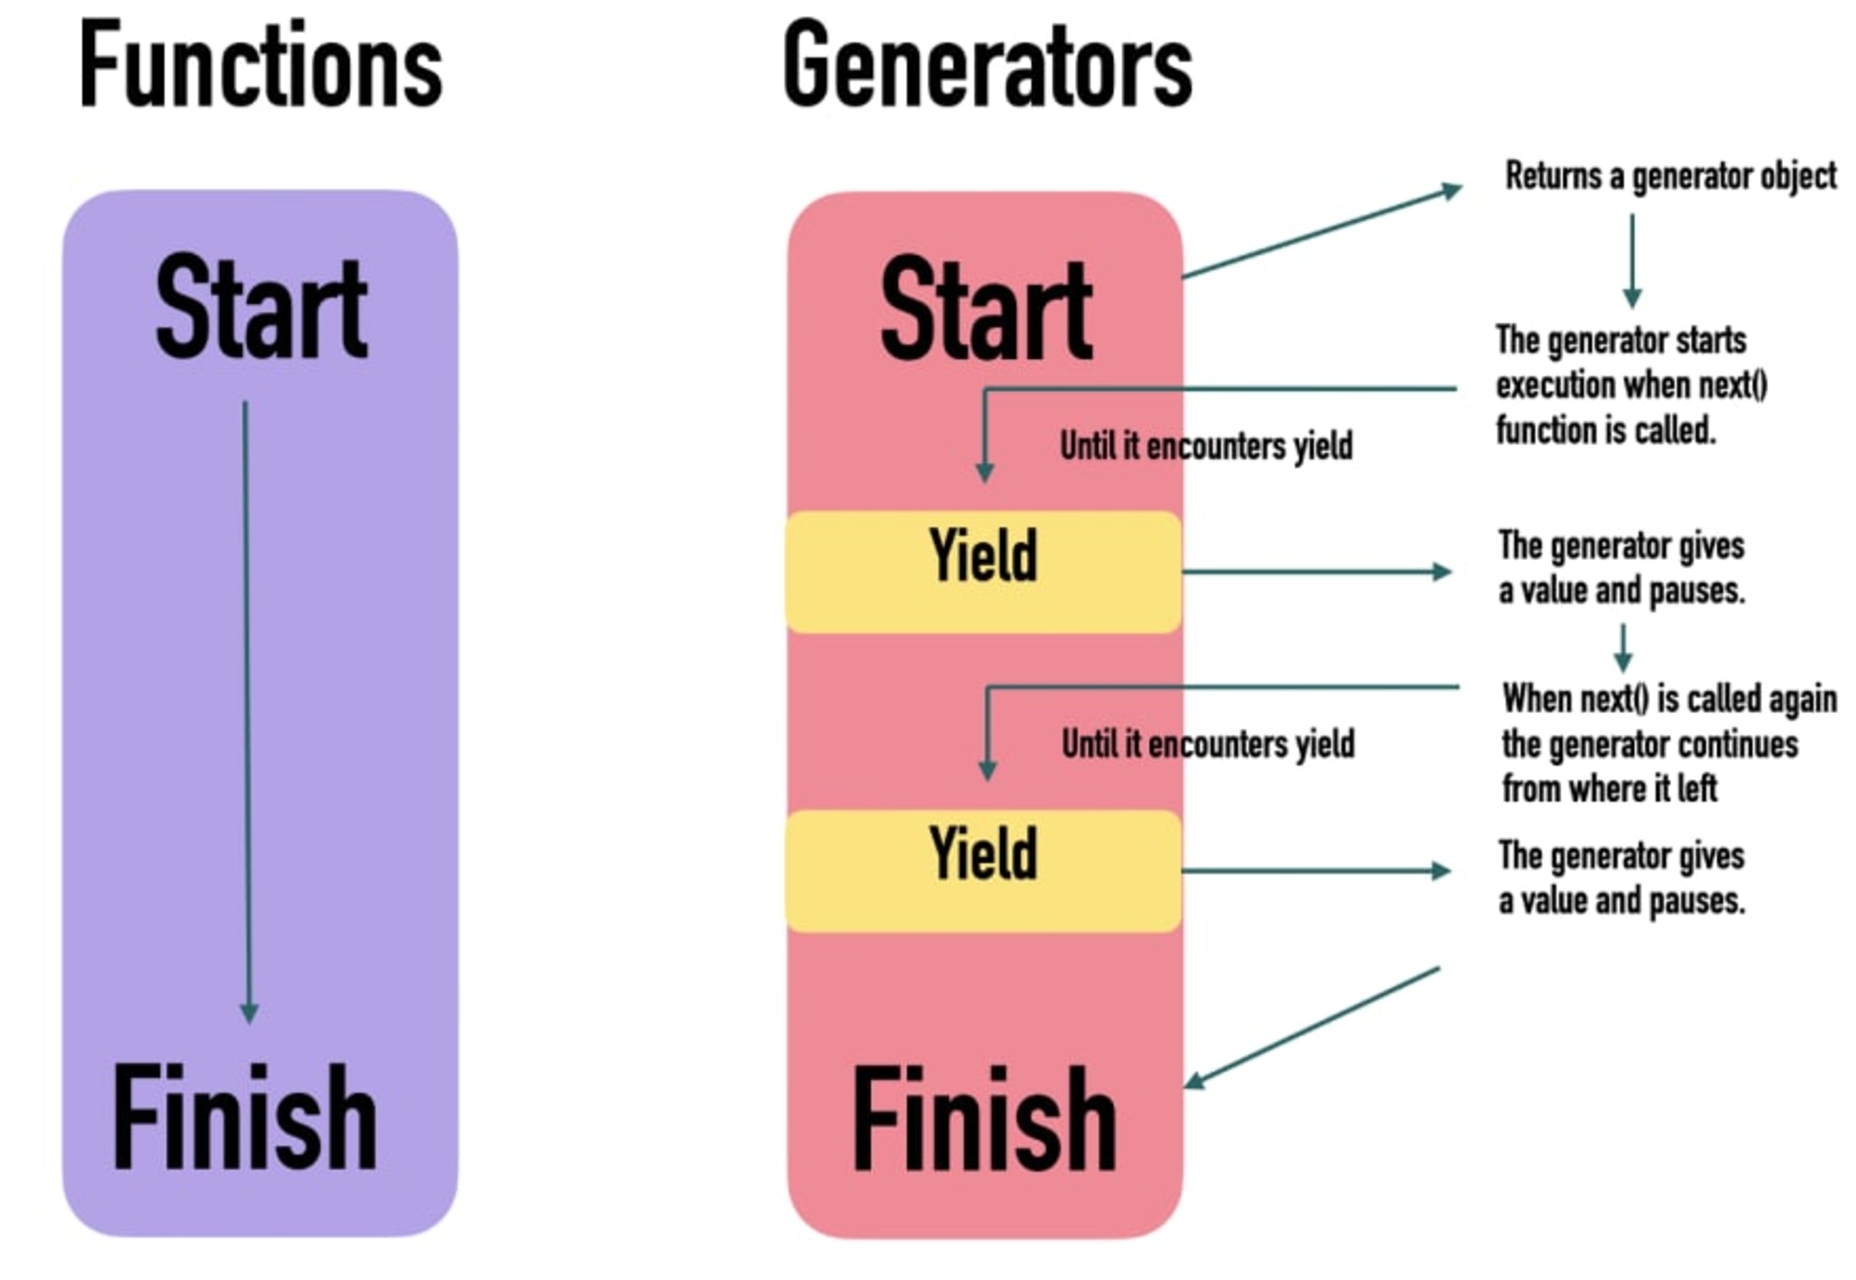
For example, let’s say you’re working on a fancy new product and you want to provide a roadmap in the form of a Gantt chart (or some other type — say flowcharts, sequences, and class diagrams). With Mermaid, you can do this in a small handful of lines:
gantt
  title My Product Roadmap
  dateFormat  YYYY-MM-DD
  section Cool Feature
  A task           :a1, 2022-02-25, 30d
  Another task     :after a1, 20d
  section Rad Feature
  Task in sequence :2022-03-04, 12d
  Task, No. 2      :24d
Which will render a nice SVG diagram like so:
Nine lines of code gets us a full-fledged Gantt chart that can be used for product roadmaps and such.
Pro tip: Mermaid has a live editor which lets you try it out without the commitment over at mermaid.live.
Mermaid diagrams in Markdown
Mermaid goes well with Markdown because it presents itself as just another fenced code block, only using the mermaid language syntax set. For example, this block of code:
tag that directly contains the contents — so, no or (like from a syntax highlighter) that you might see in the conversion from Markdown-to-HTML.
Finessing with JavaScript
With a bit of JavaScript, it’s reasonable to take the Markdown-generated HTML and finesse it into the
tag that Mermaid targets. It’s worth noting that $element.textContent is purposeful here: Markdown will HTML-encode specific characters (like > into >) that Mermaid uses. It also filters out any erroneous HTML elements that are descendants of the element.
// select <pre class="mermaid"> _and_ <pre><code class="language-mermaid">
document.querySelectorAll("pre.mermaid, pre>code.language-mermaid").forEach($el => {
// if the second selector got a hit, reference the parent <pre>
if ($el.tagName === "CODE")
$el = $el.parentElement
// put the Mermaid contents in the expected <div class="mermaid">
// plus keep the original contents in a nice <details>
$el.outerHTML = `
<div class="mermaid">${$el.textContent}</div>
<details>
<summary>Diagram source</summary>
<pre>${$el.textContent}</pre>
</details>
`
})
Now that our HTML is properly-formatted, let’s implement Mermaid to do the rendering.
Using Mermaid
Mermaid is published as an npm package, so you can grab a copy by using a package-aware CDN, like unpkg. You’ll want to use the minified code (e.g., mermaid.min.js) instead of the default export of mermaid.core.js. For example:
Mermaid is also ESM-ready, so you can use Skypack to load it up as well:
<script type="module">
import mermaid from "https://cdn.skypack.dev/mermaid@8.14.0";
</script>
You could stop right here if you want to keep things simple. By default, Mermaid will auto-initialize itself when the document is ready. As long as you do the Markdown-to-HTML finessing with JavaScript mentioned earlier — before loading in Mermaid — you’ll be all set.
However, Mermaid has a couple settings worth configuring:
// initialize Mermaid to [1] log errors, [2] have loose security for first-party
// authored diagrams, and [3] respect a preferred dark color scheme
mermaid.initialize({
logLevel: "error", // [1]
securityLevel: "loose", // [2]
theme: (window.matchMedia && window.matchMedia("(prefers-color-scheme: dark)").matches) ?
"dark" :
"default" // [3]
})
logLevel will give you a bit more visibility into any errors that may arise. If you want to see more information, you can choose a more verbose level (or vice versa).
securityLevel relates to the level of trust for the diagram source. If it’s content that you are authoring, then "loose" is fine. If it’s user-generated content, it’s probably best leaving the "strict" default in place.
Here are a couple of Mermaid diagrams examples in Markdown:
CodePen Embed Fallback
Deeper waters
This strategy is particularly effective because it’s progressive: if JavaScript is disabled then the original Mermaid source is displayed as-is. No foul.
There’s also a fully-fledged command line interface for Mermaid which, if you’re interesting in exploring, could potentially be leveraged to display diagrams that are completely server-side rendered. Between the Mermaid CLI and the online generator, it may even be possible to hook into whatever build process you use to generate a snapshot of a diagram and display it as an fallback instead of the source code.
Hopefully, we’ll see more native Mermaid integrations like this as Mermaid continues to grow in popularity. The usefulness of having visual charts and diagrams alongside documentation is unquestionable — from product roadmaps to decision trees and everything in between. That’s the sort of information that’s just plain difficult to document with words alone.
Mermaid charts solve that, and in a way that ensures the information can be managed and maintained alongside the rest of the documentation.
Designing for user experiences is what all designers do. UX is often thought of as the preserve of app or web designers; however, even a print designer laying out a magazine anticipates reader reaction to the scale of type, the placement of adverts, and the art direction of successive stories.
Because all designers design user experiences, the role of UX Designer has come to mean someone focused on creating a product or service utilizing research and testing to guide decision-making.
To research and test anything, you need metrics: a baseline and a target against which to measure. No one set of metrics is suitable for all projects, but because UX tends to be for financial profit, the Pirate Metrics Framework — Acquisition, Activation, Retention, Referral, Revenue — is a good starting place.
You might seek out very different metrics in some cases. For instance, a museum might measure the success of its education program based on how many students go on to study paleontology. However, those types of metrics are notoriously difficult to quantify. Excepting a few niche cases, successful UX increases user productivity, decreases errors, reduces the cost of support, and increases sales.
So if it’s as easy as counting dollars, why does UX go bad?
UX vs. Design Principles
To understand what UX is, you need to understand what UX is not.
One of the most straightforward design principles to understand is hierarchy: bigger is more important, i.e., a heading is visually stronger than a sub-heading, a sub-heading is visually stronger than the body text.
Design principles stem from one thing: human-centered design. At the most basic level, bigger is more important because the bigger a saber-toothed tiger appears, the more likely it intends to eat me.
The evolution of human beings is so slow that had a smartphone existed at the time, a neanderthal would have been able to tap a button with the same level of precision as me. Prehistoric man shares the same minimum button size as modern man: 48 x 48px. Design principles don’t change, don’t require research, and don’t need verifying with tests.
On the other hand, a neanderthal would not have understood a smartphone, let alone an app. You only need to step back by a single generation to find perfectly intelligent people baffled by a commonly employed design pattern.
Unlike design principles, user experience is a house built on sand. When the sand shifts, the walls crack. The bricks are still solid, but the rain gets in.
Because effective UX is temporary, so is the ROI.
Technology Breaks UX
Technology unfolds at a rapid pace. As technology develops, the user experience defined by that technology changes.
The classic example is the mobile revolution, but technological change does not necessarily mean hardware. One of the most significant shifts in UXD (User Experience Design) in my career has been the popularisation of AJAX — the process of using JavaScript to load new data without refreshing the page. This seamlessness has been around since the early 2000s, but it’s only in the last ten years, as the code to achieve it has simplified, that it’s been widely used.
Jakob’s Law states that users spend most of their time on other sites and, as a result, prefer your site to function like other sites by following familiar design patterns.
Even if your UX is rigorously tested and optimized, when other sites and services carry out their own research, they are testing against the background of younger technology, and the “other sites” Jakob Nielsen refers to begin to change. As a result, the UX of your site is gradually eroded.
The consequence of continual technological change is that user research is constantly invalidated. The UX of an app, site, or service begins to degrade as soon as it is created.
User-Experience Lifecycle
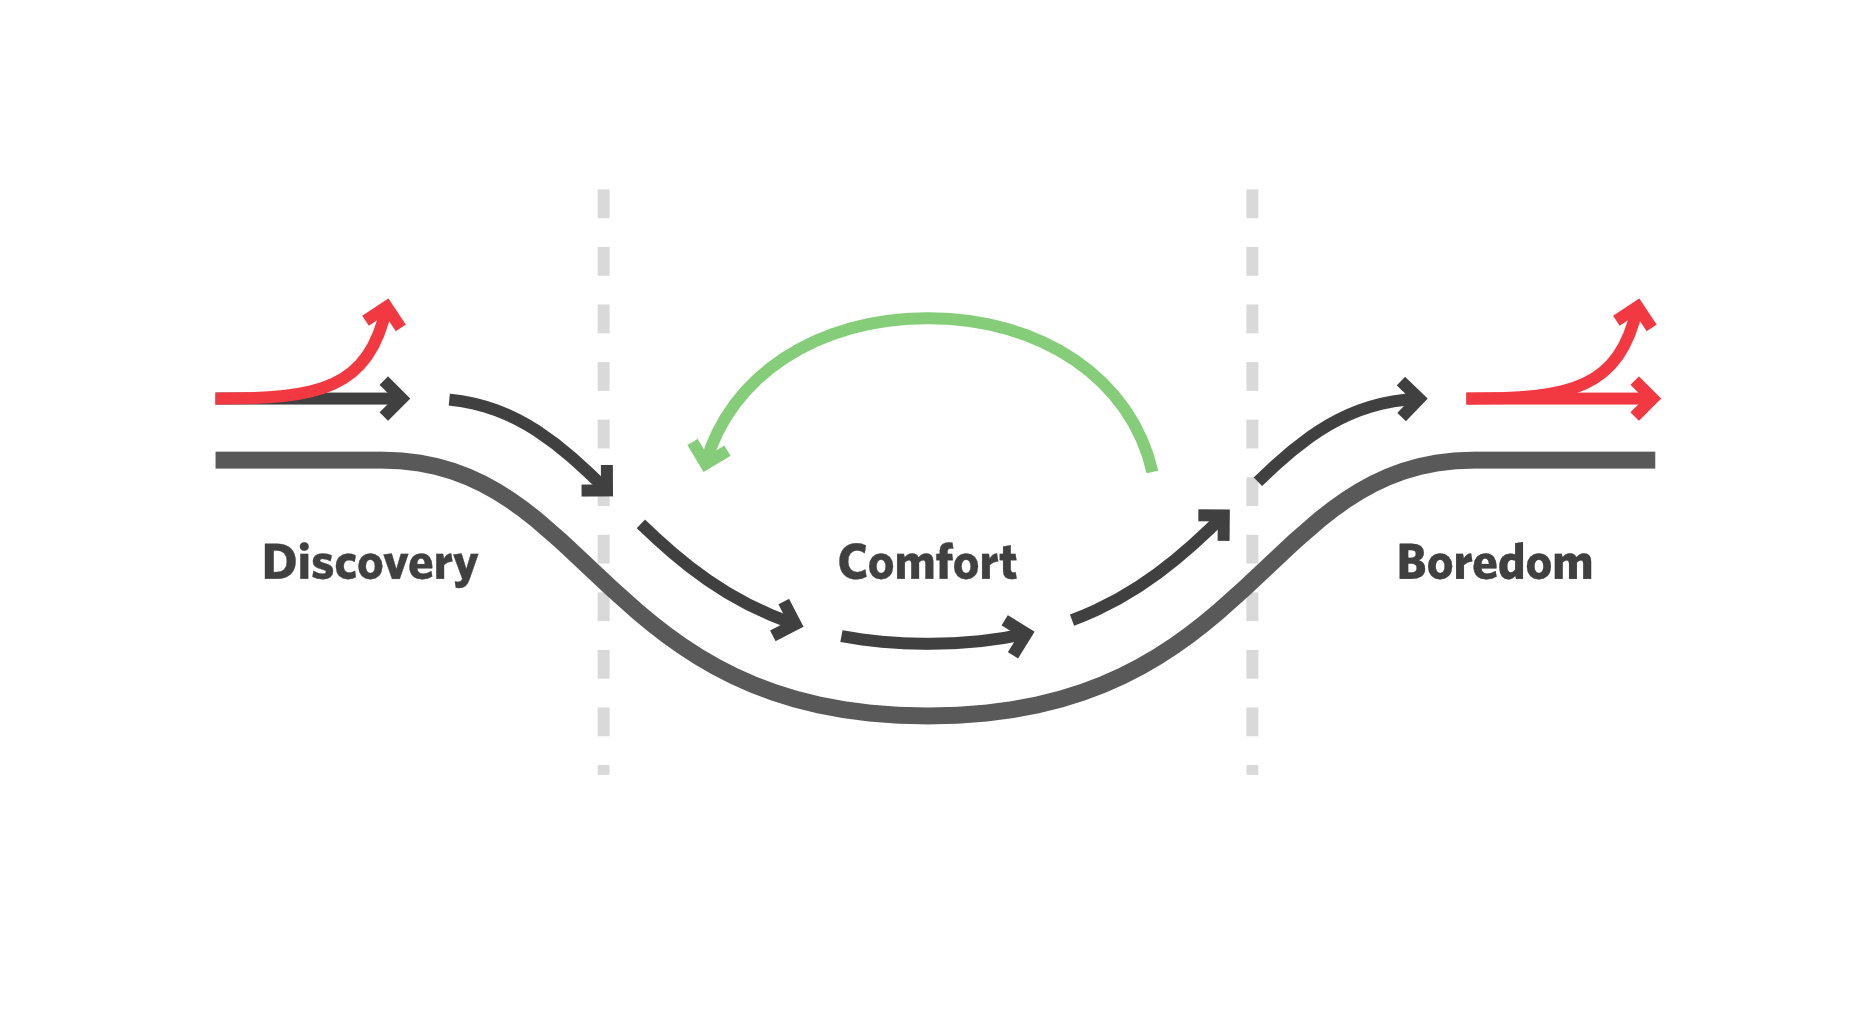
Human beings have two deep-seated motivations: survival and procreation. The most important, survival, depends on discovery — new food sources, new routes through dangerous territory, new ways to skin a mammoth. We are biologically programmed to seek out the new.
A typical user passes through three phases of a relationship with a site, app, or service: discovery > comfort > boredom. Churn, or drop-off, tends to occur in the discovery phase (if the comfort phase is too slow in developing) or the boredom phase. The sweet spot is the comfort phase. That’s the part of the business-customer relationship in which the customer requires minimal support and is least likely to drop off.
The most effective form of UX — meaning the one that satisfies most metrics — rapidly moves a user from discovery to comfort and then continually eases the user back to the start of the comfort phase without tipping back into discovery.
This can be achieved with numerous micro-discoveries, tiny chunks of new experience, from simple functionality tweaks to style revisions.
Summary
All UXD, regardless of the quality, level of investment, and skill of the practitioner, begins to degrade the moment it is created.
Design principles like simplicity are good indicators of successful UID (User Interface Design) and are timeless; comprehensive design systems, brand assets, and content offer good ROI.
The most effective UX is broadly familiar and continually refreshed in small ways, allowing users to enjoy the comfort of the familiar while also experiencing the excitement of discovery again and again.
Every day design fans submit incredible industry stories to our sister-site, Webdesigner News. Our colleagues sift through it, selecting the very best stories from the design, UX, tech, and development worlds and posting them live on the site.
The best way to keep up with the most important stories for web professionals is to subscribe to Webdesigner News or check out the site regularly. However, in case you missed a day this week, here’s a handy compilation of the top curated stories from the last seven days. Enjoy!”
Whether you are looking for comprehensive tutorials on UX design or professional courses on topics like logo design, video or photo editing, there’s the perfect YouTube channel for you as a designer.
The best thing about YouTube is that you do not have to be a professional to jump into a video tutorial and gain the knowledge you need. There are many people who have become experts in, say, Photoshop by watching many hours of YouTube videos.
In 2022, there are established and emerging channels that you, as a designer, can use to get inspired and fix problems in your workflow.
Let us take a look at our 14 favorite YouTube channels for designers:
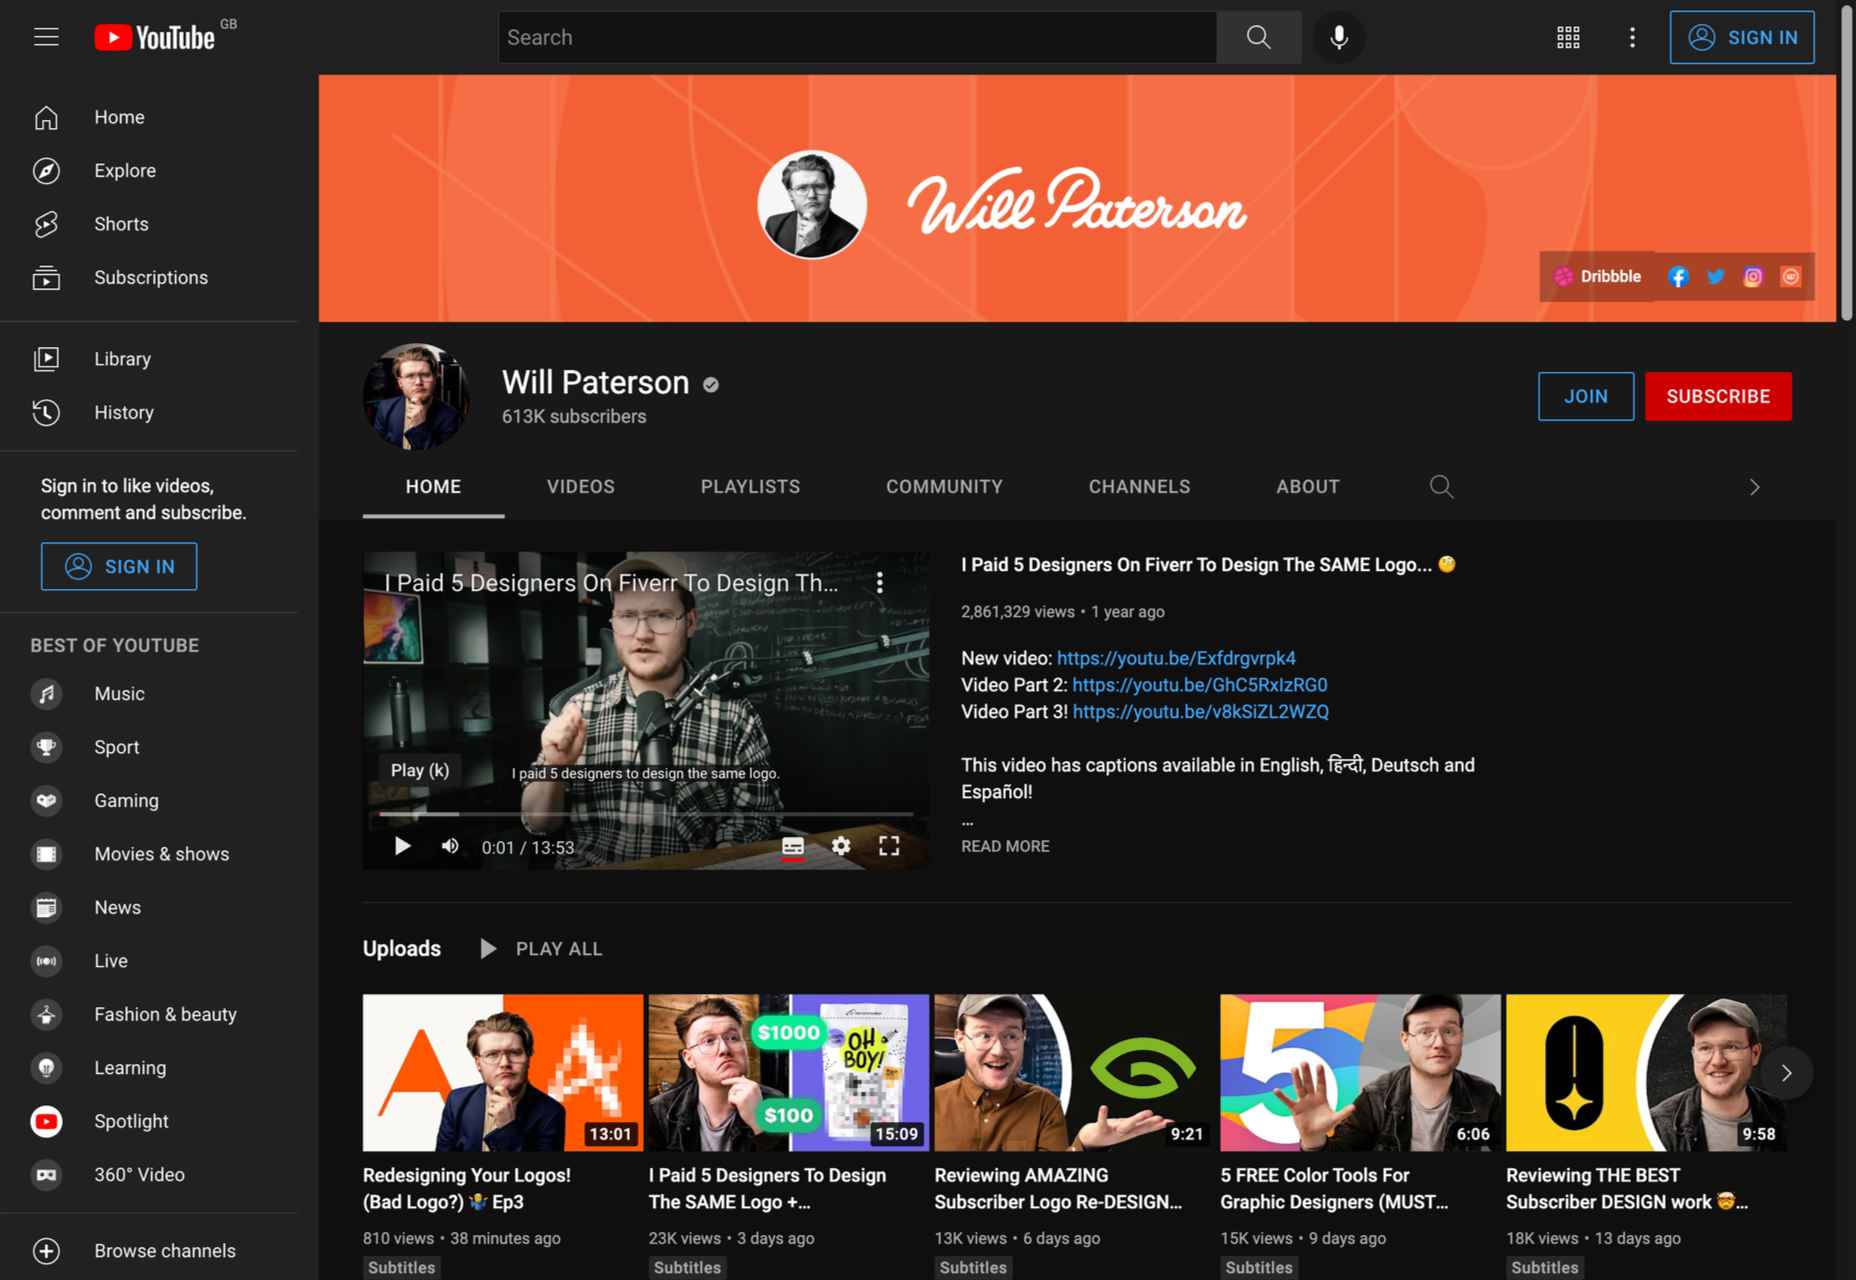
1. Will Paterson
Subject: Logo design, hand lettering, Illustrator tutorials
Subscribers: 608K
Creator: Will Paterson
Are you looking for a YouTube channel that will help you improve your logo designs and entertain you at the same time? If so, Will Paterson is the channel for you. Whether you are a professional designer or a beginner, this channel has everything you need: from logo design and Illustrator tutorials to product reviews and vlogs; nothing is left out.
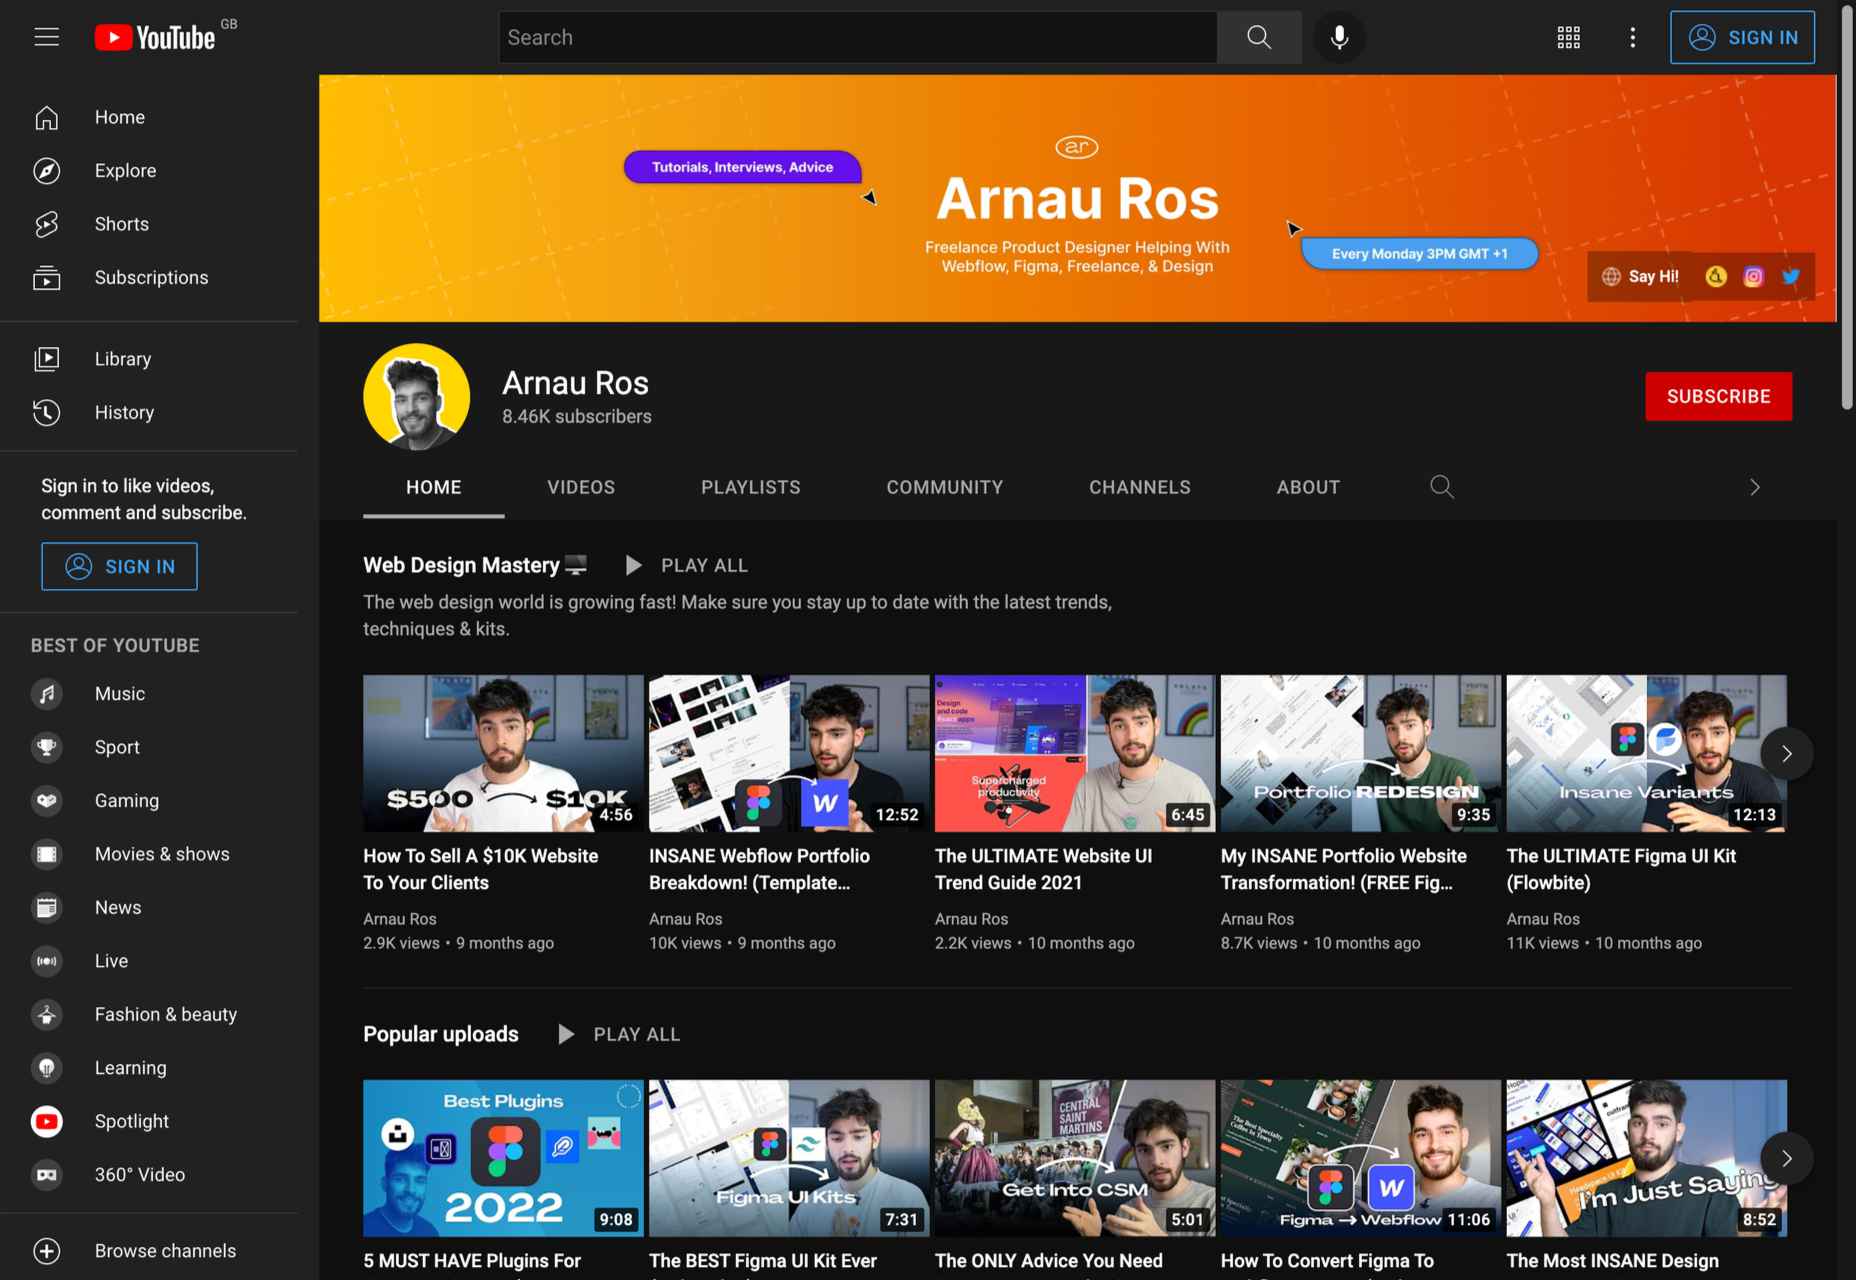
2. Arnau Ros
Subject: Web design (UI, UX), Freelancing, Figma tutorials
Subscribers: 7.7K
Creator: Arnau Ros
In about a year, Arnau Ros has managed to become one of our favorite YouTube channels. In a few words, Arnau is a very talented freelance product designer. He has published numerous videos on how to use Figma, one of the most popular problem-solving platforms for designers.
And that’s not all. Arnau has created a series of videos that will help you get started in the world of freelancing from scratch as a new designer.
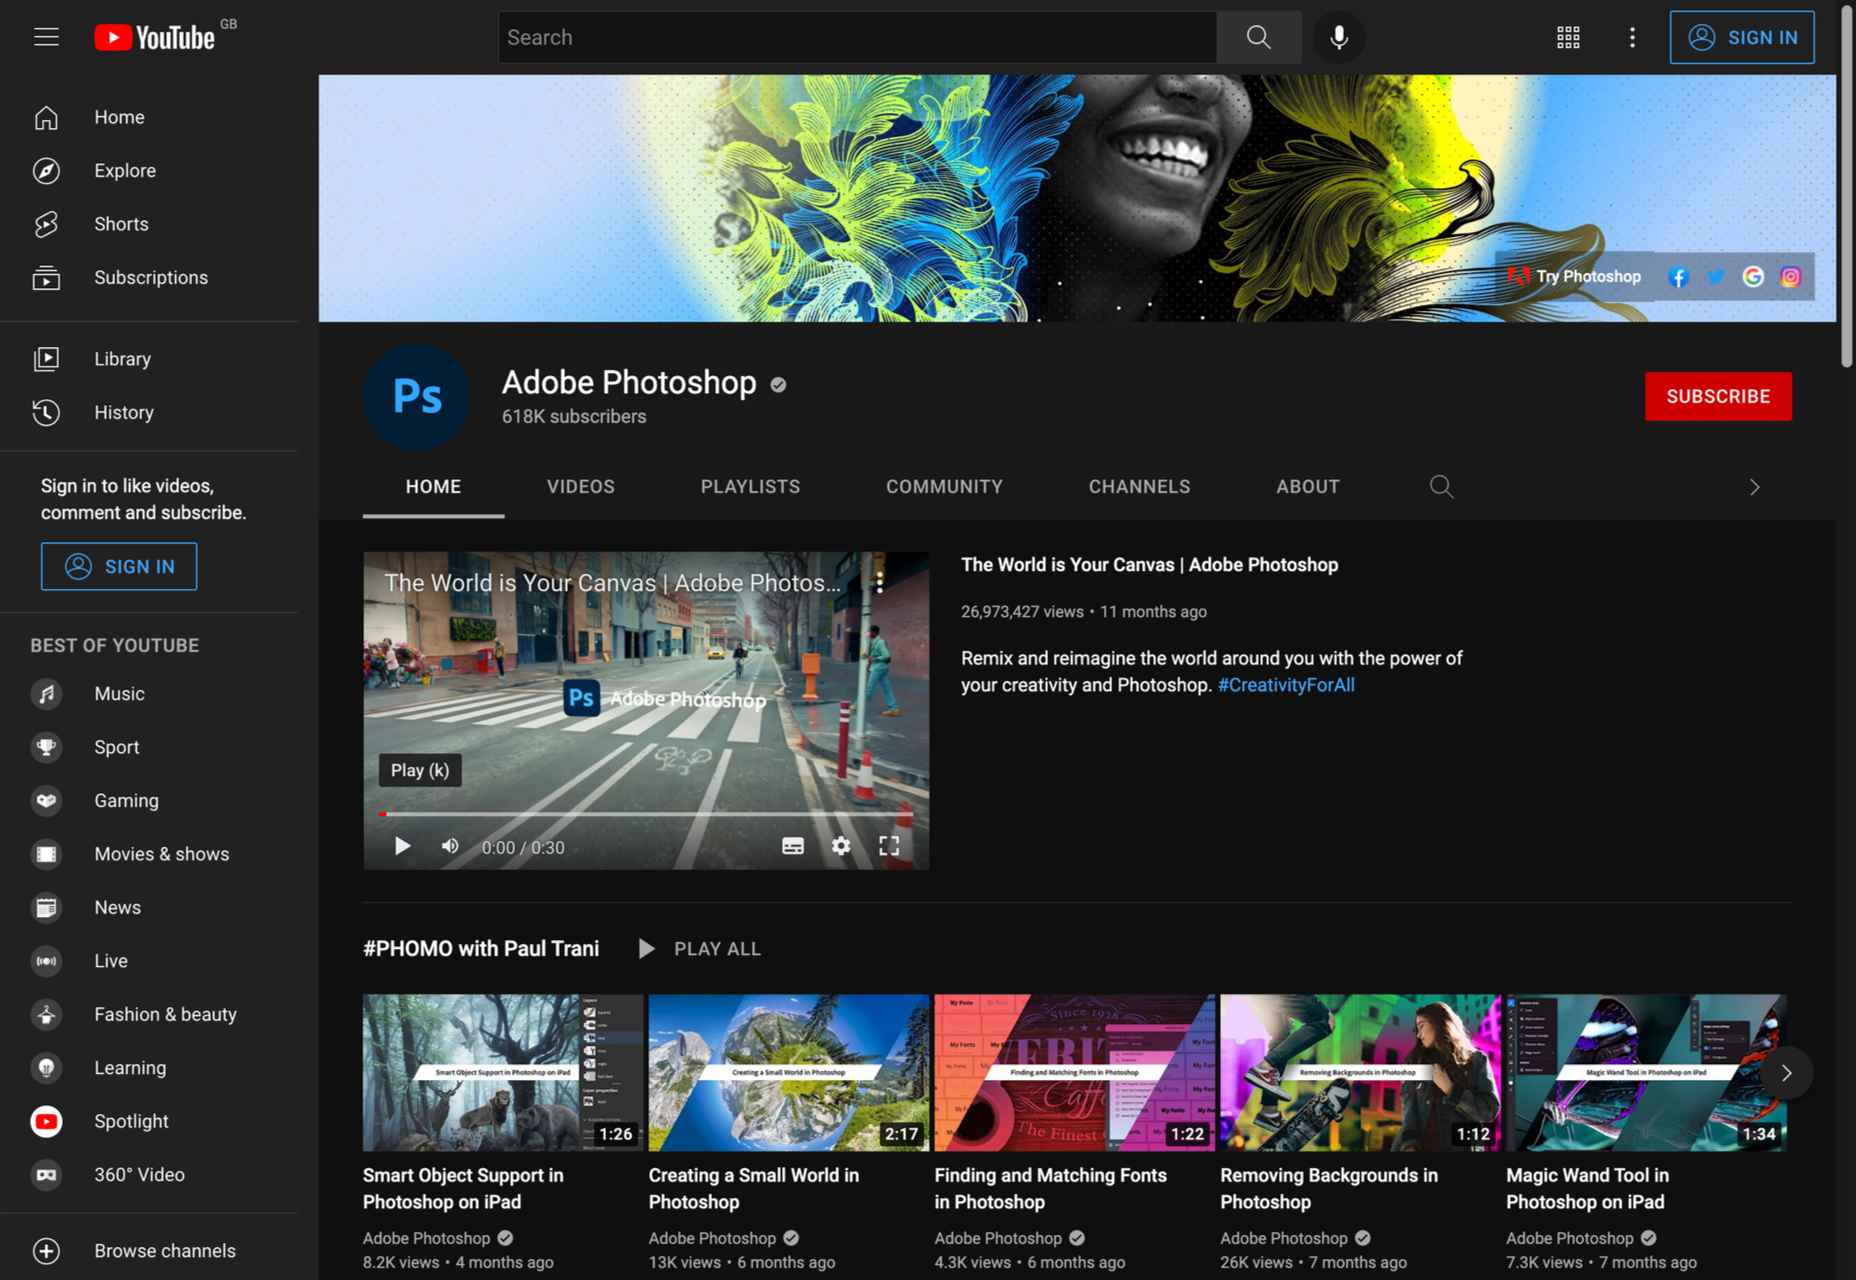
3. Adobe Photoshop
Subject: Photoshop tutorials
Subscribers: 618K
Creator: Adobe
Although there are numerous YouTube channels that offer top-notch Photoshop tutorials, the official Adobe Photoshop channel should not be underestimated. Adobe has created a quick start guide for most Photoshop features, toolboxes, etc. So if you need to quickly complete a task in Photoshop, this is the perfect channel for you.
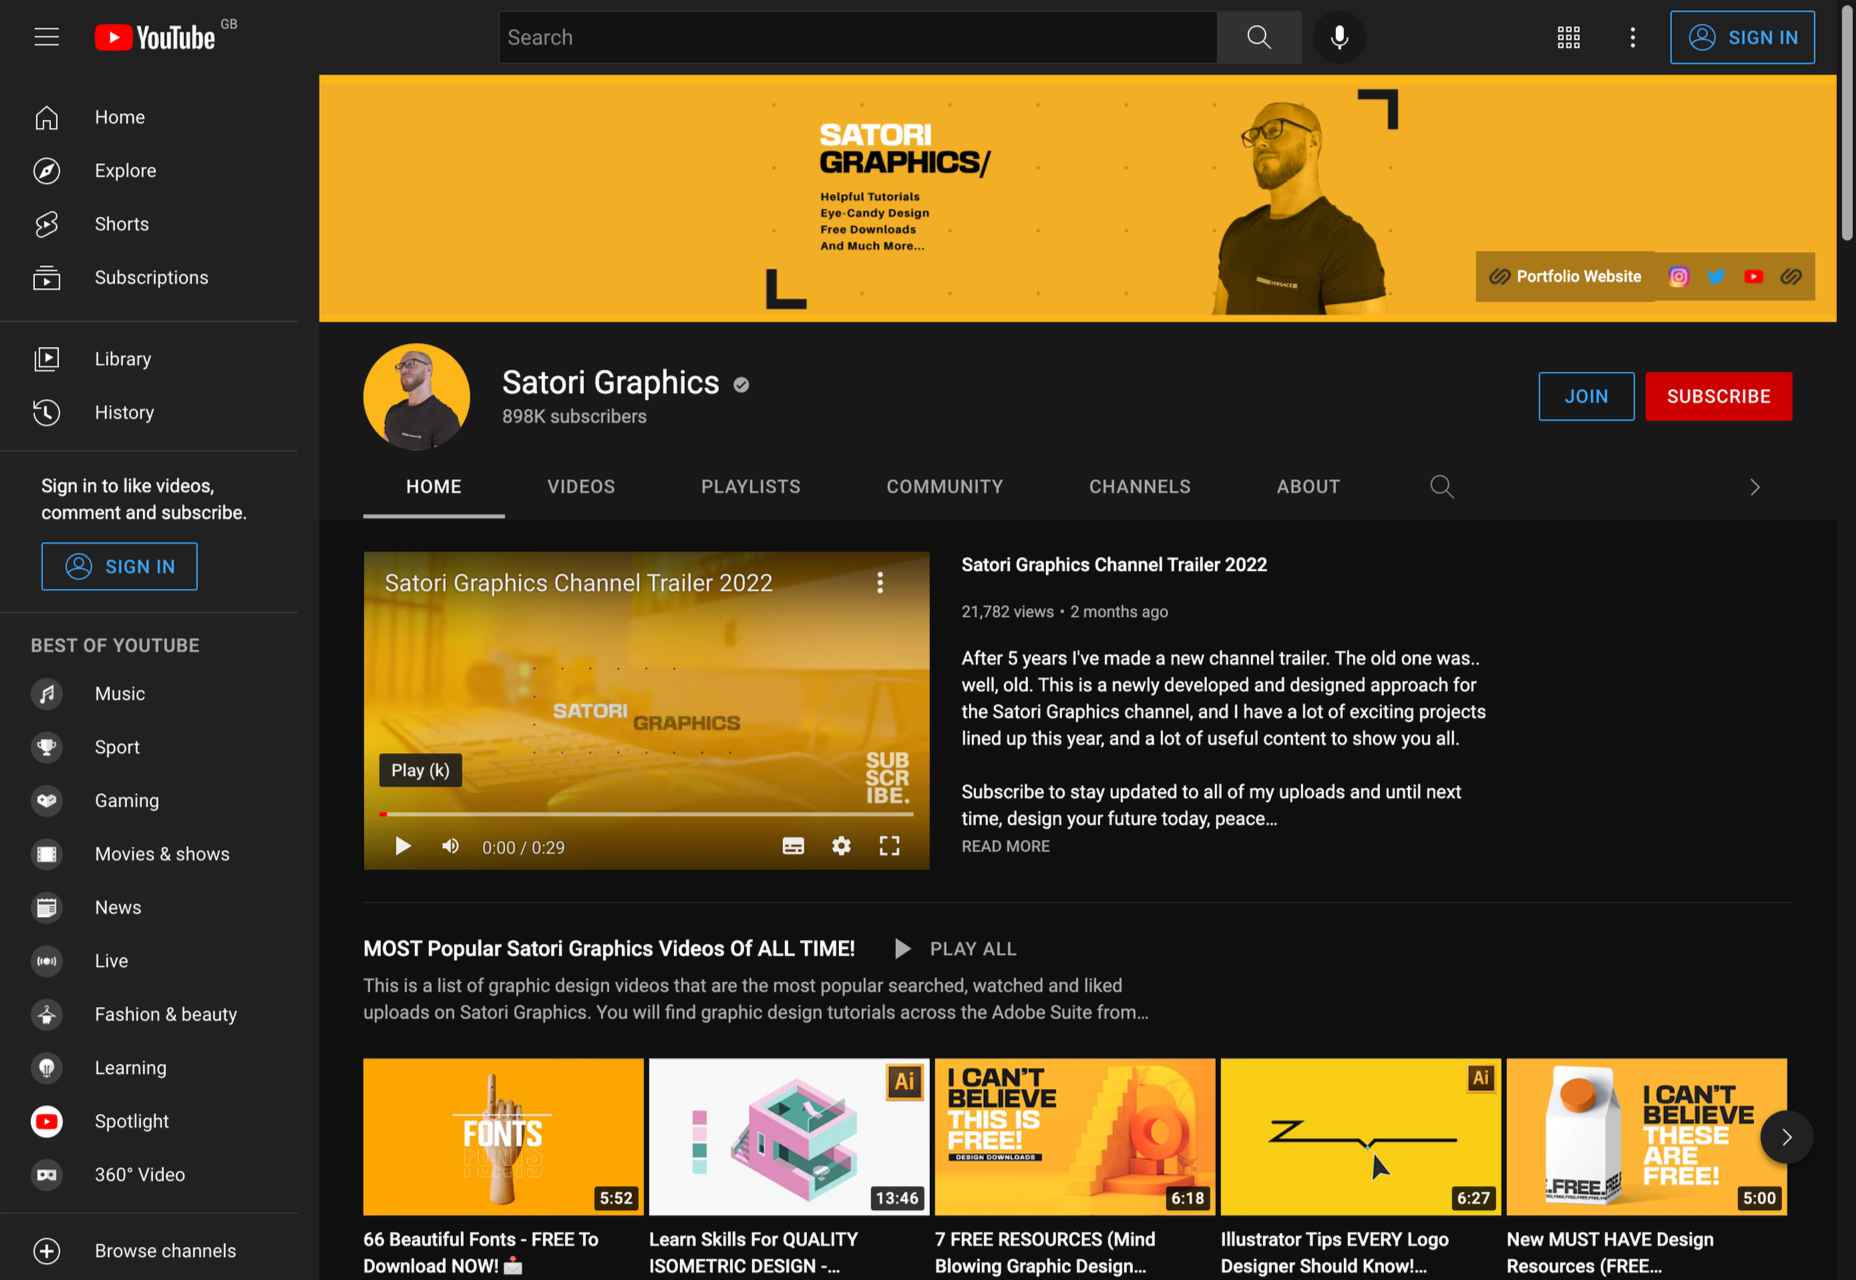
From career development videos to poster and type designs to workflow tutorials, Satori Graphics has it all. We highly recommend this channel for beginners and designers who want to master Illustrator and create a top-notch portfolio for their design work.
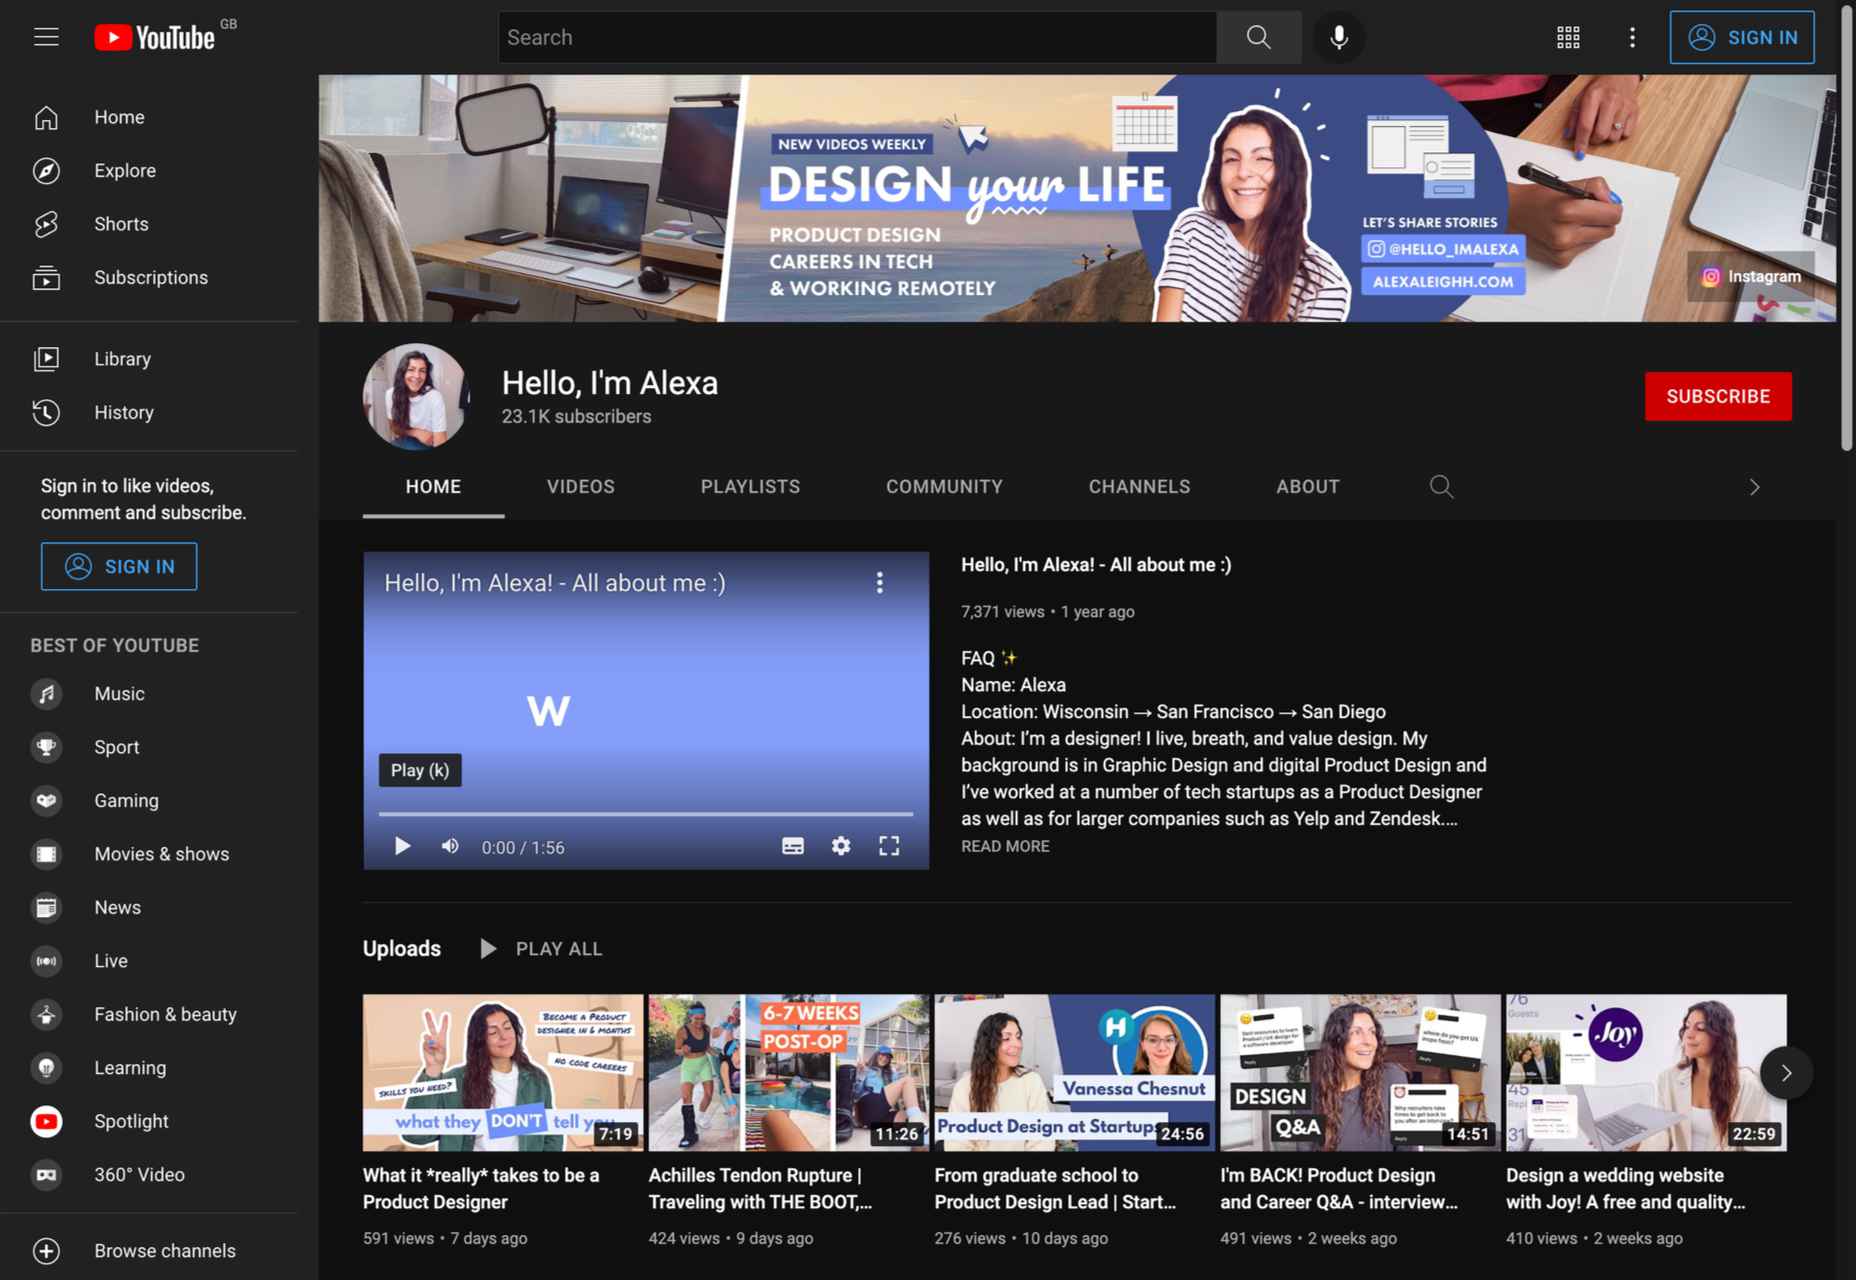
5. Hello, I’m Alexa
Subject: Freelancing, UX design, vlogs
Subscribers: 23K
Creator: Alexa Herasimchuk
Alexa’s YouTube channel is a great choice if you are a UX designer and want inspiration. What we love about Alexa is that her channel covers everything a UX and product designer needs to know. Be sure to check out the fascinating video discussions with other designers that she has uploaded.
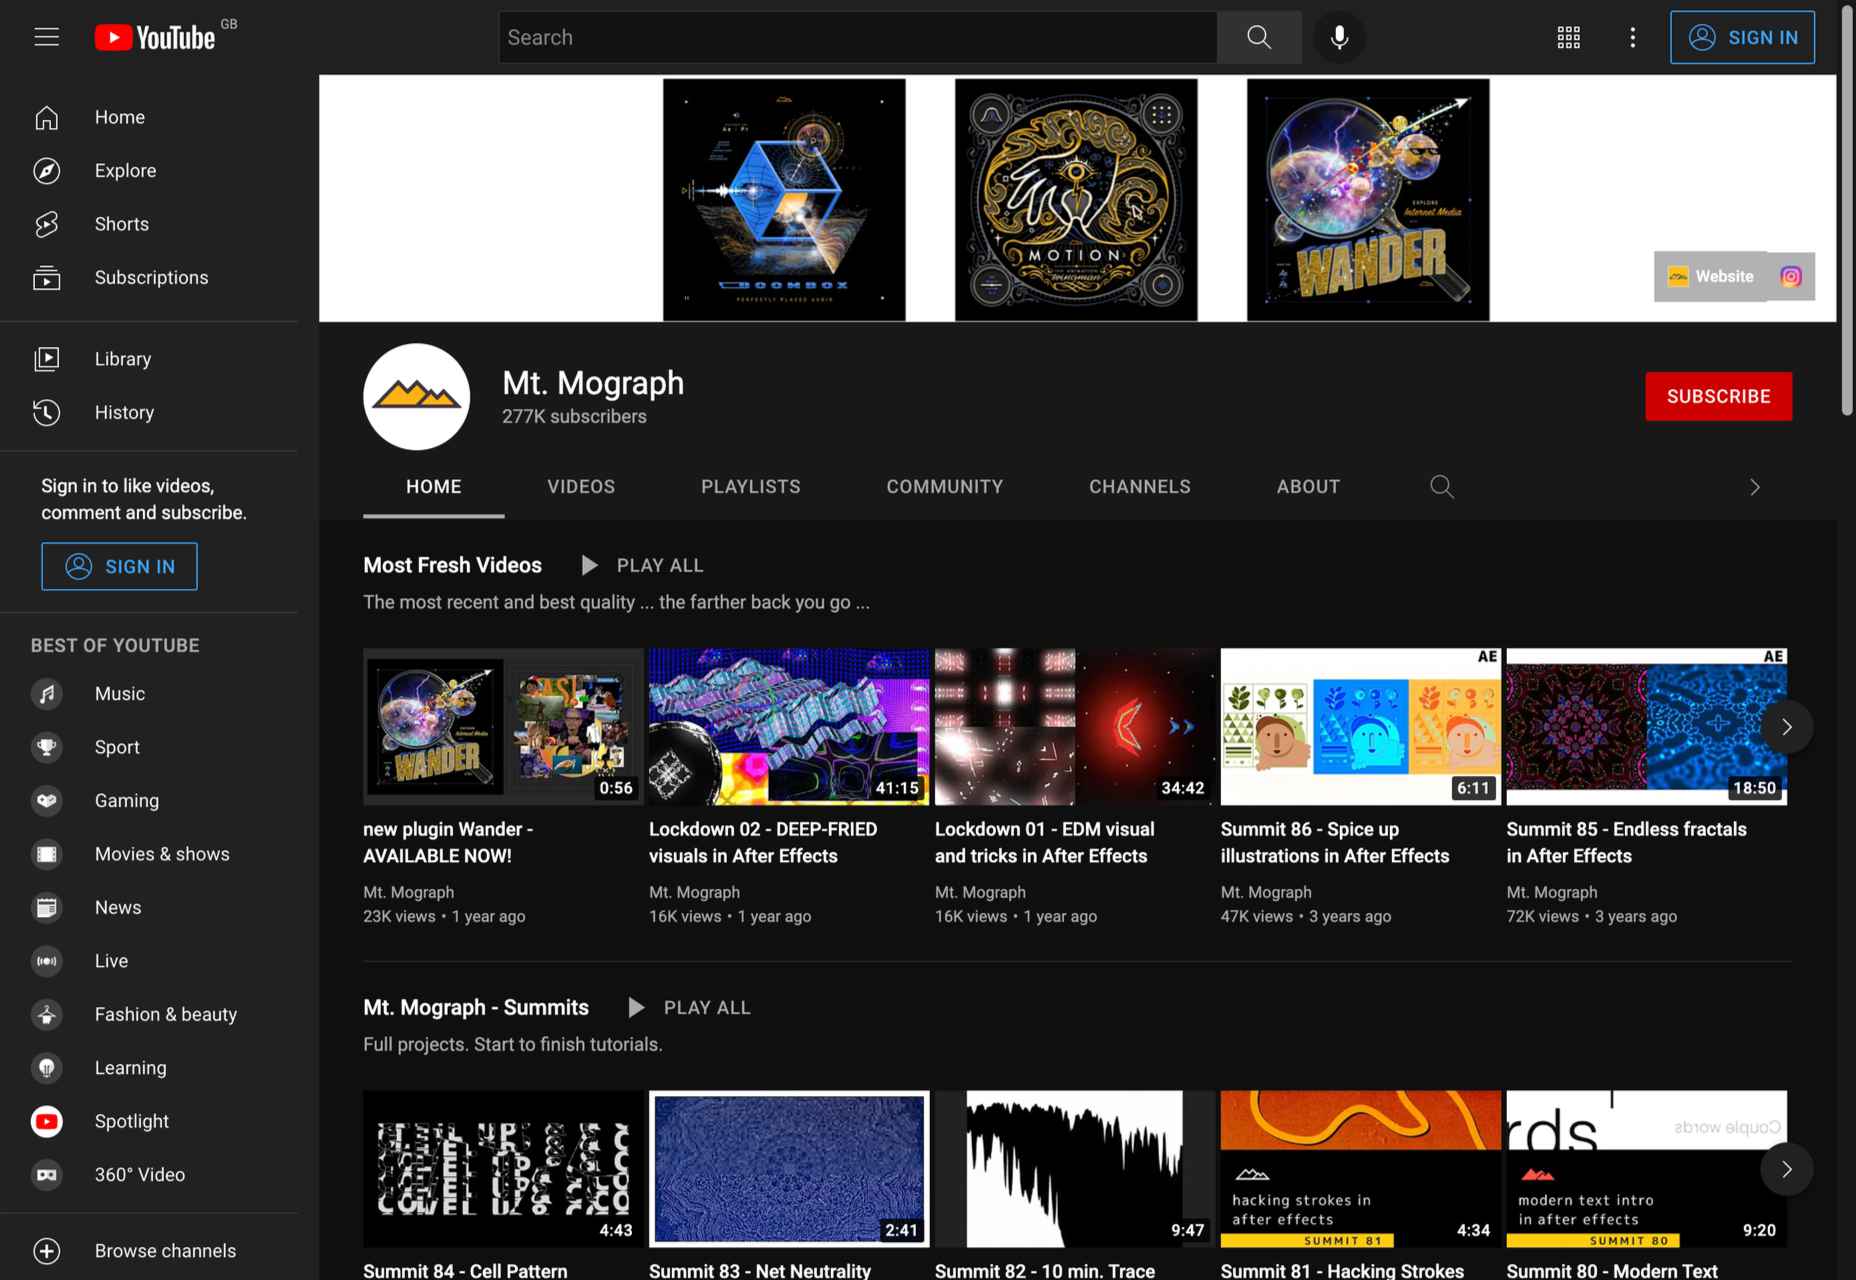
6. Mt. Mograph
Subject: 3D animation, motion graphics guides, Adobe After Effects
Subscribers: 277K
Creator: Mt. Mograph co.
For more than 3 years, Mt. Mograph has been one of the most popular YouTube channels for graphic designers. The channel is especially popular among creatives who want to learn more about 3D animation, geometric motion, and need the best After Effects tutorials.
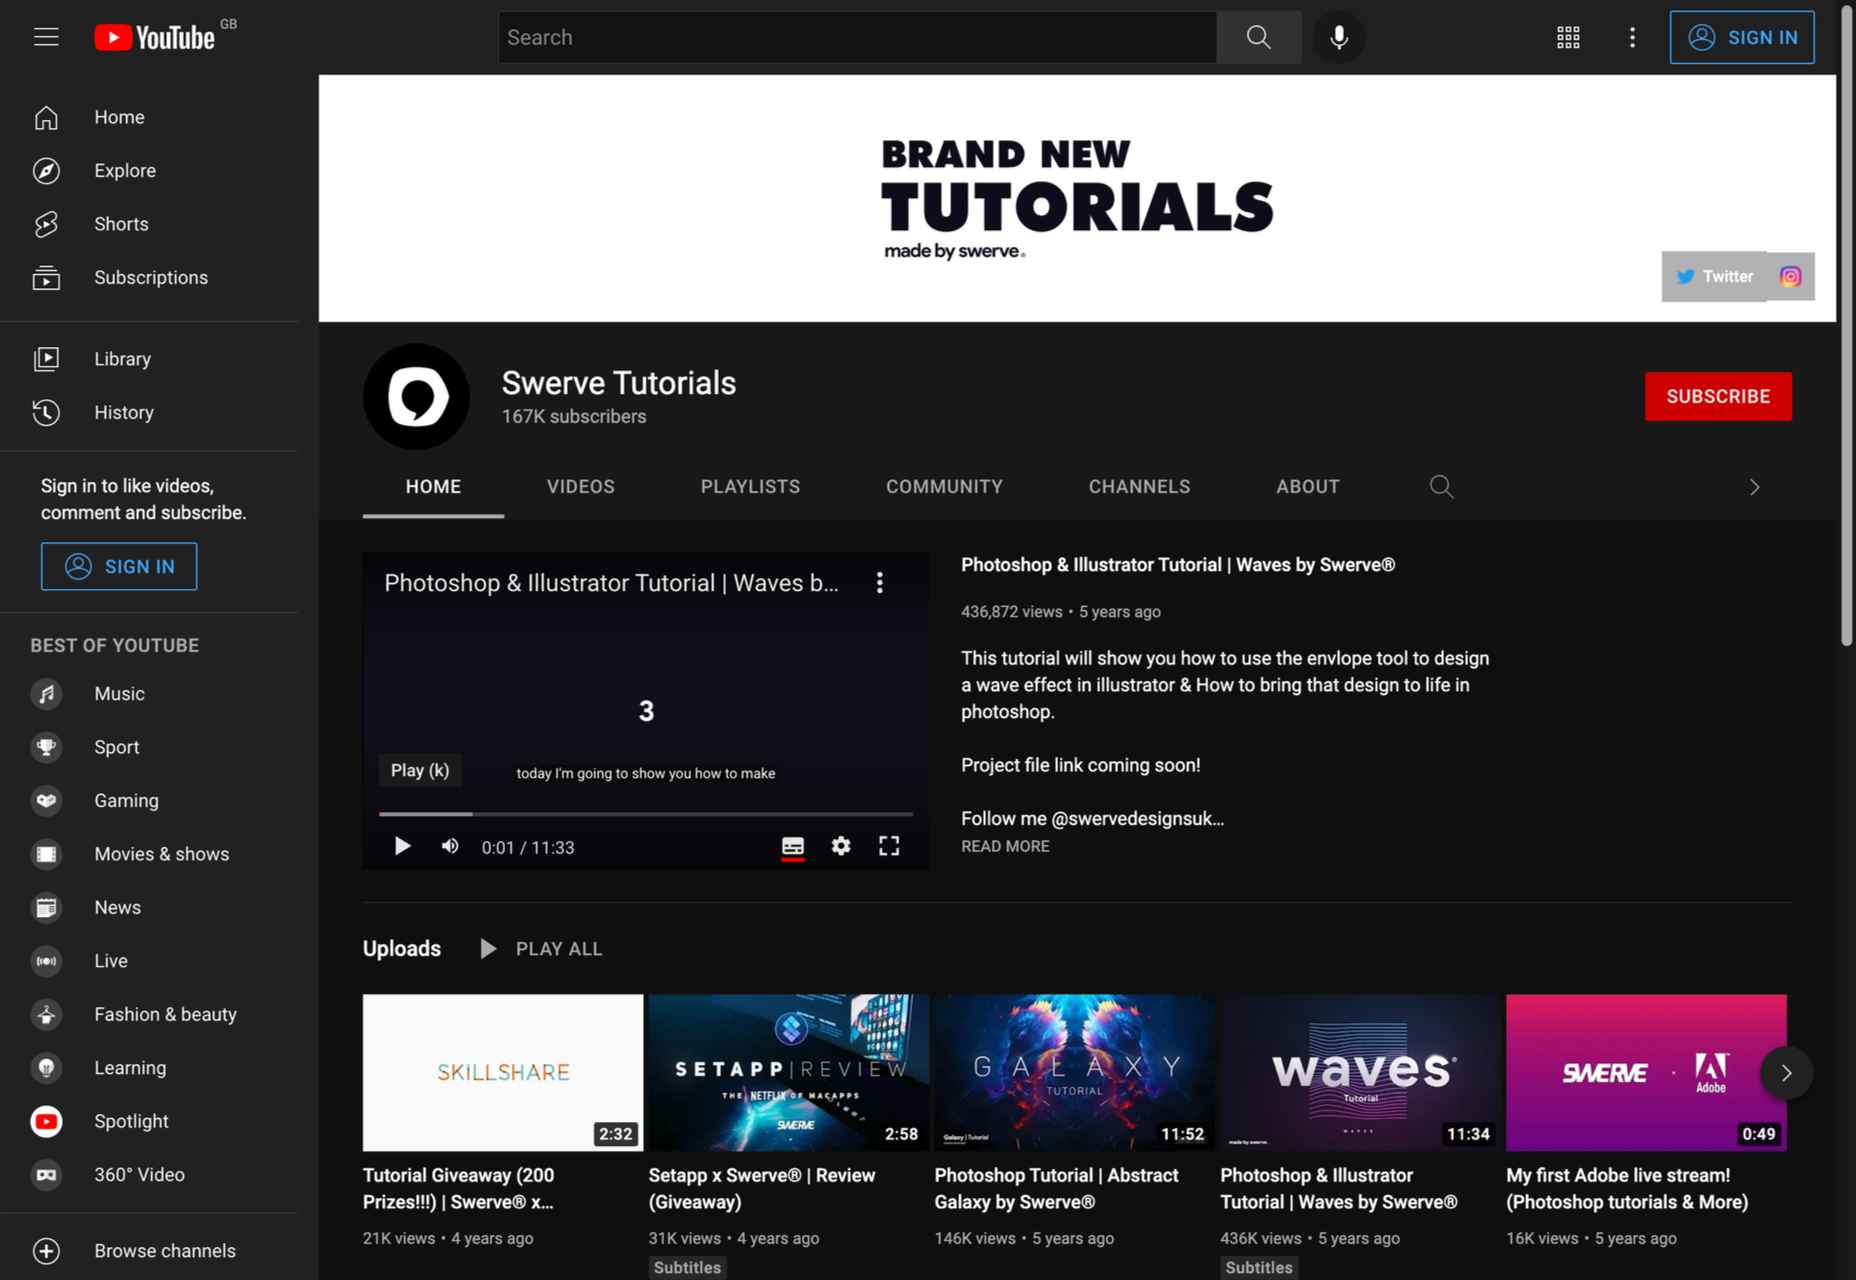
7. Swerve Tutorials
Subject: Photo editing, motion graphics
Subscribers: 167K
Creator: Swerve
Swerve has created some of the most comprehensive how-to videos for Photoshop, Illustrator, and Motion Graphics. The channel’s speed art videos are extremely inspiring. Even though the channel is not constantly updated, it already contains many videos that you should definitely watch.
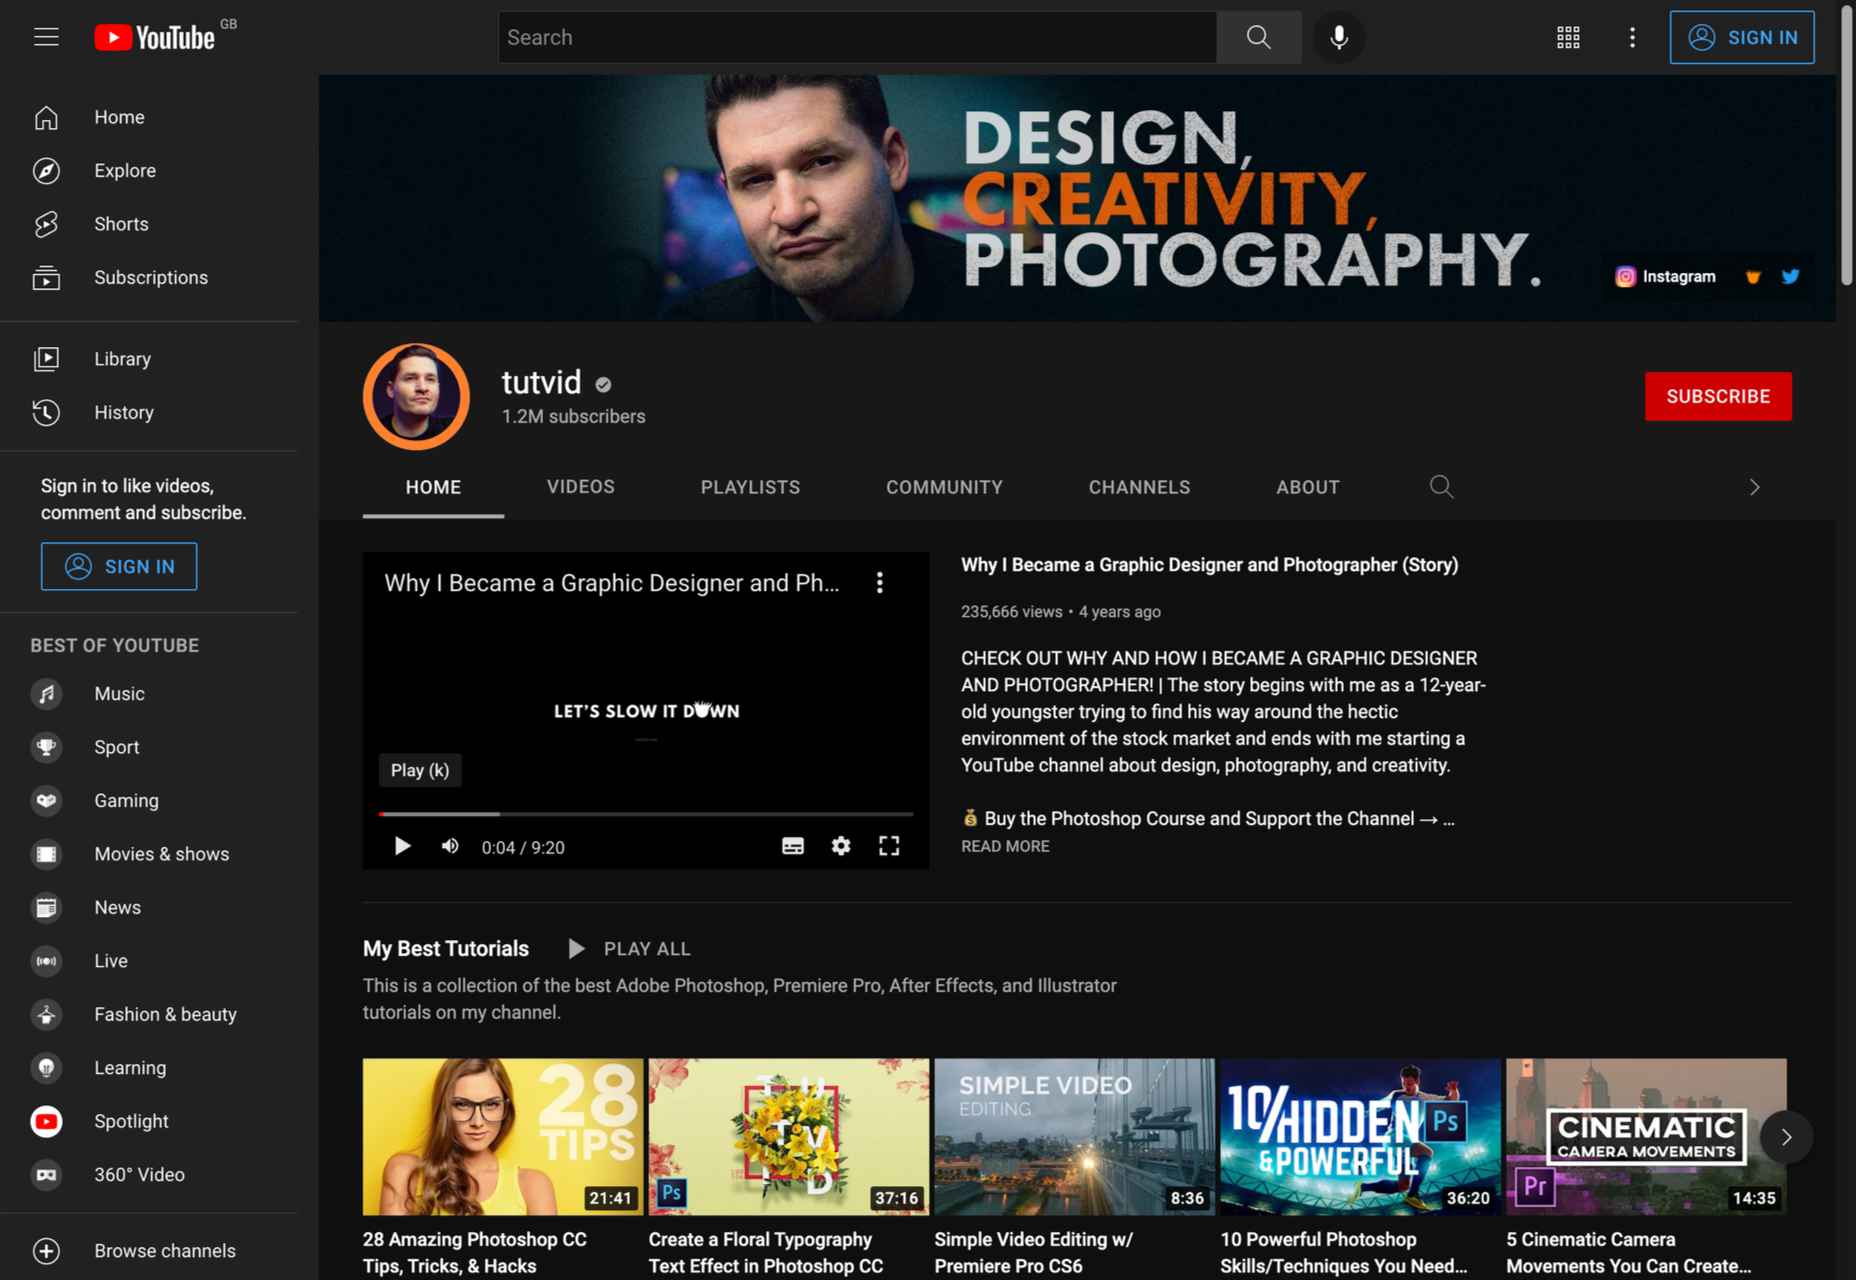
8. Tutvid
Subject: Graphic design software (Illustrator), Photo and video editing (Photoshop, Premiere, Lightroom)
Subscribers: 1.19M
Creator: Nathaniel Dodson
Tutvid needs no introduction. With more than 1 million subscribers, this has been one of the most popular YouTube channels for creatives for years. When it comes to tutorials about Adobe Creative Cloud software, nothing beats this channel.
If you are looking for comprehensive tutorials on Adobe Photoshop, Illustrator, Lightroom, and Premiere, Nathaniel Dodson is your man.
9. CharliMarieTV
Subject: Freelancing, web development, chats and vlogs
Subscribers: 209K
Creator: Charli Prangey
If you are not yet familiar with the digital nomad lifestyle, be sure to check out the CharliMarieTV channel. Charli is a freelance web designer and entrepreneur who has created some of the best videos on website design, coding, remote work, and more.
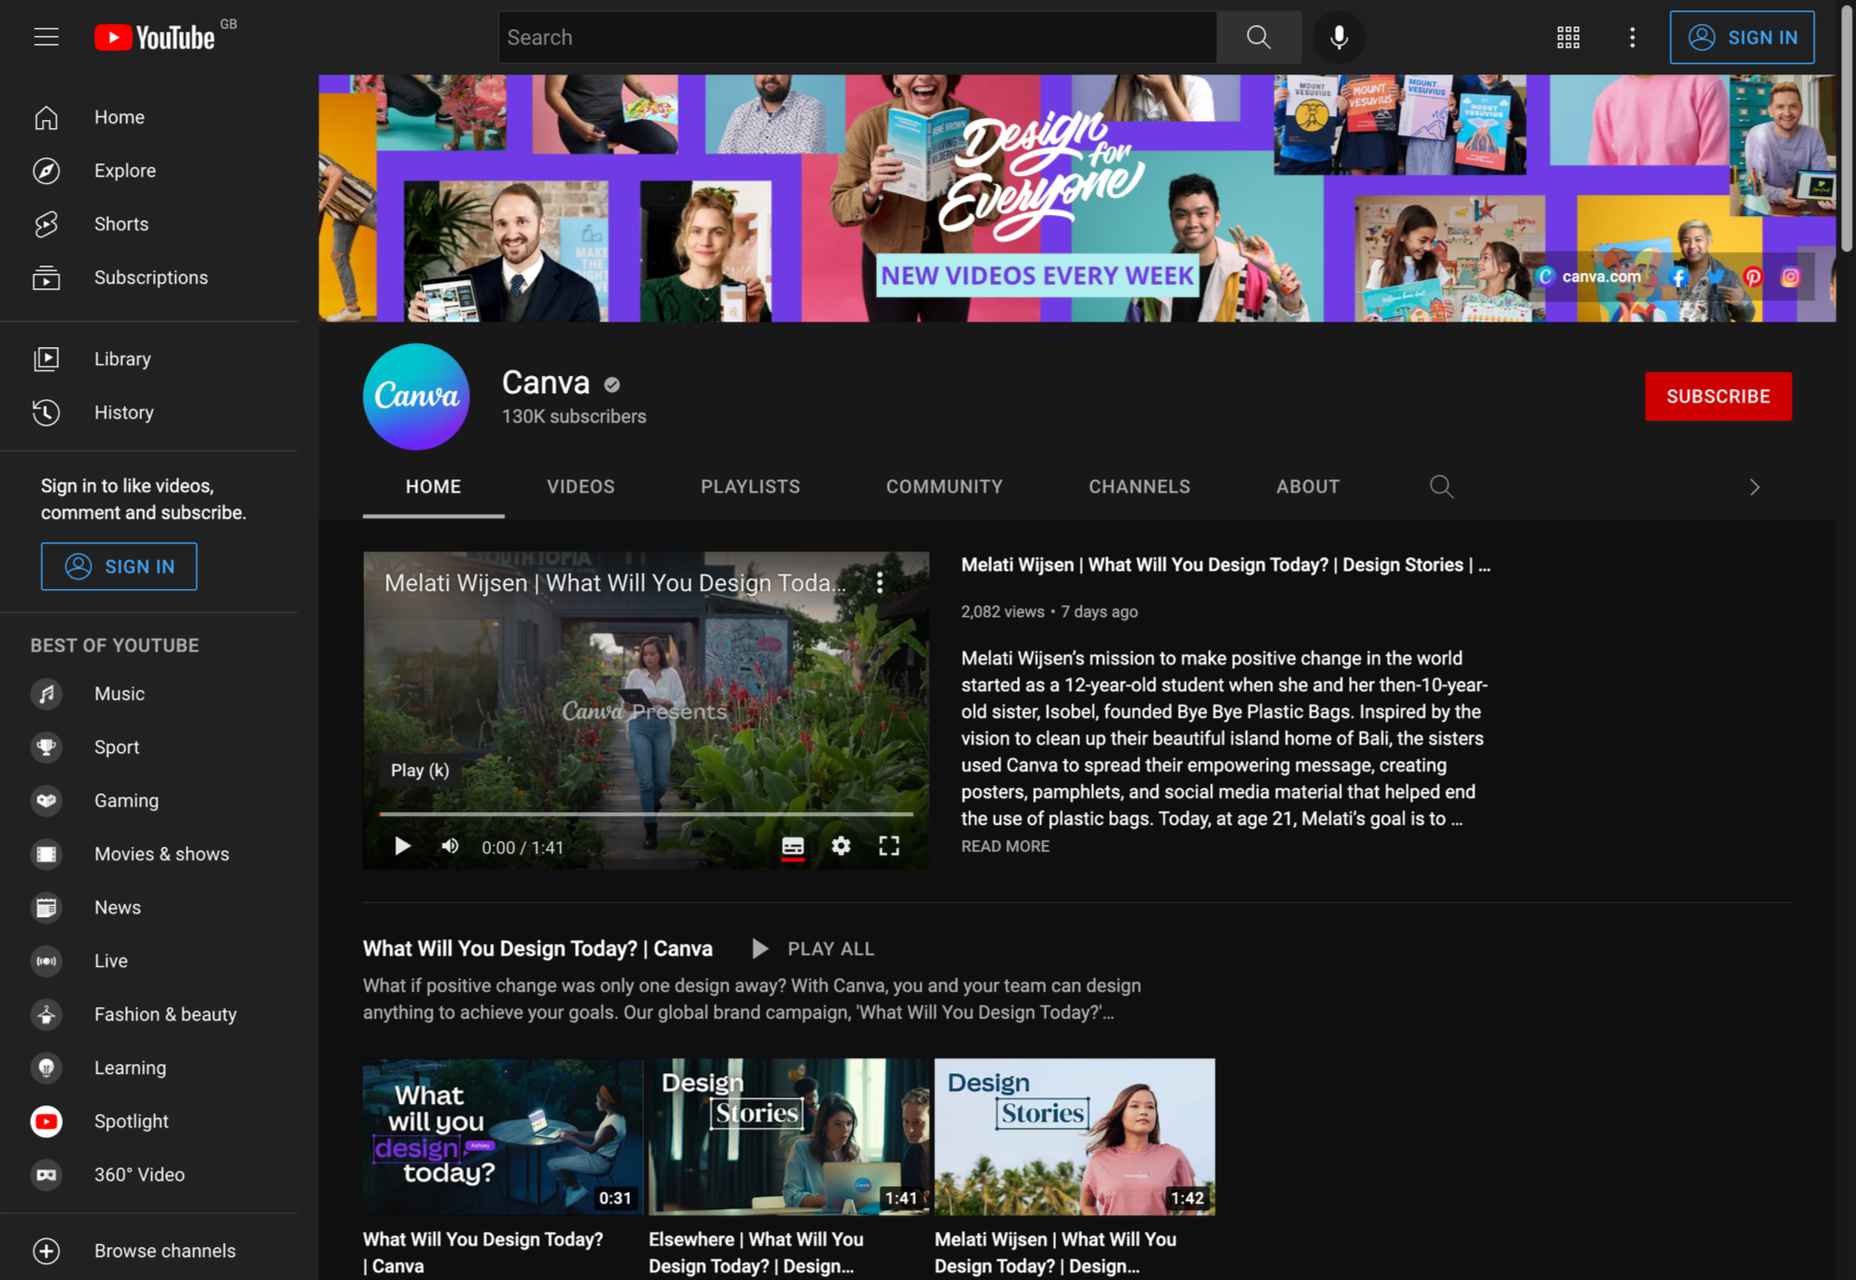
10. Canva
Subject: Canva tutorials
Subscribers: 126K
Creator: Canva
Canva is a popular web-based graphic design platform. Like the official Adobe Photoshop channel, this is the best way to quickly learn how to use Canva software. In addition to quick tutorials, this channel includes videos with all the important software updates and in-depth Canva workshops.
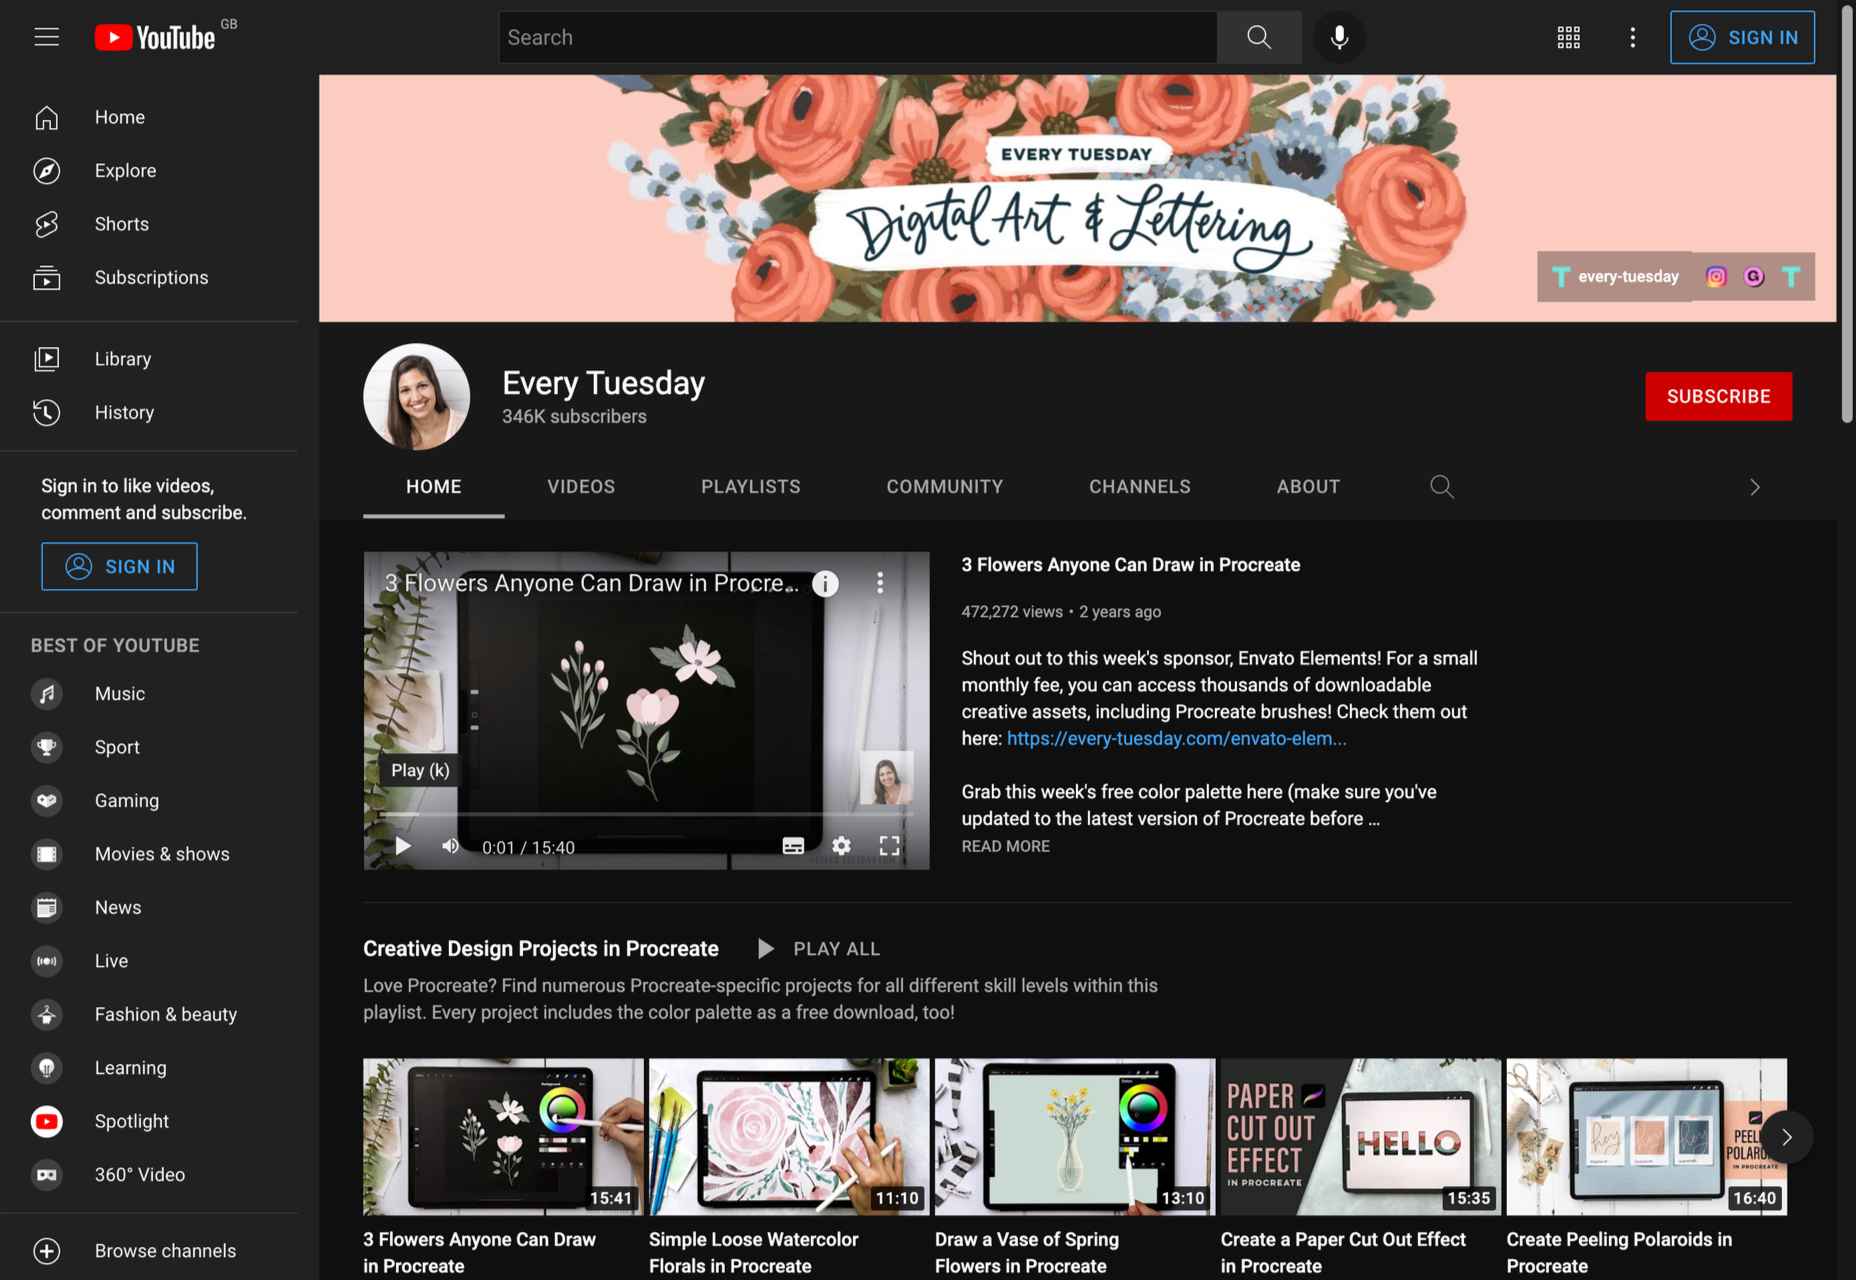
11. Every Tuesday
Subject: Graphic design guides for Procreate
Subscribers: 345K
Creator: Teela Cunningham
When it comes to Procreate tutorials, there’s nothing better than Every Tuesday. The channel has different playlists for beginners, intermediate and professional creatives. From hand lettering projects to watercolor flowers to digital gouache, you’ll find everything you need to master Procreate on Teela’s channel.
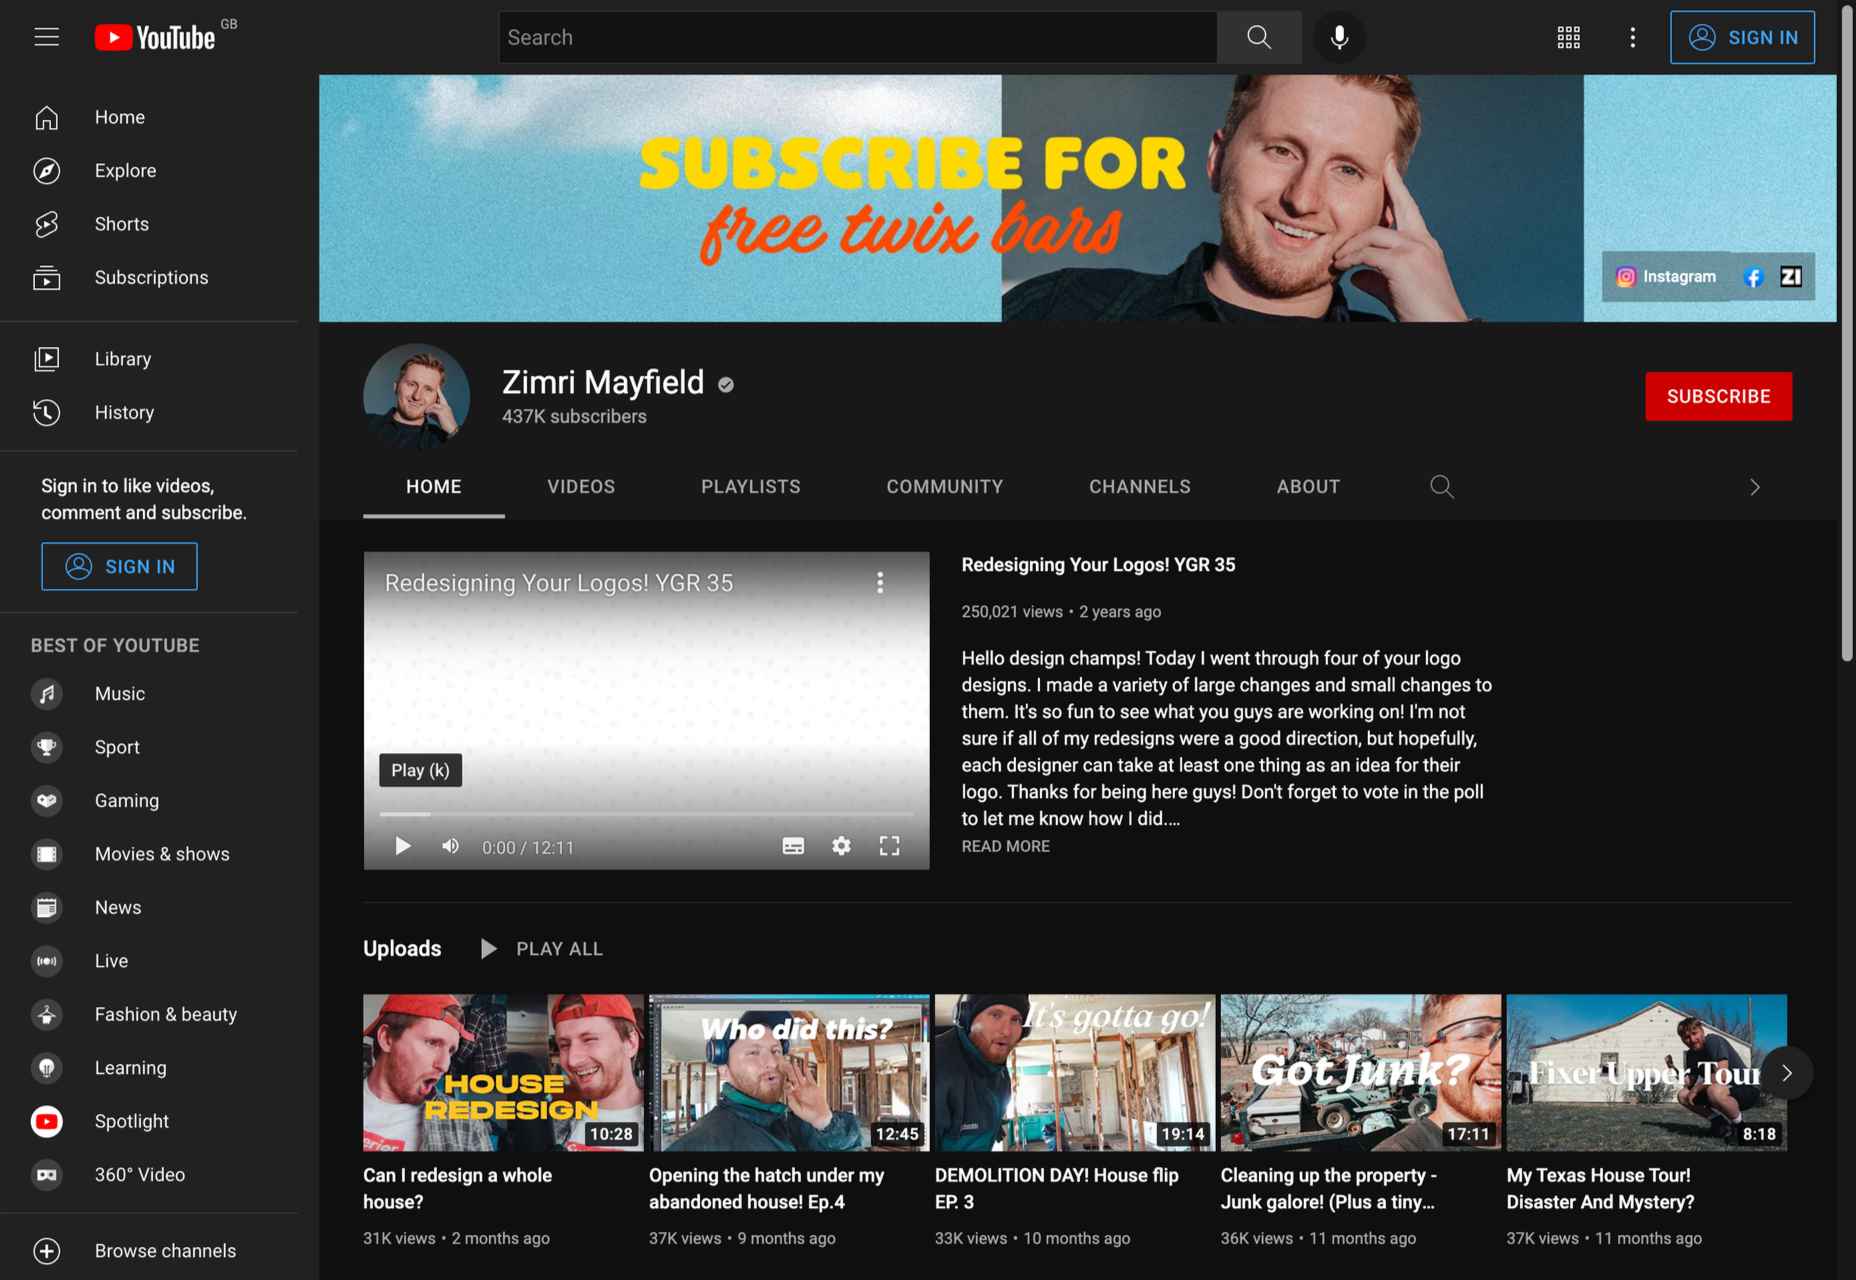
12. Zimri Mayfield
Subject: Logo design tutorials, vlogs, logo redesign
Subscribers: 437K
Creator: Zimri Mayfield
Those of you who love logo designs probably already know all about Zimri Mayfield’s channel. Professionalism and a great sense of humor are combined in one of the most inspiring YouTube channels for designers.
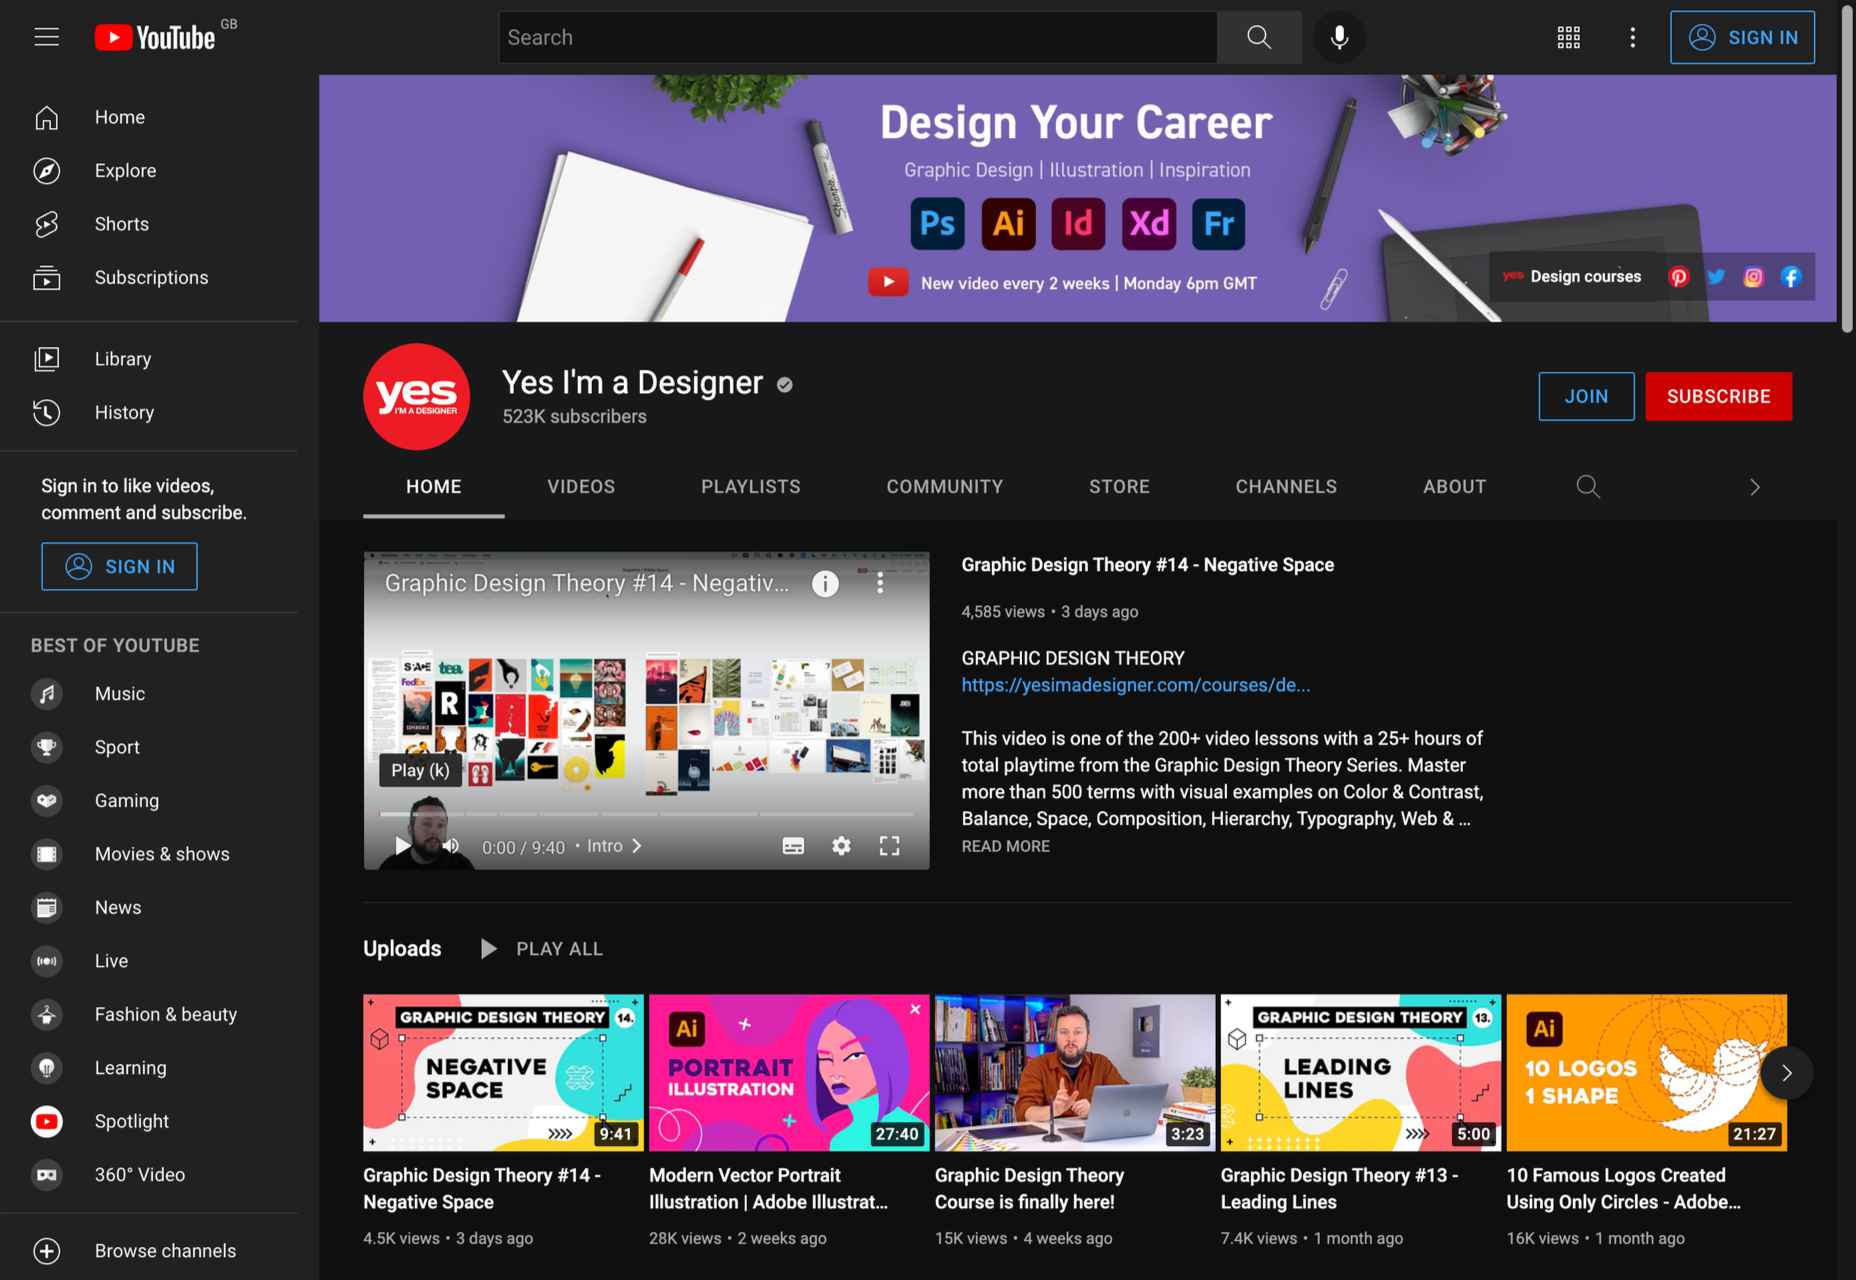
13. Yes I’m a Designer
Subject: Adobe creative cloud tutorials
Subscribers: 517K
Creator: Martin Perhiniak
As a certified Adobe design master and instructor, Martin Perhiniak has created a must-follow channel on YouTube. From basic Photoshop and Illustrator tutorials to advanced masking tutorials, you’ll find it all at Yes I’m a Designer.
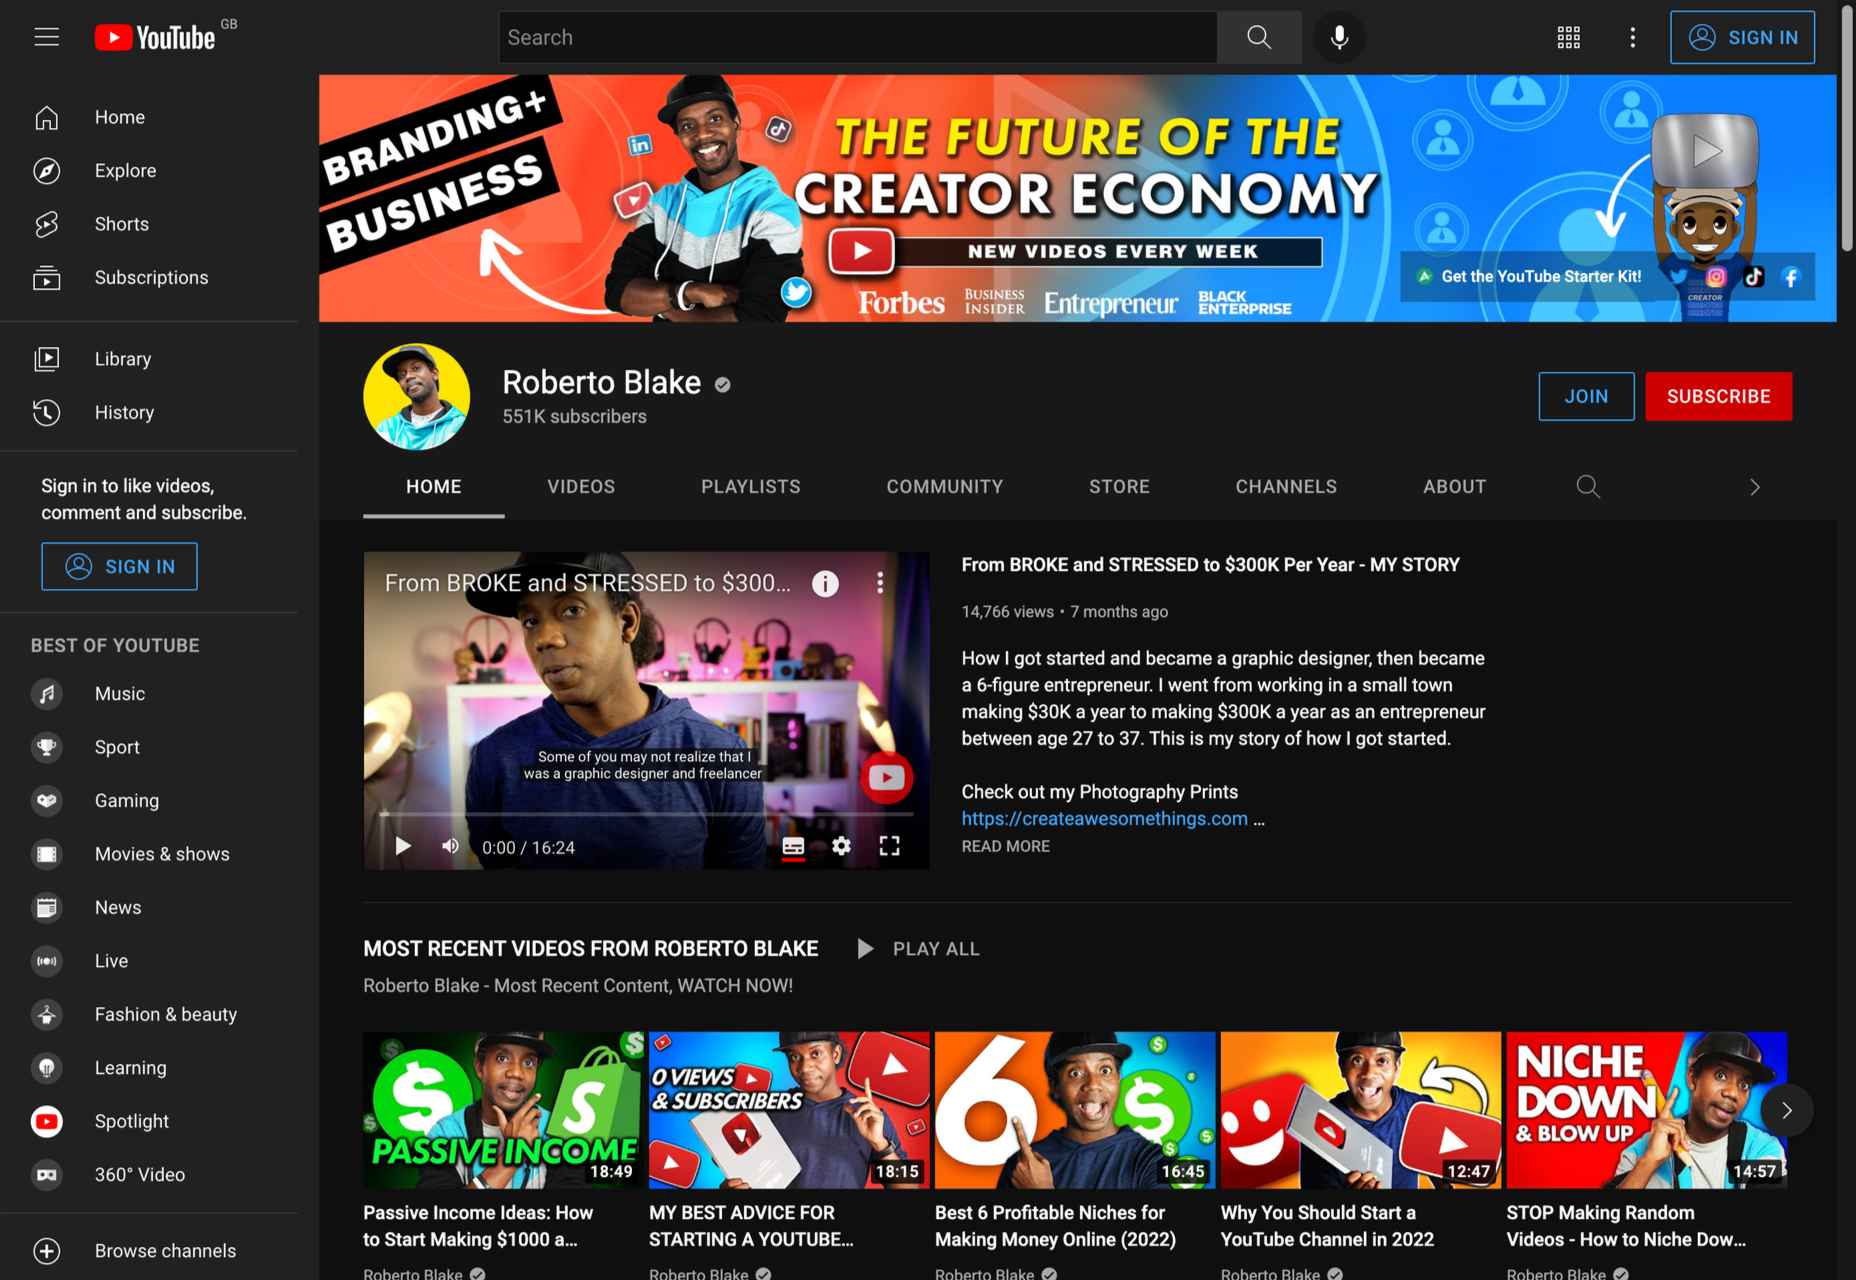
14. Roberto Blake
Subject: Adobe tutorials, brand/business development
Subscribers: 549K (as of March 2022)
Creator: Roberto Blake
If you are looking for something more than graphic design tutorials, our last suggestion is perfect. Roberto Blake has created numerous Photoshop, Dreamweaver, Illustrator, and Indesign tutorials, but also gives numerous talks and shares his knowledge on video marketing and brand development.
Wrap Up
Although there are numerous YouTube channels for designers, these are our absolute favorites. Of course, that does not mean there are not more equally successful and inspiring designers on YouTube. Made by Mighty, Sketch Together and Ch-Ch-Check It are just a few more examples of great YouTube video creators if you search for a specific topic.
We’ve been lied to that you need an email service tool like Mailchimp to do your email marketing for far too long. The kicker is that you can also run a successful email campaign from your Gmail inbox.
And whether you stick to the tools or use Gmail, one thing will remain – 99% of consumers check their email every day; hence, it is the preferred way to communicate and sell to customers.
In addition, Gmail is free to use and easy to set up. It’s also highly versatile—you can use it as a primary email client to manage your business’s day-to-day email needs or leverage its powerful features to create an effective email marketing campaign that helps you reach your goals.
So once you’ve found your emails, it’s time to nurture them right from your inbox for future conversions. Let’s get started.
An Overview of Gmail features
Gmail is an excellent tool for email marketing. However, you need to be aware of all its “marketing” features to use it effectively.
And one of the most critical features is the ability to create groups that allows you to segment your list and send targeted emails. For example, you can create a group for customers who have purchased in the last 30 days.
Another Gmail feature is the ability to create filters. Filters let you automatically organize your emails based on specific criteria. For example, you can create a filter to automatically forward all emails from a specific sender to a particular Gmail label.
Finally, Gmail offers a variety of Gmail extensions that add more features to Gmail, like email scheduler and tracker.
Tips on How To Leverage Gmail Features For Email Marketing
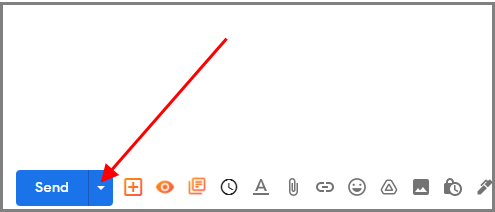
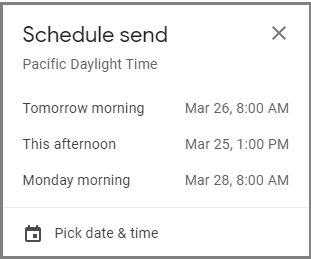
1. Use Gmail’s scheduling feature to time your sends
Gmail’s scheduling feature comes in handy when you want to time your sends to go out at a specific time.
This can be very helpful if you want to ensure your emails are going out when your subscribers are most likely to check their inboxes.
To use the scheduling feature, simply click the arrow next to the “Send” button when composing a new email.
Remember that Gmail uses your current time zone settings, so make sure those are accurate before scheduling your send!
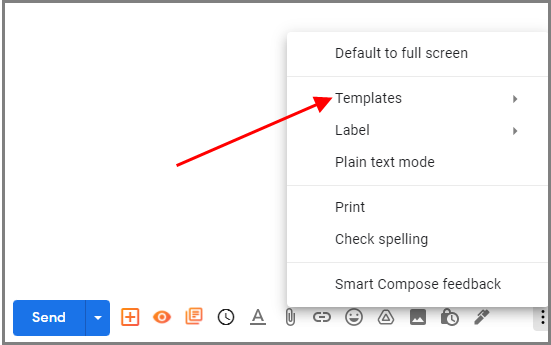
2. Take advantage of Gmail’s canned responses to save time
Gmail’s canned responses can be a lifesaver when trying to save time on email responses. Plus, it also comes in handy for more complex situations.
For example, if you’re planning a meeting, you can use it to send out the meeting details and agenda to all of the attendees.
To create canned responses, first enable it from Gmail settings. On the compose window, click the “more options” menu at the bottom of the compose window, and select Canned responses. Other Gmail apps will call it “templates.”
Next, create a new canned response or choose an existing one to insert into your message.
3. Use Gmail’s personalization features to create a more intimate connection with your customers
Gmail personalization makes your customers feel like they’re more than just an email address. And it’s simple; you just have to use the information they’ve given you to create an experience that feels more connected.
Here are some ways to get started:
Use [first name] in your subject line! Your customer will recognize their name and feel like you wrote the email primarily for them.
Start your email with “Hi [first name].” Luckily, you can use merge fields to address everyone by their first name when sending mass emails.
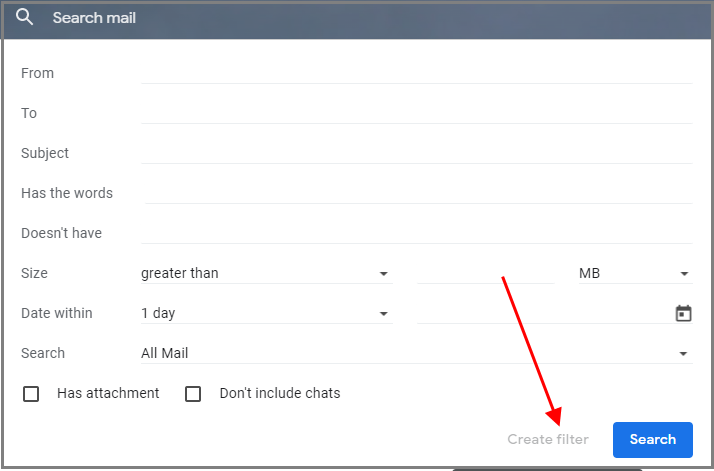
Create a Gmail filter to automatically tag and sort your email
Click on the down arrow in the Gmail search bar and select “Create a filter.” Then, enter the criteria you want to use to tag and sort your emails.
For example, you could create a filter to automatically tag all emails from your email list with the label “Email List.”
Gmail also offers a “Priority Inbox” feature that can automatically sort your emails. To enable this feature, click on the gear icon in Gmail and select “Settings.” Then, under the “Inbox” tab, select “Priority Inbox.” Gmail will then ask you to select the criteria for what constitutes a “priority” email.
Once you have selected the criteria, Gmail will automatically sort your emails into the “Priority Inbox” section.
4. Send mass emails
You don’t have to send each email with your Gmail account. Gmail makes it easy to create a mailing list and send mass emails.
Google’s contact app allows you to create groups of contacts. You’ll then use the “compose” feature to write an email and select the group of contacts you want to receive it. Gmail automatically sends the email to everyone in the group.
You can also use Gmail’s “Canned Responses” feature to create mass-email templates. Canned responses let you insert a saved template into a new Gmail compose window with just a few clicks. This is a great way to save time when sending similar emails to multiple people.
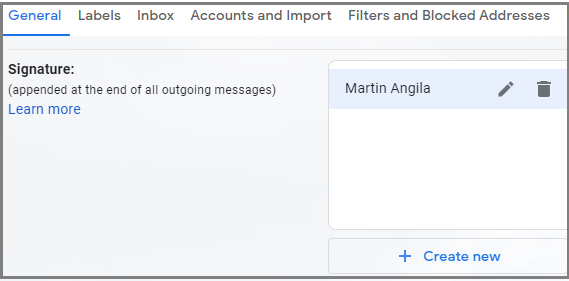
Go to Gmail settings, click on the ” Accounts and Import ” tab, and scroll down to the ” Signature ” section.
Then, put your desired text, hyperlink it to their website or social media profiles, and even add an image.
6. Offer live support via Google Hangouts
Google Hangouts is an excellent tool for providing live customer support to your customers. Live chat helps you stand out from the crowd and increase your sales.
Make it easy for your customers to reach you by adding a “Contact Us” button to your website. That way, customers can contact you without leaving the comfort of their home or office!
When setting up an account with Google Hangouts, make sure you choose a name that will be easy for people to remember. This might seem like an obvious step, but it’s important because if someone has trouble finding your contact information when they need help, they’ll probably just call another company instead!
Conclusion
We’ve covered a lot of ground in this post, so let’s review. We talked about how you can use Gmail to:
Send out targeted emails
Automatically schedule your emails.
Add dynamic content to your emails.
Get more opens, clicks, and replies.
These are just a few ways you can use Gmail for email marketing. Now it’s your turn. Take what you learned today and start applying it! You’ll be amazed by how much more productive and effective you’ll be at email marketing if you do.
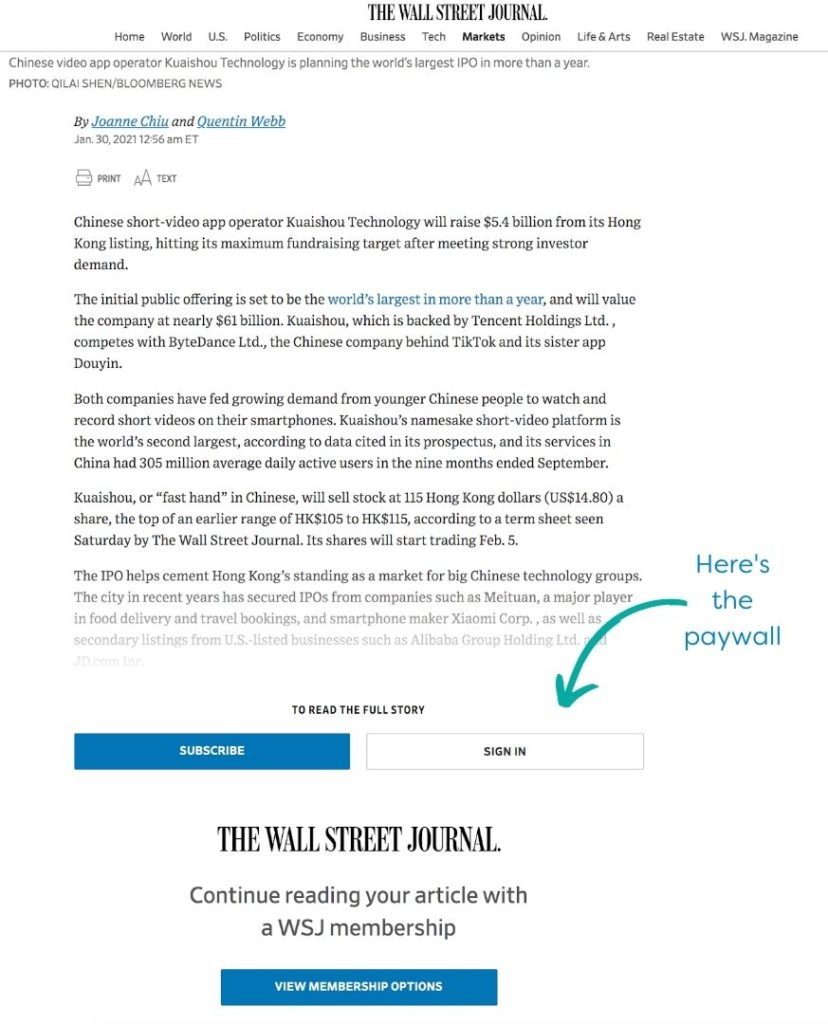
Today, we live in a digital world – chances are you’ve run into some websites that require you to pay in order to access certain content. This is common with anything from newspapers to businesses and even streaming sites.
Here’s an example from the Wall Street Journal:
That spot where a user can no longer read or access the content is called a paywall.
A paywall creates a barrier to accessing content. A paywall can block off only certain content, in the case of sites with free versus paid content. Or it can block the site altogether. There’s a variety of paywall models different businesses use – some sites go with limited access, while others have a one-time payment.
If you’ve got content on your site worth monetizing, you should consider using a paywall. Not sure where to start? Keep reading to learn how you can set up a paywall-protected site quickly and easily.
But first, let’s go over what makes paywalling such a valuable component for your online business.
Why Should You Paywall Protect Your Content?
There are any number of reasons you might want to protect certain content on your site. But the most important of these is the potential for passive income. If you have great content on your site, monetizing what you already have is a business no-brainer!
And a paywall makes generating that passive income easier than things like affiliate links or ads. Both of these rely on third parties – and there’s no guarantee your users will see them.
Also, creating a paywalled site could build a sense of community around your brand. You might make a forum or chatroom on your site – someplace where people can discuss and share their passions. If this space has the exclusivity of a subscription site, your users get to feel like they’re “part of the club”.
A paywall also increases your brand’s perceived value. If it’s worth paying for, your content has to be better than that of sites offering everything for free, right?
So the bottom line? Paywalling is valuable. With that established, let’s go over the major types of paywalls and a few use cases for each.
Main Types of Paywalls
First off, it comes down to brass tacks: What options do you have available when designing your paywalled site? There are a few methods to choose from, and they all serve different purposes.
Subscription-based
Most paywalled sites run on the subscription-based model. With this model, the user is allowed to access whatever content they want so long as they pay a recurring subscription fee. Great examples of subscription-based paywalls are Netflix and most newspaper sites.
Lots of subscription-based websites offer a free trial to test out their services. These trials usually take one of three forms. Access is granted…
Only to select content
For a limited amount of time
For a limited number of views (e.g. five articles)
Pay-per-View
With the pay-per-view model, you charge your users for each article or piece of content they access. This model is popular with sites that want to avoid the monthly model and prefer to let their users choose what to pay for. This a la carte approach gives visitors the opportunity to pick and choose their paid content more selectively.
Paywall-protected content and search engines
Adding a paywall to your site does give you a problem to tackle – keeping your site’s search engine optimization (SEO) up to snuff. Because paywalled pages are gated, you have to use indexing to keep them on Google’s radar.
Google introduced its Flexible Sampling policy code in 2017 to replace the First Click Free (FCF) policy. As the name suggests, Flexible Sampling gives you a ton of control when it comes to what general users can view on your site.
Flexible Sampling is an important tool in your toolbox, so use it! Keeping your site’s pages popping up on Google is the key to keeping your site relevant. Let’s break down the different sorts of sampling you can do with this great tool.
Metered Sampling
The first method of sampling you’ll want to consider is metered. A metered approach allows users to view a set number of articles before requiring users to subscribe or log in. That login requirement is the paywall.
Generally, it’s recommended that you use monthly metering, with between six and 10 articles viewable per month. The advantage to this approach is that your paywall will focus on your most engaged users, who are also most likely to subscribe. It also lets people get acquainted with your site for more time before the paywall shows up.
Lead-In Sampling
The other option is lead-in sampling. This method allows users to see a portion of an article or content before the paywall appears. Some publishers refer to the first few sentences on a lead-in sampled article as being “above the fold”.
The advantage of lead-in sampling is that users are allowed to see the content’s value before making a decision about whether it’s right for them. This partial-block is more valuable to users than a fully blocked page.
Ultimately, though, which form of sampling you use comes down to your individual needs and what works best for you.
All that said, let’s get down to business! Following are step-by-step instructions you can use to set up a paywall on your site in a flash.
How to Set Up a Paywall-Protected Website on WordPress
There are countless WordPress plugins that can get you where you need, ranging from free to paid. MemberPress is consistently rated as one of the best paid plugins with numerous features and flexibility, while one of the various free membership plugins might also do the trick. There’s lots of options out there for you, and I’d say it’s most important that you research to find what’s best for you.
Once you get your plugin installed, you’ll have some extra steps to take to improve your site’s functionality. Read on to hear what other tips will make your membership site a success.
How to Do Good SEO for Your Paywalled Pages
As I mentioned, something vital to your website’s success can get lost in translation with paywalled pages – your SEO. This is how Google and other search engines index your site’s pages. Having good SEO is important to keep your site high on Google’s list and visible for potential users.
The tricky part is when you introduce a paywall. How does having paywalled pages affect your SEO ranking? The short answer is that it depends on how hard you work on it. Let’s go over some tips to make sure that you’re following best practices and keeping your site high on Google’s front page.
The Technical Side
There’s a lot that goes into good paywall SEO. First, you need to make sure your site’s backend has your standard optimization to pump up your place in the algorithm.
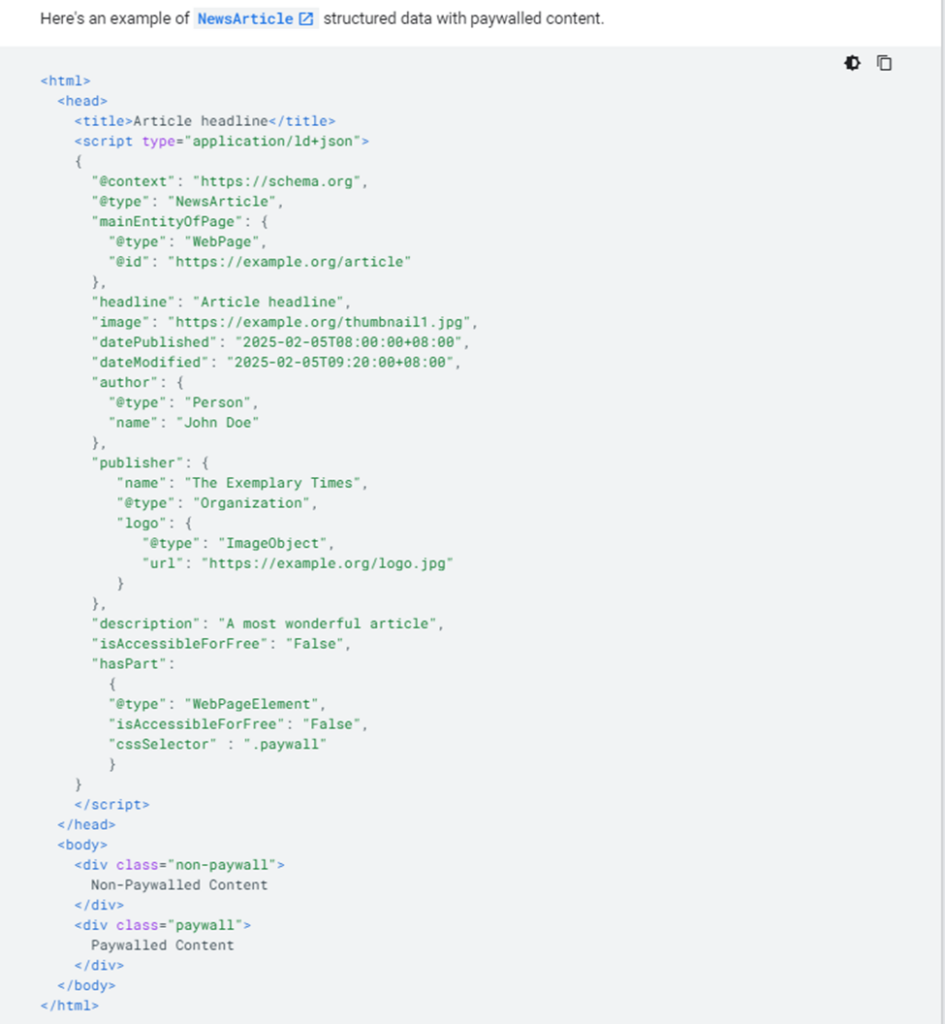
Google has a detailed post about their use of structured data that you can read here. By using schema JSON-LD to indicate the paywalled content on your site, you’ll help Google mark your stuff as “not cloaking”. That, in turn, will save you from an unfortunate and unneeded guideline violation.
Google has very detailed guidelines for improving SEO for paywalled content. Following is a summary of what to do.
First off, you need to give your paywalled pages a markup. To get started, go into your site’s backend. Then add a class name around each paywalled section of the page (for multiple paywalled sections, you’ll use an array instead). Add the appropriate structured data, then add the specific JSON-LD structured data. After all that, you’re golden.
It’s very important that you follow through on these technical steps. Having a good paywall SEO strategy is vital, and making sure you follow Google’s documentation will keep you from running into trouble. Also be sure to check your work – implementing markups incorrectly can mess up your spot in the algorithm.
The Content Side
Now that you’ve got all the technical stuff set up, you can focus in on the next most important thing: the content.
Making sure that you’re following SEO best practices is extremely important. I’d suggest beginning with a focus on keywords. As always, consider your users’ intentions. If they’re going to get behind your paywall, it’s because the high-quality content there is relevant to them. You want to make sure to have keywords that are relevant and reflect your niche.
With this in mind, you’ll want to optimize your content for a few narrow keywords. Too broad a focus won’t hit your niche. And narrow user intent means there’s less and less competition to contend with.
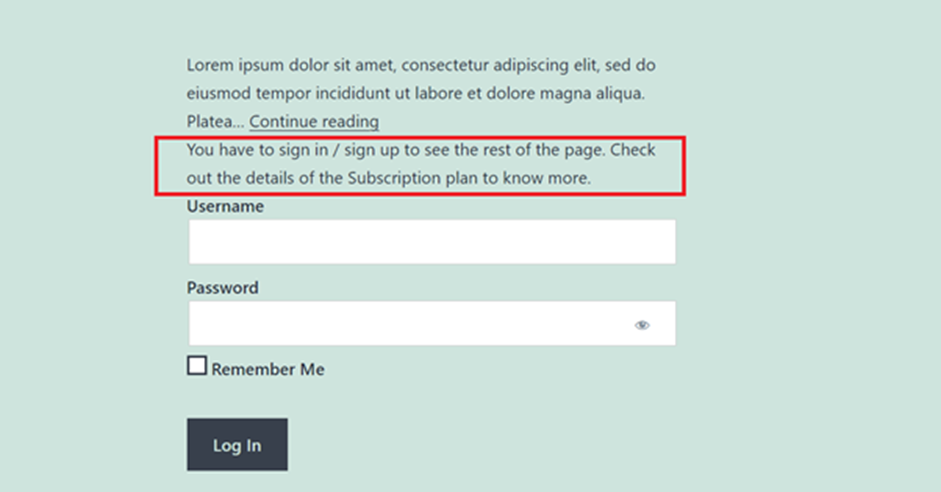
Also, keep in mind what a user sees when they go to a paywalled page directly from Google. I’d suggest using a lead-in at the top of your page’s content. As I discussed earlier, a lead-in is an explanation of the page’s content. It makes sure those who see your paywalled page will know what they’re missing out on.
An example of where a lead-in would show up on a paywalled page.
Suggestions for a good lead-in include:
A headline that’s optimized with the best possible keywords
Relevant data points from the article, including questions, facts, or statistics
A broad summary of the gated page’s overall content and its value
Setting this up will not just improve your page ranking. It’ll give potential users a taste of what they could get from being members of your paywalled site. That, in turn, will make them more likely to sign up.
Conclusion
And that’s all there is to it! You’ve decided on a model, got your payment gateways set up, got access rules in place, and sorted out your SEO. Before you know it, your membership site will be pulling in new visitors – and putting passive income in your pocket.
So long as you follow our tips and keep a close eye on your paywalled SEO, you can’t go wrong.
Brand awareness on social media is crucial for all businesses, as it’s all about the reputation of the brand and getting the name out there. With brand awareness, you need to build a brand first, and give it its own identity and make it different to competitors in the same industry. Building a brand includes things from the name, slogan, brand message, brand colours and just the overall brand image that you are wanting to give. Once you have your brand built, you can then focus on brand awareness, through the power of social media.
Social media is a powerful marketing method when it comes to businesses and is key to building a reputation and gaining more engagement and potential customers from it. Brand awareness is a term used to describe how familiar people are with a brand and the products or services. It is essentially how memorable and recognizable the brand is. Of course, brand awareness on social media is important, as you want people to remember your brand when they see it on social media.
There are several brand awareness strategies that can be used to help build up the brand’s reputation and make it memorable to people that see it on social media. We’re going to take a look into some of the brand awareness strategies that can be used.
Brand Awareness Strategy
The below strategies can be used to help increase a brand’s awareness on social media.
Brand Personality
You firstly need to make sure that you have a strong brand, as these are more memorable and have a personality of its own that people will remember. You want to give it a personality that is true to the brand and embraces the values of the business, as this will be seen by the audience. Make sure to keep it consistent with the brand and what you believe in, as this will help the brand’s reputation overall. By having a brand personality, people can then relate to it and this will attract more of an audience and potential customers.
Influencer Marketing
Another brand awareness on social media technique is to use influencer marketing. Every social media platform is full of influencers that create content, all focused on different things. This can be anything from food, fashion and electronics. If you can identify influencers that relate to the industry you’re in, you can use them to promote the brand. These influencers can have thousands of influencers across all the social media platforms and therefore, their content reaches a lot of people. Of course, you want to make sure that the influencer fits in with the brand’s values and what they stand for, as well as the interests too. You want to make sure you’re using someone who has an interest already in the industry, and not just someone random who doesn’t relate to it at all. This is a great brand awareness strategy for targeting the younger audience, who use social media on a daily basis.
Content Marketing
The next brand awareness strategy is all about content marketing, for social media and the brand. Make sure to increase the amount of content you are posting on social media, but also make sure it’s high quality and creates engagement to followers. When viewers enjoy the post, they’re likely to interact with it such as like, share and comment on it, which all of this helps to increase the brand awareness. Their engagement then reaches other people, meaning other people will then view the posts too and explore the brand.
Referral Programmes
You can use referral programmes with existing customers, as an incentive for them to refer the products or services to other people. This is a quick and excellent way to increase brand awareness, as you’re encouraging people to share the brand’s name, build up a good reputation and create more awareness from it.
Video Content
With most social media platforms now, you can create videos on them, which can be used to promote and create brand awareness. You can use video content to really show off the brand and its values, as well as the products and services. Good video content will be shown to users and with their engagement, it then helps to build up the brand reputation and increase the brand awareness. Videos are also a different type of content that you can create, which is really good for showing off the brand and drawing in people’s attention.
Increase Social Engagement
When it comes to posting content online about the brand and products or services, you also want to make sure you’re creating engagement. It’s all good sharing content on the social media channels, but you also need to be engaging with others and potential customers. By engaging with others on social media platforms, it helps to build the brand reputation and helps to increase awareness, as other people may see these comments and interactions.
There are many ways to create brand awareness on social media and it’s so easy to do too. Social media is a free platform to use and it’s important to maximise the potential of this tool when it comes to brand awareness and reputation.
Brand awareness is crucial for any business and will help it to become a successful business too. There are many great benefits to brands using social media, with creating brand awareness being one of them. No matter what industry the business is in, it’s important to build the brand first and then focus on the brand awareness and reputation of the business. The more brand awareness the business has, the more interaction, which then results in more people seeing the brand and creating more customers in the future.
Brand awareness goes a long way on social media platforms, and with the way the current generation is going, social media will only become even more popular for brands and businesses to use, to help promote their products and services. There are many different brand awareness strategies that can be used too, with some even being free to do, so make sure to make the most of this great tool and build up a good name for the brand.
If you are looking to develop cross-platform mobile applications, Flutter is surely the software for you. Flutter has become one of the most popular UI software development kits, which are now used by several companies, from Alibaba to eBay. Like Kotlin, the framework does a better job than others by removing their disadvantages, making it popular globally.
What Makes Flutter Better?
Flutter has become quite helpful to the developers. It allows them to develop mobile applications using a single code, making it great for cross-platform app development. You can create both “Android” and “iOS” applications using a single code from Flutter.
Moreover, reusable UI elements and tools like SDK and UI library of widgets will help you customize your mobile application similar to that of native machine code. Apart from this, Flutter’s applications are quite reliable and secure. You will experience better performance, animation, and better UI Flutter app development. Some other benefits of Flutter include –
Widget tree
Hot reload
Pixel rendering
2D- rendering engine
API for desktop
So with these many benefits, a question that always comes up is, “is flutter ready for enterprise app development”? This question has been asked several times for good reasons. The market is shifting towards a robust app development process. However, the biggest obstacle that developers are facing is the division of the “Android” and “iOS” applications. This division between iOS and Android is to remain and only cross-platform app development will solve it.
As both of these operating systems have many users with them, the enterprises should be mindful of targeting their audience with their applications, which is where Flutter as a cross-platform app framework can be helpful.
Why Do You Need An Enterprise Application For Your Business?
Many people think that enterprise applications are only for large and leading firms, well it is not true as irrespective of your business size, enterprise applications are great for your business. The application is designed to streamline the work in your industry. With the help of these applications, admins can control the flow of information and ensure there is large-scale automation throughout the organization.
However, to make these applications functional, enterprise application must have some essential features, which are –
Seamless UI
High-security
High-performance
These are some features that are fulfilled by Flutter for enterprise, making it a great choice for enterprise app development. However, there are other aspects that we should discuss to see if Flutter is ready for enterprise application development.
What Makes Flutter Enterprise Ready?
Some features Flutter offers make it good for enterprise application development. Here are 6 essential requirements which we have selected to show that app development over Flutter is a good idea. These are –
Development environment
App security
Layered architecture
Hardware features
User interface
Miscellaneous requirements
1. Development environment
Developers can choose any IDEs for their enterprise app development to debug, deploy, profile, and build the application. So, what makes the development environment of Flutter so good? The reasons are given below –
Scalability: Flutter applications can scale. Work can be split into smaller units between teams using Flutter Dart packages, making it easier to scale up.
Testability: Every flutter widget can be easily tested, providing maximum test coverage.
Continuous delivery and integration: Flutter deploy applications to the app stores and make the application available with CI/CD pipeline.
It should be noted that implementing Flutter applications requires good knowledge of cross-platform application development.
2. App security
Application security is one domain that is of great importance for your enterprise application. With proper application security, your application becomes reliable to the users. It is assumed that the Flutter application has the native security aspects same as those of iOS and Android applications built on iOS and Android sandbox environments. Flutter’s Simple Auth caters to other essential requirements like authentications.
Moreover, SSL certification is also mandatory for your application, decreasing application vulnerability. These security features also make Flutter a reliable tool for the developers and make the end-users quite comfortable in using applications made with the help of this framework.
3. Layered architecture
Suppose you want your enterprise application to have seamless functionality and better productivity for all your team members. In that case, you must have layered architecture in your enterprise application. These layers are separate but have interconnected presentation and data access. When the layers of the application are interposed, developers must offer –
Enhanced access to design patterns
Simultaneous work on the codebase
Understanding of different application features
With its library plugins, SQLite database, and secure networking, Flutter works like magic in this domain. Let us see how flutters shine out in this area –
RxDart: RxDart seamlessly integrated Flutter app development services and state management frameworks to fulfill your asynchronous programming requirements.
State Management: This is like a core to Flutter’s application architecture and is easier yet efficient to build on.
Background processing: It maintains the UI responsiveness of your application while performing computational intensive work.
Deep linking: This provides enhanced navigation to launch specific areas and features of your application by getting redirected from a push notification or website.
JSON serialization or Deserialization: This is a must-have for your enterprise application and RESTful client.
Dependency injection: Dependency Injection helps you make your code units independent, reusable, and easier to test.
Local storage: Small amount of valuable data is stored in local storage and allows your application to work even when the application is working in the background or has stopped working.
Push Notifications: Enterprise application requires to notify users about certain information. Therefore, push notifications are a must which Flutter provides.
SQLite: Use it for working with a large amount of structured data.
4. Hardware features
Hardware is one of the most important aspects that will affect your application’s work. So when you develop your enterprise application, you need to use the hardware’s full potential and have their support. Some hardware and software support your application needs are –
Biometric authentication
GPS
Camera
Accelerometer
Microphone
5. User interface
The user interface is one of the most important aspects of the user experience. Enterprise applications strive to deliver an exciting user interface to the end-users. Flutter comes up with extremely accurate renditions to meet this requirement.
Animations: Animations can be scaled up to any complexity. Using certain tools, your enterprise application can have a great interface.
Page transitions: With animations, the transition between the pages can become seamless and perfect.
Infinite scrolling list view: This comes in handy when you have to display a large amount of data without using too much device space.
Caching and Loading library: If you want your application to handle many images, then Caching library is what you need. Flutter provides its developers with the ability to manage these images through its caching and loading libraries.
6. Miscellaneous requirements
Other than those mentioned above, there are multiple requirements to develop an enterprise mobile application. These are –
Error Reporting: With the Sentry Library of Flutter, developers can experience error reporting.
Analytics: Use Firebase or Adobe analytics libraries to meet this requirement.
Push and play: Your application can also have a music and audio function, which can be provided in the Flutter applications.
Payment gateways: Your application must have integration of payment gateways that will help the user accept and send payments.
QR code generation: QR code scanning has become quite important for advanced levels of security and other functions.
Conclusion
Flutter has already gained much popularity and is used at several places for application development. Moreover, it has become a great option for businesses with many libraries. The growing usage of flutter libraries ensures that Flutter is now ready for enterprise application development. We are sure that Flutter for enterprise can now establish itself as a viable option for enterprise application development in the coming years. So, get your enterprise a cross-platform application to meet users’ requirement with the help of Flutter.