Archive

Archive for June, 2016

3 ways designers can improve working with engineers

June 24th, 2016 No comments

The importance of design in the tech industry has grown over the last few years, along with a greater appreciation for designers who know how to work within development constraints. We produce our best work when our designers and engineers work in a harmonious, cross-collaborative environment.

Over the last 8 years, we’ve learned a lot about working together. Here are three key takeaways that will help designers improve their relationship with engineers.

1) Be more pragmatic with decision-making

You need a solid understanding of what is feasible to build within the scope of your product. The best starting point is to digest your platform’s guidelines and standards (here you go: iOS, macOS, watchOS, material design, and web design).

Be able to see how each component will be built from an engineer’s perspective. Start to learn a programming language. Don’t feel overwhelmed by the idea that you need to know how to build a product from scratch, but any amount of knowledge that comes from knowing how to code will help you make more informed design decisions and will also help you better communicate with engineers.

Design for the best user experience first, then add the whimsy and fun after. Remember, basic UX principles should guide your design from the beginning. There has to be a balance between the amount of effort required to build a feature and the benefit of the result.

2) Make the engineer’s job as easy as possible

Provide your engineers with clean, well-organized design files that have comps and layers plainly named. Cut assets yourself and name them appropriately for the given platform. I know, this isn’t the most fun job. But it ensures that what goes into the finished product is exactly what you want. It also takes the work away from your engineers, which means they can dedicate more time to building better features.

Make sure your designs are consistent. Run audits over your work at different points in the design process. It’s better to check yourself a million times, than to block an engineer from developing down the road because there are differences in the treatment of similar elements.

Make annotated documents when necessary. You can create your own, or utilize one of many tools such as Red Pen, UX Pin, and Notebook for Sketch. Living and static style guides can aid in the cohesion of development for your product. Keep in mind that some developers never look at the style guide and work straight off a comp, so make sure to communicate early in the process with your engineering team. Spend your time wisely and efficiently.

Prototypes and interaction animations show engineers how something should work in the most straightforward way possible. Some of our favorite tools that offer different levels of control are Keynote, After Effects, Invision, Flinto, and Pixate. If you rely on word-of-mouth to get your point across, you leave a lot of room for misinterpretation and increase chances of the final product misaligning with your vision.

3) Communicate constantly and respect the engineer’s opinions

Don’t silo yourself (or the engineer) off by only talking when it’s time to hand off designs. When you work together from the beginning, you are more powerful and will ultimately create a better product.

If you are unsure about a feature’s design, how a transition will work, or the flow of a user’s interactions, consult with your engineering team. They have a wealth of knowledge and can approach your problem from an analytical, technical perspective. Don’t be shy to admit you need advice.

These three lessons boil down to empathy, organization, and communication. The key with all of these is to make sure you are in control of the execution of the final product. You want your vision to be realized, right? So do everything you can to equip your engineers with the right materials and knowledge, so they can execute your vision perfectly and you end up with a kickass product.

[– This article was originally posted on the Tendigi blog, republished with permission from the author –]

The Gibon Font Family: A Complete Comic Book Lettering Kit – only $12!

Source

Categories: Designing, Others Tags:

Free download: Comprehensive stationery mockup

June 24th, 2016 No comments

If you’re building a brand for a client, you’ll sell the pitch far more effectively if you can deliver not just flat design concepts, but detailed mockups too. To give you a boost in the right direction we have this comprehensive stationery mockup, designed for use with Photoshop CS4+, by Qeaql.com.

The whole set, which is photo-realistic, yet minimal, is designed using smart objects, so you can add your own artwork simply by double-clicking any of the smart object layers in Photoshop and pasting your artwork in. Some items in the design feature artwork areas for you to add your own graphics—the open brochure for example—others are simply adjustable by color—like the ball of twine. And of course, because the file is sorted into carefully labelled layers, you can toggle off any that you don’t need.

Amongst the most useful are the envelopes, letterhead paper, and the devices; you’ll also find more unusual branding items, like a vinyl record sleeve and a rubber stamp. Whichever you choose, mixing and matching to show off your brand concept in its best light, couldn’t be simpler.

And best of all, the file is free to all WebdesignerDepot readers, for personal and commercial use. Download the file beneath the preview:

Please enter your email address below and click the download button. The download link will be sent to you by email, or if you have already subscribed, the download will begin immediately.

The Gibon Font Family: A Complete Comic Book Lettering Kit – only $12!

Source

Categories: Designing, Others Tags:

PHP School (Learn PHP Through Command Line Workshops)

June 24th, 2016 No comments

The following is a guest post by Aydin Hassan, who is going to introduce to you a really compelling way to learn PHP. I’m sure all of us get asked by our less experienced acquaintances “how do I get started with X?” or even “what book should I buy?” Books can be great, but given the choice, learning code by actually coding in an interactive environment will do you better.

Whilst attending a local meet-up last year in Nottingham, UK, my friends and I were introduced to the concept of NodeSchool. NodeSchool workshops are small applications which run in the terminal and exist to teach you various topics related to Node and JavaScript. They range from teaching you the basics of JavaScript, all the way through to dealing with C++ extensions.

I had great fun and the workshops were really cool – you select an exercise, read the problem and start coding. Each exercise explains concepts and links to resources. Once you have written a solution to the problem, you invoke the workshop with your solution. Your solution is then ran and information regarding your success (or failure!) is printed to the terminal.

I’m a PHP developer by trade – the next day I thought to myself: is there something similar for PHP? There must be something similar for PHP? Turns out there wasn’t!

So we built it. Welcome to PHP School.

In this post we will talk a bit about why we built it, how you can run one of the workshops and finally, how you can get involved.

PHP School

Completely open source – the framework is open source, the website is open source and so are the actual workshops. We have been building and refining PHP School for the last ~9 months. There is still lots for us to do and we plan to build many more workshops.

For the time being we have one workshop Learn You PHP! – a PHP port of Learn You Node. We decided that the format worked so well, we would build the initial workshop as similar as we could.

Why did we build it?

We felt like there was a serious lack of professional learning resources for PHP, for one of the most popular web development languages, we thought this was strange. There are of course good resources, for example PHP – The Right Way, SitePoint – PHP, Laracasts and more, but there is nothing like PHP School.

What really impressed us with NodeSchool was the fact it was so suited to meet-ups and organised workshops. Everyone installs the software and attempts the exercises – the organisers, volunteers or elected persons can walk around and help out any body getting stuck or just answer questions. All of the verification process is automated by the application.

We built the framework so people could easily build their own workshops. This allows us, as a community to focus on the teaching, on the material, not the logistics. This is a tried and tested concept as seen with the NodeSchool community.

Hopefully we can lower the barrier to coding!

Getting set up

Unfortunately if you are running Windows then it is not so simple to install. Not impossible but not easy. This guide will focus on Linux installations but if you want to try it on Windows you can follow our instructions over at our website.

In order to install Learn You PHP! there are a couple of requirements.

  • PHP 5.6 or greater
  • Composer
  • A text editor

This guide assumes you have those installed and know how to use them, if you don’t you can learn about them on the Composer site and on the PHP site.

You will also need to make sure Composer’s global bin directory is added to your $PATH environment variable, you can check how to do that on the Composer site.

Open up a terminal and run:

$ composer global require php-school/learn-you-php:~0.1

Editor’s note: for the beginners out there, the “$” you see in lines like above designates “the end of your command prompt”. Your’s may look different. Mine is “Chriss-MacBook-Pro-2:~ chriscoyier$”. If you are copy and pasting the command, don’t copy the “$ ” part.

This will install Learn You PHP! globally on your system. You should be able to run it by typing:

$ learnyouphp

You will be presented with a menu containing a list of exercises. You can navigate around the menu with your arrow keys and exit using the exit button. Select an exercise by hitting enter.

A problem will be printed to the terminal, including in it will be a description of the problem and some links to digest. The first exercise “Hello World” requires you to write a program which prints the text “Hello World”, so lets do that!

First, we need a folder to contain our work, lets go for: `learnyouphp` in our home directory

$ cd ~
$ mkdir learnyouphp
$ cd learnyouphp

Open up a text editor and place the following code in there:

<?php

  echo "Hello World";

Save this as a file named helloworld-solution.php in the folder we just created. Now we can jump back to the command line and verify our exercise:

$ learnyouphp verify helloworld-solution.php

You should receive a message describing your solution as a success.

So, you completed your first exercise – you can now move on to the next exercise, each exercise increases in difficulty whilst introducing new concepts in PHP!

Intro & Installation Video Walkthrough

Meetups

These workshops are something we’d like to run at meet-ups and other events, if you are interested in using the workshops go ahead and use them, give us a shout if you need any help, or just to let us know what you are doing and how well it went.

We’d love the community to grow to the size of Node School and more – we will hopefully be organising some meet-ups our selves to get the ball rolling soon.

Getting Involved

There are lots of things you can do:

  • Host a workshop event
  • Propose a workshop to your user-group organiser
  • Help build more workshops

We plan on growing the workshop library, so if you want to build a workshop, head over to the documentation on our website. The documentation is being bulked out over the coming weeks so check back regularly for documentation on more advanced features.

If you want to host a meet-up using PHP School, give @aydin_h or @mikeymikemw a shout and maybe we could come along to help set it up.

Getting Help

There are a few channels for communication:

Conclusion

Hopefully this article has inspired you – maybe you will go ahead and learn PHP using PHP School. Maybe you will use PHP School at a meet-up you organise or propose it to the organisers of one you attend. Maybe you will build your own workshop to teach a topic or showcase your tool.

Whatever you do – let us know – drop in the Slack Channel or Tweet us!

I think we can all agree that education and learning are of great significance to this and future generations. Technology is a huge part of our evolution and can solve many of the world’s current issues. Programming is a small part of that – and you can learn to code!


PHP School (Learn PHP Through Command Line Workshops) is a post from CSS-Tricks

Categories: Designing, Others Tags:

UX Design in action, experts weigh in

June 24th, 2016 No comments

The concept of the user experience is often broken down into two areas: theory and practice. They’re not the same thing because what may work in theory obviously doesn’t always work in practice, and this is where many designers and brands sometimes run into problems with their design processes. If only there was more direct insight into what actually works and doesn’t work when designing and developing products…

UXPin’s latest guide on Design in Action delves into this topic and reveals some very interesting answers that designers can implement today in their own workflows. Featuring hours and hours of firsthand interviews with some of the top designers at influential companies, UXPin’s analysis gets to the bottom of practical methods that work at successful companies.

Design for enterprise doesn’t have to be clunky

There’s a misconception among some designers and developers that enterprise (software) design has to be characterized by bad communication or excessive documentation or a combination of both. UXPin talked to Autodesk’s Tel Aviv team to come away with some revelations that say the contrary.
Its team found that, if it applied the following, its UX design process was more efficient and wieldy when:

  • feature requests were validated with qualitative research (user interviews and support-ticket data) and quantitative research (in surveys and analytics tools) early on in the design process;
  • time was set aside early on in the process for discovery and idea brainstorming by way of half- and full-day workshops;
  • documentation was seen as a way to find information instead of just a paper trail;
  • prototyping for the hardest interaction models was prioritized.

Structured design isn’t everything

While some designers may put a lot of faith into structured design, it’s not appropriate for businesses of all sizes. Take startups, for instance: UXPin found that structured design doesn’t allow startups the flexibility they need to succeed in their design processes.

Based on interviews with Slack’s team, UXPin’s guide reveals that concept exploration should be defined by flexible procedures; in that environment, more structured development isn’t a hindrance and can in fact result in successful product development (though testing and research always have to validate progress).

Here are important takeaways from interviews with Slack’s team:

  • product briefs mustn’t hint at solutions, instead, suggestions for different strategies should be the focus;
  • after the UX design process has started, teams should be allowed to analyze concepts and determine constraints;
  • pair design (two designers working together with one as the leader) usually offers more efficient problem solving and richer idea brainstorming.

Agile UX and creative design can coexist

Fast timelines and retaining creative integrity sometimes don’t always go together in the UX design process. Based on interviews with Kaplan Test Prep, however, we see that that’s not always the case.

Consistent user validation, group brainstorming and scalable design sprints are key to hit fast timelines while still promoting creative integrity within design.

Interviews with Kaplan’s design team discovered that:

  • product ideas ought to be explored with ideation and user research working parallel to each other and then converging to establish design requirements
  • documentation should only be guidance, but certain flexibility should remain to ensure creative freedom
  • to test ideas more efficiently on a smaller scale, mobile-first product design is vital
The Gibon Font Family: A Complete Comic Book Lettering Kit – only $12!

Source

Categories: Designing, Others Tags:

How to Ask Good Coding Questions That Get Great Answers

June 24th, 2016 No comments

I see my fair share of poorly-asked technical questions. Zell Liew’s advice:

The onus is on you to craft questions that others can understand and reply quickly.

Reminds me of two excellent sentences by Pamela Marie:

Golden rule asking a question: imagine trying to answer it

Golden rule in answering: imagine getting your answer

? @pwnela #MadPlusRuby

— Chris Coyier (@chriscoyier) August 21, 2015

And also: Reduced Test Cases

Direct Link to ArticlePermalink


How to Ask Good Coding Questions That Get Great Answers is a post from CSS-Tricks

Categories: Designing, Others Tags:

Web Development Reading List #142: Contextual Identities, Form Hints, And ApplePay.js

June 24th, 2016 No comments

Today will be a day in history regardless of what happens over the next weeks. The majority of people in the UK voted to leave the EU, and this made clear once again that many people in our society think the current situation is no longer acceptable. Unfortunately, we think blaming those people is the solution, but, as we see, it isn’t. Instead, we should focus on teaching people about the root causes of problems, and we should retain from posting everything right away.

Contextual identities in Firefox Nightly

In other news, I’m back from vacation to bring you new articles to read. And I realized one thing: While mountaineering holds real risks and dangers, working on websites mostly does not. Of course, the security of our websites should be a top priority, but even if we fail, if a website is down for a few minutes, if we screwed up the layout on some devices, you won’t be dead. We have the opportunity to improve our work by making mistakes and fixing them.

The post Web Development Reading List #142: Contextual Identities, Form Hints, And ApplePay.js appeared first on Smashing Magazine.

Categories: Others Tags:

Three Online Webfont Generators for Your Projects

June 24th, 2016 No comments
Three Online Webfont Generators for Your Projects

Webfonts have become an indispensable part of web design. Aside from plenty of commercial variants, Google Fonts also provides many fonts that you can integrate into your web projects for free. Those that generally prefer to host themselves will find a couple of online webfont generators that turn desktop fonts into webfonts in the following article.

Extensive Webfont Generator by FontSquirrel

FontSquirrel is most certainly one of the most popular providers of free fonts. Among others, you will find a bunch of the same webfonts offered at Google Fonts. Using the Webfont Generator by FontSquirrel, you can easily create webfonts in all standard formats. The rather new WOFF2 format is among them as well.

Online Webfont Generators
Webfont Generator With Many Settings

To do that, just upload a TrueType, or an OpenType font, or even multiple files at once, such as an entire font family. When generating the webfonts, you choose between “basic”, “optimal”, and “expert”.

While with “basic”, everything, like hinting and kerning, stays the same, FontSquirrel will make some adjustments that create the most – well – optimal display possible when choosing “optimal.” The “expert” settings allow you to customize entirely how the webfont will be generated.

For example, there is a particular FontSquirrel hinting optimized for the web, which can be used instead of the existing hinting or an automatic hinting. You also influence the font’s rendering by removing kerning information, or let the GASP table be edited, for instance. The GASP table is what determines how fonts are displayed on monochromatic screens.

Online Webfont Generators
Custom Subsetting

Those that lack knowledge on hinting and kerning should stick to the FontSquirrel default settings. However, the option to adjust the font’s subsetting is attractive for anyone. It allows you to decide which character sets will be included in the webfont. This way, you get to implement as many language-specific characters as you wish. For instance, on a bilingual website, you only implement all special characters used in each of the languages.

When only using upper and lower-case letters, you can also embed the necessary types of letters via subsetting. If you have very individual requirements, implement single characters or Unicode areas. This way, you can assemble a webfont that only contains the characters you actually need, saving a lot of space.

After setting everything up, a webfont kit is created and downloaded. If needed, your settings will be saved in a text file, so that you can save other fonts with the exact same settings.

Fontie With a Simple Interface and Unicode Subsetting

The webfont generator Fontie works very similar to the one made by FontSquirrel. You upload a desktop font and choose subsetting, hinting, and display formats. For the subsetting, you make a choice between simple and extended options. With the simple settings, you add Latin, Greek, Cyrillic, and Arabic letters, as well as OpenType features, while the extended settings let you choose the respective Unicode subsettings.

Online Webfont Generators
Clear Webfont Generator

For the hinting, there are different methods available. Aside from Windows GDI, DirectWrite, and Grayscale, you have the option to keep the existing hinting in the font or to completely remove the hinting.

For the display format, all standard formats, except for the rather new WOFF2, are available to choose from.

Fast Generation Via Transfonter

Transfonter is very easy to use as well. Upload one or multiple fonts and, if you want to, pick auto-hinting, as well as a subsetting. When it comes to the subsetting, however, you can only choose one alphabet, including Latin, Greek, and Cyrillic among other things. A combination of multiple alphabets is not possible. Instead, you can extend your webfont by individual characters.

Online Webfont Generators
Easy-to-Use Webfont Generator

The webfont preview that Transfonter creates is interesting. This way, you check how the generated font looks in the browser before downloading it. By the way, all common formats, including WOFF2, are supported.

This generator also allows you to save the settings. However, in contrast to FontSquirrel, the settings are saved in the browser.

Conclusion

Each of the three generators has its pros and cons. If you have the required knowledge and want to customize as much as possible, FontSquirrel is a good choice. For all others, Fontie and Transfonter are good alternatives.

In any case, you are only allowed to convert fonts into webfonts when they have a license allowing that. Commercial providers like MyFonts and FontFont usually have their specific generators that are only available for fonts purchased there.

(dpe)

Categories: Others Tags:

Draw an Icon Badge and Shadow in Illustrator

June 23rd, 2016 No comments
Dansky_Learn How to Draw an Icon, Badge and Long Shadow in Adobe Illustrator

In this tutorial, we’re going to learn how to draw an icon, badge and long shadow, in Adobe Illustrator.

The Steps (1-19)

1. Create a New Document.

2. Select the Polygon Tool from the Toolbar, Left-click anywhere on the artboard and specify 6 as the number of Sides.

3. Using the Rotate Tool and holding Shift (to rotate in 45 degree increments), rotate the newly created hexagon shape so that the ‘points’ are pointing both upwards and downwards.

draw-icon-badge-long-shadow-adobe-illustrator-1

4. With the hexagon selected, hold Shift and drag from any corner to increase or decrease the size of the shape. Give the shape a Fill colour of #1D71B8 and remove any strokes.

5. Select the Rectangle Tool, and draw a four-sided shape that fills the entire dimensions of your artboard. Go to Object > Arrange > Send to Back to ensure that this shape is behind the hexagon.

draw-icon-badge-long-shadow-adobe-illustrator-2

6. Select the Ellipse Tool, Left-click and hold Shift to draw a circle. Using the Direct Selection Tool, Left-click on the bottom-centre anchor point, and drag this anchor point downwards.

7. Hold left-click on the Pen Tool, to select the Anchor Point Tool. Left-click on the bottom-centre anchor point to convert the curved edges to straight edges.

8. Select the Ellipse Tool, Left-click and hold Shift to draw a circle. Position the circle in the upper half of the pin shape. Hold Shift to select both shapes, and in the Pathfinder Palette click Minus Front/Subtract to knock-out the circle from the pin shape. This will complete the location pin icon and transform it into a single shape.

draw-icon-badge-long-shadow-adobe-illustrator-3

9. Hold Shift to adjust the size of the location pin proportionally, and position this in the centre of the hexagon shape. Give the location pin the colour white, or #FFFFFF.

10. Select the hexagon, go to Effect > Stylize > Round Corners, and adjust the Radius to slightly round-off the corners of the hexagon shape.

draw-icon-badge-long-shadow-adobe-illustrator-4

11. Select the Pen Tool, Left-click on the bottom of the hexagon to place the first anchor point, move the mouse down and to the right (remaining in-line with the angle of the hexagon shape) and place the second anchor point. Place the third anchor point in-line with the opposite edge, and at a 90 degree angle to the second anchor point. Left-click again along the top-right edge of the hexagon to place the fourth anchor point. Lastly, Left-click on the first anchor point to complete the shape – this will form the drop shadow.

12. With the drop shadow shape selected, click the Gradient Slider within the Gradient Palette to apply the default black/white gradient as a Fill. Set the Angle of the gradient to approximately 144 degrees.

draw-icon-badge-long-shadow-adobe-illustrator-5

13. In the Transparency Palette, set the Blending Mode to Multiply (set to Normal by default). This will blend the drop shadow, in particular the white, into the lighter blue background.

14. On the Gradient Slider, move the white inwards from the edge to ensure that the gradient seamlessly blends into the background. The goal here is to avoid a ‘hard edge’ or ‘banding’.

15. Repeat Steps 11-14 to create a second drop shadow shape, this time for the location pin.

draw-icon-badge-long-shadow-adobe-illustrator-6

16. Once all shapes are completed, you can adjust the colours in more detail to ensure that the shapes/icons complement the background effectively. At this point the background colour was adjusted to #3689E1, and the hexagon shape to #0081D4.

17. Select the background shape, and click the Gradient Slider in the Gradient Palette. Drag the latest background colour swatch #3689E1 on top of the white swatch on the Gradient Slider.

18. Create a new colour swatch #2D4496, and drag this on top of the black swatch in the Gradient Slider.

19. Set the gradient’s Angle to 0 degrees so that it runs horizontally from left to right.

draw-icon-badge-long-shadow-adobe-illustrator-7

Download Adobe Illustrator.

Read More at Draw an Icon Badge and Shadow in Illustrator

Categories: Designing, Others Tags:

Top 30 Responsive Joomla 3 Templates

June 23rd, 2016 No comments
Ricardo-Joomla-Template

The article is a showcase of dazzling responsive Joomla 3 Templates. All of them were carefully handpicked, so you’ll have 30 + of the latest designs on which to feast your eyes. By the way, there are a couple of free Joomla templates that are also featured in the article. This way it becomes even more intriguing, doesn’t it? So who might benefit from responsive Joomla 3 templates? Everybody who wants to keep their Joomla websites / blogs / online stores up to date.

Some of the incredible features of Joomla 3 templates are: Responsive Nature; Bootstrap; Easy Customization Options; Pre-designed Pages (Home, About, Contact (with Google map), FAQ, Blog, Forum, Gallery, Portfolio and others); Compatibility with VirtueMart (this feature allows you to build eCommerce websites).

Of course we’ve mentioned just a few reasons why you might like the responsive Joomla 3 Templates featured below. The list can be continued by describing the pleasures of Megamenu, Parallax, Sliders and others, but you’d better have a look at each template yourself.

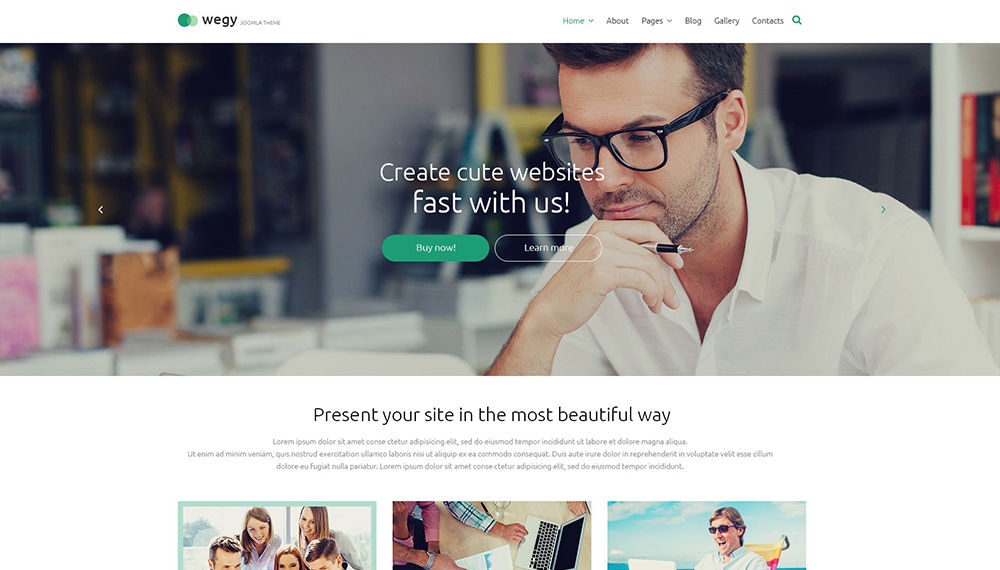
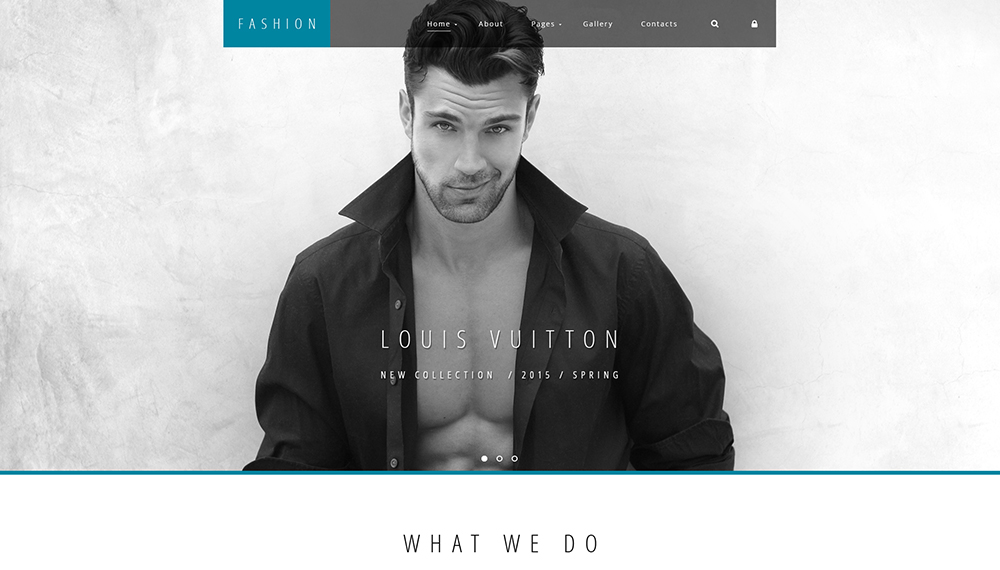
Wegy Joomla 3 Template

Wegy Joomla 3 template
Demo
More Info

Wegy is a multipurpose Joomla 3 template meaning you can use it to build a Joomla website/blog/portfolio or even an eCommerce site. It is responsive and includes 14 pre-designed pages, like Home, About, Contact (with Google map), FAQ, etc. Wegy is available in a few colors and some of its key features are: megamenu, parallax, Bootstrap, 10+ modules and RTL. Actually, it’s one of the best Joomla templates which have been recently released.

***

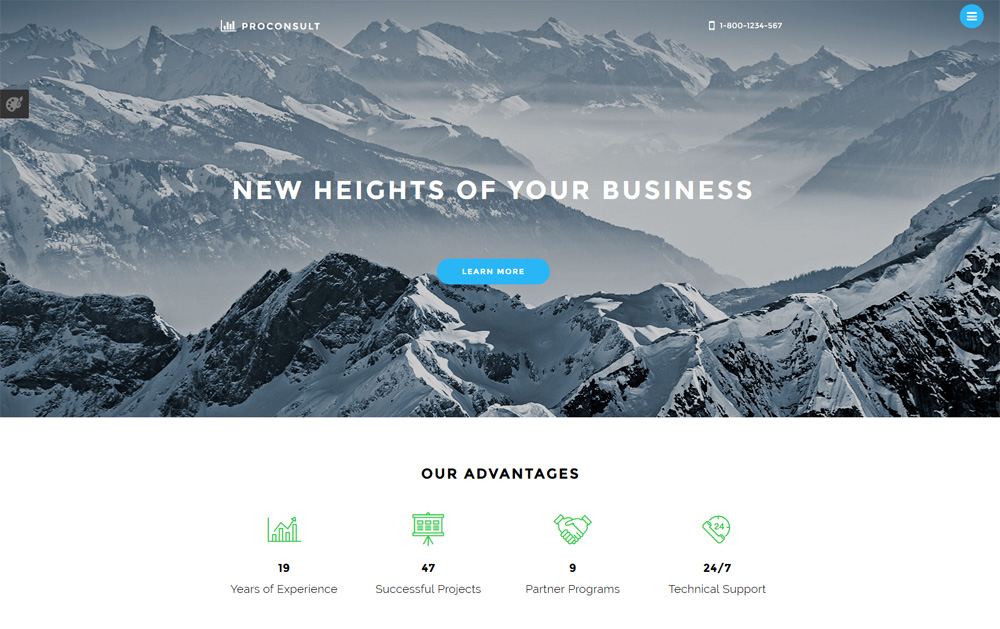
Proconsult Joomla 3 Template

Proconsult-Joomla-Template

Demo
More Info

The next item on the list of the responsive Joomla 3 templates is a perfect fit for a business company of any size. It has a hidden menu, which is a trend nowadays. So, the users should click the blue hamburger icon at the top right corner of the web page to see the main menu links.

***

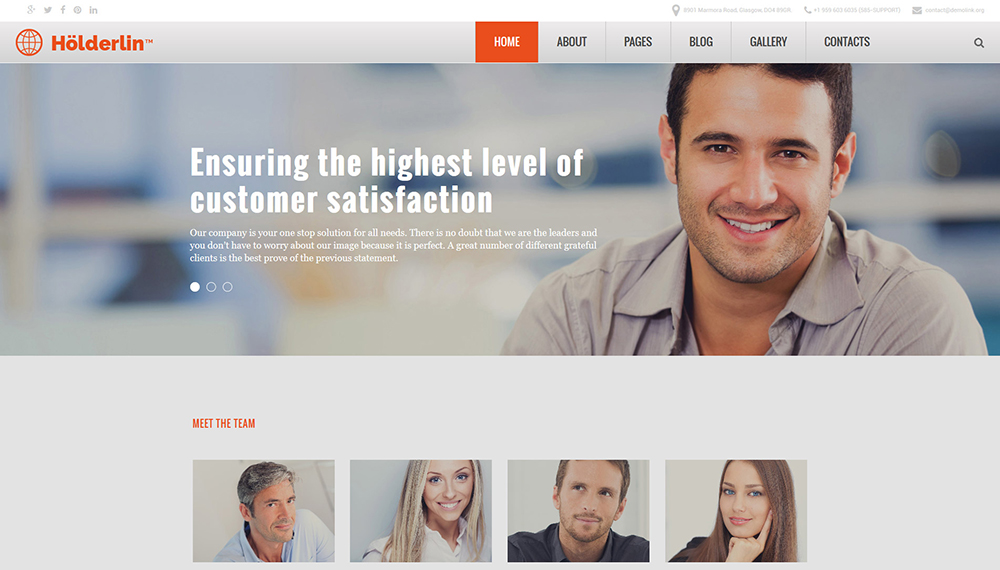
Holderlin Joomla 3 Template

Business style Joomla 3 Template
Demo
More Info

Here is one more of the multiple Responsive Joomla Templates for business companies. It comes with social login feature, which lets your customers log-in using their Facebook or Google account details in a neat dropdown.

***

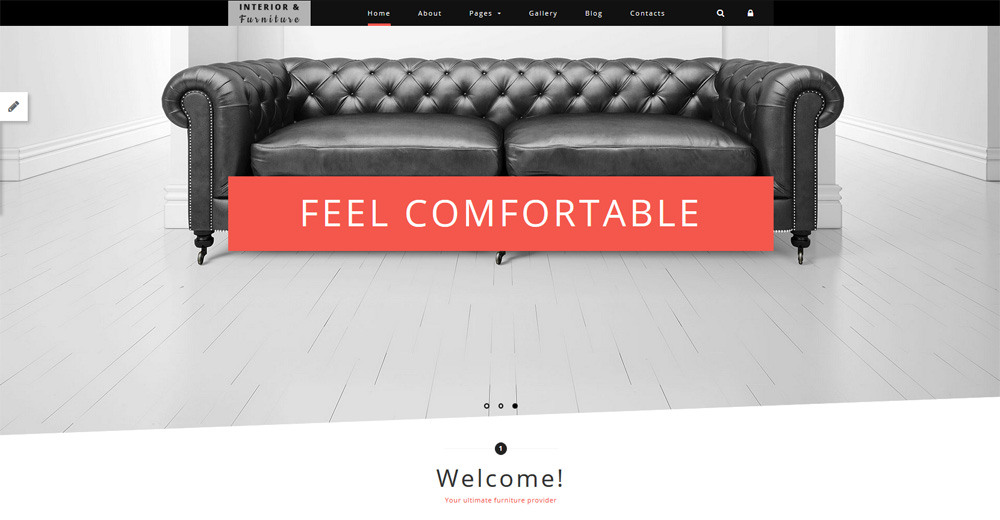
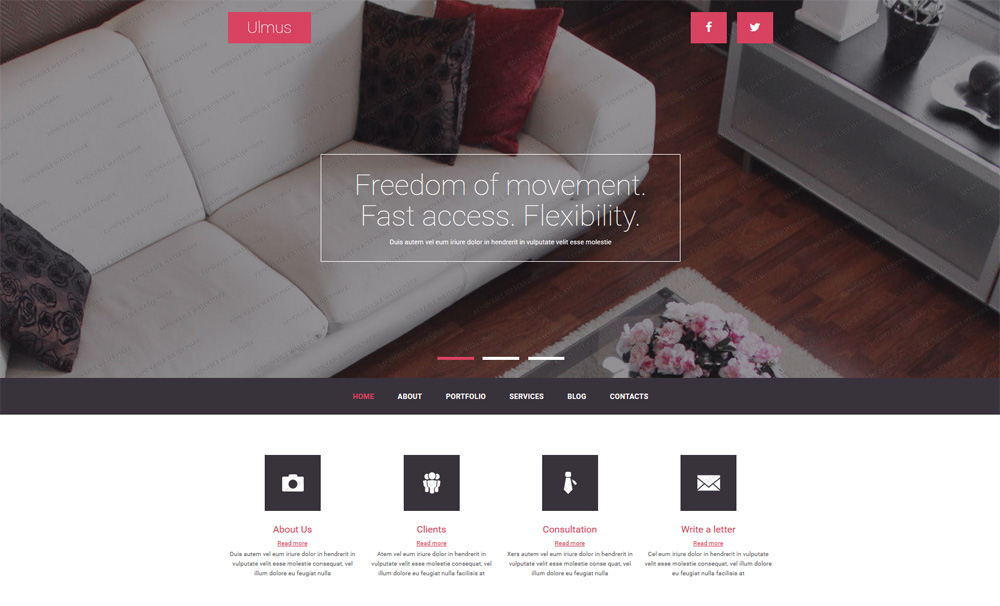
Interior and Furniture Joomla 3 Template

Interior-and-Furniture-Joomla-Template
Demo
More Info

This stylish black and white interior and furniture Joomla template draws customers’ attention to the important information, with the help of bright red elements. They guide your eyes through the page and don’t make you wonder where to look first, which is good for conversion.

***

CareerExpress Joomla 3 Template

Career Express Joomla 3 Templates
Demo
More Info

The template was developed for staffing agencies. It looks business-like and trustworthy. Parallax effect will give your Joomla site’s visitors the feel of true immersion and an illusion of depth in 2D virtual environments.

***

88 Channel Joomla 3 Template

88-Channel-Joomla-Template
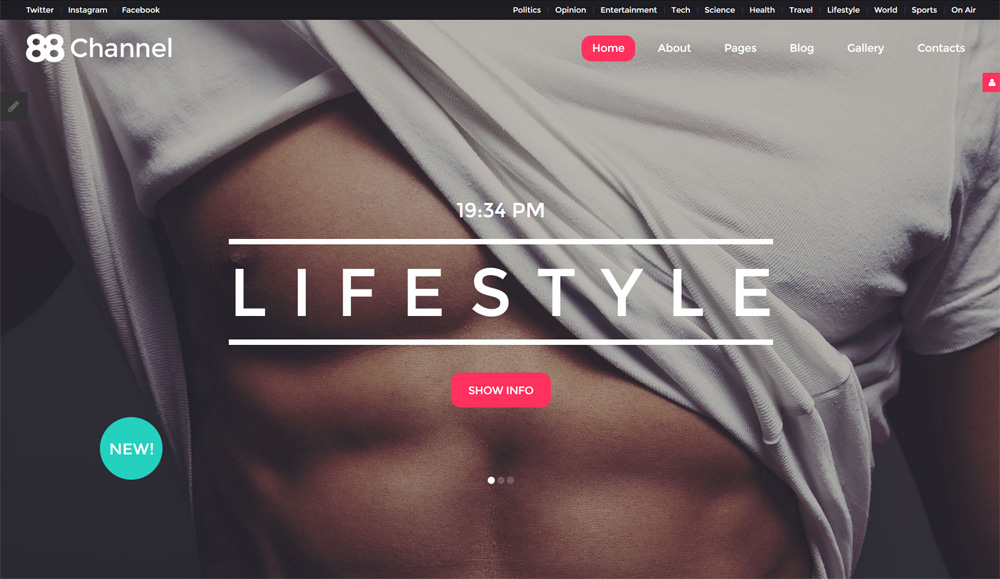
Responsive Joomla 3 templates like this one have magnetic appeal. Slider, featuring huge HD images together with video background, tells the story of your company in a beautiful, memorable way.

Demo
More Info
***

Apparel Responsive Joomla 3 Template

Apparel-Responsive-Joomla-Template
Demo
More Info

This apparel Joomla template has a very fashionable look. Apart from background video and parallax effect, it’s supplied with color switcher, which allows you to change the palette of your Joomla site’s interfaces with a click.

***

Corporate Consulting Joomla 3 Template

Corporate-Consulting-Joomla-Template
Demo
More Info

Here is a template for business consulting companies designed in bluish colors. The author masterly uses white space to focus visitors’ attention on the website’s content. Main menu is sticky, so it constantly stays before the users’ eyes, making navigation swift and easy.

***

Business Responsive Joomla 3 Template

Business-Responsive-Joomla-Templates
Demo
More Info

Responsive Joomla 3 templates are great for many kinds of websites. This one will definitely meet the requirements of Joomla sites built for business companies. A set of UI elements included with the template’s package allows you easily to add any type of content to your site with lots of UI elements from lists, block quotes and accordions to pricing tables, progress bars and counters.

***

High Fashion Joomla 3 Template

High Fashion Joomla 3 Template
Demo
More Info

This “in vogue” template made in gray scale possesses a really elegant layout. But that’s just the tip of the iceberg. It is extremely feature-rich as well. The template comes with parallax effect, slider, mega menu, Google map, theme color switcher, newsletter subscription, contact form, social login, 14 pre-designed pages, additional pages, UI elements and so on.

***

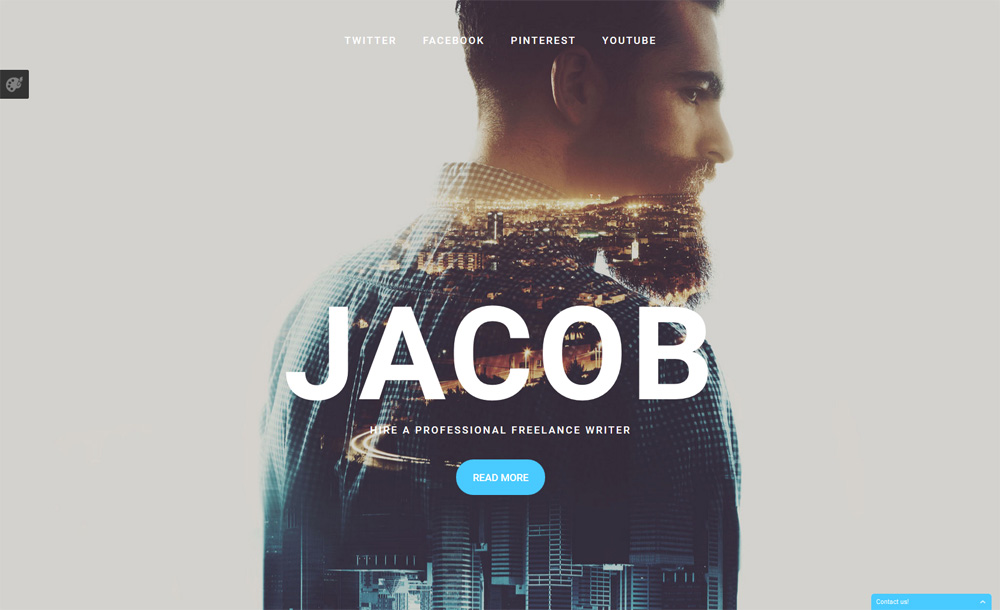
Jacob Joomla 3 Template

Jacob-Joomla-Template
Demo
More Info

The template was developed for freelance writers, but can be used as a personal portfolio of any creative artist. Texts on the web pages are very concise, they have big headings that draw visitors’ attention. Background images are large and of high quality. They tell the writer’s story better than any words.

***

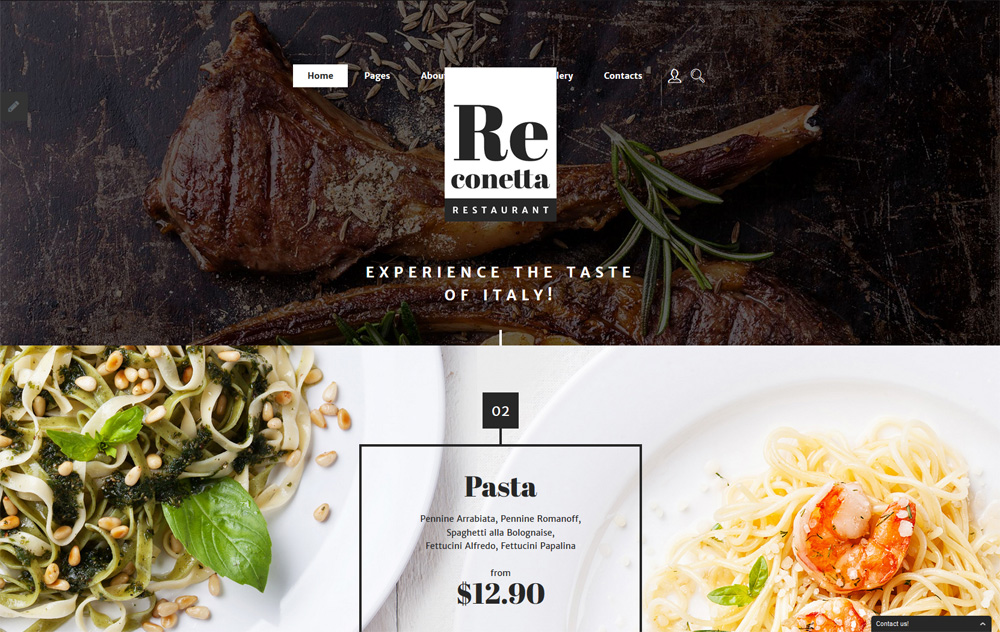
Re conetta Joomla 3 Template

Re-conetta-Joomla-Templates
Demo
More Info

This appetizing template for an Italian restaurant differs from the majority of similar responsive Joomla 3 templates, thanks to its highly professional design. Frames and borders create clear hierarchy on the page. The theme comes with all fully customizable PSD files, optimized to be used equally well by experts and beginners.

***

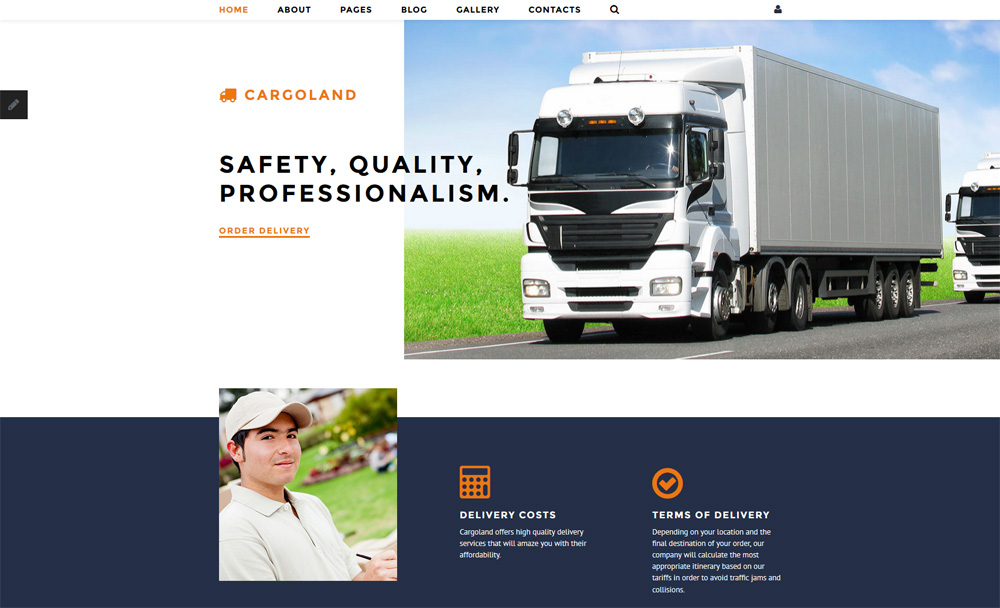
Cargoland Joomla 3 Template

Cargoland-Joomla-Template
Demo
More Info

This template is great for transportation and delivery companies. Its simple built-in contact form allows customers to get in touch with the company, inquire about more information relating to its services and leave their feedback after using them. This is the way communities are being built around websites.

***

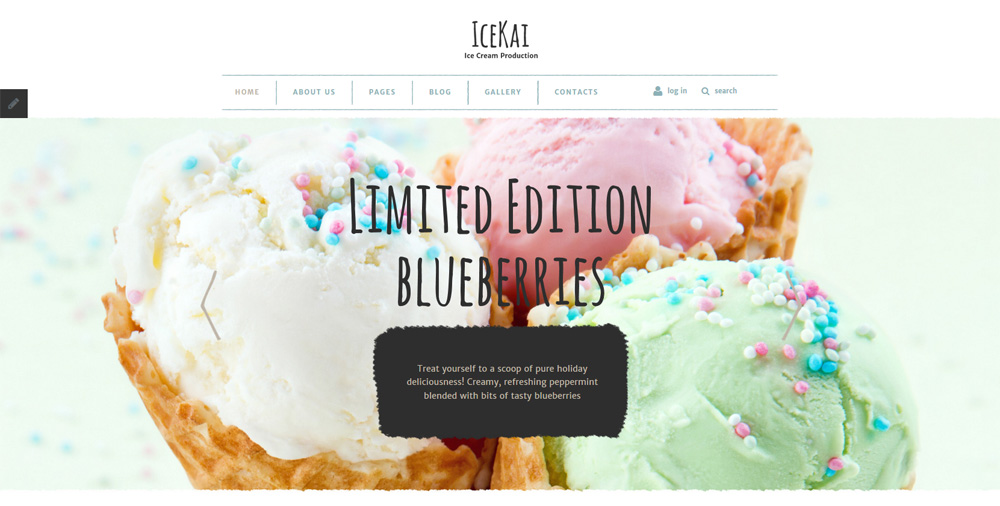
IceKai Joomla 3 Template

IceKai-Joomla-Template
Demo
More Info

This Ice Cream Joomla template is designed in a playful childish style. It has a sticky menu and two sliders on the home page. They demonstrate the company’s best products, which are accompanied by brief descriptions.

***

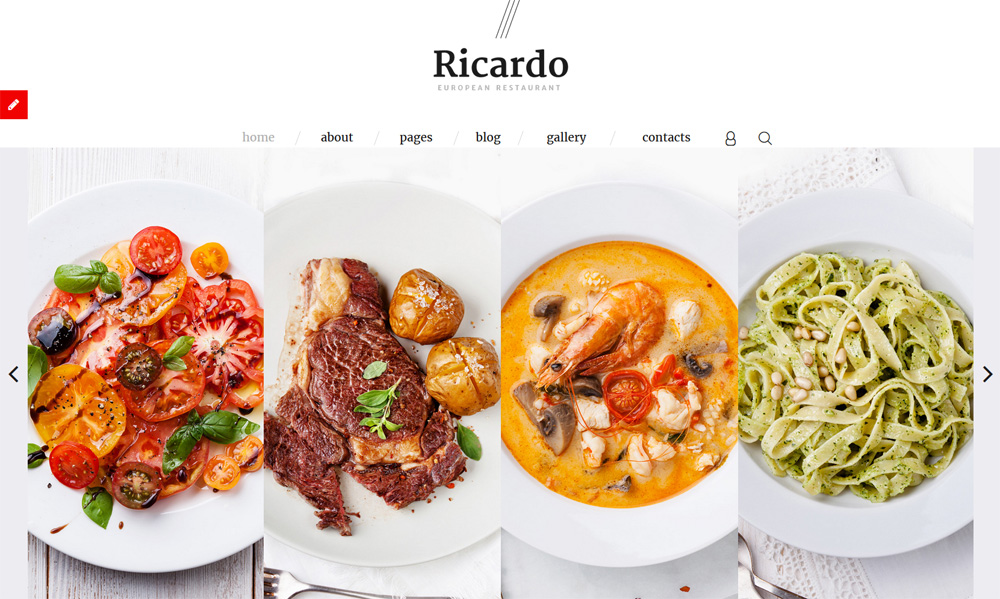
Ricardo Joomla 3 Template

Ricardo-Joomla-Template
Demo
More Info

And here is another one of the responsive Joomla 3 templates for restaurants. The author accentuates the way dishes are presented. They are featured in a slider. Place your mouse cursor over any image you like and read more info about the delicacy on the plate.

***

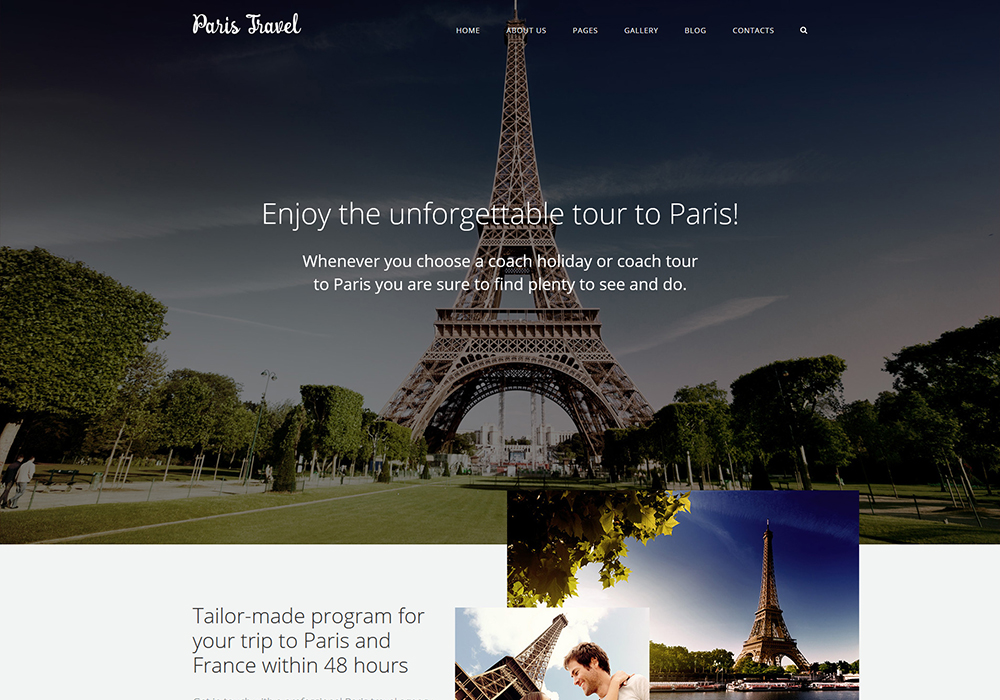
Travel Joomla 3 Template

Travel Joomla 3 template

Demo
More Info

This beautiful holiday template will help travel Joomla sites sell their tours much more efficiently. It is delivered with detailed documentation that covers all the ins and outs of the theme. Use it wisely and you’ll be able to squeeze the most out of the future website’s functionality.

***

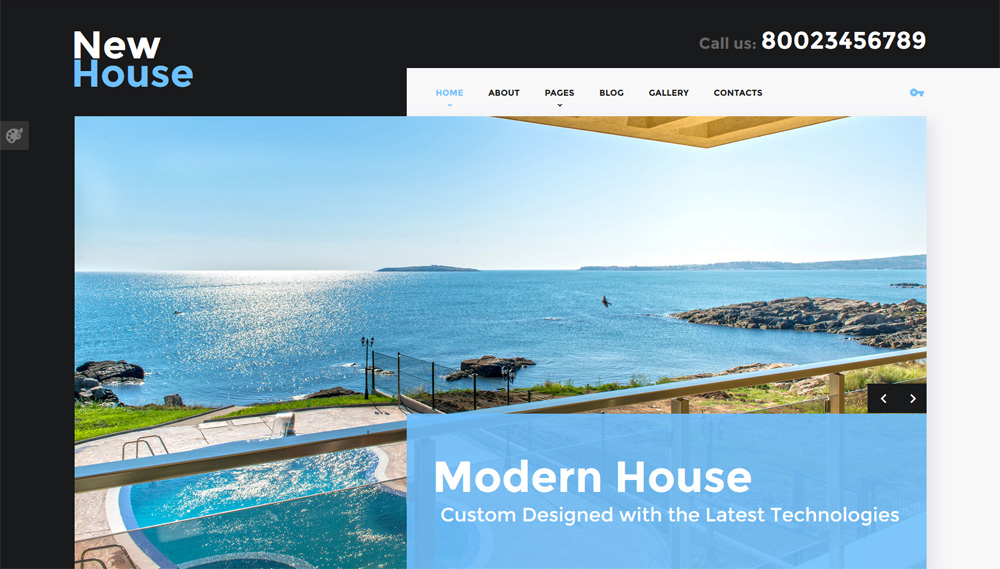
New House Joomla 3 Template

New-House-Joomla-3-Templates

Demo
More Info

This modern Joomla template with impressive slider and background video is a great solution for real estate companies. Large, browser-sized videos considerably improve visual experience on your web page. They affect the mood and atmosphere onsite or demonstrate the offered product in action. This way you can tell a story that will be fun to view as opposed to static pages.

***

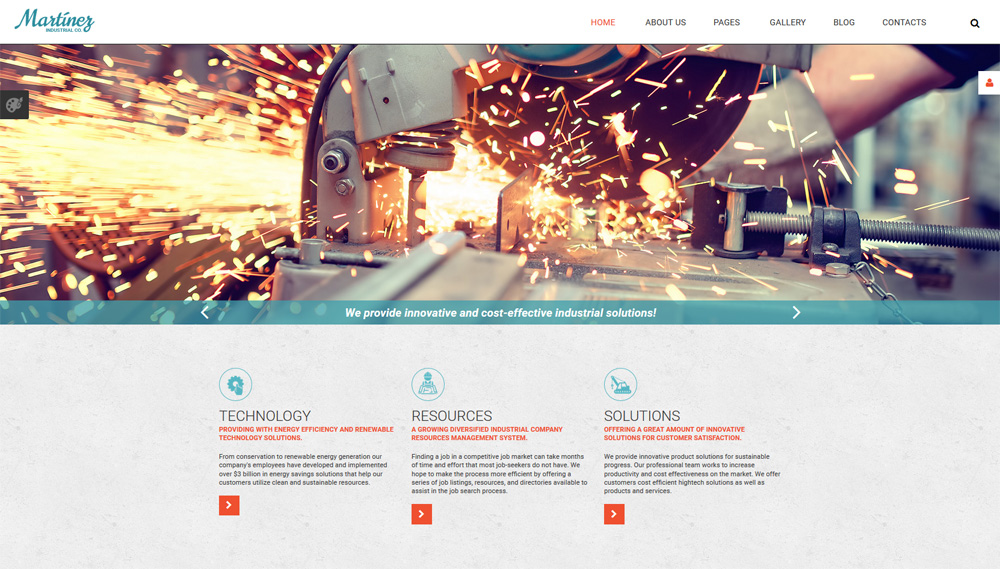
Martinez Joomla 3 Template

Martinez-Joomla-Template

Demo
More Info

This solid industrial template is very content rich. However, the text is neatly styled with the help of lists, icons, pictures and tabs. Main menu sticks to the top of the page as you start to scroll. The embedded video and parallax effect make web page viewing enjoyable.

***

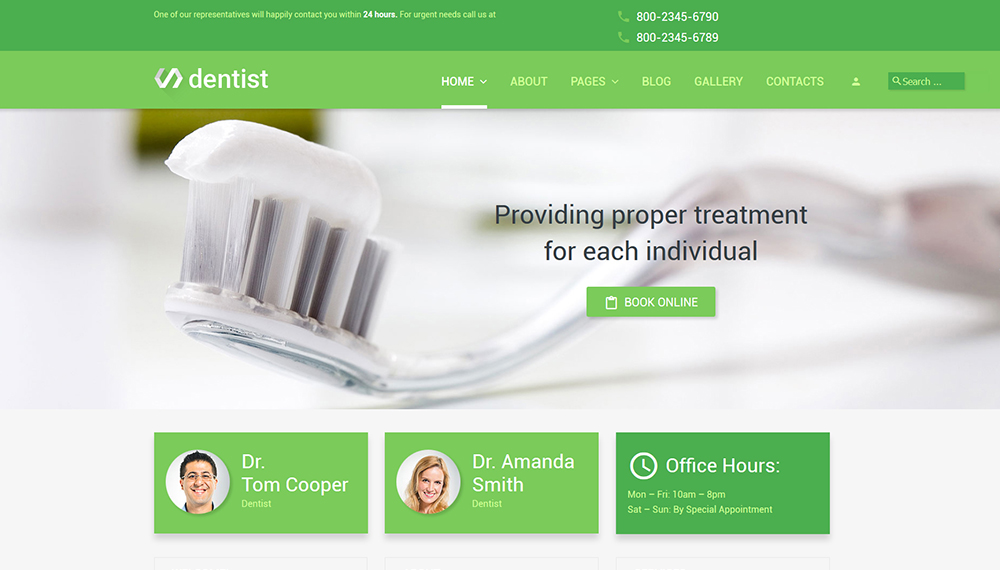
Dentist Joomla 3 Template

Dentist Joomla 3 template

Demo
More Info

This template for dental clinics can be used for weight loss, pharmaceutical and medical Joomla sites. The combination of white background and light-green elements creates a positive atmosphere on the site. Satisfied customers’ testimonials add credibility to the enterprise.

***

Hostax Joomla 3 Template

Hostax-Joomla-Template

Demo
More Info

This template is an ideal fit for a hosting provider. It is designed in grey and blue colors. Flat style makes the theme look up-to-date. Site navigation is very intuitive. Pricing plans are simple and understandable, which is extremely important.

***

Charixy Joomla 3 Template

Charixy-Joomla-Template

Demo
More Info

This Joomla template with an appealing layout is good for charity organizations. Its main menu is in a lowered position. It is placed right under the slider, but when you start scrolling down it stays at the top of the page all the time. There is a neat round button for immediate donations on the home page.

***

Invex24 Joomla 3 Template

Invex24-Joomla-Templates

Demo
More Info

The template is suitable for investment and financial companies. It has a minimalist layout with lots of white space. The arrangement of its elements allows the visitors’ attention to focus on the essential content. There is a ‘back to top’ button at the bottom right corner of the page, so the user can just click it instead of scrolling all the way back.

***

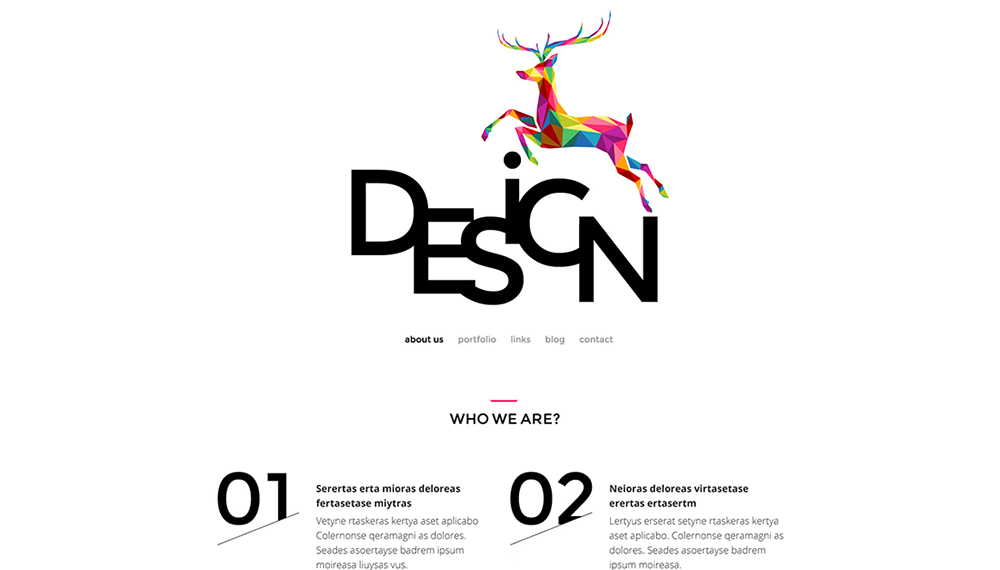
Design Joomla 3 Template

Joomla 3 Template for a design studio

Demo
More Info

If you like polygons and video presentations, this theme is an ideal variant for your design company. Portfolio is also presented in a memorable way. All theme images have hover effects; they interact with the viewer and encourage him/her to explore further.

***

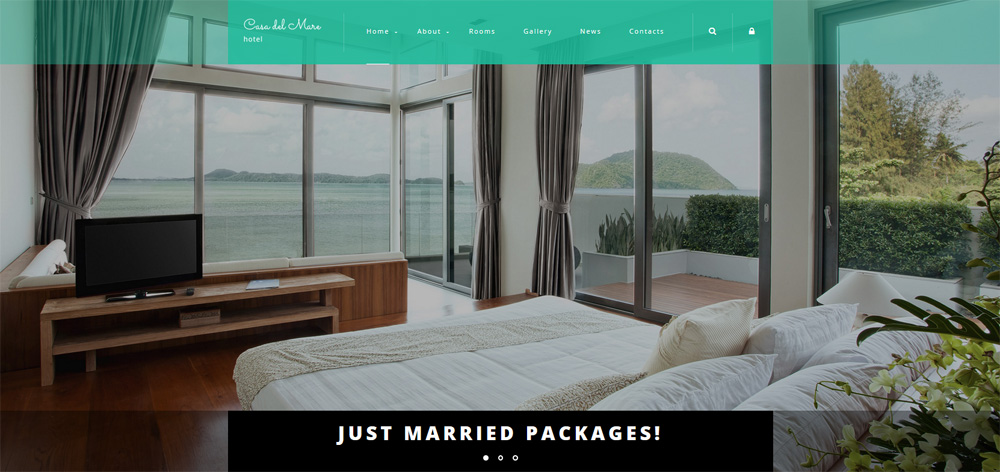
Hotel Joomla 3 Template

Hotel-Suite-Joomla-Template

Demo
More Info

Thanks to Parallax effect, this Joomla template will immerse the user in an atmosphere of luxury, rest and relaxation. Please notice the amazing HD images of hotel views and transparent blocks that seamlessly blend with the rest of the layout.

***

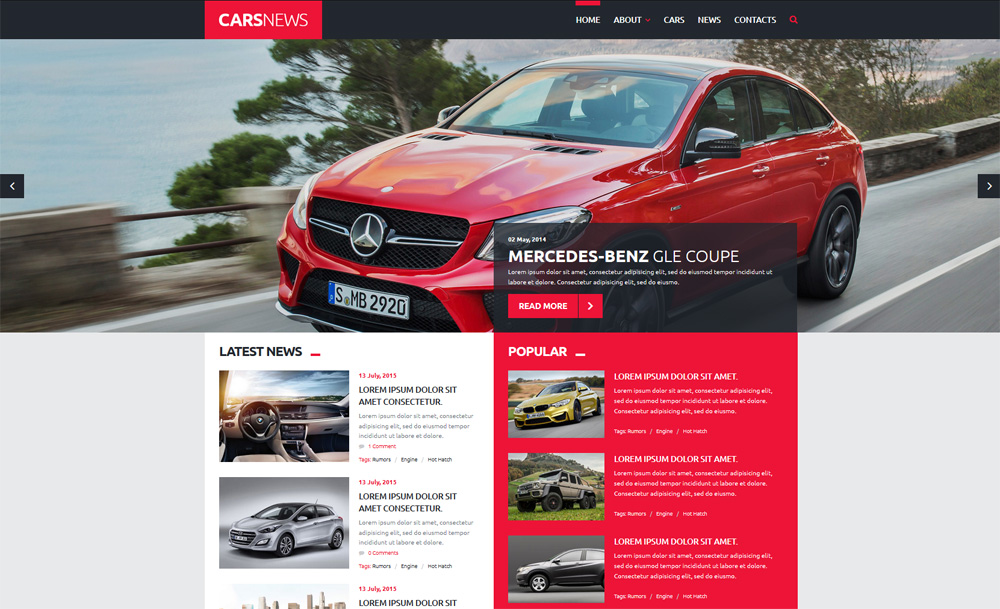
Cars News Joomla 3 Template

Cars-News-Joomla-Template

Demo
More Info

This type of layout will be highly appreciated by people loving speed, cars and bikes. Photos of the top-class cars showcased in the slider are very appealing. Bright red elements give readers a clear notion of the website’s architecture, so they intuitively understand where to look first.

***

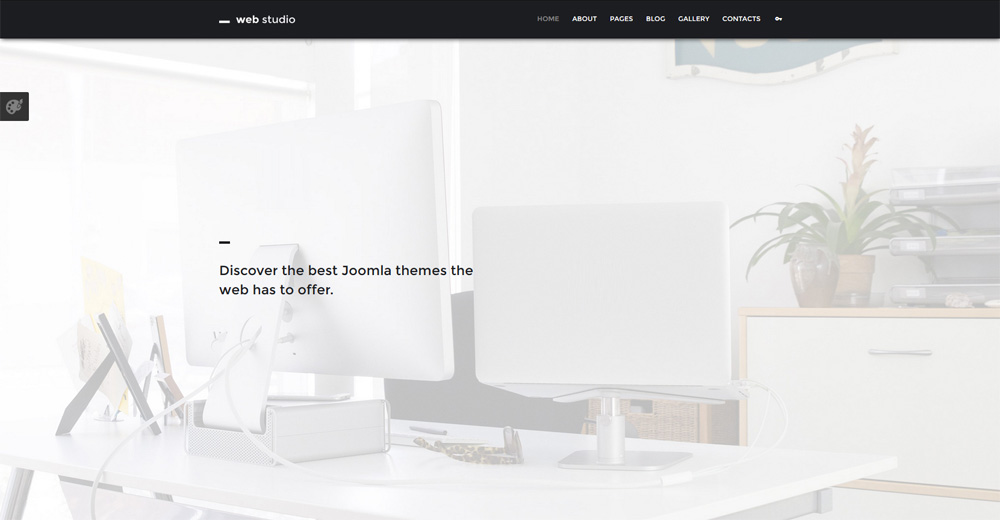
Web Studio Joomla 3Template

Web-Studio-Joomla-3-Templates

Demo
More Info

This is a template with perfect balance of black and white colors. It offers Bootstrap efficiency and scales your site with a single code base, from phones to tablets to desktops with CSS media queries. It goes without saying that you get extensive documentation for common HTML elements and dozens of custom HTML and CSS components.

***

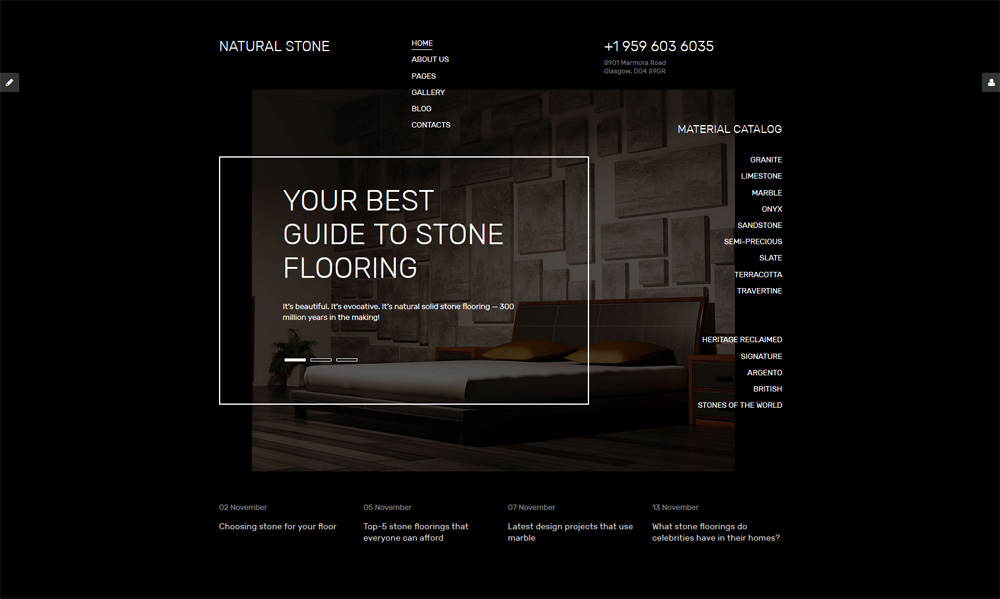
Natural Stone Joomla 3 Template

Natural-Stone-Floor-Joomla-Template

Demo
More Info

This dark Joomla template can be used for flooring, home interior and exterior companies. It is compatible with all popular browsers and there is no need to manually test anything. Do changes to your website and be sure that its look and performance will be equally perfect in all of them.

***

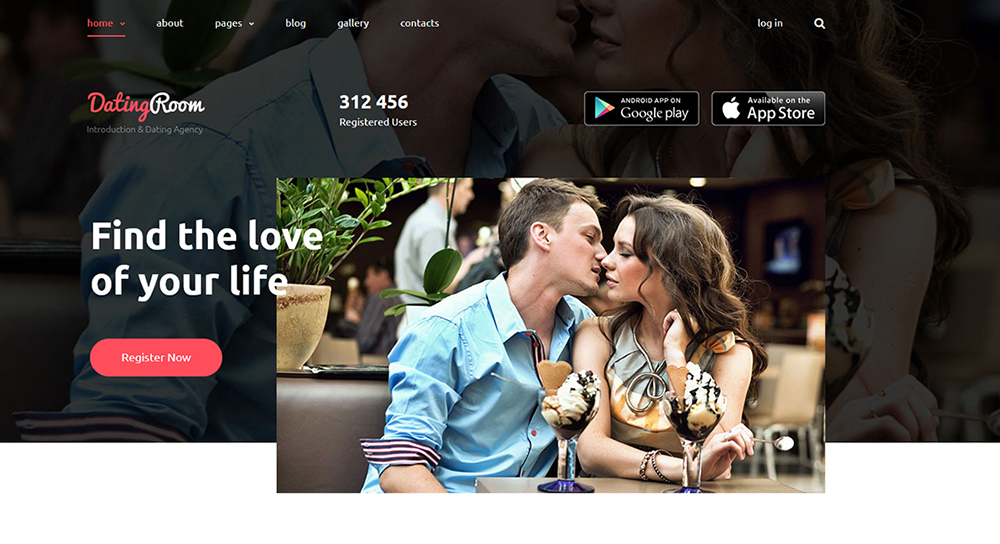
DatingRoom Joomla 3 Template

Dating Joomla template

Demo
More Info

This is the most romantic template of all dating responsive Joomla 3 templates you’ve ever seen. Cute photos of loving couples and parallax effect let you become immersed in the atmosphere of youth, beauty and flirtation. Font icons were used in the layout design. These scalable graphic elements can be adjusted to different sizes without loss of quality.

***

Fast Web Joomla 3Template
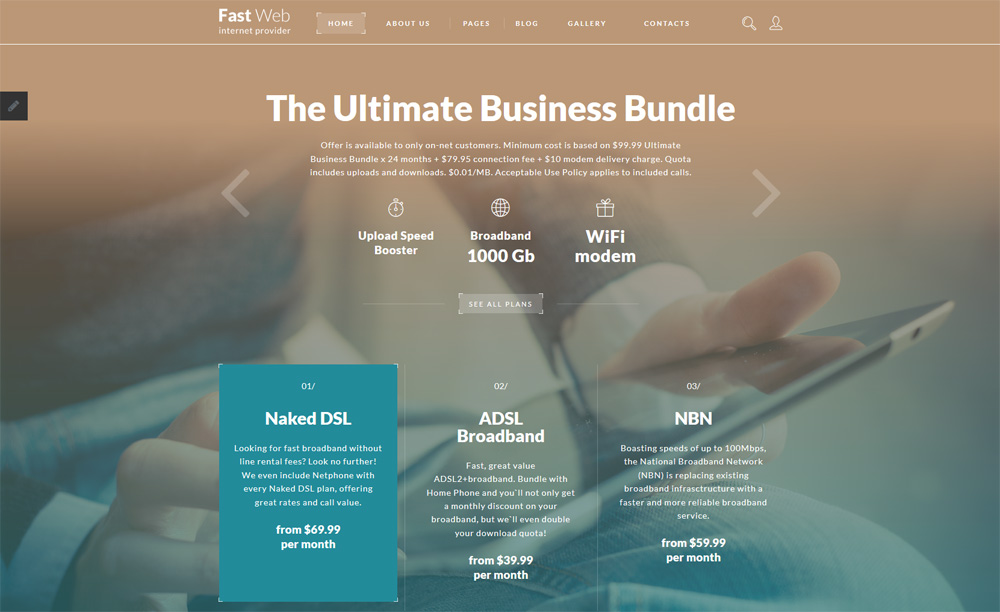
Fast-Web-Joomla-Template

Demo
More Info

Internet providers will derive maximum benefit from this high-end template. A set of monster UI elements is included in the template’s kit. That gives you the opportunity to add any type of content to your site with block quotes, accordions, pricing tables, progress bars and counters.

***

Health Joomla 3 Template
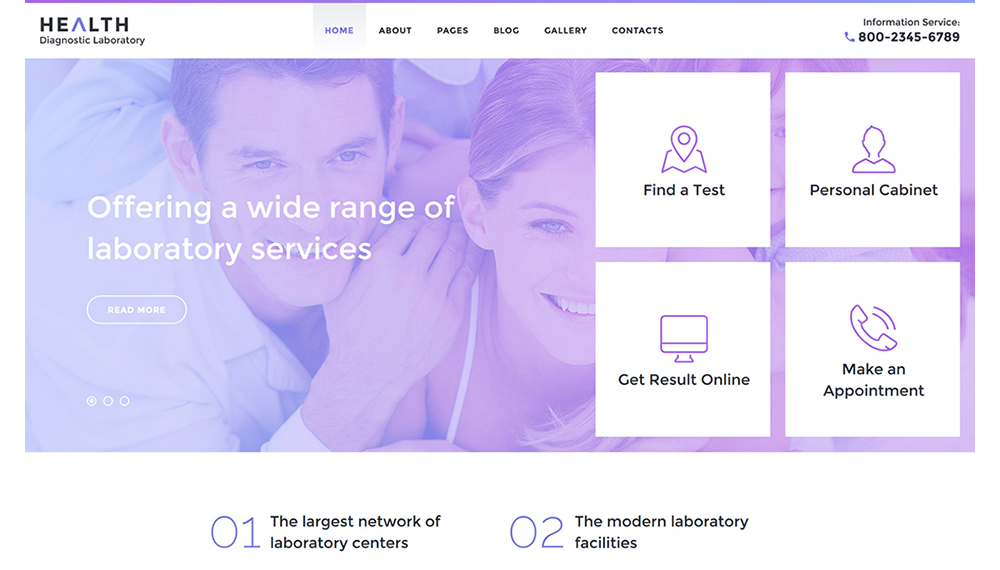
Health Diagnostic Laboratory Joomla 3 Template

Demo
More Info

The unusual, pleasant, light-lilac color scheme of the template will attract users’ attention. Cool hover effects that interact with the visitors will make UX much better. The theme has an ‘Advanced search’ function allowing visitors to find any product in seconds. The feature is included right in the package.

***

Bonus for the most patient readers!
2 Free Joomla Templates

***

Interior & Furniture Free Joomla Template

Interior-&-Furniture-Free-Joomla-Template

Demo
More Info

This free Joomla template looks exactly like premium responsive Joomla 3 templates. The only difference is that you can download it free of charge. The template is easy to install, it looks stylish and could become a perfect design for your future Joomla website.

***

Family Center Free Joomla Template
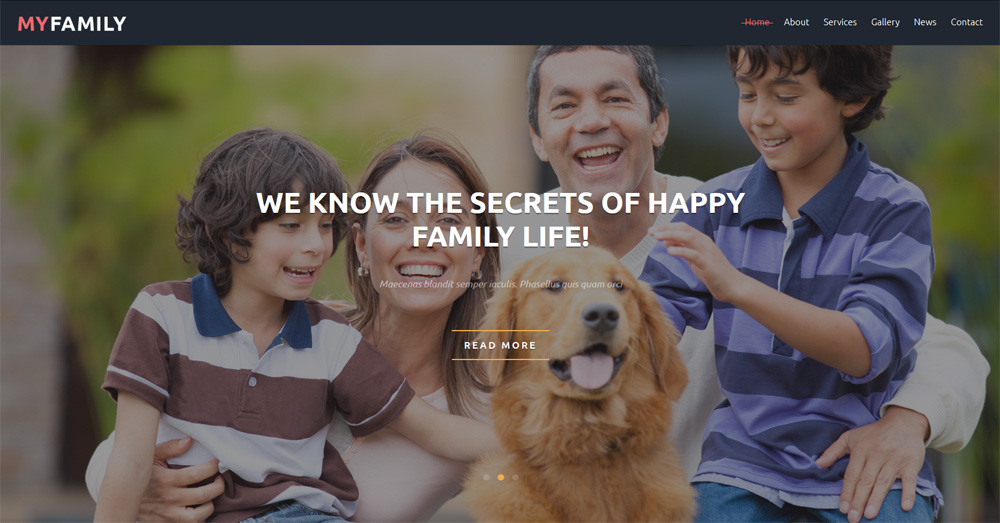
Family-Center-Free-Joomla-Template

Demo
More Info

A bright and cheerful family template free Joomla template that can easily be turned into unique Joomla sites. Slider, amazing photo gallery and streaming video make the theme even more eye-catching. Don’t want to pay for website design? Take advantage of this brilliant opportunity.

Wrap up

You have just browsed 30+ Responsive Joomla 3 Templates, both premium and free. Take your pick and use the selected templates to create one-of-a-kind Joomla sites. If we have missed some chic template, please let us know at the comment section.

Read More at Top 30 Responsive Joomla 3 Templates

Categories: Designing, Others Tags:

Deal: Save 98% on this colossal font bundle

June 23rd, 2016 No comments

If we’ve said it once, we’ve said it a hundred times: you can’t have too many fonts.

Different typefaces are like the voices with which an actor speaks; they give you the power of expression, allowing you to invest the content of designs with emotion, mood, and personality.

So we know you’re just going to love this colossal deal from our sister-site MightyDeals.com: Grab 30, high-quality fonts, worth $1349, for just $29. Yeah, that’s not a typo, grab this incredible deal and save yourself $1320! Or, for just $14 more, purchase both the desktop and web font versions.

If a 98% discount isn’t enough to tempt you, a glance through the awesome designs on offer will. There are wonderful script faces included, ranging from the elegant to the assertive, from professional and restrained, to full-on and excited.

Extra weights are packed in. There are amazing OpenType features, like ligatures, swashes, and alternate characters. You’ll even find some cool bonus files with textures and backgrounds included in the download.

What’s more, this set of 30 fonts comes with an extended license which means you can install them on multiple machines that you own, and not only that, but you can resell any flattened artwork you produce.

Jump over to MightyDeals to grab this extraordinary deal today!

LAST DAY: Create Your Own Fonts in Minutes Right Inside lllustrator – only $24!

Source

Categories: Designing, Others Tags: