David Heinemeier Hansson has written an interesting post about the current state of web design and how designers ought to be able to still work on the code side of things:
We build using server-side rendering, Turbolinks, and Stimulus. All tools that are approachable and realistic for designers to adopt, since the major focus is just on HTML and CSS, with a few sprinkles of JavaScript for interactivity.
And it’s not like it’s some well kept secret! In fact, every single framework we’ve created at Basecamp that allows designers to work this way has been open sourced. The calamity of complexity that the current industry direction on JavaScript is unleashing upon designers is of human choice and design. It’s possible to make different choices and arrive at different designs.
I like this sentiment a whole lot — not every company needs to build their websites the same way. However, I don’t think that the approach that Basecamp has taken would scale to the size of a much larger organization. David continues:
Also not interested in retreating into the idea that you need a whole team of narrow specialists to make anything work. That “full-stack” is somehow a point of derision rather than self-sufficiency. That designers are so overburdened with conceptual demands on their creativity that they shouldn’t be bordered or encouraged to learn how to express those in the native materials of the web. Nope. No thanks!
Designing for the modern web in a way that pleases users with great, fast designs needn’t be this maze of impenetrable complexity. We’re making it that! It’s possible not to.
Again, I totally agree with David’s sentiment as I don’t think there’s anyone in the field who really wants to make the tools we use to build websites overly complicated; but in this instance, I tend to agree with what Nicolas recently had to say on this matter:
You don’t like lots of minified class names in Twitter’s markup. I don’t like apps that only support English and Western desktop hardware. You don’t like losing control over hand-made CSS files. I don’t like shipping 600KB of CSS every time a big app is deployed.
The interesting thing to note here is that the act of front-end development changes based on the size and scale of the organization. As with all arguments in front-end development, there is no “right” way! Our work has to adapt to the problems that we’re trying to solve. Is a large, complex React front-end useful for Basecamp? Maybe not. But for some organizations, like mine at Gusto, we have to specialize in certain areas because the product that we’re working on is so complicated.
I guess what I also might be rambling about is that I don’t think it’s engineers that are making front-end development complicated — perhaps it’s the expectations of our users.
In January 2018 alone, consumers conducted over 1 billion voice searches. By 2020, it’s estimated that 30% of all online searches will take place without the use of a screen.
Needless to say, voice search is set to make serious waves in the not-so-distant future.
As more users seek out the convenience of using their voice to search online, you have to consider how this will impact mobile websites.
As of now, your main concern doesn’t need to be with designing a website that literally talks back to visitors. We have microinteractions and conversational UIs that can help with that. Instead, what you should do is consider the relationship between voice users and search.
Here are some things to think about as you approach the design of mobile websites in 2019 and beyond:
1. Place Answers to Common Queries at the Top
According to a Bright Local survey from 2018, 28% of voice users will call a business immediately after finding them in search.
So, while it’s important to have a well-designed website that appeals to local shoppers or customers, it’s just as important to get them the information they need right away. And when someone is using their phone and their voice to look up a website, chances are good they’re looking for a shortcut to get in touch.
But making a call isn’t the only kind of action a voice user might want to take in this instance. Think of other ways in which they’d want to engage with your client’s website or business:
To get the brick-and-mortar store’s hours of operation;
To find a live chat or support portal for help with a product or service;
To make a reservation or appointment;
To get information about current sales or free shipping offers.
Google/Peerless Insights provide some insights into the types of information most commonly sought out by voice users in search:
If someone has opted to use voice search over text, there’s a good chance they were trying to avoid the work of clicking and scrolling and taking other manual steps to convert. Instead, they engaged with their voice assistant or search voice widget in order to get a quick answer.
When it makes sense, place quick snippets of information in the header or navigation bar.
Take, for instance, this voice query I did for “when is the next marketing conference”:
Using this example of NEXT 2018, you can see that the answer is not provided in my search results:
However, upon opening the website, the answer is in the very top of the website:
As a voice user, I’d be mostly content with this. But I would’ve been even more thrilled if the answer showed up right in results. I’ll explain how to do that in the next two points.
2. Add Location to Your Content
When I wrote about how to design websites for a local audience, one of the things I suggested was that you localize content. This means using verbiage, visuals, and colors that resonate with residents in a certain area.
This point is especially pertinent when attempting to appeal to voice search users.
According to Bright Local, 46% of voice users searched for local businesses every day using a voice-assisted device.
If your website has been built for consumers in a specific geographical region, use this to your advantage.
Include the name of the region in your content and metadata;
Create location-specific pages when relevant;
Use visuals that are specific to the region;
Tag all images and videos with the name of the geographic area;
If video or audio content discusses a specific location, provide a transcription of it.
Do everything you can to ensure that voice searches for “near me” or “in [name of location]” pull up your clients’ websites first. Let me show you why this is important:
I did a side-by-side comparison between a text (left) and voice (right) search for “Find a spa in Newark, Delaware”. Already, you can see a slight discrepancy between the two search results:
Scroll down to the map and you’ll see that search results continue to differ between text and voice:
Take note of the discrepancy between the same Yelp result’s description in the text results and in the voice results. Further down on the page, I encountered a similar issue:
Yes, results continue to differ slightly, but it’s the differing descriptions of the same pages that I find the most interesting. Notice how the one on the left (text) for Massage Envy appears to be a straightforward explanation of the spa’s services while the one on the right (voice) sounds more personal. I don’t think that’s a mistake.
I’ll explain how you can provide these types of robust answers in the next point.
3. Answer Their Questions in Callouts
According to Google, 41% of voice users say that their search queries feel more like a conversation than a one-sided dialogue. As user comfort grows with this type of discourse, it’s going to affect how well your clients’ websites perform in search.
While it might not be up to you to write content that appears on the website, you certainly can frame it in a way so that it’s sure to show up in voice search results.
To start, figure out what kinds of questions the audience is most likely to ask as it pertains to your client’s business.
If you’re unsure, you can use a tool like Answer the Public to identify related questions:
Then, use KWFinder to confirm the popularity of them among your target users:
If the site has been around awhile, I’d also suggest looking at your Google Analytics data. You can find a list of search queries under: Acquisition > Search Console > Queries. You should be able to find the voice queries easily enough as they’ll sound more natural and be longer in length.
Once you’ve identified likely candidates for long-tail voice search queries, it’s time to place them in areas of your content that make sense.
To start, add them to your metadata. This is the easiest way to get your website front and center in voice search.
Also, add answers to common queries in featured boxes on your website. This’ll be beneficial to the end user in a couple ways: for one, it highlights the answer on your website and keeps voice users from having to do too much work to locate it; second, if you mark it up properly with structured data, they won’t even have to go to your website to get the information as the featured snippet will show up in voice search results.
Here’s an example from my voice search for “how do I groom my dog”:
This featured snippet from petMD actually provides me with a graphic and list of steps to take:
This helps me get started right away. It also lets me know if this is a link worth clicking into.
Further down the page, I also ran into these video clips which autoplayed (on silent):
I found this to be helpful as well since I didn’t have to waste any clicks or much time sifting through content to find my answer.
Summary
As consumers take control over how they engage with the web (i.e. predominantly using smartphones and executing more and more queries with their voice), web design must change as a result. No longer are visitors willing to sit by, passively consuming content. They want websites to respond to their queries more naturally and effectively.
And voice search optimization is going to be the way to do it.
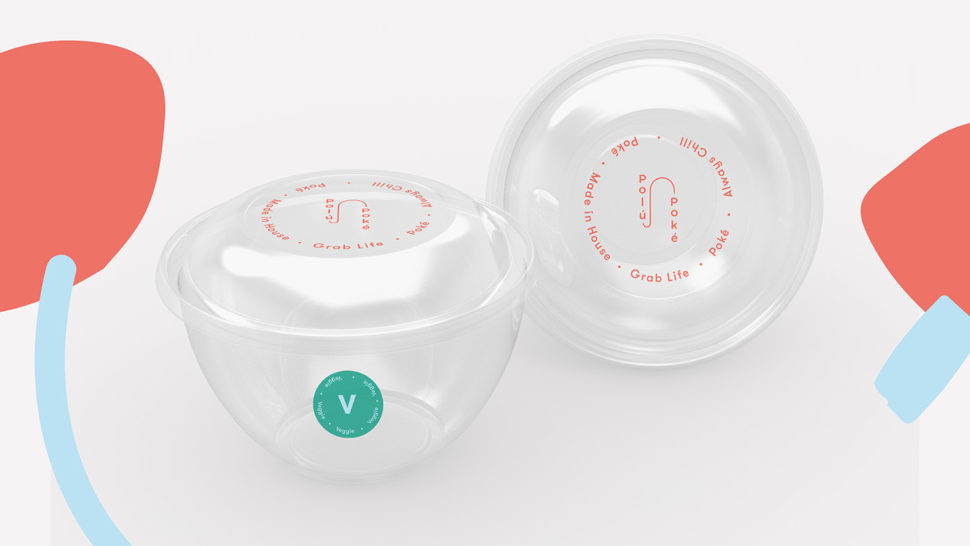
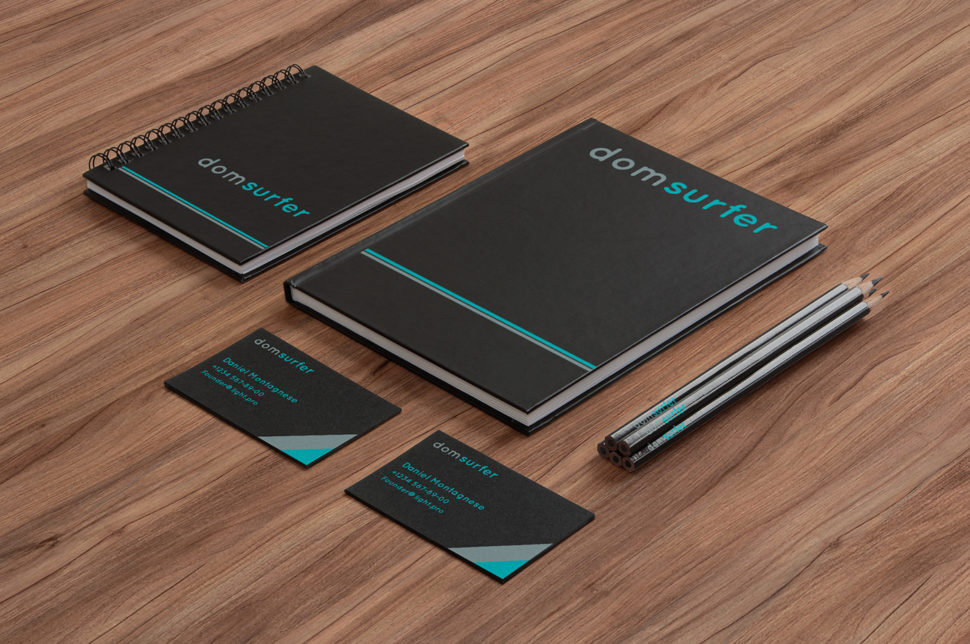
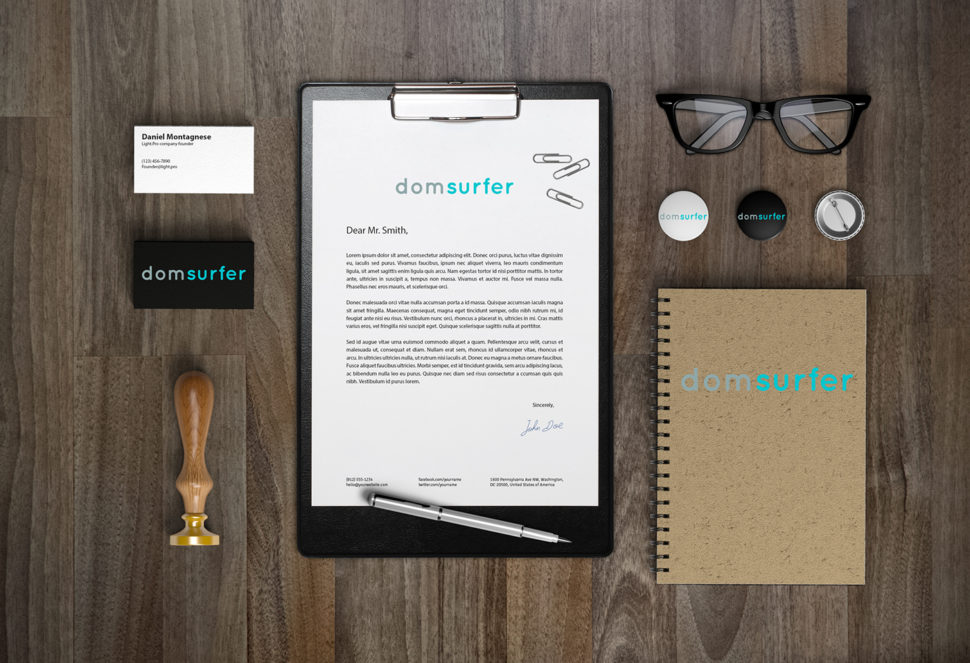
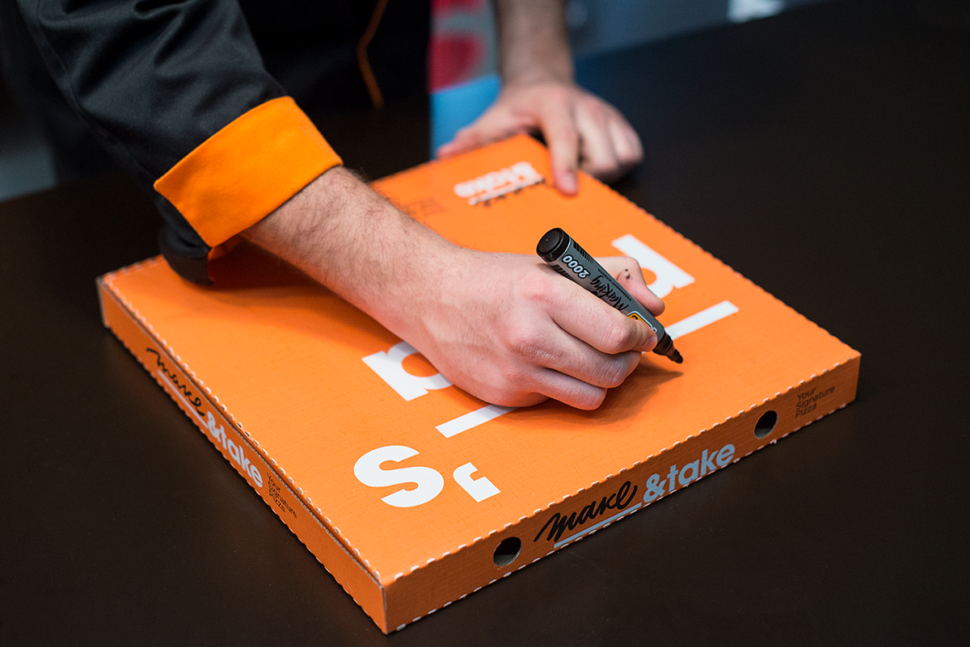
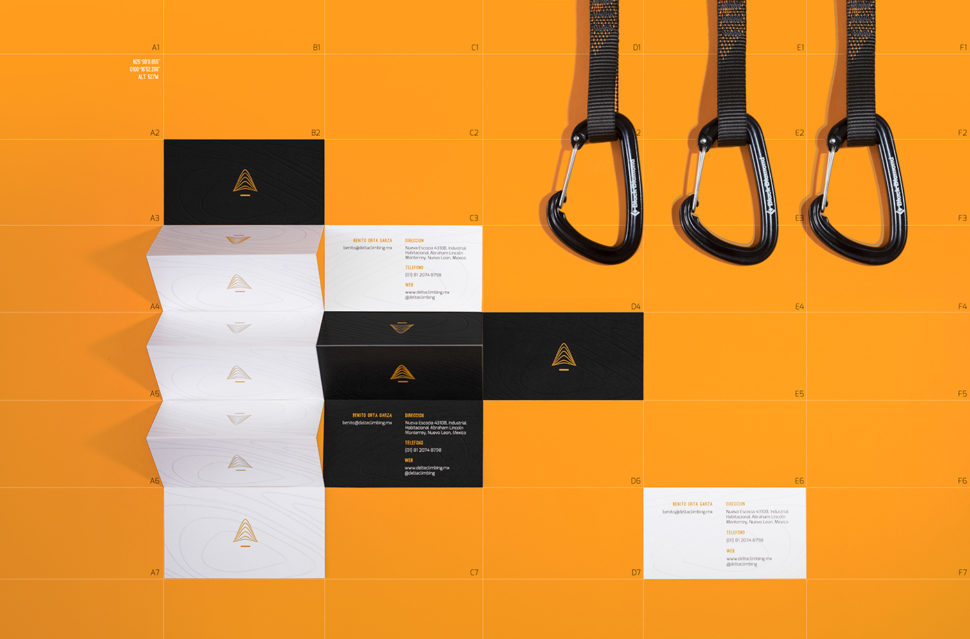
We have catalogued 30 stunning examples of Brand Identity for your inspiration!
Check them out below.
Brand identity is of paramount importance when it comes to starting a new business and promoting your products or services. Yes, it may seem difficult to come up with a creative brand identity which accurately reflects your taste and your values. Still, it all boils down to a few essentials:
Today we will be mostly touching on the logo. The logo should be properly displayed on everything from corporate products to ads and signs posted in and around the office.
We have collected 30 amazingly creative examples of brand identity designs from all over the web. These will surely help you get your creative juices flowing when coming up with yours:
Over the past week or so, I’ve been reading Refactoring by Martin Fowler and it’s all about how to make sweeping changes to a large codebase in a way that doesn’t cause everything to break. I bring this up because there’s a lot of really good notes in this book that have challenged my recent approach to auditing and refactoring a ton of CSS. A lot of the advice is small, kinda obvious stuff, but I realized that I’ve recently been lazy when it comes to how many of those small, obvious things I brush off on projects like this.
Martin writes:
…if I can’t immediately see and fix the problem, I’ll revert to my last good commit and redo what I just did with smaller steps. That works because I commit so frequently and because small steps are the key to moving quickly, particularly when working with difficult code.
So: commit frequently and only do one thing in that commit. Further, constantly test those changes as you code.
The other thing I’ve started to be more aware of — thanks to this book — is that commit messages are precious things because they help other folks understand the meaning of changed work. We’ve all seen seemingly simple commit messages, like “refactored typography” that turn out to be thousands of lines long and we roll our eyes. That’s just asking for bugs to be introduced and visual regressions to happen. Smaller commits should prevent that sort of thing from ever happening. A good string of commit messages should sort of feel like you’re pairing with someone, as if you’re walking them through the changes step-by-step.
Although I’m getting better at this, I find this method of working extraordinarily difficult because it feels slower than sweeping changes and hoping for the best. In his book, Martin encourages us to subside that feeling. When we’re refactoring large portions of our codebase, he argues, we should always be slow and steady, patient and disciplined.
Chen Hui Jing has tackled a ton of design patterns for tables that might come in handy when creating tables that are easy to read and responsive for the web:
There are a myriad of table design patterns out there, and which approach you pick depends heavily on the type of data you have and the target audience for that data. At the end of the day, tables are a method for the organisation and presentation of data. It is important to figure out which information matters most to your users and decide on an approach that best serves their needs.
This reminds me of way back when Chris wrote about responsive data tables and just how tricky they are to get right. Also there’s a great post by Richard Rutter in a similar vein where he writes about the legibility of tables and fine typography:
Many tables, such as financial statements or timetables, are made up mostly of numbers. Generally speaking, their purpose is to provide the reader with numeric data, presented in either columns or rows, and sometimes in a matrix of the two. Your reader may use the table by scanning down the columns, either searching for a data point or by making comparisons between numbers. Your reader may also make sense of the data by simply glancing at the column or row. It is far easier to compare numbers if the ones, tens and hundreds are all lined up vertically; that is, all the digits should occupy exactly the same width.
One of my favorite table patterns that I now use consistently is one with a sticky header. Like this demo here:
As a user myself, I find that when I’m scrolling through large tables of data with complex information, I tend to forget what one column is all about and then I’ll have to scroll all the way back up to the top again to read the column header.
Anyway, all this makes me think that I would read a whole dang book on the subject of the
element and how to design data accurately and responsively.
When we talk about cloud computing, we really mean the ability to rent a piece of a computer from someone else. That’s all there is to it.
Companies like Amazon and Google have a lot of computers and they’re willing to rent parts of them to you. Renting computers from them is cost-effective because you don’t have to build your own data centers or hire your own staff of experts to run them.
When you rent a part of a computer, you need it to look like a whole computer so you can run any software you want. That’s why providers give you a virtual machine (VM) — software that makes it look like you’re running on your own separate computer.
Why Your Client Cares About The Cloud
Before you learn more about the cloud, it’s important to understand why your client cares. Let’s not dismiss the allure of buzzwords; the cloud is really trendy right now. Your client may just be asking because all the cool kids are doing it, but there are reasons the cool kids are doing it.
Let’s start with the basics. Hosting your own data center would be a pain in the rear. You’d have to worry about power consumption, keeping your hardware up to date, hiring a team of experts to run it, and a thousand other problems that have nothing to do with your business. What would happen if the power went out, there was a flood, or the roof caved in? These are all reasons not to host your website on a server running in your living room.
Not only can you pass on all the headaches to someone else, but having them run the data center gives you three big advantages:
Clouds are global.
They exist in data centers around the world, including one near your client. That means speed. You don’t want customers in China waiting for data to load from the United States. When I go to Google.com, I get a different data center in Boston than I would in Chicago or L.A., and that’s just in the U.S. That’s a large part of what makes Google’s speed possible.
Clouds grow and shrink.
If I buy a server, I have one server; even if my app doesn’t need the whole computer, I still need to pay for that server. When my app gets really popular, I need to buy more servers fast. The cloud doesn’t work like that. Renting shares of servers means I can change how much I’m renting: I can scale up the order when I’m busy, and scale it down when I don’t need as much.
Clouds never go down.
Never say never…but almost never. Cloud providers talk about “five nines” — that means being up 99.999% of the time (with just 5.26 minutes of downtime a year). You can make that even smaller with services like load balancing and failover.
Those are all reasons clouds can be cool, but you can get some of them from a simple hosting service. If your client is asking about the cloud, you need to know the difference.
How Is A Cloud Different From A Hosting Service?
I have a personal website on a hosting service named Media Temple. My site runs WordPress, so it needs a few things:
A directory to put my files in
An HTTP server
A database
PHP
My directory runs on Linux, my HTTP server is Apache, my database is MySQL, and it all runs on PHP; that’s why they call it a LAMP stack (Linux-Apache-MySQL-PHP). That may sound like a lot of pieces, but they’re limited. For example, I can’t install new software. If I want to run my database on PostgreSQL, I’m out of luck. I can’t run other languages like Python or Go; I can’t write my own separate programs. I only get a very limited, pre-configured set of things I’m allowed to do.
My website also only runs on one server in one place. Where is that server? I have no idea. I think it’s somewhere in the United States, but other than that I don’t know, and I don’t really care. The hosting provider gives me a single server, I type in a URL, and my site comes up (most of the time).
Hosting providers keep it simple. Some of them host other stacks and some allow a little more configuration, but it’s always a set package.
The fundamental difference between a hosting service and a cloud is the virtual machine. A hosting service just gives me part of an existing operating system. A virtual machine gives me an entire operating system all to myself.
Why Virtual Machines Matter So Much
A virtual machine acts just like a real machine. It can run Linux or Windows and it can do anything a normal computer can do. Apple doesn’t allow you to run OS X on a virtual machine (although a few people have made it work, building a “Hackintosh”).
When you have a virtual machine you have total control. You can run anything you want there — databases, email servers, encryption, even searches for extraterrestrials. The virtual machine allows you to do anything you want.
Having an entire operating system all to yourself is really powerful, but before you can do anything useful you need to access the VM.
Let’s Talk A Little About Networking
Virtual machines are useless if you can’t get to them. You need networking, although networking can get a little complex.
But these basics will give you what you need to get started. Let’s start with an example you’ll be familiar with. It’s probably running in your house right now.
I have Comcast at home. Comcast gives me a cable modem with an IP address like 10.0.0.89. While it only gives me one IP, I have two laptops, an iPad, and a phone; my wife and daughter have even more devices. To make that work, I have a wireless router that connects to my cable modem. My wireless router gives every device I have an IP address like 192.168.0.100, 192.168.0.101, and so on, but those addresses are private to my network.
The technical term for those private addresses is non-routable. There are a few addresses that are set up for private use; most start with 10. or 192.168, as a sign to Internet routers that these addresses aren’t allowed out in the wild. I’m using these special addresses because they’re reusable.
Every IP address must be unique in a given network; otherwise, the router wouldn’t know which computer I wanted to connect to. There are 4,294,967,296 possible IP addresses. Although network designers thought that was a lot when all of this started in the 1970s, we’re now running out. There are some other protocols, like IPv6, that may solve this problem in the future, but today we solve this problem with Network Address Translation (NAT). Let me show you how it works.
The devices in my house have addresses that are unique in my house, but not in the entire world. When I want to get out to the Internet, I need the wireless router to translate them for me. Every time I click a link, my laptop talks to my wireless router to make the request for me; in turn the wireless router talks to the world on my behalf, but using its own address. Then my cable modem does the same thing when it talks to Comcast, and Comcast does the same thing again on a much larger scale when it sends my request out to the general Internet. Each router is translating the IP address from the one before it. All of this means that many computers can reuse an IP address like 192.168.0.101, and it all works out without conflicts.
So what’s my real IP address on the real Internet? Right now my real IP address is 66.30.118.150 and my private IP address is 192.168.0.103.
Where did the address 66.30.118.150 come from? It’s an IP address that Comcast owns. It makes it clear that I’m in Cambridge, Massachusetts, in the northeastern United States. I don’t need the details; all I need to know is that it’s a real public address that Comcast manages for me. Comcast probably uses the same address for hundreds or thousands of other people.
All of this address translation does something else very important. It gives me a single point of access that controls everything that goes into my home network. Nobody outside can access 192.168.0.103; to them, it’s a different address. I get a lot of security by controlling what traffic can come in and out. My wireless router is a pinch point where I can control what happens.
Most clouds work just like my home network. The computers are virtual, networks are called subnets, and the wireless router is called a gateway, but it’s all the same thing. They have virtual machines with private addresses and gateways that translate them to public addresses. They also have a space of addresses that they can use just like my wireless router at home. Like this:
It might sound complicated, but it’s not too hard. A cloud is a way for me to rent computers from someone else and set them up to look like my home network.
The most important things to remember are:
Private IPs are only available on your private network;
Public IPs are available on the Internet;
NAT allows private IPs to look like public IPs.
That’s not everything that happens with cloud networking, but it’s more than enough to get up and running and access your cloud. Now you need to decide what kind of cloud you want.
The Different Types Of Clouds
Cloud is an amorphous term — people use it to mean a lot of different things. There are really three different categories of clouds.
Infrastructure Clouds
The virtual machine and network are the building blocks for an infrastructure cloud, also known as Infrastructure as a Service (IaaS). They provide the virtualized infrastructure, which you have full control over. You decide on the operating system and everything else that runs on top of it.
You get flexibility and control, but you’re responsible for managing and supporting everything you install.
Infrastructure clouds are either static or elastic. A static cloud works like my home network: I have a set of virtual machines running whatever I need them to. They live on a private network, with a public gateway that grants them access to the Internet. Static clouds are great for processing data, having some extra computing power, or hosting a more complex site than a hosting provider can handle. You can also replicate your static cloud to other data centers around the world.
Elastic clouds work like static clouds, but they’re dynamic. Instead of a fixed set of virtual servers, you have a set that can grow or shrink depending on your needs. Your cloud expands when you have high demand on your site or service, and shrinks back to normal size when you don’t. All the expanding and shrinking saves you money. You give back the computing power you don’t need when you don’t need it.
Netflix uses IaaS. Amazon Web Services provides the infrastructure, and Netflix implements its entire system on top; it wrote its own software to provide highly customized support for streaming high-definition content. The Weather Company is another example — it runs on top of the IBM Cloud.
Platform Clouds
A platform cloud, also known as Platform as a Service (PaaS), is a specialized cloud that provides software building blocks for your application while the cloud provider manages the infrastructure and software stack for you.
For instance, if you needed a web application, PaaS could provide you with vanilla WordPress or Drupal for you to use. If you needed a database, you could pick MySQL or PostgreSQL. If you need development tools, you might choose from Node, Java, or PHP. You don’t need to worry what operating system is running, or whether a MySQL security patch needs to be applied — the cloud provider takes care of that for you.
Heroku is a PaaS cloud. It provides the software underneath, and you just write what you want on top of that. It gives you some flexibility, but does a lot more management than an IaaS cloud.
Software Clouds
A software cloud, also known as Software as a Service (SaaS), is a very specialized type of cloud that provides you with a well-defined online service. Hosting providers are a special type of SaaS cloud under the covers; they work in a very limited way.
Wix is another example of SaaS. It provides you a complete web application hosting service with a great editor, support for user login and payment, and a wide variety of templates to choose from. Wix focuses on just one job. It’s very limited in functionality, but also easier to use.
The Basic Pieces Of A Cloud
We’ve talked about the different types of clouds and why you need them. Before you can really sound like a cloud expert, you need to know the different components that make up a cloud.
Virtual Machines
A virtual machine is a software that runs like hardware, acting like a real machine without ever needing a separate server anywhere. You can do whatever you want with the VM, and it will pass the duck test — it walks and quacks like a real server. Your software will never know the difference.
This flexibility has a price. You’re responsible for maintaining your virtual machine. The cloud provider will make sure the hardware is in top condition, but you’ll have to select your operating system and everything else that runs on top of it — security patches, software updates, configuration. It’s all on you.
And if you’re not on an elastic cloud, you’d better remember to release any virtual machines you don’t need anymore. The provider will charge you whether the VM is doing work or not.
Subnets
We covered cloud networking already. Subnets are networks that run in the cloud.
Private IPs And Public IPs
The cloud network will assign a non-routable IP address to virtual machines in the subnet. Those are known as private IPs because they’re private to my network. When a virtual machine sends requests to the internet, the public gateway will translate those requests. That’s called egress traffic by the cloud providers.
Just as I can’t access my home printer from a coffee shop, in the cloud I need a public IP to access a virtual machine.
Public IPs can be assigned to virtual machines to allow ingress traffic (traffic coming from the Internet routed to virtual machines). That’s important because cloud providers will charge you differently for ingress and egress traffic.
SSH Keys
An SSH key is a piece of private information that allows you to access your cloud. It’s made up of two files. There’s a public key that looks like this:
You use these two files together instead of a password.
SSH public-key authentication is a robust way to log in to a remote system, more secure than the standard username and password. (SSH stands for “secure shell.”) You’ve probably seen SSH keys before in the form of your Github key.
The computers are powerful servers that can each host many virtual machines at the same time. These servers consume a lot of power and generate a lot of heat, and they need to be physically close together so the networking is fast. So a data center is the facility in which a cloud provider houses all the physical hardware that runs a piece of its cloud. The data center requires proper cooling, redundant power supply, massive network bandwidth, controlled access and skilled staff to keep all the machines running.
A data center can handle a lot of load, but it’s in just one place. A global cloud provider needs to spread data centers across the world to ensure that clients everywhere will have acceptable network-access latency to their servers.
Regions And Zones
A cloud provider needs to organize its data centers to ensure it can keep fulfilling requests during power outages, floods, hurricanes and other disasters. Providers call this Quality of Service, and it’s all part of making sure the cloud never goes down.
A region is a geographic area with a specific round-trip network latency (from where to where?). Regions have names like Dallas, Tokyo, or Frankfurt. You’re guaranteed to get the network latency you’re paying for inside that area.
A region is made up of one or more zones. Zones are an isolated data center in a region with independent electrical, mechanical and network infrastructure designed to guarantee no shared single point of failure between other zones. That enables you to build highly available fault tolerant applications by deploying to multiple zones in a region. The region can keep going if a zone crashes, but it’s really bad when all the zones go down.
A data center hosts a zone. Multiple data centers are clustered together to create a multi-zone region. Zones have names like us-south-1, us-south-2, and us-south-3. A small region can be served by a single robust data center, while a populous region might require multiple data centers to cope with the network and computing demand.
Disaster Recovery, High Availability, And Fault Tolerance
These concepts make even the most accomplished IT architects sweat. They stay awake at night wondering how they’ll make sure the cloud never goes down.
But you’ve got this! The cloud (almost) never goes down, and it’s easy to make sure you’re covered if it does. Let’s review these concepts one by one:
Disaster recovery (DR) is a set of policies and procedures detailing what to do during and after a major incident. Design your system so that it fails gracefully (meaning that your users will understand that something is wrong but you’ve got it covered), and after an incident, you know how to bring it back as quickly as possible. You need DR when a whole region goes down, your service is under cyber attack, or it’s vulnerable and you need to take it down.
High availability (HA) is but a goal — the “five nines” we talked about earlier. You want your application to be resilient to failure. This is nearly impossible if you run a server in your living room, but it’s doable with the cloud. You achieve the goal of high availability by relying on the cloud’s fault-tolerant infrastructure — everything’s taken care of for you.
A fault-tolerant infrastructure is a design that makes sure a backup takes over if something goes down. The cloud is a fault-tolerant system. If a zone within a region fails, the other zones will ensure continuity of service. You need to take advantage of that fault tolerance by using components like load balancers.
Load Balancers
High availability comes from running multiple instances of your application at the same time. A load balancer is a piece of equipment that will route traffic from your users to one of your instances that is live and well; it takes requests and sends them to the next healthy server.
The load balancer monitors the health of your virtual machines, and it can take different parameters into account. It can detect if your virtual machine or app crashes, but it can also check for network latency, specific data in the request headers and so much more.
Questions Your Clients Are Likely To Ask
So your application is running great, but your client is thinking about embracing the cloud. Are you ready for it? Here are common questions you should be able to answer to sound like a cloud expert.
When Do I Want More Than A Hosting Provider?
Your client might be engaged full speed ahead on migrating all services to the cloud. With greater flexibility, resiliency and a geographically distributed presence, the cloud makes it easy to get excited.
But even though the cloud is faster and more flexible and dependable, it’s also costlier; it might even require additional IT support to keep your client’s system running. The cloud is not for everyone.
If your client’s system is currently running on a hosting provider, should you move to the cloud?
Consider present and future needs: If your client is looking for high availability to comply with regulations, then move to the cloud. If your client is targeting a global audience, move to the cloud. If drastic surges in demand throughout the year are expected, move to the cloud.
If the system will be mostly accessed by local users within a specific geography, or if it’s not mission-critical to your client, then don’t move to the cloud.
The important takeaway: If your client’s system runs well on a hosting provider, you should consider existing SaaS offerings that would provide the resilience and performance of the cloud, while isolating your client from unnecessary IT expenses. There are traditional hosting providers like Bluehost offering cloud-based services, and there are cloud providers offering hosting services.
What Type Of Cloud Should I Use?
Finding the right type of cloud can be overwhelming, with each provider offering a wide range of services and options. The first things to consider are the complexity of your client’s software stack and the hardware it’s currently running on.
If the whole stack is highly customized with recompiled open-source libraries, customized Linux kernels or special storage optimizations, you should look at IaaS first. Some providers will allow your client to mix and match, using IaaS for highly customized components while picking PaaS for other parts.
However, if your client’s needs are mostly built on top of off-the-shelf libraries, PaaS is most likely a better starting point; the cloud provider will make sure your client’s code will always be running on top of up-to-date dependencies.
Once the right cloud model is identified, the requirements and evaluation criteria will be unique to your client. But it’s always worth paying attention to non-functional requirements: Does your client have to comply with domain-specific regulations, certifications or standards? Do they have any dependency on or partnership with specific vendors?
Finally, think about the cloud provider’s migration support, and vendor lock-in — how hard it is for your customer to migrate to a competitor once the system is running. Consider an exit plan even if your client is not planning to move out.
How Do I Make Sure My Site Never Goes Down?
Let’s say your client is working in the U.S. healthcare industry. HIPAA requires that every organization has some sort of disaster recovery plan, and that includes your website. Your client’s business will fail if the site goes down, so you need the resiliency of the cloud.
The cloud gives you the tools you need to ensure that your site never goes down. You’ll need multiple instances of your application running at the same time, and a way to control traffic so your users will never access a bad instance.
If your client is deploying your site on an IaaS cloud, you’ll need multiple instances of your application and a load balancer to control traffic. If your client has a PaaS cloud, just ensure that you have multiple instances running, as the cloud will provide the routing part automatically.
If your site uses a database, make sure that your client’s cloud is configured to support session affinity (also called sticky sessions), a way to ensure that all user traffic is routed to the same virtual machine.
How Do I Make My Site Fast For Everyone In The World?
If your client is going global and requires your application to provide fast service to end users around the world, then you need the flexibility and geographic reach of the cloud.
Even though the cloud is global, you need instances of your application to be running close to where your users are.
Work with your client to identify which cloud regions would best serve your user base, and where your client is hosting the APIs that support your site — your instances should be close to both. You might also discuss setting up a global proxy that routes traffic to different geographical areas based on the user’s location.
Conclusion
Providing scalable and resilient service to a growing customer base across the Internet is very complex; we’ve barely scratched the surface here. That’s why we want to leave the details to Amazon, Google, and the other cloud providers. Your job is to make good decisions about how to use their services.
Remember, when your client asks you if something should run in the cloud, you need to ask four questions:
How complex is the software you need to run?
How much does it need to scale?
How important is it that it never goes down?
How fast does it need to run for users around the world?
Start with those four simple questions, and you’ll sound like a cloud expert. Work with your clients to understand what the answers to these questions mean for them, considering the different types of cloud, and you’ll be a big part of solving their needs.
Welcome to 2019! It’s a brand new year and there are plenty of sites taking advantage of the optimism to start afresh.
Every month we publish a guide to the freshest websites launched (or relaunched with significant new updates) in the previous 4 weeks, this is January’s edition.
The slowdown for the holiday season is well behind us now, and new projects are launching daily. With some old trends still popular, and new ideas coming through, there’s no single dominant trend, making this month’s list more diverse than ever. Enjoy!
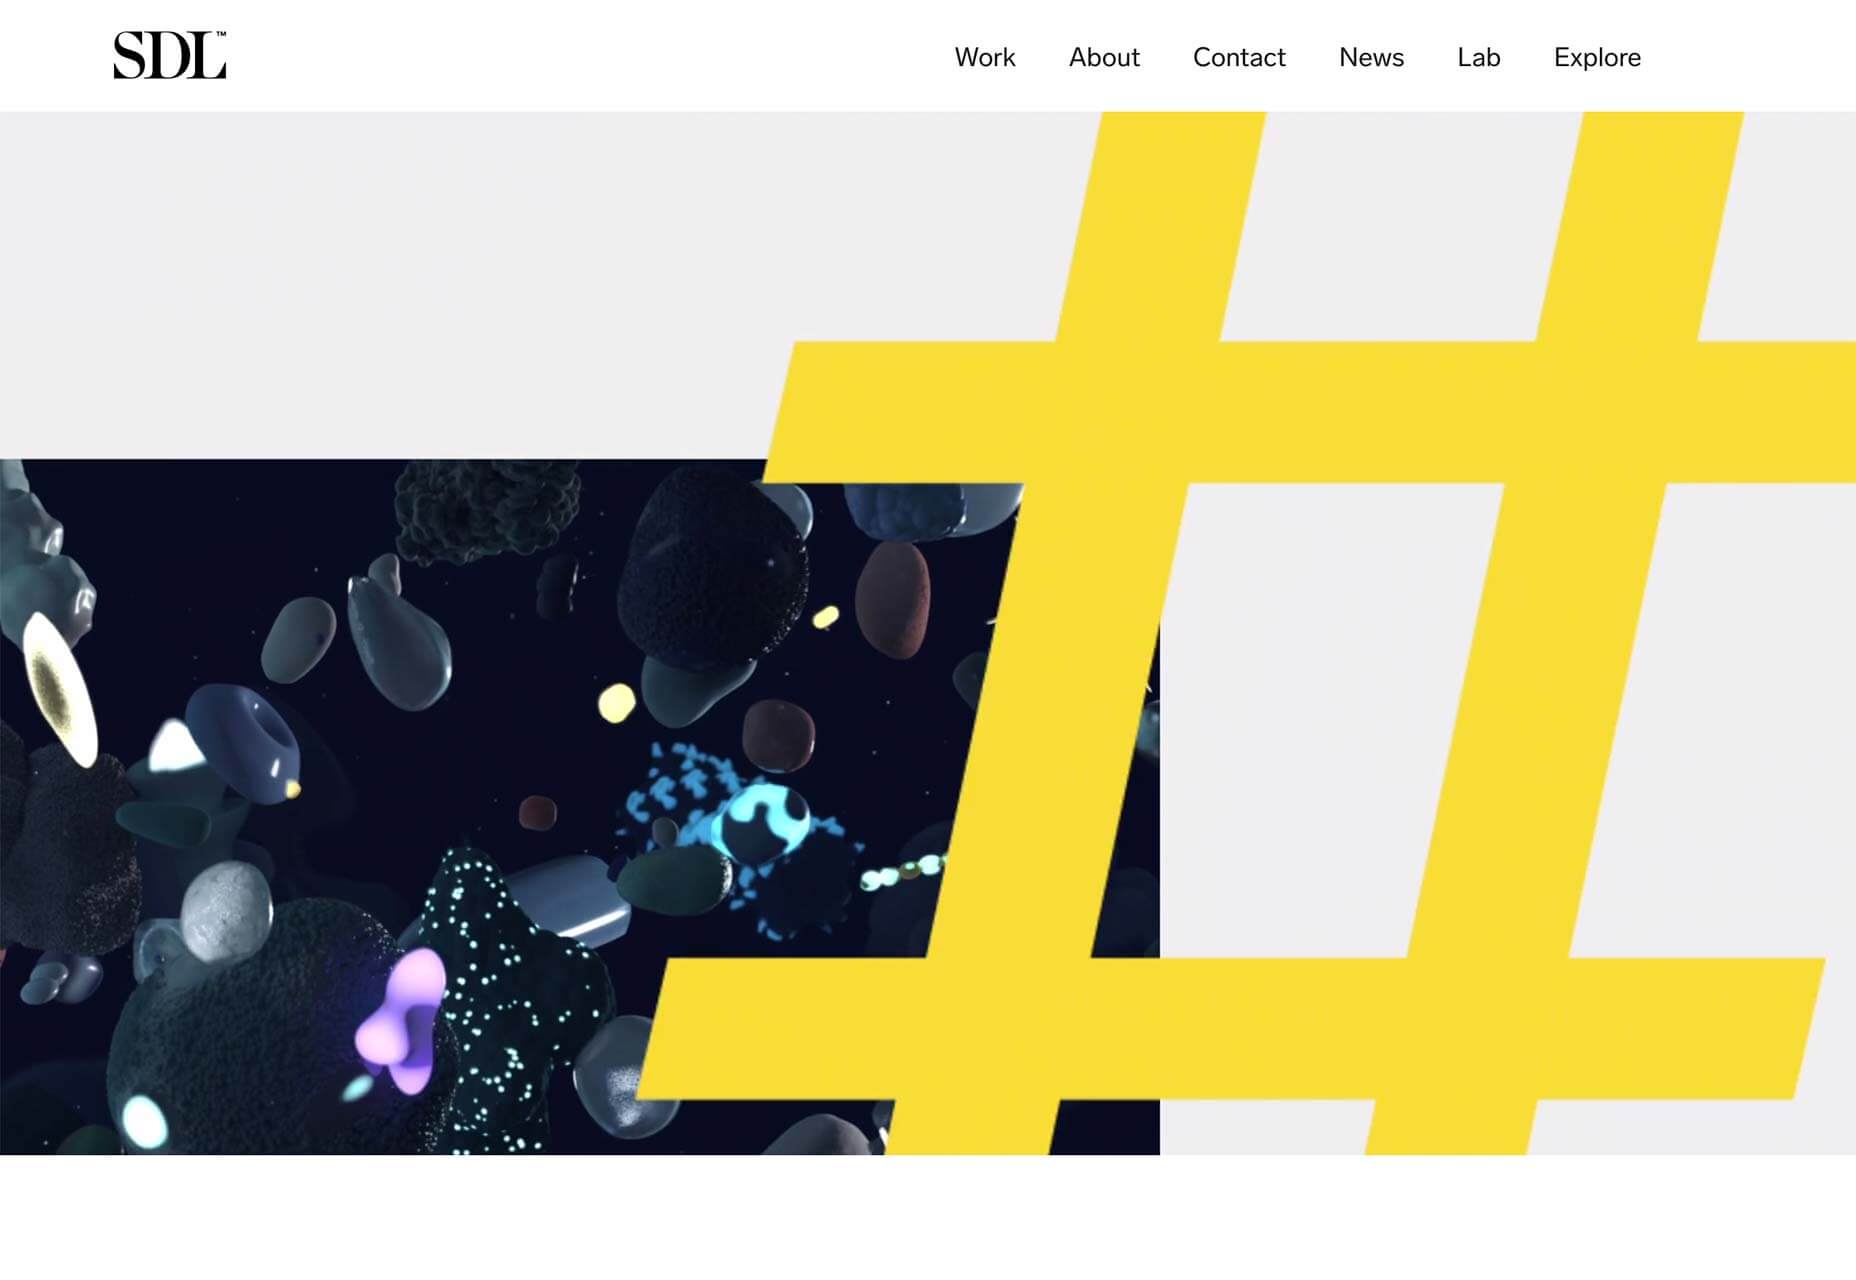
Stockholm Design Lab
The Stockholm Design Lab is a design agency that works with high-profile brands, take a look at their client list and you’ll see several global names. As if to emphasize the depth of its practice, the site lets you explore by typing different terms. It’s an impressive way to present work.
Cure
Cure is a high-end nails and wax boutique and its site showcases the aspirational lifestyle it’s selling. The typography is fresh and engaging, the art direction is modern and carefully planned, the parallax is beautifully executed, and the underlying grid is inventive.
Goldkant Interior Köln
In 2019 you can expect to see designers looking for new ways to work with parallax. Goldkant gets it right by combining parallax with the split-screen trend. Lots of sites apply an effect like this on the home page, Goldkant uses it site-wide. Plus check out that slick animated logo.
Kalfire W53/50R
The inelegantly named Kalfire W53/50R has a site that features lots of full-screen video. Click through to the design page for more video, and the efficiency page for a detailed presentation of an extremely high-end product.
Layer
Full-screen video is going to be big in 2019 and Layer’s site is on-trend with a macroscopic view of its product range. Layer make intelligent products that form emotional connections, so their video is intimate in its approach. The whole site oozes human-centered design.
Talia Collins
The amazing Talia Collins company makes swimwear out of material regenerated from discarded fishing nets, making you look amazing on the beach this Summer, all while saving marine life. Its site does a great job of counterpointing flattering style, and a love of the water.
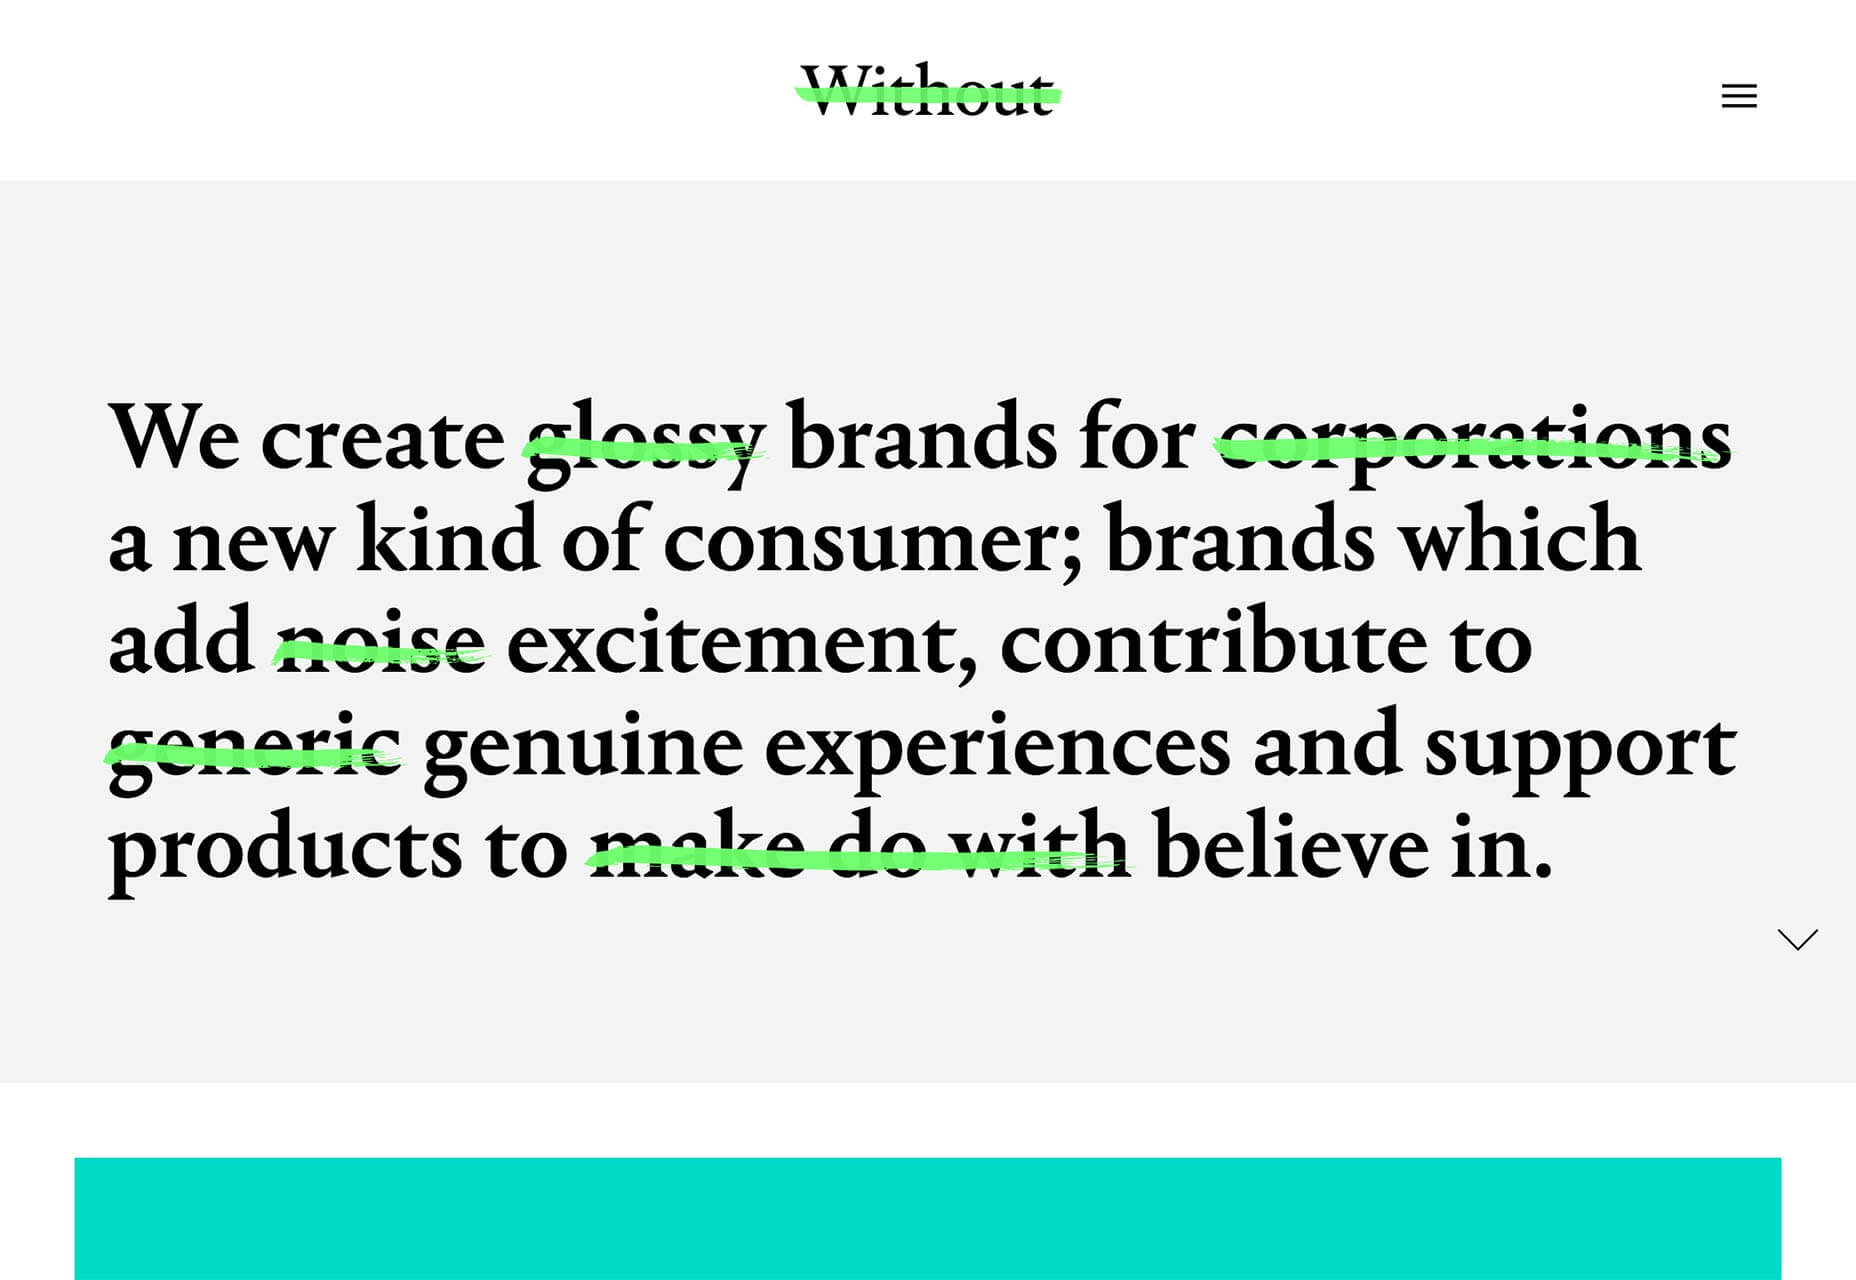
Without
Without is a design studio from London, UK. Its site features enviable typography, and a rigid application of UX principles. Scroll through the site to discover an impressive portfolio of case studies. If it wasn’t for the hamburger menu on desktop, this could be the perfect agency site.
Lesse
Lesse skincare products are 100% organic, cruelty free, and vegan. Its site and its branding follows the very recent trend of embracing organic feeling serif fonts—Lesse’s logo is almost Art Nouveaux—combined with the simple sans serif its a very 2019 design.
Knnox
I would, of course, never advocate smoking cigarettes (they will damage your health and that of your loved ones). But if I was a smoker, I’d want one of the brutalist brass lighters from Knnox, and it’s all thanks to the scandi-noir art direction on this site.
A&Mcreative
French creative agency A&Mcreative presents its work in typical Parisian style: understated, effortlessly cool, and probably three or four times over your budget. Compare the modest way its extraordinary client list is presented, to the way some agencies talk up their work.
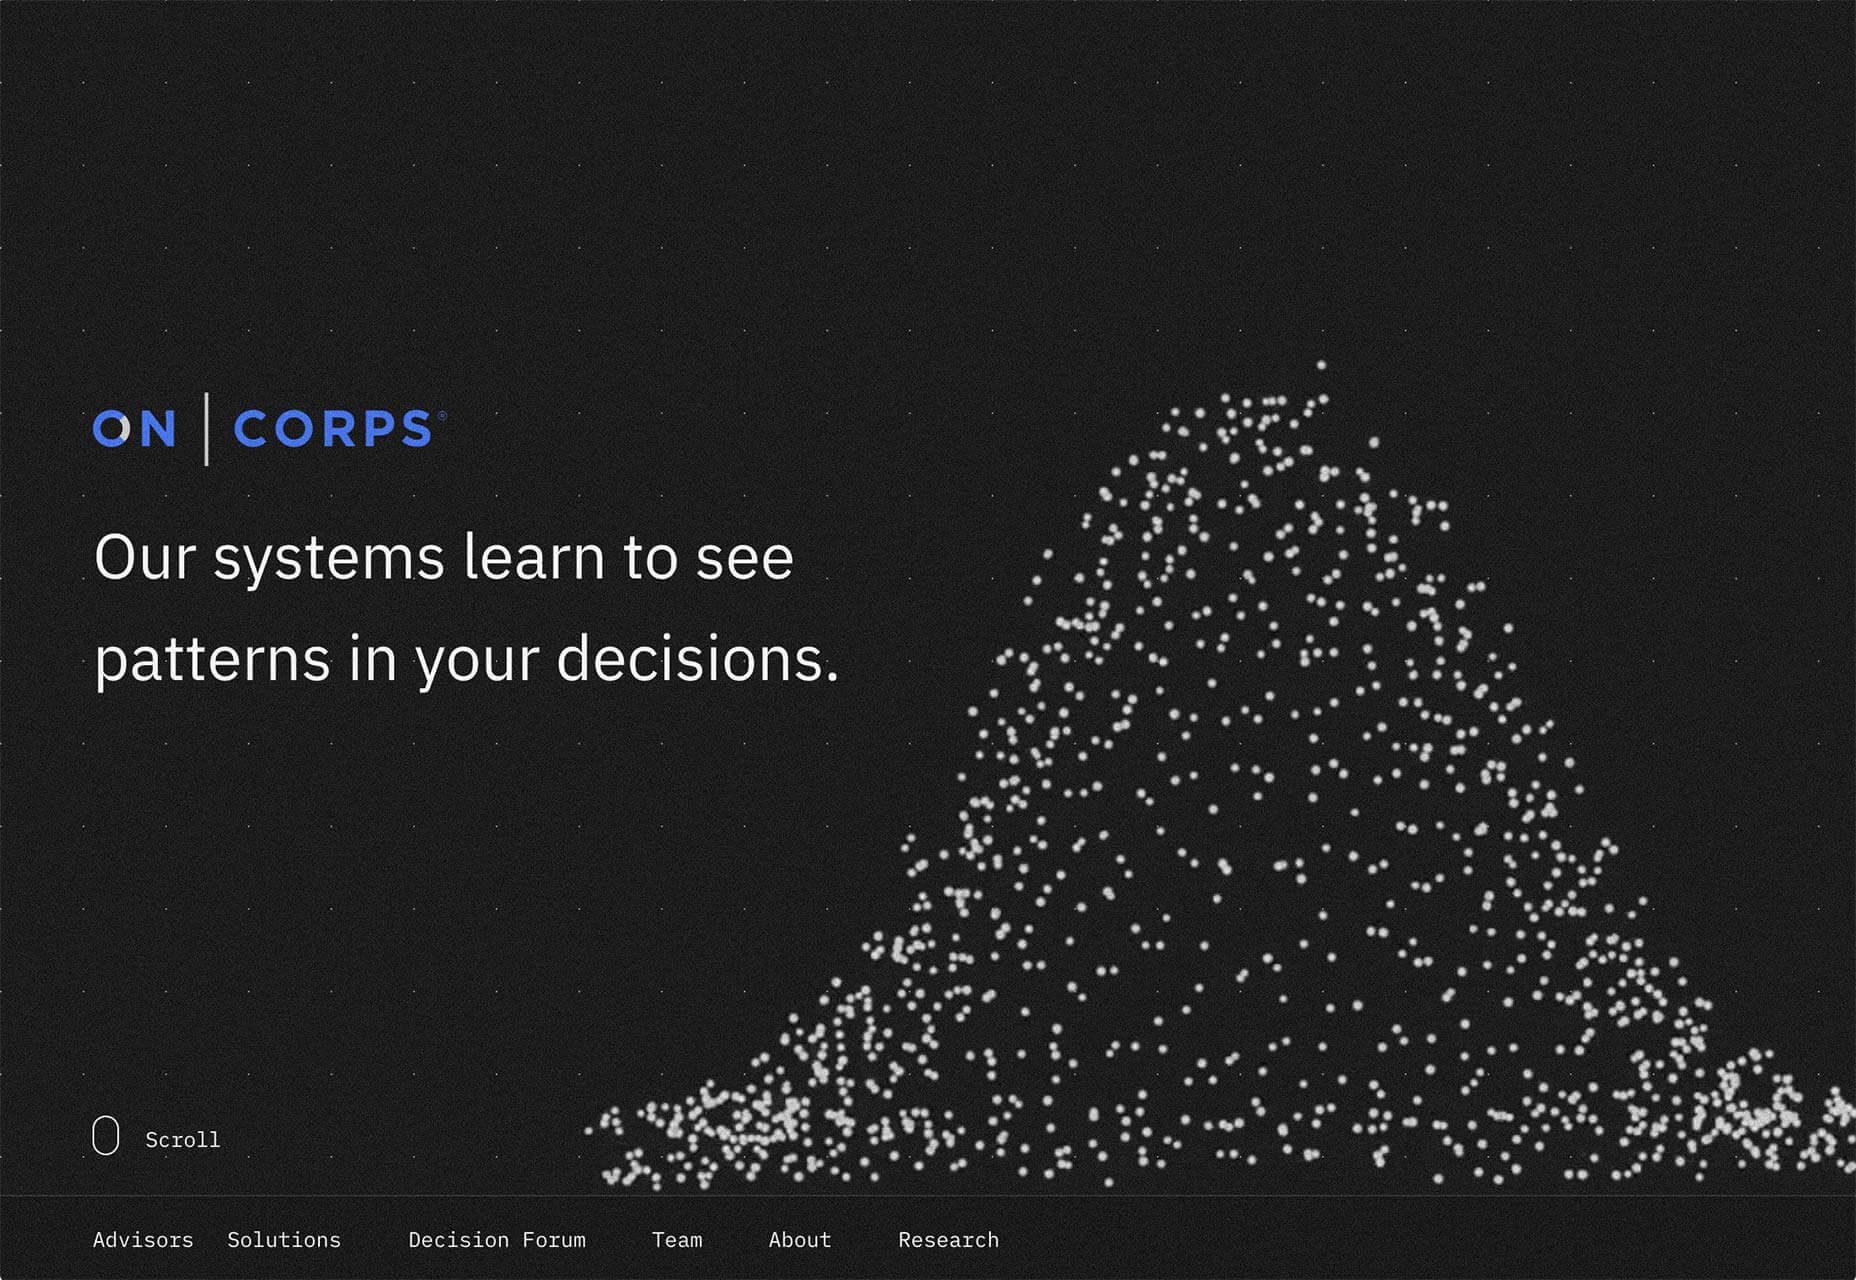
OnCorps
OnCorps decision making systems use machine learning to teach themselves about human-powered decisions, and then automate them. Its site is a simple powerpoint-style scroll, but each slide features hypnotic Math-based animations.
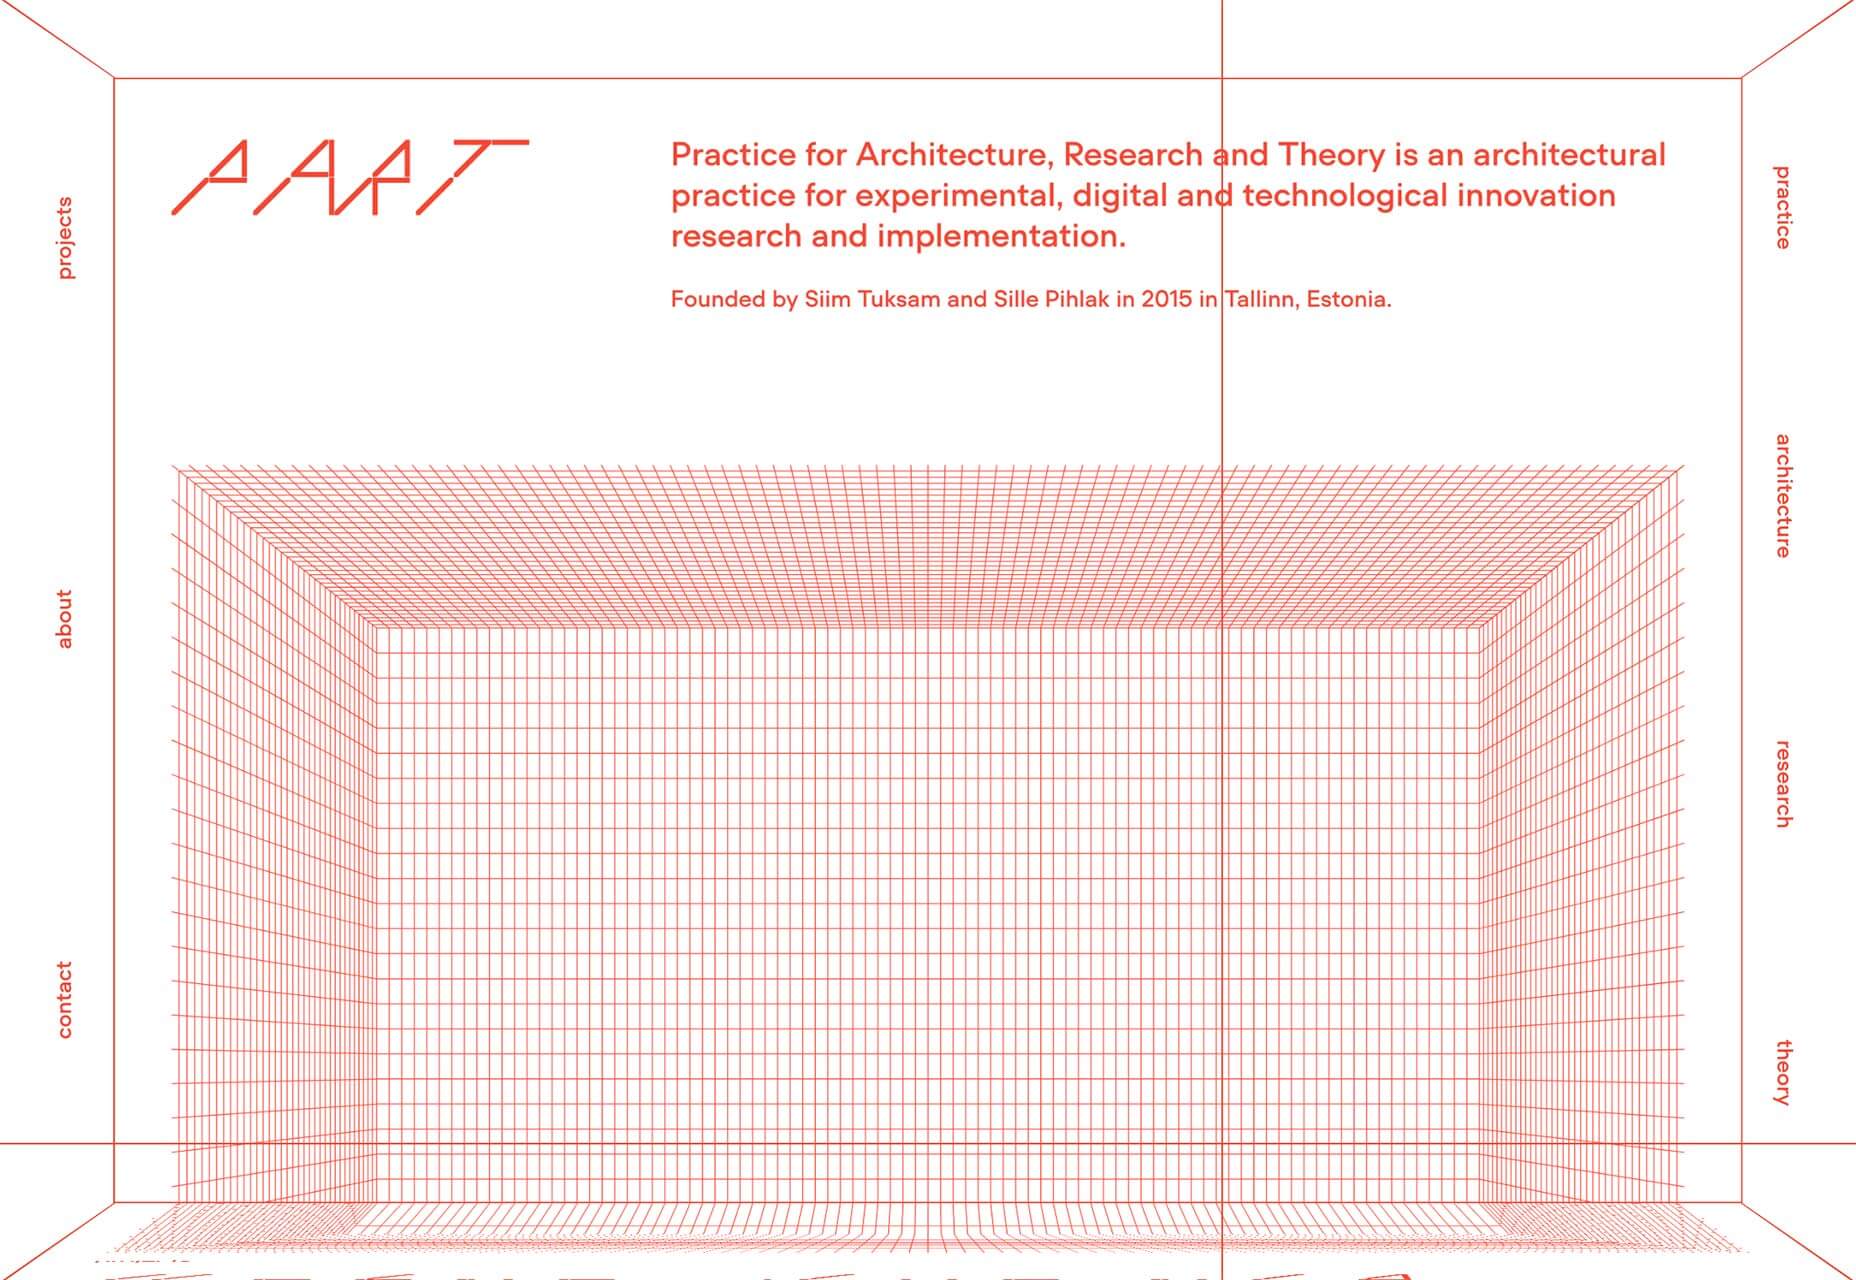
Part Architects
The site for Part Architects, is both extraordinary, and difficult to love. The text is very hard to read, using a font that wouldn’t be out of place advertising a club night. Scroll through and the text projects along the surfaces at the extremes of the viewport. It’s bonkers, but brilliant.
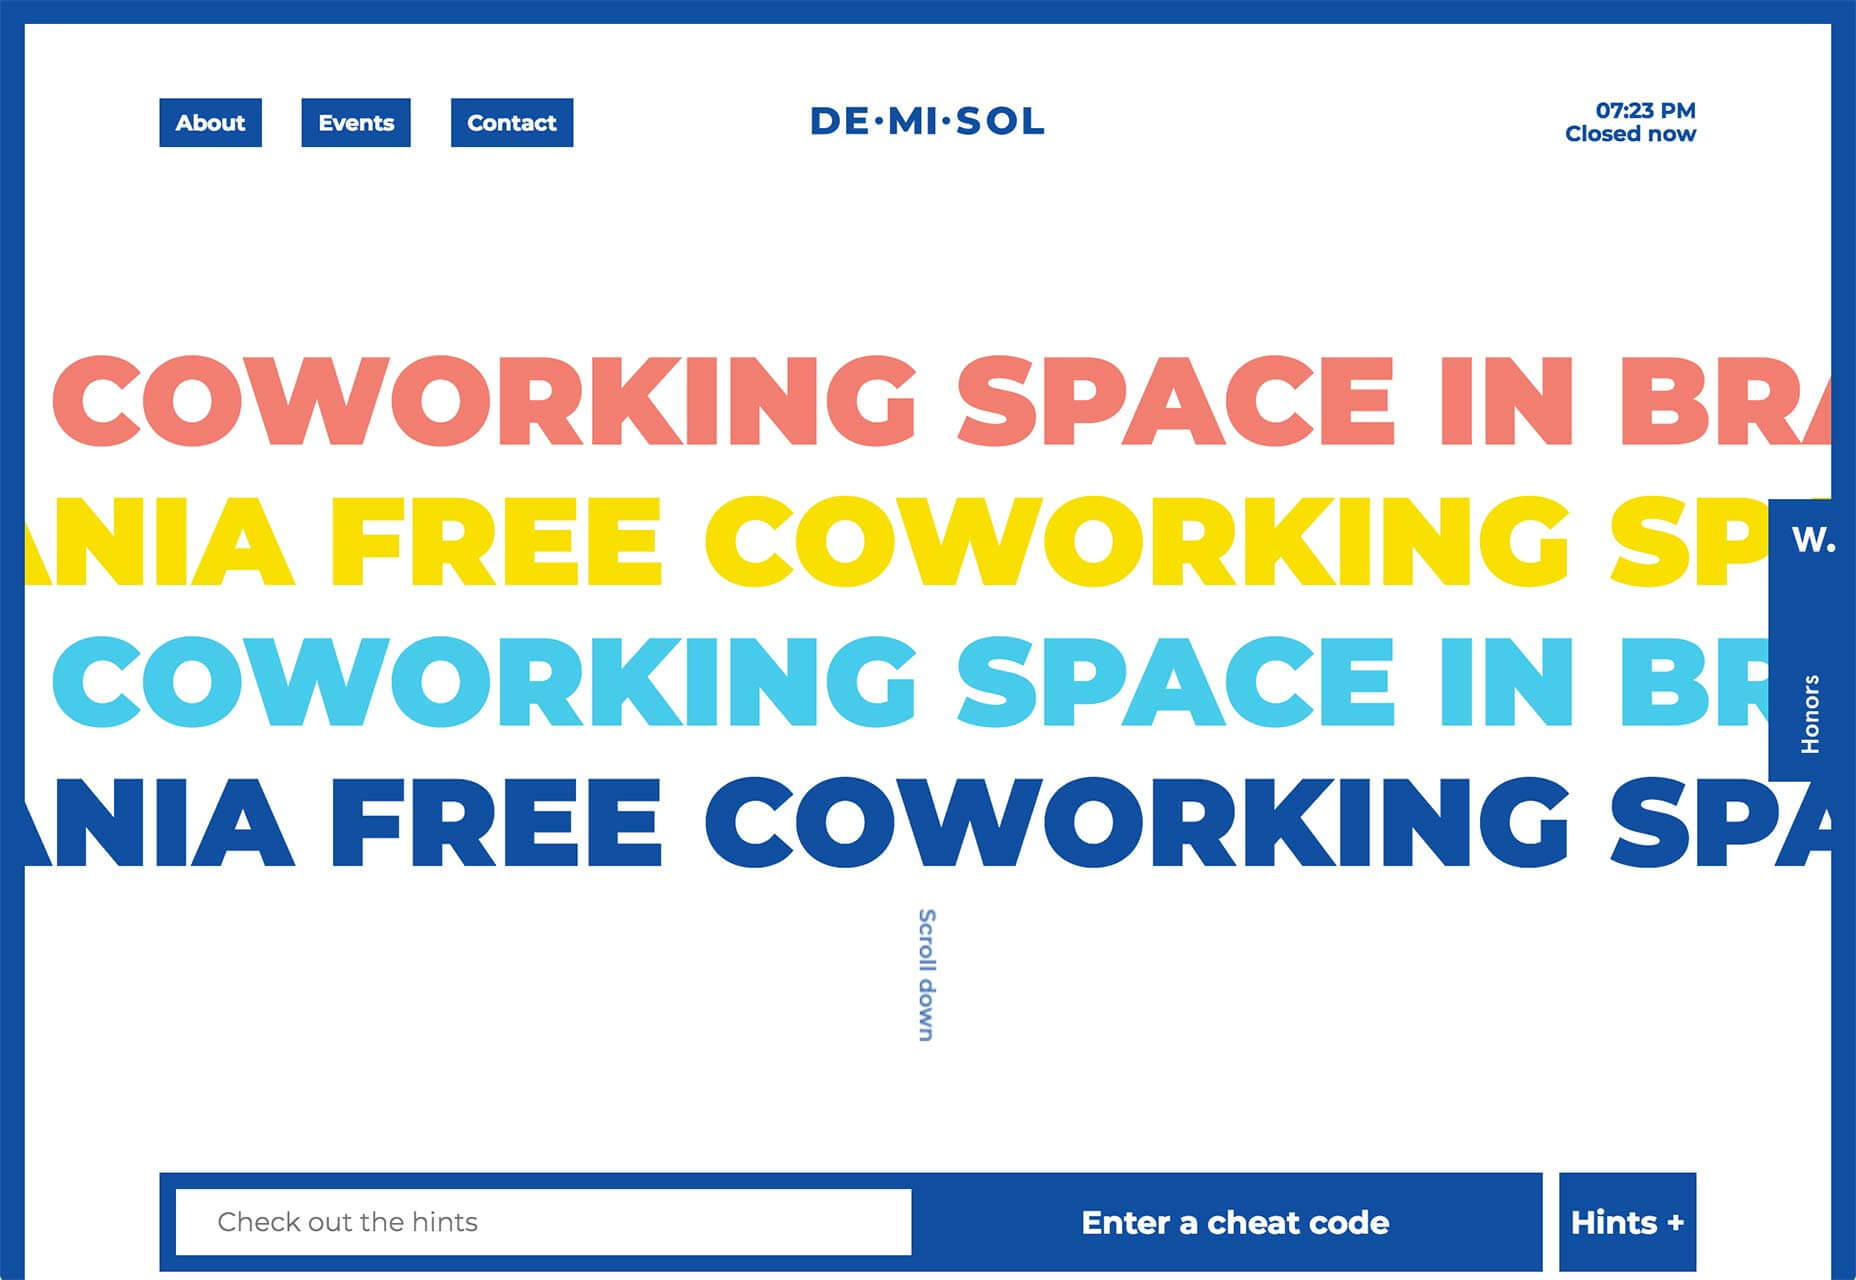
Demisol
Who says work has to be boring? Demisol is a free co-working space in Brasov, Romania. Designed for hackers, designers, developers, marketers, “troublemakers and other disrupters” it’s a flamboyant site filled with energy. No doubt, much like its offices.
Fleuressence
Fleuressence is a Scottish florist that sources unusual flowers for events of all kinds. True to its product, its beautifully simple site features blocks of color that on the welcome page can be rearranged with a click. A completely original approach to this type of site.
MMK
Frankfurt’s Museum für Moderne Kunst (Museum of Modern Art) strikes the perfect balance between informational and conceptual, guiding visitors to the gallery’s three real-world locations. On top of that, they have a fascinating navigation system that’s surprisingly intuitive.
Raleigh Centros
Throwing its hat into the ring of the emerging electric bicycle market is Centros. Targeting customers who have more money than peddle power, the slick, animated site mimics tech sites like Apple, without ever straying from the tablet-friendly format that baby-boomers prefer.
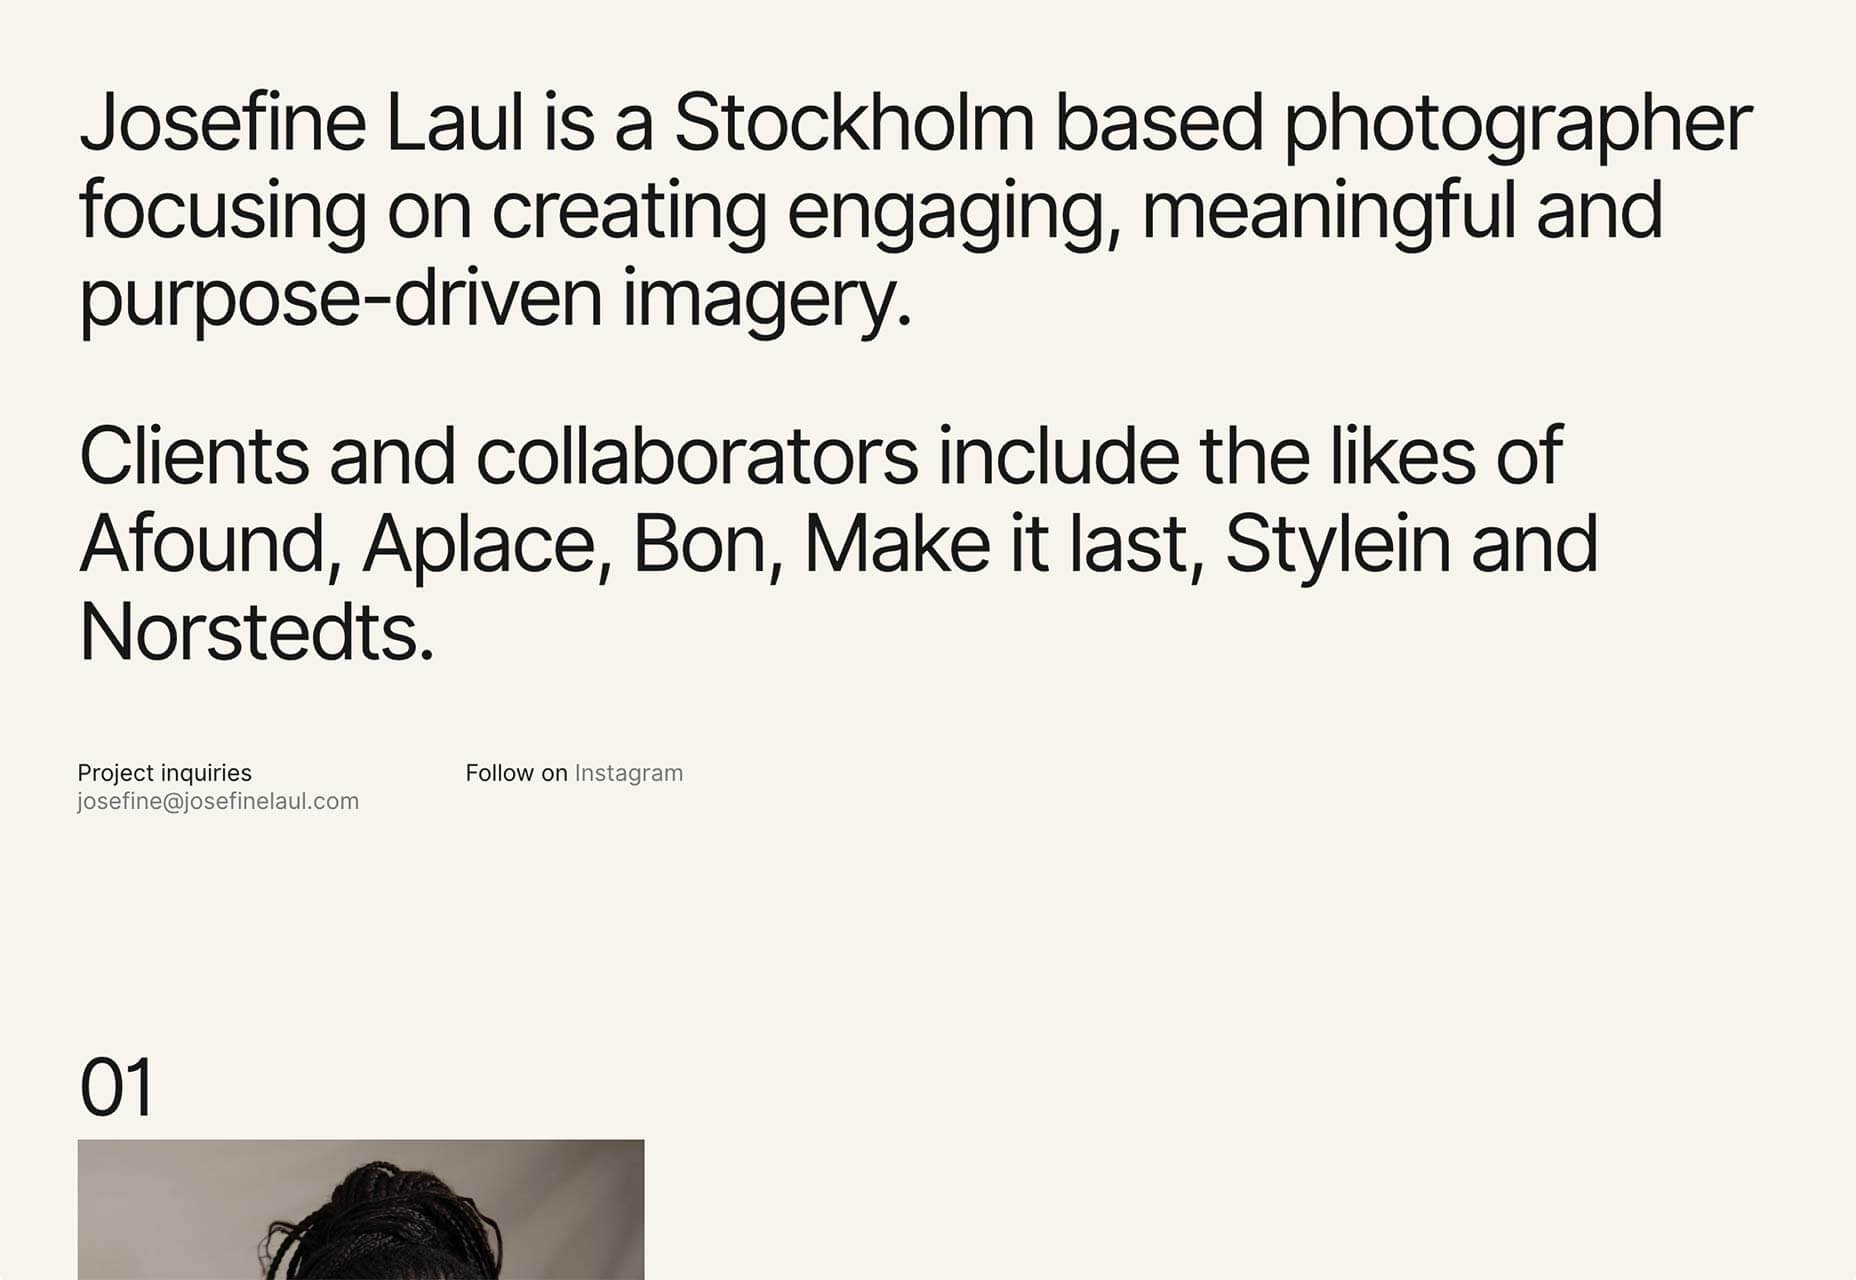
Josefine Laul
Josefine Laul’s site is an exercise in Scandinavian minimalism. The Stockholm-based photographer’s work is presented as a simple set of thumbnails, clicking on them takes you through to a project page that plays with the underlying grid.
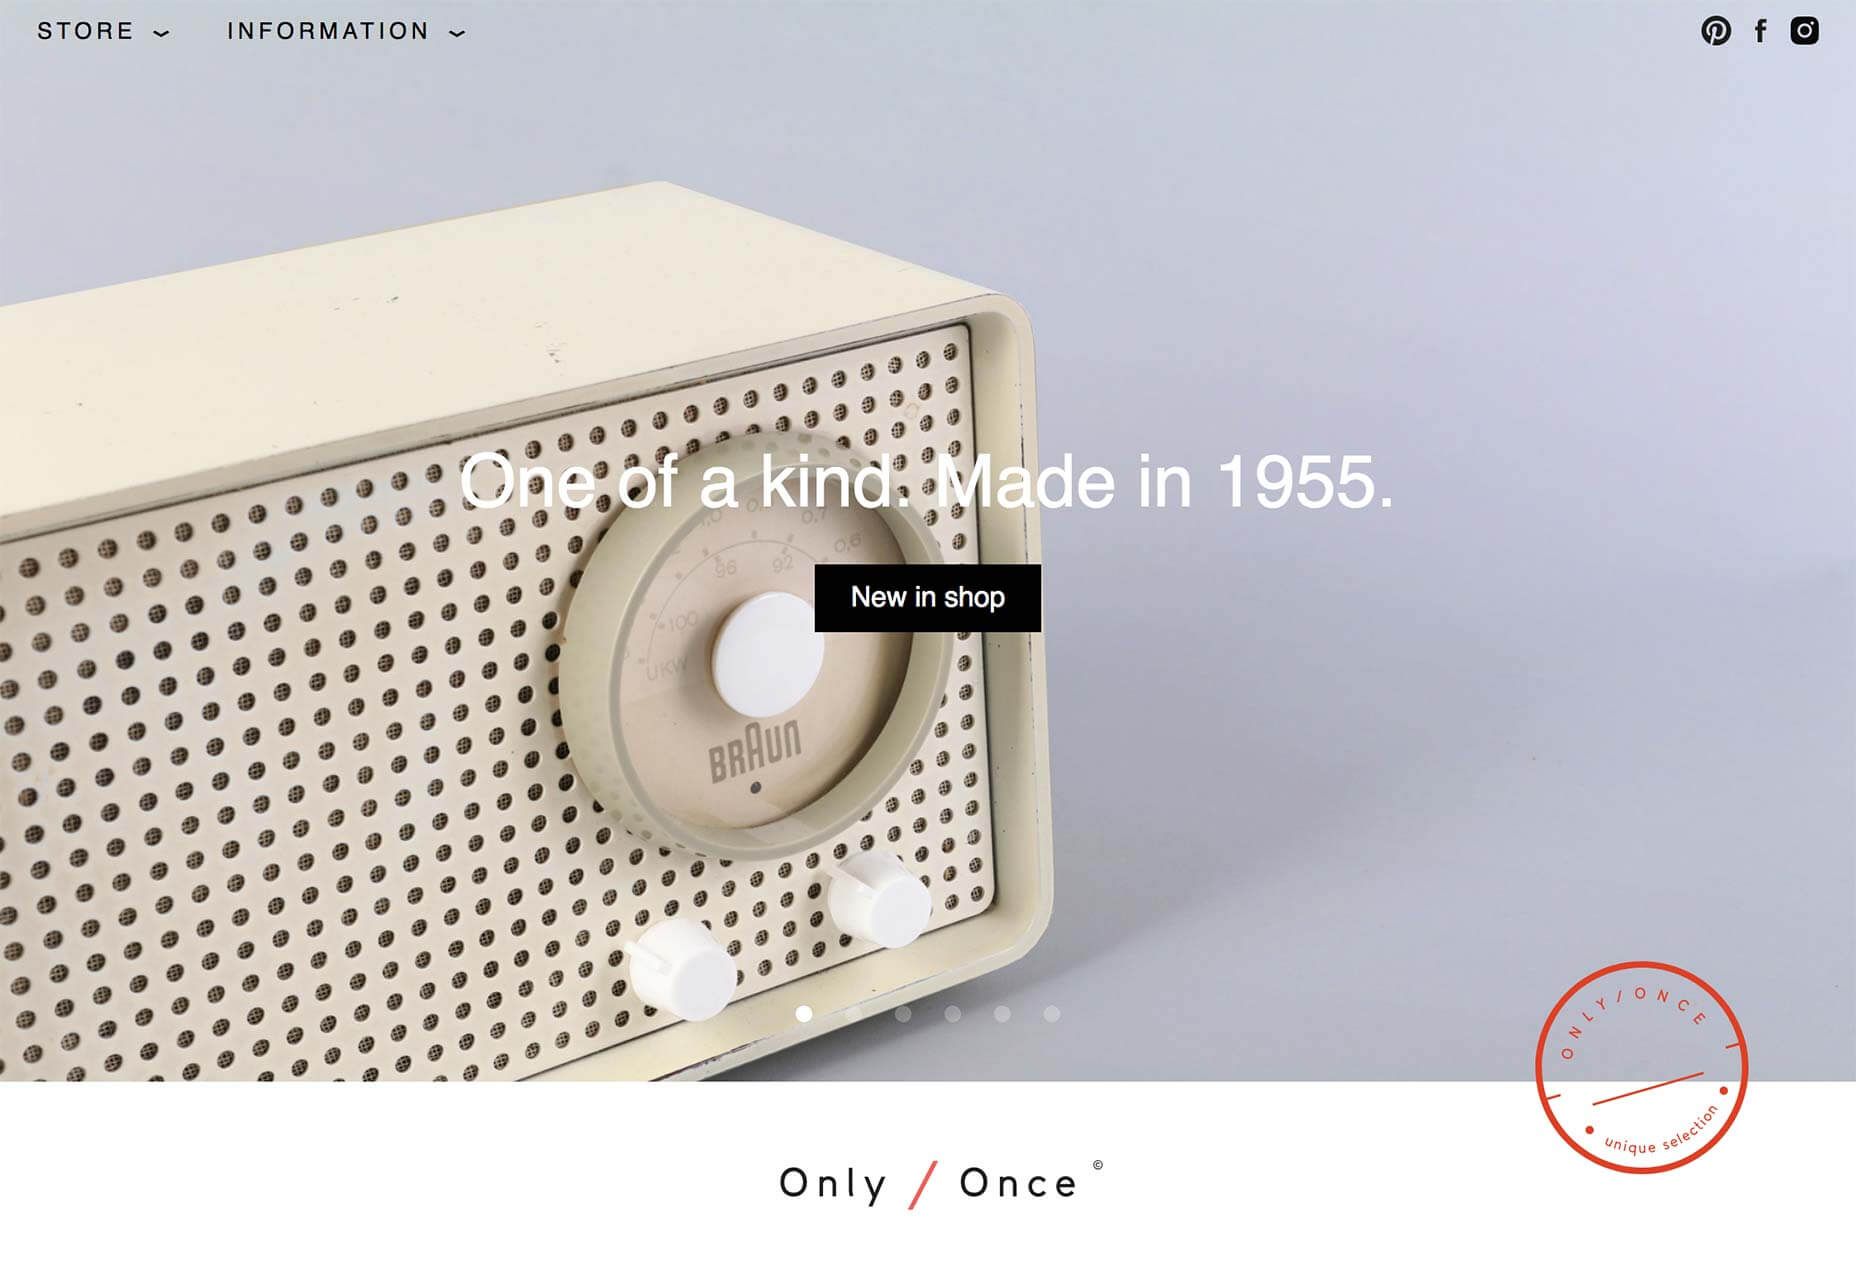
Only / Once
Only / Once is an unusual home accessories store featuring original vintage designs from some of the twentieth century’s greatest product designers. Fans of Dieter Rams, Christian Dell, and Josef Hurka, among others, will be in heaven.
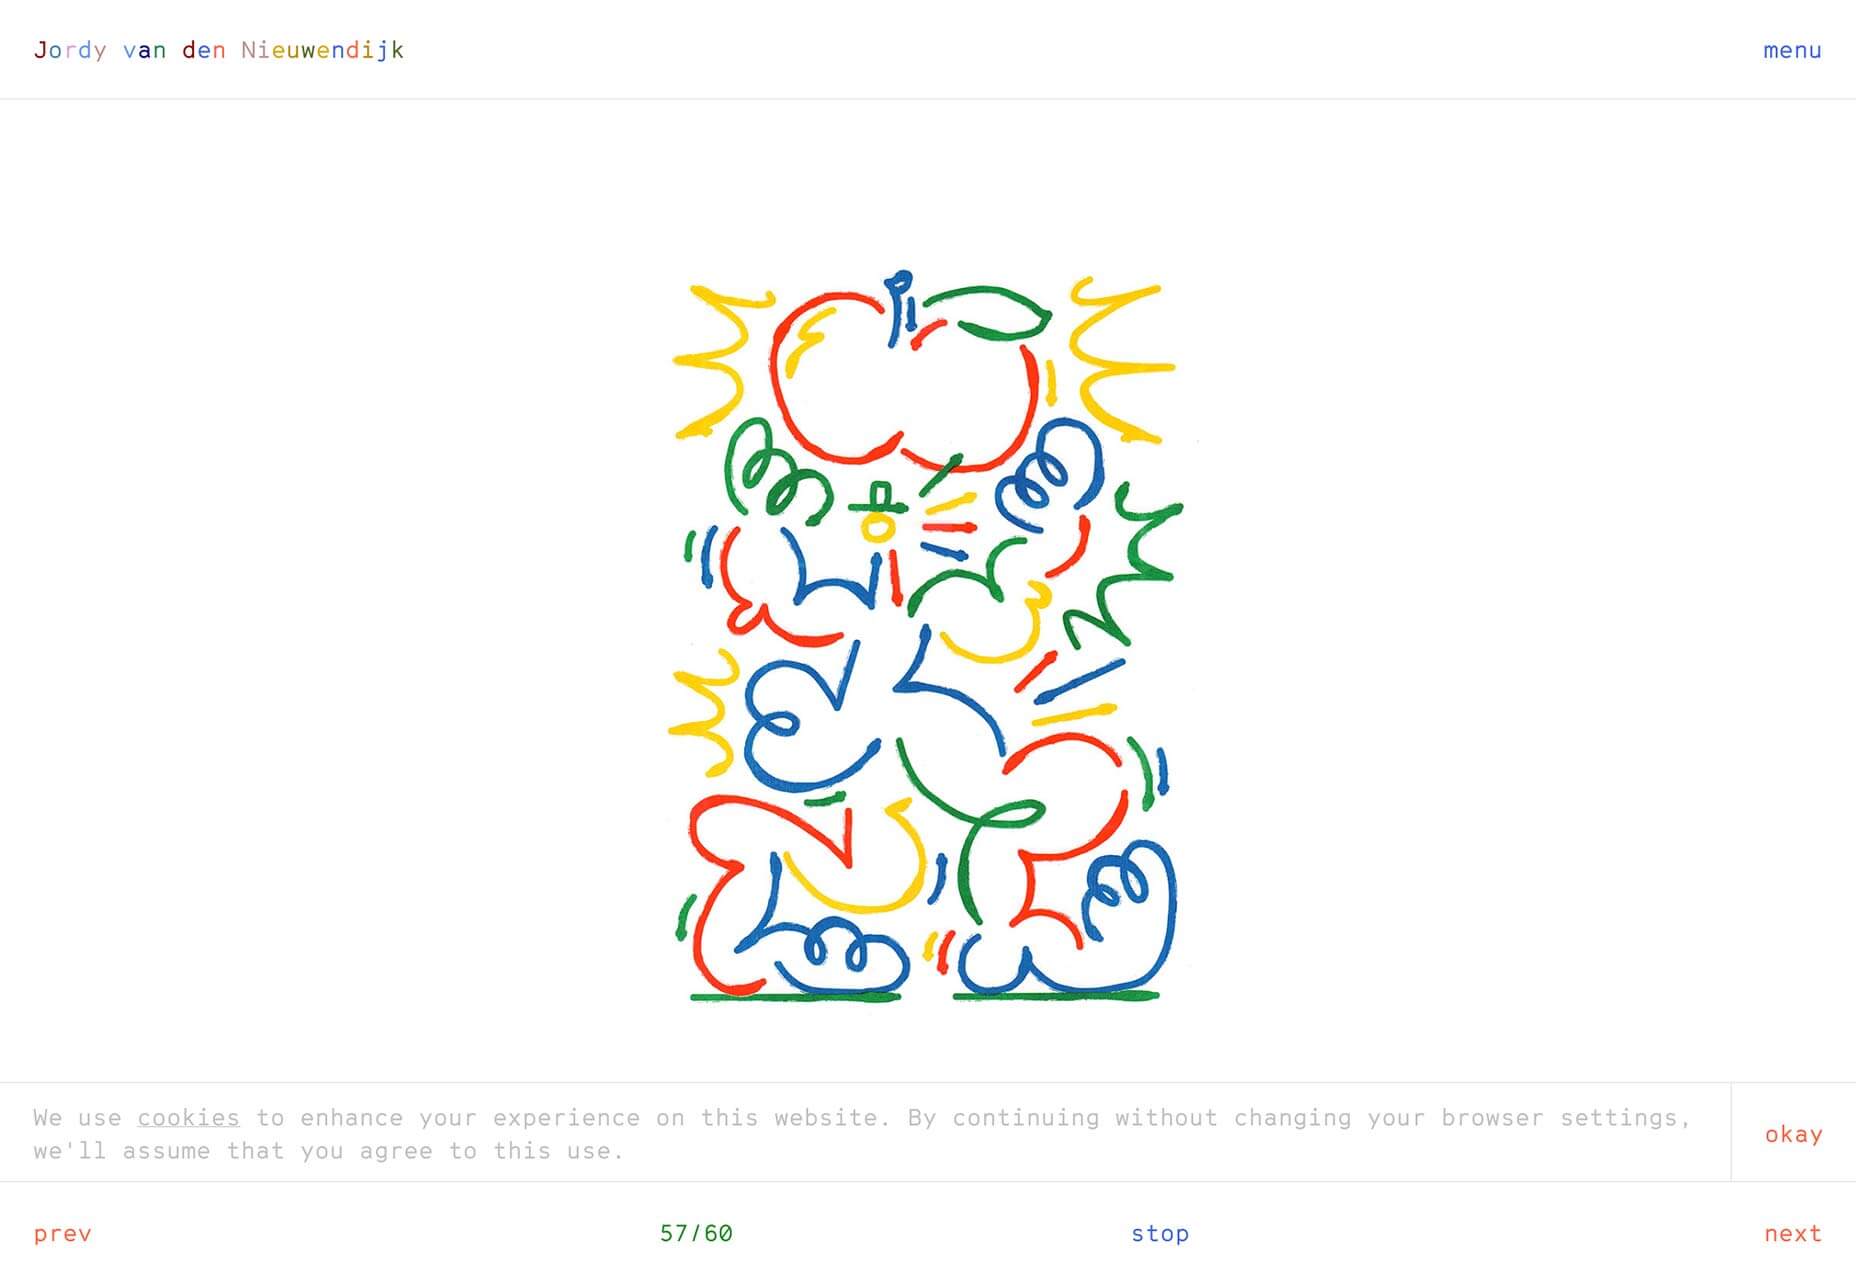
Jordy van den Nieuwendijk
If you’re worn out by the ongoing design trend for light grey text, you’ll love Jordy van den Nieuwendijk’s site featuring wonderfully colorful text. His artwork’s a positive delight too.
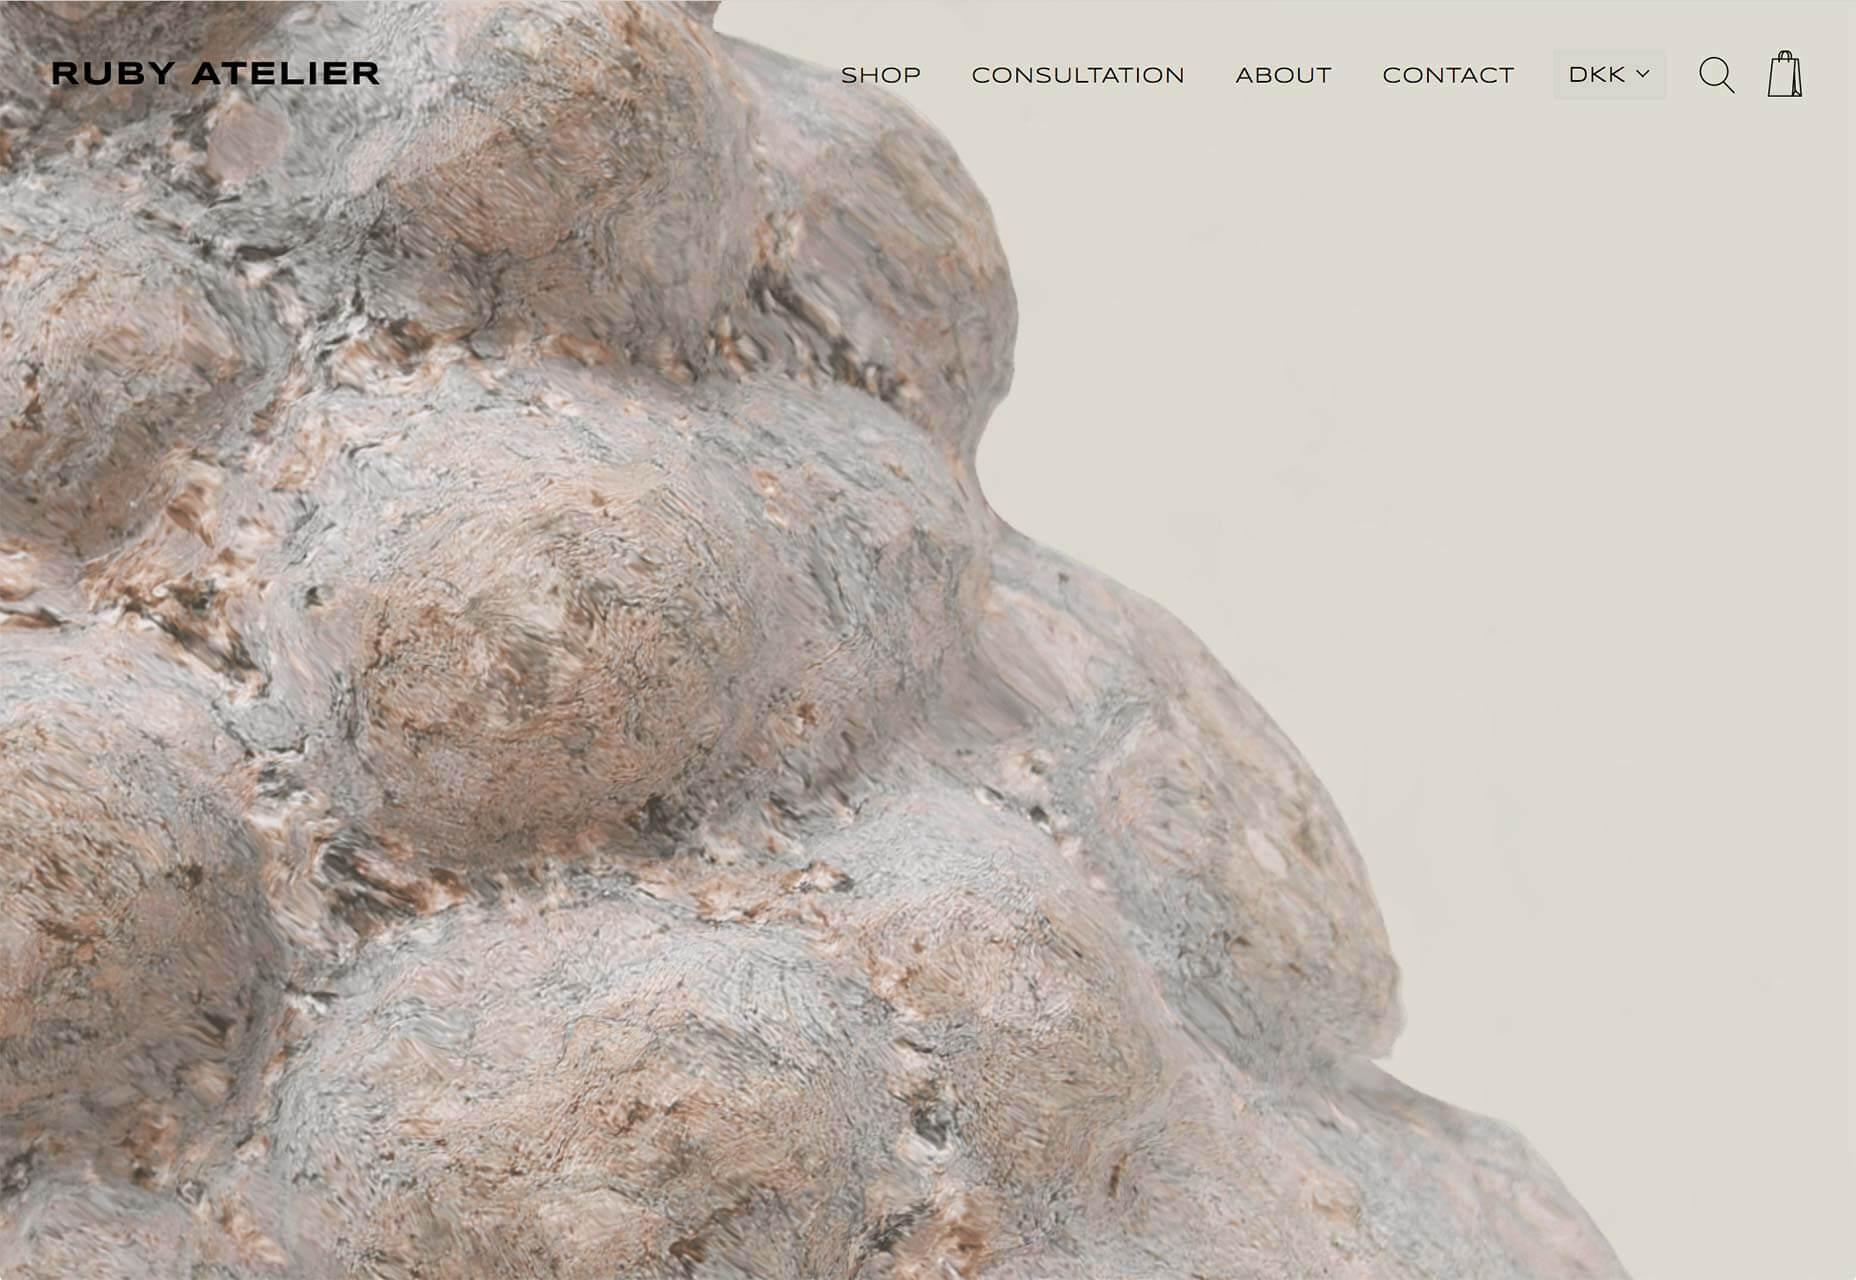
Ruby Atelier
Ruby Atelier is a Copenhagen-based interior design consultancy that also sells mid-century objects. Its welcome page features a hypnotic, liquid effect. Grab and drag to distort the macro photography into beautiful distortions.
Every week users submit a lot of interesting stuff on our sister site Webdesigner News, highlighting great content from around the web that can be of interest to web designers.
The best way to keep track of all the great stories and news being posted is simply to check out the Webdesigner News site, however, in case you missed some here’s a quick and useful compilation of the most popular designer news that we curated from the past week.
Note that this is only a very small selection of the links that were posted, so don’t miss out and subscribe to our newsletter and follow the site daily for all the news.
Tracking Users with CSS
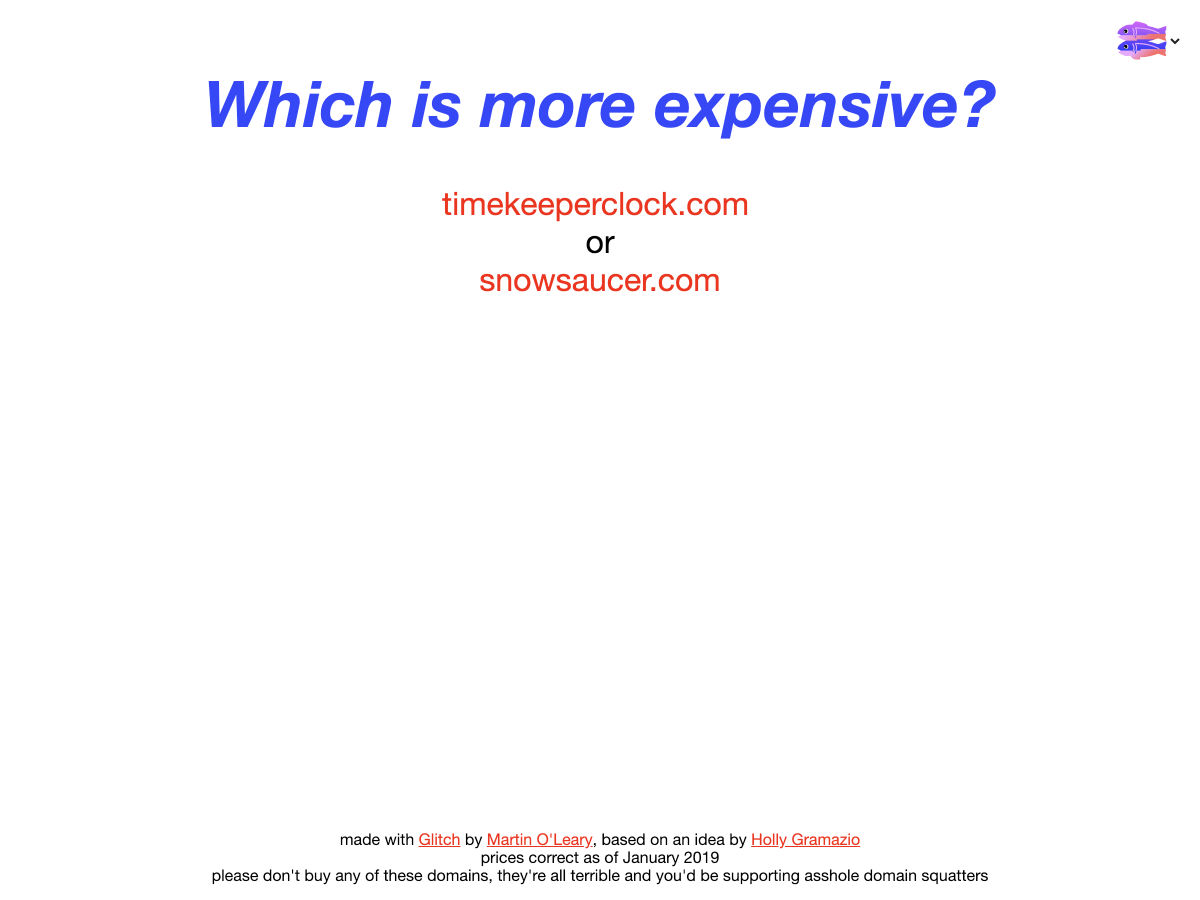
Guess the Most Expensive Domain Name
What Makes a Great Logo
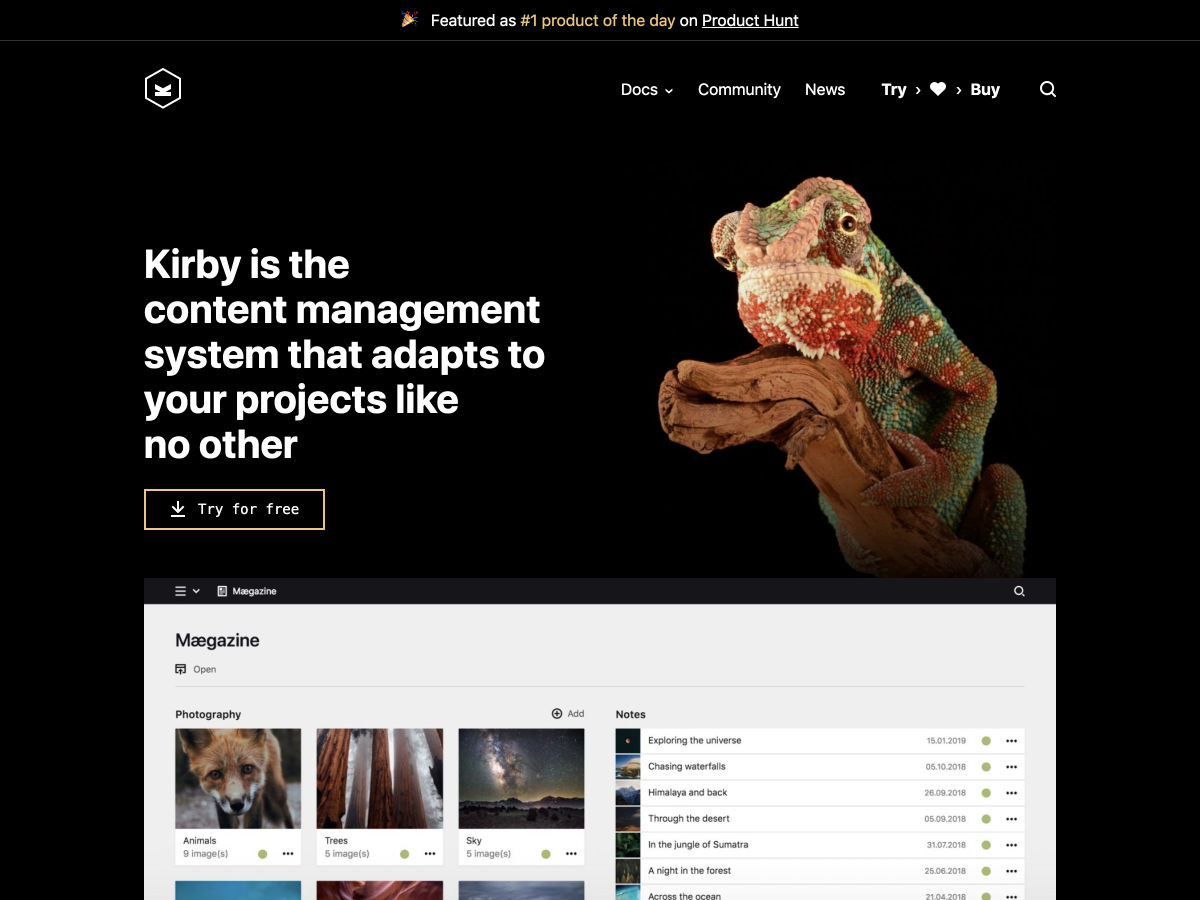
The All-new Kirby 3.0
The Mistake Developers Make When Coding a Hamburger Menu
7 Tips to Design Faster
Front End Development Topics to Learn in 2019
Top Four Principles of Human-Centred Design
The Real Cost of WordPress
10 Year Challenge: How Popular Websites Have Changed
Core Banking System?-?a UX Case Study
Dark Patterns – Designs that Pull Evil Tricks on Our Brains
Static Site Boilerplate – A Better Workflow for Building Modern Static Websites
How to Design a Blog Post
How We Succeeded by Failing to Redesign Google Translate
What is UI Design?
7 User Research Hacks
UX Designer’s Identity Crisis
14 Places to Find the Best Font for your Brand
After the Reaction to Slack, I Tried to Give Designers a Better Framework to Judge Rebrands
The Color Gold Can Change the Way You Spend Money
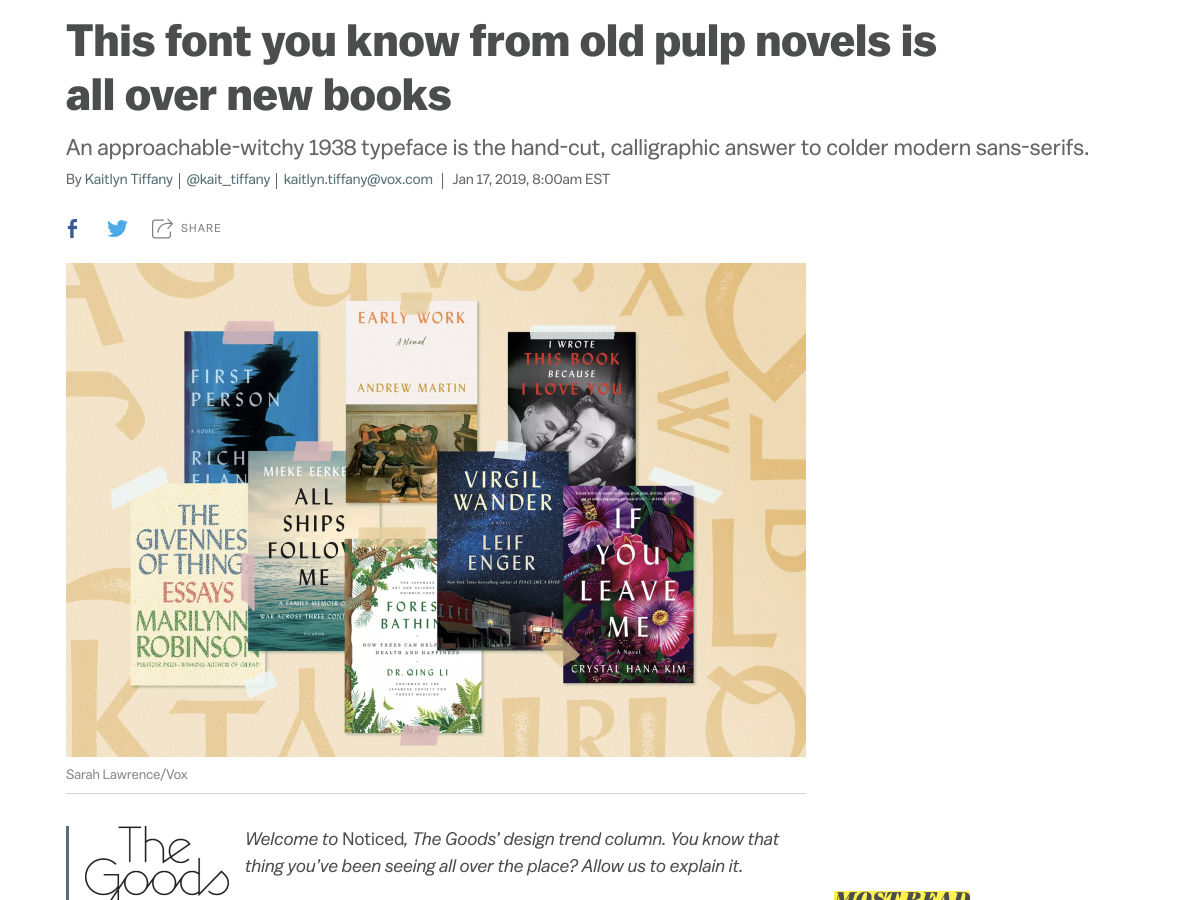
This Font You Know from Old Pulp Novels is all Over New Books
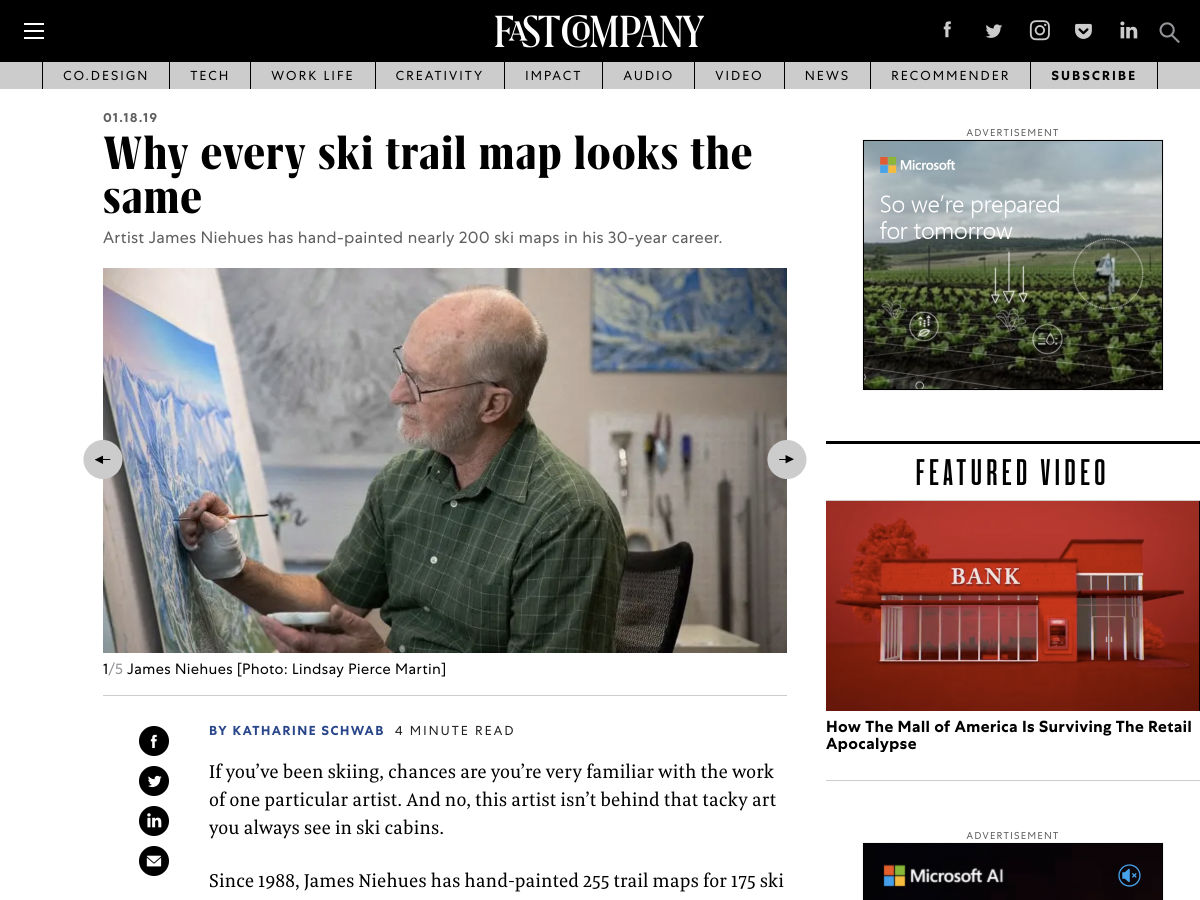
Why Every Ski Trail Map Looks the Same
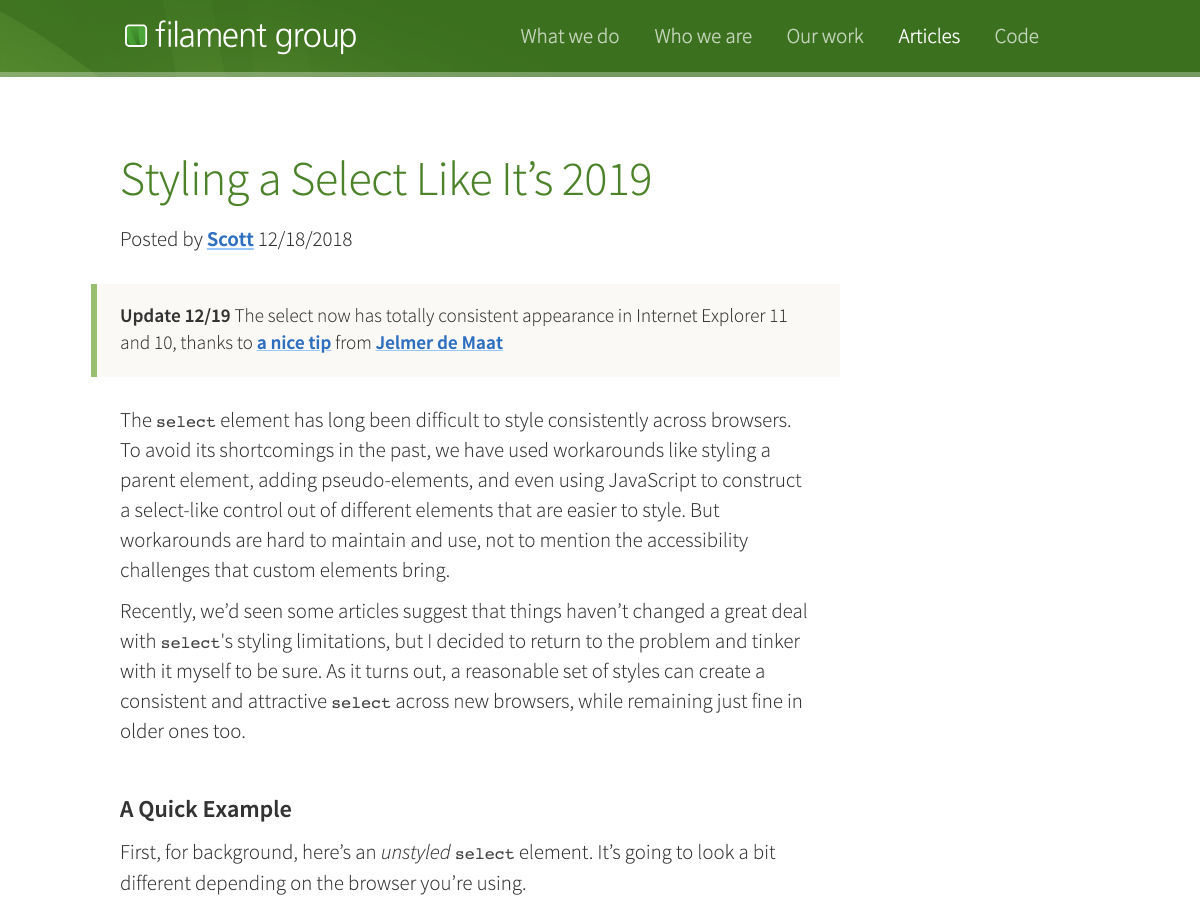
Styling a Select like it’s 2019
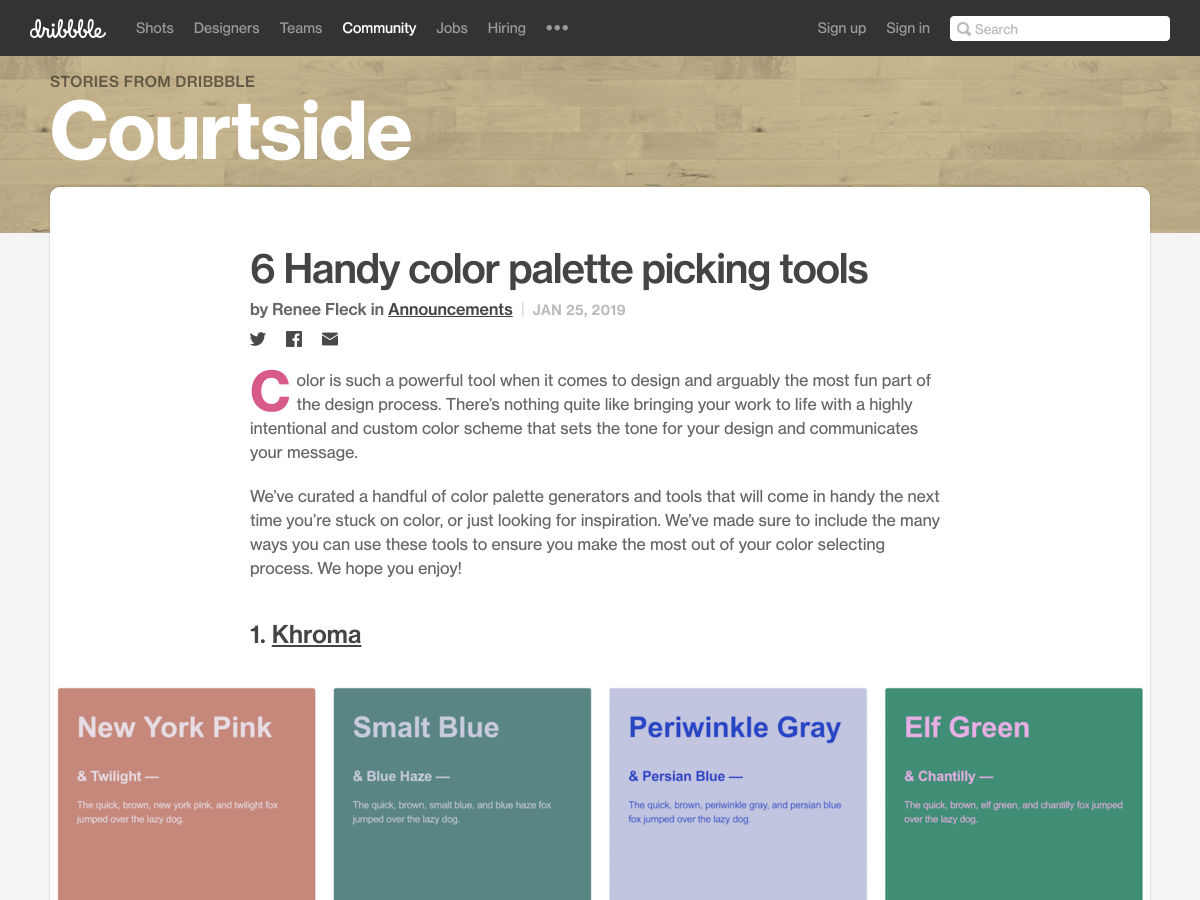
6 Handy Color Palette Picking Tools
Want more? No problem! Keep track of top design news from around the web with Webdesigner News.
Here’s a possibility! Perhaps you are testing your JavaScript with a framework like Jasmine. That’s nice because you can write lots of tests to cover your application, get a nice little UI to see the output, and even integrate it with build and deploy tools to make your ongoing development work safer.
Now, perhaps there is this zany developer on your team who keeps changing API endpoints on you — quite literally breaking things in the process. You decide to write a test that hits those endpoints and makes sure you’re getting back from it what you expect. Straightforward enough. The only slightly tricky part is that API requests are async. To really test it, the test needs to have some way to wait for the results before testing the expectations.
That can be handled in Jasmine through a beforeEach(), which can wait to complete until you call a done() function. Here’s the whole thing:
Space is vast. Space is awesome. Space is difficult to understand — or so people tend to think. But in this tutorial I am going to show you that this is not the case. Quite the contrary; the laws that govern the motion of the stars, planets, asteroids and even entire galaxies are incredibly simple. You could argue that if our Universe was created by a developer, she sure was concerned about writing clean code that would be easy to maintain and scale.
What we are going to do is create a simulation of the inner region of our solar system using nothing but plain old JavaScript. It will be a gravitational n-body simulation where every mass feels the gravity of all the other masses being simulated. To spice things up, I will also show how you can enable users of your simulator to add planets of their own to the simulation with nothing but a little bit of mouse drag action, and in doing so, cause all sorts of cosmic mayhem. A gravity or space simulator would not be worthy of its name without motion trails, so I will show you how to create some fancy looking trails, too, in addition to some other shenanigans that will make the simulator a little bit more fun for the average user.
You will find the complete source code for this project in the Pen above. There is nothing fancy going on there. No bundling of modules, or transpilation of TypeScript or JSX into JavaScript; just HTML markup, CSS, and a healthy dose of JavaScript.
I came up with the idea for this while working on a project that is close to my heart, namely Harmony of the Spheres. Harmony of the Spheres is open source and very much a work in progress, so if you enjoy this tutorial and got your appetite for all things space and physics related going, check out the repository and fire away a pull request if you find a bug or have a cool new feature that you would like to see implemented.
For this tutorial, it is assumed that you have a basic grasp of JavaScript and the syntax and features that were introduced with ES6. Also, if you are able to draw a rectangle onto a canvas element, that would help, too. If you are not yet in possession of this knowledge, I suggest you head over to MDN and start reading up on ES6 classes, arrow functions, shorthand notation for defining key-value pairs for object literals and const and let. If you are not quite sure how to set up a canvas animation, go check out the documentation on the Canvas API on MDN.
Part 1: Writing a Gravitational N-Body Algorithm
To achieve the goal outlined above, we are going to draw on numerical integration, which is an approach to solving gravitational n-body problems where you take the positions and velocities of all objects at a given time (T), calculate the gravitational force they exert on each other and update their velocities and positions at time (T + dt, dt being shorthand for delta time), or in other words, the change in time between iterations. Repeating this process, we can trace the trajectories of a set of masses through space and time.
We will use a Cartesian coordinate system for our simulation. The Cartesian coordinate system is based on three mutually perpendicular coordinate axes: the x-axis, the y-axis, and the z-axis. The three axes intersect at the point called the origin, where x, y and z are equal to 0. An object in a Cartesian space has a unique position that is defined by its x, y and z values. The benefit of using the Cartesian coordinate system for our simulation is that the Canvas API, with which we will visualize our simulation, uses it, too.
For the purpose of writing an algorithm for solving the gravitational n-body problem, it is necessary to have an understanding of what is meant by velocity and acceleration. Velocity is the change in position of an object with time, while acceleration is the change in an object’s velocity with time. Newton’s first law of motion stipulates that every object will remain at rest or in uniform motion in a straight line unless compelled to change its state by the action of an external force. The Earth does not move in a straight line, but orbits the Sun, so clearly it is accelerating, but what is causing this acceleration? As you have probably guessed, given the subject matter of this tutorial, the answer is the gravitational forces exerted on Earth by the Sun, the other planets in our solar system and every other celestial object in the Universe.
Before we discuss gravity, let us write some pseudo code for updating the positions and velocities of a set of masses in Cartesian space. We store our masses as objects in an array where each object represents a mass with x, y and z position and velocity vectors. Velocity vectors are prefixed with a v — v for velocity!
Looking at the code above, we can see that — as outlined in our discussion on numerical integration — every time we advance the simulation by a given time step, dt, we update the velocities of the masses being simulated and, with those velocities, we update the positions of the masses. The relationship between position and velocity is also made clear in the code above, as we can see that in one step of our simulation, the change in, for example, the x position vector of our mass is equal to the product of the mass’s x velocity vector and dt. Similarly, we can make out the relationship between velocity and acceleration.
How, then, do we get the x, y and z acceleration vectors for a mass so that we can calculate the change in its velocity vectors? To get the contribution of massJ to the x acceleration vector of massI, we need to calculate the gravitational force exerted by massJ on massI, and then, to obtain the x acceleration vector, we simply calculate the product of this force and the distance between the two masses on the x axis. To get the y and z acceleration vectors, we follow the same procedure. Now we just have to figure out how to calculate the gravitational force exerted by massJ on massI to be able to write some more pseudo code. The formula we are interested in looks like this:
f = g * massJ.m / dSq * (dSq + s)^1/2
The formula above tells us that the gravitational force exerted by massJ on massI is equal to the product of the gravitational constant (g) and the mass of massJ (massJ.m) divided by the product of the sum of the squares of the distance between massI and massJ on the x, y and z axises (dSq) and the square root of dSq + s, where s is what is referred to as a softening constant (softeningConstant). Including a softening constant in our gravity calculations prevents a situation where the gravitational force exerted by massJ becomes infinite because it is too close to massI. This “bug,” if you will, in the Newtonian theory of gravity arises for the reason that Newtonian gravity treats masses as point objects, which they are not in reality. Moving on, to get the net acceleration of massI along, for example, the x axis, we simply sum the acceleration induced on it by every other mass in the simulation.
Let us transform the above into code for updating the acceleration vectors of all the masses in the simulation.
const updateAccelerationVectors = (masses, g, softeningConstant) => {
  const massesLen = masses.length;

  for (let i = 0; i < massesLen; i++) {
    let ax = 0;
    let ay = 0;
    let az = 0;

    const massI = masses[i];

    for (let j = 0; j < massesLen; j++) {
      if (i !== j) {
        const massJ = masses[j];

        const dx = massJ.x - massI.x;
        const dy = massJ.y - massI.y;
        const dz = massJ.z - massI.z;

        const distSq = dx * dx + dy * dy + dz * dz;

        f = (g * massJ.m) / (distSq * Math.sqrt(distSq + softeningConstant));

        ax += dx * f;
        ay += dy * f;
        az += dz * f;
      }
    }

    massI.ax = ax;
    massI.ay = ay;
    massI.az = az;
  }
};
We iterate over all the masses in the simulation, and for every mass we calculate the contribution to its acceleration by the other masses in a nested loop and increment the acceleration vectors accordingly. Once we are out of the nested loop, we update the acceleration vectors of massI, which we can then use to calculate its new velocity vectors! Whowie. That was a lot. We now know how to update the position, velocity and acceleration vectors of n bodies in a gravity simulation using numerical integration.
But wait; there is something missing. That is right, we have talked about distance, mass and time, but we have never specified what units we ought to use for these quantities. As long as we are consistent, the choice is arbitrary, but generally speaking, it is a good idea to go for units that are suitable for the scales under consideration, so as to avoid awkwardly long numbers. In the context of our solar system, scientists tend to use astronomical units for distance, solar masses for mass and years for time. Adopting this set of units, the value of the gravitational constant (g in the formula for calculating the gravitational force exerted by massJ on massI) is 39.5. For the position and velocity vectors of the Sun and planets of the inner solar system — Mercury, Venus, Earth and Mars — we turn to NASA JPL’s HORIZONS Web-Interface where we change the output setting to vector tables and the units to astronomical units and days. For whatever reason, Horizons does not serve vectors with years as the unit of time, so we have to multiply the velocity vectors by 365.25, the number of days in a year, to obtain velocity vectors that are consistent with our choice of years as the unit of time.
To think, that with the simple equations and laws discussed above, we can calculate the motion of every galaxy, star, planet and moon contained within this dazzling cosmic panorama captured by the Hubble Telescope, is nothing short of awe-inspiring. It is not for nothing Newton’s theory of gravity is referred to as “Newton’s law of universal gravitation.”
A JavaScript class seems like an excellent way of encapsulating the methods we wrote above together with the data on the masses and the constants we need for our simulation, so let us do some refactoring:
class nBodyProblem {
  constructor(params) {
    this.g = params.g;
    this.dt = params.dt;
    this.softeningConstant = params.softeningConstant;

    this.masses = params.masses;
  }

  updatePositionVectors() {
    const massesLen = this.masses.length;

    for (let i = 0; i < massesLen; i++) {
      const massI = this.masses[i];

      massI.x += massI.vx * this.dt;
      massI.y += massI.vy * this.dt;
      massI.z += massI.vz * this.dt;
    }

    return this;
  }

  updateVelocityVectors() {
    const massesLen = this.masses.length;

    for (let i = 0; i < massesLen; i++) {
      const massI = this.masses[i];

      massI.vx += massI.ax * this.dt;
      massI.vy += massI.ay * this.dt;
      massI.vz += massI.az * this.dt;
    }
  }

  updateAccelerationVectors() {
    const massesLen = this.masses.length;

    for (let i = 0; i < massesLen; i++) {
      let ax = 0;
      let ay = 0;
      let az = 0;

      const massI = this.masses[i];

      for (let j = 0; j < massesLen; j++) {
        if (i !== j) {
          const massJ = this.masses[j];

          const dx = massJ.x - massI.x;
          const dy = massJ.y - massI.y;
          const dz = massJ.z - massI.z;

          const distSq = dx * dx + dy * dy + dz * dz;

          const f =
            (this.g * massJ.m) /
            (distSq * Math.sqrt(distSq + this.softeningConstant));

          ax += dx * f;
          ay += dy * f;
          az += dz * f;
        }
      }

      massI.ax = ax;
      massI.ay = ay;
      massI.az = az;
    }

    return this;
  }
}
That looks much nicer! Let us create an instance of this class. To do so, we need to specify three constants, namely the gravitational constant (g), the time step of the simulation (dt) and the softening constant (softeningConstant). We also need to populate an array with mass objects. Once we have all of those, we can create an instance of the nBodyProblem class, which we will call the innerSolarSystem, since, well, our simulation is going to be of the inner solar system!
const g = 39.5;
const dt = 0.008; // 0.008 years is equal to 2.92 days
const softeningConstant = 0.15;

const masses = [{
    name: "Sun", // We use solar masses as the unit of mass, so the mass of the Sun is exactly 1
    m: 1,
    x: -1.50324727873647e-6,
    y: -3.93762725944737e-6,
    z: -4.86567877183925e-8,
    vx: 3.1669325898331e-5,
    vy: -6.85489559263319e-6,
    vz: -7.90076642683254e-7
  }
  // Mercury, Venus, Earth and Mars data can be found in the pen for this tutorial
];

const innerSolarSystem = new nBodyProblem({
  g,
  dt,
  masses: JSON.parse(JSON.stringify(masses)),
  softeningConstant
});
At this moment, you are probably looking at how I instantiated the nBodyProblem class and asking yourself what is up with the JSON parsing and string-ifying nonsense. The reason for why I went about passing the data contained in the masses array to the nBodyProblem constructor in this way is that we want our users to be able to reset the simulation. However, if we pass the masses array itself to the constructor of the nBodyProblem class when we create an instance of it, and then set the value of the masses property of this instance to be equal to the masses array when the user clicks the reset button, the simulation would not have been reset; the state of the masses from the end of the previous simulation run would still be there, and so would any masses the user had added. To solve this problem, we need to pass a clone of the masses array when we instantiate the nBodyProblem class or reset the simulation, so as to avoid modifying the masses array, which we need to keep pristine and untouched, and the easiest way of cloning it is to simply parse a string-ified version of it.
Okay, moving on: to advance the simulation by one step, we simply call:
Congratulations. You are now one step closer to collecting a Nobel prize in physics!
Part 2: Creating a Visual Manifestation for our Masses
We could represent our masses with cute little circles created with the Canvas API’s arc method, but that would look kind of dull, and we would not get a sense of the trajectories of our masses through space and time, so let us write a JavaScript class that will be our template for how our masses manifest themselves visually. It will create a circle that leaves a predetermined number of smaller and faded circles where it has been before, which conveys a sense of motion and direction to the user. The farther you get from the current position of the mass, the smaller and more faded out the circles will become. In this way, we will have created a pretty looking motion trail for our masses.
The constructor accepts three arguments, namely the drawing context for our canvas element (ctx), the length of the motion trail (trailLength) that represents the number of previous positions of our mass that the trail will visualize and finally the radius (radius) of the circle that represents the current position of our mass. In the constructor we will also initialize an empty array that we will call positions, which will — quell surprise — store the current and previous positions of the mass that are included in the motion trail.
At this point, our manifestation class looks like this:
How do we go about populating the positions array with positions and making sure that we do not store more positions than the number specified by the trailLength property? The answer is that we add a method to our class that accepts the x and y coordinates of the mass’s position as arguments and stores them in an object in the array using the array push method, which appends an element to an array. This means that the current position of the mass will be the last element in the positions array. To make sure we do not store more positions than specified when we instantiated the class, we check if the length of the positions array is greater than the trailLength property. If it is, we use the array shift method to remove the first element, which represents the oldest stored position of the positions array.
class Manifestation {

  constructor() { /* The code for the constructor outlined above */ }

  storePosition(x, y) {
    this.positions.push({ x, y });

    if (this.positions.length > this.trailLength)
      this.positions.shift();
  }

}
Okay, let us write a method that draws our motion trail. As you have probably guessed, it will accept two arguments, namely the x and y positions of the mass we are drawing the trail for. The first thing we need to do is to store the new position in the positions array and discard any superfluous positions stored in it. Then we iterate over the positions array and draw a circle for every position and voilà, we have ourselves a motion trail! But it does not look very nice, and I promised you that our trail would be pretty with circles that would become increasingly smaller and faded out according to how close they were to the current position of our mass in time.
What we need is, clearly, a scale factor whose size depends on how far away the position we are drawing is from the current position of our mass in time! An excellent way of obtaining an appropriate scale factor, for our intents and purposes, is to simply divide the index (i) of the circle being drawn by the length of the positions array. For example, if the number of elements allowed in the positions array is 25, element number 23 in that array will get a scale factor of 23 / 25, which gives us 0.92. Element number 5, on the other hand, will get a scale factor of 5 / 25, which gives us 0.2; the scale factor decreases the further we get from the current position of our mass, which is the relationship we want! Do note that we need a condition that makes sure that if the circle being drawn represents the current position, the scale factor is set to 1, as we do not want that circle to be either faded or smaller, for that matter. With all this in mind, let us write the code for the draw method of our Manifestation class.
class Manifestation {

  constructor() { /* The code for the constructor outlined above */ }

  storePosition() { /* The code for the storePosition method discussed above */ }

  draw(x, y) {
    this.storePosition(x, y);

    const positionsLen = this.positions.length;

    for (let i = 0; i < positionsLen; i++) {
      let transparency;
      let circleScaleFactor;

      const scaleFactor = i / positionsLen;

      if (i === positionsLen - 1) {
        transparency = 1;
        circleScaleFactor = 1;
      } else {
        transparency = scaleFactor / 2;
        circleScaleFactor = scaleFactor;
      }

      this.ctx.beginPath();
      this.ctx.arc(
        this.positions[i].x,
        this.positions[i].y,
        circleScaleFactor * this.radius,
        0,
        2 * Math.PI
      );
      this.ctx.fillStyle = `rgb(0, 12, 153, ${transparency})`;

      this.ctx.fill();
    }
  }

}
Part 3: Visualizing Our Simulation
Let us write some canvas boilerplate and bind it together with the gravitational n-body algorithm and the motion trails, so that we can get an animation of our inner solar system simulation up and running. As mentioned in the introduction to this tutorial, I do not discuss the Canvas API in any great depth, as this is not an introductory tutorial on the Canvas API, so if you find yourself looking rather bemused and or perplexed, make haste and change this state of affairs by heading over to MDN’s documentation on the subject.
Before we continue, though, here is the HTML markup for our simulator:
Now, we turn to the interesting part: the JavaScript. We start by getting a reference to the canvas element and then we proceed by getting its drawing context. Next, we set the dimensions of our canvas element. When it comes to canvas animations on the web, I do not spare any expenses in terms of screen real estate, so let us set the width and height properties of the canvas element to the width and height of the browser window, respectively. You will notice that I have drawn on a peculiar syntax for setting the width and height of the canvas element in that I have declared, in one statement, that the width variable is equal to the width property of the canvas element which, in turn, is equal to the width of the window. Some developers frown upon the use of this syntax, but I find it to be semantically beautiful. If you do not feel the same way, you can deconstruct that statement into two statements. Generally speaking, do whatever you feel most comfortable with, or if you find yourself collaborating with others, what the team has agreed on.
At this point, we are going to declare some constants for our animation. More specifically, there are three of them. The first is the radius (radius) of the circle, which represents the current position of a mass, in pixels. The second is the length of our motion trail (trailLength), which is the number of previous positions that it includes. Last, but not least, we have the scale (scale) constant, which represents the number of pixels per astronomical unit; Earth is one astronomical unit from the Sun, so if we did not introduce this scale factor, our inner solar system would look very claustrophobic, to say the least.
Let us now turn to the visual manifestations of the masses we are simulating. We have written a class that encapsulates their behavior, but how do we instantiate and work with these manifestations in our code? The most convenient and elegant way would be to populate every element of the masses array we are simulating with an instance of the Manifestation class, so let us write a simple method that iterates over these masses and does just that, which we then invoke.
const populateManifestations = masses => {
  masses.forEach(
    mass =>
    (mass["manifestation"] = new Manifestation(
      ctx,
      trailLength,
      radius
    ))
  );
};

populateManifestations(innerSolarSystem.masses);
Our simulator is meant to be a playful affair, so it is only to be expected that users will spawn masses left and right and that after a minute, or so, the inner solar system will look like an unrecognizable cosmic mess, which is why I think it would be decent of us to provide them with the ability to reset the simulation. To achieve this goal, we start by attaching an event listener to the reset button, and then we write a callback for this event listener that sets the value of the masses property of the innerSolarSystem object to a clone of the masses array. As we cloned the masses array, we no longer have the manifestations of our masses in it, so we call the populateManifestations method to make sure that our users have something to look at after having reset the simulation.
Okay, enough setting things up. Let us breathe some life into the inner solar system by writing a method that, with the help of the requestAnimationFrame API, will run 60 steps of our simulation a second and animate the results with motion trails and labels for the planets of the inner solar system and the Sun.
The first thing this method does is advance the inner solar system by one step and it does so by updating the position, acceleration and velocity vectors of its masses. Then we prepare the canvas element for the next animation cycle by clearing it of what was drawn in the preceding animation cycle using the Canvas API’s clearRect method.
Next, we iterate over the masses array and invoke the draw method of each mass manifestation. Moreover, if the mass being drawn has a name, we draw it onto the canvas, so that the user can see where the original planets are after things have gone haywire. Looking at the code in the loop, you will probably notice that we are not setting, for example, the value of the mass’s x coordinate on the canvas to massI times scale, and that we are in fact setting it to the width of the viewport divided by two plus massI times scale. Why is this? The answer is that the origin (x = 0, y = 0) of the canvas coordinate system is set to the top left corner of the canvas element, so to center our simulation on the canvas where it is clearly visible to the user, we must include this offset.
After the loop, at the end of the animate method, we call requestAnimationFrame with the animate method as the callback, and then the whole process discussed above is repeated again, creating yet another frame — and run in quick succession, these frames have brought the inner solar system to life. But wait, we have missed something! If you were to run the code I have walked you through thus far, you would not see anything at all. Fortunately, all we have to do to change this sad state of affairs is to proverbially give the inner solar system a kick in its rear end (no, I am not going to fall for the temptation of inserting a Uranus joke here; grow up!) by invoking the animate method!
const animate = () => {
  innerSolarSystem
    .updatePositionVectors()
    .updateAccelerationVectors()
    .updateVelocityVectors();

  ctx.clearRect(0, 0, width, height);

  const massesLen = innerSolarSystem.masses.length;

  for (let i = 0; i < massesLen; i++) {
    const massI = innerSolarSystem.masses[i];

    const x = width / 2 + massI.x * scale;
    const y = height / 2 + massI.y * scale;

    massI.manifestation.draw(x, y);

    if (massI.name) {
      ctx.font = "14px Arial";
      ctx.fillText(massI.name, x + 12, y + 4);
      ctx.fill();
    }
  }

  requestAnimationFrame(animate);
};

animate();
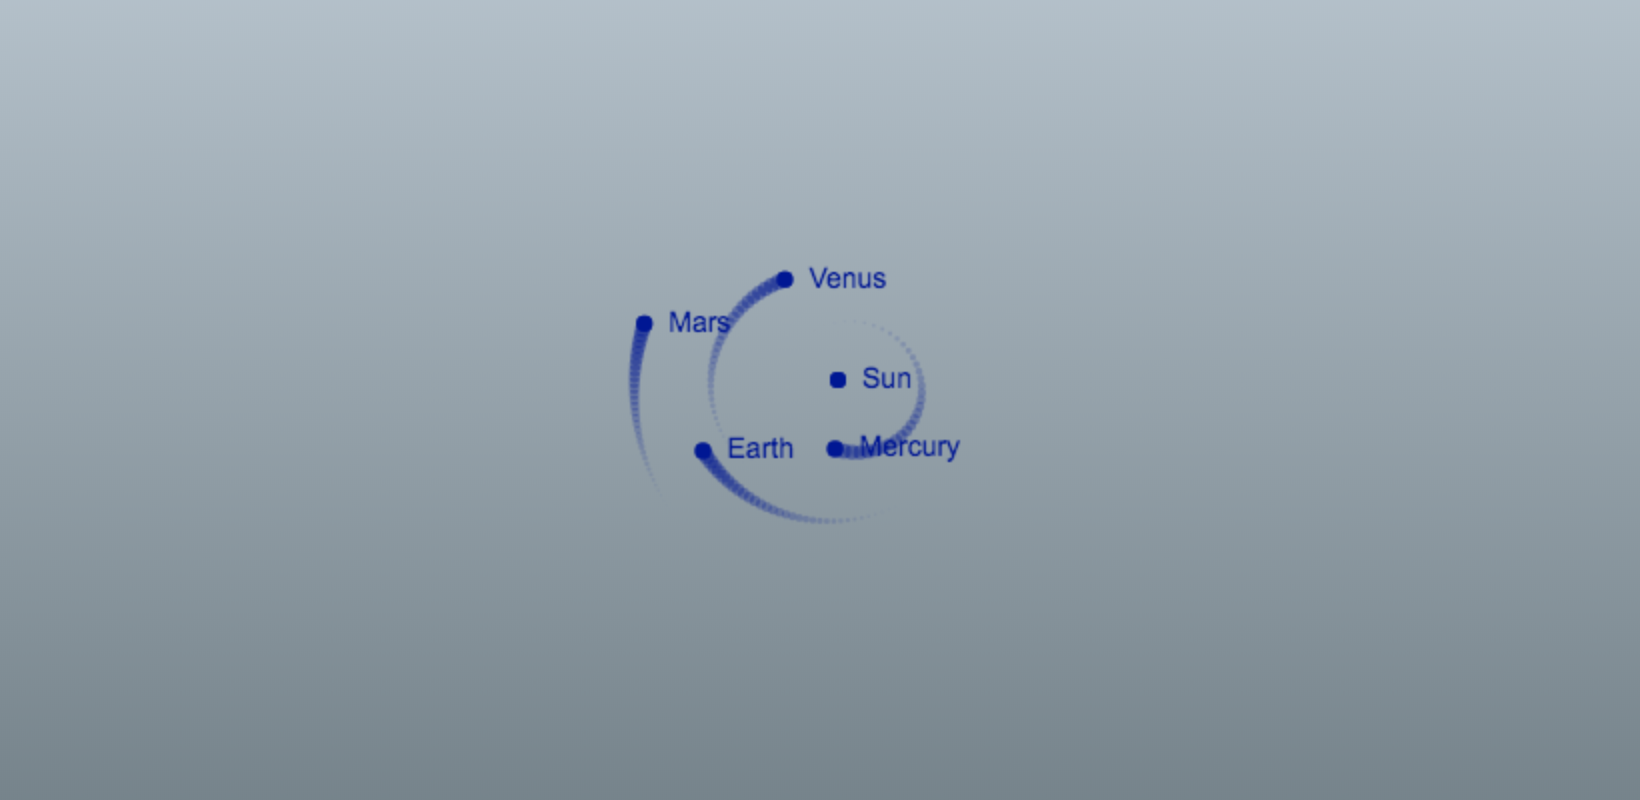
Our visualization of Mercury, Venus, Earth and Mars going about their day-to-day business of running circles around the sun. Looks pretty neat.
Woah! We have now gotten to the point where our simulation is animated, with the masses represented by dainty little blue circles stalked by marvelous looking motion trails. That is pretty cool in itself, if you were to ask me; but I did promise to also show how you can enable the user to add masses of their own to the simulation with a little bit of mouse drag action, so we are not done quite yet!
Part 4: Adding Masses with the Mouse
The idea here is that the user should be able to press down on the mouse button and draw a line by dragging it; the line will start where the user pressed down and end at the current position of the mouse cursor. When the user releases the mouse button, a new mass is spawned at the position of the screen where the user pressed down the mouse button, and the direction the mass will move is determined by the direction of the line; the length of the line determines the velocity vectors of the mass. So, how do we go about implementing this? Let us run through what we need to do, step by step. The code for steps one through six go above the animate method, while the code for step seven is a small addition to the animate method.
1. We need two variables that will store the x and y coordinates where the user pressed down the mouse button on the screen.
let mousePressX = 0;
let mousePressY = 0;
2. We need two variables that store the current x and y coordinates of the mouse cursor on the screen.
let currentMouseX = 0;
let currentMouseY = 0;
3. We need one variable that keeps track of whether the mouse is being dragged or not. The mouse is being dragged in the time that passes from when the user has pressed down the mouse button to the point where he releases it.
let dragging = false;
4. We need to attach a mousedown listener to the canvas element that logs the x and y coordinates of where the mouse was pressed down and sets the dragging variable to true.
6. We need to attach a mouseup listener to the canvas element that sets the drag variable to false, and pushes a new object representing a mass into the innerSolarSystem.masses array where the x and y position vectors are the point where the user pressed down the mouse button divided by value of the scale variable.
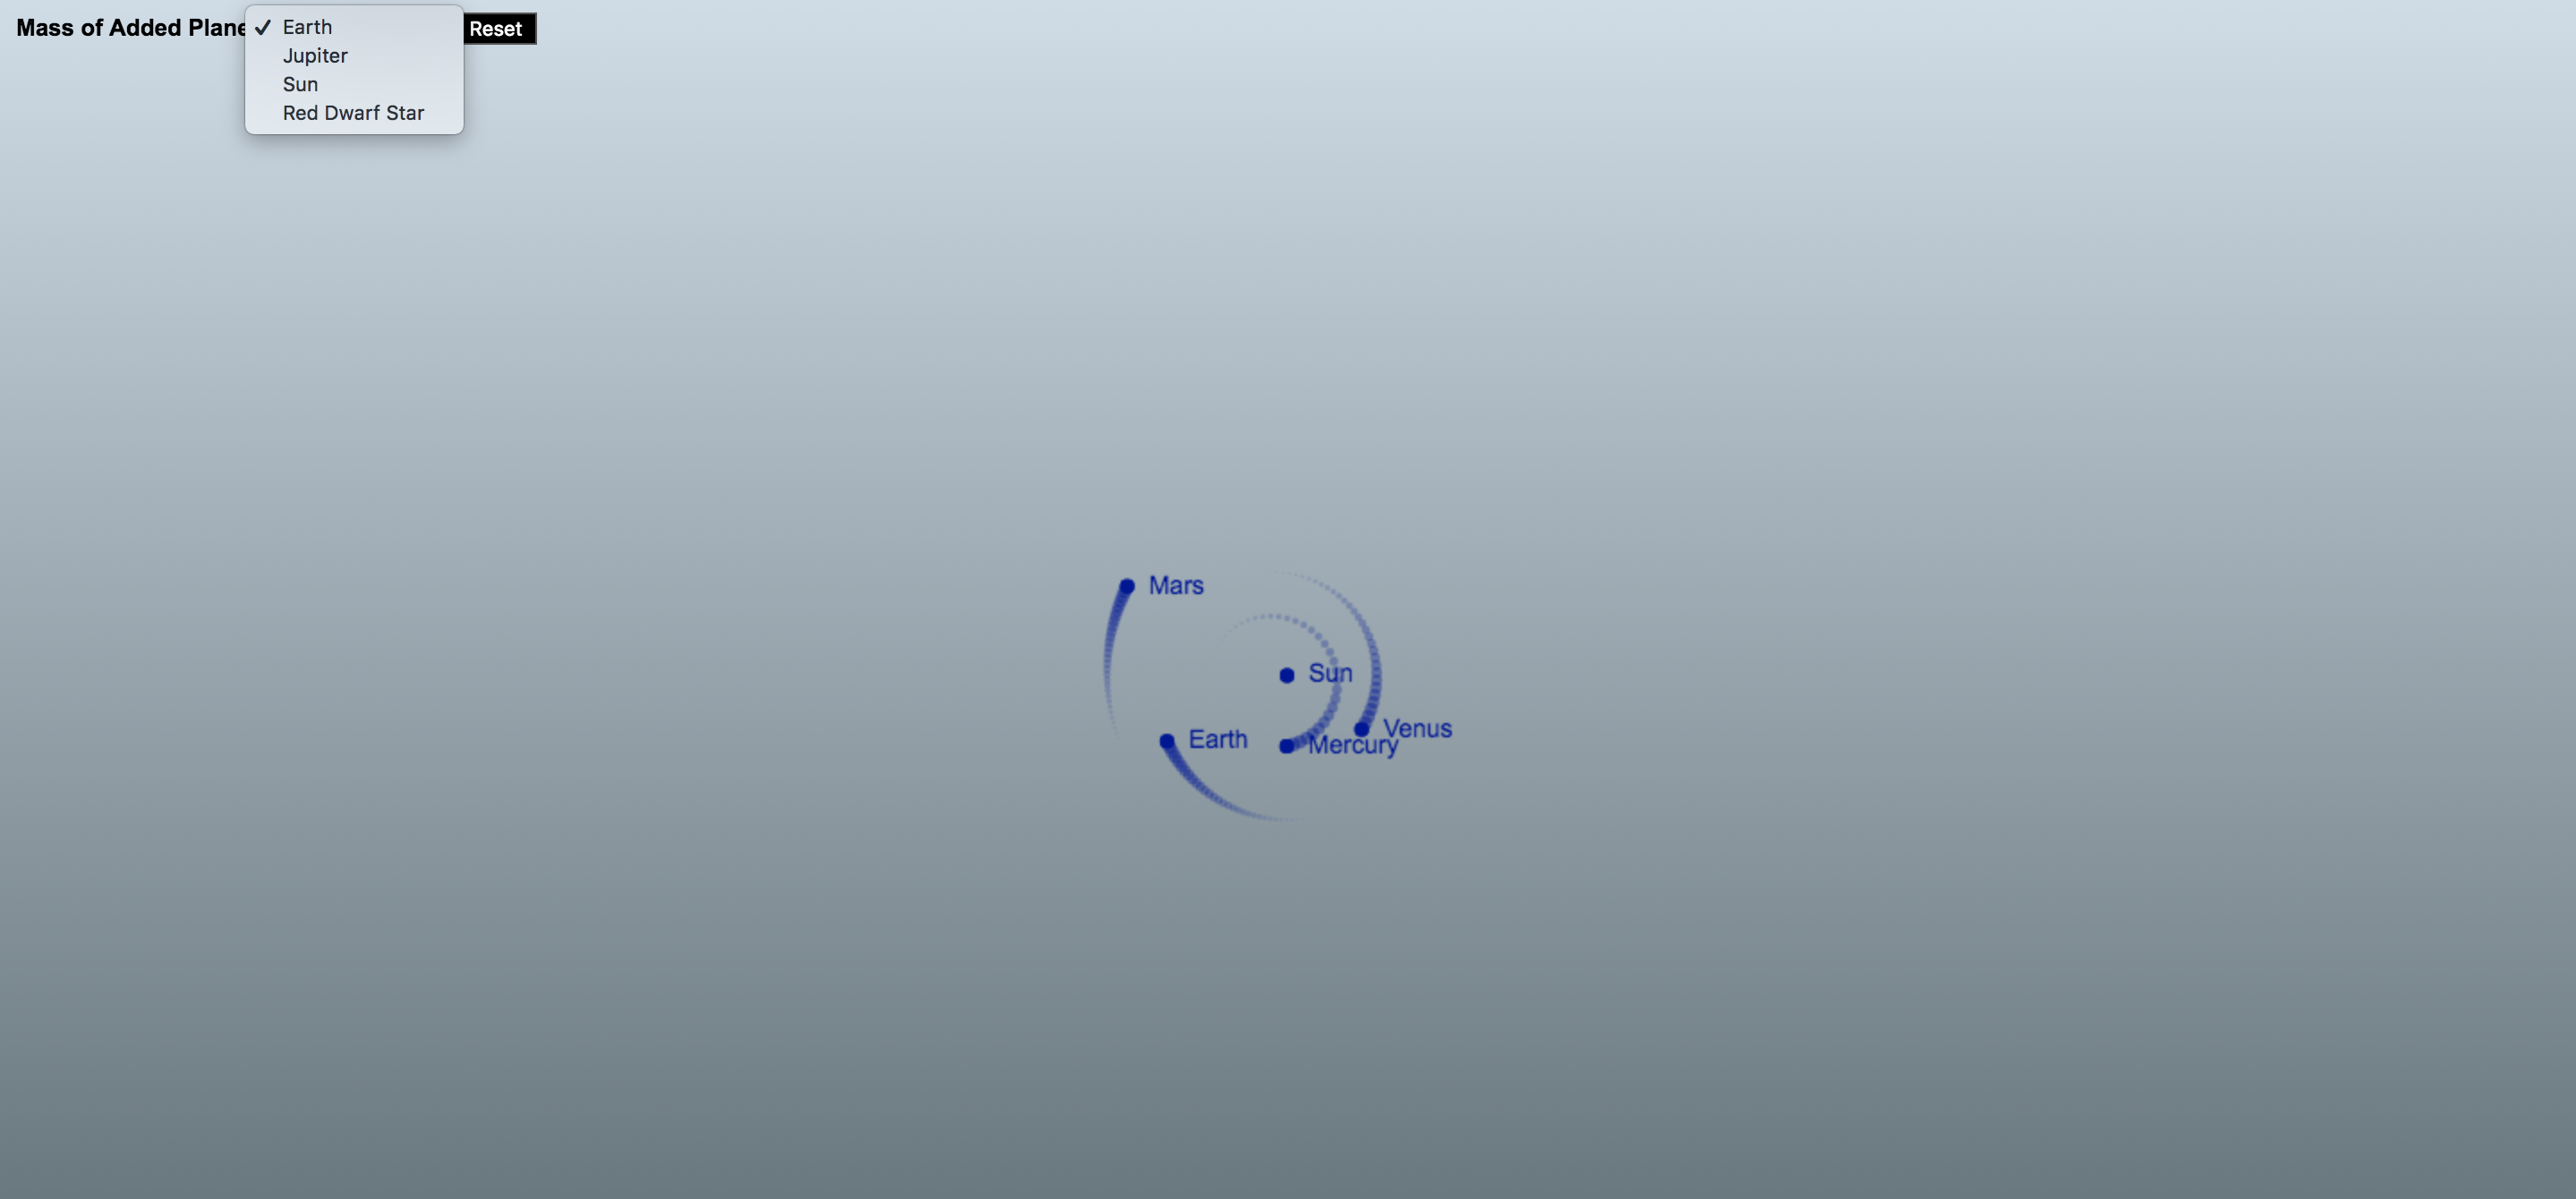
If we did not divide these vectors by the scale variable, the added masses would end up way out in the solar system, which is not what we want. The z position vector is set to zero and so is the z velocity vector. The x velocity vector is set to the x coordinate where the mouse was released subtracted by the x coordinate where the mouse was pressed down, and then you divide this number by 35. I will be honest and admit that 35 is a magical number that just happens to give you reasonable velocities when you add masses with the mouse to the inner solar system. Same procedure for the y velocity vector. The mass (m) of the mass we are adding is set by the user with a select element that we have populated with the masses of some famous celestial objects in the HTML markup. Last, but not least, we populate the object representing our mass with an instance of the Manifestation class so that the user can see it on the screen!
7. In the animate function, after the loop where we draw our manifestations and, before we call requestAnimationFrame, check if the mouse is being dragged. If that is the case, we’ll draw a line between the position where the mouse was pressed down and the mouse cursors current position.
const animate = () => {
  // Preceding code in the animate method down to and including the loop where we draw our mass manifestations

  if (dragging) {
    ctx.beginPath();
    ctx.moveTo(mousePressX, mousePressY);
    ctx.lineTo(currentMouseX, currentMouseY);
    ctx.strokeStyle = "red";
    ctx.stroke();
  }

  requestAnimationFrame(animate);
};
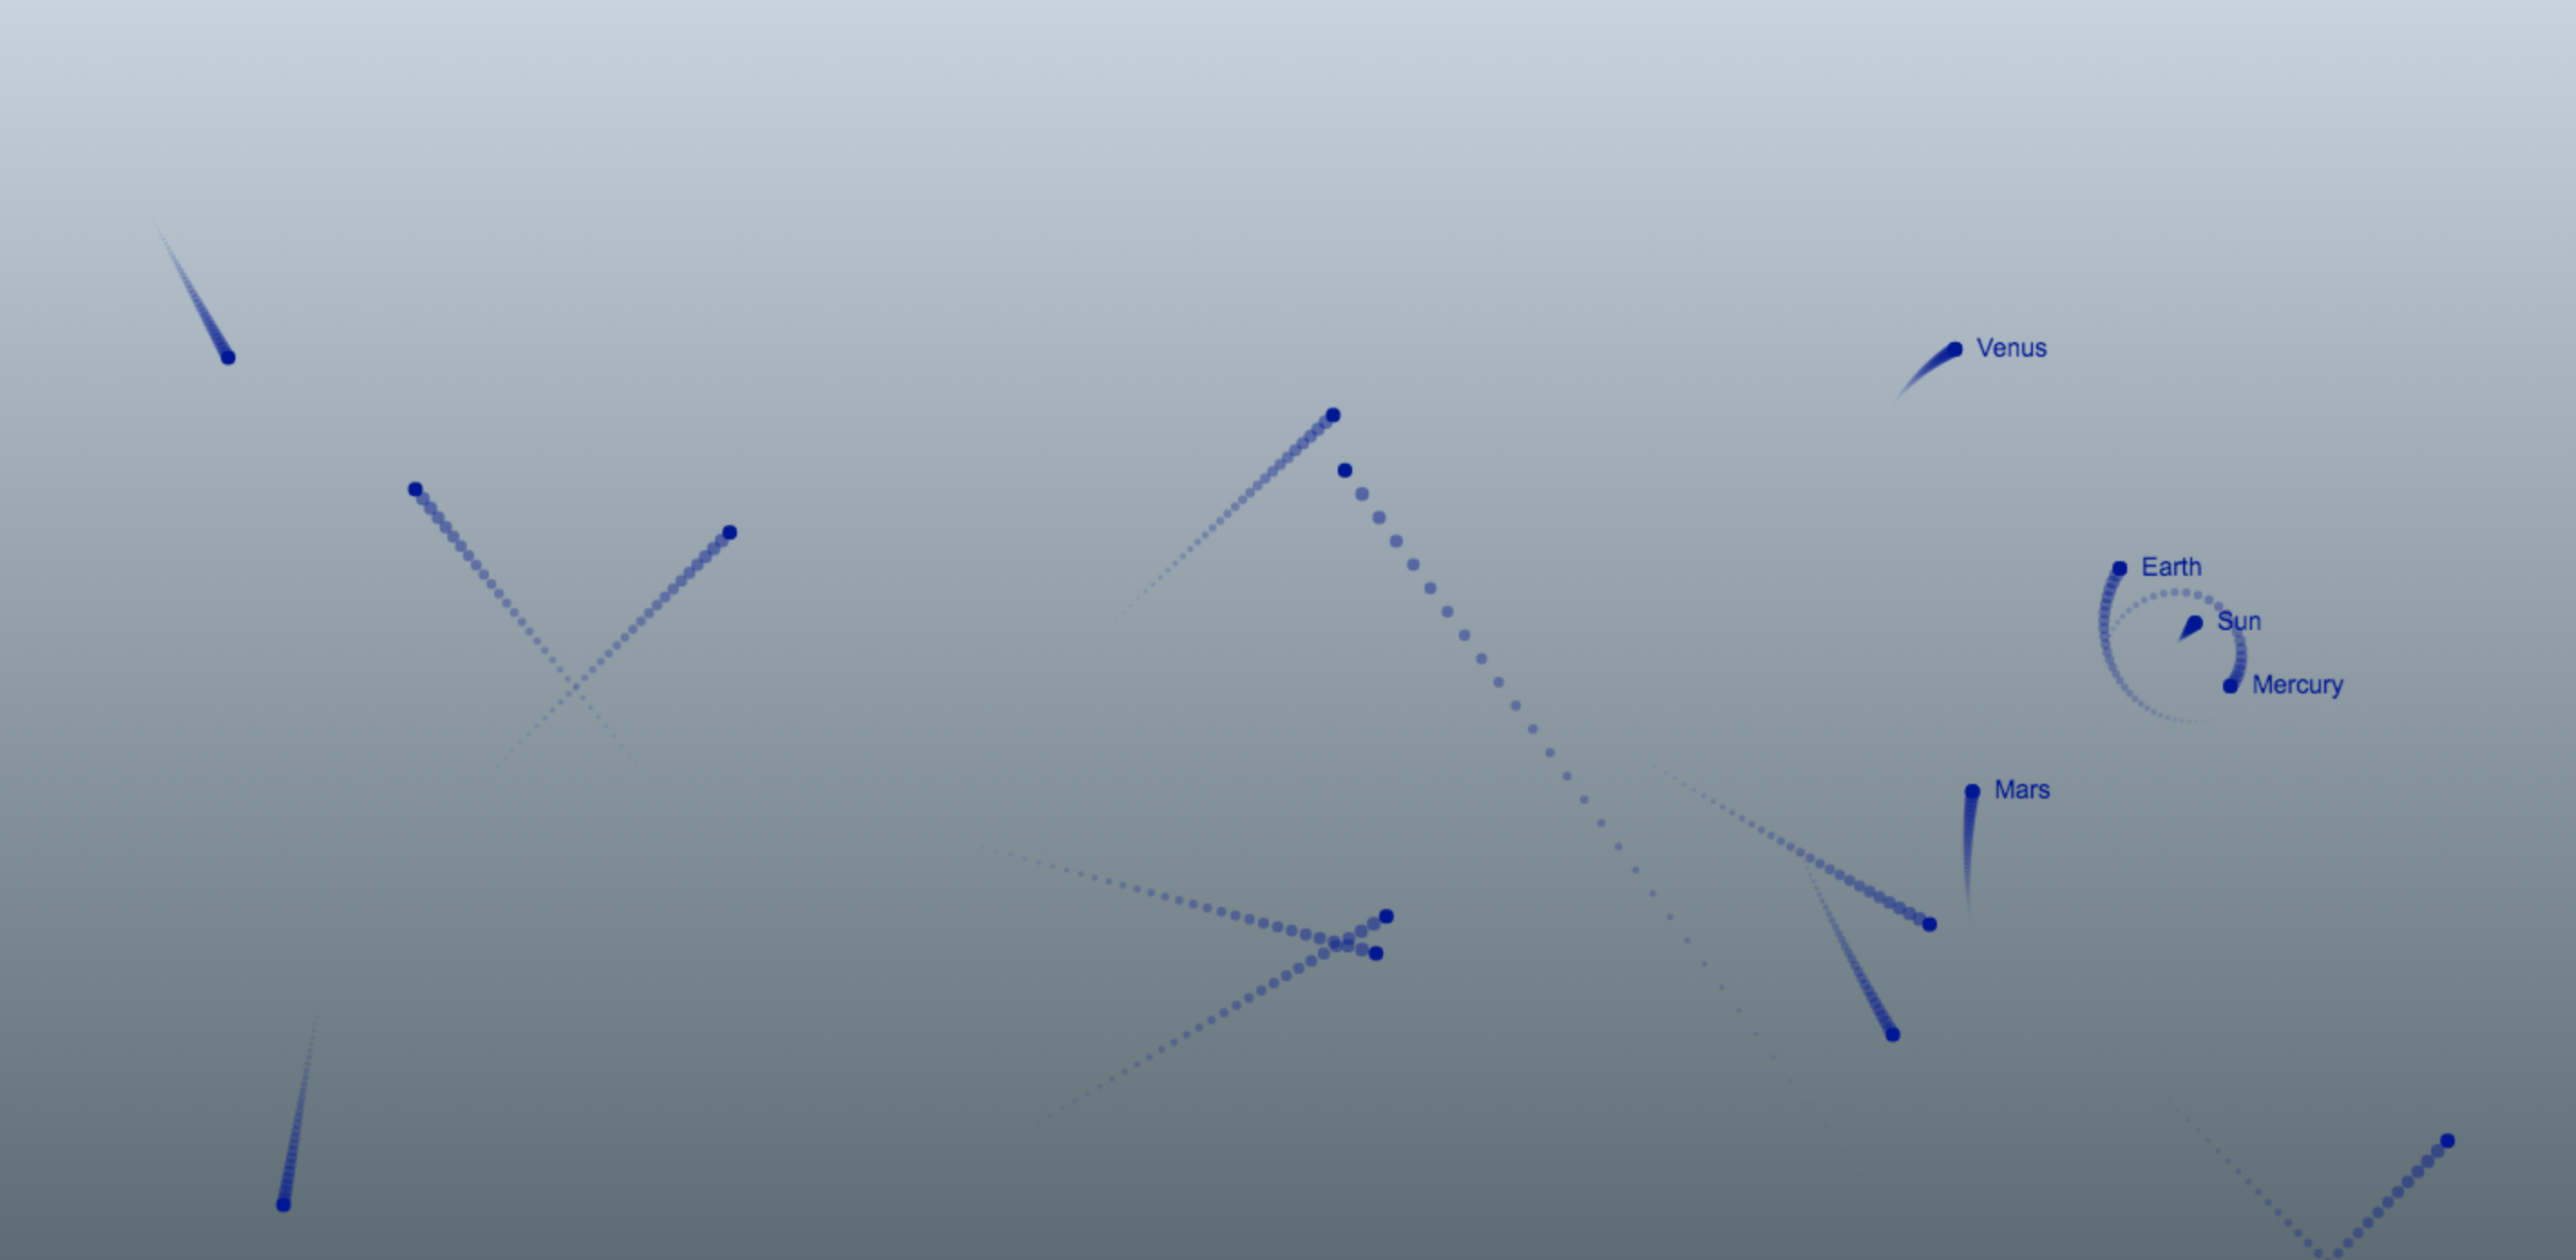
The inner solar system is about to get a lot more interesting — we can now add masses to our simulation!
Adding masses to our simulation with your mouse is not more difficult than that! Now, grab your mouse and unleash some mayhem on the inner solar system.
Part 5: Fencing off the Inner Solar System
As you will probably have noticed after adding some masses to the simulation, celestial objects are very shenanigan-prone in that they have a tendency to dance their way out of the viewport, especially if the added masses are very massive or they have too high of a velocity, which is kind of annoying. The natural solution to this problem is, of course, to fence off the inner solar system so that if a mass reaches the edge of the viewport, it will bounce back in! Sounds like quite a project, implementing this functionality, but fortunately doing so is a rather simple affair. At the end of the loop where we iterate over the masses and draw them in the animate method, we have insert two conditions: one that checks if our mass is outside the bounds of the viewport on the x-axis, and another that does the same check for the y axis. If the position of our mass is outside of the viewport on the x axis we reverse its x velocity vector so that it bounces back into the viewport, and the same logic applies if our mass is outside of the viewport on the y axis. With these two conditions, the animate method will look like so:
const animate = () => {
  // Advance the simulation by one step; clear the canvas

  for (let i = 0; i < massesLen; i++) {

    // Preceding loop code

    if (x < radius || x > width - radius) massI.vx = -massI.vx;

    if (y < radius || y > height - radius) massI.vy = -massI.vy;
  }

  requestAnimationFrame(animate);
};
Absolute madness! Venus, you silly planet, what are you doing out there?! You are supposed to be orbiting the Sun!
Ping, pong! It is almost as though we are playing a game of cosmic billiards with all those masses bouncing off the fence that we have built for the inner solar system!
Concluding Remarks
People have a tendency to think of orbital mechanics — which is what we have played around with in this tutorial — as something that is beyond the understanding of mere mortals such as yours truly. Truth, though, is that orbital mechanics follows a very simple and elegant set of rules, as this tutorial is a testament to. With a little bit of JavaScript and high-school mathematics and physics, we have reconstructed the inner solar system to a reasonable degree of accuracy, and gone beyond that to make things a little bit more spicy and, therefore, more interesting. With this simulator, you can answer silly what-if questions along the lines of, “What would happen if I flung a star with the mass of the Sun into our inner solar system?” or develop a feeling for Kepler’s laws of planetary motion by, for example, observing the relationship between the distance of a mass from the Sun and its velocity.
I sure had fun writing this tutorial, and it is my sincere hope that you had as much fun reading it!
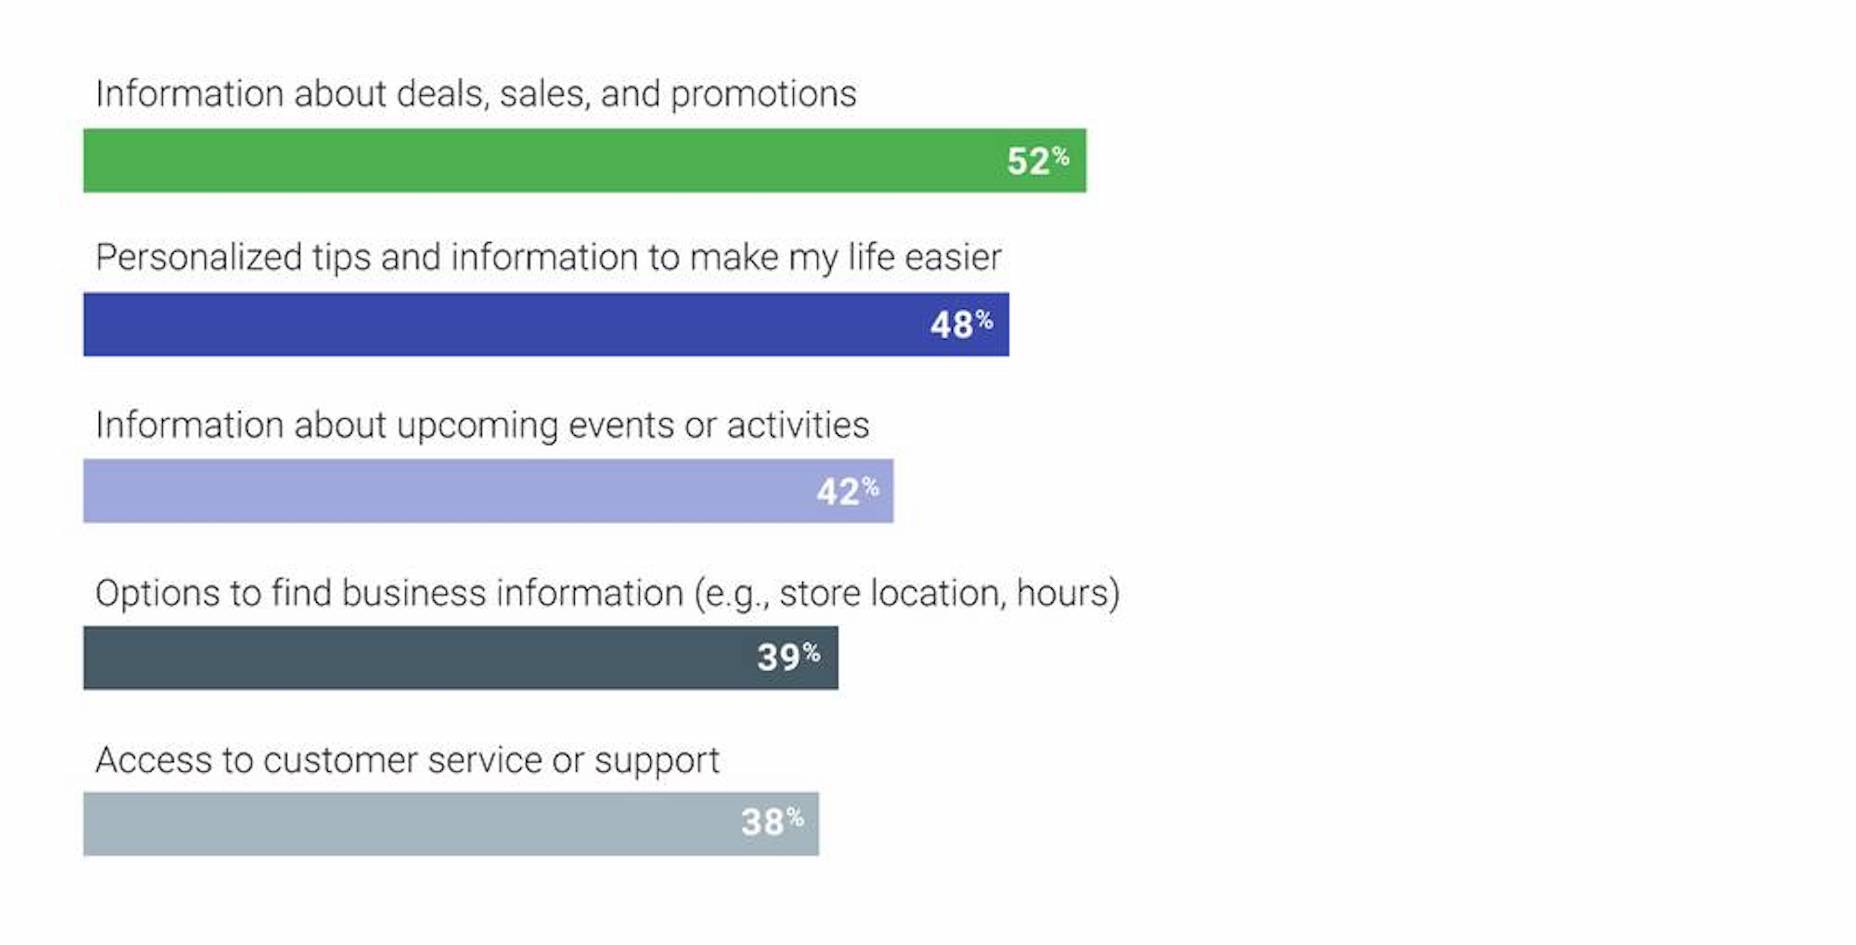
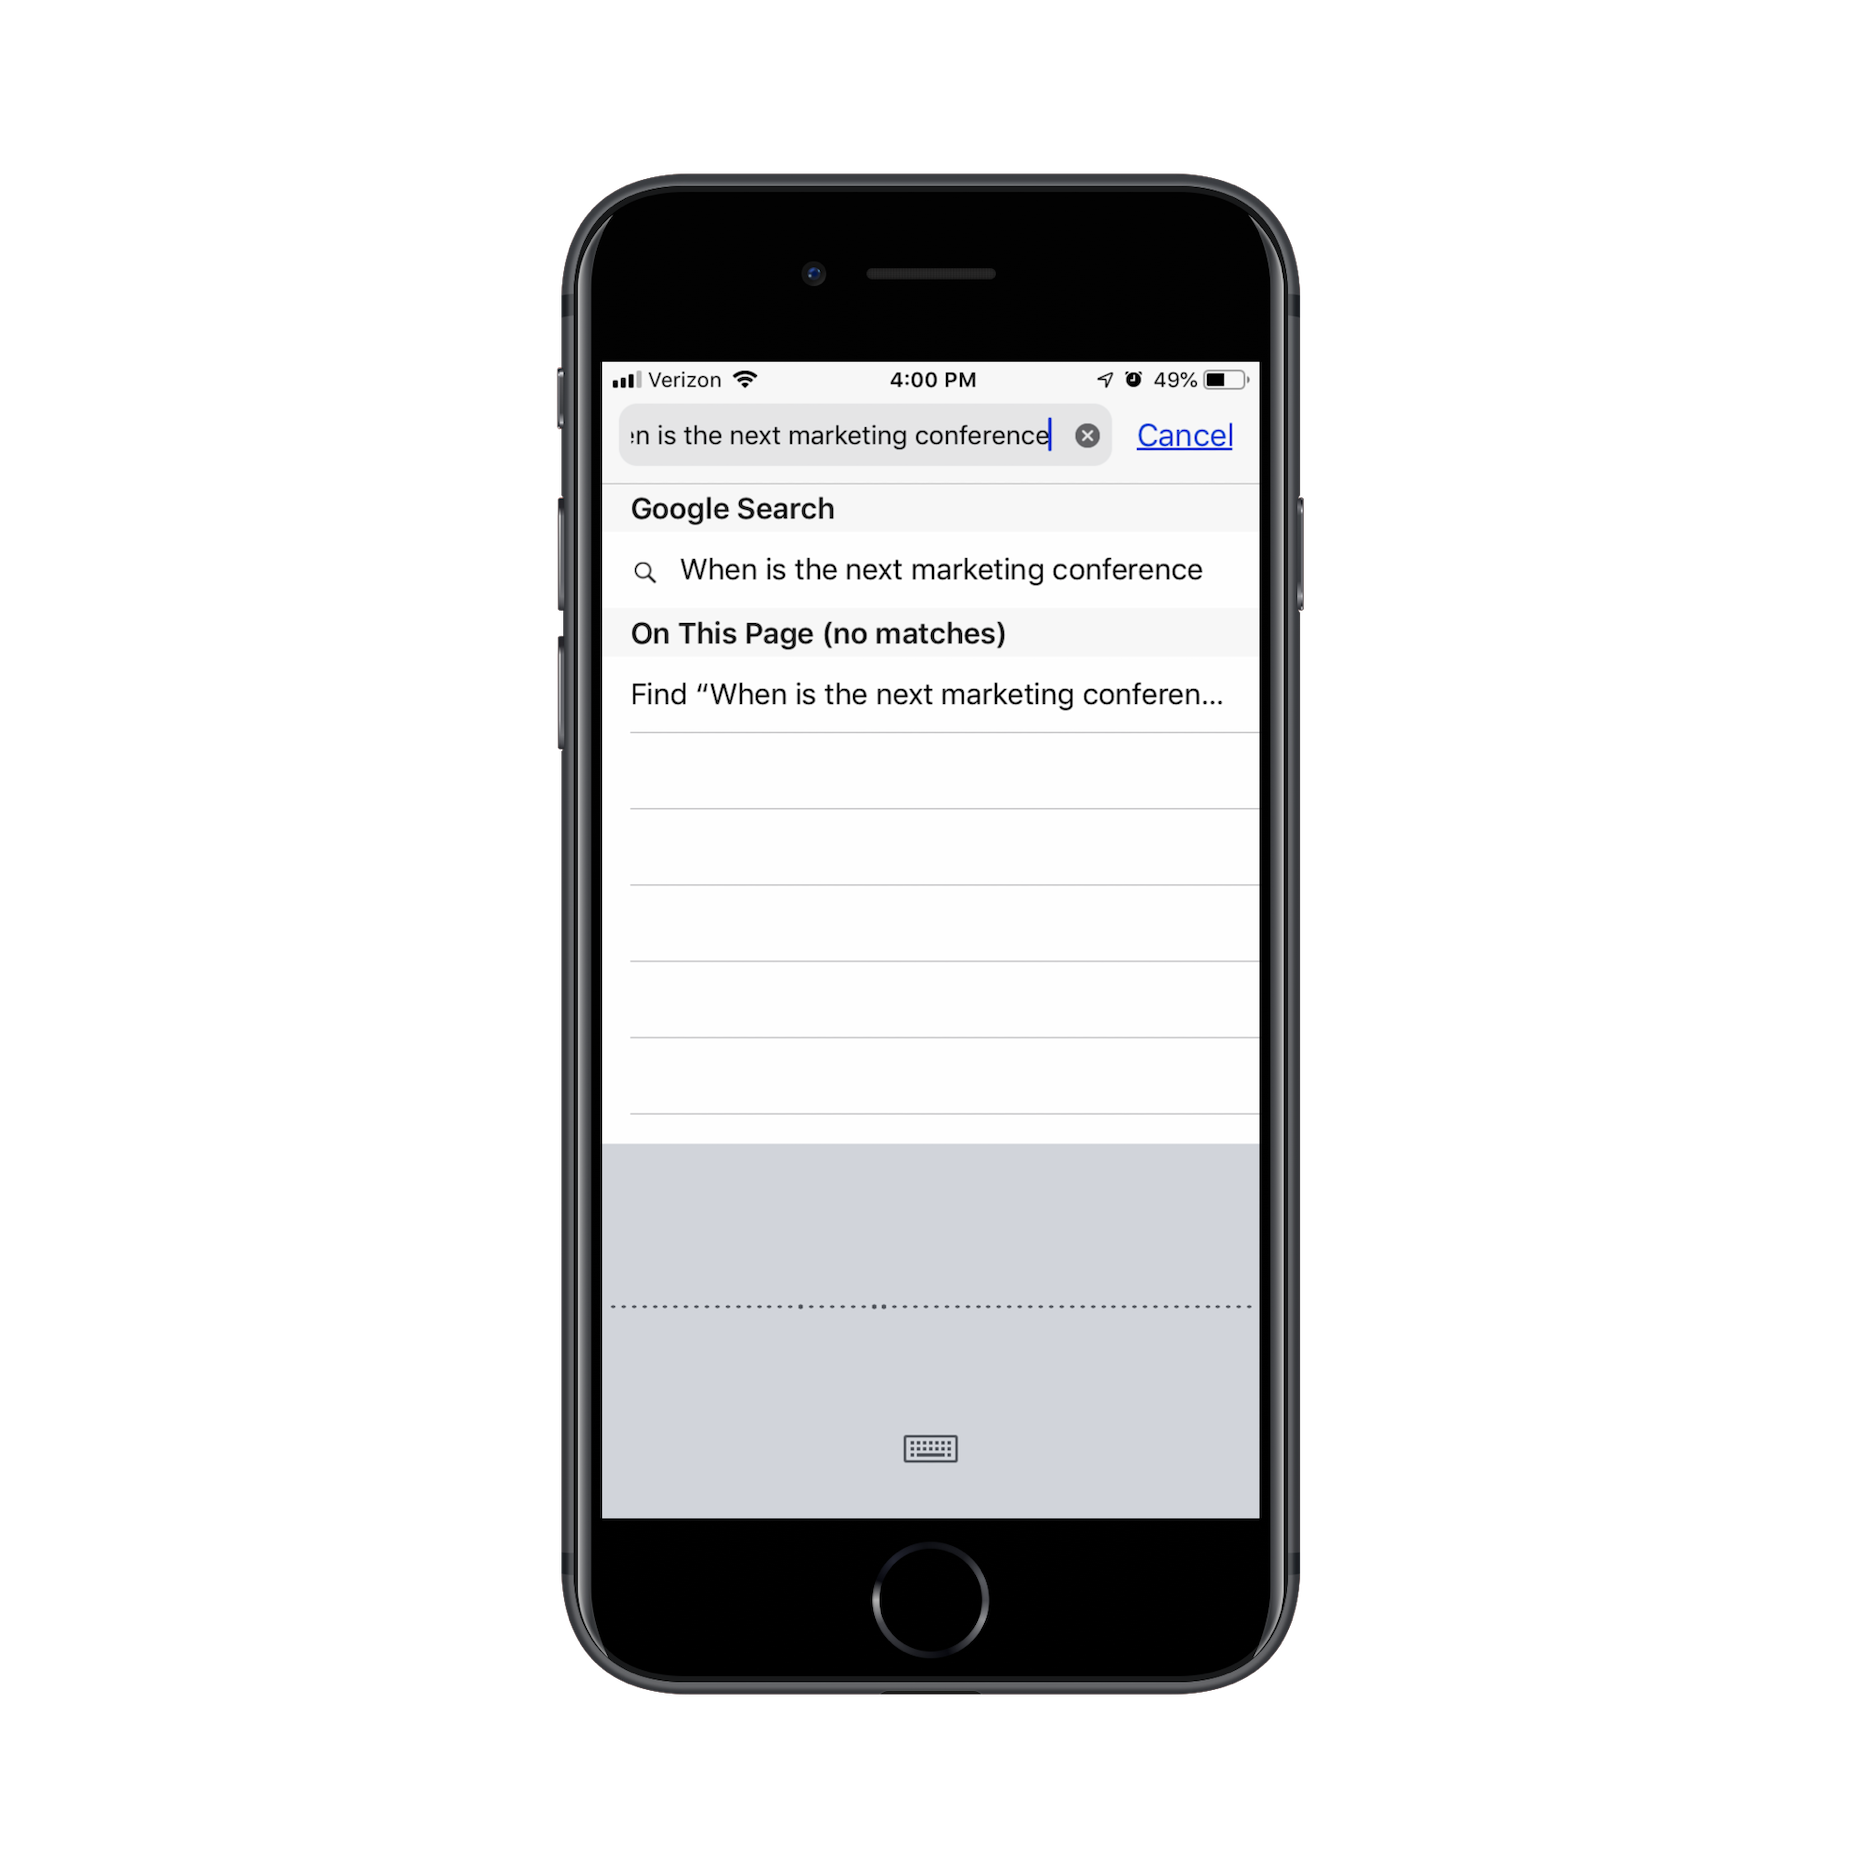
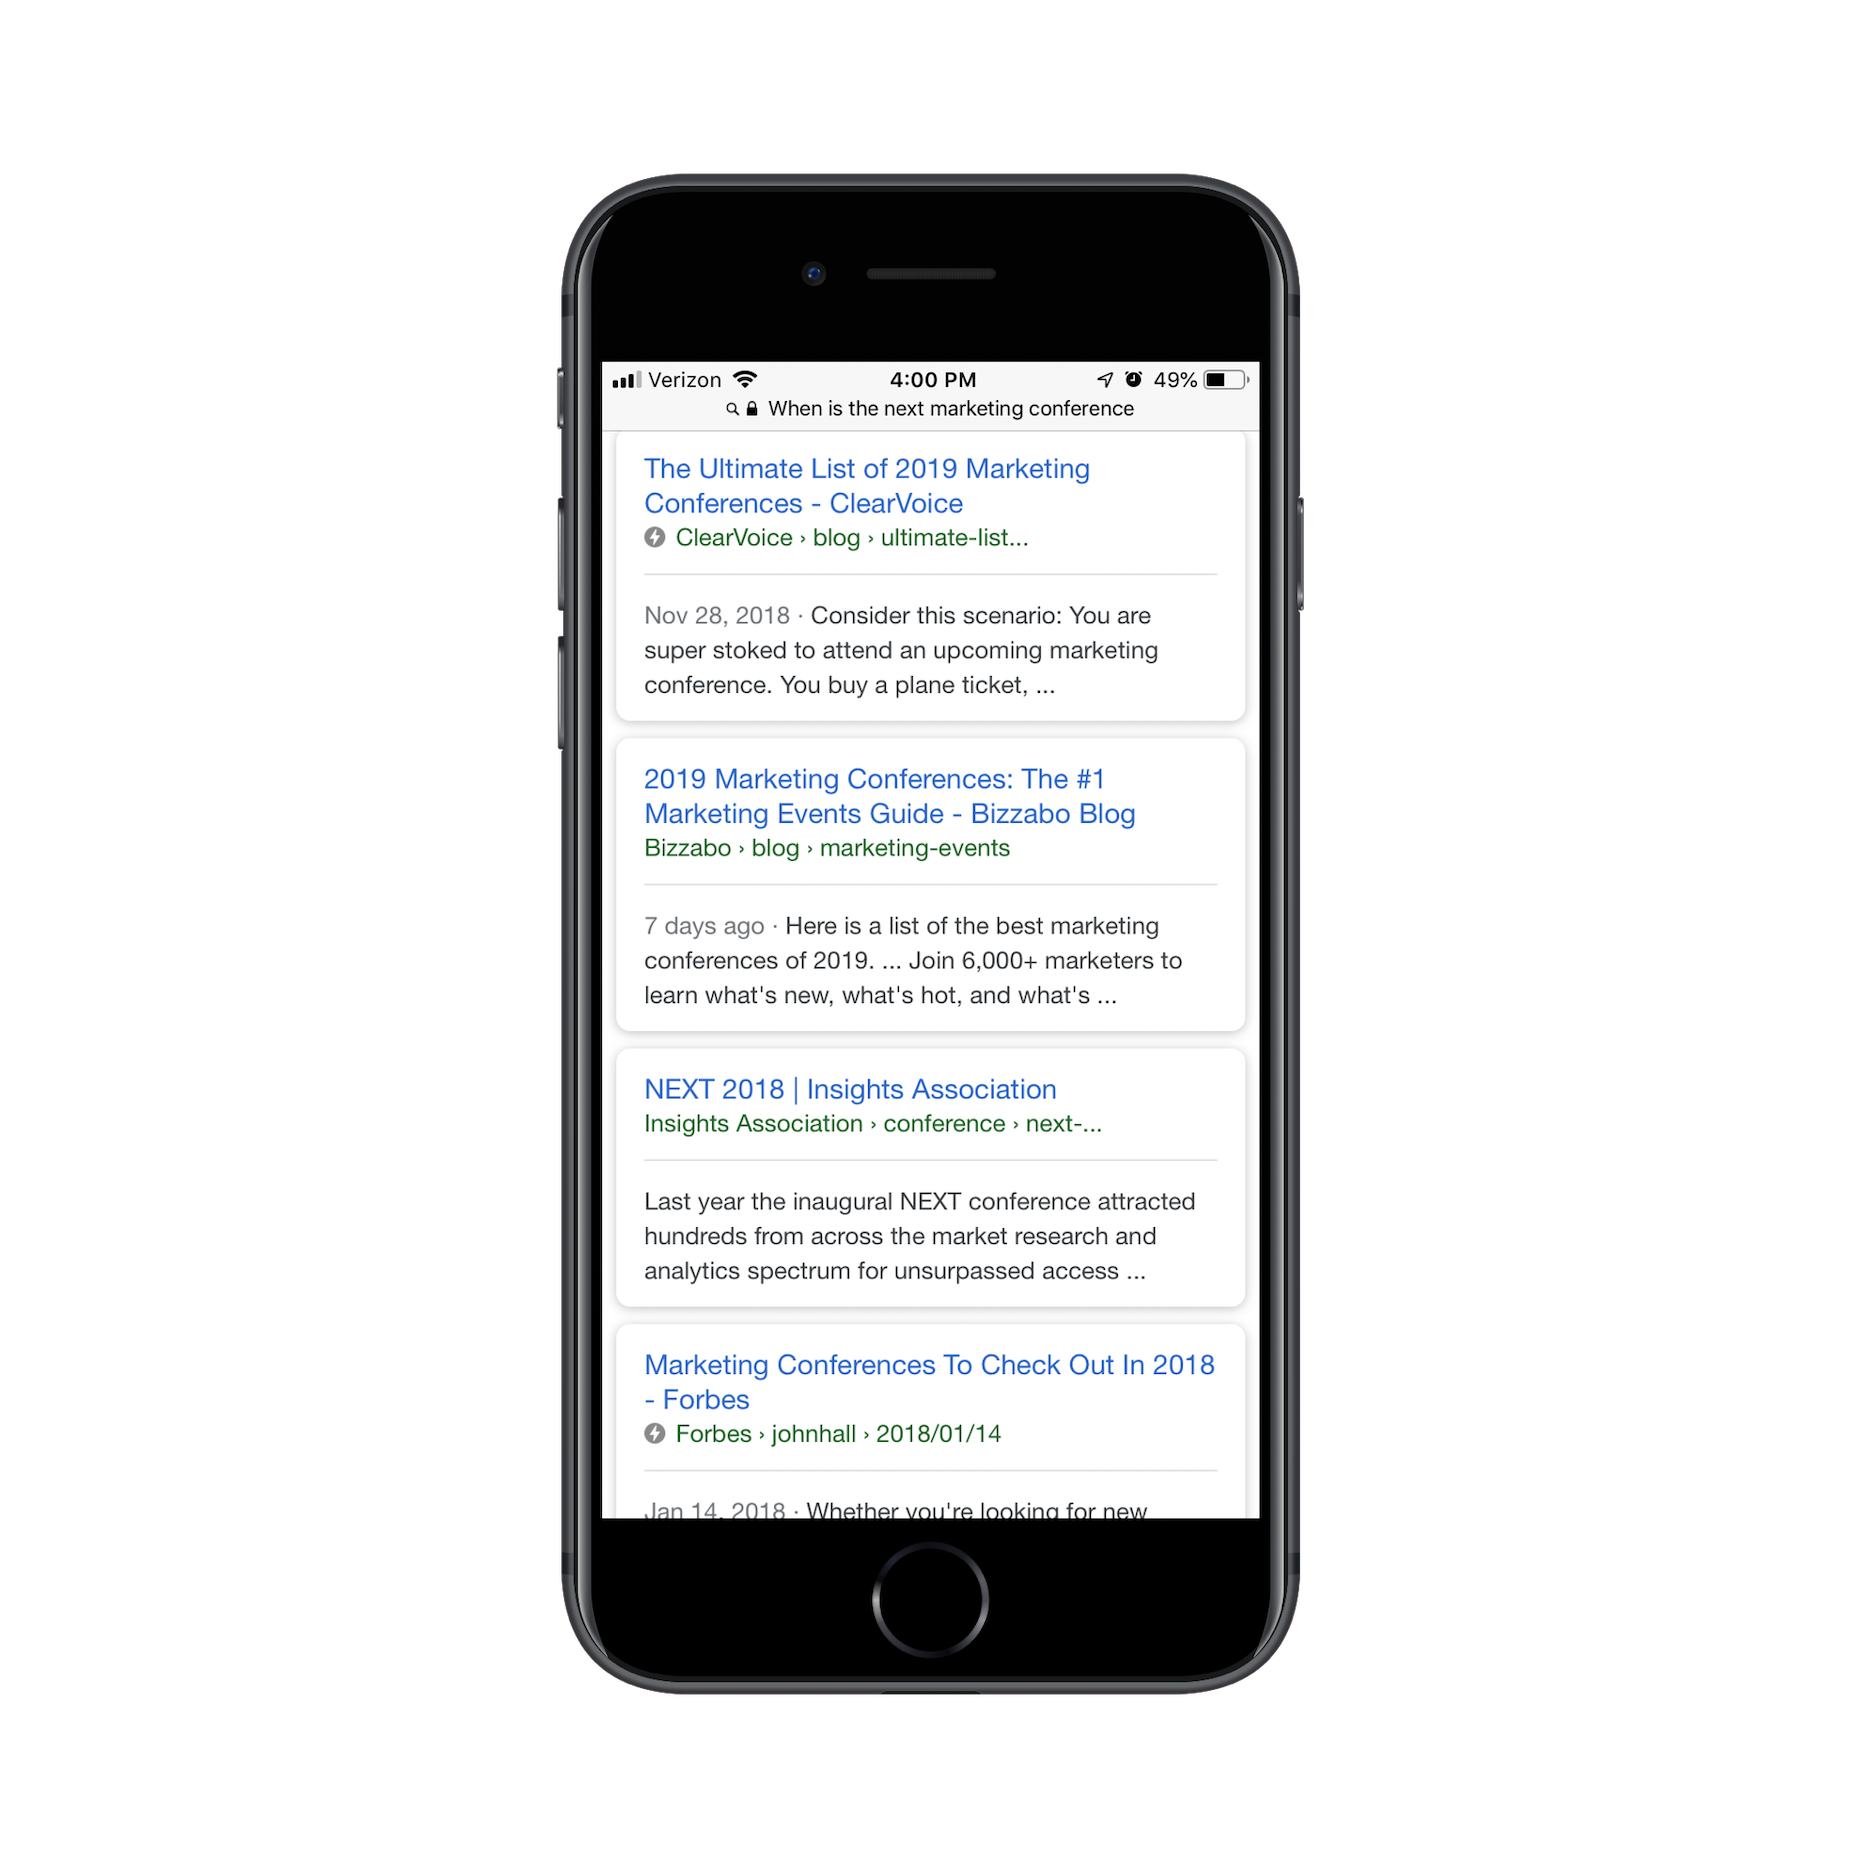

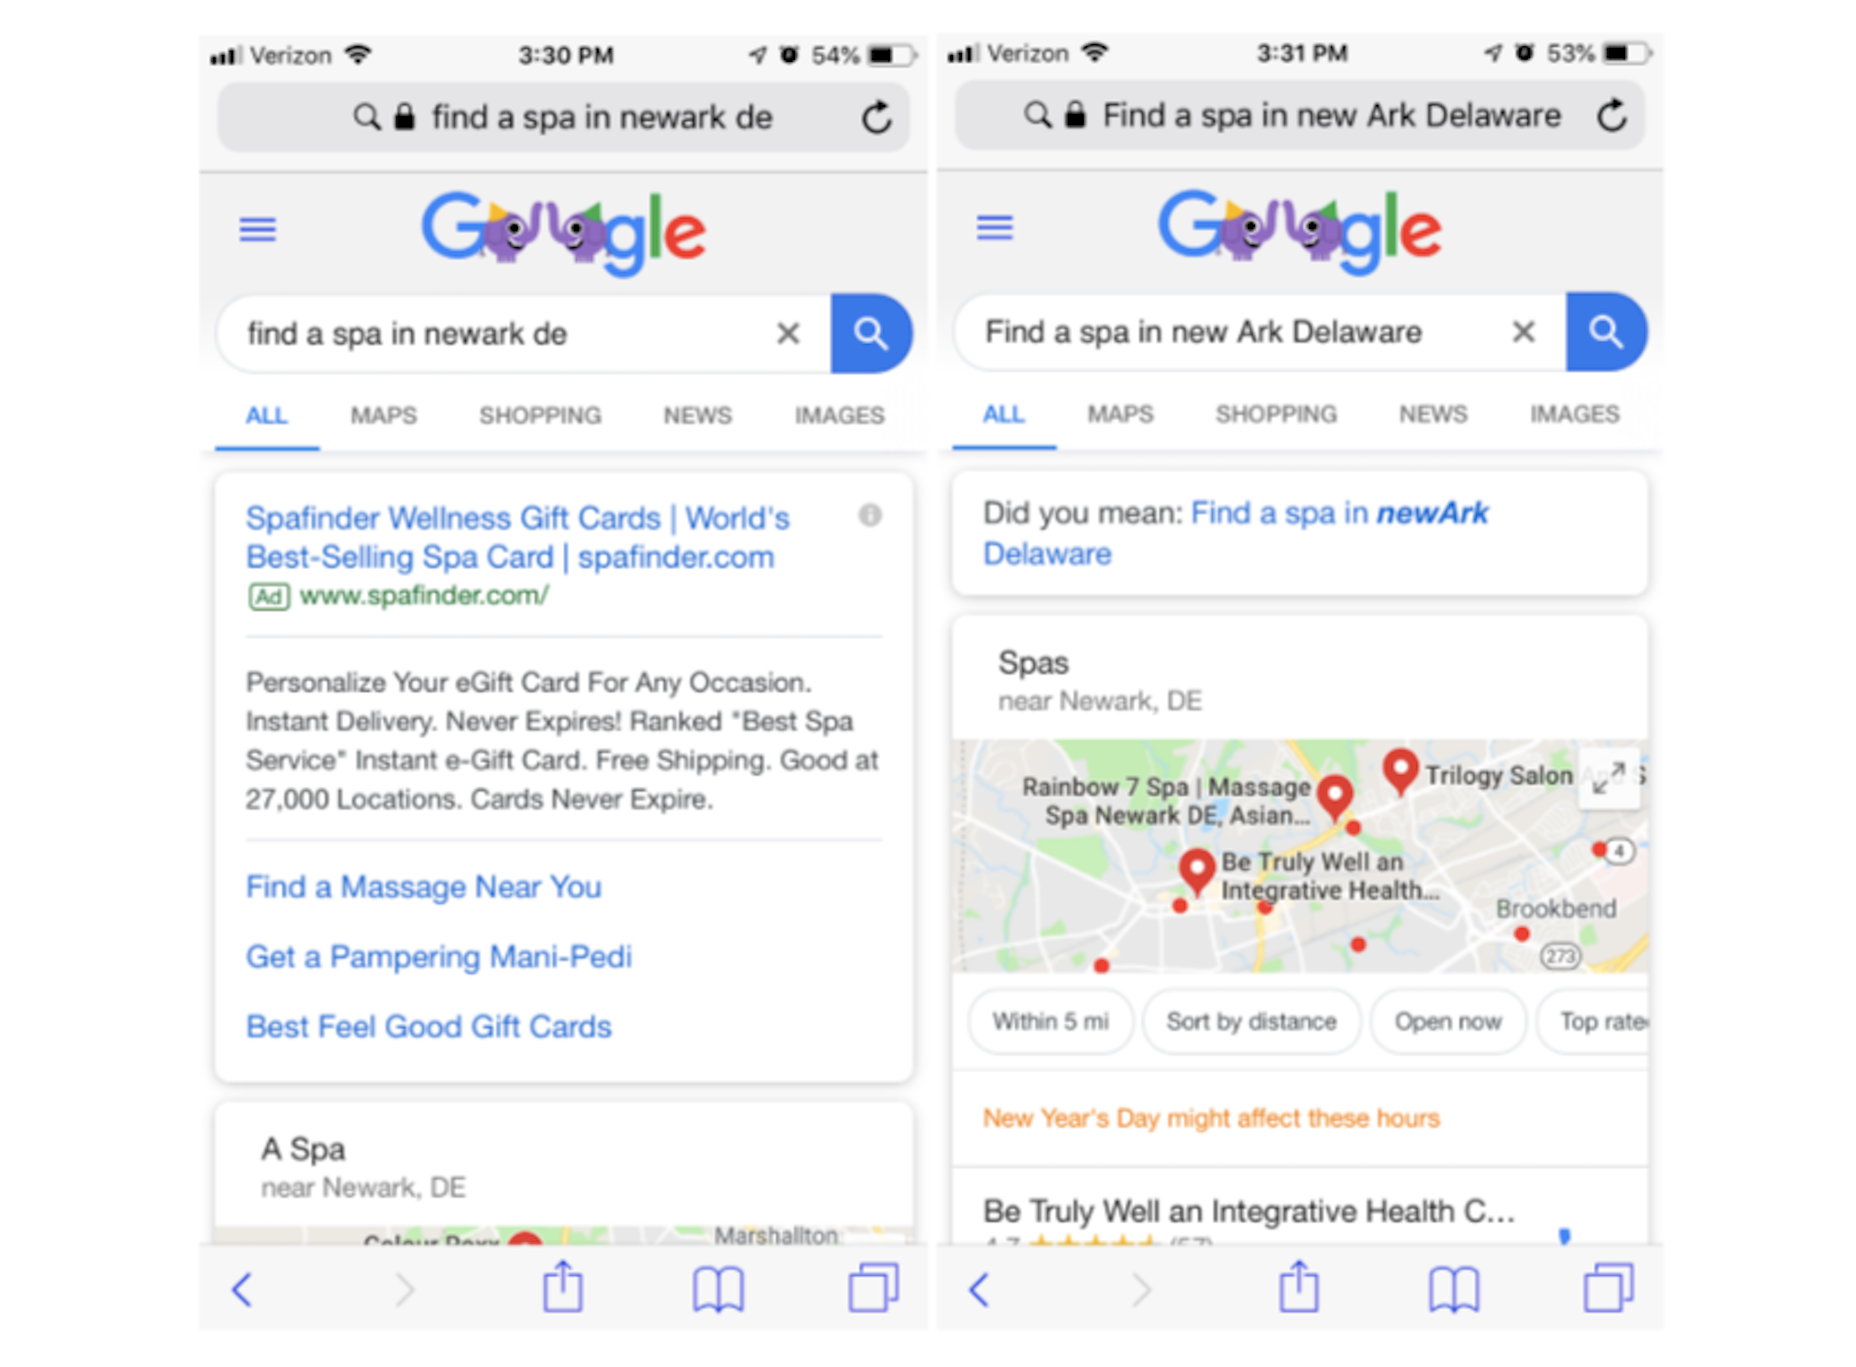
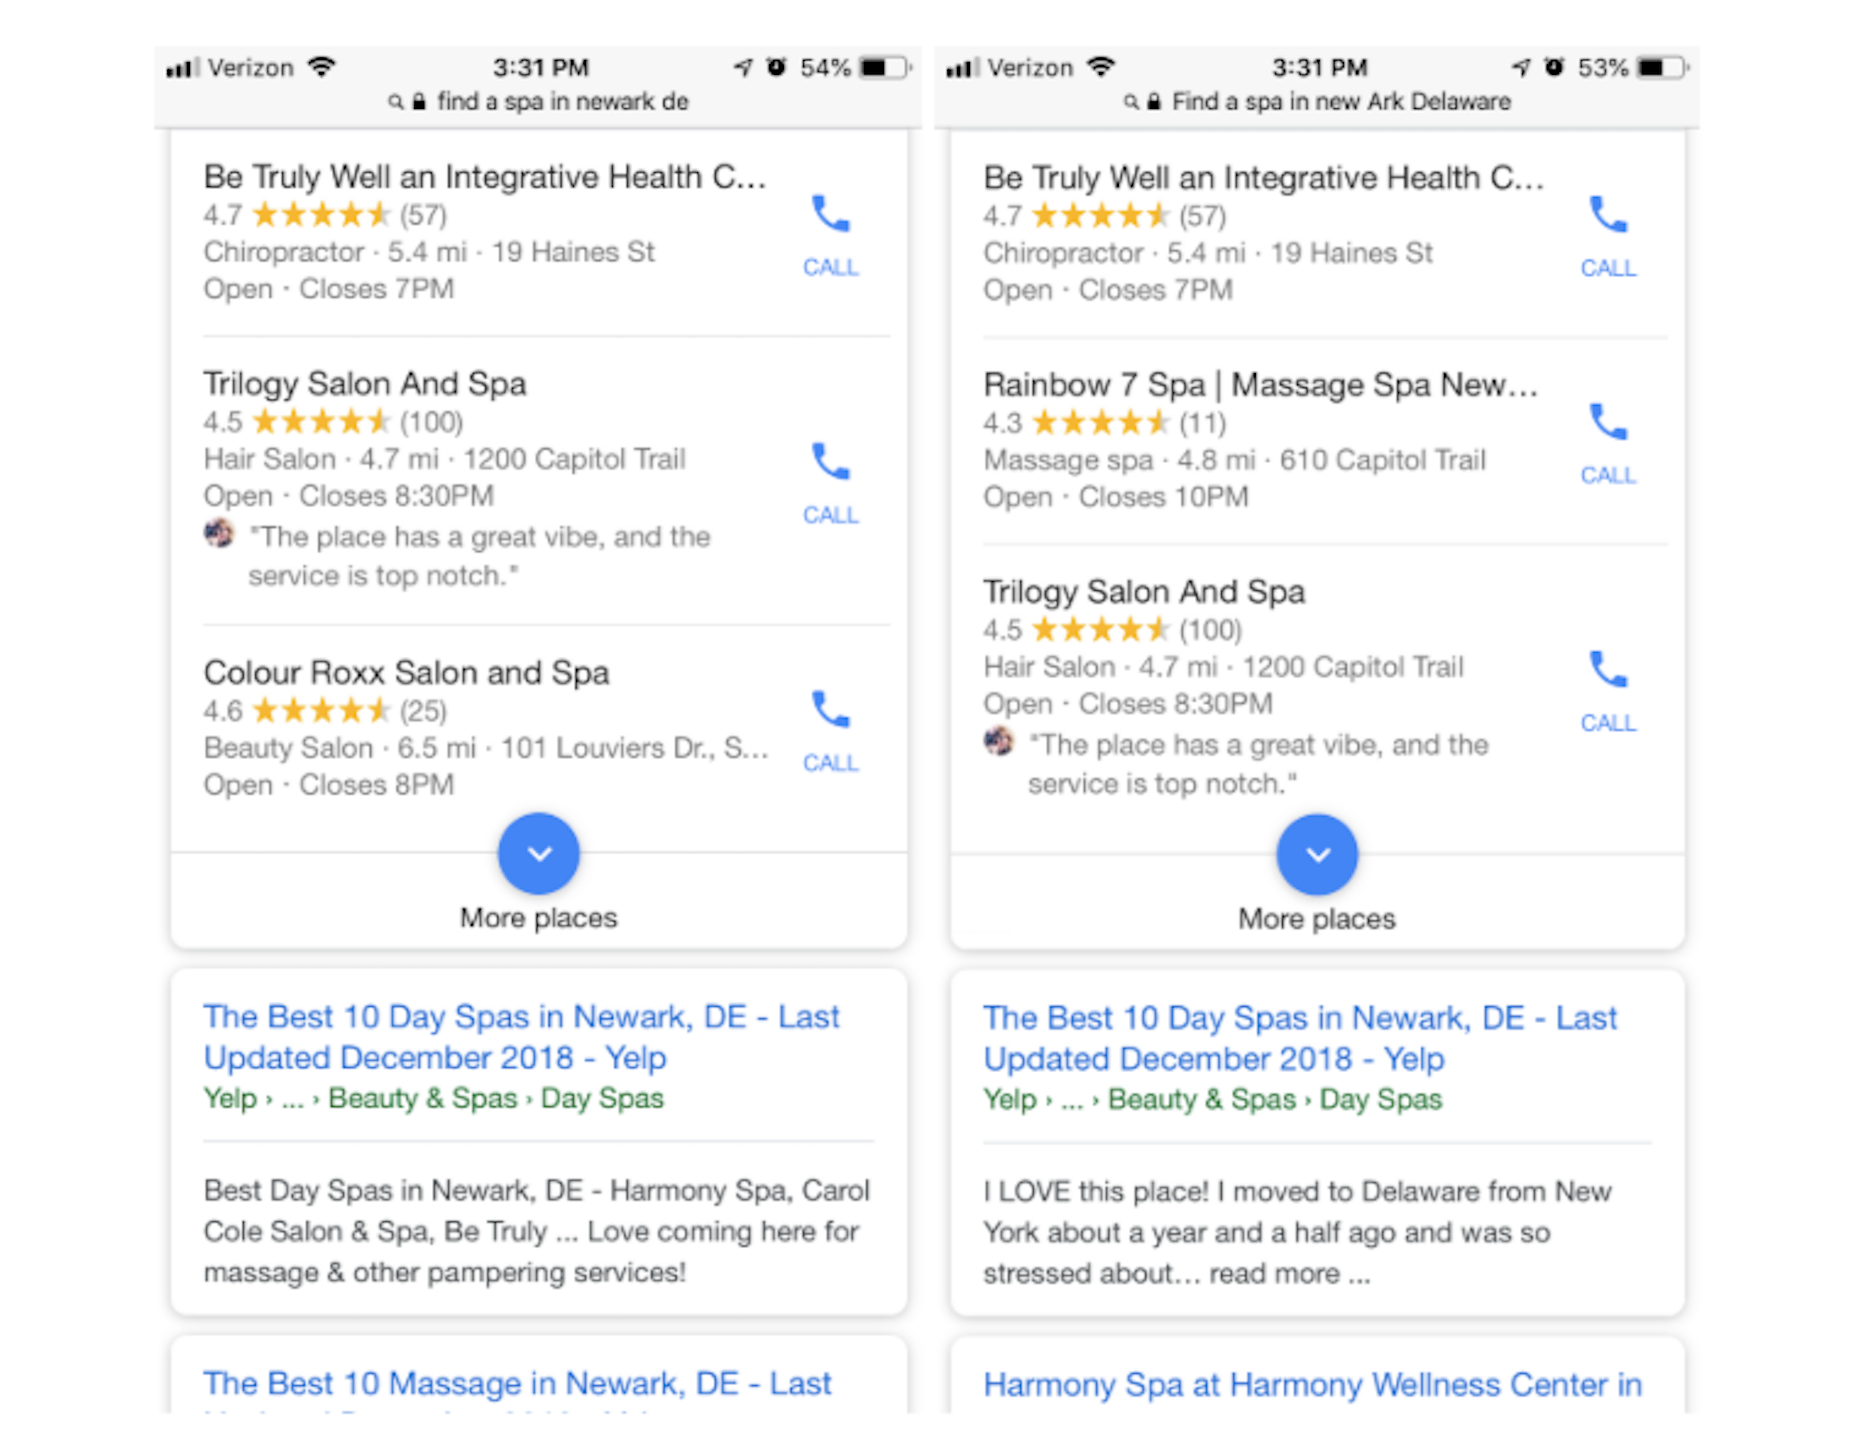
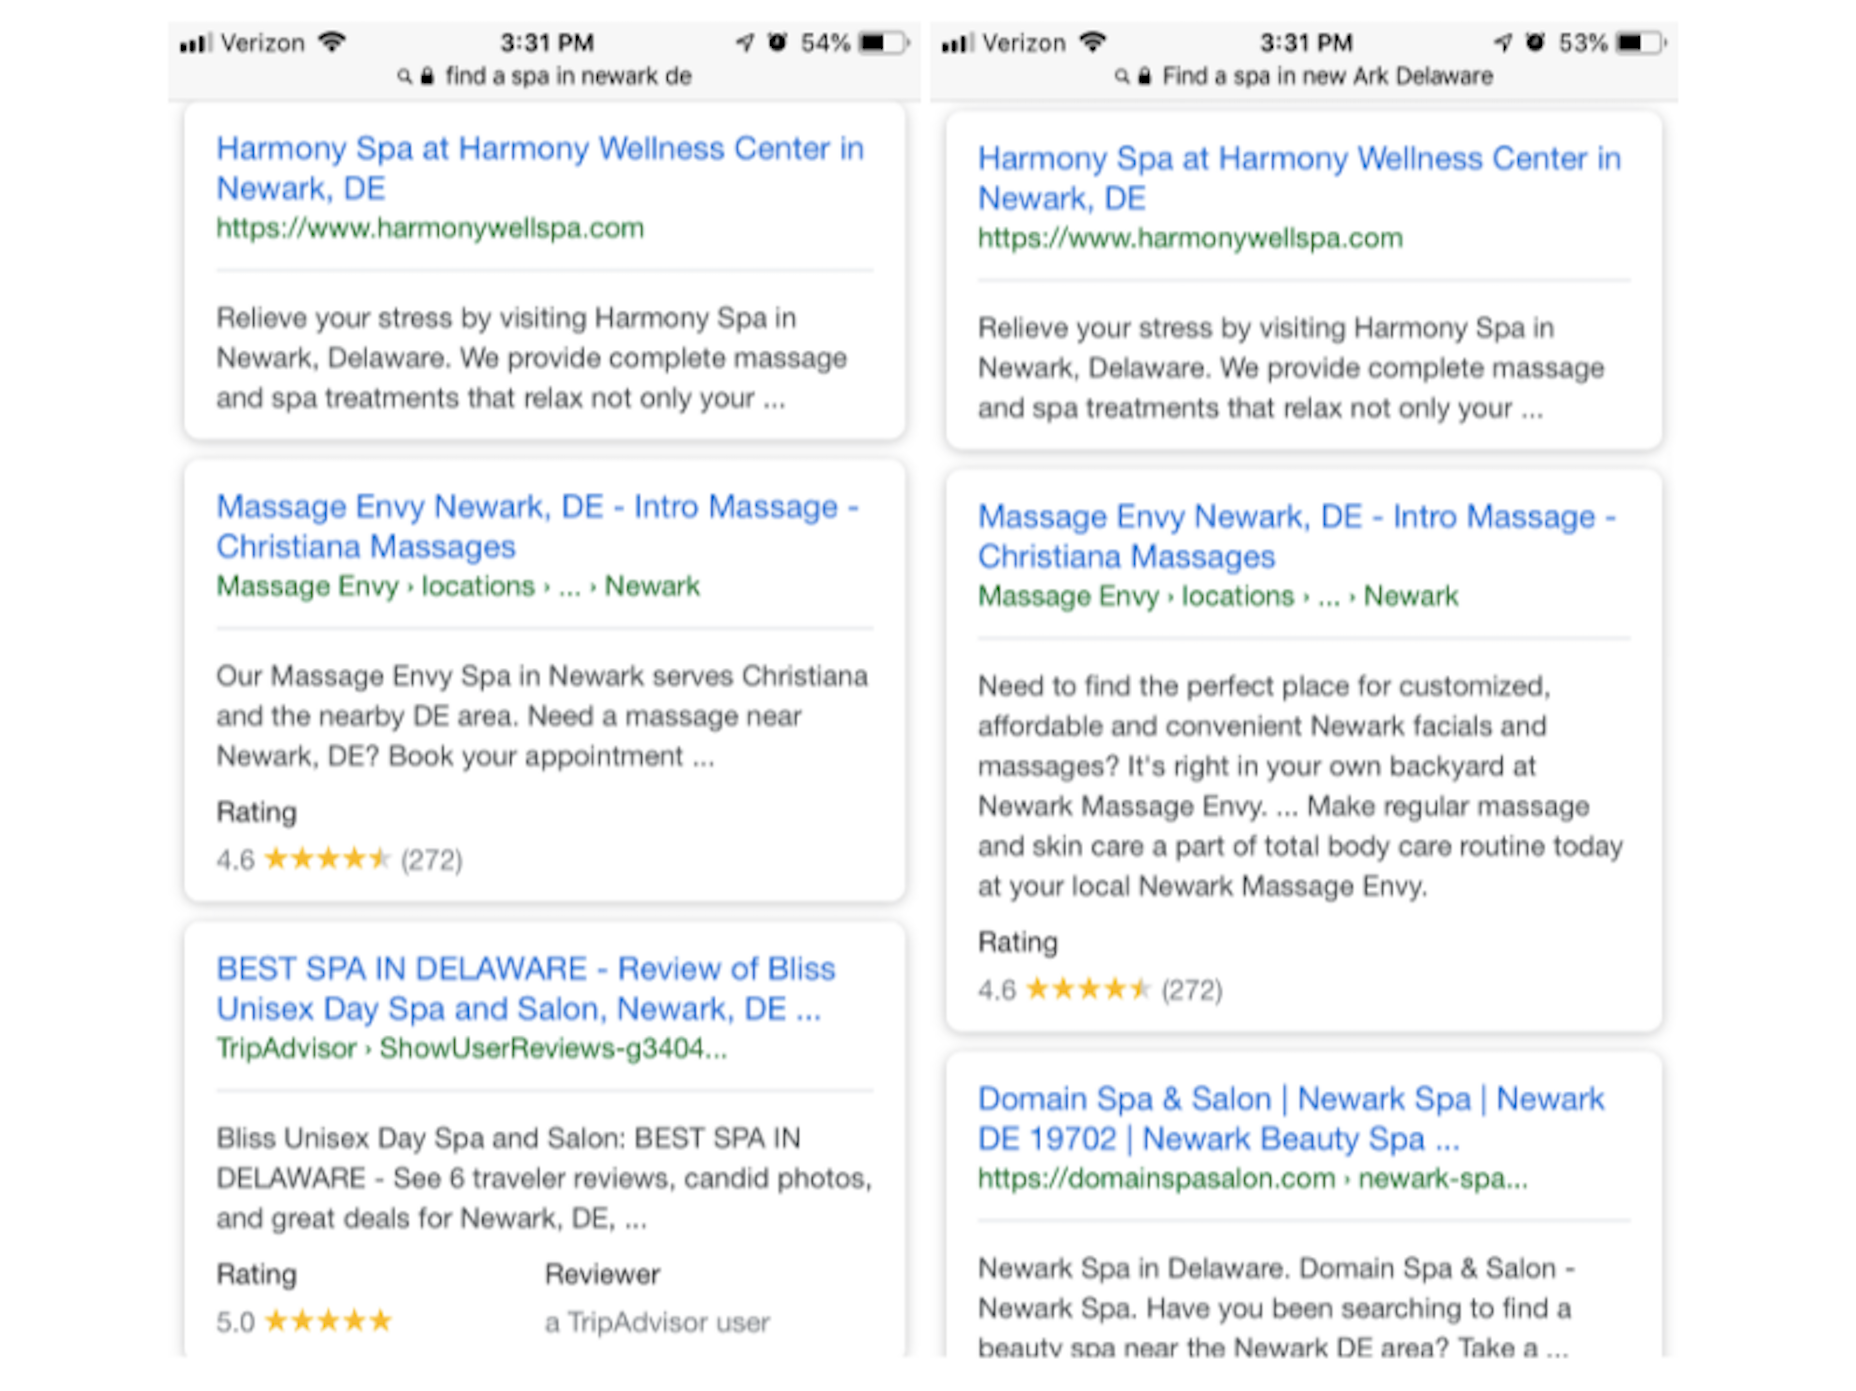
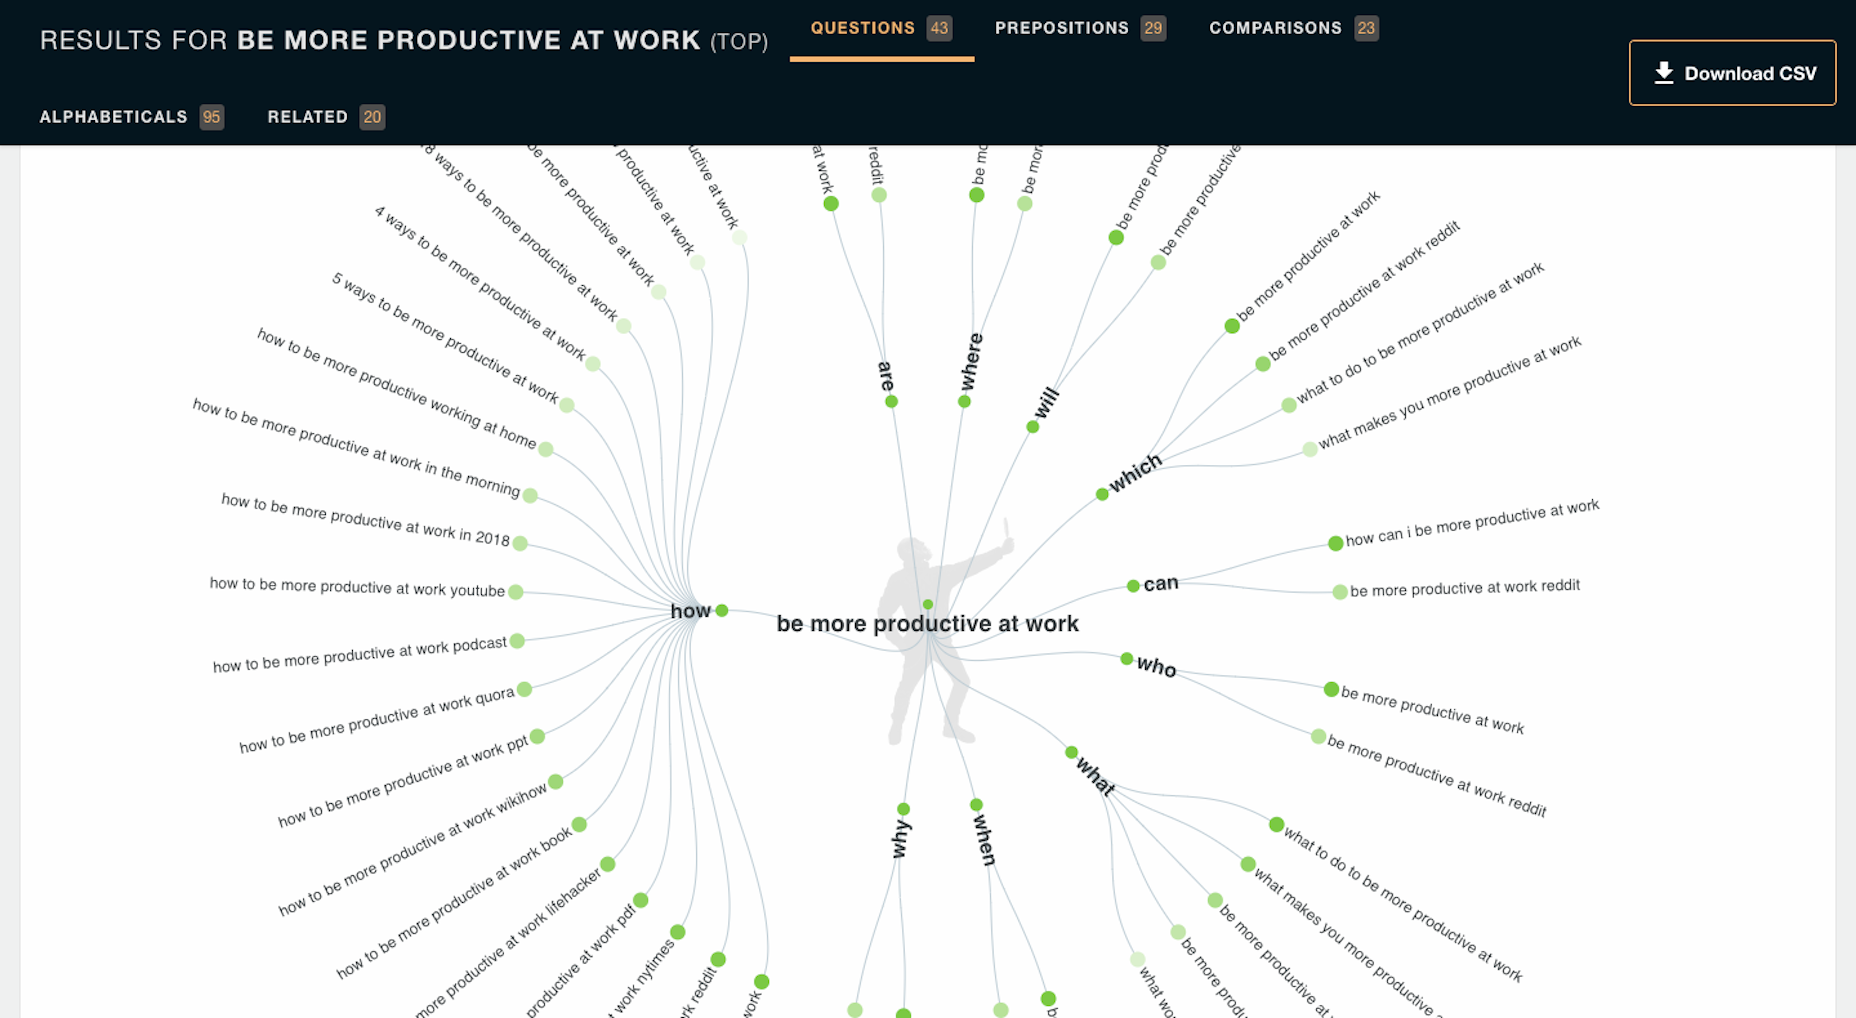
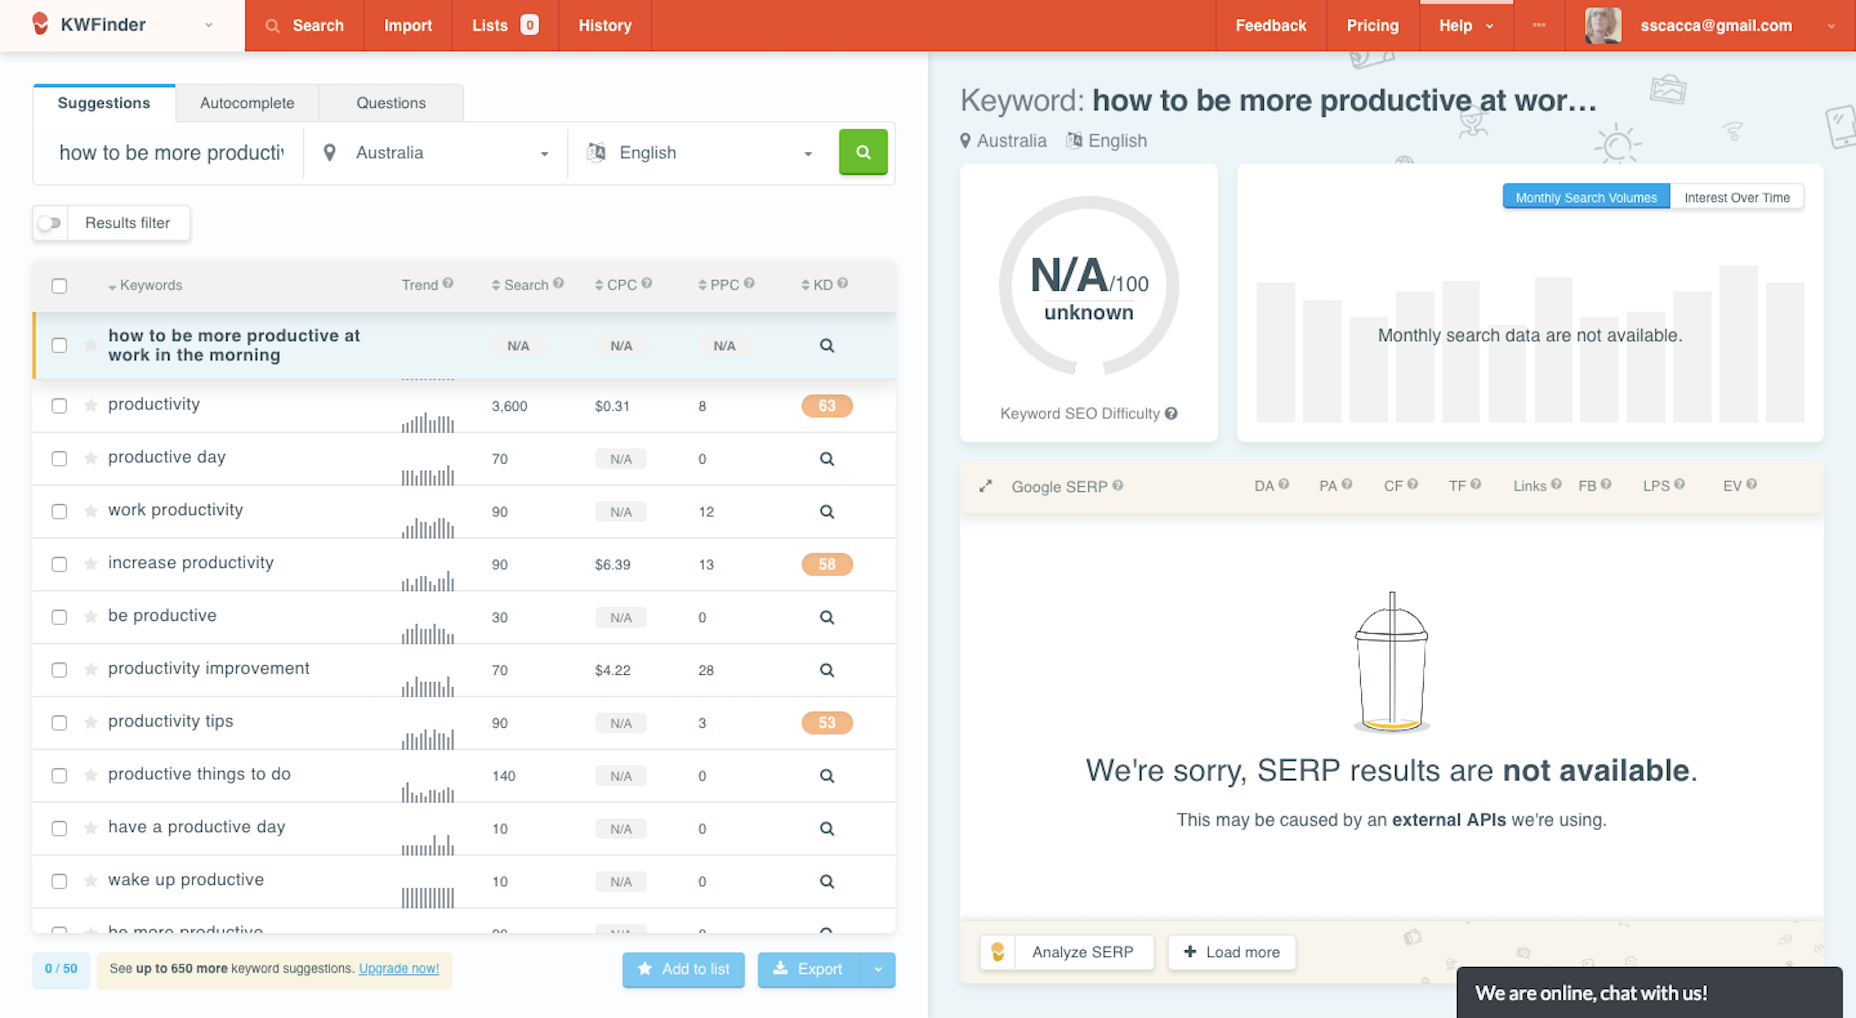
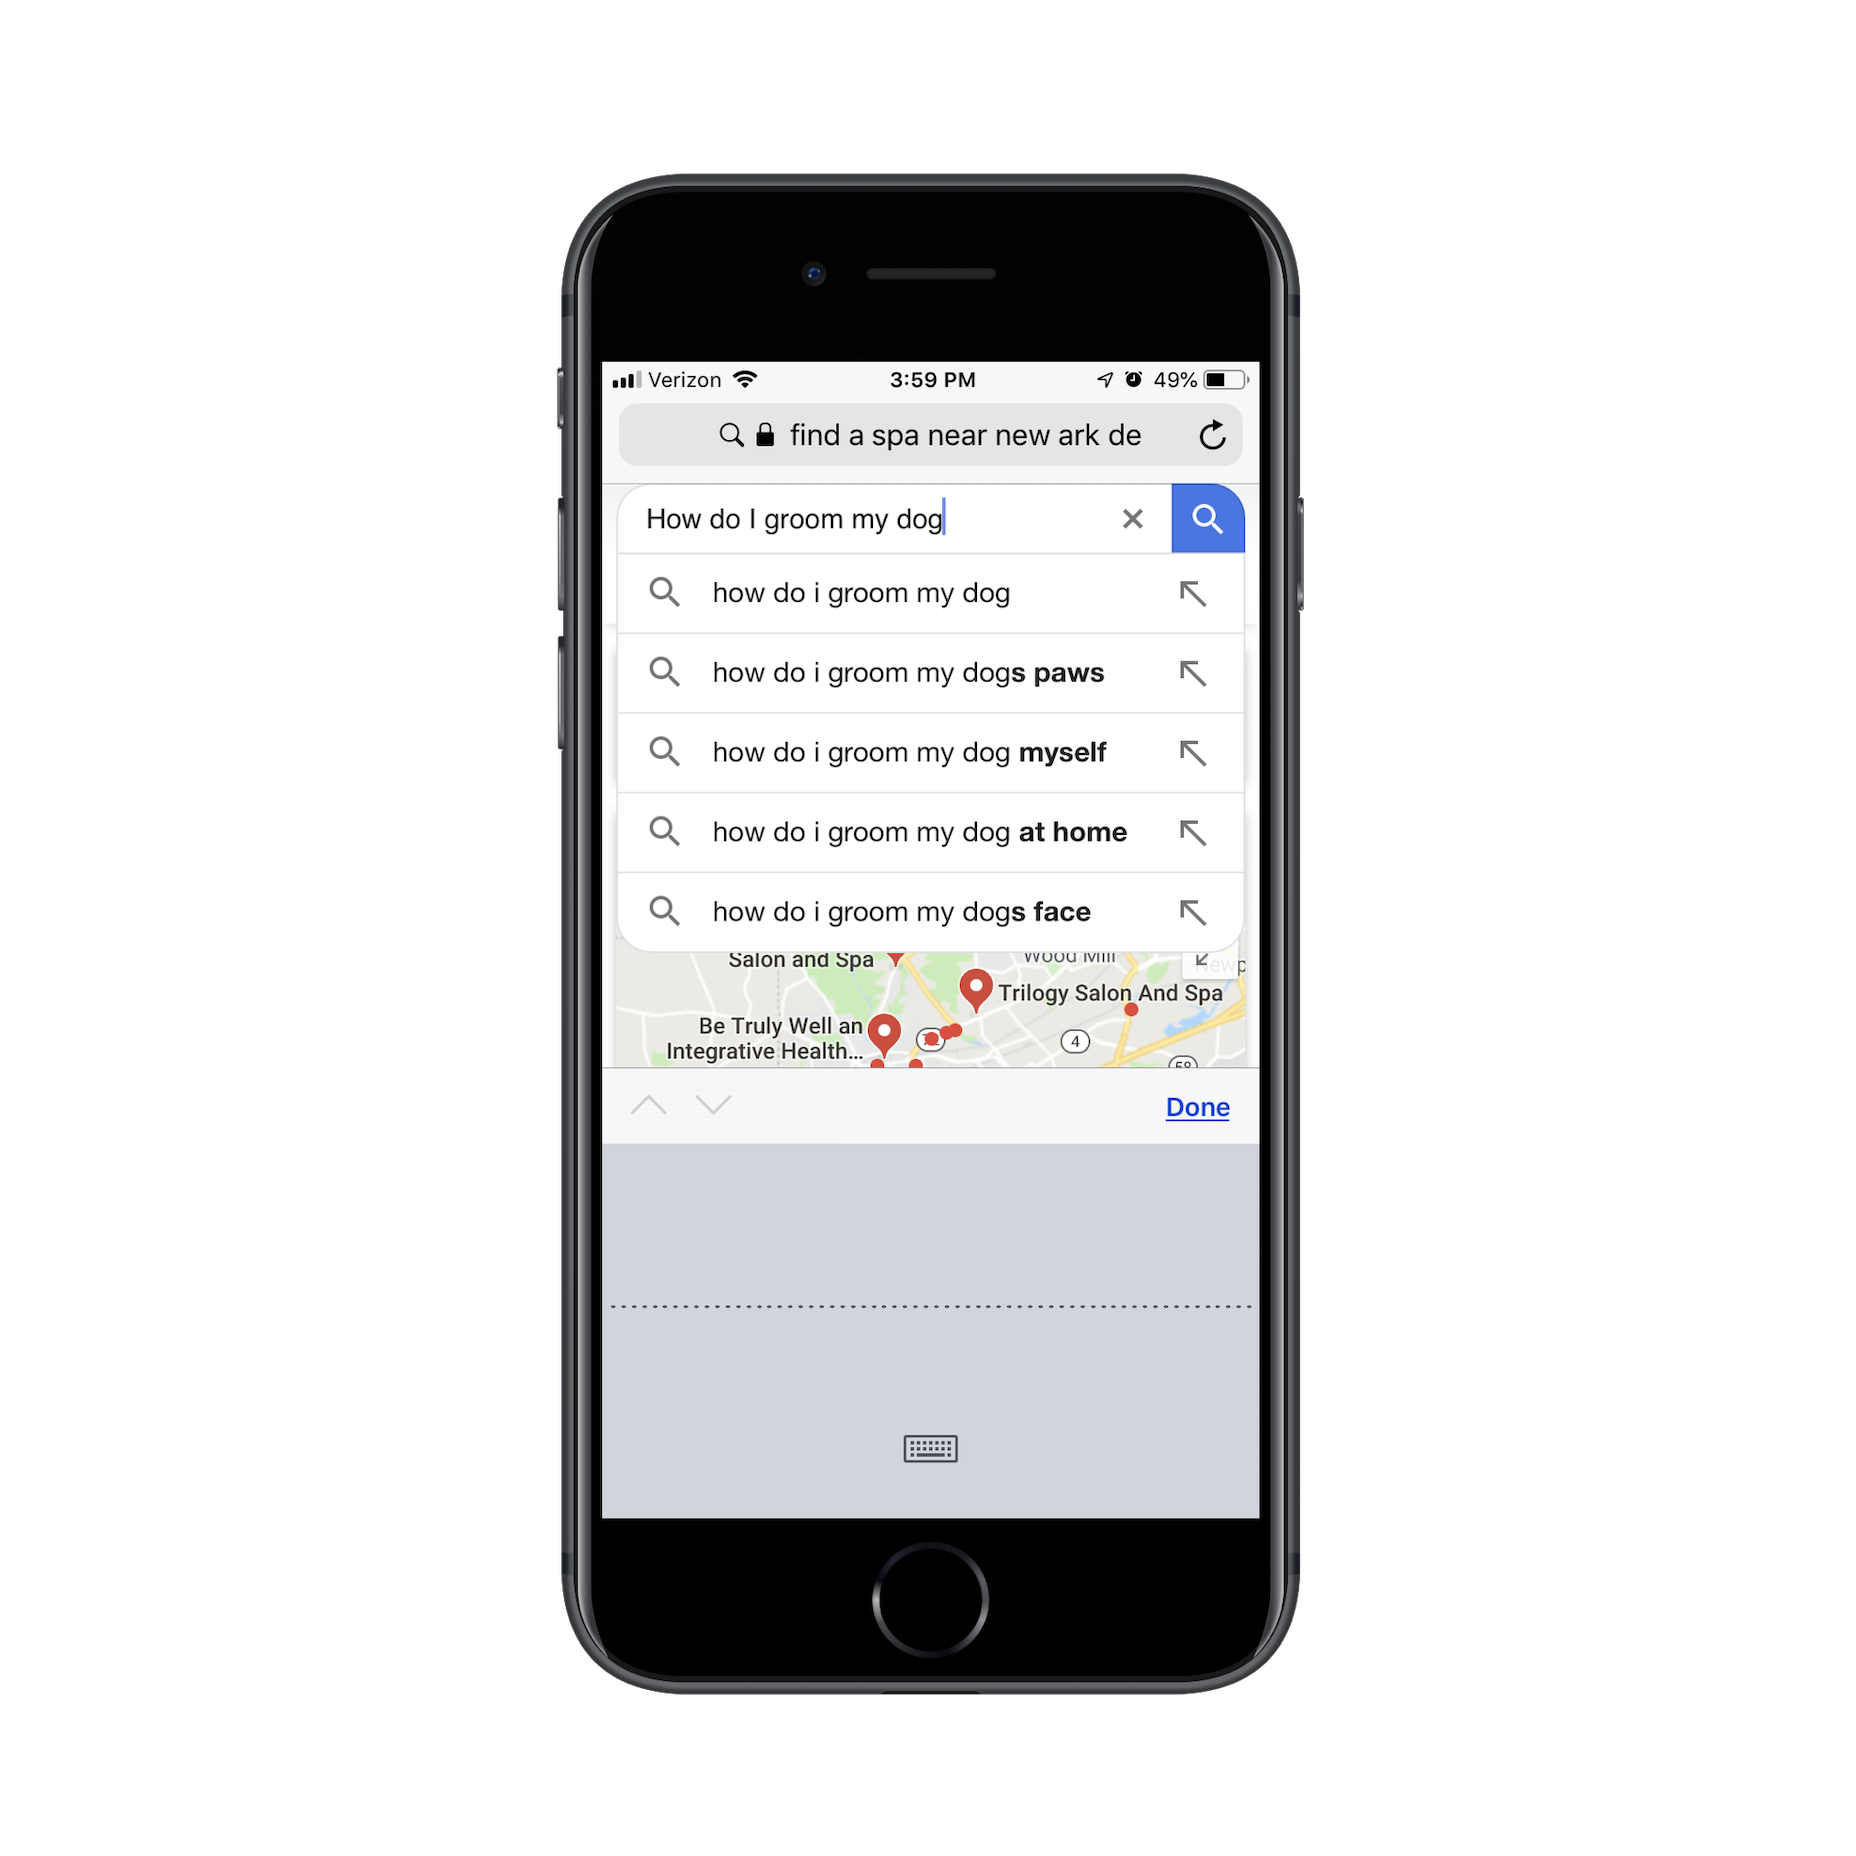
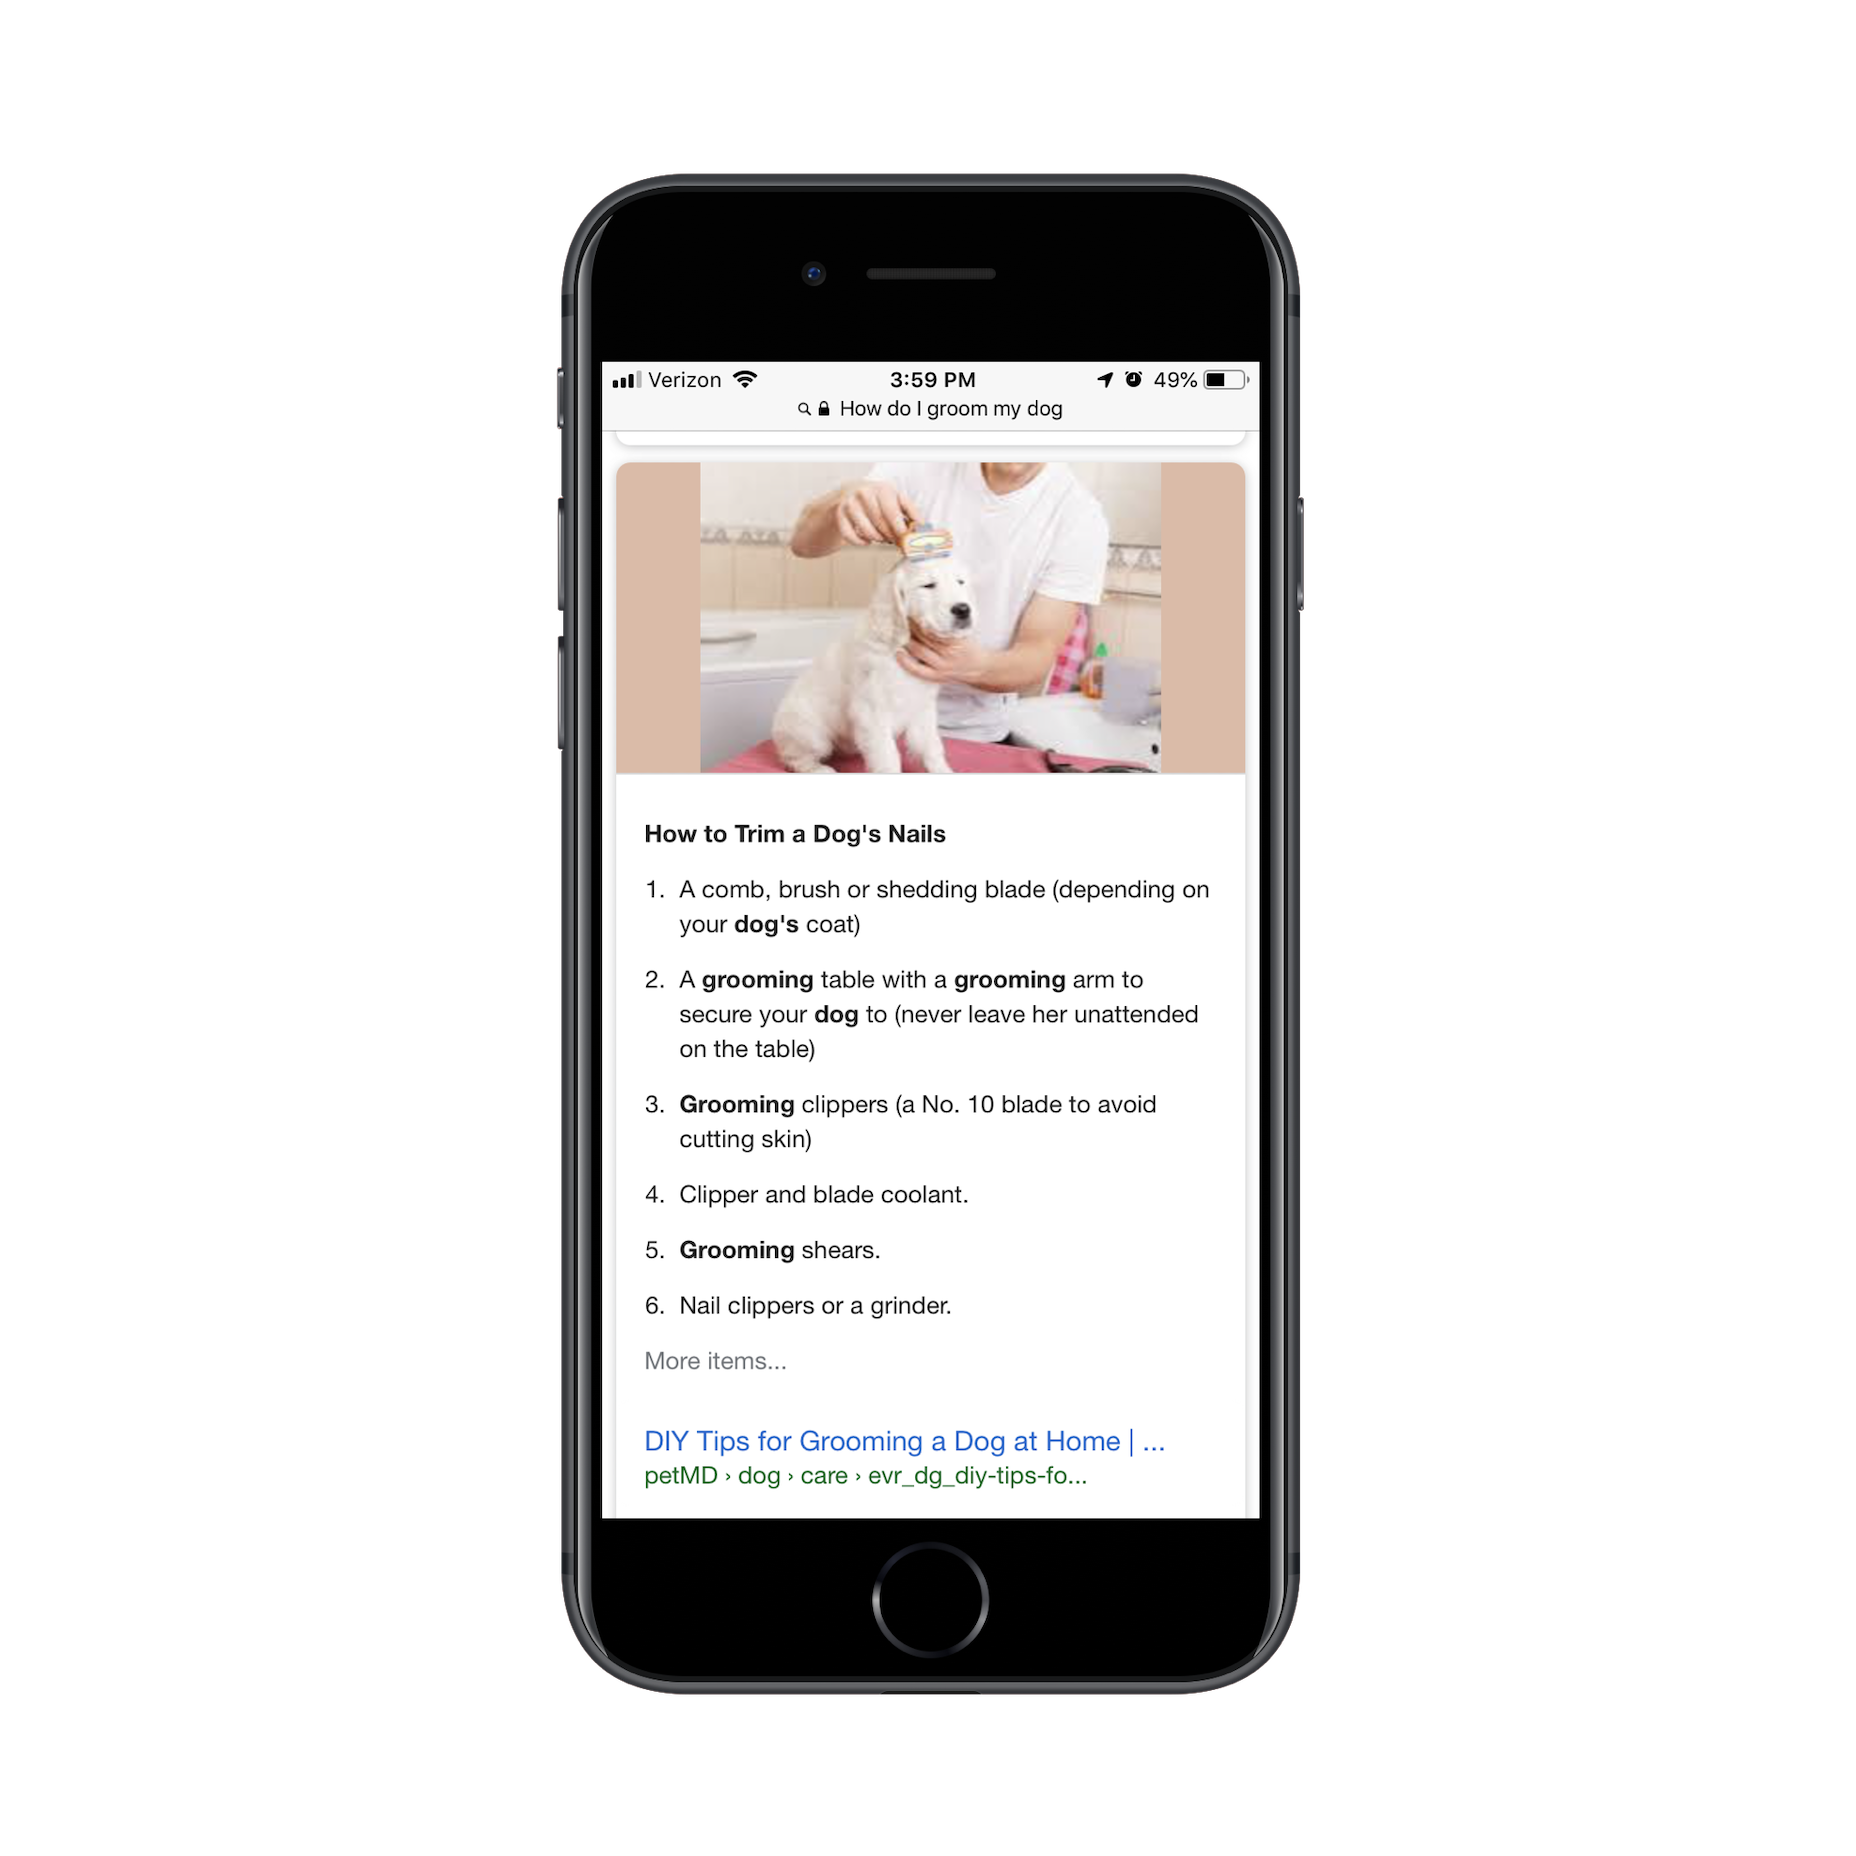


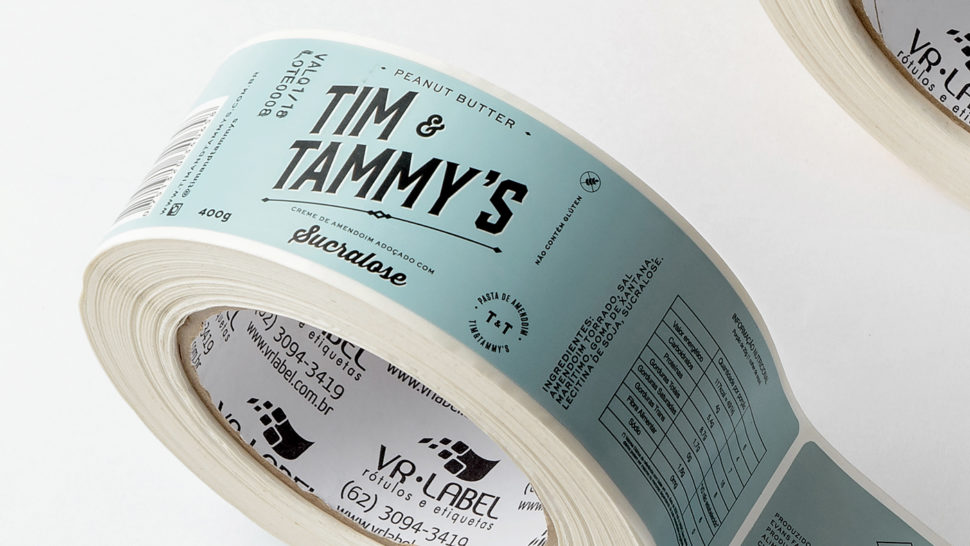

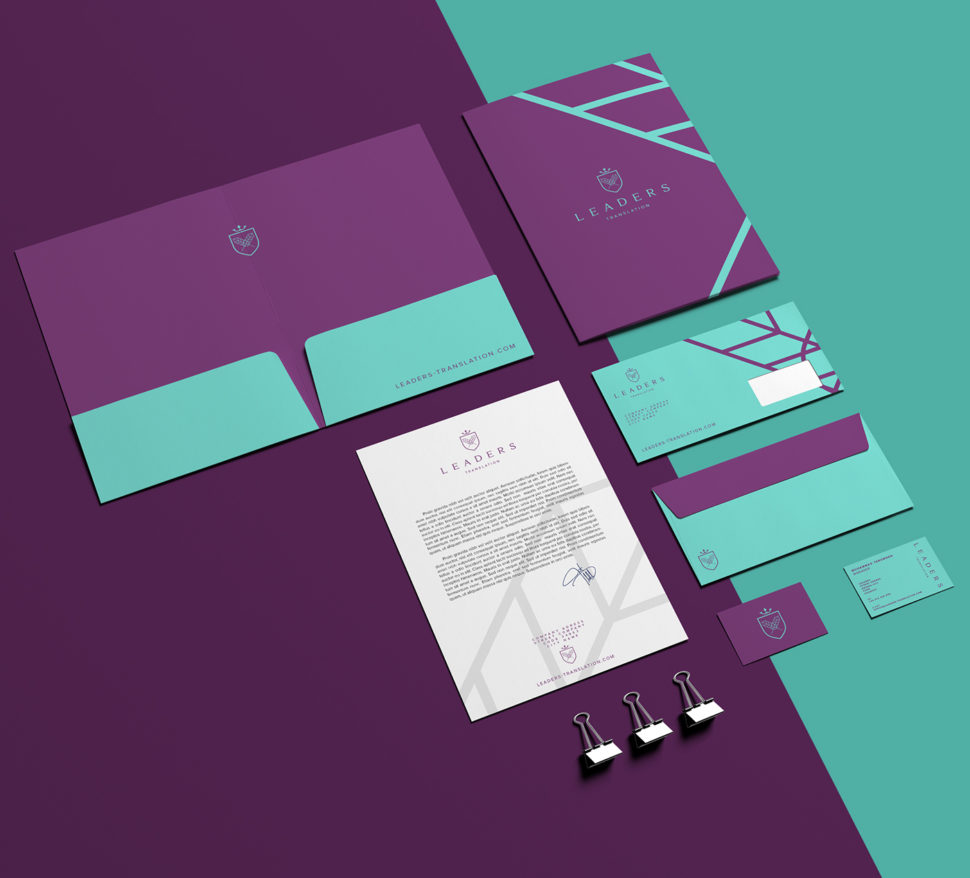


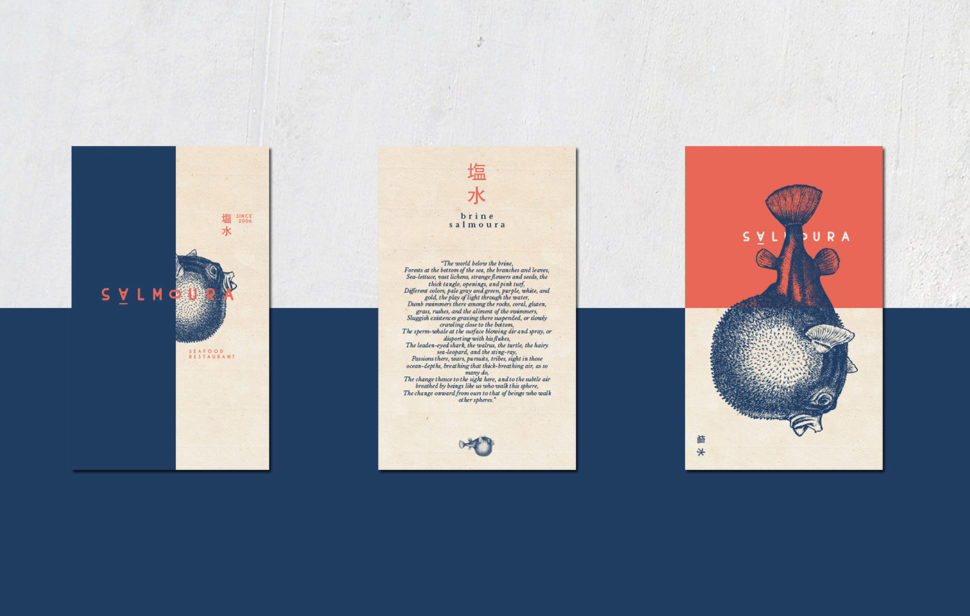

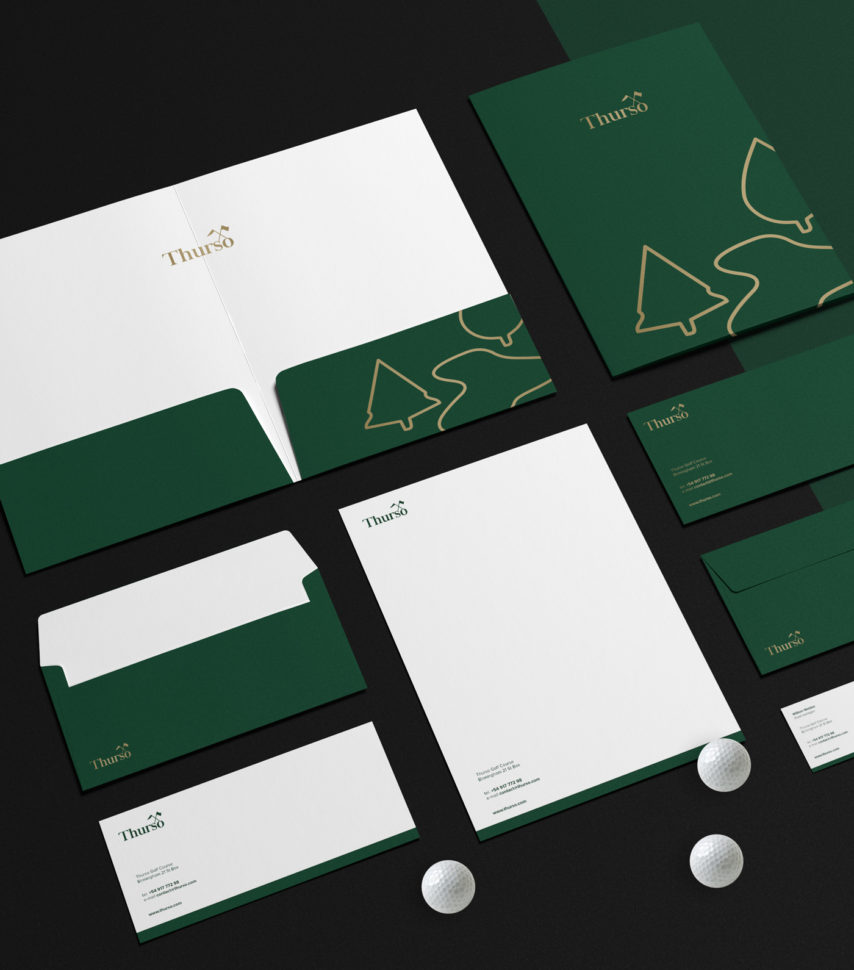


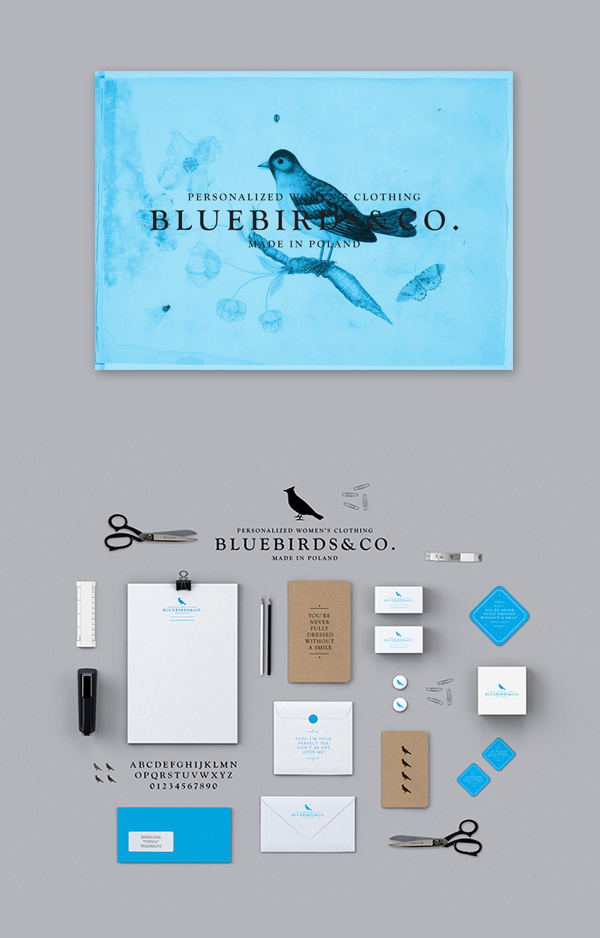


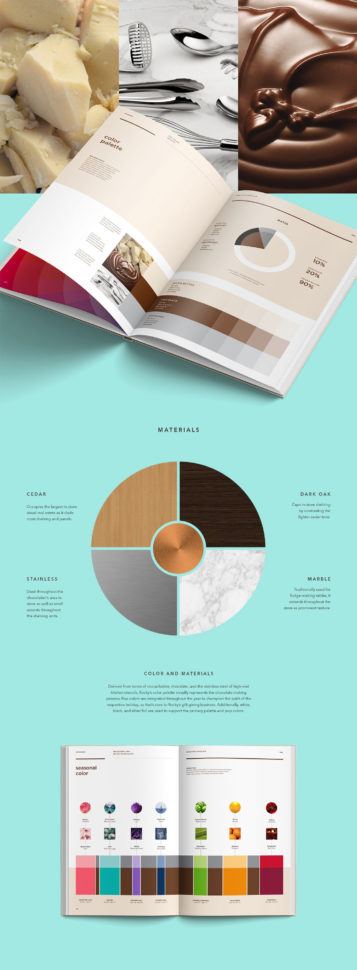


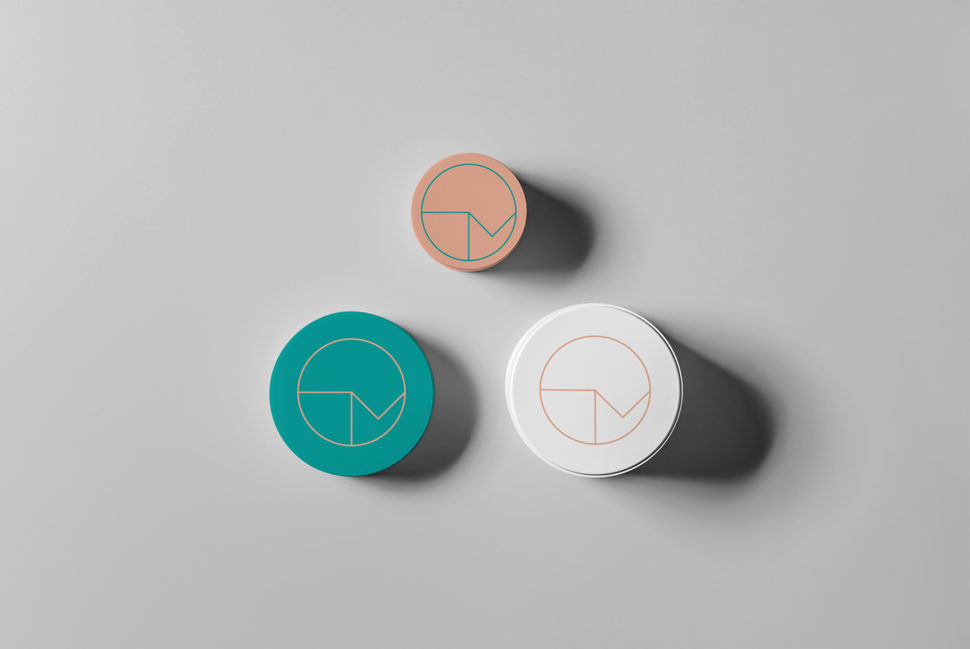


 // Branding by João Francisco Hack