Archive

Archive for February, 2019

15 Critical Website Fixes to Make Before Launching a Mobile App

February 22nd, 2019 No comments

Your target market has gone mobile. Mobile users spend up to 12% of their time browsing on their device, which works out to 87 hours a month or 1,044 hours a year spent on their phone; 90% of that time is spent using mobile apps.

Which is why having a mobile app can be so valuable for your business. No wonder everyone seems to be jumping on the bandwagon. Even 67% of small businesses now have a mobile app.

The problem is, many apps are just awful extensions of already bad websites. While you might feel the urge to dive straight into developing your own and racing it to the market, it’s a huge mistake. Mobile apps are a gateway to your site. So trying to implement them without some critical website optimization can directly impact the amount of time and money it takes to create the app.

Here are 15 website tweaks you should make before considering a mobile app.

Speed Optimization

Speed is critical to the user experience. Which means that if you want your website and your mobile app to provide a great user experience, the first thing you need to do is optimize your site speed.

Here are the tweaks you need to make, to do so:

1. Minify

Minification reduces the size of your website CSS, JavaScript, and HTML content. It works by removing any unnecessary website code, such as:

  • Unnecessary code in your JavaScript;
  • Unused spaces in your CSS;
  • Unnecessary line-breaks in your HTML.

If you use WordPress, there are plenty of plugins available that will take care of this process for you, including Fast Velocity Minify and Autoptimize.

2. Compress

Text compression can also boost speed, especially on text-heavy websites such as blogs. Most Content Delivery Networks support the sending of compressed files so you can set up default compression through a tool such as Gzip.

If you don’t host your own website, you can use Check GZIP Compression to see if compression is already set up. If it’s not, the easiest way to install it is through a plugin such as W3 Total Cache, WP Super Cache or WP Rocket.

3. Maximize Caching

HTTP caching is when a browser stores copies of resources so that they can be re-accessed faster. Using an HTTP cache header, you can define when, how, and how long a response should be cached.

You can configure your server to attach the HTTP Cache-Control header and modify it for how long you want data cached. One way to do this is to add the header directly into your code.

Here is an example of a PHP header with a Cache-Control setting of max-age equal to 84,600 seconds (1 day):

header('Cache-Control: max-age=84600')

By setting a max-age expiration header, you will ensure repeat visitors are not slowed down accessing resources they downloaded before. Aim for caching as many resources for the longest period of time as securely possible. Then provide validation tokens for efficient revalidation of the resources that got updated.

4. Reduce JavaScript Load Time

JavaScript can cause delays, especially if you have large bundles of it. On an average mobile phone, processing these bundles can take 5–10x longer than on a desktop. You can combat this with code splitting.

Code splitting breaks your JavaScript bundles into pieces to deliver them faster and only as users need it. It can be applied at a route level or component level with tools such as React, Parcel, and Webpack.

5. Optimize Images

Visuals are important for user engagement, but the last thing you want is for them to slow down the user experience. Thankfully, there are plenty of tools on the market that will help you compress and optimize your images.

Here are a number of options to choose from:

One-off optimization tools:

Automated optimization:

Hosting and optimization:

6. Format Animated Content

The GIF format is popular for animations, but it was actually never intended as an animation platform. By switching to a more suitable video format, you can greatly reduce file size and speed up page times.

You can use the FFmpeg tool to convert animation GIFs into mp4 files. You can also use the Effective Type API tool to identify slow bandwidths, and automatically convert from delivering your animated images to much smaller JPEGs. While it does remove some of the user experience, it’s better than the site failing to load or operating unreasonably slowly.

7. Reduce Plugins

WordPress has over 54,000 plugins. While it is the largest platform on the market, even competing options still offer plugins in the thousands. There are plugins for practically anything you can dream up these days — ecommerce plugins like BigCommerce for WordPress, email marketing plugins like Mailchimp, and conversion rate optimization plugins like OptinMonster. Many of them add valuable functionality.

The problem is, too many plugins can slow down your site speed. First, make sure you don’t have anything installed that you’re not using. Next, uninstall any plugins for services that you can integrate with your website through other means. Google Analytics is a prime example. There is no reason to use a plugin for this integration when you can do it with an API key.

Finally, if you still have a lot of plugins look for some all-in-one solutions that can replace handfuls of niche ones. For instance, don’t use separate plugins for minification, compression, and caching when there is one solution for all three. However, perform your due diligence as some all-in-one plugins like Jetpack slow down your site more than any others.

How many plugins are too many? Here’s a general rule of thumb:

  • No more than five if you have shared or budget cloud hosting;
  • No more than 20 if you use cloud hosting, VPS hosting, or a dedicated server.

8. Use AMP

Accelerated Mobile Pages (AMP) refers to an open-source web programming language that delivers static content instantly to mobile devices. It’s basically a lean, stripped down version of HTML built specifically for speeding up non-interactive web pages on mobile devices.

Because it’s a stripped down version, you do trade-off some functionality for this rapid speed. Here are two potential drawbacks to be aware of:

  • JavaScript is limited to an off-the-shelf AMP library;
  • Lazy load functionality is enabled (images load as you scroll down to them);
  • Lead generation may be impacted, as AMP often removes opt-in forms.

On the other hand, one of the biggest advantages (other than the improved speed) is that Google’s mobile-first indexing tends to promote AMP pages in search results. There are plenty of plugins to choose from for enabling AMP, including AMP, AMP for WP – Accelerated Mobile Pages, and AMP WP – Google AMP For WordPress.

9. Address Redirects and Broken Links

Redirects and broken links can kill your user experience as well as slow down your site speed.

Redirects

You’ll want to minimize redirects as much as possible, as they impact page speed and even the overall load time of your site. The delay tends to become even more noticeable when users are on mobile devices.

You can use a free tool such as Screaming Frog to check your website for any redirects. Once you’ve found some, remove any that aren’t needed and make changes to any that need to be updated.

If you have a secure site, you can also use HSTS to remove the SSL redirect.

Broken Links

Thankfully, there are also free tools you can use to find and fix broken links across your website. Two examples are:

Once you identify the broken links, you can either update them with the right URL or remove the linkage.

Both of these checks should be a routine part of your website management as redirects and broken links can crop up again over time.

10. Continually Test

We’ve covered nine significant methods for optimizing your page speed before introducing a mobile app. While this should significantly increase your site performance, you could still have more opportunities for improvement.

There are hundreds of tools for testing your website page speed and mobile readiness, but the best place to start is with Google’s PageSpeed Insights tool.

It will give you a current page speed score for both your desktop and mobile versions of your site and make specific suggestions on how you can improve.

The next step is to use Test My Site to further analyze mobile page speed and friendliness.

All you need to do is enter your website URL, and it will scan your site and evaluate. You can also get a free report containing optimization advice in exchange for submitting your email.

Site speed also provides huge SEO benefits. In addition to writing high-quality, long-form content and getting backlinks, site speed has a major impact on increasing website traffic.

In early 2019, I conducted a personal case study where I wrote as many guest posts as I could in 15 days. In that timeframe, I received 247 backlinks and a 372% increase in organic traffic.

However, this pales in comparison to the impact site speed has had on my mobile traffic. By boosting my mobile speed from 33 to 75+ over the same time period, I saw my mobile rankings increase 1,775% according to Google Analytics data.

UI Optimization

Speed may be at the top of the UX hierarchy, but it’s not the only factor. There are other components to consider, such as:

  1. How easy it is to find what you’re looking for;
  2. How well the site fits your mobile screen;
  3. How simple it is to use;
  4. How attractive it looks.

You can use the following site tweaks to streamline and maximize the user interface.

11. Simplify Your Structure

Your website needs to be intuitive and easy for users to navigate, especially when they’re trying to do so on the small screen of a mobile device.

Make sure your hierarchies are streamlined and that you have no more than one nested content level. Your ideal site structure should look like this:

  1. Homepage
  2. Categories (or sections)
  3. Sub categories (only for larger sites)
  4. Individual pages and posts

Focus on what your users are typically looking for and map out the common paths they will take. Then you can arrange categories in a hierarchy that will make the most sense to your audience.

You should also use knowledge base software to create a central resource or knowledge base for any users seeking answers to common questions.

This is about the simplest design tweak you can do that makes a lasting impact for both desktop and mobile usage.

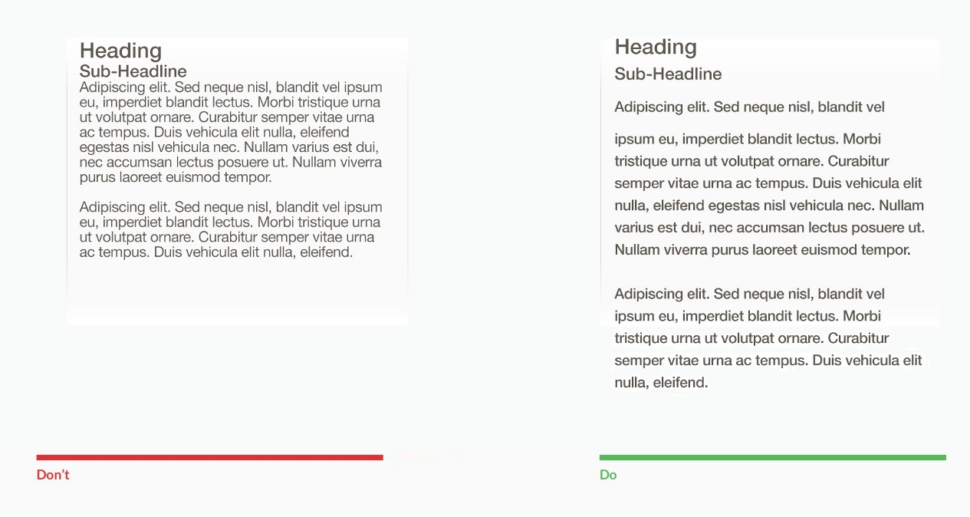
12. Focus on Content Design

Designing your content around mobile can be a bit trickier, but it’s crucial for a successful mobile experience. A bad website design can kill your content on your app.

The bottom line is that you need your content to shine through with as few distractions as possible. To do this, you may need to remove elements such as tables, graphs, and other clunky elements that don’t translate well to the small screen.

You also need to strip down features such as headers, footers, menus, and sidebars so that they can be hidden or collapsed on smaller screens. Disable any hover-effects for your content as many mobile devices don’t have this functionality.

You don’t want to use too much text either. You can cut down on text by using tools such as Grammarly’s goals and audiences to help you create more concise copy that’s on point. Or, even better, focus on replacing text with more video content to maximize your mobile experience.

13. Reduce Banners and Sliders

Sliders have been popular for a while, but people typically add 5-6 high-quality images to a slider, which increases the overall load time of your website. Plus, studies show sliders annoy users and reduce visibility, especially on mobile.

Banners can result in similar problems, especially if they have any embedded text within the image. If you currently have any banners with text you should render the text with HTML & CSS instead of embedding it into the image. This will make it more flexible and easier to see on a smaller screen.

14. Optimize Forms and Touch Points

If your website has forms on it, pay attention to the field types, lengths, and labels. Everything should be clearly visible on any device. Enable functionality so that if a user taps on a field to enter information, the view zooms-in to the correct spot.

Check to see if you have field types that require a different keypad or touchscreen, such as a ZIP code, phone number, or electronic signature. If so, you should set the field to trigger the correct keyboard when tapped on, so users don’t have to switch manually.

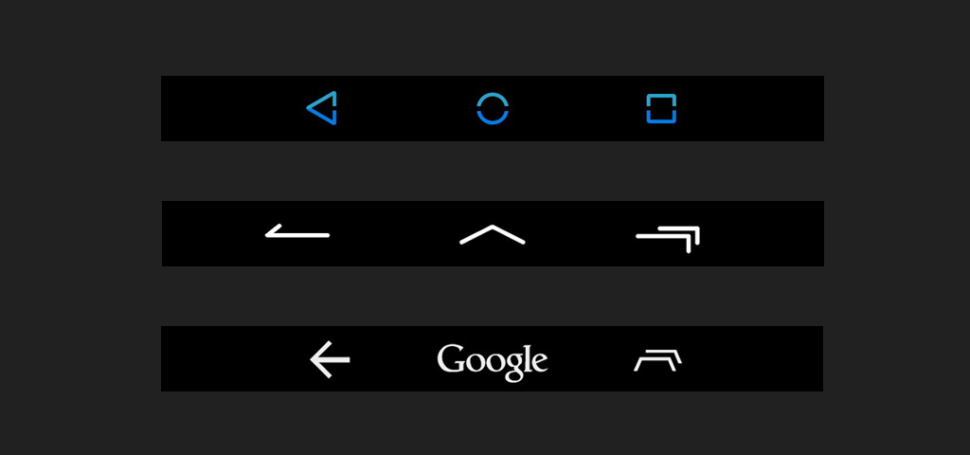
Make sure all touch points and buttons will be visible and large enough to easily tap with a finger on a small screen. The standard recommendation is that they should be roughly 48 x 48 dp in size. Place text inside of the buttons rather than above or below it for easy identification.

15. Streamline Checkout

If you run an ecommerce website, this final tweak is for you.

About half of all ecommerce traffic comes from mobile devices, but when it comes to buying more people still do it on their desktops. This is likely because the entire flow of ordering, checking out, and paying is not properly optimized for mobile devices.

To identify where your process needs improvement, go through all of the steps across multiple devices and screen sizes and identify any pain points. The issue may be something we’ve already covered such as difficult form navigation or too small touch points.

However, even with these optimized, if you require a lot of data, it can still be painful to enter it all from a mobile device.

You can remedy this in one of the following ways:

  1. Allow users to create profiles that will save and pre-populate their checkout information including shipping address and credit card number
  2. Integrate with other payment gateways, such as PayPal that won’t require them to re-type their information.

Conclusion

Phone screens are getting larger, and tablets are getting more sophisticated, so it’s no wonder more of your audience is logging on and interacting through a mobile device.

A mobile app can be a great way to further engage with your users. But only if you optimize your website first to ensure a smooth user experience.

Featured image via Unsplash

Add Realistic Chalk and Sketch Lettering Effects with Sketch’it – only $5!

Source

Categories: Designing, Others Tags:

White space and action buttons – 3 UX rules to perfect design

February 22nd, 2019 No comments
White space

Studies have shown that the first impression a user gets when visiting a site is strictly influenced by the design of the page they are reaching. Design is a very subjective element, just like user preferences. Using these elements, some UX rules have been created. If we abide by these rules, we can pretty much expect a massive change in the way users view and use our sites.

Each site has a well-defined purpose. It usually involves sales. In order to sell, a site must guide the user, and urge them to act. This is done by action buttons. The more convincing they are, the easier it will be to attract the user and get them to act. But the attractiveness of the buttons is not the only factor at play here.

Here are some UX rules that we can apply to make sure our site is successful.

How do we design attractive web buttons?

The most important thing in designing an action button is the color of the button. The negative space (the space around the button) is also important. There must be a strong contrast between the two so that the action button stands out.

White space

Thus, the Contrast Rule is paramount in this case.

The most contrasting color schemes are:

  • yellow on black/black on yellow
  • blue on white
  • red on white

Using these color schemes between the button and the negative space can ensure the success of that button. Thus, it can help the user interact with the button.

Negative space is extremely important. Another rule that applies in this step is the Rule of the Laws of Gestalt. If a form is extremely close to another form, they will be perceived as a unity. Thus, if the action button is not effectively isolated in the negative space, it can be perceived as a unit of another section. In this case, the button will lose its relevance and will certainly affect the conversion in a negative way.

White space of web design is extremely important. White space items should include:

  • margins, padding, gutters
  • white spaces between sections
  • line spacing and background – negative space

UX Rules: Why should the negative space always be white?

White space

White is a non-color. So every color placed above the white will contrast. It’s twice as easy to identify an action button placed on white than any other color. The white spaces of the sites should not be seen as simply background but as a negative element. They should be used strategically to isolate CTA buttons and clearly delimit sections of the site.

White will help the site look tidier but, most importantly, will help the visitor understand the purpose of each section.

According to specialists, pages with a lot of white space helped up to 20% more users to read content and interact with the site. Why do you think most online stores have a white background? Because administrators want to highlight products, purchase sections, and action buttons. And it really works.

White space

How important is content for action buttons?

The content is EVERYTHING in this case. You have 2 to 3 words to push the user to click on the button. Here’s what you need to consider: Less is More. This also applies to design. Less color more clarity. But as far as content is concerned, it is the first rule that we should take into account.

The fewer words the stronger and more convincing the button will be. It always starts with a verb and keeps an imperative tone. These are the buttons that convert, according to the specialists.

There you have it

Just to recap, the 3 very important rules for creating and designing the perfect CTA button are:

  • Use contrast
  • Optimize your white space
  • Less is more

The idea is to get people to see the button, distinguish it from everything else on the page, and convince them to click it. In most cases, you only have a few seconds to show them why it’s worth it, so make it count.

Read More at White space and action buttons – 3 UX rules to perfect design

Categories: Designing, Others Tags:

9 Scary Stories to Tell Around the Camp Fire

February 22nd, 2019 No comments
scary stories to tell in the dark Summer Camps

Remember the night at camp when you couldn’t sleep because of that impish little boy who told you the scariest story you’d ever heard?

I do.

Looking back at those scary moments, now I see that they turned into very pleasant memories?—?not to mention that I am still good friends with that boy.

People who have been to a summer camp will automatically remember, how haunting those stories can become around the campfire. The scary storytelling became a sine qua non for most camps all around the world.

We don’t notice how big of a part it covers in our memory lane but scary stories are actually hard to forget.

I have put together some of my favorite scary stories for you to add to your arsenal for your next summer camp. But don’t tell them all in one night! It might be too much for your fellow campers to handle 🙂

P.S. They are audiobooks to get you in the mood, my advice would be to listen to them after dark to get the full effect!

The Thing | Alvin Schwartz

Harold | Alvin Schwartz

The Big Toe | Anonymous

A Christmas Horror Story // Something Scary | Snarled

The Legend of Rawhead and Bloody Bones // Something Scary | Snarled

The Babysitter | Alvin Schwartz

“Bedtime” | Campfire Stories

“The Smiling Man” | Campfire Stories

“The Forgotten Toy” | Truly Haunting Stories

I don’t know if any of these have actually happened but let’s convince ourselves that they didn’t 😉

Ooh summer camps … With their scary stories, s’mores, nature, friendships, and first kisses… they are truly something to remember.

To keep the summer camp culture alive without all the hassle; nowadays organizing and collecting data from the attendees are extremely easy too.

Just check out JotForm’s summer camp registration forms and see how to fast forward all the drudgery work with the help of JotForm’s many form templates and skip to the good bit with the scary stories and campfires.

Share your favorite scary stories in the comments below!

Photo by Joris Voeten on Unsplash

Categories: Others Tags:

6 Efficient Tips to Protect Your Website From Cyberattacks

February 22nd, 2019 No comments
protect your website from getting hacked

Reports of cyberattacks have surged in the past few years that has affected many businesses and individuals.

Recently, the intensity of these attacks have grown by many folds, and nobody can predict the next attack. There are many website owners, who think that their site has nothing that could be worth hacking for, but even then many websites are hacked and compromised almost every day. You might be unaware of the fact that most of the websites hacked are not to steal their data.

Yes! You read it right. In fact, most of the websites are hacked to use your website and its server to send spams or set up a temporary server. Hackers can get into your network to reach your server and then access sensitive information that might be stored in your server. Also, you can be hit by ransomware, where you might need to pay a certain amount to the hackers to get access back to your website or server.

Due to this increased risk of cyberattacks, it is important for the website owners to ensure that their website is not hacked by the attackers. There are a plethora of ways in which your website can be hacked, like through automated scripts, SQL injection, malware infestations, XSS attacks, and various other ways. Owing to these various ways of hacking into a website, you might think, how to keep your website away from the attacks.

Well, here are some tips that can help you in keeping your website safe from cyberattacks:

Stay up to date

The first and the most basic thing you need to ensure is that your website and server operating system is up to date. You might think that it is a no brainer, but the fact is, most of the website owner tend to neglect that their website and its applications are needed to be updated. Today, the hackers are constantly evolving and adapting new methodologies that allow them to find loopholes in the website or the network. This is where updates plug the loopholes to ensure improved security.

If you are using off-the-shelf software, you need to make sure that the software is updated as soon as an update is released. However, if you are running your website on a custom built platform, you can ask the developer for updates with latest patches to fix loopholes. These timely updates ensure that your website stays protected from most of the attacks.

Be aware of any SQL injection

SQL injections are probably the easiest method that the hackers use to hack into any website. Here, the hacker uses a URL parameter or web form to access your database and even manipulate it. This is why you need to be aware of the risks that SQL injection could cause to your website. The best way of keeping your website away from SQL injection is by using parameterized queries, which can be found in most web languages and is easy to implement.

Use Web Application Firewalls (WAF)

Web Application firewalls or WAF is probably one of the best security tools for your website. Basically, these are plugins or extensions that are available very easily on the internet. The best part about these applications is, they are available at very reasonable prices and can get the job done efficiently.

A WAF’s job is to intercept and read all the data that is transmitted to and from your website. This allows the application to stop the attacks before they can reach your website. Also, the application stops spam and malware that might affect your website. Since most of the WAFs are on the cloud, you get improved security for your website with easy maintenance as well.

Protect your website from XSS attacks

Cross-site scripting attacks or XSS attacks inject malicious JavaScript in your webpages. These malicious JavaScripts then run on your browser and then steal your information and send it back to the hacker. They steal your cookies, cache, bookmarks, saved passwords, and even browsing history, which is frightening in itself.

This is why you need to protect your website from these attacks. This can be done by installing firewalls and other applications that can protect your website from injections of active JavaScript in the pages.

Validation on both fronts

Another way to keep your website safe from attack is to validate data both from the server and the browser. This provides your website with an extra layer of protection. The browser can effectively find simple mistakes, while the server can check and find malicious codes, scripts, and applications that might have been injected in your website. A double validation process will also help in blocking the injection of malicious scripts through form fields that accept data.

To stop the hackers be one

The best way of ensuring that your website is safe from the hackers is by becoming a hacker yourself or hiring one. Confused! Well, you read it right. Ethical hackers are the people who use the same techniques to hack a website as other hackers do, but only to ensure that you find the loopholes and fix them to avert any attack on it.

Ethical hackers are the good hackers who save your website and network from other attacks that are intended to harm you. The best way to learn ethical hacking is to choose a certification training course and attain certification in ethical hacking.

Today, you can find various online certification training organizations providing training on various ethical hacking courses, like the CEH. All you need to do is enroll yourself, learn how ethical hacking works and then execute everything that you learned to protect your website from attacks.

Categories: Others Tags:

Blobs!

February 21st, 2019 No comments

I was recently a guest editor for an issue of Bizarro Devs. It’s a great newsletter! Go sign up! I put in a bunch of links around blobs. Like those weird squishy random shapes that are so “in” right now. Here are those links as well. I’m always a fan of publishing stuff I write 😉

Blobs! Blobs are in! Blobs are — ahem — a bit bizarre. I’ll bask in a design like this annual report cover by Matt Pamer all day. I enjoy watching a design trend like this manifest itself in design tooling and become applied in lots of creative and crafty different ways.

We could start with and draw our own blob using the Pen tool that is pretty much stock in every vector design application. I’m a cheater though, and would probably wind up checking The Noun Project for some blob examples and steal the SVG from there. But sadly, there isn’t much there, at least as far as blobs go.

Thank god for… (wait for it)… THE BLOBMAKER:

Once we have a blob, it’s just begging to be moved around. Monica Dinculescu shows how to do just that with pure CSS and liberal use of various CSS transforms in a keyframe animation:

See the Pen
CSS only morphing blob
by Monica Dinculescu (@notwaldorf)
on CodePen.

Or we can use a JavaScript library like KUTE.js to get all morph-y, like Heartbeat has done here:

See the Pen
Morphing shapes with KUTE.js
by Heartbeat.UA (@hbagency)
on CodePen.

A library like Greensock could help moving and morphing the blobs around. Greensock even has a plugin that is probably the most powerful morphing tool out there. This Pen uses Greensock, but adds some native SVG filters so that the blobs squish into each other satisfyingly. We could call it the gooey effect:

See the Pen
SVG blob mask
by ATCOM (@Atcom)
on CodePen.

We’ve only looked at SVG so far, but don’t rule out ! Liam Egan has make this canvas-based blob downright jiggly:

See the Pen
Blob
by Liam Egan (@shubniggurath)
on CodePen.

Why not add a little physics to the party, like gravity, and let them blobs get squishy that way! Hakim El Hattab got it done here:

See the Pen
Blob
by Hakim El Hattab (@hakimel)
on CodePen.

And blobs don’t have to be alone! Blobs that are squished together are like fluid. You might get a kick out of Peeke Kuepers article Simulating blobs of fluid.

The post Blobs! appeared first on CSS-Tricks.

Categories: Designing, Others Tags:

Deliver your best work with the help of monday.com

February 21st, 2019 No comments

(This is a sponsored post.)

Here’s the situation: You’ve bashed out a complicated design over two weeks of near full-time effort, gotten everything down to the exact spec of the design file, turn it in for stakeholder review and… you’re way off scope. Turns out a few folks on the team put their heads together, made some changes, and never sent you an updated comp.

Boo!

The unfortunate truth is that this happens all too often in front-end development, but it’s really no one person’s fault because it boils down to simple collective miscommunication and a lack of transparency on the team.

Well, that’s where a project management platform like monday.com comes into play. Even if you’re on a remote team or sitting in an office with cubicle walls up to the ceiling, monday.com bridges gaps and tears down walls that could throw a project off-track. With powerful and intuitive tools, like instant messaging for those ad hoc meetings, file storage for a centralized repository of assets, and an activity dashboard for catching up on the status of a project at a glance, monday.com brings project out into the light so everyone is in the loop and on the same page.

Read more…

Categories: Designing, Others Tags:

Top 6 productivity apps for design teams – pick your perfect match!

February 21st, 2019 No comments

Along
with the rest of the world, we tend to be obsessed with productivity. We want
to produce more in less time. We want to do so without negatively affecting the
quality of our products or services.

The digital age has proved to be both a
blessing and a curse in this respect. New technologies have provided us with
high-quality productivity-boosting tools. At the same time, it has placed
greater demands on us to become more productive.

The rat race is still with us, and it’s
faster than ever.

We’ve discovered areas where technology is
indeed a friend. One of those areas comes in the form of smartphone apps and
other productivity apps. These wonderful creations help us manage our projects
and our personal schedules. They help us organize errands, and even plan our
meals.

We’re pleased to present for your
consideration the top productivity apps for 2019.

1.
Mason

Mason
provides increased productivity with a capital P. This front-end
feature-building platform for product design teams allows them to quickly,
economically, and efficiently create high-quality front-end features for their
apps.

Mason’s feature-building process is a model
of efficiency and high productivity, but where this tool really shines is where
it enables teams to skip wireframing and prototyping, documentation, QA
inspection and coding as they proceed through design and product deployment.

Teams can also make changes to their
front-end creations quickly; even after a product has already been deployed and
is in maintenance mode. In fact, any authorized product stakeholder who has a
Mason account can add features and make changes to a product that’s up and
running.

Mason’s building blocks and visual
interface are key to designing and building software features for websites,
apps, and other digital products. If you’ve been looking for a UI/UX tool that
can create a software feature faster, with great precision, and save you time
and money, give this productivity app a close look.

2. Proto.io

Proto.io
is an easy-to-use web application which designers, developers, product
managers, and entrepreneurs can use for prototyping when designing mobile and
web apps. Nor coding skills are required neither are any special design skills
required to build either low-fidelity or high-fidelity prototypes.

Proto.io consists of three environments:
the Dashboard, the Editor and the Player. Proto.io’s Dashboard provides
invaluable version control assistance which is especially important during
rapid prototyping activities. The Editor takes care of the entire process of
prototype-building, and the Player displays in your browser what you’ve
accomplished and in addition, it plays a major role in user testing.

Proto.io 6, the latest version of this
productivity tool, features a redesigned user interface, new state transitions,
easy sharing options, a new Proto.io app for Android and iOS integration with
user testing platforms, and more.

3. monday.com

monday.com
is a centralized team management tool that helps teams manage every aspect and
detail of their day-to-day tasks, and plan, organize, and track their work in a
single visual and collaborative space.

Once you’ve decided upon what’s important and
helpful for your team, monday.com will capture and visualize the requisite
information so you can see who’s in charge of what, track time, and generally
speed up workflow and throughput.

Project leaders and team members alike love
this productivity-boosting team management tool because of the culture of
transparency it promotes and supports. When all parties concerned can view the
same information, it gives them a greater sense of importance and empowerment.

monday.com is currently managing the work of
more than 50,000 teams in 76 countries. It’s an intuitive, beautifully
organized team management tool that helps connect people to processes.

4. ActiveCollab

The
latest version of this popular project management software features a host of
new and enhanced features and is better in almost every way you can think of.
Of particular note is the task dependencies with automatic rescheduling
feature.

In new Active Collab, when a change is made to a
parent task, each child task is automatically updated and rescheduled –
removing excessive busywork.

5.
Nutcache

Nutcache
provides an all-in-one project management software solution that helps project
managers and teams manage tasks smarter and with greater efficiency. It
promotes team collaboration from a project’s initial planning and estimating
tasks through final billing.

Nutcache also performs time tracking duties
and automates expense management and invoicing. This app’s flexibility and
simplicity has made it a popular and useful tool to help teams organize and
deliver work on time and within budget.

6. Lucidchart.com

Lucidchart
belongs in your project management toolkit if your team is spread across
different locations and team members are working on a mix of different
operating systems.

Lucidchart also saves time and eliminates
misunderstandings and misconceptions because of its ability to help you
visually communicate complex ideas or make technically-oriented presentations
to non-technical audiences. It does this by providing a library of useful
shapes to create virtually any type of a presentation diagram.

Top 5 Productivity Tips to Achieve More and Create Peace of Mind

Tip #1. Write it down.

Make a habit of
writing down every task to be done and every commitment you’ve made. Trying to
remember something you committed to last week? Or, maybe, something you should
have added to your to-do list? This can often prove to be distracting and
energy-sucking.

Tip #2. Do the task you dread doing first.

Since you’re going
to have to do it eventually, do it now. You’ll feel good about yourself once
you’ve done it.

Tip #3. Take breaks – religiously.

You can devote your
full attention to a task for only so long before the law of diminishing returns
kicks in. Experiment with the Pomodoro (Tomato) principle. Take a 5-10 minute
break every 40 minutes – whatever works best for you. Doing so will help you mentally
and physically.

Tip #4. Exercise

We’re not talking
about extreme sports training. Walk, jog, stretch, or practice some
muscle-strengthening exercises. Do this daily or several times a week. Healthy
people are more productive.

Tip #4. Learn to say no.

Say yes to
everything and everyone and you end up letting everyone else control your life.
Pick and choose tasks and commitments judiciously and you’ll be far more
productive.

Conclusion

Take the above
productivity tips seriously and make a habit of following them. You should
start noticing some very positive results in a short time. If you can use one
of more of the productivity tools listed above so much the better.

You’ll have more
control over your work, you’ll be more productive, and you’ll feel much better
about yourself.

Read More at Top 6 productivity apps for design teams – pick your perfect match!

Categories: Designing, Others Tags:

CSS Variables + calc() + rgb() = Enforcing High Contrast Colors

February 21st, 2019 No comments

As you may know, the recent updates and additions to CSS are extremely powerful. From Flexbox to Grid, and — what we’re concerned about here — Custom Properties (aka CSS variables), all of which make robust and dynamic layouts and interfaces easier than ever while opening up many other possibilities we used to only dream of.

The other day, I was thinking that there must be a way to use Custom Properties to color an element’s background while maintaining a contrast with the foreground color that is high enough (using either white or black) to pass WCAG AA accessibility standards.

It’s astonishingly efficient to do this in JavaScript with a few lines of code:

var rgb = [255, 0, 0];

function setForegroundColor() {
  var sum = Math.round(((parseInt(rgb[0]) * 299) + (parseInt(rgb[1]) * 587) + (parseInt(rgb[2]) * 114)) / 1000);
  return (sum > 128) ? 'black' : 'white';
}

This takes the red, green and blue (RGB) values of an element’s background color, multiplies them by some special numbers (299, 587, and 144, respectively), adds them together, then divides the total by 1,000. When that sum is greater than 128, it will return black; otherwise, we’ll get white. Not too bad.

The only problem is, when it comes to recreating this in CSS, we don’t have access to a native if statement to evaluate the sum. So,how can we replicate this in CSS without one?

Luckily, like HTML, CSS can be very forgiving. If we pass a value greater than 255 into the RGB function, it will get capped at 255. Same goes for numbers lower than 0. Even negative integers will get capped at 0. So, instead of testing whether our sum is greater or less than 128, we subtract 128 from our sum, giving us either a positive or negative integer. Then, if we multiply it by a large negative value (e.g. -1,000), we end up with either very large positive or negative values that we can then pass into the RGB function. Like I said earlier, this will get capped to the browser’s desired values.

Here is an example using CSS variables:

:root {
  --red: 28;
  --green: 150;
  --blue: 130;

  --accessible-color: calc(
    (
      (
        (var(--red) * 299) +
        (var(--green) * 587) +
        (var(--blue) * 114) /
        1000
      ) - 128
    ) * -1000
  );
}

.button {
  color:
    rgb(
      var(--accessible-color),
      var(--accessible-color),
      var(--accessible-color)
    );
  background-color:
    rgb(
      var(--red),
      var(--green),
      var(--blue)
    );
}

If my math is correct (and it’s very possible that it’s not) we get a total of 16,758, which is much greater than 255. Pass this total into the rgb() function for all three values, and the browser will set the text color to white.

At this point, everything seems to be working in both Chrome and Firefox, but Safari is a little cranky and gives a different result. At first, I thought this might be because Safari was not capping the large values I was providing in the function, but after some testing, I found that Safari didn’t like the division in my calculation for some reason.

Taking a closer look at the calc() function, I noticed that I could remove the division of 1,000 by increasing the value of 128 to 128,000. Here’s how that looks so far:

:root {
  --red: 28;
  --green: 150;
  --blue: 130;

  --accessible-color: calc(
    (
      (
        (var(--red) * 299) +
        (var(--green) * 587) +
        (var(--blue) * 114)
      ) - 128000 /* HIGHLIGHT */
    ) * -1000
  );
}

.button {
  color:
    rgb(
      var(--accessible-color),
      var(--accessible-color),
      var(--accessible-color)
    );
  background-color:
    rgb(
      var(--red),
      var(--green),
      var(--blue)
    );
}

Throw in a few range sliders to adjust the color values, and there you have it: a dynamic UI element that can swap text color based on its background-color while maintaining a passing grade with WCAG AA.

See the Pen
CSS Only Accessible Button
by Josh Bader (@joshbader)
on CodePen.

Putting this concept to practical use

Below is a Pen showing how this technique can be used to theme a user interface. I have duplicated and moved the --accessible-color variable into the specific CSS rules that require it, and to help ensure backgrounds remain accessible based on their foregrounds, I have multiplied the --accessible-color variable by -1 in several places. The colors can be changed by using the controls located at the bottom-right. Click the cog/gear icon to access them.

See the Pen
CSS Variable Accessible UI
by Josh Bader (@joshbader)
on CodePen.

There are other ways to do this

A little while back, Facundo Corradini explained how to do something very similar in this post. He uses a slightly different calculation in combination with the hsl function. He also goes into detail about some of the issues he was having while coming up with the concept:

Some hues get really problematic (particularly yellows and cyans), as they are displayed way brighter than others (e.g. reds and blues) despite having the same lightness value. In consequence, some colors are treated as dark and given white text despite being extremely bright.

What in the name of CSS is going on?

He goes on to mention that Edge wasn’t capping his large numbers, and during my testing, I noticed that sometimes it was working and other times it was not. If anyone can pinpoint why this might be, feel free to share in the comments.

Further, Ana Tudor explains how using filter + mix-blend-mode can help contrast text against more complex backgrounds. And, when I say complex, I mean complex. She even goes so far as to demonstrate how text color can change as pieces of the background color change — pretty awesome!

Also, Robin Rendle explains how to use mix-blend-mode along with pseudo elements to automatically reverse text colors based on their background-color.

So, count this as yet another approach to throw into the mix. It’s incredibly awesome that Custom Properties open up these sorts of possibilities for us while allowing us to solve the same problem in a variety of ways.

The post CSS Variables + calc() + rgb() = Enforcing High Contrast Colors appeared first on CSS-Tricks.

Categories: Designing, Others Tags:

Including Animation In Your Design System

February 21st, 2019 No comments
Screenshot of the Fluent's first motion principle

Including Animation In Your Design System

Including Animation In Your Design System

Val Head

2019-02-21T13:00:24+01:002019-02-23T00:04:26+00:00

(This article is sponsored by Adobe.) Design systems come in all shapes and sizes, but as Sparkbox’s design system survey noted, not all of them include guidelines for animation. Sure, some teams may have decided that motion wasn’t something their product needed guidance on, but I suspect that in some cases motion was left out because they weren’t sure what to include.

In the past few years, I’ve talked with many teams and designers who admit they think motion is something they should address, but they just aren’t sure how. If you’re in that boat, you’re in luck. This article is all about what to include in a set of motion guidelines for your design system and how to pull it off.

Why Animation?

Animation is an important design tool for both UX and brand messaging. Just like typography and color, the animation you use says something about your product and its personality. So, when it’s not addressed in a design system, that system essentially leaves that area of UI design tooling unaccounted for. Then people following the design system either do whatever they want with animation — which can lead to a strange mish-mash of animation execution across the experience — or, they just don’t use animation at all because they don’t have time to figure out all the details themselves. Neither case is ideal.

Having a clear stance on how animation is used (or not used) in your design system can help ensure your brand is using animation consistently and effectively while also helping your team work faster. Let’s dig in to get started on a set of motion guidelines for your design system.

The Groundwork: Defining What You Need To Cover

First, Talk To People

As Jina Anne says, “Design systems are for people.” I’ve often heard the advice that talking to the people who will be using the design system you’re creating is key to making a design system people will actually use. That holds true for the guidelines you create around animation too. The biggest thing you can gain from this is finding out what they need and what to focus on. This helps you set an appropriate scope for what you need to cover in your guidelines. No one wants to spend hours on extensive guidelines that address more than your team will ever actually need. That wouldn’t be any fun (or use).


Your team may not tell you about their animation pain points unprompted, but that doesn’t mean they don’t have any.

Set up some user interviews (the users of your design system) and ask them about where they get stuck with animation. Ask them how/if they use animation, and where animation falls in their design process. Ask them about what they wish they had to help with the pain points they encounter. Most importantly, listen to how they talk about using animation in their work and what goes well or not so well.

While every team is different, the concerns and questions I’ve heard most often when doing this research are things like: “How do I know an animation is good, or fits with our brand?”, “How can I convey the animation details to our engineers effectively?”,or “Our developers always say there’s no time to implement the animations we design.”

You’ve probably guessed where I’m going with this, but all of those concerns are things you can help provide answers to in your motion guidelines. And you can use the questions and pain points that come up most often to guide and focus your motion guideline efforts.

Reference Other Systems

Not every design system has to be public, but it’s great that so many of them are. They make for a helpful resource when planning your design system, and they can be useful research for your design system’s motion guidelines too. (In fact, we’ll be referencing a few them in this very article.)

Using other motion sections as reference for your own design system is very helpful, but I don’t recommend adopting another brand’s motion guidelines wholesale in place of your own. No, not even if it’s Material Design’s motion guidelines.

Material Design’s motion section is Google’s take on motion guidelines. A good one, yes, but its aim is to show you how to animate the Google way. That’s perfect if you’re making something for the Google ecosystem (or intentionally wanting to seem like you are). But it’s not a good fit when that’s not your goal. You wouldn’t use another brand’s colors or typeface on your product, so don’t just follow another brand’s motion guidelines either.

The most effective design systems contain a branded point of view unique to them — things that make their design system more specific to the product they’re for — along with common design best practices. Spend a little time researching and reading through other systems’ motion guidelines, and you start to get a feel for which parts are best practices and which parts are customized to that brand or product’s point of view. Then you can decide which best practices you might also like to include in your guidelines, as well as where to customize the guidelines for your product.

For example, using ease-ins for exits and ease-outs for entrances is a common best practice for UI animation. But the exact ease-in or ease-out curve is usually customized to a brand’s intended message and personality.

To quote Dan Mall:

“This is the kind of thing a design system should have guidelines for: perspective, point of view, extending creative direction to everyone that decides to build something with the design system. That stuff should be baked in.”

I totally agree.

The Two Main Sections Of A Design System’s Motion Guidelines

There’s no specific rule out there stating that you must have these two sections, but I’ve found this breakdown to be an effective way to approach the motion guidelines I’ve worked on. And I’ve also noticed that most design systems out there that address motion have these two categories as well, so it seems to be an approach that works for others too.

The two main sections are:

  1. Motion Principles
    Principles are typically high-level statements that explain how that brand uses motion. They’re the big picture point of view or design intention behind why the brand uses animation and their perspective on it.
  2. Implementation
    This section focuses on how to carry out those principles practically in design and/or code. It serves as the building blocks of animation for the design system, and the amount of detail they cover varies based on brand needs.

Motion Principles

The principles section is where to state your brand values around animation. They’re the high-level principles to measure design decisions against, and a place to state some specific definitions or values around animation. Principles often tend to focus on the “why” of using animation within a particular design system and the UX-driven purpose they serve. In many cases, design systems list these under the heading of Principles in their motion section. However, you can see the concept of principles present in ones that don’t include a specific section for them as well.

Your motion principles can be modeled after existing global design principles that your brand might have, extrapolated from things like voice and tone guidelines, or even be inferred from looking at your product’s existing UI animations in a motion audit.

Let’s look at some examples to get a better idea of how these play out. Microsoft’s Fluent design system lists their motion principles as being physical, functional, continuous, and contextual. They include a short description and illustration of each to explain how it applies to UI animation.


Screenshot of the Fluent's first motion principle
A segment of Fluent’s motion principles page (Large preview)

Audi doesn’t have a separate principles section, but they start off their animation section with a declaration of why they use animation, which is setting the stage for what sort of motion is to be used in the design system, just like a principle would. They state:

“We stand for dynamic premium mobility. As such, movements in the Audi look have a typically dynamic character.”

While developing the motion section for Spectrum, Adobe’s design system, we opted for a principles section to match the pattern used in other sections of the system. Within Spectrum, animation aims to be purposeful, intuitive, and seamless.

Note: Spectrum does not have a publicly available site at the time of writing.


Spectrum's motion principles of purposeful, intuitive and seamless
Spectrum’s guiding motion principles for UI animation (Large preview)

No matter how you decide to present them, your design system’s animation principles can be used to both establish the system’s expectation around animation and to evaluate potential future UI animation for the product(s) the design system is applied to. For example, if a designer following the Fluent design system wanted to introduce a large bouncing animation into a component, there could be discussion around whether that meets the motion principles. (Does it fit the principles of functional and continuous?) Then a decision could be made as to whether or not that particular animation warranted breaking from the stated principles, or if the animation should be redesigned to fit the principles.

This helps to keep the design discussions away from the “do you like it?” or personal opinion realm and gives a structure for evaluating animation in a more pragmatic design-oriented way. That’s my favorite advantage of having declared motion principles; they make discussing animation meaningfully so much easier, even for people who don’t have a lot of animation experience.

Quick Tip: For more motion principles references, check out Photon’s motion principles, Material Design motion principles and Carbon’s motion principles. There are also others out there, but these are a good start.

Implementation

Motion principles are great for some high-level guidance, but without some details on exactly how to implement them, you’ll be missing the biggest time-saving benefits of including animation in your design system. The implementation section (though rarely actually titled as such) helps to answer many of the “how” and
“what” questions your team has around animation. The objective is to provide smart defaults for anyone following the design system. That way, instead of spending ages playing around with durations and easing for every animation, they can use the smart defaults you’ve provided in the guidelines and be on their way. It’s a huge timesaver that also makes your UI animation much more consistent across the board.

The implementation guidelines are where a lot of design systems diverge in their approach and coverage. The amount of detail you include and the topics you cover in these guidelines will depend on how big of a role animation plays in your design efforts and what your team needs. For example, Photon‘s implementation section includes just one duration and one easing curve, while Material Design‘s includes individual sections on duration and easing as well as additional pages full of implementation details.

There’s no perfect length for a motion section; it’s more about covering the details your team needs than hitting a specific number of pages or rules. Some of the animation building blocks to consider including in your motion guidelines are:

The first three in the list are the main ways we customize or style animation. Variations in the properties, durations, and easings used for animation can drastically affect how animations come across. (And the last one is a way of packing up the first three.)

Let’s dig into each in more detail, and for each of these I’ll point out some of the common best practices and where there’s room for your own customized interpretation.

Durations, Ranges, And Rhythm

Duration has to do with how long animations should be, and when we’re talking about UI animation, these values tend to be very short. It’s amazing how much information we can convey in fractions of a second! This is a key aspect of animation, so every design system with motion guidelines covers it, but they do it in a variety of ways.

Some of the best practices around duration that you’ll see addressed in most motion guidelines include:

  • Shorter durations should be used for simpler effects and animationsof relatively small-sized (such as fades or color changes);
  • Longer durations should be used for more complex effects andanimations of larger relative scale (such as page transitions or moving objects on and offscreen);
  • Optimal timing can change based on viewport size.
    While the specifics of each set of guidelines varies — sometimes even greatly — you’ll see these common best practices in almost all of them. Different systems have different definitions of exactly what “short” or “long” durations are, and go into varying amounts of detail on the difference between the two. Also, while it’s more of a design system thing than an animation best practice, providing design tokens for your specified duration values is a useful thing to consider here as well.

Carbon provides a short table of ranges of duration values based on the type of animation in question. While Material Design breaks down recommendations on duration speed in categories based on the complexity of the animation, as well as by the relative area covered by the animation. Pluralsight takes a different approach and provides a set of keywords for different durations paired with cute animals.


An animated illustration and data table for guidance on Carbon's animation duration
Carbon’s illustration and table sorted by interaction type give guidance on what durations to use for UI animation within the system. (Large preview)

Animals ranging from a snail to a cheetah to represent possible animation durations
Pluarsight’s design system lists durations, animals and design tokens for each of its duration options. (Large preview)

Easing Values

My number one advice for easing guidelines is to create your own customized curves and don’t just use the CSS defaults. This is the most effective way to build some consistent motion association for your brand and as Sarah Drasner puts it: build “motion equity.” You’ll be on solid ground with just three curves: a custom eas-out, ease-in, and ease-in-out. And there’s always the option to add more if needed.

Quick Tip: If you’re totally stumped on where to start on easing curves, check out the Penner Easing equations on easings.net. These are designed to give you some nice looking motion and are grouped in threes for easy use. They’re much more expressive and flexible than the CSS defaults. Using a set of these in your motion guidelines can be a great place to start.


Six sets of easing curves that vary in their range of speed changes for an animation
A few of the Penner Easing Equations illustrated as cubic-bezier curves. (Large preview)
Essential Easing Functions

I recommend defining the three core easing curves because that will cover all your main easing needs for various animations.

  • Ease-in
    This curve is the one that accelerates as it begins any movement which reads well for moving an object out of view.
  • Ease-out
    This curve causes objects to decelerate before stopping which makes for a more natural feeling way to bring objects into view.
  • Ease-in-out
    As the name suggests, this curve combines the features of the first two and is best for moving elements from point to point.

With these three custom curves, you’ll have almost all your animation needs covered.


One curve for accelerating into the action, one for decelerating out of the action, and one for doing both
The three main types of curves most motion guidelines include (Large preview)

For Spectrum, we did exactly that and created three custom easing curves along with recommendations on which kinds of animation to use each for. (We came up with these curves through looking at existing animation and experimenting with some motion studies.)

Carbon and Pluralsight take a similar approach, designating three curves with suggested uses, as well as designating one as the default curve to use when in doubt. In some cases, you might only feel the need to have one custom easing curve (like Photon does) defining one curve for use across all animations.


The ease-out curve for Spectrum
One of Spectrum’s three custom easing curves (Large preview)

Along with the easing curves, it’s helpful to provide some supporting information like associated design tokens, language-specific code (for CSS, JS, iOS and/or Android), or After Effects keyframe velocities depending on which tools your team uses. This adds to the ease of use and helps make following the smart defaults in your motion guidelines the path of least resistance.

A visual illustration of the curve and interactive examples of the curve are also a big plus for quickly demonstrating how the easing curves work and what they look like. Never underestimate the power of showing instead of telling. (Or showing along with telling!)

Easing Hierarchy

Including a hierarchy of easing is one way you can take things a little further than the three core custom curves. This can be especially useful for brands that use motion as a core method of conveying their design message. Just like with type, you may want a way to make certain animation stand out more than others. Animations that stand out more strongly can be used to emphasize a particular point or interaction. In these cases, structuring your easing curves so that you have one that is more dramatic to stand out from the others can be a useful technique.

Off To A Good Start

At this point, armed with principles plus your durations and easing sections, you have a solid set of motion guidelines. That might be all you need for a version one of your motion guidelines, or for a brand that doesn’t rely heavily on motion in its design. If you’re pressed for time, establishing smart defaults for durations and easing will get far enough to see the benefits of establishing motion guidelines and save your team time.

Named Effects

Providing a listing of named effects or a library of animations to use can be a useful thing to have in your motion guidelines. Not all design system’s motion guidelines have these, some opt to bake the animation guidelines into their components instead (or as well), and some just don’t need this level of detail.

One word of caution on these though: more isn’t always better. It might look cool to have a huge library of animations as part of your design system, but the more effects you list, the more time and effort it will take to maintain those effects. To avoid creating a huge time sink for you and your team, I’d suggest making any collection of named effects as small as you possibly can.

There tend to be two approaches to providing a library of effects in motion guidelines. One approach is the way the Lightning design system does it, providing a library of small animation effects (molecules of animation, if you will) that can be used individually or composed together to build up more complex animations.


A listing of small named animations that can be composed into more complex effects
A few of Lightning Design System’s named animation library (Large preview)

The other approach is to provide more comprehensive and purpose-specific effects like Audi does for its show and hide, transform, shift, and superimposing effects and Fluent does for its page transition effects. For either approach, providing the design rationale and specific code implementations for each is useful.

Quick Tip: If you’re looking for additional motion guidelines for research, Adele is a design system collection that lets you filter by topics like motion, and styleguides.io is always a great resource for finding public design systems too.

Other Places Motion Might Come Up In Your Design System

Design systems come in all shapes and sizes. And in many cases these animation guidelines are also baked into the DNA or components of your design systems. Digging into how to do that is beyond the scope of what we’re covering here, but I do want to note that can also be useful to include animation information on component-specific pages instead of in a named effects section. It all depends on what works best for your team and your design system.

Additionally, it might be useful to call out performance and accessibility considerations for animation either in those sections of your design system, in guidelines for components, or in the motion section itself. Performance and accessibility goals affect all aspects of our design work, and animation is no exception there.

Some Parting Thoughts

I hope this article has helped to show that including motion guidelines in your design system can be incredibly useful, and helped to demystify the process of creating one. Addressing animation in your design system can be beneficial to the consistency of your product’s design and doesn’t have to be an overly time-consuming effort.

As you’re working on your motion guidelines, I encourage you to work in stages instead of waiting for your motion guidelines to be perfect. Shipping a version one with the intention of adding to it and updating it is much easier on you, the person or people authoring the guidelines, and can help you make sure you’re creating guidelines that are useful.

As hard as it can be to share something that you know is missing some detail, it can be hugely useful to ship a version one of your motion guidelines then talk to your team again to see how the first version of the guidelines has helped them and which pain points are still a factor. This iterative approach can go far towards making your guidelines cover the most relevant topics, and lets you adapt them to your team’s needs. Both are good for having a system that’s useful and avoiding unnecessary extra effort.

(il)

This article is part of the UX design series sponsored by Adobe. Adobe XD is made for a fast and fluid UX design process, as it lets you go from idea to prototype faster. Design, prototype and share — all in one app. You can check out more inspiring projects created with Adobe XD on Behance, and also sign up for the Adobe experience design newsletter to stay updated and informed on the latest trends and insights for UX/UI design.

Categories: Others Tags:

40 web tools and services for designers and developers

February 21st, 2019 No comments
web tools and services for designers and developers

For most people, the thought of designing your own website or doing anything related to web development is daunting and scary, especially if you’re new to all this internet stuff.

If you’re searching for the best web design and development software, then you’re probably feeling a little confused as to where you start.

That’s why we created a guide to show how you can create your own website. With the help of some free and paid web tools, you can do anything when it comes to web development and design. Check out the 40 handpicked tools below.

1. Wix.com

The easiest way to create a professional and complete online store is to build it with Wix, the most powerful website builder on the market. It’s fully packed with tons of features and options that no other builder has. Getting a beautiful storefront, a powerful management system, and mobile optimized online store with Wix takes minutes. Anyone can do it; you don’t need any coding skills or previous experience. Wix has more than 140 million users from 190 countries and is a perfect fit for building e-commerce websites, blogs, and any other web-related tool you need.

2. EverSign

EverSign can help anyone — from individuals to small- and medium-sized businesses right up to corporations — go paperless. They are here to help you securely get your paperwork out of the way and close deals faster.

Our global economy is shifting rapidly, and digitalization is finding its way into every department. What we once mailed is now sent via email, what was once discussed in person now happens via Skype, and what was once signed on paper is now signed using platforms like EverSign. With digital signatures taking over in thousands of large companies already, taking care of business documents has become significantly easier, more cost-effective, and less time-consuming.

3. Tailor Brands

Tailor Brands is the design tool every webmaster needs in their toolbox. In under five minutes, their logo designer uses AI, along with other tools, to create a sleek, professional logo that gives you a more efficient overall brand design.

Once a user subscribes, they will have access to a complete branding suite, including everything from branded merchandise to a Master Design Tool. In the design library are scores of pre-made designs that can be used for every purpose, such as social covers, presentation headers, marketing materials, and more. Of course, each design is editable and can be tweaked according to your aesthetic preferences, just like your logo. With Tailor’s branding package, you’ll have full creative control over your entire brand, from start to finish.

4. Total WordPress Theme

The Total WordPress theme is one of the best themes on the market. Easy and intuitive customization options, as well as developer-friendly code (with nearly 500 custom snippets and theme filters) make this theme a no-brainer. Getting started is as easy as importing one of 40+ prestyled demos. Or you can build your own custom site from scratch using the front-end drag-and-drop page builder, custom header and footer builder, hundreds of live customizer settings (for fonts, colors, site widths, etc.), and custom WooCommerce & bbPress styling.

5. Landingi

LandingI is one of the most popular and simple solutions for building high-converting landing pages. No coding skills or previous experience needed — everyone can design and optimize custom landing pages that will generate lots of traffic and leads.

LandingI comes with a powerful drag-and-drop builder, lots of beautiful templates, and tons of features and options, including a friendly interface that you will enjoy using.

6. Darwin Pricing

With more than 700 customers, Darwin Pricing is a Swiss-based data science consultancy that will help you with dynamic pricing software development. They work with all types of customers, from small companies to large corporations.

7. Codester

Codester is a huge marketplace for web designers and developers that is attracting a lot of attention. It is loaded with thousands of high-quality and interesting scripts, codes, app templates, themes, plug-ins, and more.

8. NameQL

Whenever you’re out of ideas or you want to save time, use Name QL to find your next product, company, or domain name. Simply enter the base name and this web tool will show you lots of variations to pick from.

9. Dr. Link Checker

Every aspect of a website matters. A bad or, even worse, malicious link will do a lot of trouble. People run from these links and from websites that have them. Some never return.

Dr. Link Checker can run automated scans of your site and find out exactly which links aren’t working. Start with the free plan and upgrade it anytime.

10. Rank Math SEO

Rank Math SEO is the most powerful, effective, yet simple-to-use WordPress SEO plug-in on the market. Setup takes just a few minutes. From day one, you can see that the plug-in is generating more traffic by improving your website’s SEO.

11. Online Quiz Maker

With Opinion Stage, everybody can create awesome polls, quizzes, surveys, and more without any coding skills or previous experience. More than 100,000 brands, entrepreneurs, publishers, and blog owners use this solution to create quizzes that people love to complete and share.

12. WP Hacks

WP Hacks is a highly respected resource website that contains high-quality tutorials, themes, plug-ins, and deals. Everything is handpicked before being uploaded to the website.

13. Meridian Themes

Meridian Themes is a powerful WordPress developer focused on building high-quality, pixel-perfect themes that are fully responsive, SEO friendly, lightning fast, and simple to fully customize.

14. WP Review

WP Review is a WordPress plug-in that you can use to create stunning, high-converting reviews on your website. The plug-in is packed with tons of features and options. You don’t need any coding skills to use it, and it’s free to download.

15. Grace — Creative Multipurpose Bootstrap Template

Grace is a multipurpose Bootstrap template with a pixel-perfect, gorgeous design. Loaded with tons of features and options that are usually included in the most expensive themes on the market, it features a full-screen background slider, an animated sticky header, an isotope portfolio, animated elements, and more.

Grace is free to use with limited features.

16. Landing — Free OnePage Bootstrap 4 Template

Landing is a free bootstrap 4 website template that you can use to build high-converting landing pages. Packed with lots of powerful features and options, it is fully customizable in just a few minutes.

17. Photorealistic iPhone Xs PSD Mockup

A gorgeous iPhone mockup graphic is the perfect way to demonstrate your app, website, or user interface. Try this photorealistic iPhone Xs PSD mockup, which includes fully layered PSD files that can easily be edited in Adobe Photoshop. Its smart object layers will help you create a beautiful presentation in no time. The mockup is high resolution with dimensions of 2730×2176 pixels.

18. NextGen Gallery

NextGen is a powerful, fully customizable WordPress plugin for photographers. It displays stunning galleries that will beautifully display your projects. You can make it even more powerful by getting the PRO extensions.

19. Photocrati

Beautiful pictures should be displayed on beautiful websites. The Photocrati theme was made by photographers for photographers, which is why it has none of the issues that general themes do when it comes to photography.

The price of $99 includes the Photocrati theme and NextGEN Pro Plugin for Galleries with lifetime rights to use Photocrati and NextGEN Pro. Also includes one year of updates and support.

20. Tesla Themes

Tesla Themes is well known in the market for its gorgeous, modern, clean WordPress themes. All of their products are extremely fast, SEO friendly, and super simple to customize. Get 67 stunning WordPress themes for just $99.

21. Showthemes

With more than 6,000 customers worldwide, ShowThemes build the best event themes on the market. The secret behind their high-quality products? They are made by event professionals. Leave behind your issues with general themes and use a dedicated solution for your event website.

22. uKit

Want to tell a beautiful story but don’t know where to start? uKit is a go-to service if you’re in search of a way to present your work to the world. You don’t need to be tech-savvy to create a beautiful website to host your art. A visual editor, easy-to-use interface, and drag-and-drop work mode are at your fingertips.

23. uLanding

uLanding is a modern code-free platform that empowers you to create a professional digital identity for your business and increase sales. It tracks the effectiveness of your landing page using built-in analytics — analyze your site traffic, where it’s coming from, and which ad and user types generate the most profit. A seven-day free trial is available.

24. uSocial

uSocial provides an easy way to add social media icons and buttons to your site. No knowledge of coding is needed. Everything is fast and hassle-free. Just copy and paste the embed code. Build your custom button set by tweaking the design options to achieve the needed look and feel. And brace for increased user engagement.

25. Logaster

Logaster is the way to go if you want extremely fast logo design or brand identity work for your next project. Simply enter the name, and the web tool will show you lots of designs. You will pay only for the design you like..

26. Content Snare

Content Snare helps digital agencies and web designers get digital content from their clients without using email. One of the biggest bottlenecks in the web design process is waiting on clients to send their content, but with Content Snare you can put these tasks on autopilot.

The company is also dedicated to helping digital agencies grow through the accompanying podcast, Agency Highway.

A free 14-day trial is available.

27. Work Examiner

Work Examiner is the most powerful, all-in-one, easy-to-use internet monitoring software on the market. Use it to increase productivity and efficiency, prevent data theft, and much more. Try it for free for 30 days.

28. MailMunch

Mail Munch is the all-in-one solution for lead generation. Using the drag-and-drop builder, the gorgeous templates, and the friendly interface, anybody can create websites that convert.

29. Invoice Berry

Invoice Berry is a great invoicing platform that is a perfect fit for freelancers and small- and medium-sized companies. Creating, fully customizing, and sending gorgeous invoices takes less than 60 seconds. This software can also be used to track expenses, manage clients, create detailed reports, and much more.

30. Bonsai

Bonsai is a dedicated contract solution for all types of freelancers. More than 100,000 people have used it with great success to create and sign contracts and invoices, store the documents online, and much more.

31. SuperbWebsiteBuilders

SuperbWebsiteBuilders is a blog that provides valuable information about website builders and hosting providers. It’s a great resource for both inexperienced and proficient users who are in search of a web building tool. Browse multiple reviews, comparisons, and ratings to make an informed choice.

32. Xfive — Developers Who Care

A web and mobile application development company, Xfive has more than 10 years’ experience. They can act as an extension of your existing team or be hired to make your ideas come to life. Whatever you need, they are here to help. You’ll enjoy working with developers who care.

33. actiTIME

actiTIME is a highly recognized, all-in-one time tracking software and work scope management system that will supply your business with intelligent data. Get valuable insights about any aspect of your business with dozens of powerful reports.

34. uCalc

uCalc is a professional service that empowers businesses with online calculators and forms. There’s no learning curve to worry about; anyone can master uCalc. Choose from a wide collection of beautiful preconfigured layouts, customize your form, and add it to your website. You can also share your form as a standalone link.

35. What Font Is

Ever see the perfect font on the internet but don’t know its name or where to get it ? With What Font Is, simply upload a picture of the font or enter the URL where you saw it. The powerful AI software will search over 450K fonts (premium and free) to find the one you want. It will also show you more than 60 similar fonts.

Even better, it’s free.

36. Wokiee — Multipurpose Shopify Theme

Wokiee is a powerful and complete multipurpose Shopify theme. More than 50,000 happy customers use this powerful design tool and all of the features and options that come with it.

37. Pixpa

Pixpa is a powerful online portfolio builder that you can use for your website, store, blog, or client gallery. It has a professional and easy-to-use drag-and-drop builder, lots of beautifully designed templates, and a friendly interface.

38. Instant Logo Design

Looking to get a gorgeous logo in a few minutes without spending a fortune? Instant Logo Design will do exactly that. Enter your logo name, your slogan, and select whether or not you want symbols. The software will quickly show you lots of designs to choose from.

39. Gravitas

To create a leading website that is capable of winning over your core audience, you need something special. Get ready for an amazing MotoCMS 3 flagship product that will impress every visitor to your site. Gravitas is an incredible template that will help you build a website that stands out from the crowd.

40. TMS Outsource

Do you need experienced developers to extend and back up your tech team? Or are you launching a startup, and need experts to take care of the development? TMS is a team of Java, Node.JS, PHP, Symfony, Laravel, Vue.JS, React, and Angular developers; Agile project managers; and quality assurance engineers. They apply the Agile Scrum workflow in their projects. Let the TMS team take on your technical challenges.

Categories: Others Tags: