You do excellent work, but you’re always looking for ways to take your game a higher level, and we’re here to help you do just that.
Since there are roughly 55,000 WordPress tools services on the market, you would think finding solutions to some of your everyday problems, concerns, or issues that make improvement easier would be a piece of cake. The problem is, plowing through that vast array of potential solutions to find what will work best for you could take weeks.
That’s fine if you have plenty of spare time on your hands, but we can offer a better way. We’ve done most of the heavy lifting for you, and we’d like to share with you 5 tools and services that are the best of the bunch when it comes to improving website quality, maintenance management, and speeding up day-to-day project workflow.
Elementor is a powerful page builder with endless advanced design elements and options that lets you create the ideal website for your clients.
You can start your pages from scratch and put Elementor’s library of useful widgets to work, or if you prefer you could choose from a large array of templates to get your projects underway.
Either way, Elementor can improve your workflow and increase your productivity, and the quality of your websites – big time.
To say Elementor is popular and widely used is a huge understatement when you consider there are already more than 2 million active installs, already explains why it might be the world’s best website builder.
You can use any theme and any WordPress plugin with Elementor. You won’t be bothered by design constrains some themes impose on you, and plugins won’t slow you down. Those two features alone could be reason enough to choose this powerful WordPress tool. Investigate Elementor’s capabilities further and you’ll discover even more reasons.
Website builders aren’t a lazy bunch, but as a rule they don’t object to working with a tool that’s almost ridiculously intuitive and easy to use, doesn’t require coding, or doesn’t require any special technical skills. Brizy WordPress page builder fits that description perfectly, and it has everything needed to enable you to create the most perfect websites you can imagine.
The Brizy package includes 150 layouts, 240 design blocks, and 16 popups, every one of which is ready-made and professionally crafted. 4,000 icons are also included, and you’ll find color-schemes and fonts easy to work with.
The blocks make great starting points, especially if you find starting from scratch is somewhat intimidating. With the layouts and blocks at your fingertips you could easily build a complete page in minutes.
Brizy is free to download, and you can build your first website on Brizy free of charge with no strings attached.
Maintaining an up-and-running website can be a pain at times, and if you’re responsible for multiple sites, maintenance and troubleshooting it’s no fun at all. Newt Labs will be happy to take over those tasks so you can focus on designing and building websites, pleasing your clients, and growing your business.
The Newt Labs team will do any needed troubleshooting, offer advice or help you make small fixes, and take care of WordPress core, theme, and plugin updates, site security monitoring, backups, and other day-to-day management tasks. Since Newt Labs’ cloud hosting is WordPress optimized, you can upgrade to a proper hosting service if you need to speed up your website.
Newt Labs also gives you easy access to the latest WooCommerce and WordPress video tutorials, so you and your clients will be able to get the most from your use of WordPress and your website designs.
WordLift is a semantic platform that applies AI to SEO analysis and design. It partners with WooRank to measure the performance of your site content in terms of key factors influencing search rankings and organic traffic in general.
This SEO tool takes your site content and translates it into knowledge graphs and machine readable content that helps the search engines better understand what your content is all about and allows you to find out how to improve user engagement. A useful tool indeed!
Launch your website design the Goodie way by working directly with an experienced developer. You’ll save time and money and avoid communications bottlenecks by avoiding middlemen. Whether your design is richly detailed or barely beyond the conceptual stage all you need to do is hand it over and Goodie will carefully code it for you at a special price of $999.
Goodie specializes in helping web designers and small business owners and coding WordPress websites and websites in the 1-10 page range.
Tips to Make Your WordPress Site Secure
Choose a Good Hosting Company
When you choose a hosting company you can expect to get what you pay for in terms of site performance and site security. If you go cheap, you’re putting your site and perhaps even your business at risk.
It’s far better to choose a hosting service that will treat your site as if it’s their own even if it costs a little more.
Install a WordPress Security Plugin
Do you rarely check your site security for malware, check it on occasion, or have you automated the process by letting a plugin do the work? The third option makes the most sense. The right plugin can monitor your site 24/7 which means less work for you and greater site security.
Update WordPress regularly
WordPress continually improves its performance and security through its upgrades. Malicious bugs are promptly taken care of when an update is released. If you don’t update, any latent malicious bug can be a source of mischief.
Periodically visit WordPress’s dashboard to check for new updates and hit the “Update Now” button when you see one.
Back up your site regularly
It’s simply a matter of creating a copy of your site and storing it in a safe place. Do it periodically. Some hosting sites perform daily backups.
Conclusion
This article covers 5 must-have WordPress tools and services you can use to build high-quality websites and built them quickly. plus 5 tips you should follow to keep those sites up and running. One of the services listed can do that for you.
If you’re looking for a faster, more efficient, and easy to use website builder either Elementor or Brizy will be an ideal choice. If SEO design is giving you headaches, give WordLift a try or go to Goodie for your development needs. And, if you’ve been thinking about handing your site maintenance responsibilities to someone else so you can better focus on website design, Newt Labs is there to help.
The raison d’être of this adventure was to push your humble author a little in the disciplines of visual design and JavaScript coding. The functionality of the application I’d decided to build was not dissimilar to a ‘to do’ application. It is important to stress that this wasn’t an exercise in original thinking. The destination was far less important than the journey.
Want to find out how the application ended up? Point your phone browser at https://io.benfrain.com.
Here is a summary of what we will cover in this article:
The project set-up and why I opted for Gulp as a build tool;
Application design patterns and what they mean in practice;
How to store and visualize application state;
how CSS was scoped to components;
what UI/UX niceties were employed to make the things more ‘app-like’;
How the remit changed through iteration.
Let’s start with the build tools.
Build Tools
In order to get my basic tooling of TypeScipt and PostCSS up and running and create a decent development experience, I would need a build system.
In my day job, for the last five years or so, I have been building interface prototypes in HTML/CSS and to a lesser extent, JavaScript. Until recently, I have used Gulp with any number of plugins almost exclusively to achieve my fairly humble build needs.
Typically I need to process CSS, convert JavaScript or TypeScript to more widely supported JavaScript, and occasionally, carry out related tasks like minifying code output and optimizing assets. Using Gulp has always allowed me to solve those issues with aplomb.
For those unfamiliar, Gulp lets you write JavaScript to do ‘something’ to files on your local file system.
To use Gulp, you typically have a single file (called gulpfile.js) in the root of your project. This JavaScript file allows you to define tasks as functions. You can add third-party ‘Plugins’, which are essentially further JavaScript functions, that deal with specific tasks.
An Example Gulp Task
An example Gulp task might be using a plugin to harness PostCSS to process to CSS when you change an authoring style sheet (gulp-postcss). Or compiling TypeScript files to vanilla JavaScript (gulp-typescript) as you save them. Here is a simple example of how you write a task in Gulp. This task uses the ‘del’ gulp plugin to delete all the files in a folder called ‘build’:
var del = require("del");

gulp.task("clean", function() {
  return del(["build/**/*"]);
});
The require assigns the del plugin to a variable. Then the gulp.task method is called. We name the task with a string as the first argument (“clean”) and then run a function, which in this case uses the ‘del’ method to delete the folder passed to it as an argument. The asterisk symbols there are ‘glob’ patterns which essentially say ‘any file in any folder’ of the build folder.
Gulp tasks can get heaps more complicated but in essence, that is the mechanics of how things are handled. The truth is, with Gulp, you don’t need to be a JavaScript wizard to get by; grade 3 copy and paste skills are all you need.
I’d stuck with Gulp as my default build tool/task runner for all these years with a policy of ‘if it ain’t broke; don’t try and fix it’.
However, I was worried I was getting stuck in my ways. It’s an easy trap to fall into. First, you start holidaying the same place every year, then refusing to adopt any new fashion trends before eventually and steadfastly refusing to try out any new build tools.
I’d heard plenty of chatter on the Internets about ‘Webpack’ and thought it was my duty to try a project using the new-fangled toast of the front-end developer cool-kids.
Webpack
I distinctly remember skipping over to the webpack.js.org site with keen interest. The first explanation of what Webpack is and does started like this:
import bar from './bar';
Say what? In the words of Dr. Evil, “Throw me a frickin’ bone here, Scott”.
I know it’s my own hang-up to deal with but I’ve developed a revulsion to any coding explanations that mention ‘foo’, ‘bar’ or ‘baz’. That plus the complete lack of succinctly describing what Webpack was actually for had me suspecting it perhaps wasn’t for me.
Digging a little further into the Webpack documentation, a slightly less opaque explanation was offered, “At its core, webpack is a static module bundler for modern JavaScript applications”.
Hmmm. Static module bundler. Was that what I wanted? I wasn’t convinced. I read on but the more I read, the less clear I was. Back then, concepts like dependency graphs, hot module reloading, and entry points were essentially lost on me.
A couple of evenings of researching Webpack later, I abandoned any notion of using it.
I’m sure in the right situation and more experienced hands, Webpack is immensely powerful and appropriate but it seemed like complete overkill for my humble needs. Module bundling, tree-shaking, and hot-module reloading sounded great; I just wasn’t convinced I needed them for my little ‘app’.
So, back to Gulp then.
On the theme of not changing things for change sake, another piece of technology I wanted to evaluate was Yarn over NPM for managing project dependencies. Until that point, I had always used NPM and Yarn was getting touted as a better, faster alternative. I don’t have much to say about Yarn other than if you are currently using NPM and everything is OK, you don’t need to bother trying Yarn.
One tool that arrived too late for me to appraise for this application is Parceljs. With zero configuration and a BrowserSync like browser reloading backed in, I’ve since found great utility in it! In addition, in Webpack’s defense, I’m told that v4 onwards of Webpack doesn’t require a configuration file. Anecdotally, in a more recent poll I ran on Twitter, of the 87 respondents, over half chose Webpack over Gulp, Parcel or Grunt.
I started my Gulp file with basic functionality to get up and running.
A ‘default’ task would watch the ‘source’ folders of style sheets and TypeScript files and compile them out to a build folder along with the basic HTML and associated source maps.
I got BrowserSync working with Gulp too. I might not know what to do with a Webpack configuration file but that didn’t mean I was some kind of animal. Having to manually refresh the browser while iterating with HTML/CSS is soooo 2010 and BrowserSync gives you that short feedback and iteration loop that is so useful for front-end coding.
By consequence of my technology choices, some elements of code organization for the application were defining themselves. A gulpfile.js in the root of the project, a node_modules folder (where Gulp stores plugin code) a preCSS folder for the authoring style sheets, a ts folder for the TypeScript files, and a build folder for the compiled code to live.
The idea was to have an index.html that contained the ‘shell’ of the application, including any non-dynamic HTML structure and then links to the styles and the JavaScript file that would make the application work. On disk, it would look something like this:
Configuring BrowserSync to look at that build folder meant I could point my browser at localhost:3000 and all was good.
With a basic build system in place, files organization settled and some basic designs to make a start with, I had run-out of procrastination fodder I could legitimately use to prevent me from actually building the thing!
Writing An Application
The principle of how the application would work was this. There would be a store of data. When the JavaScript loaded it would load that data, loop through each player in the data, creating the HTML needed to represent each player as a row in the layout and placing them in the appropriate in/out section. Then interactions from the user would move a player from one state to another. Simple.
When it came to actually writing the application, the two big conceptual challenges that needed to be understood were:
How to represent the data for an application in a manner that could be easily extended and manipulated;
How to make the UI react when data was changed from user input.
One of the simplest ways to represent a data structure in JavaScript is with object notation. That sentence reads a little computer science-y. More simply, an ‘object’ in JavaScript lingo is a handy way of storing data.
Consider this JavaScript object assigned to a variable called ioState (for In/Out State):
var ioState = {
    Count: 0, // Running total of how many players
    RosterCount: 0; // Total number of possible players
    ToolsExposed: false, // Whether the UI for the tools is showing
    Players: [], // A holder for the players
}
If you don’t really know JavaScript that well, you can probably at least grasp what’s going on: each line inside the curly braces is a property (or ‘key’ in JavaScript parlance) and value pair. You can set all sorts of things to a JavaScript key. For example, functions, arrays of other data or nested objects. Here’s an example:
The net result is that using that kind of data structure you can get, and set, any of the keys of the object. For example, if we want to set the count of the ioState object to 7:
ioState.Count = 7;
If we want to set a piece of text to that value, the notation works like this:
aTextNode.textContent = ioState.Count;
You can see that getting values and setting values to that state object is simple in the JavaScript side of things. However, reflecting those changes in the User Interface is less so. This is the main area where frameworks and libraries seek to abstract away the pain.
In general terms, when it comes to dealing with updating the user interface based upon state, it’s preferable to avoid querying the DOM, as this is generally considered a sub-optimal approach.
Consider the In/Out interface. It’s typically showing a list of potential players for a game. They are vertically listed, one under the other, down the page.
Perhaps each player is represented in the DOM with a label wrapping a checkbox input. This way, clicking a player would toggle the player to ‘In’ by virtue of the label making the input ‘checked’.
To update our interface, we might have a ‘listener’ on each input element in the JavaScript. On a click or change, the function queries the DOM and counts how many of our player inputs are checked. On the basis of that count, we would then update something else in the DOM to show the user how many players are checked.
Let’s consider the cost of that basic operation. We are listening on multiple DOM nodes for the click/check of an input, then querying the DOM to see how many of a particular DOM type are checked, then writing something into the DOM to show the user, UI wise, the number of players we just counted.
The alternative would be to hold the application state as a JavaScript object in memory. A button/input click in the DOM could merely update the JavaScript object and then, based on that change in the JavaScript object, do a single-pass update of the all interface changes that are needed. We could skip querying the DOM to count the players as the JavaScript object would already hold that information.
So. Using a JavaScript object structure for the state seemed simple but flexible enough to encapsulate the application state at any given time. The theory of how this could be managed seemed sound enough too – this must be what phrases like ‘one-way data flow’ were all about? However, the first real trick would be in creating some code that would automatically update the UI based on any changes to that data.
The good news is that smarter people than I have already figured this stuff out (thank goodness!). People have been perfecting approaches to this kind of challenge since the dawn of applications. This category of problems is the bread and butter of ‘design patterns’. The moniker ‘design pattern’ sounded esoteric to me at first but after digging just a little it all started to sound less computer science and more common sense.
Design Patterns
A design pattern, in computer science lexicon, is a pre-defined and proven way of solving a common technical challenge. Think of design patterns as the coding equivalent of a cooking recipe.
Perhaps the most famous literature on design patterns is “Design Patterns: Elements of Reusable Object-Oriented Software” from back in 1994. Although that deals with C++ and smalltalk the concepts are transferable. For JavaScript, Addy Osmani’s “Learning JavaScript Design Patterns” covers similar ground. You can also read it online for free here.
Observer Pattern
Typically design patterns are split into three groups: Creational, Structural and Behavioural. I was looking for something Behavioural that helped to deal with communicating changes around the different parts of the application.
More recently, I have seen and read a really great deep-dive on implementing reactivity inside an app by Gregg Pollack. There is both a blog post and video for your enjoyment here.
When reading the opening description of the ‘Observer’ pattern in Learning JavaScript Design Patterns I was pretty sure it was the pattern for me. It is described thus:
The Observer is a design pattern where an object (known as a subject) maintains a list of objects depending on it (observers), automatically notifying them of any changes to state.
When a subject needs to notify observers about something interesting happening, it broadcasts a notification to the observers (which can include specific data related to the topic of the notification).
The key to my excitement was that this seemed to offer some way of things updating themselves when needed.
Suppose the user clicked a player named “Betty” to select that she was ‘In’ for the game. A few things might need to happen in the UI:
Add 1 to the playing count
Remove Betty from the ‘Out’ pool of players
Add Betty to the ‘In’ pool of players
The app would also need to update the data that represented the UI. What I was very keen to avoid was this:
playerName.addEventListener("click", playerToggle);

function playerToggle() {
  if (inPlayers.includes(e.target.textContent)) {
    setPlayerOut(e.target.textContent);
    decrementPlayerCount();
  } else {
    setPlayerIn(e.target.textContent);
    incrementPlayerCount();
  }
}
The aim was to have an elegant data flow that updated what was needed in the DOM when and if the central data was changed.
With an Observer pattern, it was possible to send out updates to the state and therefore the user interface quite succinctly. Here is an example, the actual function used to add a new player to the list:
function itemAdd(itemString: string) {
  let currentDataSet = getCurrentDataSet();
  var newPerson = new makePerson(itemString);
  io.items[currentDataSet].EventData.splice(0, 0, newPerson);
  io.notify({
    items: io.items
  });
}
The part relevant to the Observer pattern there being the io.notify method. As that shows us modifying the items part of the application state, let me show you the observer that listened for changes to ‘items’:
io.addObserver({
  props: ["items"],
  callback: function renderItems() {
    // Code that updates anything to do with items...
  }
});
We have a notify method that makes changes to the data and then Observers to that data that respond when properties they are interested in are updated.
With this approach, the app could have observables watching for changes in any property of the data and run a function whenever a change occurred.
If you are interested in the Observer pattern I opted for, I describe it more fully here.
There was now an approach for updating the UI effectively based on state. Peachy. However, this still left me with two glaring issues.
One was how to store the state across page reloads/sessions and the fact that despite the UI working, visually, it just wasn’t very ‘app like’. For example, if a button was pressed the UI instantly changed on screen. It just wasn’t particularly compelling.
Let’s deal with the storage side of things first.
Saving State
My primary interest from a development side entering into this centered on understanding how app interfaces could be built and made interactive with JavaScript. How to store and retrieve data from a server or tackle user-authentication and logins was ‘out of scope’.
Therefore, instead of hooking up to a web service for the data storage needs, I opted to keep all data on the client. There are a number of web platform methods of storing data on a client. I opted for localStorage.
The API for localStorage is incredibly simple. You set and get data like this:
// Set something
localStorage.setItem("yourKey", "yourValue");
// Get something
localStorage.getItem("yourKey");
LocalStorage has a setItem method that you pass two strings to. The first is the name of the key you want to store the data with and the second string is the actual string you want to store. The getItem method takes a string as an argument that returns to you whatever is stored under that key in localStorage. Nice and simple.
However, amongst the reasons to not use localStorage is the fact that everything has to be saved as a ‘string’. This means you can’t directly store something like an array or object. For example, try running these commands in your browser console:
// Set something
localStorage.setItem("myArray", [1, 2, 3, 4]);
// Get something
localStorage.getItem("myArray"); // Logs "1,2,3,4"
Even though we tried to set the value of ‘myArray’ as an array; when we retrieved it, it had been stored as a string (note the quote marks around ‘1,2,3,4′).
You can certainly store objects and arrays with localStorage but you need to be mindful that they need converting back and forth from strings.
So, in order to write state data into localStorage it was written to a string with the JSON.stringify() method like this:
Using localStorage meant everything was on the client and that meant no 3rd party services or data storage concerns.
Data was now persisting refreshes and sessions — Yay! The bad news was that localStorage does not survive a user emptying their browser data. When someone did that, all their In/Out data would be lost. That’s a serious shortcoming.
It’s not hard to appreciate that `localStorage` probably isn’t the best solution for ‘proper’ applications. Besides the aforementioned string issue, it is also slow for serious work as it blocks the ‘main thread’. Alternatives are coming, like KV Storage but for now, make a mental note to caveat its use based on suitability.
Despite the fragility of saving data locally on a users device, hooking up to a service or database was resisted. Instead, the issue was side-stepped by offering a ‘load/save’ option. This would allow any user of In/Out to save their data as a JSON file which could be loaded back into the app if needed.
This worked well on Android but far less elegantly for iOS. On an iPhone, it resulted in a splurge of text on screen like this:
As you can imagine, I was far from alone in berating Apple via WebKit about this shortcoming. The relevant bug was here.
At the time of writing this bug has a solution and patch but has yet to make its way into iOS Safari. Allegedly, iOS13 fixes it but it’s that’s in Beta as I write.
So, for my minimum viable product, that was storage addressed. Now it was time to attempt to make things more ‘app-like’!
App-I-Ness
Turns out after many discussions with many people, defining exactly what ‘app like’ means is quite difficult.
Ultimately, I settled on ‘app-like’ being synonymous with a visual slickness usually missing from the web. When I think of the apps that feel good to use they all feature motion. Not gratuitous, but motion that adds to the story of your actions. It might be the page transitions between screens, the manner in which menus pop into existence. It’s hard to describe in words but most of us know it when we see it.
The first piece of visual flair needed was shifting player names up or down from ‘In’ to ‘Out’ and vice-versa when selected. Making a player instantly move from one section to the other was straightforward but certainly not ‘app-like’. An animation as a player name was clicked would hopefully emphasize the result of that interaction – the player moving from one category to another.
Like many of these kinds of visual interactions, their apparent simplicity belies the complexity involved in actually getting it working well.
It took a few iterations to get the movement right but the basic logic was this:
Once a ‘player’ is clicked, capture where that player is, geometrically, on the page;
Measure how far away the top of the area is the player needs to move to if going up (‘In’) and how far away the bottom is, if going down (‘Out’);
If going up, a space equal to the height of the player row needs to be left as the player moves up and the players above should collapse downwards at the same rate as the time it takes for the player to travel up to land in the space vacated by the existing ‘In’ players (if any exist) coming down;
If a player is going ‘Out’ and moving down, everything else needs to move up to the space left and the player needs to end up below any current ‘Out’ players.
Phew! It was trickier than I thought in English — never mind JavaScript!
There were additional complexities to consider and trial such as transition speeds. At the outset, it wasn’t obvious whether a constant speed of movement (e.g. 20px per 20ms), or a constant duration for the movement (e.g. 0.2s) would look better. The former was slightly more complicated as the speed needed to be computed ‘on the fly’ based upon how far the player needed to travel — greater distance requiring a longer transition duration.
However, it turned out that a constant transition duration was not just simpler in code; it actually produced a more favorable effect. The difference was subtle but these are the kind of choices you can only determine once you have seen both options.
Every so often whilst trying to nail this effect, a visual glitch would catch the eye but it was impossible to deconstruct in real time. I found the best debugging process was creating a QuickTime recording of the animation and then going through it a frame at a time. Invariably this revealed the problem quicker than any code based debugging.
Looking at the code now, I can appreciate that on something beyond my humble app, this functionality could almost certainly be written more effectively. Given that the app would know the number of players and know the fixed height of the slats, it should be entirely possible to make all distance calculations in the JavaScript alone, without any DOM reading.
It’s not that what was shipped doesn’t work, it’s just that it isn’t the kind of code solution you would showcase on the Internet. Oh, wait.
Other ‘app like’ interactions were much easier to pull off. Instead of menus simply snapping in and out with something as simple as toggling a display property, a lot of mileage was gained by simply exposing them with a little more finesse. It was still triggered simply but CSS was doing all the heavy lifting:
There when the data-evswitcher-showing="true" attribute was toggled on a parent element, the menu would fade in, transform back into its default position and pointer events would be re-enabled so the menu could receive clicks.
ECSS Style Sheet Methodology
You’ll notice in that prior code that from an authoring point of view, CSS overrides are being nested within a parent selector. That’s the way I always favor writing UI style sheets; a single source of truth for each selector and any overrides for that selector encapsulated within a single set of braces. It’s a pattern that requires the use of a CSS processor (Sass, PostCSS, LESS, Stylus, et al) but I feel is the only positive way to make use of nesting functionality.
I’d cemented this approach in my book, Enduring CSS and despite there being a plethora of more involved methods available to write CSS for interface elements, ECSS has served me and the large development teams I work with well since the approach was first documented way back in 2014! It proved just as effective in this instance.
Partialling The TypeScript
Even without a CSS processor or superset language like Sass, CSS has had the ability to import one or more CSS files into another with the import directive:
@import "other-file.css";
When beginning with JavaScript I was surprised there was no equivalent. Whenever code files get longer than a screen or so high, it always feels like splitting it into smaller pieces would be beneficial.
Another bonus to using TypeScript was that it has a beautifully simple way of splitting code into files and importing them when needed.
This capability pre-dated native JavaScript modules and was a great convenience feature. When TypeScript was compiled it stitched it all back to a single JavaScript file. It meant it was possible to easily break up the application code into manageable partial files for authoring and import then into the main file easily. The top of the main inout.ts looked like this:
This simple house-keeping and organization task helped enormously.
Multiple Events
At the outset, I felt that from a functionality point of view, a single event, like “Tuesday Night Football” would suffice. In that scenario, if you loaded In/Out up you just added/removed or moved players in or out and that was that. There was no notion of multiple events.
I quickly decided that (even going for a minimum viable product) this would make for a pretty limited experience. What if somebody organized two games on different days, with a different roster of players? Surely In/Out could/should accommodate that need?
It didn’t take too long to re-shape the data to make this possible and amend the methods needed to load in a different set.
At the outset, the default data set looked something like this:
The new data was an array with an object for each event. Then in each event was an EventData property that was an array with player objects in as before.
It took much longer to re-consider how the interface could best deal with this new capability.
From the outset, the design had always been very sterile. Considering this was also supposed to be an exercise in design, I didn’t feel I was being brave enough. So a little more visual flair was added, starting with the header. This is what I mocked up in Sketch:
It wasn’t going to win awards but it was certainly more arresting than where it started.
Aesthetics aside, it wasn’t until somebody else pointed it out, that I appreciated the big plus icon in the header was very confusing. Most people thought it was a way to add another event. In reality, it switched to an ‘Add Player’ mode with a fancy transition that let you type in the name of the player in the same place the event name was currently.
This was another instance where fresh eyes were invaluable. It was also an important lesson in letting go. The honest truth was I had held on to the input mode transition in the header because I felt it was cool and clever. However, the fact was it was not serving the design and therefore the application as a whole.
This was changed in the live version. Instead, the header just deals with events — a more common scenario. Meanwhile, adding players is done from a sub-menu. This gives the app a much more understandable hierarchy.
The other lesson learned here was that whenever possible, it’s hugely beneficial to get candid feedback from peers. If they are good and honest people, they won’t let you give yourself a pass!
Summary: My Code Stinks
Right. So far, so normal tech-adventure retrospective piece; these things are ten a penny on Medium! The formula goes something like this: the dev details how they smashed down all obstacles to release a finely tuned piece of software into the Internets and then pick up an interview at Google or got acqui-hired somewhere. However, the truth of the matter is that I was a first-timer at this app-building malarkey so the code ultimately shipped as the ‘finished’ application stunk to high heaven!
For example, the Observer pattern implementation used worked very well. I was organized and methodical at the outset but that approach ‘went south’ as I became more desperate to finish things off. Like a serial dieter, old familiar habits crept back in and the code quality subsequently dropped.
Looking now at the code shipped, it is a less than ideal hodge-bodge of clean observer pattern and bog-standard event listeners calling functions. In the main inout.ts file there are over 20 querySelector method calls; hardly a poster child for modern application development!
I was pretty sore about this at the time, especially as at the outset I was aware this was a trap I didn’t want to fall into. However, in the months that have since passed, I’ve become more philosophical about it.
The final post in this series reflects on finding the balance between silvery-towered code idealism and getting things shipped. It also covers the most important lessons learned during this process and my future aspirations for application development.
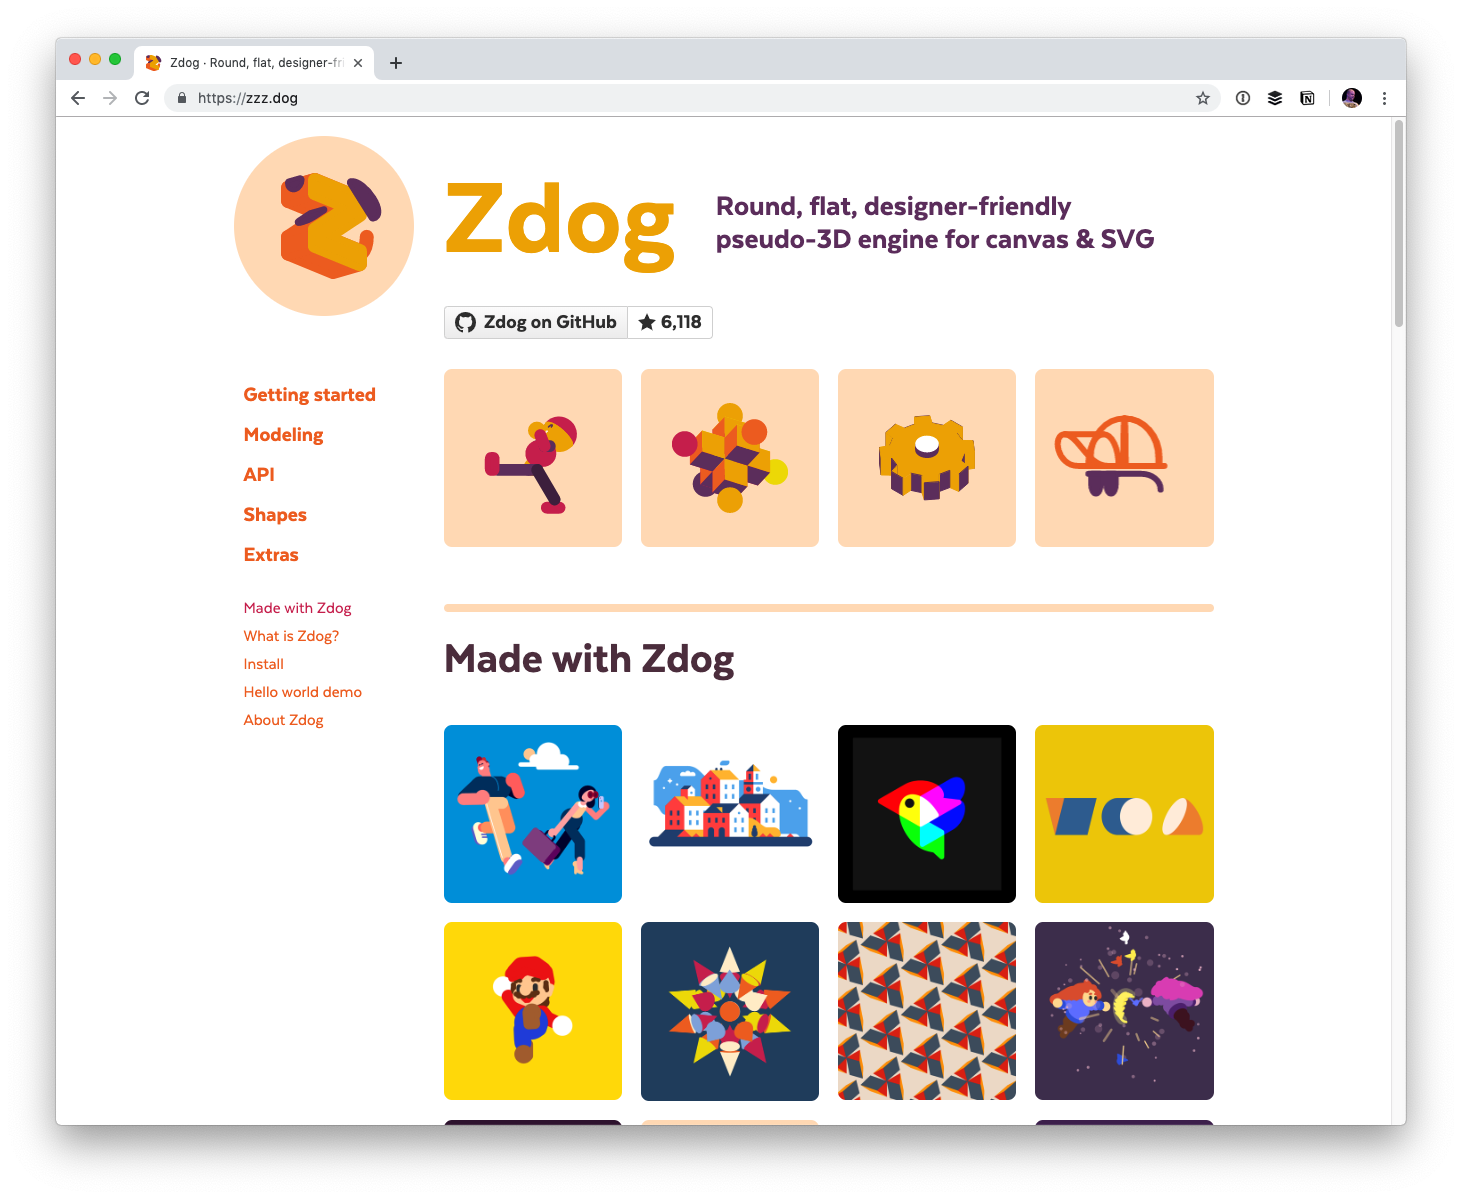
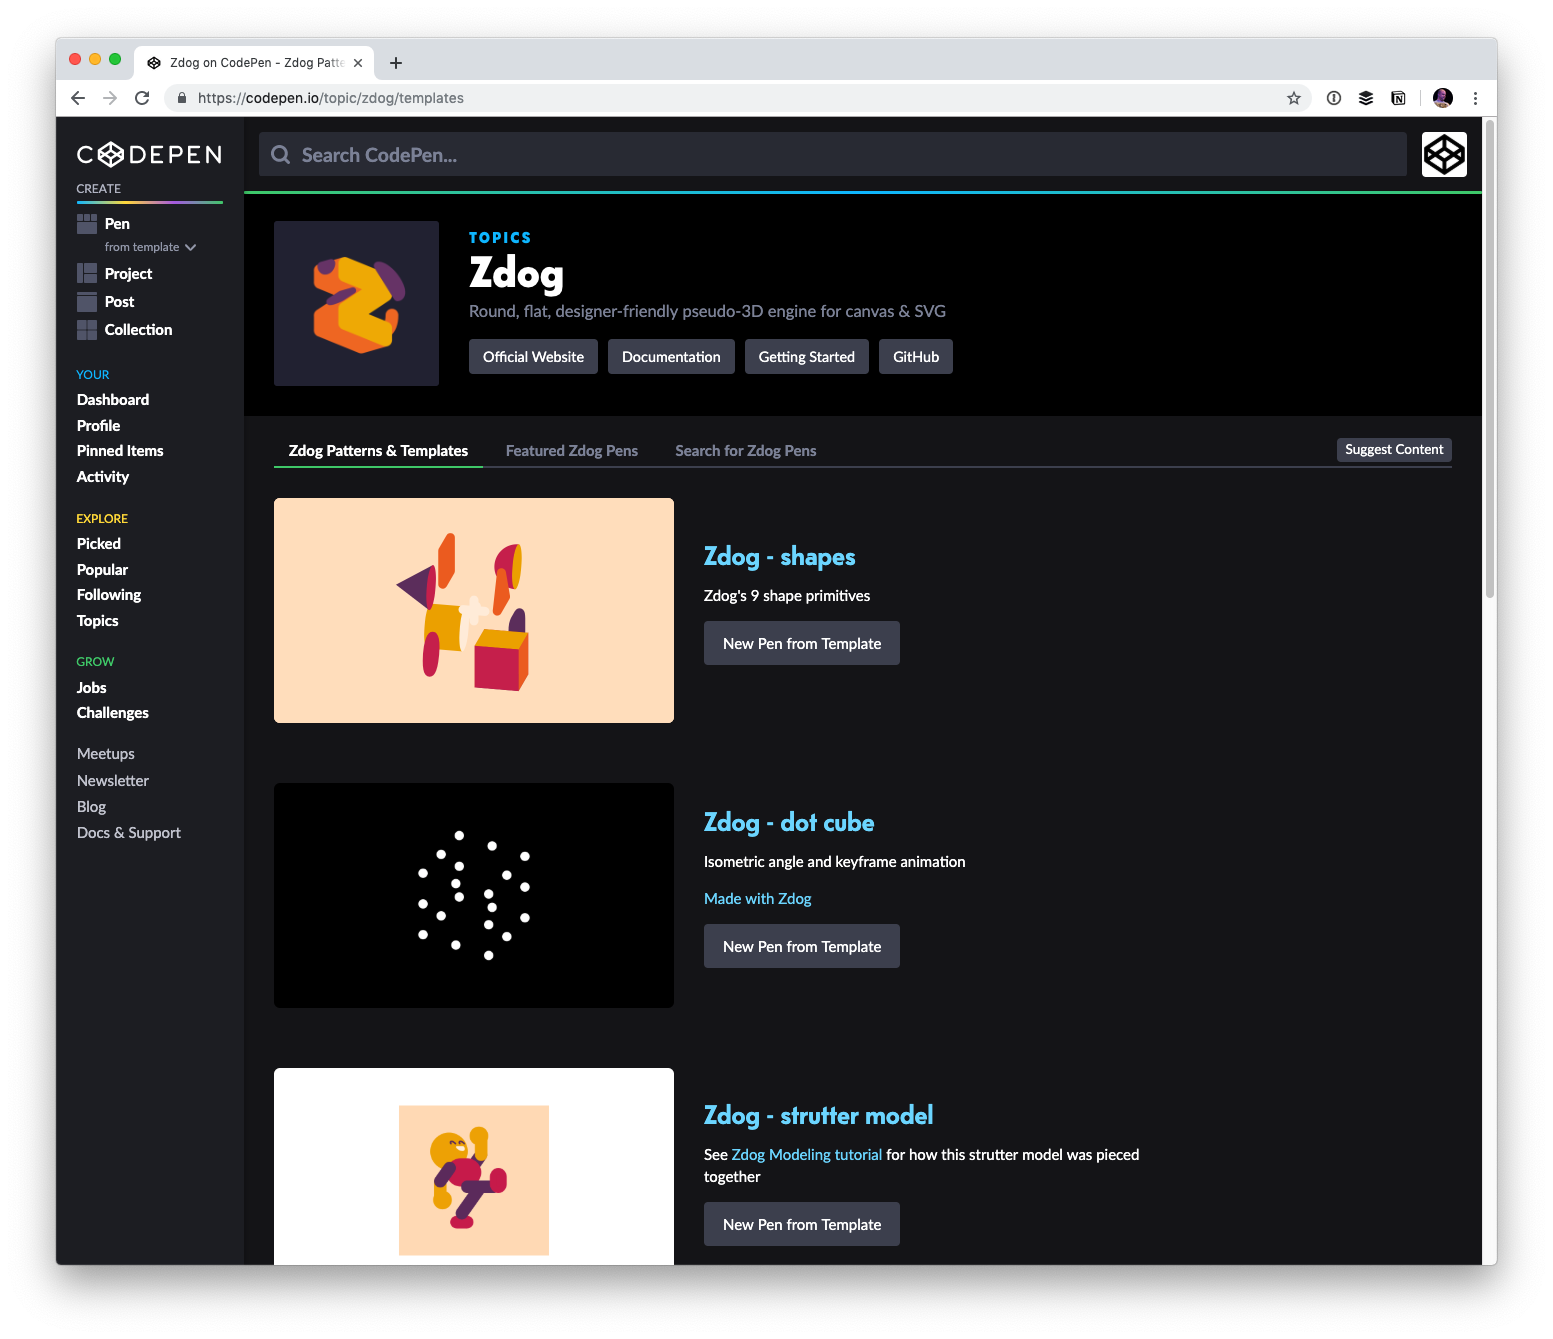
David DeSandro has loads of super cool JavaScript libraries he’s created over the years. His latest is Zdog, a “round, flat, designer-friendly pseudo-3D engine for canvas & SVG.” It’s only been about a month since he dropped it (although, like any good library, it’s been simmering) and it has been pretty incredible to watch it capture the imagination of loads of designers and developers.
I’m shouting out Zdog here because I think it’s worth y’all checking out. There is something about the API and how easy it becomes to draw in a 3D space that is clicking with folks. It might just click with you! Having a little moment like that is what web dev is all about ;).
(By the way, if you have a good idea for a “Topic” on CodePen, let me know! The main thing we need is a good strong Collection of “starter” Pens to help people understand concepts and use the library, plus a Collection of strong, complete examples. I have some cool swag and stuff I could send your way if you’re into the idea of helping.)
I really like :focus-within. It’s a super useful selector that allows you to essentially select a parent element when any of its children are in focus.
Say you wanted to reveal some extra stuff when a
is hovered…
div:hover {
  .extra-stuff {
     /* reveal it */
  }
}
That’s not particularly keyboard-friendly. But if something in .extra-stuff is tab-able anyway (meaning it can be focused), that means you could write it like this to make it a bit more accessible:
Browsers ignore entire selectors if it doesn’t understand any part of them. So, if you’re dealing with a browser that doesn’t support :focus-within then it would ignore the CSS example above, meaning you’ve also lost the :hover state.
Instead:
div:hover {
  .extra-stuff {
     /* reveal it */
  }
}
div:focus-within {
  .extra-stuff {
     /* reveal it */
  }
}
That is safer. But it’s repetitive. If you have a preprocessor like Sass…
Recently, I was part of a 3-person team of consultants who in 12 weeks built the foundations of a new design system. That design system is now used in multiple products and is contributed to by other developers and designers.
In this post you’ll find some of the techniques we used to make the project a success within its short timespan. (While we did deliver code on the project, this article is written from my perspective as a designer.)
1. Invest in Relationships
When building a design system, it’s crucial to first secure buy-in from your stakeholders, from product managers, product managers’ managers, developers and designers.
it’s imperative that neither side see these repeated interactions as nuisances
Ultimately, a design system can only be successful if everyone is on board. One way to do this is to meet with key figures one-on-one to discuss with them their hopes and fears for the design system. That helps with building trust and identifying potential roadblocks early on. The groundwork should be laid for relationships where you feel comfortable seeking feedback from any person as often and as many times as needed, no matter how high up they are.
In order to make any project work – and make it work fast – it’s imperative that neither side see these repeated interactions as nuisances. That’s easier said than done: outside consultants, in particular, have to make an impression and make it fast.
Be proactive in setting up meetings and slot yourselves in whatever available time you can find on a person’s calendar.
2. Get Clear on Your Design Principles
Once all stakeholders are involved, it’s crucial to set a clear vision for the project along with a design vision.
Getting aligned on project goals is best achieved with a kickoff meeting. Getting on the same page regarding the design vision is most often achieved by defining the design principles.
It’s best to avoid using generic adjectives such as ‘simple’ and ‘beautiful’ when formulating design principles — all design systems should be this by default! Instead, focus on the goals and needs of the target audience of the products, that the design system serves.
avoid using generic adjectives such as ‘simple’ and ‘beautiful’
One practical way to zero in on your design principles is to bring all stakeholders together in a short workshop. First, share examples of specific, working design principles that help everyone not familiar with the concept to understand what a good set of design principles should look like. Next, ask that everyone write down design principles they believe apply to their product (not just the design system, but the product(s) that the design system will be applied to). Then, have everyone share their thoughts with the group. Go through rounds of affinity mapping to reach a final set of principles. Don’t panic if the key terms aren’t beautifully worded at the end of the workshop.
When we used this approach, the group work resulted in a set of specific and actionable principles, all ones that then needed to be reworded multiple times until they became clear and succinct. Agreeing on your design principles helps make sure everyone is heading full steam in the right direction.
3. Keep the Team Focused and Nimble
Dedicating yourself entirely to the project at hand will lead to faster results — in any project.
A benefit of working on a design system as a consultancy is that it is easier to have that type of focus. Often, when a design system is built in-house, the designers and developers involved juggle that project alongside other responsibilities. The multitasking approach makes it challenging to get to a first usable version of a design system within a short timeframe.
With a design system, there is plenty of high-level conceptual work to be done, including defining the design principles, but also an array of nitty-gritty, low-concept tasks, such as naming components and building a symbol library. It is often beneficial therefore to initially have at least two designers on the team, meaning that design tasks can be allocated according to the type of work they require. A repeated context switch between high and low concept work can otherwise wear the team out, significantly slowing down progress.
For developers, by contrast, operating in the beginning as a single unit can be beneficial: it means a certain nimbleness and speed in implementing decisions. That said, it is necessary to acknowledge that there is more design work to be done in the beginning stages of a design system and an increasing amount of developer work towards the project end. That’s why — midway through our project — we mixed up the team by replacing one of the designers with another developer. That kind of agile, focused approach allows the team to maintain maximum speed throughout the project.
4. Build Robust Foundations That Allow For Quick Changes at Scale
This is where the work of a designer gets tricky but rewarding: it’s critical to find the right balance between a near-perfectionism on the one hand, and a willingness to discard things that don’t work on the other.
The foundations must become robust. A common way of doing that is to make heavy use of reusable symbols and styles from the start and then use those symbols as a base structure for the rest of the system.
No one reads the manual, even if there is one
Especially on short projects, it’s imperative to be able to execute repeated large-scale changes with rapid speed and limited effort. We did this by making heavy use of text styles and layer styles inside all symbols in Sketch, so that if we needed to adjust a color somewhere, we didn’t need to then change it in countless other places too.
5. Keep it Standard
No one reads the manual, even if there is one. That’s why it’s advantageous not to reinvent the wheel on the design side and keep things as standard as possible.
Often, design systems are built for other designers and developers without them being there yet to use the system. That is especially true for consultants. For that reason, it is wise to not rely on any third-party plugins or any detailed instructions.
Design systems should be easy to adopt by future designers and developers. In our project, we used only built-in Sketch functionality, which means the system works for whoever later uses it, whether they like to use plugins or not.
6. Make it Tangible For the Client From the Start
What all of these lessons ultimately hint at, is that it’s vital to create a minimum viable product and to test it often to see if it creates real value. (And then, if it doesn’t, to have the courage to kill it!)
In general, it’s not advisable to build a design system in isolation; the system needs to be plugged into the broader network of people and systems it will be influencing. It’s good to keep in mind that describing a product is one thing and showing a prototype of it is another; real, useful user feedback often requires that one additional step.
the worst type of time lag is not falling a few weeks behind on a schedule, it’s building a system that nobody wants
For one product, we created fake redesigns of what the new versions of our stakeholders’ systems could potentially look like. Showing people a single button does not elicit much in the way of a response. But when that same button is presented as part of a revamped, existing system the stakeholders can recognize, they suddenly have a wealth of opinions on that design language as a whole. It makes the potential change real, and that’s what all designers should be able to do. Granted, it’s harder with a design system — but equally as important as with any other product.
Because the worst type of time lag is not falling a few weeks behind on a schedule, it’s building a system that nobody wants.
7. Get Users to Implement it
Feedback on how components look is one thing, input on whether that component is usable for a designer or developer is something entirely different. A design system is only successful if designers and developers actually want to use it, so you have to make sure that it saves them time and makes their lives easier. Otherwise, they will (rightfully!) keep creating their own components from scratch and the investment in the design system will have been wasted.
In the final month of our 12-week project, we stopped adding new components and instead focused on refining the system that we had built. We were lucky to be able to work with a developer outside our team who could use our design system’s components on a product. Inevitably, he discovered gaps, bugs, and things that could be better explained.
It’s a great feeling to uncover problems through testing; correcting them means the system will have an even greater chance of success in the organization, years down the line.
8. Study the Greats
Learning from someone else’s successes and mistakes is always useful. When there’s limited time, learning from other people’s experiences becomes invaluable. You have less time to make – and learn from – your own mistakes.
Studying existing design systems is a great way to learn from others and speed up decision-making. When you get started and don’t yet have any components, it can be hard to imagine what the effect of documentation layout and design file organization will be later on. Taking a look at how certain choices pan out in mature design systems can help lot when making those types of choices at the very beginning.
For a long time, we wanted to create a printed magazine that hasn’t existed before. Not a magazine about fleeting design trends or ever-changing frameworks, but topics that would make us all think, and that would remain useful as time passes. A printed magazine exploring topics that often get lost in the myriad of blog posts out there.
About the Magazine
With Smashing Magazine Print, we want to provide a space for topics that perhaps have more longevity than what we usually cover online — without running short on practical and actionable insights, of course. One theme per issue, with handy, digestible 60–80 pages of high-quality print, containing a handful of curated and unpublished articles.
Approachable, friendly and inclusive. Written by and for the community, with a focus on real-world insights and the challenges that we all have to tackle together — for people just like you, who design and build the web. It took us more time than expected, but we are done now, and shipping worldwide. Download a free PDF preview (3 MB) and get your copy now.
Printed magazine for free + DRM-free eBooks, webinars and other fancy things.
All Smashing Members ($5 per month) get the eBook for free, and Smashers ($9 plan) also get a free printed copy shipped to the doorsteps. For additional copies, a discount of $10 applies.
About the Issue
We kick off with an issue exploring topics very close to our hearts — ethics, privacy and security, because these issues reach into all our lives, from our personal use of the web through to the advanced applications we develop. We take a closer look at the current state of tracking, advertising, GDPR and privacy law, data protection and addictive interfaces. We explore how we all can integrate privacy-driven decisions into our workflows by default, abandoning dark patterns for good along the way.
The web is wonderfully diverse and unpredictable because of the wonderfully diverse people who shape it. While we often see people as lifeless dots in our analytics stats, every single dot is an actual person, and so every single dot matters. We deserve to be respected and valued, and that holds true for how companies treat our data and privacy, too. In times when humility and kindness have become rarities, we need to find a way to make the web a calmer, more respectful place that treats data and privacy seriously?
That’s what we wanted to explore. So, we got to work. We’ve teamed up with Veerle Pieters for the design and illustrations, and Rachel has been working with the authors to bring valuable insights to the magazine. Rather than asking the authors to write on very specific topics, Rachel asked them to contribute to a collection of thinking on the subjects of ethics, privacy and security.
Table of Contents
What follows is a collection of articles that sit very well together, yet tackle different aspects of the issues at hand. You might not agree with all of them, but we hope they will make you think.
It’s Not About You by Heather Burns and Morten Rand-Hendriksen
This One Weird Trick Tells Us Everything About You by Laura Kalbag
Quieting Disquiet by Stuart Langridge
Advertising Is Not The Problem by Cennydd Bowles
Along with the themed articles, we have included some little insights into our Smashing Family, pieces about our books, conferences and membership. You might not know it, but Smashing Magazine is brought to you by a tiny team of people who care. We care about the values we stand behind, and about the people who read the magazine, who join as members, and who come to conferences. We care a lot about the web. We hope that shines through in everything we do.
60 pages. High-quality print. Free worldwide airmail shipping from Germany, late July. Written by and for the community. Download a free PDF preview (3 MB).
Printed magazine for free + DRM-free eBooks, webinars and other fancy things.
Community Matters ??
The printed magazine wouldn’t exist without our dear Smashing community, and that’s why it is and always will be free to Smashing Members.
If you haven’t heard of the Membership yet, no worries: you are awesome just the way you are, and you can join our wonderful community any time. We can’t wait to see you!
If you are a Supporter ($3 plan), please don’t forget to sign in for your discount to be applied automatically.
If you are a Member ($5 plan), please sign in and download the digital version on the product page. Obviously, you also get a discount on the printed copy.
Our brand-new printed magazine is free for Smashing Members (eBook with the $5 plan, Print + eBook with $9 plan). You can cancel any time, you know.
Admittedly, publishing a printed magazine in a time when everything has gone digital is quite a gamble for us. But you never know for sure until you try — and fail or succeed.
We don’t know how the magazine will take shape in the future, but we already can’t wait to hear your feedback. We’re very excited, and we hope you’ll be, too —at least when you hold the very first issue of the printed magazine in your hands.
Stay smashing, and thank you for your ongoing support, everyone!
Honesty, humility and authenticity became rarities on the web. Dark patterns are prevailing many of the interfaces we use, and our data is collected, evaluated and handed over to third-parties left and right, often without us noticing at all. To many of our customers it’s not really a big deal — privacy is often seen as a fair price for using all the wonderful free services around us.
However, we might underestimate the value of data we willingly hand over to data-driven companies. And very often, while we mindlessly click away a cookie consent prompt, we are giving away the sense of intimacy. After all, nobody loves to search for shoes one day, and be followed by the same shoes across the entire web over weeks to come.
Smashing TV: “Towards Privacy By Default”, a live stream conversation, starting at 1PM GMT (3PM CEST). Moderated by Vitaly Friedman. With Trine Falbe, Laura Kalbag, Heather Burns, Cennydd Bowles, Stuart Langridge and Morten Rand-Hendriksen.
How do we deal with advertising, tracking, sensitive data collection and treatment of data?
How do we “sell” ethics and privacy to managers and clients?
How do we change the culture of dark patterns in our interfaces?
How and when do we integrate privacy, ethics, security in our design/dev workflows?
How do we maintain privacy and ethics over time?
How does GDPR help us shift the culture on the web?
These aren’t easy questions to answer, and we need reliable solutions to make the difference. But we can figure out a way forward, and how to make privacy-aware decisions a default in our design and development work. These are also the questions we explore in our brand-new Smashing Magazine Print. In fact, it’s the magazine that prompted us to run a live session in the first place.
Meet Our New Printed Magazine
With Smashing Magazine Print, we want to provide a space for important topics that perhaps have more longevity than what we usually cover online — without running short on practical and actionable insights, of course.
We kick off with a 60-pages issue exploring ethics, privacy and security. We take a closer look at the current state of tracking, advertising, GDPR and privacy law, data protection and addictive interfaces. We explore how we all can integrate privacy-driven decisions into our workflows by default, abandoning dark patterns for good along the way.
Printed magazine for free + eBooks, webinars, discounts and other fancy things.
Join the Live Stream Today, 1PM GMT!
And that’s a wrap!Join us live with Trine Falbe, Laura Kalbag, Heather Burns, Cennydd Bowles, Stuart Langridge and Morten Rand-Hendriksen. Also, prepare and post your questions and we’ll bring them up during the discussion as well, of course!
Speaking of kinda douchey words, I’m reminded of one of my favorite sites on the internet: Unsuck It. Not only does it call out a ton of terms for being, uh, sucky, but suggests unsucky alternatives.
Bubble Up
Thank you for pointing out that issue. I’ll be sure to bubble that up.
Unsucked: Tell someone with more authority.
Powwow
Oh, yes! That’s very important to me. Let’s have a powwow about this first thing tomorrow.
Unsucked: Yet more unthinking appropriation of Native American culture. Meeting.
“My life is shaped by the urgent need to wander and observe — and my camera is my passport,” says famous American photographer Steve McCurry. Whether you’re a professional photojournalist snapping pictures on the front lines or a novice photographer just starting out, there is something inside that drives people to dedicate their time to photography.
People become photographers for different reasons — a passion for aesthetics, an eagerness to tell stories, a desire to better understand the world around them, or maybe just a simple but unexplainable passion for capturing moments on film.
How do you become a professional photographer?
Know yourself. Decide if photography is right for you.
Build your skills. Practice. Take photography classes or get a photography degree. Learn how to edit photos. Practice some more.
Find the right equipment and tools. Choose a camera, tripod, lights, and lenses. Invest in a good laptop and photo-editing software.
Set up your photography business. Decide on a type of photography to pursue. Develop a business plan. Create and implement a marketing strategy. Network with other photographers.
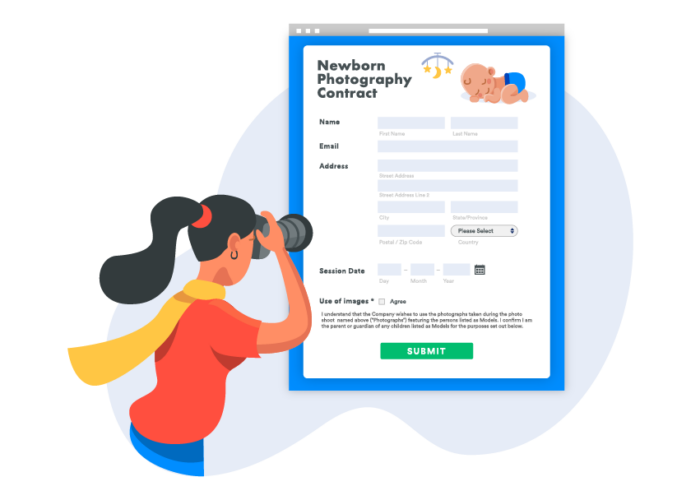
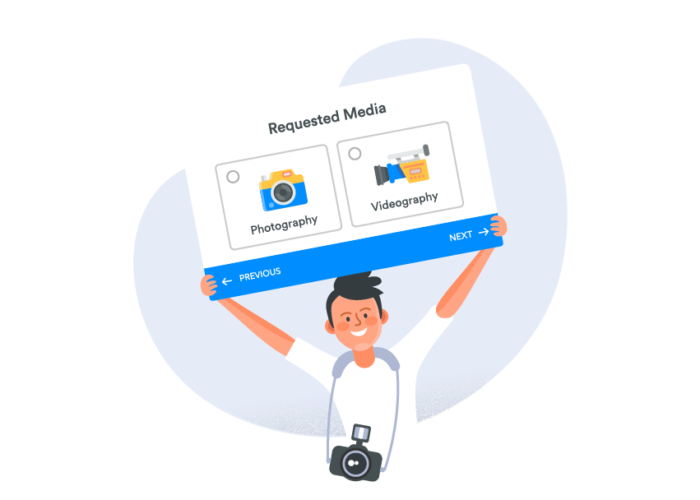
Optimize your business. Simplify and automate business processes, such as scheduling appointments, obtaining session agreements and release forms, gathering customer feedback, and more with JotForm.
Before starting, we would like to remind that you can also download the PDF version of this photography business guide for free!
How to know if photography is right for you
Before embarking on photography as a career, you’ll want to make sure this is absolutely the right field for you. That’s because, at the end of the day, photography demands passion and sacrifice — of course, those sacrifices can yield rewarding outcomes. You will have to spend time, energy, and probably some money to get really good at it. So before you dive in, it’s worth taking the time to evaluate whether or not you have the right personality for the world of photography.
Are you ready for the long hours and possible frustrations that come with photography? Are you passionate enough to withstand the ups and downs a beginning photographer faces? Answer those questions, and you’ll have a better understanding of whether or not photography is right for you.
Knowing yourself
Who are you? OK, that’s a pretty big question. To make things easier, here are three slightly more specific questions:
What gets you excited to wake up in the morning?
Which three adjectives would you use to describe your personality?
What kind of work brings you satisfaction?
Together these questions get at what motivates you and how you behave in certain situations. Your answers may be broad — and some of them might be only vaguely related to photography or not related at all. For instance, maybe your answer to the first question is “your family.” Although this answer isn’t directly related to photography, it might hint at what motivates you to start a photography business. You may want extra funds so that you can better support your family financially — and maybe you’re passionate about capturing other families’ memories with your camera.
None of your answers to these questions specifically qualify or disqualify you from becoming a photographer. Instead, answering these questions prepares you for what’s ahead. They make you aware of the strengths and weaknesses that you bring to photography. If, for instance, you said you’re “impatient,” you’ll want to keep that in mind as you learn photography. Are you a procrastinator? Again, good to know.
Your working habits and how you relate to your work are also helpful to understand. For instance, maybe you’re someone who thrives on outside validation. You need someone beside you to keep you going and remind you why the work you’re doing matters. Unfortunately, photography can be a bit lonely — spending late nights in the darkroom or hours alone on your laptop editing. You’ll need to go out of your way to get feedback from others and set up a support system both inside and outside of the photography world. These topics — getting feedback and creating a network — we’ll discuss later.
“Knowing yourself is the beginning of all wisdom,” said Aristotle. It’s a wisdom that will come in handy as you embark on your budding photography career. Get ready to work hard — and reap lasting rewards.
Choose photography because you love it
Many people come to photography as a way to make some money. It’s no wonder why: Many people around the world support themselves with photography, turning it into a lasting and fulfilling career. Countless advertising agencies and publications need photographers to provide them with content — and they pay handsomely. It’s also a perfect “side hustle,” allowing you the freedom to make your own hours and earn sizable hourly income on a freelance basis. To top it off, photography engages your creativity in a world where creative careers are harder and harder to come by.
Unfortunately, becoming a photographer merely because of the money likely isn’t enough of a motivator. You also need to you love photography. Getting those paychecks and turning photography into a lucrative career is only possible if it’s guided by a real passion for the art. You’ll only be able to put in the time and energy needed for photography if you’re motivated by respect for your craft.
Feeling passionate? Ready to turn photography into a life-changing creative career? Then let’s get to it — because there’s quite a bit to learn about how to become a photographer.
Becoming a professional photographer
A tourist on 57th Street sees a musician getting out of a cab. He goes over and asks, “How do you get to Carnegie Hall?” Without pause, the musician replies wearily, “Practice.”
Everyone can take pictures. Who hasn’t snapped a pretty picture of a sunset during a hike? Or taken a particularly cute picture of their dog? And almost everyone in the world has taken a selfie at this point. When you take a picture like this, you are technically a photographer. But being a professional photographer — someone who gets paid for their work and sees photography as more than just a pleasant pastime — is entirely different. Take a real-world use case as an example and learn how famous photographer, Jeremy Cowart, made it big.
What sets professional photographers apart is practice. Pros have honed their craft. They’ve labored over photographs, becoming masters (or near masters) of every step in the photographic process. And still, they’re always looking to improve, researching the latest photographic technology, updating their equipment, and taking on new projects that will stretch their skills and take their mastery further.
In this section we’ll stress the importance of practice and explain why it’s such a crucial element of becoming a professional photographer. We’ll also explain how to practice — and how to find time to practice.
Practice makes perfect
Photography is a craft — just like metallurgy or shoe cobbling or any other old-timey occupation you can think of. Crafts require practice. It’s no wonder there are so many photography apprenticeships. These apprenticeships pair a seasoned professional with a novice so that the master’s wisdom can pass on to the student.
People often confuse “practice” with “learning.” Learning is obviously useful. Reading a how-to book about photography is immensely valuable, as is looking through a book of photographs and evaluating them on a formal level. But practice involves doing. It means going out into the world with your camera and taking lots of pictures — then developing them, editing them, and engaging with every part of the photographic process.
Along the way you’ll make mistakes; that’s good! Mistakes help you learn. Pushing yourself and solving new problems is the best way to develop crucial skills and become a more well-rounded photographer. In fact, going out of your comfort zone and setting yourself up to face challenges is perhaps the most useful means of acquiring new skills.
Create goals for yourself. What skills do you want to improve? How are you going to track your progress in terms of developing this skill? And on what timeline are you planning to improve? Laying out your goals clearly is important, and tracking your progress is just as vital. Keeping a journal or a personal blog where you can chart your progress privately or publicly can be useful. Then it’s a matter of determining how you’re going to meet these goals. As we said, the best way to learn is by doing, and the best way to do is by tackling lots of projects.
Create projects for yourself. Tell a friend you’re taking them to the park and photographing them. They’ll probably be flattered. Sure, this might be something you’ve never done before. But now you’ll have the chance to practice composition, getting the lighting right, and working face-to-face with a client. Not to mention the practice you’ll get editing after the fact. Sitting down and saying, “I’m going to practice landscape photography” can feel too abstract. Creating a project for yourself forces you to tackle real-world problems and engages lots of different skills all at once. The goal is clear, and it’s up to you to meet it.
Mastering photography requires sacrifice
As we’ve discussed, becoming a professional photographer doesn’t happen overnight. You’re going to have to make some sacrifices along the way. Here are three that stand out:
Time: From idea to finished product, taking a photograph can be quite labor intensive. Great photographers are often detail oriented. They might spend hours trying to perfect a single element of a photograph. So as you tackle projects and dedicate yourself to improving your craft, you might find that you’re dedicating quite a chunk of time to photography. That’s just a reality of photography: You sacrifice lots of time along the way. If you love what you’re doing, the time will fly by. You might look up from your laptop after an epic editing session and realize it’s 3 a.m. It’s up to you to determine if the time you’re spending is worthwhile and to create an environment where you can improve as a photographer while keeping up with your other responsibilities.
Energy: Between traveling to gigs, networking, and running a business — not to mention the actual act of taking photographs — photography will take some energy out of you. Don’t burden yourself too much early on, or you might end up getting burnt out. Pace yourself, and realize it’s OK to ask for help.
Money: Photography is a pretty expensive endeavor in the early going. Getting the right camera — not to mention lenses, lighting equipment, etc. — can make a dent in your paycheck. There’s no real way around this, though you can start out slow. Maybe wait to invest in a top-of-the-line camera. Technology has come a long way, and you can find an affordable camera that meets almost all of your needs. You can even learn a lot from taking photos on your smartphone camera. There are also some very cheap and even free versions of editing software online. So while there is a financial sacrifice involved in becoming a photographer, you have some control over just how much money you spend early on. And ultimately, the money you spend is a worthwhile investment in terms of advancing your career.
Education can take you to the next level
Having a solid photography education tends to separate hobbyists from professionals. Sure, there have been plenty of successful photographers with only a minimal educational background. But for most, taking classes and working with an instructor enable you to hone your technique and gain valuable experience.
How much can you self-teach? You often hear about “self-taught masters” — people who ignored the classic paths laid out by academic programs and forged their own way to photographic mastery. And self-teaching could very well be the first step you take. There are countless instructional articles and videos online that can give you a basic understanding of the techniques professional photographers use every day. The downside of this approach is the mentorship you lack from not working with an instructor and the inability to give and receive feedback, which having classmates allows you to do.
How do you know you’re ready for more education? Maybe you’ve been working as a hobbyist photographer but have decided to take your skills to the next level. But are you even good enough to take a beginner class? You should never be afraid of taking the next step and educating yourself about photography if you have a passion for it. There are classes out there designed for complete beginners. Even many photography programs consist of students who have only cursory knowledge of photography. What’s your budget? Of course, there are logistical concerns. After all, education requires time and money. Though we’ll discuss this more, you’ll want to be aware of how much money you’re willing to spend on your photography education. There are a wide range of options, from pricey graduate programs to more affordable online courses. You simply need to assess your goals and decide what provides the best value for you.
Formal photography education
Now that you’ve decided to embark on a formal photography education, it’s time to explore your options. The types of photography instruction available are diverse. Here are the three worth focusing on:
Online photography courses: The benefits of an online course are obvious — you don’t have to leave your house. Working online allows you to follow an instructor’s lead without having to worry about going to a physical classroom. This also means you can work on the class on your own time, which is great for busy people seeking flexibility. At the same time, online courses don’t allow for as immersive an experience because you aren’t interacting with other students and a teacher in person. Most of these classes offer a certificate upon completion.
Single photography courses:Instead of a long academic series of courses, you can also just take a single course at a learning annex or community center. It may meet once a week or so and function as a workshop where students can bring in work and get feedback from a classroom of other students at a similar skill level. You can find beginner, intermediate, and advanced classes that touch on a variety of different photography types. If you’re in a major city, you probably have more options. Again, many of these classes offer a certificate, typically if you complete a certain sequence of classes.
College photography degrees: The vast majority of colleges have photography programs, and there are many great graduate photography programs around the world. Art schools and photography colleges can offer rich, interdisciplinary exposure to the subject. Undergraduate courses can help beginners get acquainted with photography. But a graduate program is for the most serious photographers and usually touches on more than just technique — such as photographic history and critical analysis of famous photography. Those who complete a graduate photography degree typically earn a Master of Fine Arts (MFA), which can be a helpful degree to have when seeking out photography jobs.
Fundamentals come first
What exactly do photography classes teach you? At the heart of every photography class is an exploration of the fundamentals of photography. Beginner courses will cover
How a camera works: You can’t take pictures without a camera, so most beginner courses will take a deep dive into what sets different cameras apart. Courses will explore how lenses work, how exposure works, and then outline different shutter systems and how shutter speed impacts the photos you take. You’ll ideally come away understanding how to adjust your camera — and its lenses, exposure, and shutter speed — given certain situations. To get an idea of the impact of these fundamentals, here are some stunning examples of long exposure.
Composition: At its heart, photography is about composing photos for a desired effect. Learning the basics of composition is fundamental to a photographer’s education. Where do you place objects in the frame of the shot? How can you adjust the composition of your shot to highlight the subject in a particular way? Perspective, background, and layers all play a role as you bring the three-dimensional world to life in your photographs.
Depth of field: Understanding how the aperture on your camera works can help you solve compositional problems and unleash memorable visual effects. Knowing your way around the aperture is fundamental to good photography and, once mastered, can take your work to the next level.
Lighting: Add dimension and mood to your photographs with lighting. Most instructors will tell you that lighting is often misunderstood and misused. Aiming for subtlety with the color and intensity of your lighting can have a profound effect on your work’s quality. Most classes will also typically cover ambient light, hard and soft light, and introduced light — and explain how to introduce these elements into your photography in a way that’s effective.
Editing: Although many beginner classes will focus on the most basic tenets of photography and prioritize familiarizing students with their cameras, lots of classes will wade into the important task of editing. Photo editing has evolved over the years as new digital tools make it easier than ever to tweak shots after the fact. You rarely can edit a bad shot into something that works — hence the importance of fundamentals — but editing can take a good shot to a whole other level.
Rule of thirds
One fundamental principle of photography that you’ll learn is the rule of thirds. This rule helps you carefully compose photographs and can be applied to many different types of photography. It’s one of the first things you’ll learn in a beginner photography class — and something you’ll keep in mind throughout your career.
Getting feedback makes you better
Just about the best part of working with other students in a classroom is getting regular feedback. This feedback comes from your classmates as well as the instructor — and both provide valuable criticism that you can use to make your photographs better. Here are a few things to keep in mind when receiving feedback:
Listen first. When you receive feedback, you’re learning. You’re seeing your work through someone else’s eyes, cutting away your personal connection to the work so that you can understand it from a new perspective. That’s why you need to sit back and listen. In fact, most workshops will wisely have multiple students chime in with feedback before letting the photographer respond. This places the focus on those who are looking at the work rather than the creator of the work.
Ask the right questions. Once you’ve listened to what your classmates and instructor have to say, it’s time to respond with questions that will help you improve. For instance, if any feedback felt vague (e.g., “This photo didn’t really have an impact on me.”), ask for clarification. What about the photo failed to strike a chord? Ask tactical questions. See if any of your classmates have favorite photos that might have come to mind when they were assessing your photos, and then take a look at those photos.
Let your instructor’s feedback motivate you. In an ideal setting, your instructor will become something of a mentor for you. So you will naturally look forward to their feedback the most. In fact, you’ll probably earn a letter or number grade from them. While grades can be stressful, they’re a great way to motivate you and enhance your work. If you got a lower grade than expected, let this be an inspiration to improve. If you got a high grade, you’ve raised expectations — now it’s up to you to follow up on these expectations.
Don’t take it personal. Receiving feedback isn’t easy, especially if it’s negative. You’re bound to feel vulnerable. Suddenly the spotlight’s on you, and people aren’t afraid to call out the flaws of your work. It’s stressful — and takes a thick skin. The most important thing to remember is that you can’t take criticism personally. See honest criticism as a gift. When someone tells you exactly how they feel about your work, you’re getting a valuable glimpse into the way the world responds to your work. You can use this information to adjust and optimize. After all, this criticism is focused on your work — and says nothing about you as a person.
Enter photo contests. Want to guarantee some feedback outside of the classroom? A photo contest is a great option. It puts your work in front of a panel of judges who will not only tell you what they think of your work, but also potentially reward it, often in the form of money (not a bad deal, eh?).
If you aren’t in a class, find ways to actively seek out feedback. Turn to friends, family, and anyone else whose opinion you respect to hear how they feel about your work. Doing this consistently will teach you and help you become more aware of the impact of your work.
Learn how to self-edit — and self-criticize
You won’t always have access to a roomful of classmates willing to give you feedback. When you’re going over your photos alone in the darkroom or editing them on your laptop, you’ll find it’s time for some self-editing. This tends to be more difficult than getting feedback from an outside source. You often have personal feelings wrapped up in your work. So how do you go about effectively self-editing so that you can improve your work?
Remove your personal attachments. You spent hours getting a photo just right. The labor that went into this photo might make you more protective of its quality — and keep you from being honest with yourself about it. Or you might come down too hard on this photo if you’re disappointed in the final product. Regardless, self-criticism is all about removing your personal feelings and looking at your work objectively. Depersonalize so that you view your work in the same way a classmate would. This takes practice.
Focus objectively on the fundamentals. Where should you focus your criticism? On the fundamentals. Recall what you learned in class (if you are taking or have taken a class). Go through the basics of exposure, composition, and lighting. What works well, and what could be improved? What do you think your instructor would say about your handling of the fundamentals? What fundamental of photography do you think you need to focus on improving when taking your next photo? Keying in on the fundamentals will keep your self-editing objective and turn the process into a powerful learning experience.
Be your own worst critic — but be kind to yourself. Don’t be afraid to be ruthless with your self-criticism. For many artists, this is natural. Being your own worst critic can be a valuable tactic. It can help you to strive to improve and never feel complacent about your skills or the work you’re producing. But if you are going to be hard on your work, make sure you cut yourself some slack. If you’re a new photographer, remember that you’re still improving. Some work you make will be disappointing. All that matters is that you don’t lose motivation and you move onto the next project with enthusiasm and confidence.
Enter workshop mode. Sometimes looking at a photo and assessing your response to it isn’t enough. Many people find it helpful to reflect on their photo out loud, as though they’re speaking in workshop. You get out of your own way a bit when you do this and have the chance to speak objectively. Alternatively, writing a few sentences about your response to your photo is a good way to organize your thoughts. Saving this written feedback can be valuable, as you can look back on your work with some distance and see how your reaction to it changes over time.
Deciding on your educational path
As we’ve discussed, you have plenty of options when it comes to your formal photography education. And as we’ve seen, most classes tend to focus on similar fundamental concepts. As you decide on your educational path, you need to ask yourself a few questions:
What are your goals? Where do you want photography to take you? Do you want it to be a full-time job? An especially rewarding hobby? A fun and lucrative side hustle? Knowing your goals and scaling your educational path alongside your goals is a good way to decide on the right kind of program.
Who are your idols? There’s probably someone out there in the photography world who has a body of work or career that you admire. See what they did in terms of education. You don’t have to copy them. But knowing who you look up to and understanding how they got where they are is a good way to decide on the right educational path.
What is your current life situation? Maybe you’re at a point where entering a graduate program is out of the question. That’s OK. You need to be realistic. Maybe you take an online course, earn an online photography degree, and make some money as a photographer for a few years before you have the earnings and confidence to pursue a more advanced photography degree at a college. It’s not always a straight line from “beginner photographer” to “professional photographer.” Embrace the detours while keeping your overall plan in mind.
What kind of photography do you enjoy the most? Different classes and programs focus on different things. Are you looking to do commercial photography? More artistic photography? What kind of earning potential are you looking for? Do you want a class that touches on photographic history and art criticism? These are all things to consider when choosing a class.
Before signing up for or applying to a class, reach out to any valuable resources. These could be admissions officers, former students, or instructors. Explain your goals and see if the class content matches up with those goals. Go on a tour of a photography school and do plenty of online research. You’re making a big, exciting decision when you decide on an education path. Take it seriously and weigh your options carefully.
Finding the right equipment and tools
In many ways, mastery in photography is about mastery of tools. It’s a craft that forces you to understand machinery on a deep level: How does a different lens alter the way a photograph looks? What lighting equipment do you need to evoke a specific mood?
Having the right equipment makes everything easier. But finding the right equipment isn’t simple. Different types of photography call for different tools. There are certain cameras that transcend type and work in a variety of settings. And when you’re starting out, it’s probably best to go with equipment that is fairly general. After all, you’re still exploring and learning your way around a camera. So it’s best to choose a camera that helps you explore as widely as possible.
Another complicating factor is the evolution of different technologies. It feels like there’s a new cutting-edge camera released every day, but it’s best not to get caught up in the latest technological advancements. Always looking for the “next best thing” in photographic equipment is usually a waste of time and can put a real dent in your bank account. Instead, find the camera that’s right for you and learn how to use it inside and out.
As your photography skills grow, you’ll find that you aren’t just buying a camera. You’re instead buying a collection of photographic equipment that works together to help you produce your best work. You want a camera, photo editing software, and a laptop that all work for you, as well as a host of other tools that help take your photos to the next level. In this section we’ll explore this equipment and outline which tools work best in which contexts.
Choosing a camera
Choosing a camera is one of the biggest decisions a new photographer makes. And as you grow, you’ll likely need to seek out new cameras. That’s why learning how to choose a camera can become a skill unto itself. While this might feel like a high-pressure decision, choose which camera to buy the same way you’d weigh any other purchase — by carefully weighing your needs against your options.
For instance, when you buy a mattress, you probably consider what type of sleeper you are. Do you sleep on your side? Do you tend to toss and turn? Do you run hot or cold during the night? These are all questions that tease out what kind of sleeper you are. Once you know the answers — and have a budget in mind — you’re ready to search for a mattress. When buying a camera, you’ll similarly want to ask yourself what type of photographer you are and conduct your search accordingly.
What are your needs? You’re likely just starting out. In that case, you probably want something that allows for versatility. You also don’t want to make too dramatic an investment off the bat, so consider aiming for something in a medium price range. If you think you’ll need to change lenses frequently, you’ll probably want to go for a larger camera like a DSLR instead of a compact camera. Do you need high shutter speed? Powerful autofocus? Do you want something lightweight, or are you OK with something bulkier? These are the questions you need to answer.
What are your options? Compact cameras, DSLRs, and mirrorless cameras are the three main types worth investigating. They each have different pros and cons in terms of features and price. Luckily there’s flexibility within these categories — you can find some expensive and advanced compact cameras and cheaper, more basic DSLRs.
Do your research. The most important thing is comprehensively researching your options. Read reviews online. Familiarize yourself with different brands. Go into a photography store and see if they’ll let you test out a camera yourself — many will. Watch plenty of YouTube videos and collect as much information as possible. All the resources you need are out there, ready to help you find the best possible camera for your needs.
Which camera type is the best for you?
Once you know your needs, it’s time to assess your camera options. As a beginner, you probably don’t want to break the bank right away. But you still want a camera that allows you to explore, make mistakes, and grow as a photographer.
Use some of these popular online photography tools
Not every photography purchase involves going to a store. There are also plenty of tools for photographers online. These include photo-editing tools, useful instructional resources, and more that will help you advance your skills.
Finding the right laptop
When you think of photography, you probably imagine holding a camera to your face and composing beautiful images. But that’s only one part of the process. You also have to edit tons of photos. Luckily, advances in technology mean most laptops are able to give photographers everything they need to succeed. But some laptops offer features that are more aligned with the needs and lifestyle of a photographer. What should you look for when seeking the best laptop for photography?
Top-of-the-line display: You’re going to be looking at photos closely on your laptop; you need an absolutely top of-the-line display so that you can see every nook and cranny of your photos. If you’re looking at photos on a laptop with so-so display, you likely won’t be able to make edits with confidence. The Apple Macbook with Retina display is a popular choice for this reason. Retina display offers detail, brightness, contrast, and saturation. If you want a larger screen that still has powerful display, the Dell XPS 15 is 15 inches (making it larger than the 13-inch Macbook), which means it’s a great option.
The ability to handle the software you need: You’re going to be installing lots of software for editing — most likely the Adobe Photoshop suite. While Adobe works with just about every major laptop brand, you still want a computer that can handle this software while performing quickly and without crashes. The Lenovo Thinkpad X1 Yoga is a popular choice for that reason, offering a powerful processor that’ll allow you to edit photos without any delays disrupting your workflow.
A touchscreen: More and more laptops are offering touchscreen capabilities, making a mouse or touchpad obsolete. While this might not be a requirement for all photographers, the ability to take a hands-on approach to editing (literally!) can help some photographers. You can easily zoom in or make minute changes. And using a stylus can help you get even more tactical with your edits. The Surface Pro from Microsoft is an especially popular touchscreen option.
Long battery life: You may have to edit on the go — and you might not always want to drag around a charger on top of the other equipment you’ll have. A laptop with long battery life gives you peace of mind and allows you to edit for long stretches of time without interruption. Lucky for you, most major brands are making advances in battery life, so you should be able to find an option that lasts you a while.
It’s easier than ever to find a laptop that works for a photographer. Advances in technology mean that most brands offer pretty vivid display. You also no longer need to worry about storage, as external hard drives and the cloud have made it easy to store tons of image data. So do your research, weigh your options, and seek out a laptop that works for you.
Lenses, tripods, and lights — oh my!
It’s not just about your camera. You also need plenty of other equipment if you’re looking to create professional photos. Fortunately there are plenty of options out there that can work for just about any type of photographer. Here are the other pieces of equipment you’ll need and the things to consider when purchasing them:
Lenses: Earlier we mentioned DSLRs and mirrorless cameras that enable you to change lenses on a dime. Of course you’ll need a solid selection of lenses in order to make the most of this capability. Lenses can have a massive impact on how your images look. For instance, macro lenses help you photograph small images up close. You can imagine they’re useful for nature photographers taking photos of small insects. If you’re buying a camera that enables you to change lenses, it will come with a few lenses to use, known as “kit lenses.” But you might want to supplement your lens collection with a telephoto zoom lens for taking photos from a long distance as well as a wide-angle prime lens for shooting with wide apertures.
Tripods: If lenses seem a bit overwhelming, don’t worry — tripods are much simpler. Tripods are a basic stabilizing tool, and as a beginner, you likely won’t need anything too complex or expensive. You want something versatile, lightweight, and stable. Sizeable height and a strong swivel system are differentiators. Monopods, which you can hold in your hand and take on the go, are useful for active photographers who may be photographing nature or sports events.
Lights: As a beginner, you likely will not need too dramatic a lighting setup. But as you become a professional, you’ll want lighting that imbues mood in your photographs and allows you to offset the effect of exterior conditions. Do you need lighting that’s portable, or do you have a studio space where you can put more permanent lighting? Once you know what you need, you’ll want to research monolights, flashes, and strobes to get an idea of the lighting tools that fit your budget. You can also rent lighting equipment if you only need lighting for a certain shoot.
Mastering photo editing
Taking photos is only half the battle — editing is the other half. And becoming a master of photo editing can take your skill set to a whole new level. You know the tools you need for editing (Adobe Elements and Lightroom primarily), so now it’s time to find the educational resources out there to help you master photo editing.
Editing classes: Most intermediate and advanced photo classes will delve into editing (and even some beginner classes touch on it). College programs will often have entire classes dedicated to photo editing. If you’re looking to really master this skill, look no further than a class where you can work alongside a teacher and get frequent feedback.
Online tutorials: Although classes about photographic composition are a bit difficult to take online, editing is somewhat easier. That’s because many online photo classes and tutorials are project based. You may be given a collection of photos and told to edit them based on the skills you’ve acquired. Projects are the best way to learn photo editing. Most “master photo editors” will tell you that many of their skills were self-taught, learned through trial and error while working on projects. If you don’t want to take a full class, smaller general Photoshop tutorials and Illustrator-specific tutorialsare all over the internet, available to help you grow your skills. Here are a few more to check out:
Feedback: When learning photo editing, feedback is crucial. A classroom of other students who chime in with feedback is definitely helpful. But if you aren’t in a class, you can get feedback from everyday people who aren’t photographers. That’s because the final results you’re looking for have a level of quality that is easily recognizable. People can usually tell right away if a photo is edited poorly. So don’t be overly discerning when looking for feedback — ask friends and family whose opinions you trust.
Tools: While you’re growing as a photo editor, always make sure you’re using the right tools. For instance, maybe in the beginning you’ll use a free online photo editor like GIMP. While several free editing programs are powerful and offer plenty of features, they do have limits. So as you progress, know when it’s time to graduate to a new program. And be aware that changing tools and learning a new set of controls can be tough. So attempt to make your first editing program your “forever program.”
Setting up your photography business: Where to start
Once you’ve leveled up your photography skills, the natural next question is how do you monetize these skills? Don’t worry. Even as Instagram leads everyone to believe they’re a photographer, there’s still massive demand for actual professionals who can take stunning photos.
The options for starting a photography business are varied — and there are plenty of paths to success. In this section we’ll explore the different types of photography businesses, outline the different ways of building a loyal following, and explore the ins and outs of how to start a photography business.
It’s time to turn these photography skills into a business, but how? Luckily it’s not as difficult to get started as you may think. Here are the steps you should take.
Identify the most monetizable types of photography. Some types of photography make more money more consistently than others. A few that stand out as particularly lucrative are wedding photography, family photography, maternity photography, real estate photography, commercial/stock photography, pet photography, product photography, and boudoir photography. Again, this list isn’t comprehensive, and money can be made in just about any subcategory of photography. One area that’s trending is aerial photography, which uses drones to snap pictures from a bird’s-eye view. Keep in mind your own interests. For instance, the best wedding photographers are able to tap into the palpable excitement of a wedding — and that passion comes through in the photographs. If you find weddings silly, you probably won’t be very successful in that field.
Assess the market around you. When one suburban mom realized her children were constantly having their photos taken — for graduation, sports, prom, etc. — she realized her town had a major market for youth-based portrait photography. The best business plans often come from organic market needs. For instance, if you’re in an area with lots of real estate turnover, there’s probably a need for real estate photographers. And someone looking to get into fashion photography will likely have more luck finding clients in Milan than they would in, say, rural Kentucky. So before you dive in and commit to a type of photography, ensure that your community has a need for that kind of photography.
Focus on one or a few types — and practice. Now that you know the types of photography that make money and have a better idea of the market around you, it’s time to decide on a path — and start practicing. There are lots of ways to practice before diving head first into a business. If you’ve decided on portrait photography, for instance, you don’t need a bunch of human subjects to practice the fundamentals.
Learn from the best. Who are the best wedding photographers out there? Who is absolutely nailing it in the world of pet photography? Gather as many role models as possible and learn from them. Set your sights high with some of the industry’s greatest and see how they manage to produce such great work. Then try to find more humble businesses that are in the early stages but finding success. Ideally study photographers who are working in a market similar to your own. Focus not just on their work, but also on their business model. Keep these resources at the ready as your business launches.
Develop a marketing strategy. Getting the word out about your photography business is crucial. Clients can’t find you if they don’t know about your business. So start drafting a marketing plan. It doesn’t have to be anything elaborate off the bat. Just know the channels you’re going to invest in. For instance, some photography businesses get off the ground with a stunning Instagram. It’s free and just takes a small investment of time. As you get closer to really launching your business, you can start to home in on a detailed marketing strategy — which we’ll discuss later.
What’s the best drone for photography?
Drones are becoming a bigger and bigger part of photography. As technology advances, drones are being used for beautiful aerial photography. Want to know the best drone for photography? Or the features to consider when selecting a drone?
Promoting your photography
Once you’re serious about your photography business, it’s time to get your name out there. This is where developing an effective marketing strategy enters the frame. In short, there’s no “correct” way to promote your photography. People use all sorts of different tools and methods to get their work out there and show prospective clients what they’re capable of. All that matters is getting people’s attention.
Build a portfolio. What’s your best work, the work that really shows off all you’re capable of as a photographer? That’s the work you’ll want to include in your portfolio. Of course, your portfolio can be as big as you want it to be. But the best portfolios are discerning, showing just the work that’s necessary without wasting the viewer’s time or including photography that is subpar or insignificant. Furthermore, you should make sure your portfolio isn’t full of duplicates. Literal duplicates are obviously unnecessary. But even having multiple portrait shots from the same angle and with the same lighting and composition can be unnecessary. Pick the best one and let that photo do the talking!
The internet is your friend. It can be hard to imagine how photographers promoted their businesses before the internet. And as computer displays improve, there’s no reason the web shouldn’t be your own personal showroom. Between a personal website and social media feeds, you have so many opportunities to show off your work in an easily accessible way. And while many photography businesses grow via word of mouth, don’t be afraid to invest in some social media advertising. Facebook ads are an affordable way to draw people to your work and find clients.
Make your work sing. But don’t just put your work online — put it online in a way that makes it look as good as possible. Too many photography websites have clunky templates that detract from the portfolio on display. Opt for a minimal template. Web hosting platforms like WordPress usually offer templates that are specifically designed to showcase photography. There are also widgets you can add to your site that allow visitors to zoom in on pictures and view them in an easy and illuminating manner.
Build relationships. Having an online presence will definitely get your name heard. Posting about your business on social feeds and getting your own domain puts your work out into a rich ecosystem of potential clients. Still, word of mouth can be effective. Work on face-to-face interactions where you can build relationships. One client can turn into three clients down the road if you deliver great photographs, great service, and encourage referrals. For instance, offer a free photo shoot to anyone who refers a friend. You’ll quickly find your client list growing.
It takes creativity and curation to promote your work. Find what you do best, display it, and find creative ways to turn the viewers of your work into loyal customers. At the end of the day, the best way to grow your business is to consistently deliver fantastic work to your clients while being a joy to work with.
Setting up a portfolio is one of the most crucial steps in promoting your photography business. A portfolio puts your skills and style on display. Here are a few easy things to consider when creating your portfolio:
Make sure your portfolio shows everything you can do and nothing more. Avoid duplication and redundancy.
Make the portfolio easy to navigate, both in person in a binder and online in your website’s gallery.
Think of this portfolio as your first impression — and realize it can make or break your chances of securing a client.
Get many outside opinions. Ask friends, family, and people in your photography network to give feedback on your portfolio.
Pick a simple domain name. Don’t overthink your domain name. Plenty of photographers just use their first and last name then tack on a .com. If you’re working to brand your business around a certain name (such as your last name followed by “Photos”), that can also work as a domain name and should figure prominently on your website.
Have an about page and a contact page. When people get to your website, they want to learn a bit about you. What are your credentials? Where did you study photography? Who have you worked with in the past, if applicable? What are your specialties? What is your general workflow (e.g., scheduling, quotes, etc.)? Include all of this on a concise but informative about page, which can be accessed easily from your website’s homepage. In fact, many websites just include this information tastefully on the homepage. Then include all of your contact information. This means your phone number, email, and social media profiles. Give your potential clients many diverse ways of reaching you.
Let your photos do the talking. Now that you’ve explained who you are and how to get in contact with you, it’s time to let your photos do the talking. Your photos should figure very prominently on your website, either on the homepage or on a separate “gallery page” that you can get to very easily from the homepage. The page where you place your portfolio should be very minimal — think a white background that is free of text. This way, people can focus on the photos and not be distracted by a busy background.
Categorize your photos if necessary. Within your portfolio, you should divide your photos by type. For instance, if you have both still life photos and portrait photos on your website, sort them accordingly instead of mixing everything together. You can include a dropdown menu that allows you to easily navigate between photos or tag each of your photos by type so that your portfolio is organized and easy to navigate.
Add some character. Sure, your website should be pretty straightforward — some quick personal info combined with your portfolio. But don’t be afraid to include some character here and there. After all, you want to brand your business and enable it to stand out from the pack.
Spread the word on social media
Social media thrives on photo sharing. Instagram and Snapchat are all about pictures — and pictures figure prominently on Facebook, Twitter, Tumblr, and Pinterest too. Plan on making social media one of the cornerstones of your marketing strategy. Here are a few things to consider as you use social media to promote your photography business:
Carefully curate Instagram. Instagram is the central hub for many photographers. It’s an especially good place for fashion photography, travel photography, and food photography — though just about anything works. Think of Instagram as your personal portfolio that’s ever-evolving and growing. You might just find that some prospective clients show up in your comments and direct messages.
Be interactive. Instagram, Facebook, and Snapchat all allow you to have stories. These are a great way to interact with customers on the go. See a pretty sunrise on your morning commute? Snap a photo of it and upload it to your story. This is a great way to keep your brand chugging along — and it shows prospective clients that photography is your passion at any hour of the day. When you aren’t making stories, be sure to respond to comments and messages when people interact with you on social media. It’s a great chance to connect and show some personality.
Be aware that social media skews younger. This is one of the great bonuses of social media. You have a large audience of generally younger people who love to share content and interact. So always be sure to share content that is fresh and in step with internet culture. Don’t try too hard — and no, don’t share memes! — but do try to create a space online that is fun while still maintaining a level of professionalism.
Periodically post your business information. Don’t spam friends and family with your contact information every day. But every few months, post a story or photo that reminds people of the services you offer. It doesn’t have to be intrusive — it can just be a friendly reminder to connect with you and spread the word.
Advertise on social media. The world of social media advertising can also pay off big-time if you do it right. Buying ads on Facebook, for instance, is a great way to push your brand in front of a wider audience. Of course this costs money, so be sure this is a worthwhile investment and within your budget.
Social media is a hub of photographic content. And because you’re a skilled photographer, it’s somewhere you can stand out and draw lots of attention. Post good content consistently and you can be pretty confident that people will find it and want to work with you.
Network in the photography world
Connecting with other photographers is a great way to grow your client list. Yes, you are technically in competition with other photographers for clients. But there is still a nice level of solidarity within the community. Other photographers care about their craft — so they always like to see other photographers producing great work.
Join photography communities. There are all sorts of online message boards and social media groups specially designed to connect photographers with others in their profession. These are a great way to get feedback, learn about the newest technology, and potentially find collaborators.
Go to festivals and expos. In-person networking events are naturally a great way to meet people in your industry. Going to a photography festival can also introduce you to new cameras and equipment that might benefit your business. These events are also a great chance to hand out your business card and find people to work with down the road.
Volunteer. Sometimes organizations need photographers for events but don’t have the funds to pay for photography. This is where you come in. Not only does volunteering feel great — capturing memories for people on a pro bono basis — but it’s also a chance to meet other photographers or simply get your name out there in the community.
Connect on social media. Follow other photographers on Instagram, Twitter, and any other platform they use. And don’t just follow — interact. Cheer them on with positive comments or chime in with an intelligent question about the camera or equipment they used for a certain photo. This is a great chance to build relationships with others in your field.
Optimizing your business — and making more profit
Let’s face the facts: Photography isn’t a cheap profession. Cameras and equipment cost a great deal of money. So photographers are always looking for tools that can save them money while making their jobs easier.
That’s where JotForm comes in. JotForm boasts plenty of features that can make photographers’ lives easier. JotForm’s wide array of data collection tools can make booking and scheduling clients a snap. Many photographers have used JotForm to ease their workflow — and it’s enabled them to affordably provide great service for their clients.
How can JotForm help you optimize?
A lot of information needs to be exchanged before a photo can be taken. Client information, schedule information, payment information, and, potentially, release forms. And that’s just before the photo. Afterward you might send proofs so your client can let you know which photographs they like.
If you aren’t organized, this entire process can become a huge headache for the client and a time suck for you. If data collection becomes a pesky bottleneck in your workflow, you could potentially alienate the customer and lose time that could be spent working with other clients.
Make scheduling a breeze. Scheduling can get out of control, devolving into a head-spinning back and forth as photographer and client try to settle on a time. With the JotForm appointment slots widget, you can show clients which times are available and which aren’t. That way your schedule is clearly laid out for anyone who visits your scheduling form.
Collect all contracts and payment info. Gone are the days of sorting through hard copies of session agreements. JotForm’s session agreement form helps you gather a client’s information and signature, then displays it on your JotForm dashboard. And you can easily collect payment information on top of these contracts — and have all of it in one place. Payment processing in JotForm is suited to your clients’ needs thanks to over 20 different payment integrations, such as Square, PayPal, and Stripe.
Arm yourself with model release forms. Model release forms are a crucial document for professional photographers. They give you the signatures you need to ensure that you can use photos containing people for commercial use. JotForm’s model release forms make the process easier for photographers because they can access these forms on their phone. You can easily link this form with Google Sheets so that your signatures appear in one organized spreadsheet.
It’s no wonder big-time photographers have a fleet of assistants — being a photographer calls for plenty of paperwork. Luckily, JotForm makes the entire process easier, digitizing the collection and sorting of online forms so that all of the information you need is in one easy-to-navigate place.
Saving time and money with JotForm
There are plenty of expensive photography tools out there. And when running your business, you can easily run up your costs by investing in workflow software that doesn’t do a whole lot to make your job easier. If that isn’t enough, you may need to hire an assistant to keep track of all of your administrative materials.
Luckily it doesn’t have to be this way. Online forms can help you save money and time, cutting out the need for expensive software and added staff. Here are the different ways JotForm can save photographers time and money:
Easy setup: Getting started with JotForm is fast and simple. All you have to do is build a form.
High customizable: Your business is unique. And you want a form that caters to your business’s specific tasks and goals. That’s why the customizations available in JotForm have been such a hit among photographers, enabling them to create online forms that help them grow their business.
Time-saver: The time it takes to pass forms back and forth can add up fast. This can slow down your business operations, which increases the cost per client and makes it harder for you to take on more clients.
Digital: Payment integrations and e-signatures are especially helpful for photographers. In a profession where a great deal of work is done on the computer, it’s convenient to handle payment processing and signature collection on the computer as well.
Seamless scheduling: One of the top use cases for photographers is JotForm’s scheduling forms. Photographers have busy schedules, so sending a client a form with all of your available times expedites the scheduling process and saves you from time-intensive back and forth as you try to settle on a time.
Convenient client info collection: It’s great to go into a photo shoot knowing exactly what the client wants to get out of the session. By collecting this information ahead of time with JotForm, you can hit the ground running once your photo shoot begins.
Time really is money when you’re running a business. Saving time with JotForm will help you handle more clients, conduct business efficiently, and provide service that keeps clients coming back over and over.
Common photography forms
Photographers use online forms for all sorts of tasks. Here are a few JotForm forms that are particularly popular among our clients who run photography businesses:
Photo release form: Photographers need to get consent before taking photos of people. JotForm’s extensive array of photo release forms allow you to seamlessly gather the signatures you need — and enables you to have this information on hand in your JotForm account whenever you might need it. You can even collect information and link it to Google Sheets so that all of your signatures are in one place.
Session agreement forms: What have you and your client agreed on for your session? Session agreement forms put this information in writing to ensure that you and the client are on the same page. And JotForm makes it easy to collect this information with a variety of different session agreement forms. For instance, check out this form specifically designed for taking photos of families.
Photographer applicant forms: Maybe you’re growing your business and hiring a few other photographers to help you out. If you’ve gotten to this point, congrats! And if you want to keep all of your applicants’ information carefully organized and easy to sift through, online forms will certainly come in handy.
Equipment rental forms: Renting out some of your equipment? Or renting from someone else? Getting all of the details of this transaction down in writing is vital and seamless with an online form.
Feedback forms: Getting client feedback is important. JotForm has a wide array of feedback form templates that you can customize to your business.
If you need to collect information, there’s a pretty good chance JotForm has a form for the job. Throughout the entire transaction — from booking, signing, paying, and leaving feedback — JotForm is there to make the process easy so that you can focus on taking great photographs.
Customer feedback can go a long way
You always want to make sure you’re offering your clients the best possible service. But it’s not always easy to get their feedback. For photography, there isn’t a ready-made way for clients to leave reviews the way they do for other businesses. So how do you get an idea of what went well in a given photo shoot and what needs improvement?
It all comes down to customer feedback outreach. You can easily ask for feedback with JotForm’s extensive array of feedback forms. These forms enable customers to give their thoughts — and then send that feedback straight to your JotForm dashboard and email.
How do you get started? Getting started with JotForm feedback forms is simple. Just explore the library of templates and find the form that best suits your needs. You probably want to include a mix of number rating (on a scale of 1-10) alongside text fields for qualitative feedback.
Get ready to customize. You’re able to get under the hood and customize our forms to your liking. In short, you want to make sure you’re getting a detailed evaluation from the customer filling out the form. At the same time, you don’t want to make the form too lengthy. Otherwise the customer might feel like you’re wasting their time. Keep it concise but in a way that will still be useful for you.
Make the most of your feedback. After you’ve gotten plenty of feedback through your online form, use this input to improve your business. Do customers like the finished product but feel the actual photo shoots could be more organized and run more smoothly? Internalize that feedback and apply it to future clients. And if you get your client’s permission, don’t be afraid to use some positive feedback as testimonials in marketing materials, such as your website.
Remember in photography class when you would get feedback from your instructor and classmates? Well you’re now a professional photographer with clients — and you’re getting feedback in the real world. This feedback serves the same function as it did in school: to give you the tools to improve. Because, after all, you care about your craft, you always want to get better at what you do, and you’re absolutely determined to become a master of the photographic arts.
Yonatan Doron wrote a post on Medium not long ago called “Art of Code — Why you should write more Pseudo Code.” Love that title, as a fan of pseudo code myself. That is, writing “code” that describes something you want to do or communicate, but that isn’t of any particular language and doesn’t use any correct APIs or anything.
Taking this time to write commented pseudo code helps organize our thoughts and our motivation and plan the desired outcome code ahead. By doing so, one moment later when we venture through to start hacking we would always have this map or skeleton of our thoughts that can help us regain focus and increase our productiveness
When the user submits a form, then show a modal dialogue with an acknowledgment.” I then encouraged them to write a script …but I don’t mean a script in the JavaScript sense; I mean a script in the screenwriting or theatre sense. Line by line, write out each step that you want to accomplish. Once you’ve done that, translate each line of your English (or Portuguese) script into JavaScript.
I’ve seen educators use this technique time and time again. But it isn’t just for teachers to use and students to learn from — it’s for anyone’s benefit. I find myself doing pseudo code before I write real code, sure, but I also leave it in place sometimes in code comments. Most commonly, I do it in Notion documents or in Slack conversations to get across a point.
Even simple ideas:
if env.dev
  stop email delivery
Anything with logic and branching or step-by-step bits benefits highly from it. Notice that code isn’t valid code. It’s not valid in any language I can think of. Sometimes, I’ll throw in some random parenthesis or a semicolon out of muscle memory. Who cares? It’s just about communicating an idea to myself or someone else.
if (grid is supported)
  use grid
else
  lay out things in a basic row with flexbox
It’s natural. Chances are, they won’t care about the syntax either, they’ll just get the idea.
on form submit
  validate
  if errors
     show errors;
  else
     submit to api;
     if api success
        show ui success;
     else
        show ui fail;
(After writing these out, it made me think of uilang. Check out how the plain language code blocks work there.)
Yonatan’s article was missing real-world pseudo code examples, so I asked around. Check out all these great examples!
My whole notebook is a pseudo…
These transfer to comments before I start coding so I know what I’m doing & what I’ve done later pic.twitter.com/9vfJYfweDh
I’m a little surprised at how much of it is on paper! That’s pretty cool, really. Just weird for me as I very rarely use paper for anything. I probably should.