SEO is often considered the snake oil of the web. How many times have you scrolled through attention-grabbing headlines on know how to improve your SEO? Everyone and their uncle seems to have some “magic” cure to land high in search results and turn impressions into conversions. Sifting through so much noise on the topic can cause us to miss true gems that might be right under our nose.
We’re going to look at one such gem in this article: structured data.
There’s a checklist of SEO must-haves that we know are needed when working on a site. It includes things like a strong </code>, a long list of <code></code> tags, and using descriptive <code>alt</code> tags on images (which is a double win for accessibility). Running a cursory check on any site <a target="_blank" href="https://developers.google.com/web/tools/lighthouse/">using Lighthouse</a> will flag up turn up even more tips and best practices to squeeze the most SEO out of the content.</p>
<p>Search engines are getting smarter, however, and starting to move past the algorithmic scraping techniques of yesteryear. <a target="_blank" href="https://www.wired.com/2016/02/ai-is-changing-the-technology-behind-google-searches/">Google</a>, Amazon, and <a target="_blank" href="https://blogs.bing.com/search/2017-12/search-2017-12-december-ai-update">Microsoft </a>are all known to be investing a considerable amount in machine learning, and with that, they need clean data to feed their search AI. </p>
<p>That’s where the the concept of schemas comes into play. In fact, it’s funding from Google and Microsoft — along with Yahoo and Yandex — that led to the establishment of <a target="_blank" href="https://schema.org/">schema.org</a>, a website and community to push their format — more commonly referred to as <strong>structured data</strong> —forward so that they and other search engines can help surface content in more useful and engaging ways.</p>
<h3>So, what is structured data?</h3>
<p>Structured data describes the content of digital documents (i.e. websites, emails, etc). It’s used all over the web and, much like <code><meta</code>> tags, is an invisible layer of information that search engines use to read the content.</p>
<p>Structured data comes in three flavors: <strong>Microdata</strong>, <strong>RDFa </strong>and <strong>JSON-LD. </strong>Microdata and RDF are both injected directly into the HTML elements of a document, peppering each relevant element of a page with machine readable pointers. For example, an example of using Microdata attributes on a product, <a target="_blank" href="https://schema.org/Product">taken straight from the schema.org docs</a>:</p>
<pre><code><div itemscope itemtype="http://schema.org/Product">
<span itemprop="name">Kenmore White 17" Microwave</span>
<img itemprop="image" src="kenmore-microwave-17in.jpg" alt='Kenmore 17" Microwave' />
<div itemprop="aggregateRating"
itemscope itemtype="http://schema.org/AggregateRating">
Rated <span itemprop="ratingValue">3.5</span>/5
based on <span itemprop="reviewCount">11</span> customer reviews
</div>
<div itemprop="offers" itemscope itemtype="http://schema.org/Offer">
<!--price is 1000, a number, with locale-specific thousands separator
and decimal mark, and the $ character is marked up with the
machine-readable code "USD" -->
<span itemprop="priceCurrency" content="USD">$</span><span
itemprop="price" content="1000.00">1,000.00</span>
<link itemprop="availability" href="http://schema.org/InStock" />In stock
</div>
Product description:
<span itemprop="description">0.7 cubic feet countertop microwave.
Has six preset cooking categories and convenience features like
Add-A-Minute and Child Lock.</span>
Customer reviews:
<div itemprop="review" itemscope itemtype="http://schema.org/Review">
<span itemprop="name">Not a happy camper</span> -
by <span itemprop="author">Ellie</span>,
<meta itemprop="datePublished" content="2011-04-01">April 1, 2011
<div itemprop="reviewRating" itemscope itemtype="http://schema.org/Rating">
<meta itemprop="worstRating" content = "1">
<span itemprop="ratingValue">1</span>/
<span itemprop="bestRating">5</span>stars
</div>
<span itemprop="description">The lamp burned out and now I have to replace
it. </span>
</div>
<div itemprop="review" itemscope itemtype="http://schema.org/Review">
<span itemprop="name">Value purchase</span> -
by <span itemprop="author">Lucas</span>,
<meta itemprop="datePublished" content="2011-03-25">March 25, 2011
<div itemprop="reviewRating" itemscope itemtype="http://schema.org/Rating">
<meta itemprop="worstRating" content = "1"/>
<span itemprop="ratingValue">4</span>/
<span itemprop="bestRating">5</span>stars
</div>
<span itemprop="description">Great microwave for the price. It is small and
fits in my apartment.</span>
</div>
<!-- etc. -->
</div></code></pre>
<p>If that seems like bloated markup, it kinda is. But it’s certainly beneficial if you prefer to consolidate all of your data in one place.</p>
<p>JSON-LD, on the other hand, usually sits in a <code></code> tag and describes the same properties in a single block of data. Again, from the docs:</p>
<pre><code><script type="application/ld+json">
{
"@context": "http://schema.org",
"@type": "Product",
"aggregateRating": {
"@type": "AggregateRating",
"ratingValue": "3.5",
"reviewCount": "11"
},
"description": "0.7 cubic feet countertop microwave. Has six preset cooking categories and convenience features like Add-A-Minute and Child Lock.",
"name": "Kenmore White 17" Microwave",
"image": "kenmore-microwave-17in.jpg",
"offers": {
"@type": "Offer",
"availability": "http://schema.org/InStock",
"price": "55.00",
"priceCurrency": "USD"
},
"review": [
{
"@type": "Review",
"author": "Ellie",
"datePublished": "2011-04-01",
"description": "The lamp burned out and now I have to replace it.",
"name": "Not a happy camper",
"reviewRating": {
"@type": "Rating",
"bestRating": "5",
"ratingValue": "1",
"worstRating": "1"
}
},
{
"@type": "Review",
"author": "Lucas",
"datePublished": "2011-03-25",
"description": "Great microwave for the price. It is small and fits in my apartment.",
"name": "Value purchase",
"reviewRating": {
"@type": "Rating",
"bestRating": "5",
"ratingValue": "4",
"worstRating": "1"
}
}
]
}
</script></code></pre>
<p>This is my personal preference, as it is treated as a little external instruction manual for your content, much like JavaScript for scripts, and CSS for your styles, all happily self-contained. JSON-LD can become essential for certain types of schema, where the content of the page is different from the content of the structured data (for example, <a target="_blank" href="https://developers.google.com/search/docs/data-types/speakable">check out the <code>speakable</code> property</a>, currently in beta).</p>
<p>A welcome introduction to the implementation of JSON-LD on the web is Google’s allowance of <a target="_blank" rel="noreferrer noopener" href="https://developers.google.com/search/docs/guides/generate-structured-data-with-javascript#custom-javascript">fetching structured data</a> from an external source, rather than forcing inline scripting, which was previously frustratingly impossible. This can be done either by the developer, or in Google Tag Manager.</p>
<h3>What structured data means to you</h3>
<p>Beyond making life easier for search engine crawlers to read your pages? Two words: <strong>Rich snippets</strong>. Rich snippets are highly visual modules that tend to sit at the top of the search engine, in what is sometimes termed as “Position 0” in the results — displayed above the first search result. Here’s an example of a simple search for “blueberry pie” in Google as an example:</p>
<figure><figcaption>Check out those three recipes up top — and that content in the right column — showing up before the list of results using details from structured data.</figcaption></figure>
<p>Even the first result is a rich snippet! As you can see, using structured data is your ticket to get into a rich snippet on a search results page. And, not to spur FOMO or anything, but any site not showing up in a rich snippet is already at risk of dropping into “below the fold” territory. Notice how the second organic result barely makes the cut.</p>
<p>Fear not, dear developers! Adding and testing structured data to a website is aq simple and relatively painless process. Once you get the hang of it, you’ll be adding it to every possible location you can imagine, even emails.</p>
<p>It is worth noting that structured data is not the only way to get into rich snippets. Search engines can sometimes determine enough from your HTML to display some snippets, but utilizing it will push the odds in your favor. Plus, using structured data puts the power of how your content is displayed in your hands, rather than letting Google or the like determine it for you.</p>
<h3>Types of structured data</h3>
<p>Structured data is more than recipes. Here’s a full list of the <a target="_blank" href="https://developers.google.com/search/docs/data-types/article">types of structured data Google supports</a>. (Spoiler alert: it’s almost any kind of content.)</p>
<ul>
<li>Article</li>
<li>Book (limited support)</li>
<li>Breadcrumb</li>
<li>Carousel</li>
<li>Course</li>
<li>COVID-19 announcements (beta)</li>
<li>Critic review (limited support)</li>
<li>Dataset</li>
<li>Employer aggregate rating</li>
<li>Estimated salary</li>
<li>Event</li>
<li>Fact check</li>
<li>FAQ</li>
<li>How-to</li>
<li>Image license metadata (beta)</li>
<li>Job posting</li>
<li>Local business</li>
<li>Logo</li>
<li>Movie</li>
<li>Product</li>
<li>Q&A</li>
<li>Recipe</li>
<li>Review snippet</li>
<li>Sitelinks searchbox</li>
<li>Software app</li>
<li>Speakable (beta)</li>
<li>Subscription and paywalled content</li>
<li>Video</li>
</ul>
<p>Yep, lots of options here! But with those come lots of opportunity to enhance a site’s content and leverage these search engine features.</p>
<h3>Using structured data</h3>
<p>The easiest way to find the right structured data for your project is to look through <a target="_blank" href="https://developers.google.com/search/reference/overview">Google’s search catalogue</a>. Advanced users may like to browse what’s on <a target="_blank" href="https://schema.org/docs/full.html">schema.org</a>, but I’ll warn you that it is a scary rabbit hole to crawl through.</p>
<p>Let’s start with a fairly simple example: <a target="_blank" href="https://developers.google.com/search/docs/data-types/logo">the <code>Logo</code> logo data type</a>. It’s simple because all we really need is a website URL and the source URL for an image, along with some basic details to help search engine’s know they are looking at a logo. Here’s our JSON-LD:</p>
<pre><code><script type="application/ld+json">
{
"@context": "https://schema.org",
"@type": "Organization",
"name": "Example",
"url": "http://www.example.com",
"logo": "http://www.example.com/images/logo.png"
}
</script></code></pre>
<p>First off, we have the tag itself, telling search engines that it’s about to consume some JSON-LD.</p>
<p>From there, we have five properties:</p>
<ul>
<li><strong><code>@context</code>:</strong> This is included on all structured data objects, no matter what type it is. It’s what tells search engines that the JSON-LD contains data that is defined by schema.org specifications.</li>
<li><strong><code>@type</code>: </strong>This is the reference type for the object. It’s used to identify what type of content we’re working with. In this case, it’s “Organization” which <a target="_blank" href="https://schema.org/Organization">has a whole bunch of sub-properties</a> that follow.</li>
<li><strong><code>name</code>:</strong> This is the sub-property that contains the organization’s name.</li>
<li><strong><code>url</code>: </strong>This is the sub-property that contains the organization’s web address.</li>
<li><strong><code>logo</code>: </strong>This is the sub-property that contains the file path for the organization’s logo image file. For Google to consider this, it must be at least 112?112px and in JPG, PNG, or GIF format. Sorry, no SVG at the moment.</li>
</ul>
<p>A page can have multiple structured data types. That means it’s possible to mix and match content.</p>
<h3>Testing structured data</h3>
<p>See, dropping structured data into a page isn’t that tough, right? Once we have it, though, we should probably check to see if it actually works.</p>
<p><a target="_blank" href="https://search.google.com/structured-data/testing-tool/">Google</a>, <a target="_blank" href="https://www.bing.com/toolbox/markup-validator">Bing</a>, and <a target="_blank" href="http://webmaster.yandex.com/microtest.xml">Yandex</a> (login required) all have testing tools available. Google even has one specifically for <a target="_blank" href="https://www.google.com/webmasters/markup-tester/">validating structured data in email</a>. In most cases, simply drop in the website URL and the tool will spin up a test and show which object it recognizes, the properties it sees, and any errors or warning to look into.</p>
<figure><img decoding="async" src="https://i2.wp.com/css-tricks.com/wp-content/uploads/2020/05/MXKc19mw.png?ssl=1" alt="Showing Google's testing results where the JSON-LD is displayed on the left of the screen and the details of it on the right."><figcaption><a target="_blank" rel="noreferrer noopener" href="https://search.google.com/structured-data/testing-tool">Google’s structured data testing tool </a>fetches the markup and displays the information it recognizes.</figcaption></figure>
<p>The next step is to confirm that the structured data is accessible on your live site through <a target="_blank" href="https://search.google.com/search-console">Google Search Console</a>. You may need to set up an account and verify your site in order to use a particular search engine’s console, but checking data is — yet again — as simple as dropping in a site URL and using the inspection tools to check that the site is indeed live and sending data when it is accessed by the search engine.</p>
<p>If the structured data is implemented correctly, it will display. In Google’s case, it’s located in the “Enhancements” section with a big ol’ checkmark next to it.</p>
<figure><img decoding="async" src="https://i1.wp.com/css-tricks.com/wp-content/uploads/2020/05/pMwjz8aM.png?ssl=1" alt="Google Search Console screenshot showing Google can find the site and that it recognizes search enhancements below that. In this case, it is showing that the Logo structured data type was found and is supported."><figcaption>Notice the “Logo” that is detected at the end — it works!</figcaption></figure>
<h3>But wait! I did all that and nothing’s happening… what gives?</h3>
<p>As with all search engine optimizations, there are no guarantees or time scales, when it comes to how or when structured data is used. It might take a good while before rich snippets take hold for your content — days, weeks, or even months! I know, it stinks to be left in the dark like that. It is unfortunately a waiting game.</p>
<hr>
<p>Hopefully, this gives you a good idea of what structured data is and how it can be used to leverage features that search engines have made to spotlight content has it.</p>
<p>There’s absolutely no shortage of advice, tips, and tricks for helping optimize a site for search engines. While so much of it is concerned with what’s contained in the or how content is written, there are practical things that developers can do to make an impact. Structured data is definitely one of those things and worth exploring to get the most value from content.</p>
<p>The world is your oyster with structured data. And, sure, while search engine only support a selection of the schema.org vocabulary, they are constantly evolving and extending that support. Why not start small by <a target="_blank" href="https://developers.google.com/gmail/markup/reference/go-to-action">adding structured data to an email link</a> in a newsletter? Or perhaps you’re into trying something different, like <a target="_blank" href="https://developers.google.com/search/docs/data-types/sitelinks-searchbox">defining a sitelinks search box</a> (which is very meta but very cool). Or, hey, add a <a target="_blank" href="https://developers.pinterest.com/docs/rich-pins/recipes/?">recipe for Pinterest</a>. Blueberry pie, anyone? </p>
<p>The post <a target="_blank" rel="nofollow" href="https://css-tricks.com/using-structured-data-to-enhance-search-engine-optimization/">Using Structured Data to Enhance Search Engine Optimization</a> appeared first on <a target="_blank" rel="nofollow" href="https://css-tricks.com/">CSS-Tricks</a>.</p>
<div class="fixed"></div>
</div>
<div class="under">
<span class="categories">Categories: </span><span><a href="http://www.webmastersgallery.com/category/design/" rel="category tag">Designing</a>, <a href="http://www.webmastersgallery.com/category/uncategorized/" rel="category tag">Others</a></span> <span class="tags">Tags: </span><span></span> </div>
</div>
<div class="post" id="post-3249881">
<h2><a class="title" href="http://www.webmastersgallery.com/2020/05/26/framer-web/" rel="bookmark">Framer Web</a></h2>
<div class="info">
<span class="date">May 26th, 2020</span>
<span class="author"><a href="http://www.webmastersgallery.com/author/admin/" title="Posts by admin" rel="author">admin</a></span> <span class="comments"><a href="http://www.webmastersgallery.com/2020/05/26/framer-web/#respond">No comments</a></span>
<div class="fixed"></div>
</div>
<div class="content">
<div class="ftpimagefix" style="float:left"><a target="_blank" href="https://www.framer.com/"><img decoding="async" src="https://i2.wp.com/css-tricks.com/wp-content/uploads/2020/05/Screen-Shot-2020-05-23-at-6.28.12-PM.png?fit=1024%2C622&ssl=1" alt=""></a></div>
<p>The prototyping app Framer just launched the web version of their design tool and it looks pretty darn neat. I particularly love the design of the marketing site that explains how to use Framer and what sets it apart from other design tools. They have a ton of examples that you can pop open to explore as well, like this demo for how to make hover tooltips in the app:</p>
<figure></figure>
<p>I have to say that I <em>love</em> how the UI feels in Framer — both on the website and the design app itself. It all reminds me of the <a target="_blank" href="https://www.oculus.com/quest/">Oculus Quest</a> UI with rounded corners and dark-mode inspired elements. I know it’s probably just a silly trend, but I like it!</p>
<p>Anyway, I’ve yet to dig into this fancy new tool too much but the animation effects appear to be quite magic and absolutely worth experimenting with. </p>
<p><a target="_blank" href="https://www.framer.com/" title="Direct link to featured article">Direct Link to Article</a> — <a target="_blank" href="https://css-tricks.com/framer-web/">Permalink</a></p>
<p>The post <a target="_blank" rel="nofollow" href="https://css-tricks.com/framer-web/">Framer Web</a> appeared first on <a target="_blank" rel="nofollow" href="https://css-tricks.com/">CSS-Tricks</a>.</p>
<div class="fixed"></div>
</div>
<div class="under">
<span class="categories">Categories: </span><span><a href="http://www.webmastersgallery.com/category/design/" rel="category tag">Designing</a>, <a href="http://www.webmastersgallery.com/category/uncategorized/" rel="category tag">Others</a></span> <span class="tags">Tags: </span><span></span> </div>
</div>
<div class="post" id="post-3254408">
<h2><a class="title" href="http://www.webmastersgallery.com/2020/05/26/an-intro-to-adobe-edge-web-fonts-updated-for-2020/" rel="bookmark">An Intro to Adobe Edge Web Fonts: Updated for 2020</a></h2>
<div class="info">
<span class="date">May 26th, 2020</span>
<span class="author"><a href="http://www.webmastersgallery.com/author/admin/" title="Posts by admin" rel="author">admin</a></span> <span class="comments"><a href="http://www.webmastersgallery.com/2020/05/26/an-intro-to-adobe-edge-web-fonts-updated-for-2020/#respond">No comments</a></span>
<div class="fixed"></div>
</div>
<div class="content">
<div class="ftpimagefix" style="float:left"><a target="_blank" href="https://webdesignledger.com/intro-to-edge-webfonts/"><img decoding="async" src="https://storage.googleapis.com/webdesignledger.pub.network/WDL/7bf3bba2-screenshot-2020-05-27-at-12.28.15-970x544.png" alt="Adobe Fonts homepage screenshot 2020"></a></div>
<p>With the release of Creative Cloud 2015, Adobe has continued its tradition of generating a buzz in the tech sector.</p>
<p>In addition to major updates on their programs like Photoshop and Illustrator, Adobe has also released a new platform named <a target="_blank" href="https://edgewebfonts.adobe.com/">Adobe Edge Web Fonts</a>.</p>
<p>Edge Fonts is a stunning font foundry that web designers can use 100% free for all design work.</p>
<p>If you’re familiar with Adobe and the creative cloud platform then you know about TypeKit.</p>
<p>This is Adobe’s premium font service which costs money.</p>
<p><img decoding="async" loading="lazy" src="https://storage.googleapis.com/webdesignledger.pub.network/WDL/95ccfaa4-screenshot-2020-05-27-at-12.31.42.png" alt="adobe font packs 2020" width="2048" height="1155"></p>
<p>But with the release of Edge Fonts Adobe now provides an alternative to TypeKit, offering web designers over 500 different font-families to choose from.</p>
<p>I’ll give you an overview of Edge Web Fonts and why designers should be excited about this amazing collection of typefaces.</p>
<p><img decoding="async" src="https://storage.googleapis.com/webdesignledger.pub.network/WDL/2015/08/edgewebfonts.png" alt="Edge Web Fonts Homepage"></p>
<h2>Worth the Wait</h2>
<p>In the recent past <a target="_blank" href="https://www.google.com/fonts">Google has dominated</a> the web font game. Simply put, no other service provided an extensive collection of web fonts for free.</p>
<p>There is no denying that Adobe TypeKit is extremely popular among web designers. But the price of TypeKit often caused people to stray from using it.</p>
<p><img decoding="async" loading="lazy" src="https://storage.googleapis.com/webdesignledger.pub.network/WDL/2c92f7ed-screenshot-2020-05-27-at-12.33.07.png" alt="" width="2048" height="1154"></p>
<p>Because Edge Web Fonts is free to use commercially, Adobe now provides an alternative to the once unrivaled Google Webfonts.</p>
<p>Edge Web Fonts aims to provide a free service that is easy to use.</p>
<p>Just like Google Fonts, a person does not need any sort of account to utilize Edge Fonts library (Scroll down for an update on this).</p>
<p>In addition to being easy to use, Edge Fonts is powered by the TypeKit font service.</p>
<p>Users can expect high-end performance and stability for their web fonts.</p>
<h2>Edge Web Fonts User Interface</h2>
<p><img decoding="async" src="https://storage.googleapis.com/webdesignledger.pub.network/WDL/2015/08/edge-web-fonts-ui.png" alt="Edge Web Fonts UI"></p>
<p>In the image above you can see the interface Edge Web Fonts provides for choosing fonts.</p>
<p>For those of you who’ve used Typekit in the past, you’ll notice the Edge Fonts website is strikingly similar to that of TypeKit.</p>
<p>As a TypeKit user myself I think this is pretty important to note.</p>
<p>The user interface was one of the main reasons why I continued to use TypeKit, and now Adobe is providing this to web designers for free.</p>
<p><img decoding="async" src="https://storage.googleapis.com/webdesignledger.pub.network/WDL/2015/08/adobe-edge-serif.png" alt="Edge Web Fonts Serif Filter"></p>
<p>In the example above I’ve narrowed the choices down to only serif fonts in order to show you a basic example of how Adobe’s interface works.</p>
<p>Although this may not seem very powerful, it allows you to sift through font faces that are alike in some way.</p>
<p>Edge Fonts also allows you to search fonts depending on whether they will be used as a heading or paragraph text.</p>
<p>This interface is much easier to choose the most appropriate font for whatever environment you’re designing.</p>
<p>Google Fonts is indeed a tremendous font foundry for web designers, however, sifting through the extensive number of fonts can become a problem.</p>
<p>It seems Edge Web Fonts has a leg up in this regard.</p>
<h2>Adobe Edge Web Fonts – 2020 Update</h2>
<p><img decoding="async" loading="lazy" src="https://storage.googleapis.com/webdesignledger.pub.network/WDL/7bf3bba2-screenshot-2020-05-27-at-12.28.15.png" alt="Adobe Fonts homepage screenshot 2020" width="2048" height="1149"></p>
<p>In 2018, Typekit was finally and officially renamed as Adobe Fonts.</p>
<p>And that was great for all of us. With this new name came many new, much-needed updates.</p>
<p>For example, there are no more web-only fonts, no more desktop sync limits, and no more pageview limits.</p>
<p>And now instead of only having 500 fonts like there were when it Adobe fonts was first released, there are now thousands of fonts for you to choose from.</p>
<p><img decoding="async" loading="lazy" src="https://storage.googleapis.com/webdesignledger.pub.network/WDL/075b6e34-screenshot-2020-05-27-at-13.40.03.png" alt="thousands of fonts on Adobe Fonts" width="2048" height="1155"></p>
<p>Adobe Fonts is free to use IF you have a subscription to any one of their products.</p>
<p>It is no longer a standalone product like it was when it was Typekit.</p>
<p>That is a bummer, but hey, you gotta do what you gotta do.</p>
<p><em>And</em> chances are, you probably have a subscription to Adobe.</p>
<p>So you should be good to go.</p>
<p><img decoding="async" loading="lazy" src="https://storage.googleapis.com/webdesignledger.pub.network/WDL/5f8e76a7-screenshot-2020-05-27-at-13.42.16.png" alt="adobe fonts free price" width="1318" height="544"></p>
<p>The great thing about Adobe Fonts is that you don’t have to worry about finding the rights to any font you fall in love with, as Adobe takes care of all of that for you!</p>
<p>All fonts are free to use for personal and commercial use.</p>
<p><img decoding="async" loading="lazy" src="https://storage.googleapis.com/webdesignledger.pub.network/WDL/37c8c6ce-screenshot-2020-05-27-at-13.44.46.png" alt="" width="2048" height="1152"></p>
<p>This means that once you find that perfect font for your project, that’s literally it.</p>
<p>No more contacting the owner and buying the rights to it.</p>
<p>That’s right, you just get to keep the perfect font.</p>
<p>Isn’t that amazing?</p>
<h2>Top 10 Adobe Fonts Designers Use</h2>
<p>Before we end our time together today, I want to show you my top 10 favorite fonts from Adobe Fonts.</p>
<p>If you’re not convinced that you <em>need </em>to be using Adobe Fonts yet, well, after this, I’m almost certain you will be.</p>
<h2><a target="_blank" href="https://fonts.adobe.com/fonts/acumin">1. Acumin</a></h2>
<p><img decoding="async" loading="lazy" src="https://storage.googleapis.com/webdesignledger.pub.network/WDL/978ce36c-acumin-font-sample-2x.png" alt="Acumin adobe fonts 2020" width="984" height="590"></p>
<h2><a target="_blank" href="https://fonts.adobe.com/fonts/itc-avant-garde-gothic">2. ITC Avant Garde Gothic</a></h2>
<p><img decoding="async" loading="lazy" src="https://storage.googleapis.com/webdesignledger.pub.network/WDL/1da532d5-itc-avant-garde-gothic-font-sample-2x.png" alt="ITC Avant Garde 2020 adobe fonts" width="984" height="590"></p>
<h2><a target="_blank" href="https://fonts.adobe.com/fonts/orpheus">3. Orpheus</a></h2>
<p><img decoding="async" loading="lazy" src="https://storage.googleapis.com/webdesignledger.pub.network/WDL/15451213-orpheus-font-sample-2x.png" alt="" width="984" height="590"></p>
<h2><a target="_blank" href="https://fonts.adobe.com/fonts/itc-benguiat">4. ITC Benguiat</a></h2>
<p><img decoding="async" loading="lazy" src="https://storage.googleapis.com/webdesignledger.pub.network/WDL/62c551a3-itc-benguiat-font-sample-2x-1.jpg" alt="" width="984" height="590"></p>
<h2><a target="_blank" href="https://fonts.adobe.com/fonts/plantin">5. Plantin</a></h2>
<p><img decoding="async" loading="lazy" src="https://storage.googleapis.com/webdesignledger.pub.network/WDL/df6dafc5-plantin-font-sample-2x.png" alt="" width="984" height="590"></p>
<h2><a target="_blank" href="https://fonts.adobe.com/fonts/minion">6. Minion</a></h2>
<p><img decoding="async" loading="lazy" src="https://storage.googleapis.com/webdesignledger.pub.network/WDL/f80b2f61-minion-font-sample-2x.png" alt="Adobe fonts 2020" width="984" height="590"></p>
<h2><a target="_blank" href="https://fonts.adobe.com/fonts/atf-franklin-gothic">7. Franklin Gothic</a></h2>
<p><img decoding="async" loading="lazy" src="https://storage.googleapis.com/webdesignledger.pub.network/WDL/66c4c454-franklin-gothic-font-sample-2x.png" alt="" width="984" height="590"></p>
<h2><a target="_blank" href="https://fonts.adobe.com/fonts/proxima-nova">8. Proxima Nova</a></h2>
<p><img decoding="async" loading="lazy" src="https://storage.googleapis.com/webdesignledger.pub.network/WDL/3007d87e-proxima-nova-font-sample-2x.png" alt="" width="984" height="590"></p>
<h2><a target="_blank" href="https://fonts.adobe.com/fonts/baskerville-urw">9. Baskerville</a></h2>
<p><img decoding="async" loading="lazy" src="https://storage.googleapis.com/webdesignledger.pub.network/WDL/3d806938-baskerville-font-sample-2x.png" alt="" width="984" height="590"></p>
<h2><a target="_blank" href="https://fonts.adobe.com/fonts/mrs-eaves">10. Mrs Eaves</a></h2>
<p><img decoding="async" loading="lazy" src="https://storage.googleapis.com/webdesignledger.pub.network/WDL/e14c18d1-mrs-eaves-font-sample-2x.png" alt="" width="984" height="590"></p>
<h2>Conclusion</h2>
<p>In order to truly grasp the power of Edge Web Fonts you’ll have to check it out for yourself.</p>
<p>Not only does it provide an extensive number of fonts, it also makes the process of finding them quick & easy. Also you should remember that Edge Web Fonts provides premier performance for your font styles by utilizing TypeKit!</p>
<p>You’ll surely not be disappointed when you see what has been given to web designers with the incredible Edge Web Fonts service.</p>
<p>Read More at <a target="_blank" rel="nofollow" href="https://webdesignledger.com/intro-to-edge-webfonts/">An Intro to Adobe Edge Web Fonts: Updated for 2020</a></p>
<div class="fixed"></div>
</div>
<div class="under">
<span class="categories">Categories: </span><span><a href="http://www.webmastersgallery.com/category/design/" rel="category tag">Designing</a>, <a href="http://www.webmastersgallery.com/category/uncategorized/" rel="category tag">Others</a></span> <span class="tags">Tags: </span><span></span> </div>
</div>
<div class="post" id="post-3249895">
<h2><a class="title" href="http://www.webmastersgallery.com/2020/05/26/how-to-feel-more-energized-even-when-youre-stuck-at-a-desk-all-day/" rel="bookmark">How To Feel More Energized Even When You’re Stuck At A Desk All Day</a></h2>
<div class="info">
<span class="date">May 26th, 2020</span>
<span class="author"></span> <span class="comments"><a href="http://www.webmastersgallery.com/2020/05/26/how-to-feel-more-energized-even-when-youre-stuck-at-a-desk-all-day/#respond">No comments</a></span>
<div class="fixed"></div>
</div>
<div class="content">
<div class="ftpimagefix" style="float:left"><a target="_blank" href="http://feedproxy.google.com/~r/SmashingMagazine/~3/KHnM-CR5SrA/"><img decoding="async" src="https://res.cloudinary.com/indysigner/image/fetch/f_auto,q_auto/w_400/https://cloud.netlifyusercontent.com/assets/344dbf88-fdf9-42bb-adb4-46f01eedd629/c0d8b42e-459b-4297-9b87-4613488216f7/energized-homeoffice-image5.png" alt="wikiHow graphic - right and wrong postures working at desk"></a></div>
<p> <title>How To Feel More Energized Even When You’re Stuck At A Desk All Day
How To Feel More Energized Even When You’re Stuck At A Desk All Day
I used to work for a translation agency. It was my job to copy-and-paste translations from one document into another and then to review the writing for errors. I worked between 10 and 12 hours every day, usually taking lunch at my desk (if I remembered to do so) and physically repeated the same thing over and over: mousing back and forth between my two giant computer screens and staring at too-small type.
Two years later, I found myself in physical therapy because I’d worn away the tissue beneath my right shoulder cap and had developed tennis elbow. Despite the months of therapy to repair my arm, I primarily use my left arm to work today. And although it feels a heck of a lot better than trying to power through the pain that happens when working with my right…
It makes me much slower than I used to be…
Which can lead to longer hours in front of the computer…
And I experience higher levels of stress, frustration and fatigue as a result.
I feel like if you’ve had a desk job for long enough, you have a similar story to tell. Maybe yours isn’t due to bad posture or technique. Maybe it has to do with the fact that you forget to eat lunch most days and don’t remember what it’s like to be outside when the sun is at its brightest. Or you move from your desk to the couch to the bed and back again, never giving your body or mind the physical activity it needs to stay energized.
Rather than let this be our collective fate because of the nature of our work, let’s try and change the narrative. Today, we’re going to look at some things you can do to feel more alert and energized even if you’re stuck at your desk for most of the day.
Fix Your Desk Setup and Alignment
Even if it feels more comfortable to work from your couch or bed or to slouch down in your work chair, the long-term benefits of not sitting properly will haunt you. Trust me.
I don’t know how old most of you are, but you may or may not have had to go through typing classes in school as I did. We didn’t just learn to type in them. We learned the right posture for sitting before a computer. This graphic from wikiHow sums it up:
An illustration that depicts the right and wrong posture when sitting at a desk. (Image source: wikiHow) (Large preview)
Basically, you want to aim for the following:
Body folded at 90-degree angles,
Back straight against the chair,
Feet flat on the floor,
Arms bent at the elbows,
Fingers hover above the keyboard or mouse without bending or resting the wrists,
Eyes level with the computer screen.
This is a good place to start, regardless if you sit in a chair, on a stool or a stability ball. That said, it’s not the only thing you can do to fix your body at your workstation.
Another thing to think about is using a standing desk.
According to Dr. Edward R. Laskowski and the Mayo Clinic, sitting can be really bad for your health. People who sit for long periods of time are more prone to increased blood pressure, high cholesterol, diabetes, obesity, and cancer.
“The Take-a-Stand Project reduced time spent sitting by 224% (66 minutes per day), reduced upper back and neck pain by 54% and improved mood states.”
You don’t need to go investing in a standing desk to make this change. They can be expensive, especially when you already have a setup you’re comfortable with. However, what you can do is invest in a riser.
A modified desk turns into a standing desk with an adjustable riser. (Image source: Suzanne Scacca) (Large preview)
Not only can I adjust the height of the riser, but I can tilt it, too. This is useful not just for turning my desk into a standing desk setup, but I can take this with me when I work in hotels to make sure I’m always maintaining proper alignment.
Use Time-Blocking To Schedule Your Day
Usually when people recommend the Pomodoro Technique — developed by Francesco Cirillo — they’re going to tell you to break your day into 25-minute intervals. That’s not really what the goal of this time management method is though.
The reason you break your workday into blocks is because it’s easier to focus when you have a clear and reasonable end-time in sight. It’s also useful for structuring your day.
For someone like a salesperson who has to get on call after call with leads or to sit in an endless string of meetings, half-hour blocks make a whole lot of sense. That’s naturally how their day breaks apart. Web designers would benefit from much longer blocks. Here’s why:
“When people are constantly interrupted, they develop a model of working faster (and writing less) to compensate for the time they know they will lose by being interrupted. Yet working faster with interruptions has its cost: people in the interrupted conditions experienced a higher workload, more stress, higher frustration, more time pressure and effort. So interrupted work may be done faster, but at a price.”
You have to be careful about managing the “cost” of taking a break. 25-minute blocks are just too costly for a web designer. I’d recommend looking at how your tasks naturally break apart.
Would prototyping a landing page take an hour or two? How about research and planning? Take a close look at the tasks you commonly perform and how long they take, on average, to complete.
I’d also look at where you naturally start to “fail” and lose focus. It’s the same thing that happens in workouts — when you reach your breaking point, your body just gives up. Unfortunately, some people try to push through it when it’s the brain screaming, “Stop!”
Another thing to look at is where your peak energy hours are. We all have them. For me, it’s between 2 PM and 5 PM every day. I always schedule my hardest projects then.
Use those as benchmarks for your blocks. On top of creating blocks and breaks throughout the workday, also be sure to set dedicated hours and limits for yourself. It’s a lot harder to get fatigued if you know you only have to put in a specific number of hours of work that day.
As for building this out, use a tool that makes it easy to set recurring breaks and stick to the same schedule every day. It could be as simple as using your Google Calendar:
An example of how a web designer might schedule their work and breaks in blocks. (Image source: Google Calendar) (Large preview)
Whatever you choose, make sure you can slot in each task by time and color-code tasks based on things like client, priority, type, design stage, etc.
Get Outside During The Workday
Okay, so let’s talk about what you should be doing with your scheduled breaks.
Unless there’s a dangerous storm outside, you should make an effort to get outside at least once a day. There are a ton of health benefits associated with sunlight, including an increase in vitamin D and serotonin.
Vitamin D is useful as it helps increase our immune systems and fight off disease. If you’ve ever tried to work while battling a cold or the flu, you know how difficult that can be — especially when your bed is just a matter of steps away.
Serotonin is also useful for work. Serotonin is what gives us the energy and good mood to power through longer days. Melatonin, on the other hand, is what puts us soundly to sleep at night. If we don’t get the right balance of it — which can happen if you’re stuck inside with artificial lighting all day — you could end up with sleepless nights and exhausting days.
Despite the extra coverings, I was enjoying the boost of sunshine on my lunch break as I walked around the Providence waterfront. (Image source: Suzanne Scacca) (Large preview)
“The light we get from being outside on a summer day can be a thousand times brighter than we’re ever likely to experience indoors. For this reason, it’s important that people who work indoors get outside periodically and moreover that we all try to sleep in total darkness. This can have a major impact on melatonin rhythms and can result in improvements in mood, energy and sleep quality.”
But it’s not just sunlight and fresh air that help with energy and productivity. Exercise is important, too. And what better way to fit in fitness than when you’re already outside and on a break from work?
For some people, taking a long walk is their preferred mode of outdoor exercise. It’s also a great option if you’re a dog owner and want to give them a big dose of exercise at the same time.
Ann Green, a fitness studio owner, yoga teacher and heptathlon world athlete, explains the benefits of walking:
“There are many reasons to walk for exercise. Walking improves fitness, cardiac health, alleviates depression and fatigue, improves mood, creates less stress on joints and reduces pain, can prevent weight gain, reduce the risk for cancer and chronic disease, improve endurance, circulation and posture and the list goes on.”
If you want something a little more exhilarating without breaking a major sweat in the middle of the workday, why not take an electric bike out?
There are many great things about this option. For starters, because e-bikes (like the ones you get from Rad Power Bikes) take some of the work out of pedaling for you, you can ride for a lot longer and go further.
Researchers at the University of Colorado conducted a study with 20 volunteers to see what would happen when they traded their car for an e-bike when commuting to work. Their objective was to ride for at least 40 minutes, three times a week, for a full month.
They found that electric bikes had improved their:
Cardiovascular health,
Aerobic capacity,
Blood sugar control.
Rad Power Bikes e-bikes aren’t just healthier for you, they’re healthier for the environment. (Image source: Rad Power Bikes)
Another reason an e-bike is an attractive option is because you can use it for a variety of purposes.
You can use it for commuting, if you have an office you work out of. You can use it for general exercise whenever you feel like it. You can also use it to get more done during your breaks. If you ever feel stressed out about when you’re going to have time to pick up groceries, for instance, an e-bike would be a great way to knock out your exercise and chores all at once.
Bottom line:
You’re carving time out of your workday to get away from your computer and give your brain and body a rest so it can recharge. Don’t waste it by putting yourself in front of another screen. If you can get outside, not only will you improve your overall health, but you’ll give yourself an instant boost of energy and mood, too.
Wrapping Up
Just because working indoors, at a desk, in front of a computer screen has been known to cause issues, that doesn’t mean you can’t take steps to lessen or remove those negative side effects from your workday.
Focus and energy are both very important in your line of work. By making just a few small adjustments, you can ensure that both remain high while you’re desk-side.
WordPress plugins are both great for adding functionality to WordPress and by extension reducing website designers’ workloads, as well as reducing costs to their clients.
There’s certainly no shortage of plugins. 55,000+ currently reside in the official WordPress repository and more are added with each passing day.
Some of these plugins are free, some are quite affordable, and some are premium products that can be quite expensive. Most provide good value for the money.
Picking a plugin or two, or three, that would make your work easier could be quite a challenge if you have to sift through all 55,000. Finding the best ones for the work at hand would be even more so.
Which is why we’re here to help. We believe every web designer and WordPress user should be aware of the 8 plugins addressed in this article for the remainder of 2020 and beyond.
1. Amelia WordPress Booking Plugin
Booking is an important task for many types of businesses. Although a single booking is not time consuming, multiple manual bookings can be, and managing multiple bookings that involve changes, cancellations, special requests, etc., can take time, energy, and require human resources.
Amelia is a WordPress booking plugin that can give a health clinic, gym, beauty parlor, or spa an error-free, reliable booking solution 24/7.
Amelia not only manages clients’ bookings but employee scheduling as well, taking into account hours worked, special days, and days off.
Amelia can manage bookings and appointments for a single business location, or multiple locations.
Amelia provides business owners or managers with up-to-date graphic depictions of the business’s key performance indicators (KPIs).
Amelia provides each business’s customer with its own Frontend Customer Panel
This remarkable automated booking system is easy to use and is currently used by 12,000+ businesses. It is GDPR compliant.
Click on the banner to find out more.
2. wpDataTables – Table and Chart WordPress Plugin
Crafting a table or chart can take time, and especially so when large amounts of complex data are involved or data is taken from more than a single source. wpDataTables is a fast, easy-to-use plugin that can not only save you a ton of time and frustration but will organize your data and present it in attractive, informative, and editable tables and charts.
A few of WPDataTables’ many popular features and capabilities:
Conditional formatting in which data of particular importance or interest is color-coded or highlighted
Multi-criteria filtering of data
Managing data from multiple separate Database connections
Creating tables and charts based on Excel files, CSV files, SQL queries, and Google spreadsheets
Creating tables and charts based on PHP arrays, JSON feeds, and XML feeds
With WPData tables you can build tables and charts using a single, rather than multiple plugins and organize data the way you want.
Click on the banner to find out more.
3. Go Dash – Makes Your Dashboard Fast
On the average, WordPress users spend 5.7 minutes searching for what they need after they log in. Time wasted.
Power users seldom have that problem. They can complete some tasks in 3 or 4 minutes that might take you 15 or 20. They finish their work faster and seemingly never have to ask where to find something.
Maybe it’s time to stop feeling envious of power users and invest in Go Dash, a revolutionary new plugin that gives you instant access to every post, product, page, and screen on your site
With Go Dash you can:
Power Search all your pages, posts & products – Even admin pages!
Create favorites & groups for fast access
Open multiple pages with a single click
Access recently viewed pages and posts
Take the first step toward finishing tasks more quickly, never having to ask where to find some obscure WordPress setting, and becoming a full-fledged WordPress power user by clicking on the above banner.
4. Logic Hop – Content Personalization for WordPress
Logic Hop brings the power of content personalization to WordPress by using on-site activity and real-time data to show the right content to the right person at the right time. Fully integrated into WordPress, Logic Hop is a complete personalization solution.
Logic Hop’s free add-ons enable uses to personalize with WooCommerce, Divi, Elementor, & more
It’s the only tool that enables unlimited personalization with geolocation at one low price
Click on the banner to find out more about this powerful plugin.
5. MapSVG WordPress mapping plugin
MapSVG lets you significantly spice up your site by helping you create custom content that you can show on a Google, Vector, or image map.
MapSVG has a build-in database and content manager
Map filter and search capabilities are included
Maps and information can be edited and maintained within MapSVG
Click on the banner to find out more about adding interactive maps to your site.
6. AdSanity
The AdSanity plugin supports Image Ads, Ad Networks, HTML5 ads, and Text Ads. It’s easy-to-use because it functions seamlessly with WordPress Custom Post Types.
Templates and filters help AdSanity users size and format ads
Click to learn more.
7. Slider Revolution
Slider Revolution 6 is much more than a slider builder. It’s a full-fledged, powerhouse website content builder and a potential game changer if your websites have taken on a certain sameness.
Slider Revolution’s cutting edge designs can create exciting, dynamic solutions to everyday design problems.
Create everything from sliders, carousels, and content modules to full websites.
Features include 2000+ royalty-free media assets
Click on the banner to learn more about this powerhouse website builder.
8. Ads Pro Plugin – Multi-Purpose WordPress Advertising Manager
AdsPro is the largest ad management plugin for WordPress is terms of the sheer flexibility provided through its many features
Highlights include
An order form
25+ Ad templates
User’s panel and user statistics
20+ Ad Display Types
PayPal, Stripe, Bank Option, and WooCommerce payment methods
AdsPro is 100% responsive and provides geo targeting, ad filtering and scheduling, and ad duration management.
Click on the banner to learn more about this powerful time-saving plugin.
*****
A discussion about which plugins and solutions are best for WordPress users can often lead to a healthy debate. That’s not terribly surprising since there are so many fantastic WordPress plugins on the market. Also because different people use them in different ways.
The WordPress plugins we bring you today are in our opinion MUST-HAVE tools. We have crowdsourced from some of the most successful online entrepreneurs and bloggers we know.
[– This is a sponsored post on behalf of BAW Media –]
Nuxt.js provides an Axios module for easy integration with your application. Axios is a promise-based HTTP client that works in the browser and Node.js environment or, in simpler terms, it is a tool for making requests (e.g API calls) in client-side applications and Node.js environment.
In this tutorial, we’re going to learn how to use the Axios module and how to make a request on the server-side using asyncData and fetch. These two methods make a request on the server-side but they have some differences which we’re also going to cover. Finally, we’ll learn how to perform authentication and secure pages/routes using the auth module and auth middleware.
This article requires basic knowledge of Nuxtjs and Vuejs as we’ll be building on top of that. For those without experience with Vuejs, I recommend you start from their official documentation and the Nuxt official page before continuing with this article.
The modules array accepts a list of Nuxt.js modules such as dotenv, auth and in this case, Axios. What we’ve done is to inform our application that we would be using the Axios module, which we reference using @nuxtjs/axios. This is then followed by the axios property which is an object of configurations like the baseURL for both client-side and server-side.
Now, you can access Axios from anywhere in your application by calling this.$axios.method or this.$axios.$method. Where method can be get, post, or delete.
Making Your First Request Using Axios
For this tutorial, I’ve put together a simple application on Github. The repository contains two folders, start and finish, the startfolder contains all you need to get right into the tutorial. The finish folder contains a completed version of what we would be building.
After cloning the repo and opening the start folder, we would need to install all our packages in the package.json file so open your terminal and run the following command:
npm install
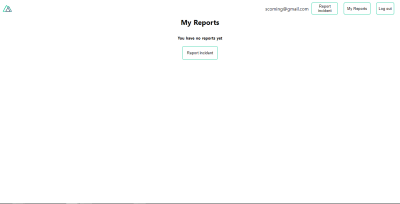
Once that is done, we can start our app using the npm run dev command. This is what you should see when you go to localhost:3000.
The next thing we have to do is to create a .env file in the root folder of our application and add our API URL to it. For this tutorial, we’ll be using a sample API built to collect reports from users.
Here, we tell Nuxt.js to use this baseURL for both our client-side and server-side requests whenever we use this Axios module.
Now, to fetch a list of reports, let us open the index.vue file and add the following method to the script section.
async getIncidents() {
  let res = await this.$store.dispatch("getIncidents");
  this.incidents = res.data.data.incidents;
}
What we have done is to create an async function that we call getIncidents() and we can tell what it does from the name — it fetches a list of incidents using the Vuex store action method this.$store.dispatch. We assign the response from this action to our incidents property so we can be able to make use of it in the component.
We want to call the getIncidents() method whenever the component mounts. We can do that using the mounted hook.
mounted() {
    this.getIncidents()
  }
mounted() is a lifecycle hook that gets called when the component mounts. That will cause the call to the API to happen when the component mounts. Now, let us go into our index.js file in our store and create this action where we’ll be making our Axios request from.
export const actions = {
  async getIncidents() {
    let res = await this.$axios.get('/incidents')
    return res;
  }
}
Here, we created the action called getIncidents which is an async function, then we await a response from the server and return this response. The response from this action is sent back to our getIncidents() method in our index.vue file.
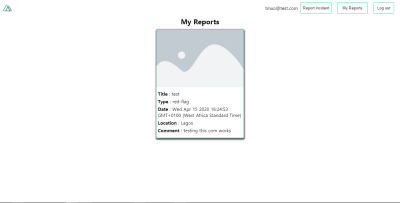
If we refresh our application, we should now be able to see a long list of incidents rendered on the page.
We have made our first request using Axios but we won’t stop there, we are going to be trying out asyncData and fetch to see the differences between them and using Axios.
AsyncData
AsyncData fetches data on the server-side and it’s called before loading the page component. It does not have access to this because it is called before your page component data is created. this is only available after the created hook has been called so Nuxt.js automatically merges the returned data into the component’s data.
Using asyncData is good for SEO because it fetches your site’s content on the server-side and also helps in loading content faster.
Note that asyncData method can only be used in the pages folder of your application as it would not work in the components folder. This is because asyncData hook gets called before your component is created.
Let us add asyncData to our index.vue file and observe how fast our incidentsdata loads. Add the following code after our components property and let us get rid of our mounted hook.
Here, the asyncData method accepts a property from the context$axios. We use this property to fetch the list of incidents and the value is then returned. This value is automatically injected into our component. Now, you can notice how fast your content loads if you refresh the page and at no time is there no incident to render.
Fetch
The Fetch method is also used to make requests on the server-side. It is called after the created hook in the life cycle which means it has access to the component’s data. Unlike the asyncData method, the fetch method can be used in all .vue files and be used with the Vuex store. This means that if you have the following in your data function.
You can easily modify id or gender by calling this.id or this.gender.
Using Axios As A Plugin
During the process of development with Axios, you might find that you need extra configuration like creating instances and interceptors for your request so your application can work as intended and thankfully, we can do that by extending our Axios into a plugin.
To extend axios, you have to create a plugin (e.g. axios.js) in your plugins folder.
This is an example of a plugin I wrote for a Nuxt application. Here, your function takes in a context object of $axios, store and redirect which we would use in configuring the plugin. The first thing we do is to listen for an error with a status of 500 using $axios.onError and redirect the user to the login page.
We also have an interceptor that intercepts every request response we make in our application checks if the status of the response we get is 200. If that is true we proceed and check that there is a response.request.responseURL and if it includes login. If this checks out to be true, we then send this response using our store’s dispatch method where it then mutated in our state.
Add this plugin to your nuxt.config.js file:
plugins: [
    '~/plugins/axios'
  ]
After doing this, your Axios plugin would intercept any request you make and check if you have defined a special case for it.
Introduction To The Auth Module
The auth module is used for performing authentication for your Nuxt application and can be accessed from anywhere in your application using $this.auth. It is also available in fetch, asyncData, middleware and NuxtInitServer from the context object as $auth.
The context provides additional objects/params from Nuxt to Vue components and is available in special nuxt lifecycle areas like those mentioned above.
To use the auth module in your application, you would have to install it using yarn or npm.
YARN
yarn add @nuxtjs/auth
NPM
npm install @nuxtjs/auth
Add it to your nuxt.config.js file.
modules: [
  '@nuxtjs/auth'
],
auth: {
  // Options
}
The auth property accepts a list of properties such as strategies and redirect. Here, strategies accepts your preferred authentication method which can be:
local
For username/email and password-based flow.
facebook
For using Facebook accounts as a means of authentication.
Github
For authenticating users with Github accounts.
Google
For authenticating users with Google accounts.
Auth0
Laravel Passport
The redirect property accepts an object of links for:
login
Users would be redirected to this link if login is required.
logout
Users would be redirected here if after logout current route is protected.
home
Users would be redirected here after login.
Now, let us add the following to our nuxt.config.js file.
Please note that the auth method works best when there is a user endpoint provided in the option above.
Inside the auth config object, we have a redirect option in which we set our login route to /login, logout route to / and home route to /my-reports which would all behave as expected. We also have a tokenType property which represents the Authorization type in the header of our Axios request. It is set to Bearer by default and can be changed to work with your API.
For our API, there is no token type and this is why we’re going to leave it as an empty string. The tokenName represents the Authorization name (or the header property you want to attach your token to) inside your header in your Axios request.
By default, it is set to Authorization but for our API, the Authorization name is x-auth. The autoFetchUser property is used to enable user fetch object using the user endpoint property after login. It is true by default but our API does not have a user endpoint so we have set that to false.
For this tutorial, we would be using the local strategy. In our strategies, we have the local option with endpoints for login, user and logout but in our case, we would only use the *login* option because our demo API does not have a *logout* endpoint and our user object is being returned when *login* is successful.
Note:The auth module does not have a register endpoint option so that means we’re going to register the traditional way and redirect the user to the login page where we will perform the authentication using this.$auth.loginWith. This is the method used in authenticating your users. It accepts a ‘strategy’ (e.g local) as a first argument and then an object to perform this authentication with. Take a look at the following example.
let data {
          email: 'test@test.com',
          password: '123456'
}
this.$auth.loginWith('local', { data })
Using The Auth Module
Now that we have configured our auth module, we can proceed to our registration page. If you visit the /register page, you should see a registration form.
Here, we have an async function called registerUser which is tied to a click event in our template and makes an Axios request wrapped in a try/catch block to an endpoint /user/create. This redirects to the /login page and notifies the user of a successful registration. We also have a catch block that alerts the user of any error if the request is not successful.
If the registration is successful, you would be redirected to the login page.
Login page with notification component. (Large preview)
Here, we’re going to make use of auth authentication method this.$auth.loginWith('local', loginData) after which we would use the this.$auth.setUser(userObj) to set the user in our auth instance.
To get the login page working, let’s add the following code to our login.vue file.
methods: {
  async logIn() {
    let data = this.login;
    this.loading = true;
    try {
      let res = await this.$auth.loginWith("local", {
        data
      });
      this.loading = false;
      let user = res.data.data.user;
      this.$auth.setUser(user);
      this.$notify({
        group: "success",
        title: "Success!",
        text: "Welcome!"
      });
    } catch (error) {
      this.loading = false;
      this.$notify({
        group: "error",
        title: "Error!",
        text: error.response
          ? error.response.data.error
          : "Sorry an error occured, check your internet"
      });
    }
  }
}
We created an async function called logIn using the auth method this.$auth.loginWith('local, loginData). If this login attempt is successful, we then assign the user data to our auth instance using this.$auth.setUser(userInfo) and redirect the user to the /my-report page.
You can now get user data using this.$auth.user or with Vuex using this.$store.state.auth.user but that’s not all. The auth instance contains some other properties which you can see if you log in or check your state using your Vue dev tools.
If you log this.$store.state.auth to the console, you’ll see this:
The auth instance contains a loggedIn property that is useful in switching between authenticated links in the nav/header section of your application. It also contains a strategy method that states the type of strategy the instance is running (e.g local).
Now, we will make use of this loggedIn property to arrange our nav links. Update your navBar component to the following:
In our template section, we have several links to different parts of the application in which we are now using auth.loggedIn to display the appropriate links depending on the authentication status. We have a logout button that has a click event with a logOut() function attached to it. We also display the user’s email gotten from the auth property which is accessed from our Vuex store using the mapState method which maps our state auth to the computed property of the nav component. We also have a logout method that calls our Vuex action logOut and redirects the user to the login page.
Now, let us go ahead and update our store to have a logOut action.
The logOut action calls the auth logout method which clears user data, deletes tokens from localStorage and sets loggedIn to false.
Routes like /my-reports and report-incident should not be visible to guests but at this point in our app, that is not the case. Nuxt does not have a navigation guard that can protect your routes, but it has is the auth middleware. It gives you the freedom to create your own middleware so you can configure it to work the way you want.
It can be set in two ways:
Per route.
Globally for the whole app in your nuxt.config.js file.
router: {
  middleware: ['auth']
}
This auth middleware works with your auth instance so you do not need to create an auth.js file in your middleware folder.
Let us now add this middleware to our my-reports.vue and report-incident.vue files. Add the following lines of code to the script section of each file.
middleware: 'auth'
Now, our application would check if the user trying to access these routes has an auth.loggedIn value of true. It’ll redirect them to the login page using our redirect option in our auth config file — if you’re not logged in and you try to visit either /my-report or report-incident, you would be redirected to /login.
If you go to /report-incidents, this is what you should see.
This page is for adding incidents but that right now the form does not send incident to our server because we are not making the call to the server when the user attempts to submit the form. To solve this, we will add a reportIncident method which will be called when the user clicks on Report. We’ll have this in the script section of the component. This method will send the form data to the server.
Update your report-incident.vue file with the following:
Here, we have a form with input fields for title, location, and comment with two-way data binding using v-model. We also have a submit button with a click event. In the script section, we have a reportIncident method that collects all the information provided in the form and is sent to our server using FormData because the API is designed to also accept images and videos.
This formData is attached to a Vuex action using the dispatch method, if the request is successful, you get redirected to /my-reports with a notification informing you that this request was successful otherwise, you would be notified of an error with the error message.
At this point, we don’t have reportIncident action in our store yet so in your browser console, you would see an error if you try to click submit on this page.
Here, we have a reportIncident function that takes in an empty context object and the data we’re sending from our form. This data is then attached to a post request that creates an incident and returns back to our report-incident.vue file.
At this point, you should be able to add a report using the form after which you would be redirected to /my-reports page.
At this point, we would notice a difference in how fetch method and asyncData loads our data.
Conclusion
So far, we have learned about the Axios module and all of its features. We have also learned more about asyncData, and how we can fetch both of them together despite their differences. We’ve also learned how to perform authentication in our application using the auth module and how to use the auth middleware to protect our routes. Here are some useful resources that talk more about all we’ve covered.
I was reading this article by Chris where he talks about block links — you know, like wrapping an entire card element inside an anchor — being a bad idea. It’s bad accessibility because of how it affects screen readers. And it’s bad UX because it prevents simple user tasks, like selecting text.
But maybe there’s something else at play. Maybe it’s less an issue with the pattern than the implementation of it. That led me to believe that this is the time to write follow-up article to see if we can address some of the problems Chris pointed out.
Throughout this post, I’ll use the term “card” to describe a component using the block link pattern. Here’s what we mean by that.
CodePen Embed Fallback
Let’s see how we want our Card Components to work:
The whole thing should be linked and clickable.
It should be able to contain more than one link.
Content should be semantic so assistive tech can understand it.
The text should be selectable, like regular links.
Things like right-click and keyboard shortcuts should work with it
Its elements should be focusable when tabbing.
That’s a long list! And since we don’t have any standard card widget provided by the browser, we don’t have any standard guidelines to build it.
Like most things on the web, there’s more than one way to make a card component. However, I haven’t found something that checks all the requirements we just covered. In this article, we will try to hit all of them. That’s what we’re going to do now!
Method 1: Wrap everything an
This is the most common and the easiest way to make a linked card. Take the HTML for the card and wrap the entire thing in an anchor tag.
<a href="/">
  <!-- Card markup -->
</a>
CodePen Embed Fallback
Here’s what that gives us:
It’s clickable.
It works with right-click and keyboard shortcuts.
Well, not great. We still can’t:
Put another link inside the card because the entire thing is a single link
Use it with a screen reader — the content is not semantic, so assistive technology will announce everything inside the card, starting from the time stamp
Select text
That’s enough ? that we probably shouldn’t use it. Let’s move onto the next technique.
Method 2: Just link what needs linking
This is a nice compromise that sacrifices a little UX for improved accessibility.
CodePen Embed Fallback
With this pattern we achieve most of our goals:
We can put as many links as we want.
Content is semantic.
We can select the text from Card.
Right Click and keyboard shortcuts work.
The focus is in proper order when tabbing.
But it is missing the main feature we want in a card: the whole thing should be clickable! Looks like we need to try some other way.
Method 3: The good ol’ ::before pseudo element
In this one, we add a ::before or ::after element, place it above the card with absolute positioning and stretch it over the entire width and height of the card so it’s clickable.
CodePen Embed Fallback
But now:
We still can’t add more than one link because anything else that’s linked is under the pseudo element layer. We can try to put all the text above the pseudo element, but card link itself won’t work when clicking on top of the text.
We still can’t select the text. Again, we could swap layers, but then we’re back to the clickable link issue all over again.
Let’s try to actually check all the boxes here in our final technique.
Method 4: Sprinkle JavaScript on the second method
Let’s build off the second method. Recall that’s what where we link up everything we want to be a link:
<article class="card">
  <time datetime="2020-03-20">Mar 20, 2020</time>
  <h2><a href="https://css-tricks.com/a-complete-guide-to-calc-in-css/" class="main-link">A Complete Guide to calc() in CSS</a></h2>
  <p>
    In this guide, let's cover just about everything there is to know about this very useful function.
  </p>
  <a class="author-name" href="https://css-tricks.com/author/chriscoyier/" target="_blank">Chris Coyier</a>
    <div class="tags">
      <a class="tag" href="https://css-tricks.com/tag/calc/" >calc</a>
    </div>
</article>
So how do we make the whole card clickable? We could use JavaScript as a progressive enhancement to do that. We’ll start by adding a click event listener to the card and trigger the click on the main link when it is triggered.
Temporarily, this introduces the problem that we can’t select the text, which we’ve been trying to fix this whole time. Here’s the trick: we’ll use the relatively less-known web API window.getSelection. From MDN:
The Window.getSelection() method returns a Selection object representing the range of text selected by the user or the current position of the caret.
Although, this method returns an Object, we can convert it to a string with toString().
With one line and no complicated kung-fu tricks with event listeners, we know if the user has selected text. Let’s use that in our handleClick function.
This way, the main link can be clicked when no text selected, and all it took was a few lines of JavaScript. This satisfies our requirements:
The whole thing is linked and clickable.
It is able to contain more than one link.
This content is semantic so assistive tech can understand it.
The text should be selectable, like regular links.
Things like right-click and keyboard shortcuts should work with it
Its elements should be focusable when tabbing.
Here’s the final demo with all the JavaScript code we have added:
CodePen Embed Fallback
I think we’ve done it! Now you know how to make a perfect clickable card component.
What about other patterns? For example, what if the card contains the excerpt of a blog post followed by a “Read More’ link? Where should that go? Does that become the “main” link? What about image?
For those questions and more, here’s some further reading on the topic:
I’ll be the first to admit that I’m writing this article, in part, because it’s something I look up often and want to be able to find it next time. Formatting a date string that you get from an API in JavaScript can take many shapes — anything from loading all of Moment.js to have very finite control, or just using a couple of lines to update it. This article is not meant to be comprehensive, but aims to show the most common path of human legibility.
UTC is an extremely common date format. You can generally recognize it by the Z at the end of the string. Here’s an example: 2020-05-25T04:00:00Z. When I bring data in from an API, it’s typically in UTC format.
If I wanted to format the above string in a more readable format, say May 25, 2020, I would do this:
First, I’m passing in options for how I want the output to be formatted. There are many, many other options we could pass in there to format the date in different ways. I’m just showing a fairly common example.
Next, I’m creating a new Date instance that represents a single moment in time in a platform-independent format.
return new Date(date)
Finally, I’m using the .toLocaleDateString() method to apply the formatting options.
return new Date(date).toLocaleDateString(undefined, options)
Note that I passed in undefined. Not defining the value in this case means the time will be represented by whatever the default locale is. You can also set it to be a certain area/language. Or, for apps and sites that are internationalized, you can pass in what the user has selected (e.g. 'en-US' for the United States, 'de-DE' for Germany, and so forth). There’s a nice npm package that includes list of more locales and their codes.
Hope that helps you get started! And high fives to future Sarah for not having to look this up again in multiple places. ?
In this post, we’ll look at several different ways you can build reusable React components that leverage Tailwind under the hood while exposing a nice interface to other components. This will improve your code by moving from long lists of class names to semantic props that are easier to read and maintain.
You will need to have worked with React in order to get a good understanding of this post.
Tailwind is a very popular CSS framework that provides low-level utility classes to help developers build custom designs. It’s grown in popularity over the last few years because it solves two problems really well:
Tailwind makes it easy to make iterative changes to HTML without digging through stylesheets to find matching CSS selectors.
Tailwind has sane conventions and defaults. This makes it easy for people to get started without writing CSS from scratch.
Add the comprehensive documentation and it’s no surprise why Tailwind is so popular.
These methods will help you transform code that looks like this:
The difference between both snippets is that in the first we made use of a standard HTML button tag, while the second used a component. The component had been built for reusability and is easier to read since it has better semantics. Instead of a long list of class names, it uses properties to set various attributes such as size, textColor, and bgColor.
Let’s get started.
Method 1: Controlling Classes With The Classnames Module
A simple way to adapt Tailwind into a React application is to embrace the class names and toggle them programmatically.
The classnames npm module makes it easy to toggle classes in React. To demonstrate how you may use this, let’s take a use case where you have components in your React application.
// This could be hard to read.
<button className="bg-blue-500 hover:bg-blue-700 text-white font-bold py-2 px-4 rounded">Enable</button>

// This is more conventional React.
<Button size="sm" textColor="white" bgColor="blue-500">Enable</Button>
Let’s see how to separate Tailwind classes so people using this component can use React props such as size, textColor, and bgColor.
Pass props such as bgColor and textColor directly into the class name string template.
Use objects to programmatically switch class names (as we have done with the size prop)
In the example code below, we’ll take a look at both approaches.
Looking at the code above, you’ll notice that we don’t have any Tailwind classes. They are all hidden inside the implementation code of . The user of this Dropdown component just has to provide a list of options and a click handler, onOptionSelect when an option is clicked.
Let’s see how this component can be built using Tailwind.
Removing some of the unrelated code, here’s the crux of the logic. You can view this Codepen for a complete example.
import classNames from 'classnames';

function Dropdown({ options, onOptionSelect }) {

  // Keep track of whether the dropdown is open or not.
  const [isActive, setActive] = useState(false);

  const buttonClasses = `inline-flex justify-center w-full rounded-md border border-gray-300 px-4 py-2 bg-white text-sm leading-5 font-medium text-gray-700 hover:text-gray-500 focus:outline-none focus:border-blue-300 focus:shadow-outline-blue active:bg-blue-500 active:text-gray-200 transition ease-in-out duration-150`;

  return (
    // Toggle the dropdown if the button is clicked
    <button onClick={() => setActive(!isActive)} className={buttonClasses}>
      Options
    </button>
    // Use the classnames module to toggle the Tailwind .block and .hidden classes
    <div class={classNames("origin-top-right absolute right-0 mt-2 w-56 rounded-md shadow-lg", {
      block: isActive,
      hidden: !isActive
    })}>
    // List items are rendered here.
    {options.map((option) => <div key={option} onClick={(e) => onOptionSelect(option)}>{option}</div>)}
   </div>
  )
}

export default Dropdown;
The dropdown is made interactive by selectively showing or hiding it using the .hidden and .block classes. Whenever the is pressed, we fire the onClick handler that toggles the isActive state. If the button is active (isActive === true), we set the block class. Otherwise, we set the hidden class. These are both Tailwind classes for toggling display behavior.
In summary, the classnames module is a simple and effective way to programmatically control class names for Tailwind. It makes it easier to separate logic into React props, which makes your components easier to reuse. It works for simple and interactive components.
Method 2: Using Constants To Define A Design System
Another way of using Tailwind and React together is by using constants and mapping props to a specific constant. This is effective for building design systems. Let’s demonstrate with an example.
Start with a theme.js file where you list out your design system.
ButtonType defines how buttons are styled in our app.
ButtonSizes defines the sizes of buttons in our app.
Now, let’s write our component:
import {ButtonType, ButtonSize} from './theme';

function Button({size, type, children}) {

  // This can be improved. I'm keeping it simple here by joining two strings.
  const classNames = ButtonType[type] + " " + ButtonSize[size];

  return (
    <button className={classNames}>{children}</button>
  )
}
export default Button;
We use the ButtonType and ButtonSize constants to create a list of class names. This makes the interface of our much nicer. It lets us use size and type props instead of putting everything in a class name string.
// Cleaner and well defined props.
<Button size="xs" type="primary">Enable</Button>
If you need to redefine how buttons look in your application, just edit the theme.js file and all buttons in your app will automatically update. This can be easier than searching for class names in various components.
Method 3: Composing Utilities With @apply
A third way to improve the legibility of your React components is using CSS and the @apply pattern available in PostCSS to extract repeated classes. This pattern involves using stylesheets and post-processors.
Let’s demonstrate how this works through an example. Suppose you have a Button group that has a Primary and a Secondary Button.
A Button Group consisting of a primary and secondary button. (Large preview)
The code above isn’t real CSS but it will get compiled by PostCSS. There’s a GitHub repository available here which shows how to setup PostCSS and Tailwind for a JavaScript project.
The concept of extracting Tailwind utility classes into higher-level CSS classes seems like it makes sense, but it has some disadvantages which you should be aware of. Let’s highlight these with another example.
First, by extracting these class names out, we lose some information. For example, we need to be aware that .btn-primary has to be added to a component that already has .btn applied to it. Also, .btn-primary and .btn-secondary can’t be applied together. This information is not evident by just looking at the classes.
If this component was something more complicated, you would also need to understand the parent-child relationship between the classes. In a way, this is the problem that Tailwind was designed to solve, and by using @apply, we are bringing the problems back, in a different way.
Here’s a video where Adam Wathan — the creator of Tailwind — dives into the pros and cons of using @apply.
Summary
In this article, we looked at three ways that you can integrate Tailwind into a React application to build reusable components. These methods help you to build React components that have a cleaner interface using props.
Use the classnames module to programmatically toggle classes.
Define a constants file where you define a list of classes per component state.
Use @apply to extract higher-level CSS classes.
If you have any questions, send me a message on Twitter at @tilomitra.
For many professionals looking for new work opportunities, they know that prospective employers are going to ask for proof of their credentials; where they went to school; how long they worked in the field; who they worked for; a résumé communicates these details nicely.
For web designers, though, a list of jobs and accolades isn’t sufficient.
Imagine if you created a resume that listed off your skills and experience as a designer:
I have 10 years of experience building responsive websites;
I’m an Adobe certified expert;
I’m proficient in HTML, CSS, and JavaScript.
None of these things would mean much to prospective clients unless they themselves are designers or developers. It’s the same reason you don’t talk to clients using web design “speak”. They want to know what you’re going to do for them, not how you do it.
Below, you’ll find five signs that it’s time to update or redesign your portfolio website again:
Sign #1: Business Has Been Slow
There are many reasons why business may be slow for you. What I’d suggest is taking a look at your Google Analytics account to get a sense for why.
Do You Have Steady Traffic?
If the answer is “no”, then there’s an issue with visibility in search. You’ll need to address either your indexing issues or problems with SEO to fix the problem.
Is Your Bounce Rate High (>90%) & Time on Page Low (< 10 seconds)?
There’s likely something wrong with loading speeds. Check your speed through PageSpeed Insights and Google will tell you how to repair the issue.
Do You Have Traffic But Zero Leads?
Then the issue is most likely your portfolio. Even then, there are so many things that could be happening here. The work samples might be underwhelming, outdated, or not geared towards the audience you’re targeting. The copy might be too confusing or vague. Next steps might be unclear or inaccessible (like a broken contact form).
Use Google Analytics to look at your Users Flow (under Audience > Users Flow):
This will help you visualize where your traffic is going within your portfolio site and to see where most of it is dropping off. If you find that people are viewing your work, but aren’t taking action, then it’s definitely time to give the site a rework.
Sign #2: Business Has Been Extremely Busy
When you first built your portfolio website, you probably selected the best of the best to represent your body of work, right? But that was then. What about now?
As business picks up, it’s easy to lose sight of your portfolio because you’re so busy tending to clients that need help. However, if you want to keep those numbers up, then you should make time to update your portfolio so it accurately reflects your best work up to the minute.
Helen Keller International, Politico, WCG, FiveThirtyEight Live Blog, The Saturday Evening Post, and Investor Place are the first samples you see.
Now, let’s go back to February 2019. This is what the “Work” page looked like then:
Motor Trend, WAMU.org, Smarter Travel, FiveThirtyEight, Windows Launch Event, and Maine Today Media are in the top spots.
If you scroll down the page as it stands today, you’ll find these projects there. It takes about three scrolls to find them. So, it’s clear that 10up updates its portfolio at least once or twice a year with fresh work.
Sign #3: You Recently Acquired a New Skill
A portfolio should be a reflection of your current skill set. And what that translates to is showing off websites that align with current web design practices and ideals. It also means redesigning your website so that it accurately depicts what’s going on with web design today.
Considering how quickly design trends come or go, this means you’ll need to update your portfolio site about once a year or so. It doesn’t need to be a major overhaul, but it should at least help you “sell” new clients on more modern designs and website features. For example:
Client: My friend has a chatbot on her site and she said it’s been a big help in getting her more appointments. Is that something we can do? You: As a matter a fact, it is. And it’s something I’ve personally had a lot of success with.
You would then show the prospect your portfolio site equipped with a chatbot.
That said, you don’t need to litter your site with all the trendy new features. All you need is a portfolio site that reflects the very best in design today.
The portfolio website for Kati Forner Design, for example, went under the knife to reflect this type of modernization of design:
This was how the website looked in 2019:
And this is how the studio’s “Works” were displayed:
It’s an attractive website and one I’m sure did very well with its target audience. That said, a lot changes over the course of a year, so it’s no surprise to see that the studio has adopted a new look in 2020:
The same goes for its portfolio page:
The style of the website and portfolio page have a bolder and more confident look to them these days. This could be a reflection of the times and it very well could be a reflection of a change in their audience demographic. Both are valid considerations when updating a portfolio website.
Sign #4: You Recently Switched Niches
For web designers that work on their own, it makes a lot of sense to niche down. By carving out a singular niche for yourself, it’s easier to find clients as you’re not having to sell yourself as a jack of all trades or to constantly be changing gears from job to job.
Design agencies, on the other hand, may decide that it’s worth catering to various niches because they have the amount of capacity to do so. And that’s fine, too, so long as the resources and expertise are there.
Regardless of which boat you find yourself in, a change in niche or an addition of a new one is not unheard of. When that happens, though, your portfolio website needs to reflect this change.
Let’s fast forward to 2020. The list of niches has changed (as has the overall look of the site):
Medical
Financial
Travel/Tourism
B2B
e-Commerce
Nonprofit
Construction
Legal
Creative and Start-Ups are now gone. In their place are Travel/Tourism and Legal — and each page comes with information on how the agency serves the niche, information on a sample project, and a custom contact form.
Whenever it comes time to change up your niche, just make sure you’re prepared with all of the details needed to sell prospective clients on it.
When In Doubt, Update Your Portfolio Website
I know it’s not easy finding the time to give your design business the love and attention it deserves. But your portfolio website is something you can’t afford to ignore. It’s the web designer’s version of a résumé and it’s an essential part of your marketing and sales strategy.
Just keep in mind that a portfolio website is just like any other website. There’s no setting it and forgetting it. It needs to be updated so that it’s always the most accurate reflection of your body of work, skills, and area of expertise.
Even if you take a few hours every year to look in on it and make sure the design, copy, and samples are up to snuff, that may be all you really need to do to maintain it.

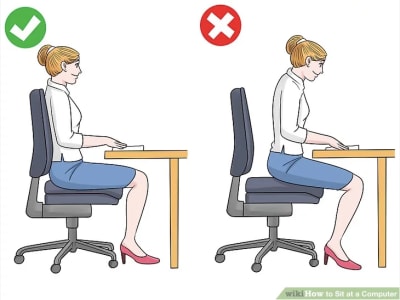
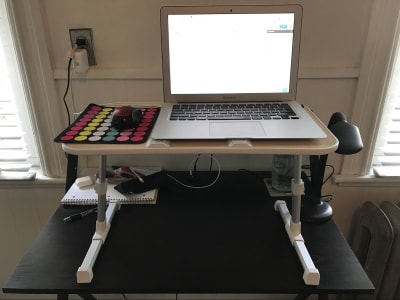
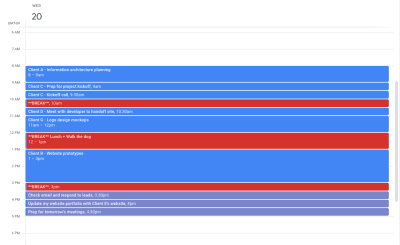


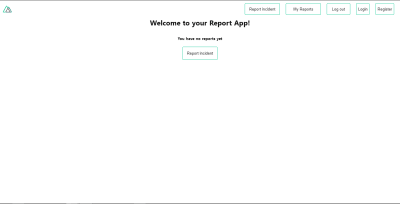
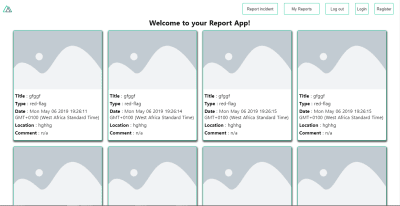

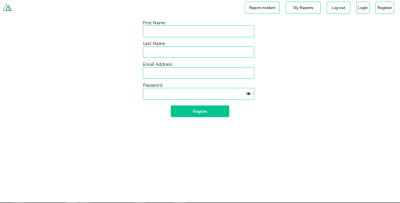
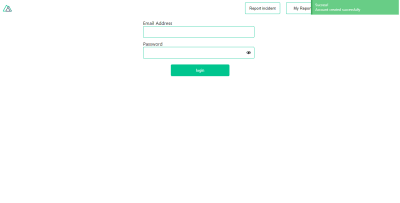
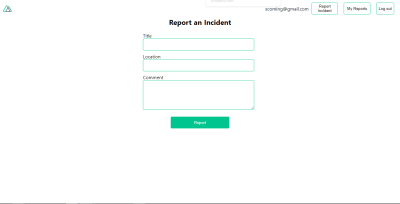
![error message that reads ‘[Vuex] unknown action type: reportIncident'](https://res.cloudinary.com/indysigner/image/fetch/f_auto,q_auto/w_400/https://cloud.netlifyusercontent.com/assets/344dbf88-fdf9-42bb-adb4-46f01eedd629/3f5d686f-0554-4ab4-aae5-0b3f154a0abb/07-action-error-message.png)