If you are building a data-driven web or mobile application, then key concerns you need to address is how data will be surfaced to the client and how the client can update the state on the server. This is not a new problem, and one that we have been solving for decades.
GraphQL provides one way to address this problem and uses an approach that provides significant benefits over previous RPC-based approaches. GraphQL was originally created at Facebook several years ago. It has been widely adopted since by Github, Concur, Airbnb and more. We’re even now adopting it at DocuSign. If you are doing React development, GraphQL has become the de-facto way to query from React clients.
What is GraphQL?
At its heart, GraphQL is several things.
A schema that allows defining a structured view of data that will be surfaced to / queried / updated by a GraphQL client.
A query language for interacting with a GraphQL endpoint to retrieve, update, and subscribe to notifications.
Tooling and SDKs for building GraphQL clients and servers, or interacting with GraphQL endpoints such as the GraphiQL editor, clients like Apollo and Relay, servers like Apollo, GraphQL for .NET, and more.
A few things that have stood out for me that I have really liked about GraphQL.
It provides a standard way to query and update data including non-crud based actions. It supports “graphs” of data allowing queries to pull hierarchical data.
It puts power in UI teams hands to be able to hand craft queries with the data they need, without having to constantly send custom requests to the API team.
It has GraphiQL which is an awesome intellisense-driven tool for querying GraphQL endpoints that you can provide to developers for interacting with the endpoint.
It can work side by side with, and wrap existing “REST” APIs
It is not opinionated about where data resides, it is not bound to a database. Data could live in MongoDB, SQL, in documents like S3/Azure Blob, or even in memory. It is really easy to make GraphQL work with any data store
It allows full control from the server-side as to what data is exposed.
There are also plenty of tradeoffs with GraphQL vs traditional APIs and it is not a silver bullet. Fortunately it is not mutually exclusive and can live side by side with “REST” APIs. Still you should go in with eyes open (as with any other technology or approach).
GraphQL with .NET
Yes you can develop GraphQL solutions with .NET! There are several open source projects that enable this, my favorite one being GraphQL for .NET. GraphQL for .NET lets you create GraphQL schemas and queries in C#, and then surface them via an ASP.NET core endpoint. It also provides a C# client which you can use to issue queries from an application such as as a Xamarin mobile client. All of the libraries are also available on NuGet. If you head to the GraphQL for .NET documentation you can find out more.
I’ve also created an ASP.NET Core example endpoint which can be ran on Windows, Mac or Linux which you can download from here. The readme contains lots of example queries you can run using the GraphiQL editor that is built in.
Check out my LinkedIn Learning Course
If you are interested in learning more about GraphQL for .NET, you can also check out my LinkedIn Learning Course: API Development in .NET with GraphQL. In the course I’ll take you through building the Orders GraphQL endpoint above from scratch in ASP.NET Core. I show you how to use GraphQL for .NET to define your schema, queries, and mutations, and subscriptions and expose them via ASP.NET Core. It’s heavily code based so you can follow along and build it with me. If you check out the course, let me know what you think.
GraphQL is growing
GraphQL is exploding in traction, with more and more companies adopting it as the standard. All signs are that will continue. It is exciting that this powerful ecosystem is available now to you as a .NET developer!
If you are building a data-driven web or mobile application, then key concerns you need to address is how data will be surfaced to the client, and how the client can update the state on the server. This is not a new problem, and one that we have been trying to solve for decades.
GraphQL provides one way to address this problem, and uses an approach that provides significant benefits over previous RPC-based approaches. GraphQL was originally created at Facebook several years ago. It has been widely adopted since by Github, Concur, Airbnb and more. We’re even now adopting it at DocuSign. If you are doing React development, GraphQL has become the de-facto way to query from React clients.
What is GraphQL?
At its heart, GraphQL is several things.
A schema that allows defining a structured view of data that will be surfaced to / queried / updated by a GraphQL client.
A query language for interacting with a GraphQL endpoint to retrieve, update, and subscribe to notifications.
Tooling and SDKs for building GraphQL clients and servers, or interacting with GraphQL endpoints such as the GraphiQL editor, clients like Apollo and Relay, and servers like Apollo, and GraphQL for .NET, and more.
A few things that have stood out for me that I have really liked about GraphQL.
It provides a standard way to query and update data including non-crud based actions. It supports “graphs” of data allowing queries to pull hierarchical data.
It puts power in UI teams hands to be able to hand craft queries with the data they need, without having to constantly send custom requests to the API team.
It has GraphiQL which is an awesome intellisense-driven tool for querying GraphQL endpoints that you can provide to developers for interacting with the endpoint.
It can work side by side with, and wrap existing “REST” APIs
It is not opinionated about where data resides, it is not bound to a database. Data could live in MongoDB, SQL, in documents like S3/Azure Blob, or even in memory. It is really easy to make GraphQL work with any data store
It allows full control from the server-side as to what data is exposed.
There are also plenty of tradeoffs with GraphQL vs traditional APIs and it is not a silver bullet. Fortunately it is not mutually exclusive and can live side by side with “REST” APIs. Still you should go in with eyes open (as with any other technology or approach).
GraphQL with .NET
Yes you can develop GraphQL solutions with .NET! There are several open source projects that enable this, my favorite one being GraphQL for .NET. GraphQL for .NET lets you create GraphQL schemas and queries in C#, and then surface them via an ASP.NET core endpoint. It also provides a C# client which you can use to issue queries from an application such as as a Xamarin mobile client. All of the libraries are also available on NuGet. If you head to the GraphQL for .NET documentation you can find out more.
I’ve also created an ASP.NET Core example endpoint which can be ran on Windows, Mac or Linux which you can download from here. The readme contains lots of example queries you can run using the GraphiQL editor that is built in.
Check out my LinkedIn Learning Course
If you are interested in learning more about GraphQL for .NET, you can also check out my LinkedIn Learning Course: API Development in .NET with GraphQL. In the course I’ll take you through building the Orders GraphQL endpoint above from scratch in ASP.NET Core. I show you how to use GraphQL for .NET to define your schema, queries, and mutations, and subscriptions and expose them via ASP.NET Core. It’s heavily code based so you can follow along and build it with me.
GraphQL is growing
GraphQL is exploding in traction, with more and more companies adopting it as the standard. All signs are that will continue. It is exciting to know that this powerful ecosystem is available to .NET developers!
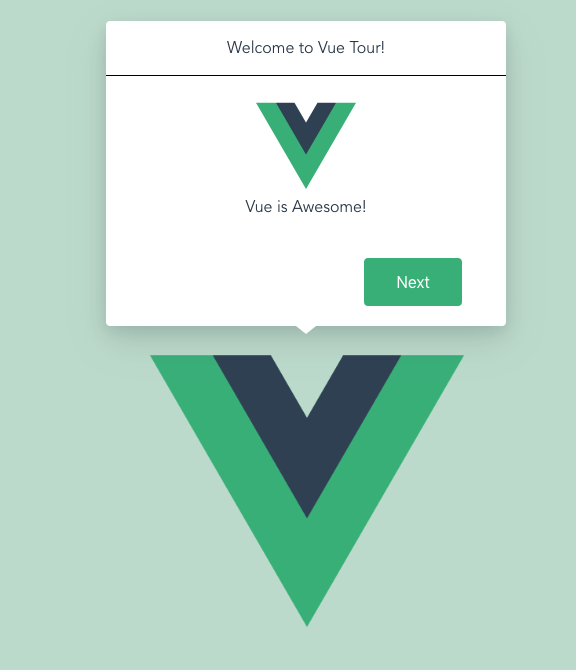
A popover is a transient view that shows up on top of a content on the screen when a user clicks on a control button or within a defined area. For example, clicking on an info icon on a specific list item to get the item details. Typically, a popover includes an arrow pointing to the location from which it emerged.
Popovers are great for situations when we want to show a temporary context to get user’s attention when interacting with a specific element on the screen. They provide additional context and instruction for users without having to clutter up a screen. Users can simply close them by clicking the same way they were opened or outside the popover.
We’re going to look at a library called popper.js that allows us to create reusable popover components in the Vue framework. Popovers are the perfect type of component for a component-based system like Vue because they can be contained, encapsulated components that are maintained on their own, but used anywhere throughout an app.
Let’s dig in and get started.
But first: What’s the difference between a popover and tooltip?
Was the name “popover” throwing you for a loop? The truth is that popovers are a lot like tooltips, which are another common UI pattern for displaying additional context in a contained element. There are differences between them, though, so let’s briefly spell them out so we have a solid handle on what we’re building.
Tooltips
Popovers
Tooltips are meant to be exactly that, a hint or tip on what a tool or other interaction does. They are meant to clarify or help you use the content that they hover over, not add additional content.
Popovers, on the other hand, can be much more verbose, they can include a header and many lines of text in the body.
Tooltips are typically only visible on hover, for that reason if you need to be able to read the content while interacting with other parts of the page then a tooltip will not work.
Popovers are typically dismissible, whether by click on other parts of the page or second clicking the popover target (depending on implementation), for that reason you can set up a popover to allow you to interact with other elements on the page while still being able to read it’s content.
Popovers are most appropriate on larger screens and we’re most likely to encounter them in use cases such as:
OK, now that we’ve got a baseline understanding of popovers and what we’re building, let’s get into the step-by-step details for creating them using popper.js.
Step 1: Create the BasePopover component
Let’s start by creating a component that will be responsible for initializing and positioning the popover. We’ll call this component BasePopover.vue and, in the component template, we’ll render two elements:
Popover content: This is the element that will be responsible for rendering the content within the popover. For now we use a slot that will allow us to pass the content from the parent component responsible for rendering our popover (Requirement #1: Reusability).
Popover overlay: This is the element responsible for covering the content under the popover and preventing user from interacting with the elements outside the popover. It also allows us to close the popover when clicked (Requirement #2: Dismissibility).
we import popper.js (the library that takes care of the popover positioning), then
we receive the popoverOptions props, and finally
we set initial popperInstance to null (because initially we do not have any popover).
Let’s describe what the popoverOptions object contains:
popoverReference: This is an object in relation to which the popover will be positioned (usually element that triggers the popover).
placement: This is a popper.js placement option that specifies the where the popover is displayed in relation to the popover reference element (the thing it is attached to)
offset: This is a popper.js offset modifier that allows us to adjust popover position by passing x- and y-coordinates.
Why do we need that? The popper.js library allows us to position the element in relation to another element with ease. It also does the magic when the popover gets to the edge of the screen an reposition it to be always in user’s viewport (Requirement #3: Positioning)
Step 2: Initialize popper.js
Now that we have a BasePopover component skeleton, we will add few methods that will be responsible for positioning and showing the popover.
In the initPopper method, we will start by creating a modifiers object that will be used to create a Popper instance. We set the options received from the parent component (placement and offset) to the corresponding fields in the modifiers object. All those fields are optional, which is why we first need to check for their existence.
Then, we initialize a new Popper instance by passing:
the popoverReference node (the element to which the popover is pointing: popoverReference ref)
the popper content node (the element containing the popover content: basePopoverContent ref)
the options object
We also set the preventOverflow option to prevent the popover from being positioned outside of the viewport. After initialization we set the popper instance to our popperInstance data property to have access to methods and properties provided by popper.js in the future.
As you can see, we are calling one more method in the mounted hook: the updateOverlayPosition method. This method is a safeguard used to reposition our overlay in case we have any other elements on the page that have absolute positioning (e.g. NavBar, SideBar). The method is making sure the overlay is always covering the full screen and prevent user from interacting with any element except the popover and overlay itself.
We have our popper initialized but now we need a way to remove and dispose it when it gets closed. There’s no need to have it in the DOM at that point.
We want to close the popover when we click anywhere outside of it. We can do that by adding a click listener to the overlay because we made sure that the overlay is always covering the whole screen under our popover
Let’s create a method responsible for destroying the popover. In that method we first check if the popperInstance actually exist and if it does we call popper destroy method that makes sure the popper instance is destroyed. After that we clean our popperInstance data property by setting it to null and emit a closePopover event that will be handled in the component responsible for rendering the popover.
OK, we have our popover ready to be rendered. We do that in our parent component, which will be responsible for managing the visibility of the popover and passing the content to it.
In the template, we need to have an element responsible for triggering our popover (popoverReference) and the BasePopover component. The BasePopover component receives a popoverOptions property that will tell the component how we want to display it and isPopoverVisible property bound to v-if directive that will be responsible for showing and hiding the popover.
In the script section of the component, we import our BasePopover component, set the isPopoverVisible flag initially to false and popoverOptions object that will be used to configure popover on init.
We set popoverReference property to null initially because the element that will be the popover trigger does not exist when our parent component is created. We get that fixed in the mounted lifecycle hook when the component (and the popover reference) gets rendered.
Now let’s create two methods, openPopover and closePopover that will be responsible for showing and hiding our popover by setting proper value on the isPopoverVisible property.
The last thing we need to do in this step is to attach those methods to appropriate elements in our template. We attach the openPopover method to click event on our trigger element and closePopover method to closePopover event emitted from the BasePopover component when the popover gets destroyed by clicking on the popover overlay.
Having this in place, we have our popover showing up when we click on the trigger element and disappearing when we click outside of the popover.
Step 5: Create BasePopoverContent component
It does not look like a popover though. Sure, it renders content passed to the BasePopover component, but it does so without the usual popover wrapper and an arrow pointing to the trigger element. We could have included the wrapper component in the BasePopover component, but this would made it less reusable and couple the popover to a specific template implementation. Our solution allows us to render any template in the popover. We also want to make sure that the component is responsible only for positioning and showing the content.
To make it look like a popover, let’s create a BasePopoverContent component. We need to render two elements in the template:
an arrow element having a popper.js x-arrow selector needed for the popper.js to properly position the arrow
content wrapper that expose a slot element in which our content will be rendered
You can see the popover animating in and out in the example above. We’ve left animation out of this article for the sake of brevity, but you can check out other popper.js examples for inspiration.
You can see the animation code and working example here.
Let’s look at our requirements and see if we didn’t missed anything:
Pass?
Requirement
Explanation
Pass
Reusability
We used a slot in the BasePopover component that decouples the popover implementation from the content template. This allows us to pass any content to the component.
Fail
Dismissibility
We made it possible to close the popover when clicking outside of it. We still need to make sure we can dismiss the popover by pressing the ESC on the keyboard.
Pass
Positioning
That’s where popper.js solved an issue for us. It not only gave us positioning superpowers, but also takes care of repositioning the popover when it reaches the edge of the viewport.
Fail
Interaction
We have a popover popping in and out, but we do not have any interactions with the popover content yet. As for now, it looks more like a tooltip than popover and could actually be used as a tooltip when it comes to showing and hiding the element. Tooltips are usually shown on hover, so that’s the only change we’d have to make.
Darn, we failed interaction requirement. Adding the interaction is a matter of creating a component (or components) that will be placed in the BasePopoverContent slot. In the example, I created a very simple component with a header and text showing a few Vue style guide rules. By clicking on the buttons, we can interact with the popover content and change the rules, when you get to the last rule the button changes its purpose and serve as a close button for the popover. It’s a lot like the new user welcome screens we see in apps.
We also need to fully meet the dismissibility requirement. We want to hit ESC on the keyboard to close the popover in addition to clicking anywhere outside it. For kicks, we’ll also add an event that proceeds to the next Vue style guide rule when pressing Enter.
We can handle that in the component responsible for rendering the popover content using Vue event key modifiers. To make the events work we need to make sure that the popover is focused when mounted. To do that we add a tabindex attribute to the popover content and a ref that will allow us to access the element in the mounted hook and call focus method on it.
And there we have it: a fully functional popover component we can use anywhere in our app. Here are a few things we learned along the way:
Use a popover to expose a small amount of information or functionality. Remember that the content will disappear when user is finished with it.
Consider using popovers instead of temporary views like sidebars. Popovers leave more space for content and are only temporary.
Enable a closure behavior that makes sense based on the popover’s function. A popover should be visible only when needed. If it allows user to make a choice, close the popover as soon as the user makes a decision.
Position popovers onscreen with care. A popover’s arrow should always point directly to the element that triggered it and should never cover the trigger element.
Display one popover on screen at a time. More than one steals attention.
Take care of the popover size. Prevent making it too big but bear in mind that proper use of padding can make things look nice and clean.
If you don’t want to dig too deep into the code and you just need the component as it is, you can try out the npm package version of the component.
Hopefully you will find this component useful in your project!
With the advent of HTML5, many sites were able to replace JavaScript plugin and codes with simple more efficient HTML codes such as audio, video, geolocation, etc. HTML5 tags made the job of developers much easier while enhancing page load time and site performance. In particular, HTML5 web storage was a game changer as they allow users’ browsers to store user data without using a server. So the creation of web storage, allowed front-end developers to accomplish more on their website without knowing or using server-side coding or database.
Online e-commerce websites predominantly use server-side languages such as PHP to store users’ data and pass them from one page to another. Using JavaScript back-end frameworks such as Node.js, we can achieve the same goal. However, in this tutorial, we’ll show you step by step how to build a shopping cart with HTML5 and some minor JavaScript code. Other uses of the techniques in this tutorial would be to store user preferences, the user’s favorite content, wish lists, and user settings like name and password on websites and native mobile apps without using a database.
Many high-traffic websites rely on complex techniques such as server clustering, DNS load balancers, client-side and server-side caching, distributed databases, and microservices to optimize performance and availability. Indeed, the major challenge for dynamic websites is to fetch data from a database and use a server-side language such as PHP to process them. However, remote database storage should be used only for essential website content, such as articles and user credentials. Features such as user preferences can be stored in the user’s browser, similar to cookies. Likewise, when you build a native mobile app, you can use HTML5 web storage in conjunction with a local database to increase the speed of your app. Thus, as front-end developers, we need to explore ways in which we can exploit the power of HTML5 web storage in our applications in the early stages of development.
I have been a part of a team developing a large-scale social website, and we used HTML5 web storage heavily. For instance, when a user logs in, we store the hashed user ID in an HTML5 session and use it to authenticate the user on protected pages. We also use this feature to store all new push notifications — such as new chat messages, website messages, and new feeds — and pass them from one page to another. When a social website gets high traffic, total reliance on the server for load balancing might not work, so you have to identify tasks and data that can be handled by the user’s browser instead of your servers.
Project Background
A shopping cart allows a website’s visitor to view product pages and add items to their basket. The visitor can review all of their items and update their basket (such as to add or remove items). To achieve this, the website needs to store the visitor’s data and pass them from one page to another, until the visitor goes to the checkout page and makes a purchase. Storing data can be done via a server-side language or a client-side one. With a server-side language, the server bears the weight of the data storage, whereas with a client-side language, the visitor’s computer (desktop, tablet or smartphone) stores and processes the data. Each approach has its pros and cons. In this tutorial, we’ll focus on a simple client-side approach, based on HTML5 and JavaScript.
Note: In order to be able to follow this tutorial, basic knowledge of HTML5, CSS and JavaScript is required.
Project Files
Click here to download the project’s source files. You can see a live demo, too.
Overview Of HTML5 Web Storage
HTML5 web storage allows web applications to store values locally in the browser that can survive the browser session, just like cookies. Unlike cookies that need to be sent with every HTTP request, web storage data is never transferred to the server; thus, web storage outperforms cookies in web performance. Furthermore, cookies allow you to store only 4 KB of data per domain, whereas web storage allows at least 5 MB per domain. Web storage works like a simple array, mapping keys to values, and they have two types:
Session storage
This stores data in one browser session, where it becomes available until the browser or browser tab is closed. Popup windows opened from the same window can see session storage, and so can iframes inside the same window. However, multiple windows from the same origin (URL) cannot see each other’s session storage.
Local storage
This stores data in the web browser with no expiration date. The data is available to all windows with the same origin (domain), even when the browser or browser tabs are reopened or closed.
Both storage types are currently supported in all major web browsers. Keep in mind that you cannot pass storage data from one browser to another, even if both browsers are visiting the same domain.
Build A Basic Shopping Cart
To build our shopping cart, we first create an HTML page with a simple cart to show items, and a simple form to add or edit the basket. Then, we add HTML web storage to it, followed by JavaScript coding. Although we are using HTML5 local storage tags, all steps are identical to those of HTML5 session storage and can be applied to HTML5 session storage tags. Lastly, we’ll go over some jQuery code, as an alternative to JavaScript code, for those interested in using jQuery.
Add HTML5 Local Storage To Shopping Cart
Our HTML page is a basic page, with tags for external JavaScript and CSS referenced in the head.
We’ll create and call the JavaScript function doShowAll() in the onload() event to check for browser support and to dynamically create the table that shows the storage name-value pair.
<body onload="doShowAll()">
Alternatively, you can use the JavaScript onload event by adding this to the JavaScript code:
window.load=doShowAll();
Or use this for jQuery:
$( window ).load(function() {
  doShowAll();
});
In the CheckBrowser() function, we would like to check whether the browser supports HTML5 storage. Note that this step might not be required because most modern web browsers support it.
/*
=====> Checking browser support.
 //This step might not be required because most modern browsers do support HTML5.
 */
 //Function below might be redundant.
function CheckBrowser() {
    if ('localStorage' in window && window['localStorage'] !== null) {
        // We can use localStorage object to store data.
        return true;
    } else {
            return false;
    }
}
Inside the doShowAll(), if the CheckBrowser() function evaluates first for browser support, then it will dynamically create the table for the shopping list during page load. You can iterate the keys (property names) of the key-value pairs stored in local storage inside a JavaScript loop, as shown below. Based on the storage value, this method populates the table dynamically to show the key-value pair stored in local storage.
// Dynamically populate the table with shopping list items.
//Step below can be done via PHP and AJAX, too.
function doShowAll() {
    if (CheckBrowser()) {
        var key = "";
        var list = "<tr><th>Item</th><th>Value</th></tr>n";
        var i = 0;
        //For a more advanced feature, you can set a cap on max items in the cart.
        for (i = 0; i <= localStorage.length-1; i++) {
            key = localStorage.key(i);
            list += "<tr><td>" + key + "</td>n<td>"
                    + localStorage.getItem(key) + "</td></tr>n";
        }
        //If no item exists in the cart.
        if (list == "<tr><th>Item</th><th>Value</th></tr>n") {
            list += "<tr><td><i>empty</i></td>n<td><i>empty</i></td></tr>n";
        }
        //Bind the data to HTML table.
        //You can use jQuery, too.
        document.getElementById('list').innerHTML = list;
    } else {
        alert('Cannot save shopping list as your browser does not support HTML 5');
    }
}
Note: Either you or your framework will have a preferred method of creating new DOM nodes. To keep things clear and focused, our example uses.innerHTMLeven though we’d normally avoid that in production code.
Tip:If you’d like to use jQuery to bind data, you can just replacedocument.getElementById('list').innerHTML = list;with$(‘#list').html()=list;.
Run And Test The Shopping Cart
In the previous two sections, we added code to the HTML head, and we added HTML to the shopping cart form and basket. We also created a JavaScript function to check for browser support and to populate the basket with the items in the cart. In populating the basket items, the JavaScript fetches values from HTML web storage, instead of a database. In this part, we’ll show you how the data are inserted into the HTML5 storage engine. That is, we’ll use HTML5 local storage in conjunction with JavaScript to insert new items to the shopping cart, as well as edit an existing item in the cart.
Note: I’ve added tips sections below to show jQuery code, as an alternative to the JavaScript ones.
We’ll create a separate HTML div element to capture user input and submission. We’ll attach the corresponding JavaScript function in the onClick event for the buttons.
You can set properties on the localStorage object similar to a normal JavaScript object. Here is an example of how we can set the local storage property myProperty to the value myValue:
localStorage.myProperty="myValue";
You can delete local storage property like this:
delete localStorage.myProperty;
Alternately, you can use the following methods to access local storage:
To save the key-value pair, get the value of the corresponding JavaScript object and call the setItem method:
function SaveItem() {

    var name = document.forms.ShoppingList.name.value;
    var data = document.forms.ShoppingList.data.value;
    localStorage.setItem(name, data);
    doShowAll();

}
Below is the jQuery alternative for the SaveItem function. First, add an ID to the form inputs:
Then, select the form inputs by ID, and get their values. As you can see below, it is much simpler than JavaScript:
function SaveItem() {
    var name = $("#name").val();
    var data = $("#data").val();
    localStorage.setItem(name, data);
    doShowAll();
}
To update an item in the shopping cart, you have to first check whether that item’s key already exists in local storage, and then update its value, as shown below:
//Change an existing key-value in HTML5 storage.
function ModifyItem() {
    var name1 = document.forms.ShoppingList.name.value;
    var data1 = document.forms.ShoppingList.data.value;
    //check if name1 is already exists

//Check if key exists.
            if (localStorage.getItem(name1) !=null)
            {
              //update
              localStorage.setItem(name1,data1);
              document.forms.ShoppingList.data.value = localStorage.getItem(name1);
            }


    doShowAll();
}
Below shows the jQuery alternative.
function ModifyItem() {
    var name1 = $("#name").val();
    var data1 = $("#data").val();
    //Check if name already exists.
//Check if key exists.
         if (localStorage.getItem(name1) !=null)
         {
           //update
           localStorage.setItem(name1,data1);
           var new_info=localStorage.getItem(name1);
           $("#data").val(new_info);
         }

    doShowAll();
}
We will use the removeItem method to delete an item from storage.
function RemoveItem()
{
var name=document.forms.ShoppingList.name.value;
document.forms.ShoppingList.data.value=localStorage.removeItem(name);
doShowAll();
}
Tip:Similar to the previous two functions, you can use jQuery selectors in theRemoveItemfunction.
There is another method for local storage that allows you to clear the entire local storage. We call the ClearAll() function in the onClick event of the “Clear” button:
We use the clear method to clear the local storage, as shown below:
function ClearAll() {
    localStorage.clear();
    doShowAll();
}
Session Storage
The sessionStorage object works in the same way as localStorage. You can replace the above example with the sessionStorage object to expire the data after one session. Once the user closes the browser window, the storage will be cleared. In short, the APIs for localStorage and sessionStorage are identical, allowing you to use the following methods:
setItem(key, value)
getItem(key)
removeItem(key)
clear()
key(index)
length
Shopping Carts With Arrays And Objects
Because HTML5 web storage only supports single name-value storage, you have to use JSON or another method to convert your arrays or objects into a single string. You might need an array or object if you have a category and subcategories of items, or if you have a shopping cart with multiple data, like customer info, item info, etc. You just need to implode your array or object items into a string to store them in web storage, and then explode (or split) them back to an array to show them on another page. Let’s go through a basic example of a shopping cart that has three sets of info: customer info, item info and custom mailing address. First, we use JSON.stringify to convert the object into a string. Then, we use JSON.parse to reverse it back.
Hint: Keep in mind that the key-name should be unique for each domain.
//Customer info
//You can use array in addition to object.
var obj1 = { firstname: "John", lastname: "thomson" };
var cust = JSON.stringify(obj1);

//Mailing info
var obj2 = { state: "VA", city: "Arlington" };
var mail = JSON.stringify(obj2);

//Item info
var obj3 = { item: "milk", quantity: 2 };
var basket = JSON.stringify(obj3);

//Next, push three strings into key-value of HTML5 storage.

//Use JSON parse function below to convert string back into object or array.
var New_cust=JSON.parse(cust);
Summary
In this tutorial, we have learned how to build a shopping cart step by step using HTML5 web storage and JavaScript. We’ve seen how to use jQuery as an alternative to JavaScript. We’ve also discussed JSON functions like stringify and parse to handle arrays and objects in a shopping cart. You can build on this tutorial by adding more features, like adding product categories and subcategories while storing data in a JavaScript multi-dimensional array. Moreover, you can replace the whole JavaScript code with jQuery.
We’ve seen what other things developers can accomplish with HTML5 web storage and what other features they can add to their websites. For example, you can use this tutorial to store user preferences, favorited content, wish lists, and user settings like names and passwords on websites and native mobile apps, without using a database.
To conclude, here are a few issues to consider when implementing HTML5 web storage:
Some users might have privacy settings that prevent the browser from storing data.
Some users might use their browser in incognito mode.
Be aware of a few security issues, like DNS spoofing attacks, cross-directory attacks, and sensitive data compromise.
Before I became a writer, and before I entered the world of marketing and web design, I was a long-time project manager. And although I could’ve stepped into any of my project management jobs and simply executed the tasks employers asked of me, I was never happy with the status quo.
We’re living in an amazing time for technology and I knew there would always be a better way to work, if only we could find the right tool for it. And that’s the key, isn’t it? Finding tools that are right for the job and that are right for you.
Adopting the wrong-fit tools can do a lot of harm to one’s productivity and success, which is why we should all be picky about what we use. It’s also why we should be loyal to tools once we’ve found ones we know we can trust.
There are 13 tools I’m 110% dedicated to and use on a daily basis. These tools help me write, optimize websites, and even create fake web pages in order to demonstrate points I’m trying to make or to show how tools work in my articles. I also rely on a number of communication and productivity apps to keep me on top of things without being overwhelmed or distracted by them.
Curious to see how a tool junkie runs her day? Check these out:
1. Google Apps
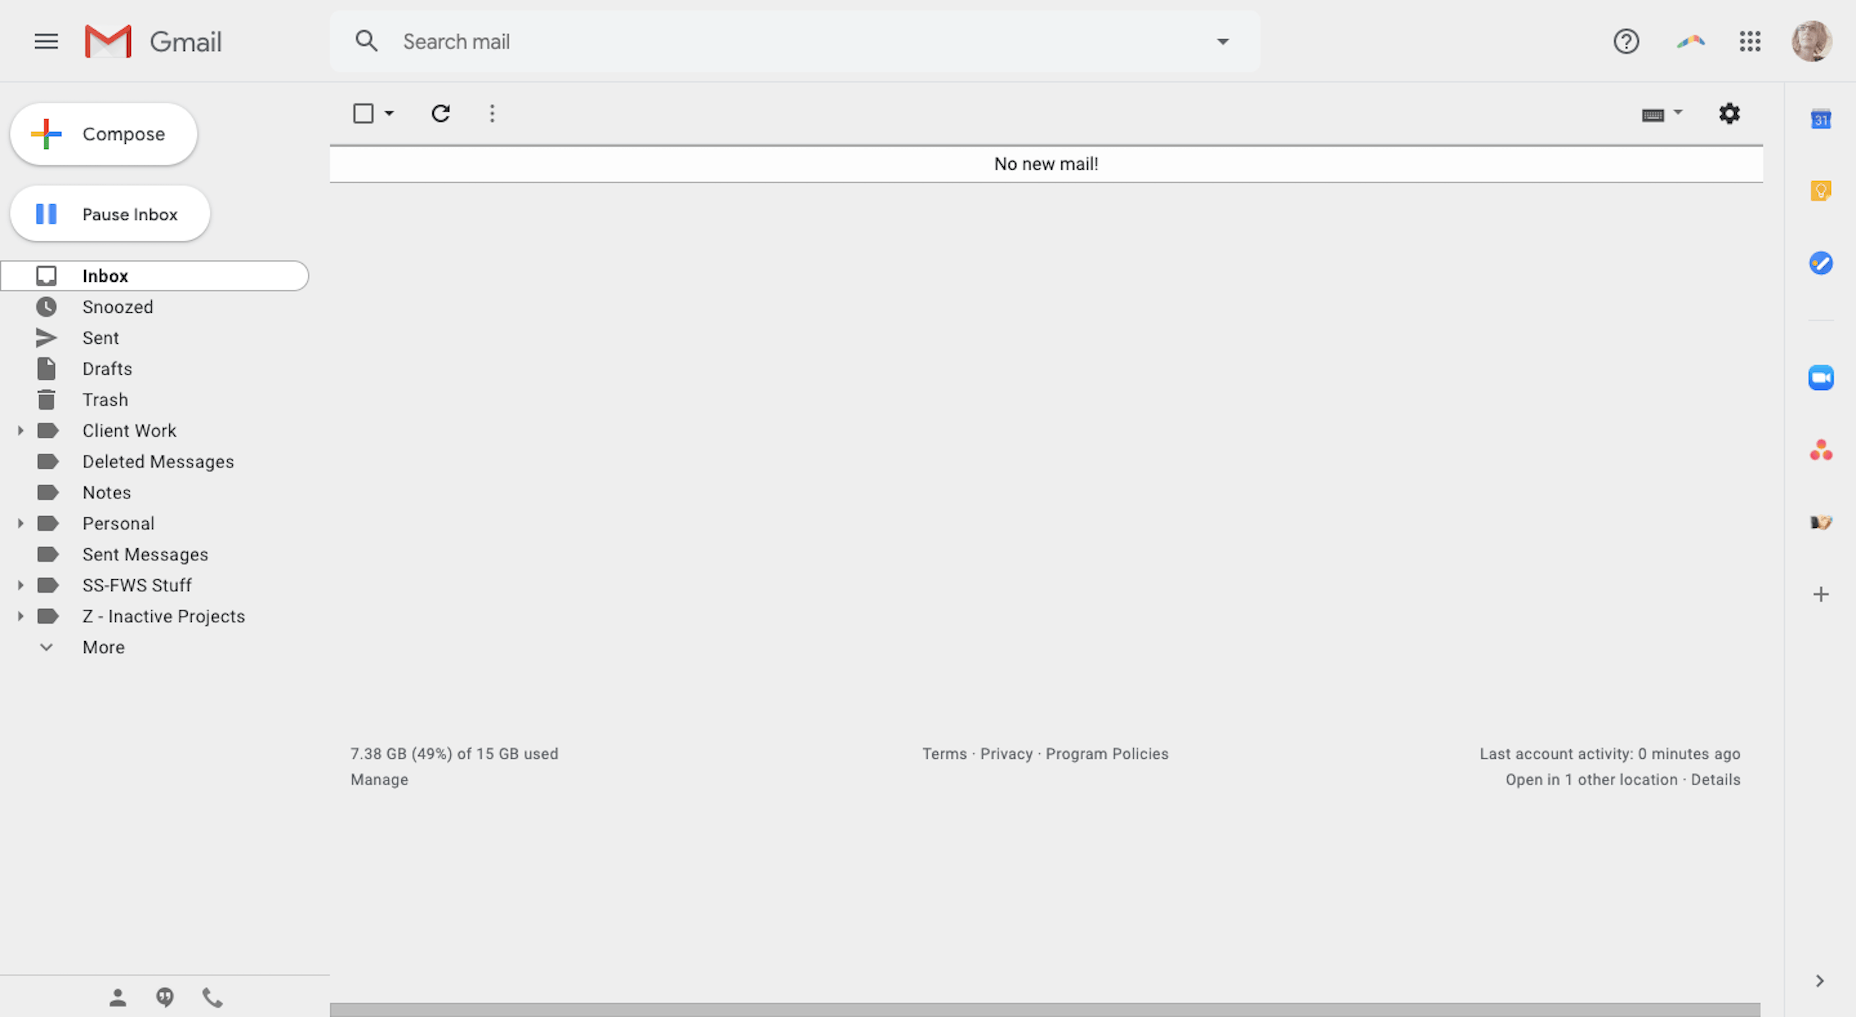
Google is pretty much the central hub of my business. I do all my major communicating through it with Gmail.
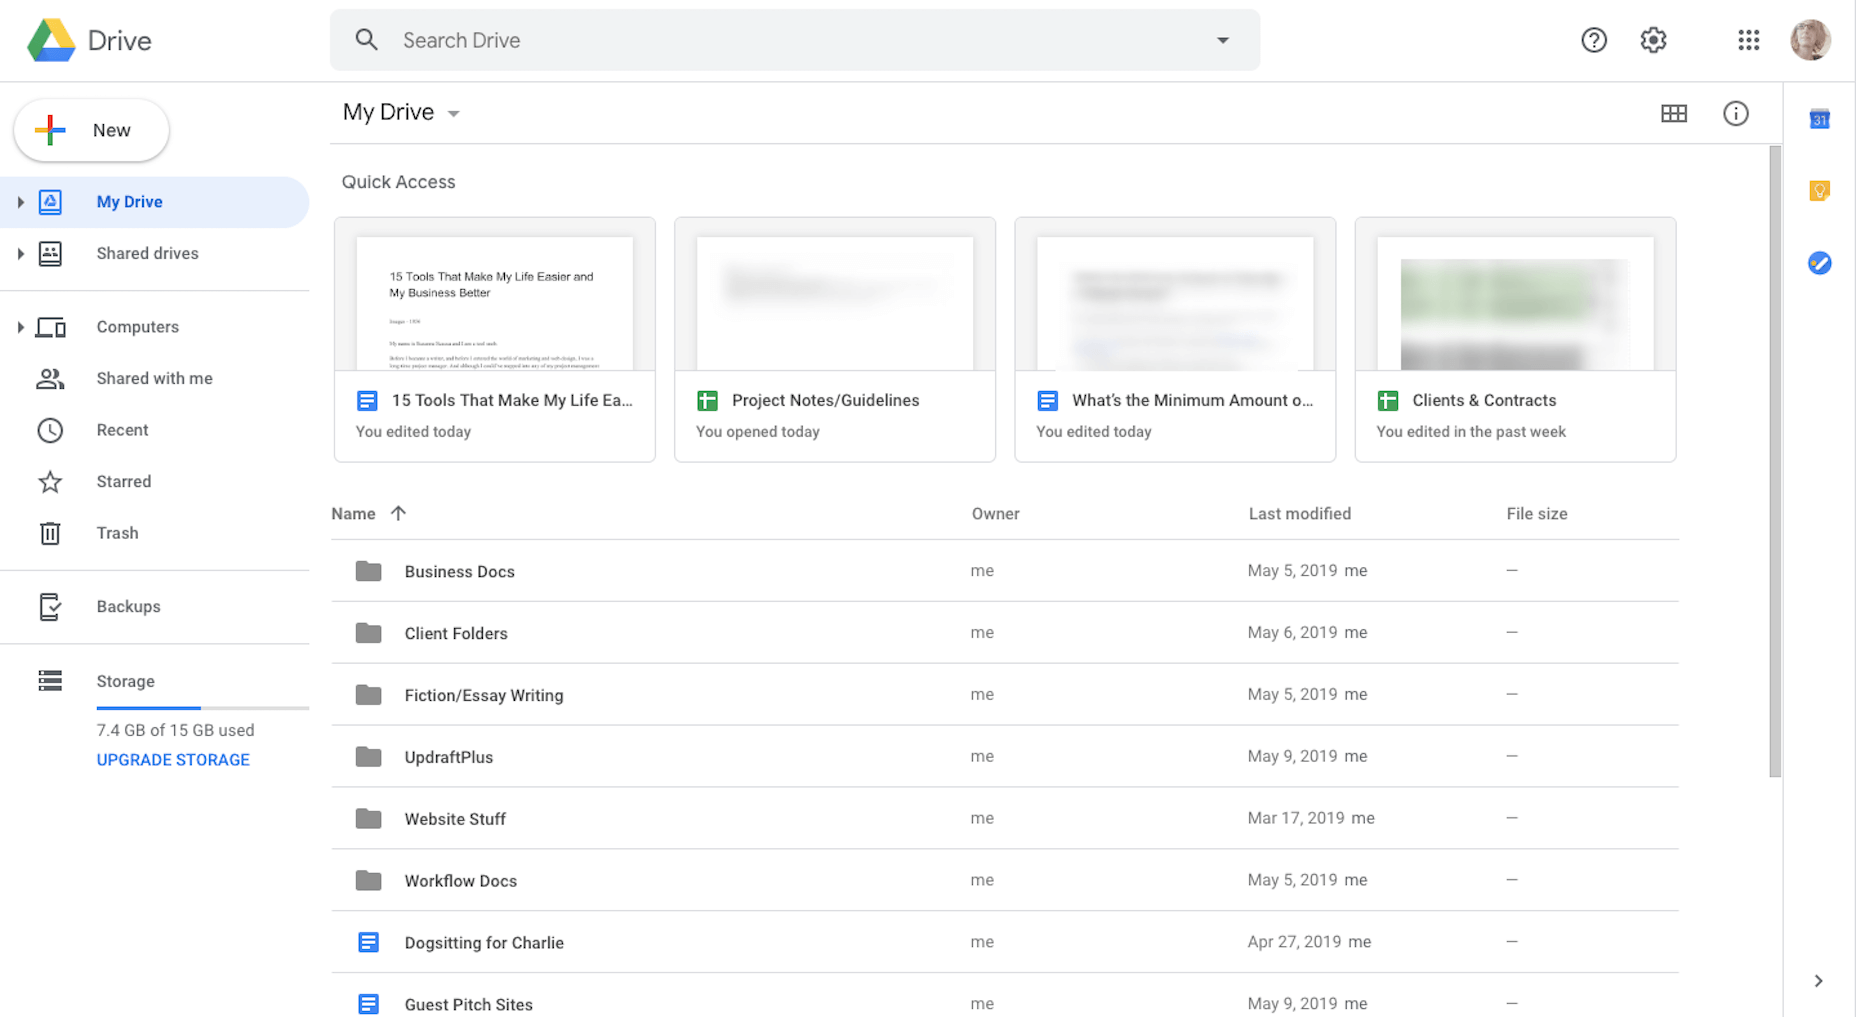
I do all my note-taking, brainstorming, writing, editing, and content collaboration in Google Drive.
I’ve also integrated a number of my applications with Google (like Zoom, Asana, and Zoho), so I have fewer steps to take as I move things from one platform to another.
2. Boomerang for Gmail
Because I worked as a project manager for so long, it’s my natural instinct to reply to messages and tackle new tasks the second they hit my inbox. This is a major problem for me as a writer because once I lose track of what I’m working on, it takes a couple minutes to get back into the swing of things.
That said, I can’t focus if my Gmail isn’t at Inbox Zero. It’s just how I operate.
What it does is it prevents new messages from entering Gmail and holds them in a hidden queue for me. While it took some getting used to, it’s actually helped me become less dependent on email during the workday. I also use it at night and on the weekends when I really shouldn’t be working anyway.
Another cool feature is that I can schedule my emails. That way, if I want to wait on sending something to a client or prospect, but don’t want to forget about it, I can schedule it to go out when I want it to.
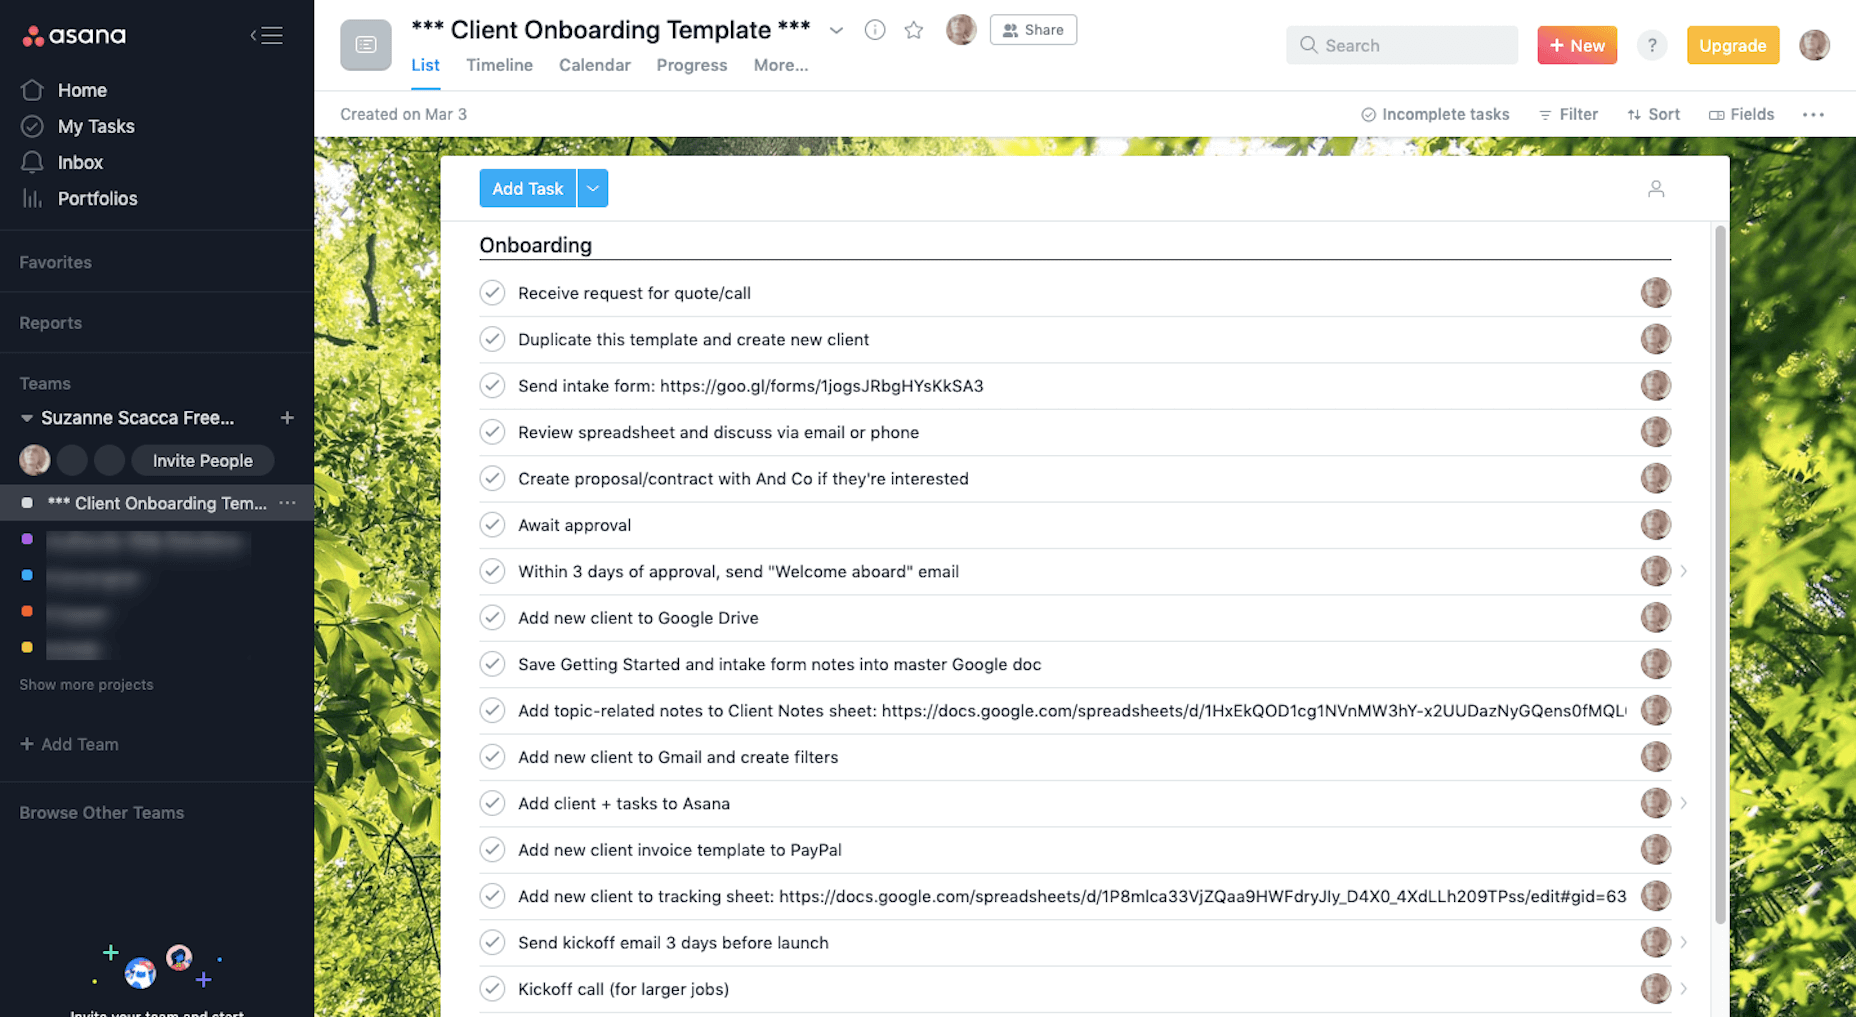
3. Asana
I’ve used enough project management systems to know what works for me and what doesn’t. And Asana has nearly everything I need.
With color-coded “Teams” for each of my clients and an easy-to-use system of creating and completing tasks, Asana gives me great relief that I’ll never miss an assignment or deadline.
I don’t know what I’d do without Asana. As I’ve scaled my business, I’ve worried that something will inevitably fall through the cracks, but this tool always helps me keep my head on straight.
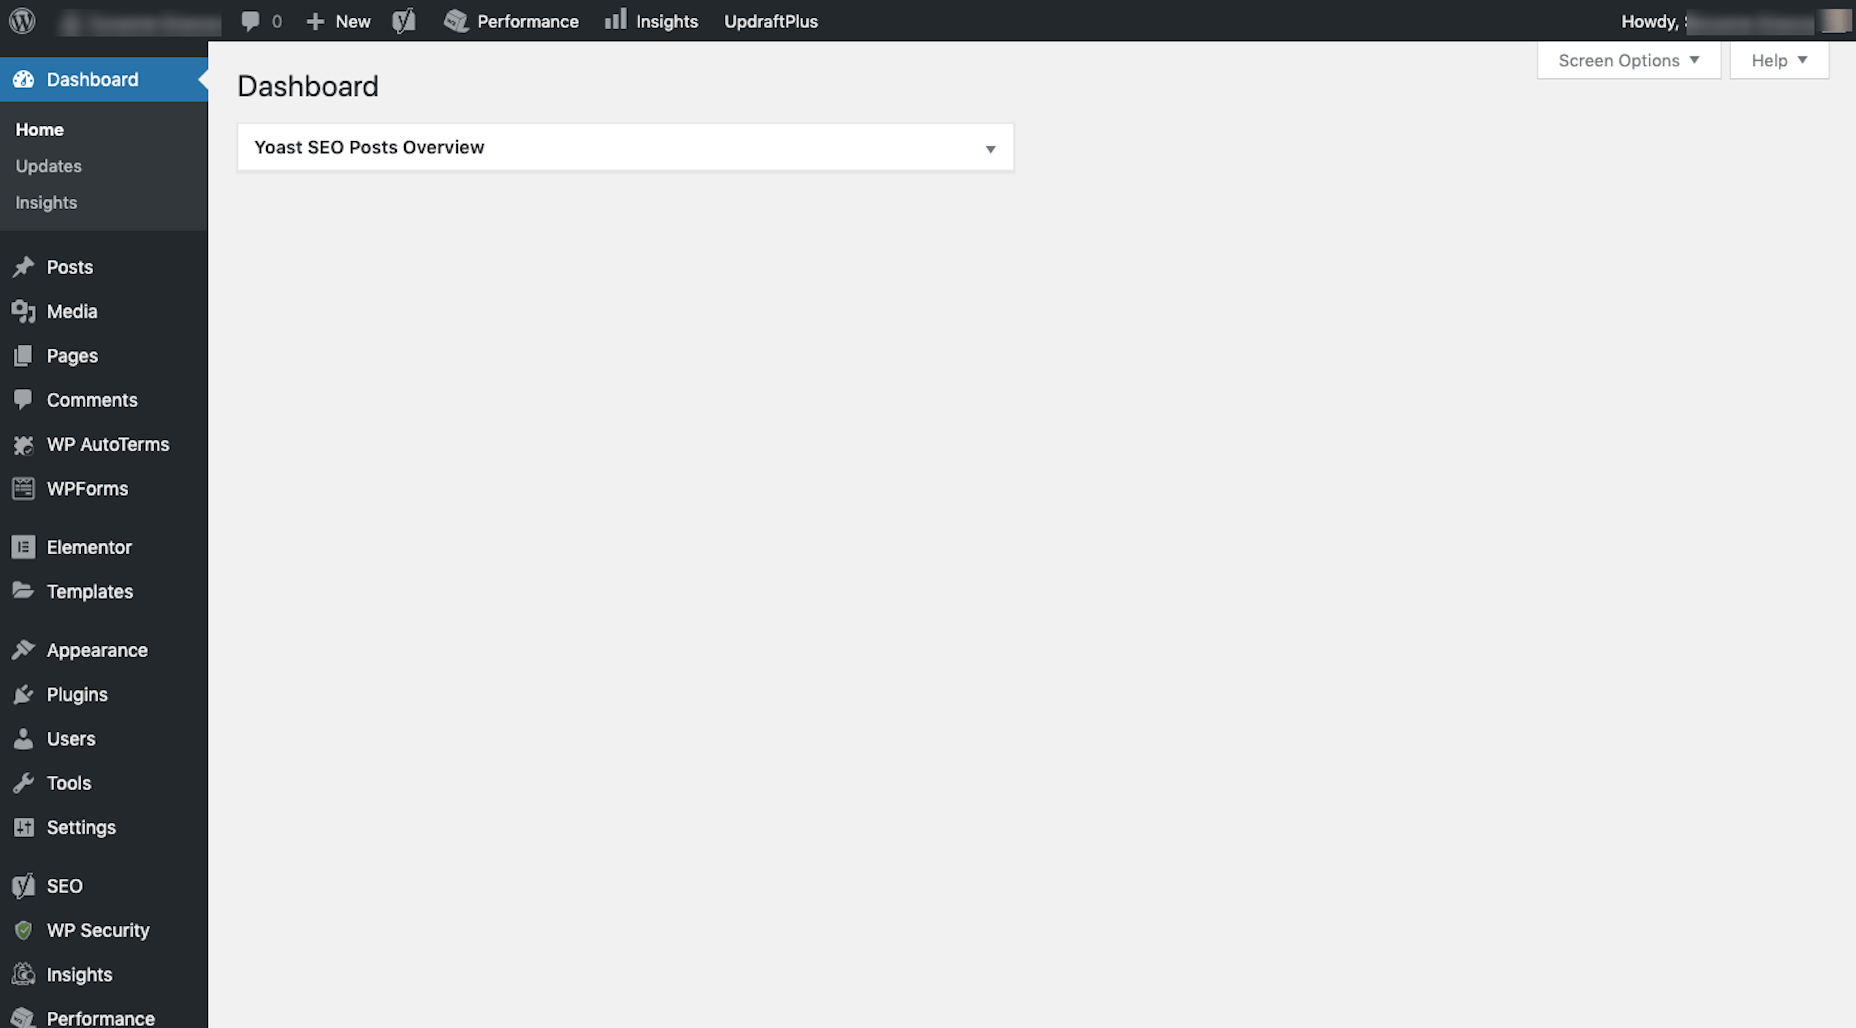
4. WordPress
I’ve been a WordPress user for almost 10 years. First, it was to create websites for myself. Then, I worked for an agency where I created, documented, and refined our processes inside and outside of WordPress. Now, I write guides on how to build websites, use plugins, and customize themes.
I occasionally help small business owners build WordPress websites, in addition to running my own. I also upload and optimize blog content I write for clients that have WordPress websites.
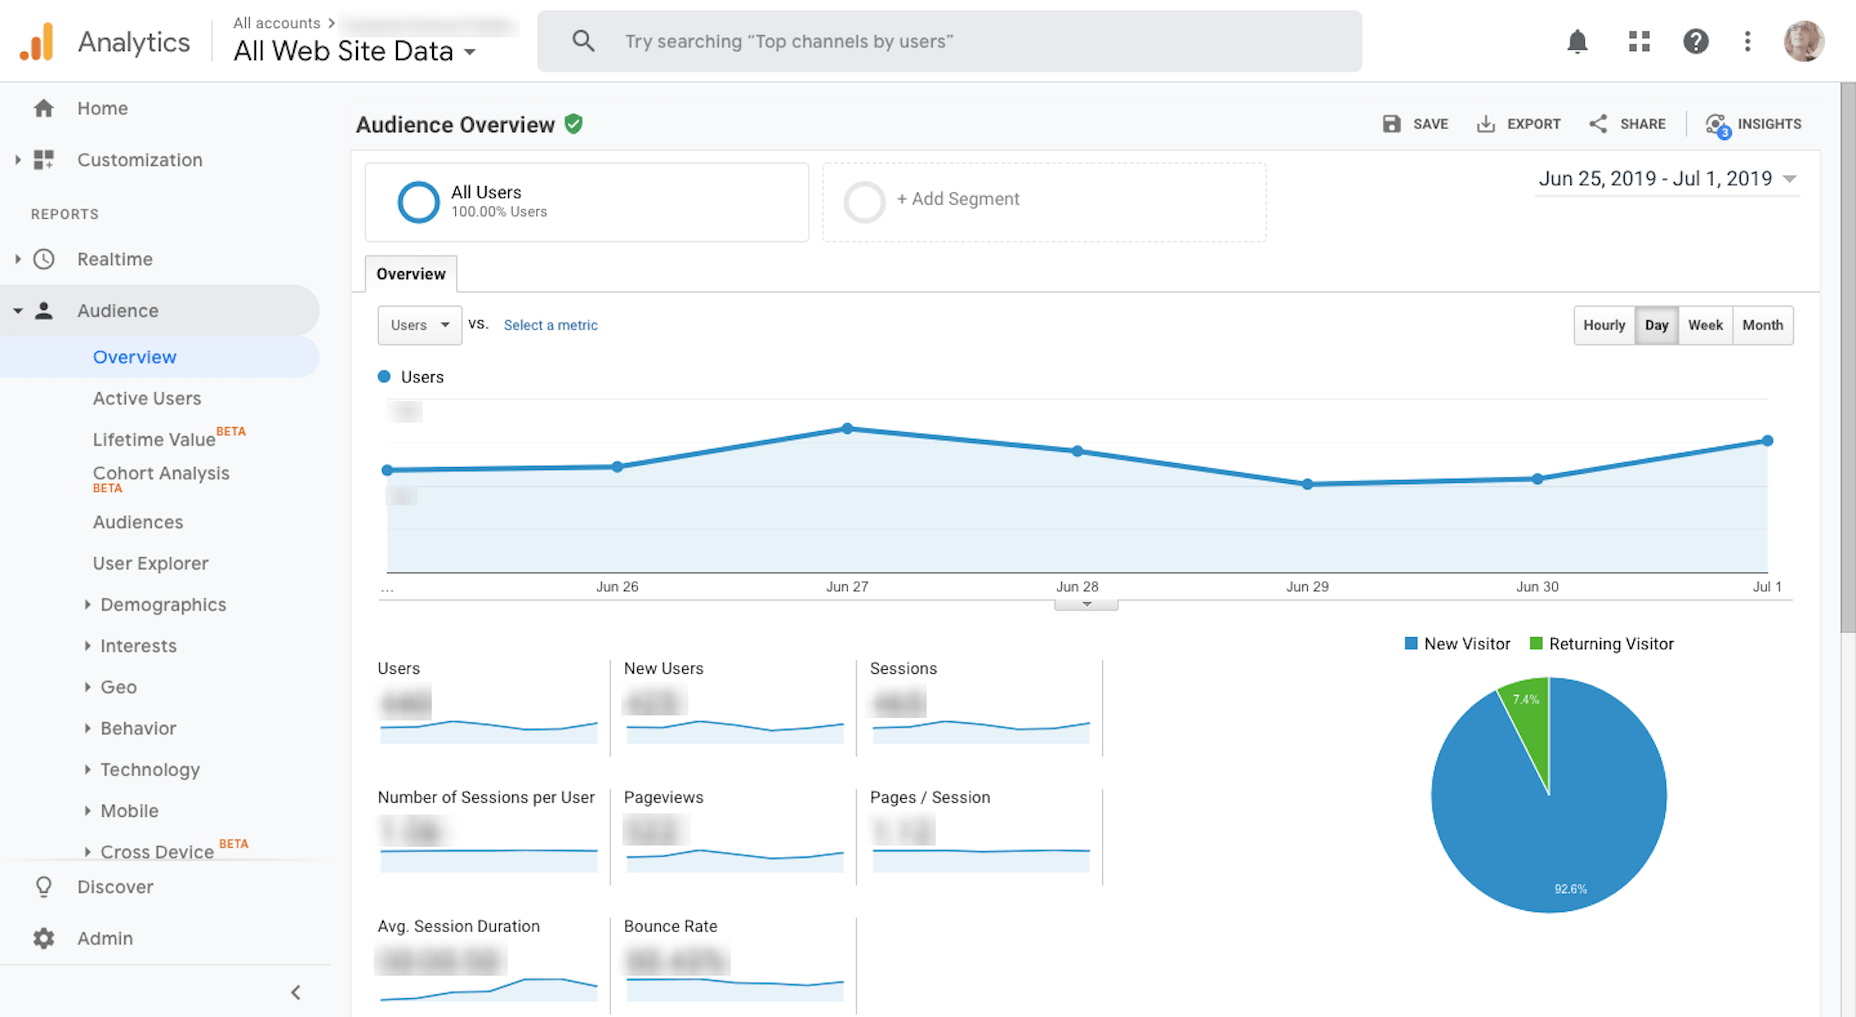
5. Google Analytics & 6. Google Search Console
I use Google Analytics weekly to measure my website’s stability and overall reception with visitors.
I also use Google Analytics to determine what kind of topics to write for my clients.
I use Google Search Console in conjunction with Google Analytics. (It’s very rare I’ll go into one without accessing the other.)
While Google Analytics tells me most of what I need to know about my website traffic and how they’re responding to my content, I need Google Search Console to help me fill in the searchability and ranking piece.
7. My iPhone
It’s very difficult for me to work without my iPhone since I’m constantly having to take screenshots of mobile websites or apps for articles. Because of this, I’m very easily tempted by distractions.
But then I discovered the iPhone’s distraction free mode that makes my phone look like this:
I’ve set limits on how long I’m allowed to access certain apps for and turn off all notifications on them until the workday is over. It’s been great for helping me focus on what I need to do in the browser and then encouraging me to put the phone away when I’m done.
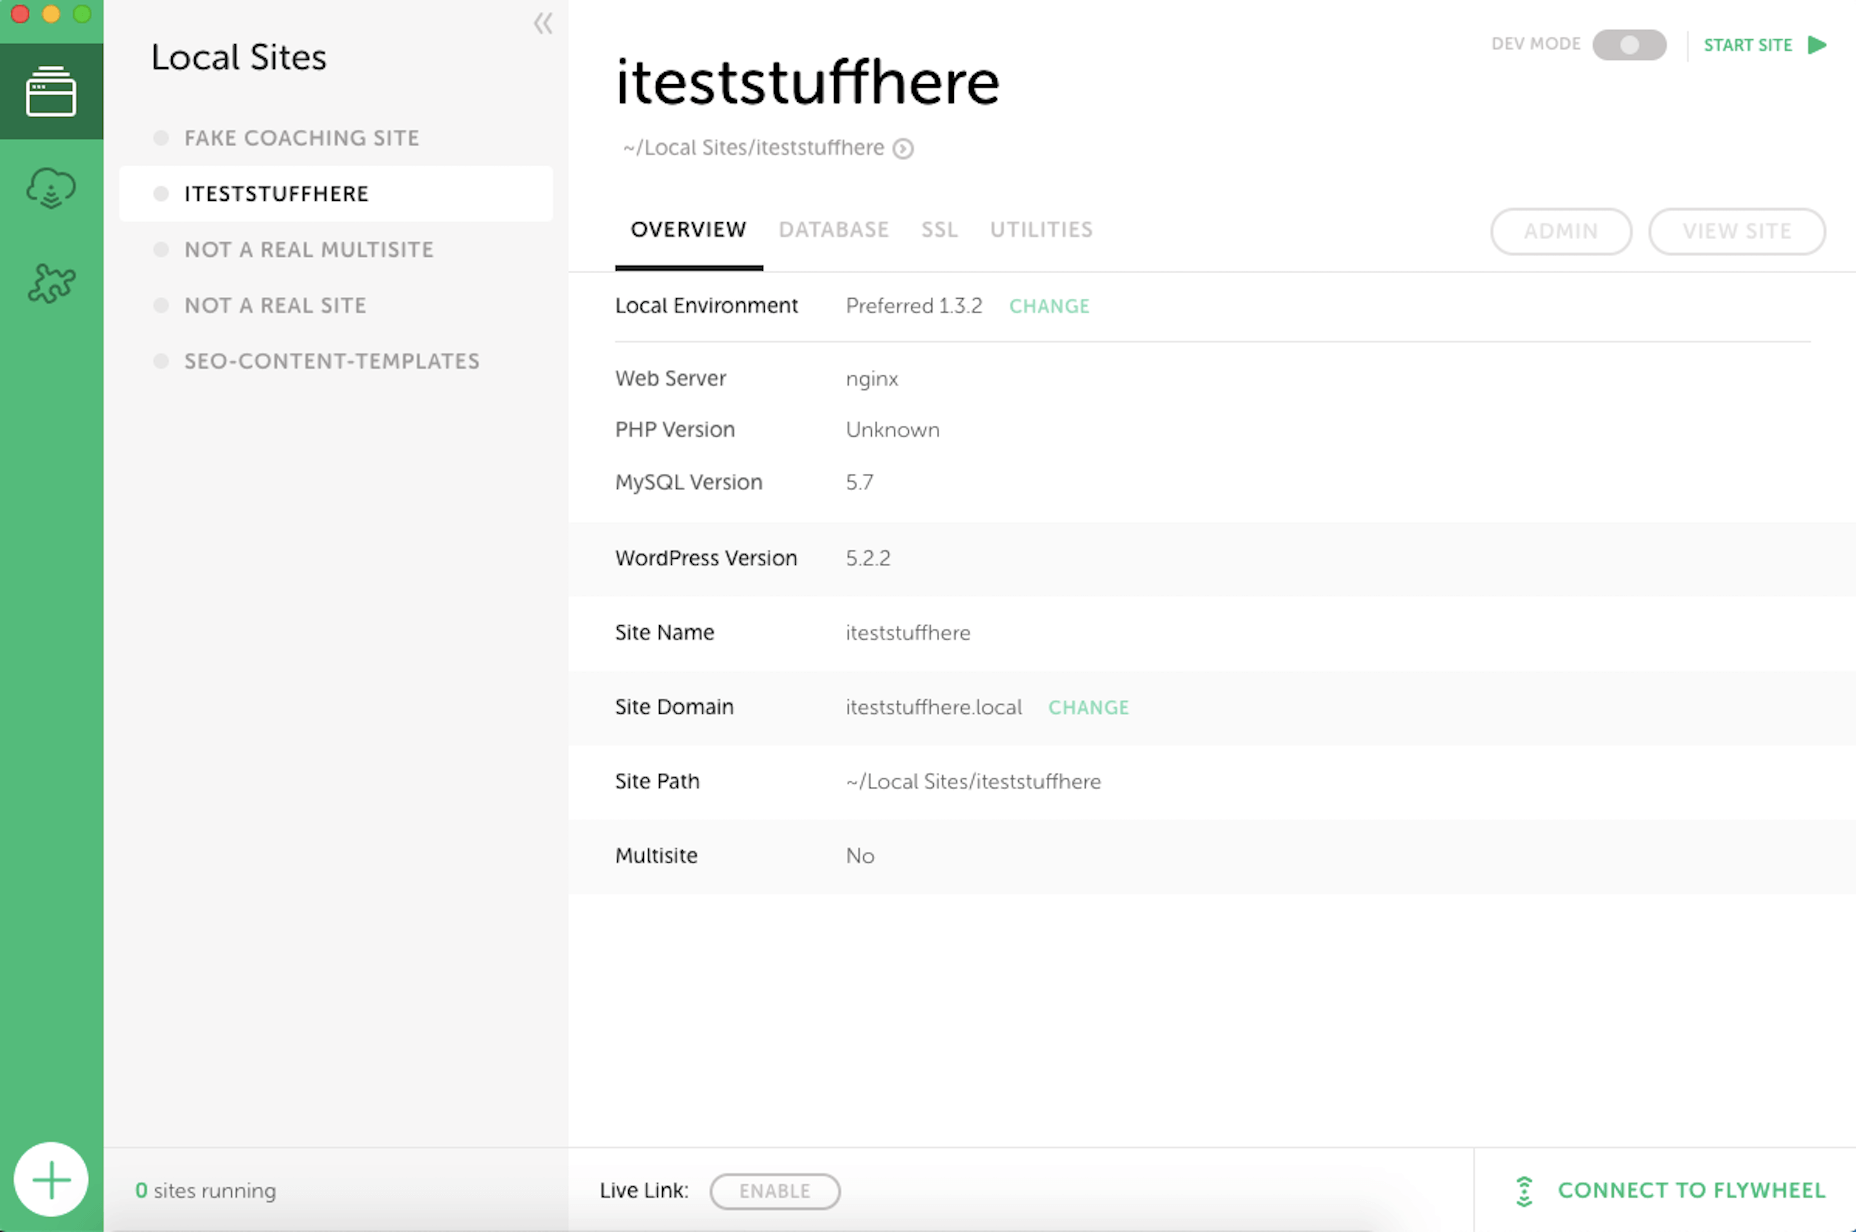
8. Local by Flywheel
On occasion, I write articles or film videos that teach others how to use WordPress. Since I don’t want to use my own website to demonstrate these lessons, I use Local by Flywheel to create my simulations.
Essentially, it allows me to set up a local installation of WordPress so I can safely build anything I want. If I were still working on websites for clients, I’d be using this to safely handle updates and edits for their sites, too. For now, though, it’s just my playground.
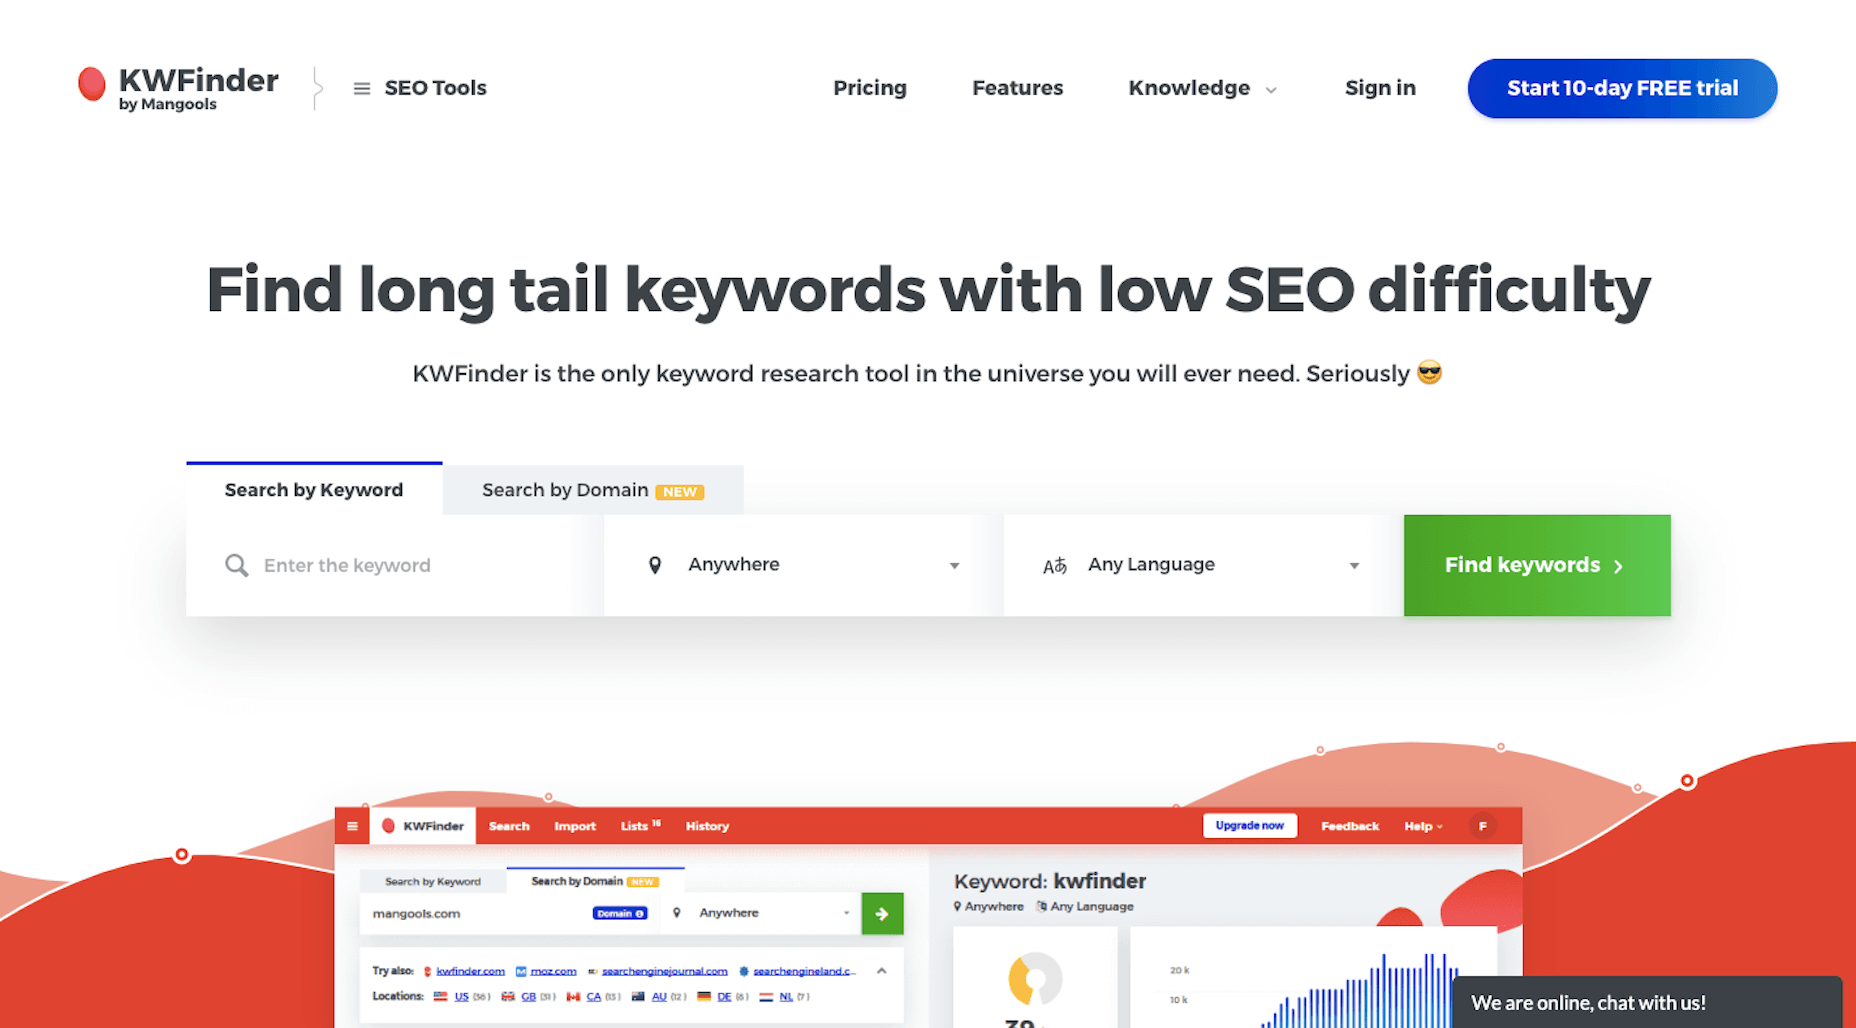
9. KWFinder
As part of my writing services, I optimize the content I write for search. Now, there’s a lot more to SEO than just keywording. However, I do always use KWFinder to ensure that the keywords I’ve chosen will help my clients’ content rank well in search.
What’s more, because I write for a number of clients in Australia, I can filter my keyword lists for that specific audience. That way, my optimizations aren’t skewed to the wrong people, at least geographically speaking.
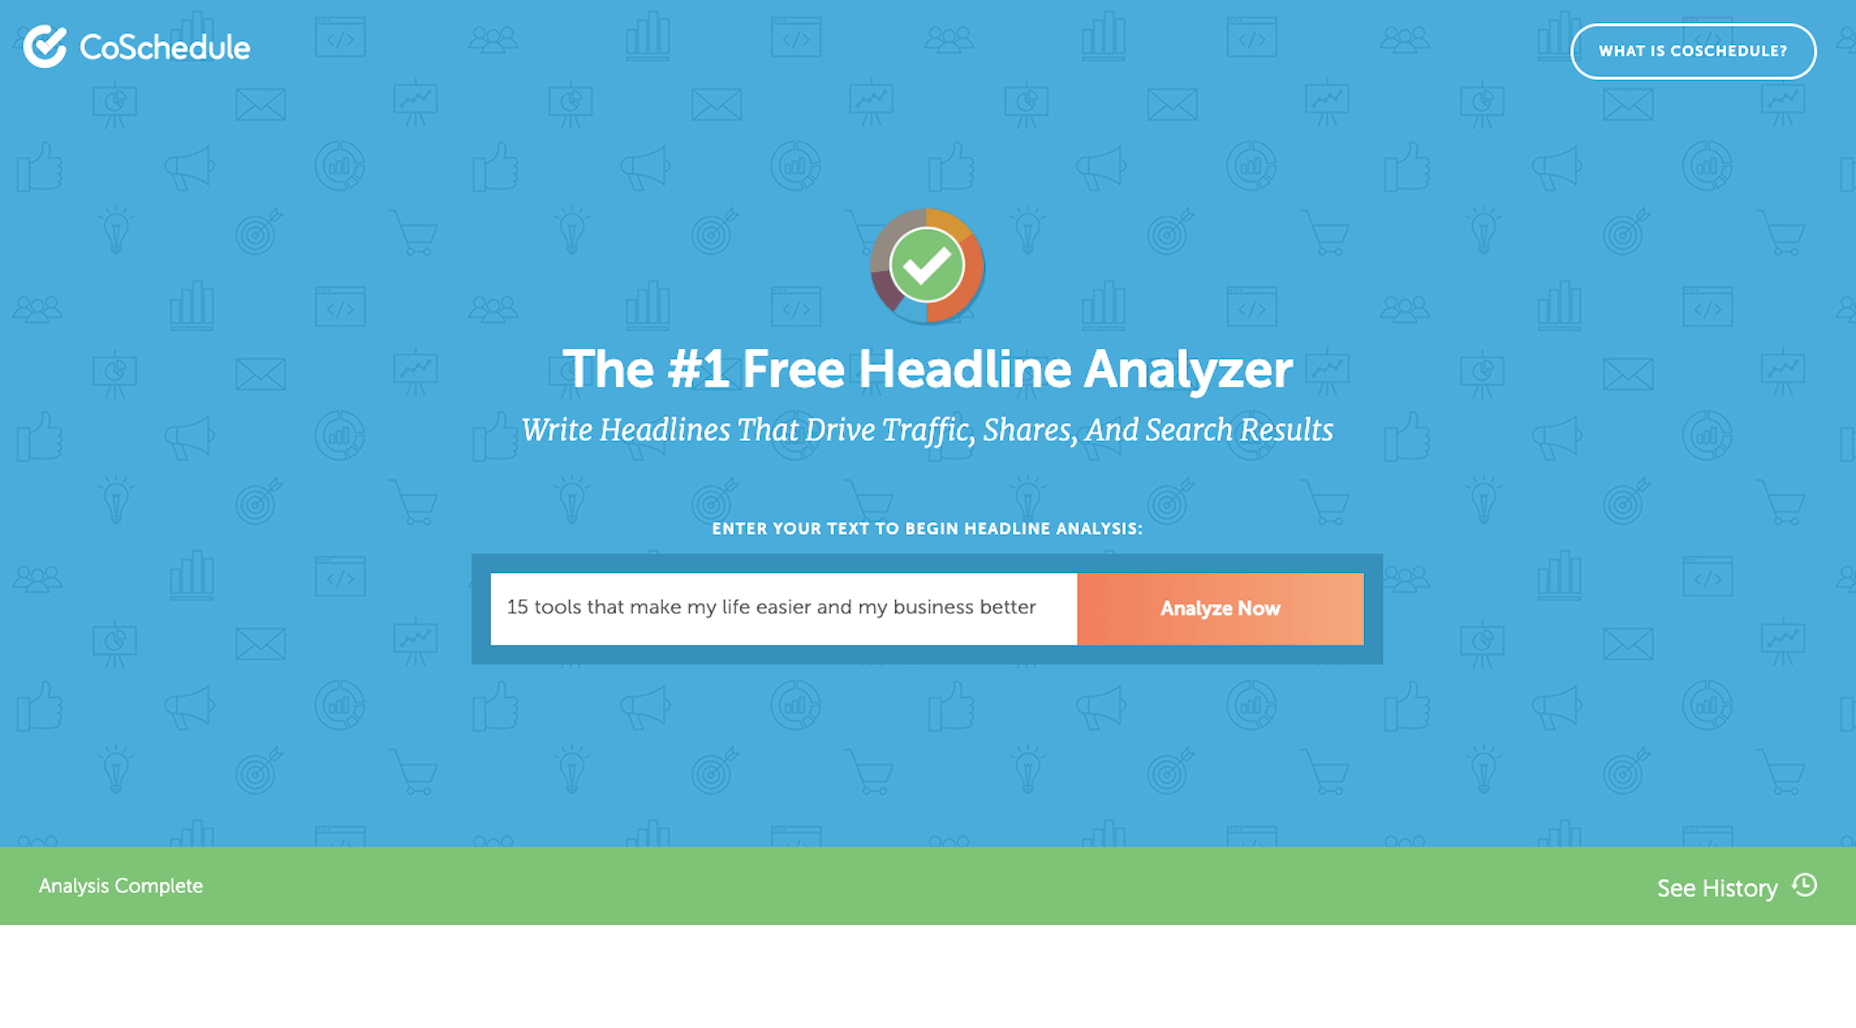
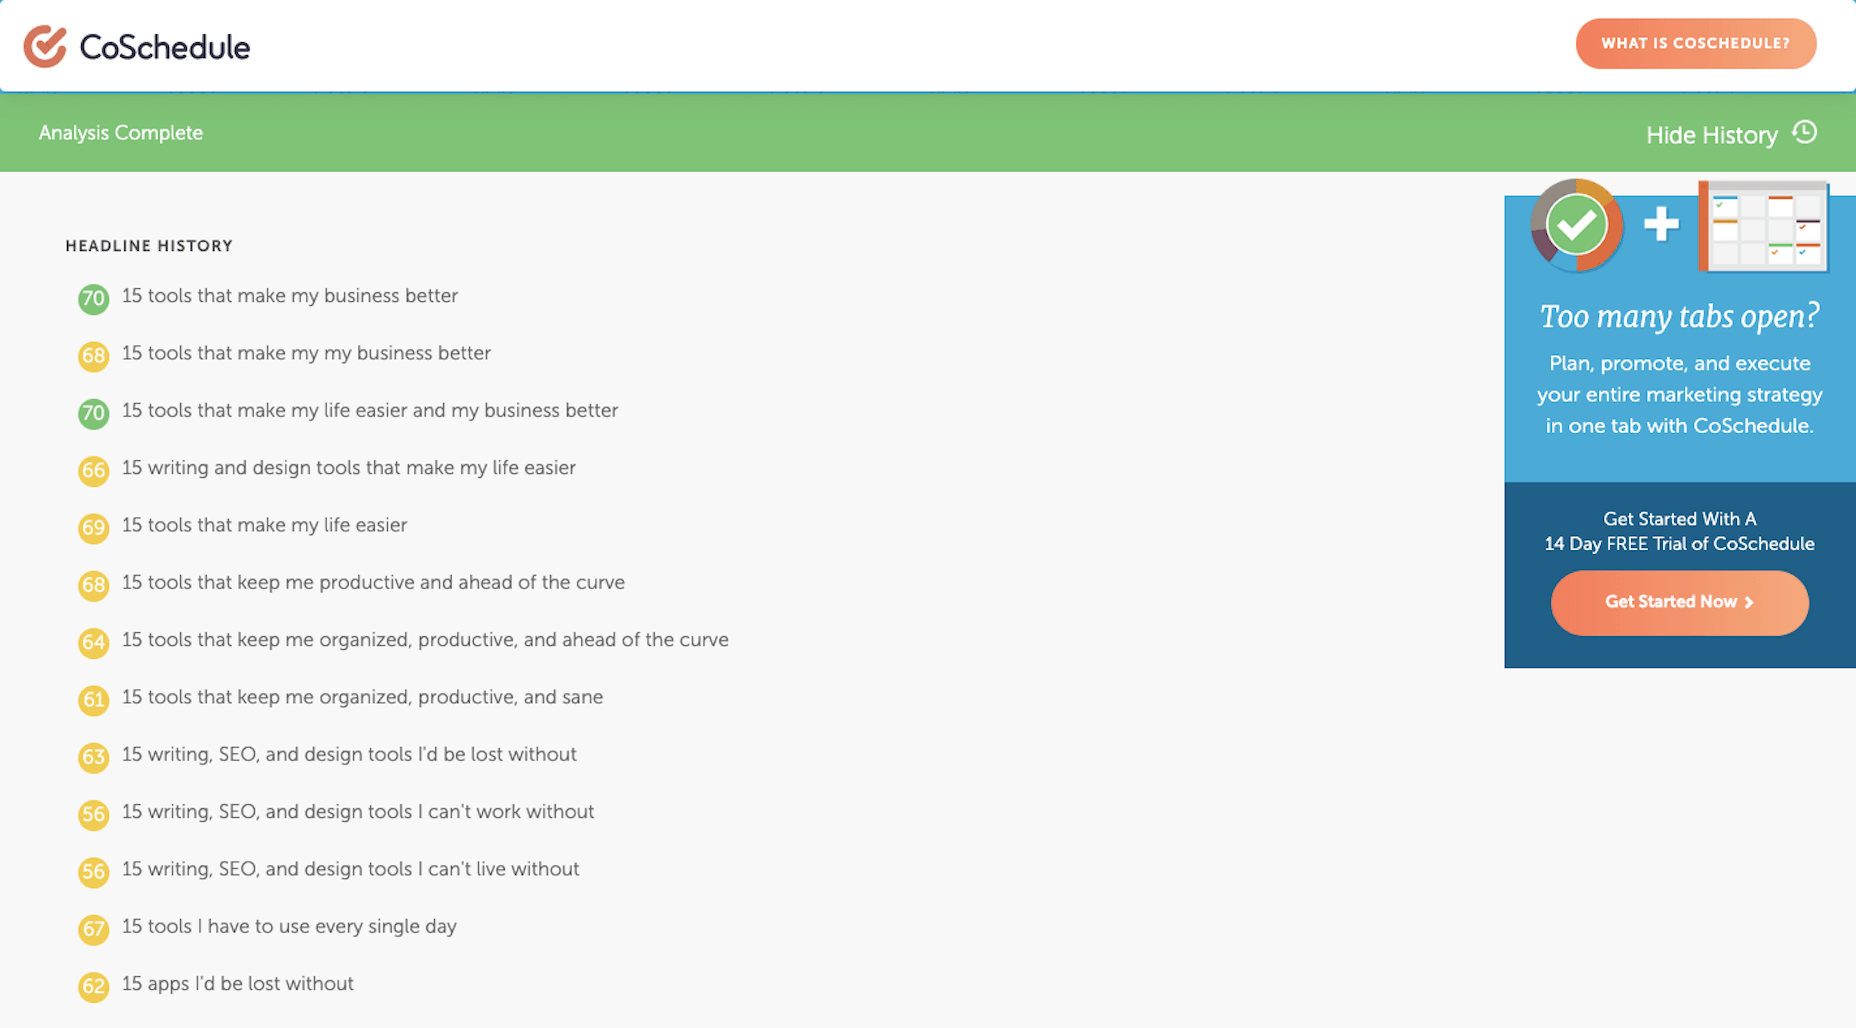
10. CoSchedule Headline Analyzer
I like to think of blog titles as gatekeepers. They appear in search results on behalf of our pages and posts. They appear in social media, attached to said pages. And they appear in RSS feeds, easy to miss if they don’t stand out from the content all around them.
Every time I enter a new title, it saves and scores it for me. Red is bad, yellow is okay, and green is good.
While it can take some time finding the perfect combination of power words and title structure to get it right, it’s worth it. Without a strong headline, I can’t help my clients get clicks or reads.
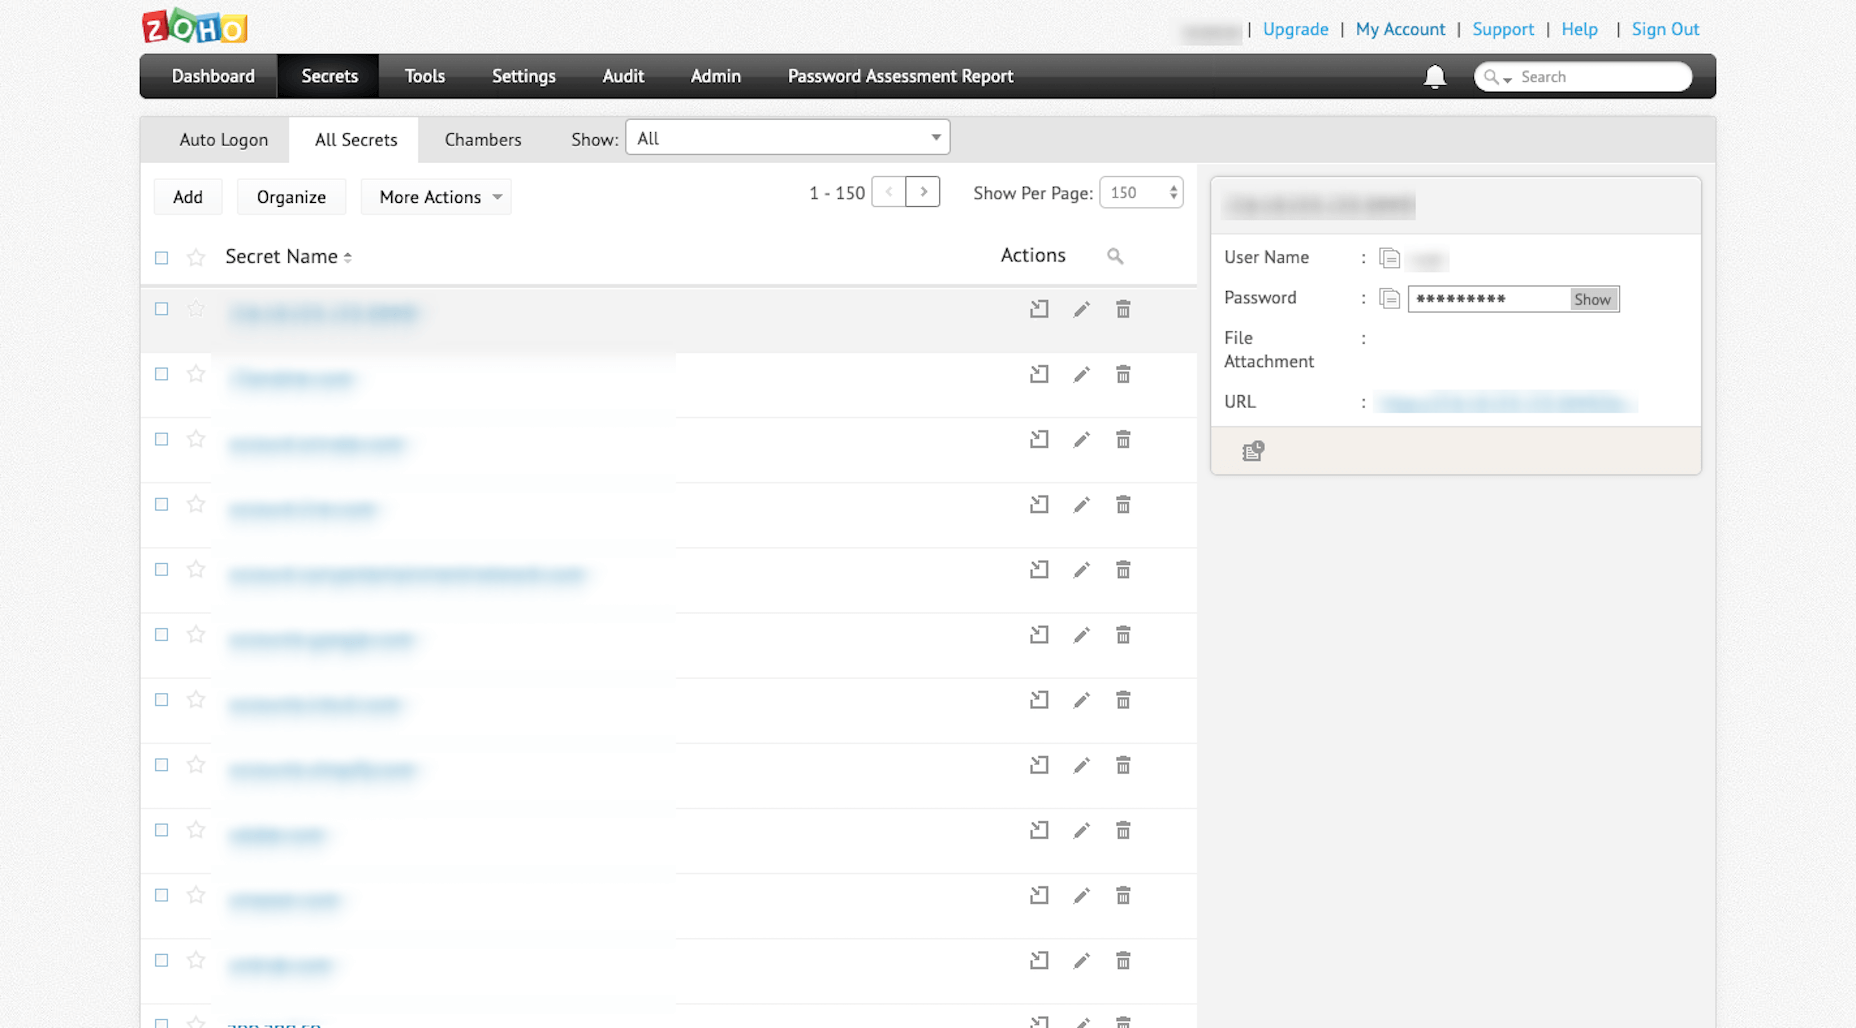
11. Zoho Vault
I’m not going to name names, but there was a different password manager I used for years before Zoho Vault.
However, after they experienced a server outage last year, it corrupted all of the login and password records I had stored there (along with countless others). Because their customer support disappeared during and after the outage, and because I had to spend hours recreating passwords for all of my tools as a result, I decided to switch to a provider I knew and trusted: Zoho.
Since I log in and out of over a dozen tools every day, it’s absolutely critical that I have a way to quickly generate super-strong passwords and store them somewhere safe. Zoho Vault is the one that takes care of that for me now.
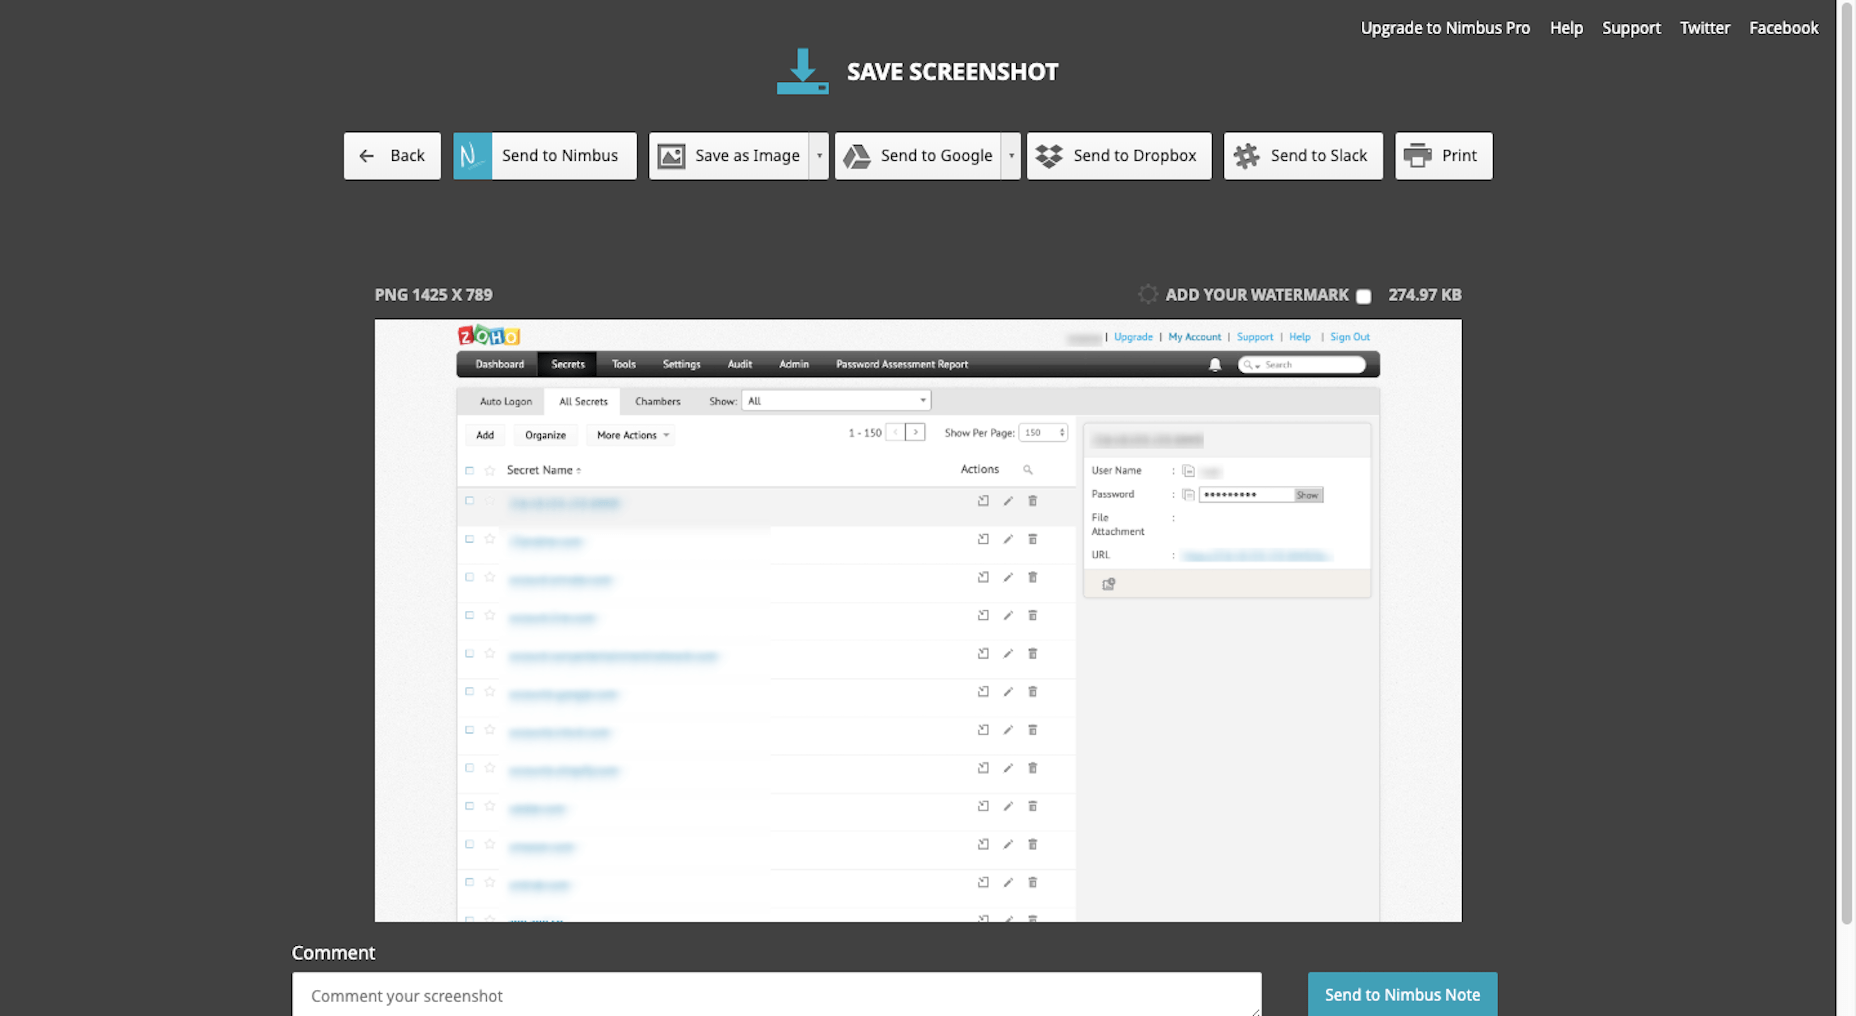
12. Nimbus Capture
Sometimes I feel like my job is “professional screenshot-taker”. As such, I need a tool that will take all kinds of screenshots for me:
Selected areas of a screen
A full screen
An entire browser window
And video
What I like even more about Nimbus Capture is that it allows me to edit and annotate my screenshots before I ever save them to the file type of my choice.
13. MockUPhone
When I do screenshoting from my mobile phone, I don’t really like to share the raw portrait files from it. It’s not that there’s anything wrong with them. It’s just that they’re usually too tall and force readers to scroll in order to view the entire image.
That’s why I use MockUPhone. It automatically places my screenshots into an iPhone UI. It also adds a horizontal buffer so it sits more comfortably within my content on a page. (You can see an example of this under “My iPhone” above.)
Wrap-Up
I remember a time when Excel spreadsheets and sticky notes were the best way to stay organized, productive, and sane. Needless to say, I’m really grateful for all of the tools that power my business and improve the work I do for clients on a daily basis. I can’t imagine being a freelancer and making any sort of profit without them.
Ecommerce is growing fast. In 2017, USA e-commerce sales grew by 16%, reaching $453 billion in sales (SaleCycle).
From here, it is expected that it will grow to up to $4.5 trillion by the year 2020 (Shopify Plus) and by 2040, 95% of shopping will be facilitated by e-commerce (Nasdaq).
However, you cannot become successful in e-commerce just because you have an online store. You also need some marketing strategies to grow your store at a faster rate. In this article, you’ll learn some marketing strategies that can massively grow your eCommerce business.
What Is Ecommerce Marketing?
It is important to understand e-commerce marketing before you employ any marketing strategy to your business. You need to know how it works so that you’ll know how each approach can help you succeed. Plunging in without any knowledge of e-commerce marketing will inevitably result in information overload.
You see, e-commerce marketing is different because you are selling on a digital platform. Unlike the old days where you have a brick and mortar store and customers go to your store to buy from you. E-commerce stores are situated in website hosts online, and people can buy from you with a single click of a mouse button. But there is more to e-commerce marketing than getting them to click. It is about facilitating user behavior so that they trust you enough to buy from you again and again.
With this, it is essential to start small. Look for a small group of people who will be interested in your products. Then, market your products to them. Once you get some traction, you should build your brand. You can do this through content marketing or by providing commendable customer service. From here, you should make a list of subscribers. These are potential buyers that can purchase from your online store repetitively.
What makes e-commerce unique is convenience. It is not only convenient for the customer, but it is also very convenient for the seller. While the buyer is able to buy products from the comfort of his home, the seller is able to facilitate orders without a warehouse and accept orders without a physical store. This revolutionizes the idea of selling, resulting in the fastest growing industry on the Internet.
In this article, you’ll learn more than just marketing methods. You’ll also learn how to prepare a brand new e-commerce website for selling. Hopefully, this will help you in promoting your brand and getting more traffic and sales to your online store.
STRATEGY #1: Get to Know Your Target Customers
Creating a successful e-commerce website starts with your customers. If your customers like your products and like your brand enough to buy from you, you will succeed. Ultimately, it is up to the customers to determine if they will trust you or not.
With all of the e-commerce websites online, it is important to know how to stand out. You need to give your prospects a solid reason on why they should buy from you. This is where branding comes in. For you to do this, you should get to know your customers first.
This is where creating a persona comes in. A persona is an imaginary entity that has the characteristics of the person that you plan to sell to. Aside from the primary motivations for purchasing, this persona also has demographic attributes like age, sex, location, and salary. Apart from this, the persona also has specific interests and hobbies. This fuels their goals and problems which you can come in and solve.
It may seem complex at first, but it is not that difficult. Think of it as creating an identification card for your customers. You have their names and their pictures as well as some details about them. But more than the basic details, you also know their behaviors and motivations and you use this to design your sales funnel.
How can you get to know your audience? You can approach this in two ways.
1 – Deduction
The first method is a deduction. This is for a brand new e-commerce website that doesn’t have any customer data. In this approach, you look at similar brands and look at their target market. You can see this through the website testimonials and mentions. From here, you can create a similar persona for your own brand.
2 – Observation
The next method is observation. In this method, you need to have some traffic and sales into your website. You will then use existing data to create your customer’s persona. You can get this data from existing customers, subscribers and social media followers. You can also observe them through their behavior and comments. This will give you a clue on their interests, hobbies and needs. You can then create a persona for your brand from this.
PRO TIP: Want to leverage user personas easily? You need to know how to trigger emotions. Most online purchases are done subconsciously with emotion as a major driving factor. If you can move a prospects’ emotion, you can get them to buy.
STRATEGY #2: Learn The Keywords That Your Customers Use to Find You
Keywords are not just for SEO. They are also for fully understanding your target market. Aside from this, it can also help you drive more traffic to your site through paid ads. So it is essential to know the exact keywords that your prospects use to find you.
One of the tools that I love to use for this purpose is Ahrefs. I am not affiliated with them but they have the best tool when it comes to analyzing keywords. It also helps in idea generation for it can give you more keywords from a seed keyword. Just ensure that you are using a keyword that has 2-3 words. This way, you’ll get even longer keywords.
PRO TIP: Ahrefs has an option to uncover medium and long-tail keywords that have 3-4 words per keyword. Be sure to select that option when you are searching.
From here, you can then look at Shopping Results in Google. These are the keywords that Google display products in. You’ll want to use these keywords so that your products will show up in the search engine results.
ANOTHER PRO TIP: Did you know that promoting an e-commerce or Shopify store through Google Adwords has a higher conversion than Facebook ads? It is because of user intention. While Facebook specializes in discovery, Google is specializing in bringing you customers who are on the verge of buying.
STRATEGY #3: Create Only Content That Gets Conversions
It is easy to get lost amidst all the marketing tips online. One website will tell you to create a blog and have tons of content while another will tell you to focus on creating a few for maximum search engine optimization results. No one is right or wrong. What matters is to create the type of content that your prospect loves. Every niche has a different target market. In some niches, having tons of content works better. In others, having less content is desirable. Aside from that, you should also consider the content formats. There are certain content formats that get maximum conversions and that’s what you will learn in this section.
PRO TIP: You have gathered some keywords from the previous strategy. You can use that in your content for search engine optimization. Just be sure to incorporate keywords naturally so that it can also aid you in getting better search engine rankings.
How do you know the content formats that will work for your business? It all depends on the shareable topics in your niche. For this, you will need to look at highly shared topics in your niche. Fortunately, there are some tools that you can use for this. There is BuzzSumo. This allows you to search for highly shared topics for any keyword.
The first thing you must do is look at the content formats. There are different types of content formats that get the highest shares. These are the in-depth guide, the list and the case study. It is important to not only look at these formats but also look at the other formats that are currently working in your niche.
From here, you should create your own content. It helps to look at top-performing content in your niche and ‘make it better’. So if there’s a list that’s performing quite well, you should create a longer and more detailed list. If there’s a curated guide, create a more in-depth guide. It is about creating content that provides more value to your prospects than the existing content. In Ahrefs, there is also an option to view the top content in a domain. You can use this to create a content marketing strategy for your business.
STRATEGY #4: Have a Referral Program
One of the fastest ways to grow an e-commerce site is to have a referral program. Brands like Uber, Airbnb, and Best Hunting Bow Labs did this with success. This is a system that allows website visitors and customers to refer family and friends to the website. Fortunately, creating one is easy. You can easily create one with referral marketing software. Thanks to the software, you can create a referral program without any knowledge of coding. Plus, you can manage all of your referrers and referrals in one convenient interface.
To create a referral program, you have to decide on a few things.
First, you must decide on who to reward. In every referral program, there are two actors. These are the referrer and the friend. The referrer is the person who promotes the program for you. He is in charge of getting as many people into the funnel as possible. The friend is the person that signs up as a result of the referrer’s promotion. This is usually a person who has a close relationship with the referrer.
The next thing that you must decide on is the reward. This can be a cash reward, a discount code or a freebie. Cash rewards work great if you want your prospects to take action. This is what PayPal used in generating millions of users for their platform. Discount rewards are more prevalent in e-commerce stores. This is because it doesn’t cost that much on the part of the website owner but it makes the prospects feel rewarded. Freebies are good if you have products in your extra inventory that you have to give away. You can give them out as a limited-time reward and give out freebies only while supplies last.
Once you have this, you can create the mechanics for your referral program. You can write this down and put it in your referral page. With referral software, you can set it up and it is ready to go. From here, you just need to inform your prospects that your referral program exists. You can do this by putting the details of your referral program in the announcement bar of your website or by emailing your subscribers.
BONUS STRATEGY: Influencer Marketing
Want an even faster way to grow your business? You can leverage the power of influencers. Getting influencers to promote your product is as easy as approaching them with free products and subtly asking for a review. You don’t need to pay them. You can just ask for honest feedback on your products.
PRO TIP: Is your brand becoming more popular? An influencer may have already purchased from you. It helps to follow up with an influencer who has recently purchased from your business to create a review for you. This is easier for they already took interest in your products before you even approach them.
Building an e-commerce brand is all about standing out amidst all the competing websites in the niche. The digital marketplace is open to everybody. It grants everyone easy access to an online audience who is capable of buying. However, it is not enough that you set up an e-commerce website. You should also know how to promote it. Promoting your website blindly will not do. You need a marketing strategy that works.
Every week users submit a lot of interesting stuff on our sister site Webdesigner News, highlighting great content from around the web that can be of interest to web designers.
The best way to keep track of all the great stories and news being posted is simply to check out the Webdesigner News site, however, in case you missed some here’s a quick and useful compilation of the most popular designer news that we curated from the past week.
Note that this is only a very small selection of the links that were posted, so don’t miss out and subscribe to our newsletter and follow the site daily for all the news.
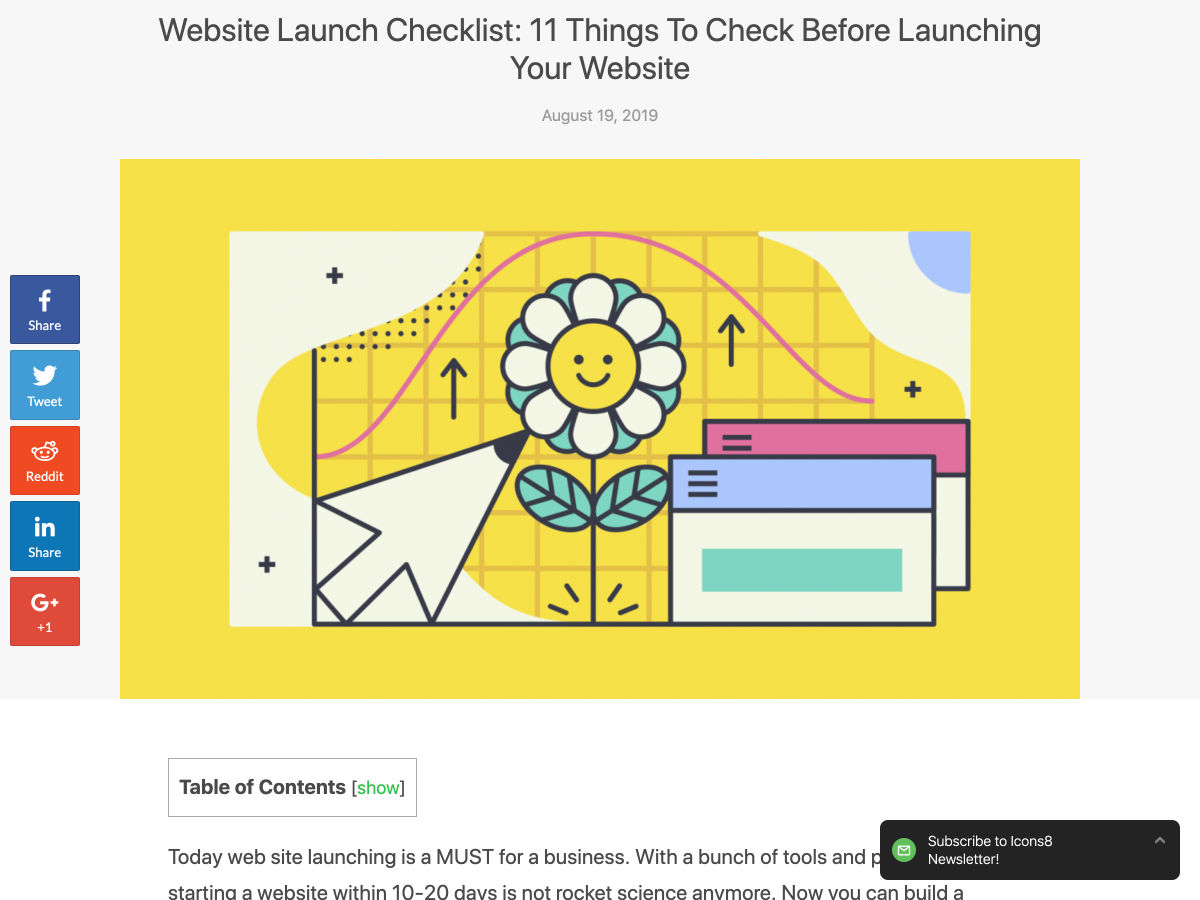
Website Launch Checklist: 11 Things to Check Before Launching Your Website
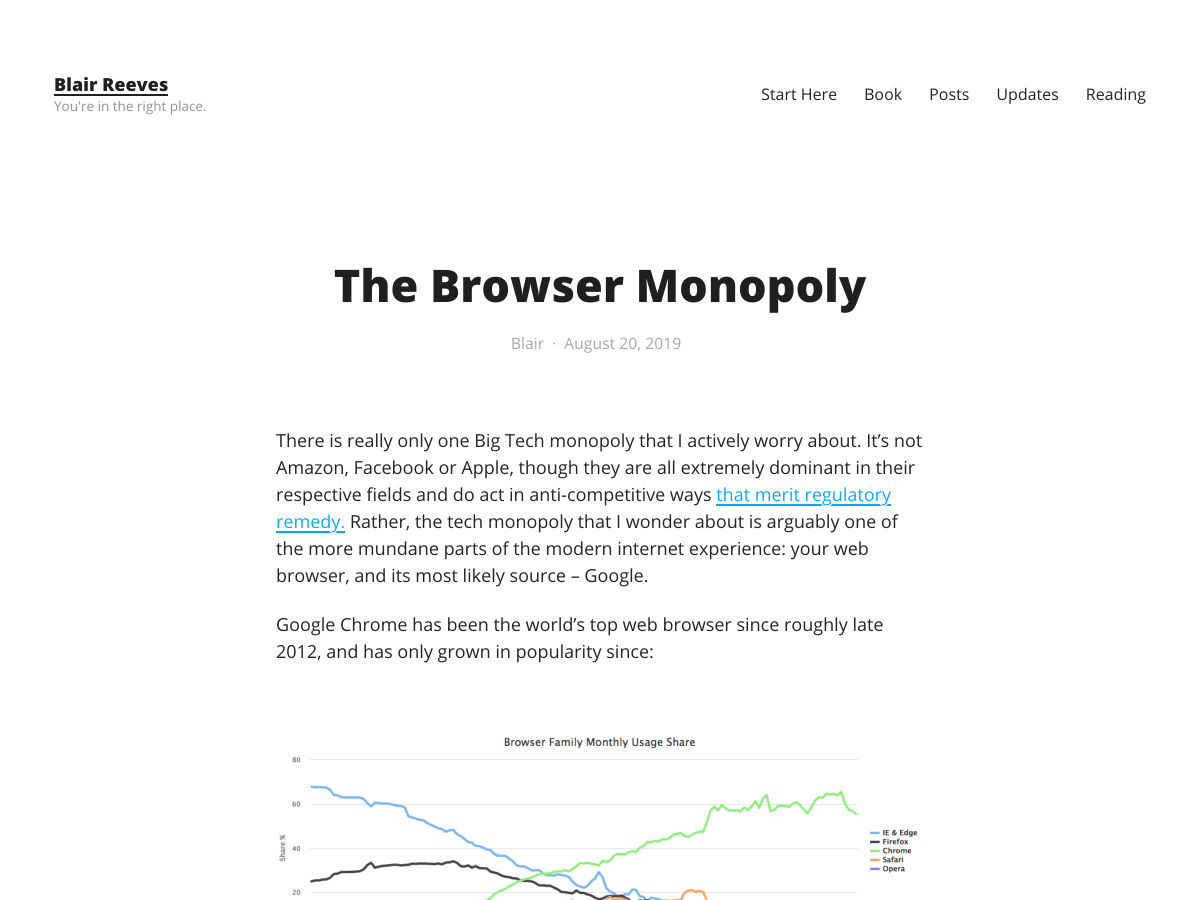
The Browser Monopoly
Color Tools for Designers 2019
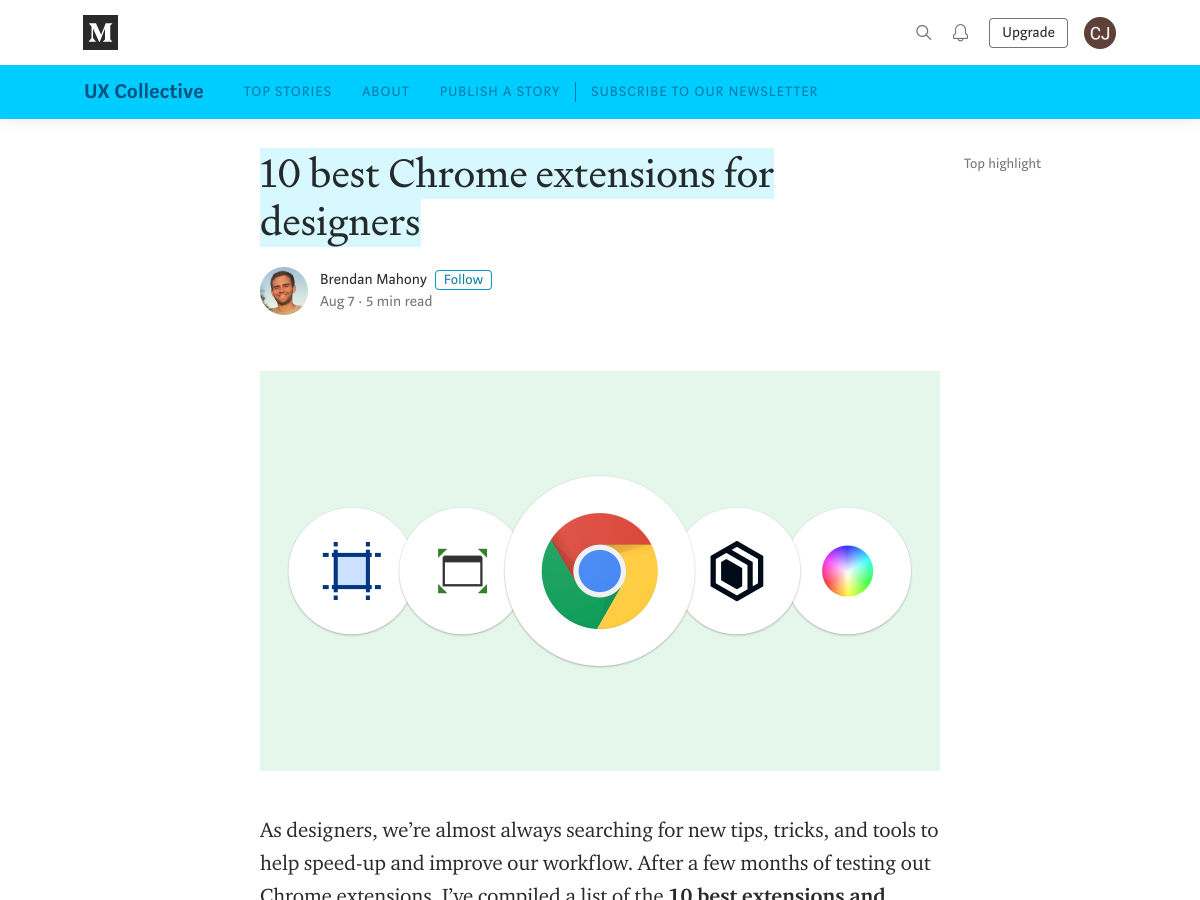
10 Best Chrome Extensions for Designers
Should We Still Be Selling Responsive Web Design?
Bond 25: British Spy Returns with a Slick New Logo
The Power of Visual in Product Design
What UX Writers and Designers Can Learn from Street Signs
Adobe Fresco Brings the Best Watercolor and Oil Paint Strokes to iPad
Site Design: KIKK Festival 2019
The Pros and Cons of Building Websites with Third-Party Products
When You Need to Show a Button’s Loading State
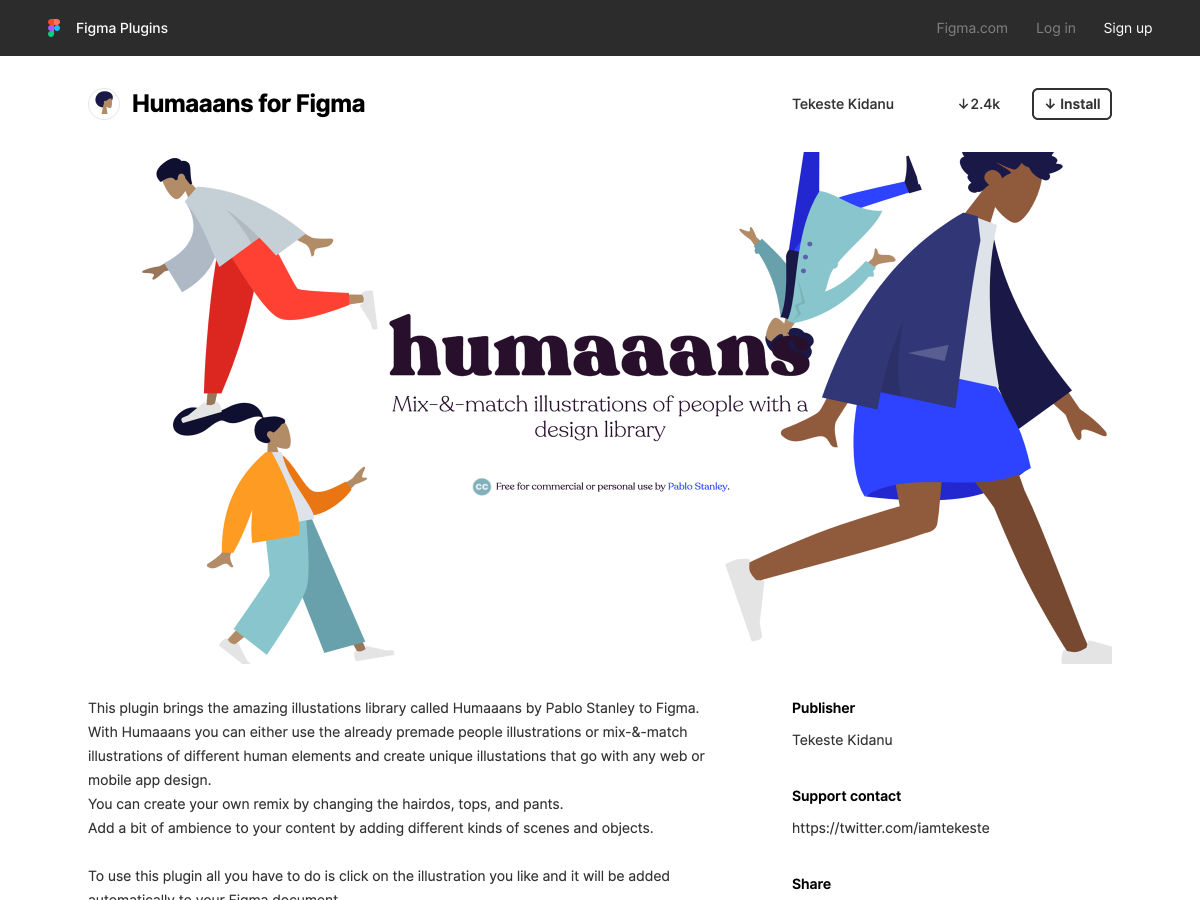
Humaaans for Figma
Fast Food Rivals: Logo Mashups
The Mystery of Why Gas Pump Interface Design Sucks so Badly
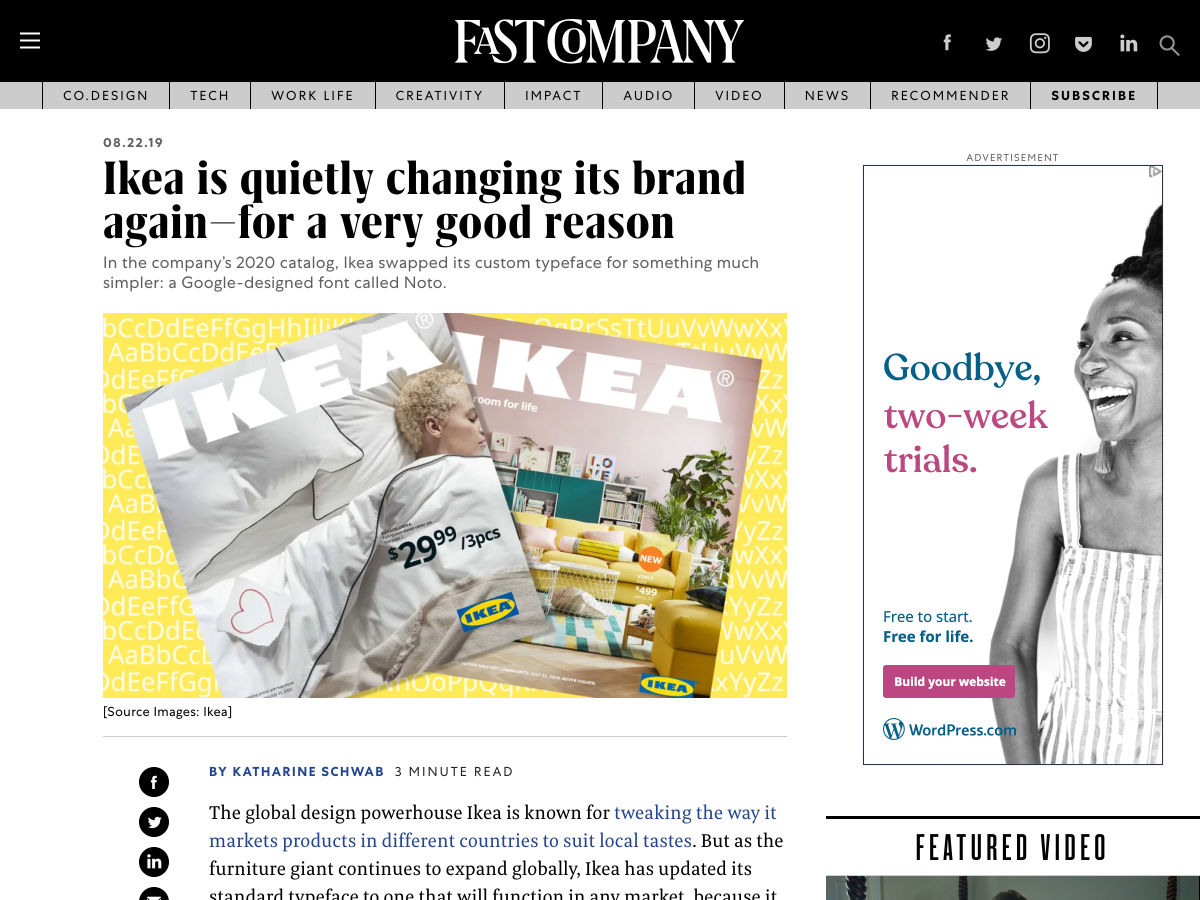
Ikea is Quietly Changing its Brand Again-for a Very Good Reason
The ABCs of Design Systems
How to Be a Triangle-shaped Designer
Where Did the Web’s Personality Go?
Lexend – A Variable Font Designed for Reading
The Adobe XD Shortcuts You Should Know (but Probably Don’t)
Credibility in Design
Branding Blocks
The Untold Story of America’s Brilliant National Parks Branding
Should You Start a Creative Agency?
Want more? No problem! Keep track of top design news from around the web with Webdesigner News.
I really enjoyed this interview with Jeremy Keith on the state of the web, how things have changed in recent years and why he’s a mix of optimistic and nervous for the future.
One thing that caught my attention during the interview more than anything was where Jeremy started discussing how folks think that websites are pretty crummy in general. This reminded me that I cannot count the number of times when someone has said to me “ah, I can’t view this website on my phone.”
We have websites that aren’t responsive! We have websites that litter the UI with advertisements and modals! And we have websites that are slow as all heck just when we need them the most!
Of course folks are going to start complaining about the web and working around them if they find that this is the case. I’ll even catch myself sending an email to myself when I know that the mobile experience is going to be crummy. Or I’ll Instapaper something because the design of the website is particularly difficult to read. Remember, Reader Mode is the button to beat.
My quick thought on this is that we shouldn’t become sour and pessimistic. We should roll up our sleeves and get to work because clearly there’s much left to do.
GraphQL is a query language for APIs that is very empowering for front-end developers. As the GraphQL site explains it, you describe your data, ask for what you want, and get predictable results.
If you haven’t worked with it before, GraphQL might be a little confusing to grok at first glance. So, let’s build a multiplayer tic-tac-toe game using it in order to demonstrate how it’s used and what we can do with it.
First thing we need is a backend for our APIs. We’re going to use Hasura GraphQL Engine along with a custom GraphQL server for this tutorial. We’ll look at the queries and mutations that the client-side needs to build the game. You can implement this kind of thing in whatever framework you wish, but we’re going with use React and Apollo for this tutorial.
GraphQL is a query language for APIs; a language with a syntax that defines a way to fetch data from the server. It works with any kind of API that is backed by a strong system that makes your codebase resilient. Some of the primary characteristics of GraphQL are:
The client can ask the server for what queries it supports (check out introspection for more).
The client must ask the server for exactly what it wants. It can’t ask for something like a wildcard (*) but rather exact fields. For example, to get a user’s ID and name, the GraphQL query would be something like:
query {
  user {
    id
    name
  }
}
Every query is made to a single endpoint and every request is a POST request.
Given a query, the structure of the response is enforced. For example, for the above query to get the id and name of a user object, a successful response would be something like:
This series of articles is a great place to start if you want to know more about GraphQL.
Why are we using GraphQL, anyway?
We just discussed how GraphQL demands that the client must ask the server for exactly what it wants. That means there is no unnecessary data retrieved from the server, like in case of REST where you would receive a huge response even when you need one field. Getting what new need and only what we need optimizes responses so that they’re speedy and predictable.
The client can ask the server for its schema via introspection. This schema can be used to build queries dynamically using an API explorer like GraphiQL. It also enables linting and auto-completing because every query can be built with and cross-checked against the GraphQL schema. As a front-end developer, this greatly enhances the DX as there is much less human error involved.
Since there is a single endpoint and every request is a POST request, GraphQL can avoid a lot of boilerplate since it doesn’t have to track endpoints, request payloads and response types. Response caching is much easier because every query response can be expected to be of a certain structure.
Furthermore, GraphQL has a well-defined spec for implementing real-time subscriptions. You do not have to come up with your own implementation details for building real-time servers. Build a server that complies with GraphQL’s real-time spec and any client can start consuming the real-time GraphQL APIs with ease.
GraphQL Terminology
I will be using some GraphQL terms in this post, so it’s worth covering a few of them here in advance.
Query: A GraphQL query is one that simply fetches data from the server.
Mutation: This is a GraphQL query that changes something on the server and fetches some data.
Subscription: This is a GraphQL query that subscribes the client to some changes on the server.
Query variables: These allow us to add parameters to a GraphQL query.
Getting back to the backend
Now that we have a cursory understanding of GraphQL, let’s start with modeling a backend. Our GraphQL backend would be a combination of Hasura GraphQL Engine and a custom GraphQL server. We will not go into the subtleties of code in this case.
Since Tic Tac Toe is a multiplayer game, there is a need to store state in the database. We will use Postgres as our database and Hasura GraphQL Engine as a GraphQL server that allows us to CRUD the data in Postgres over GraphQL.
Apart from CRUD on the database, we would also want to run some custom logic in the form of GraphQL mutations. We will use a custom GraphQL server for that.
Hasura describes itself quite nicely in its README file:
GraphQL Engine is a blazing-fast GraphQL server that gives you instant, realtime GraphQL APIs over Postgres, with webhook triggers on database events, and remote schemas for business logic.
Going a little deeper, Hasura GraphQL Engine is an open-source server that sits on top of a Postgres database and allows you to CRUD the data over real-time GraphQL. It works with both new and existing Postgres databases. It also has an access control layer that you can integrate with any auth provider. In this post though, we will not implement auth for the sake of brevity.
Let’s start by deploying an instance of Hasura GraphQL Engine to Heroku’s free tier that comes with a fresh Postgres database. Go ahead, do it; it is free and you do not need to enter your credit card details 🙂
Once you deploy, you will land up on the Hasura console which is the admin UI to manage your backend. Note that the URL you are at, is your GraphQL Engine URL. Lets start with creating our required tables.
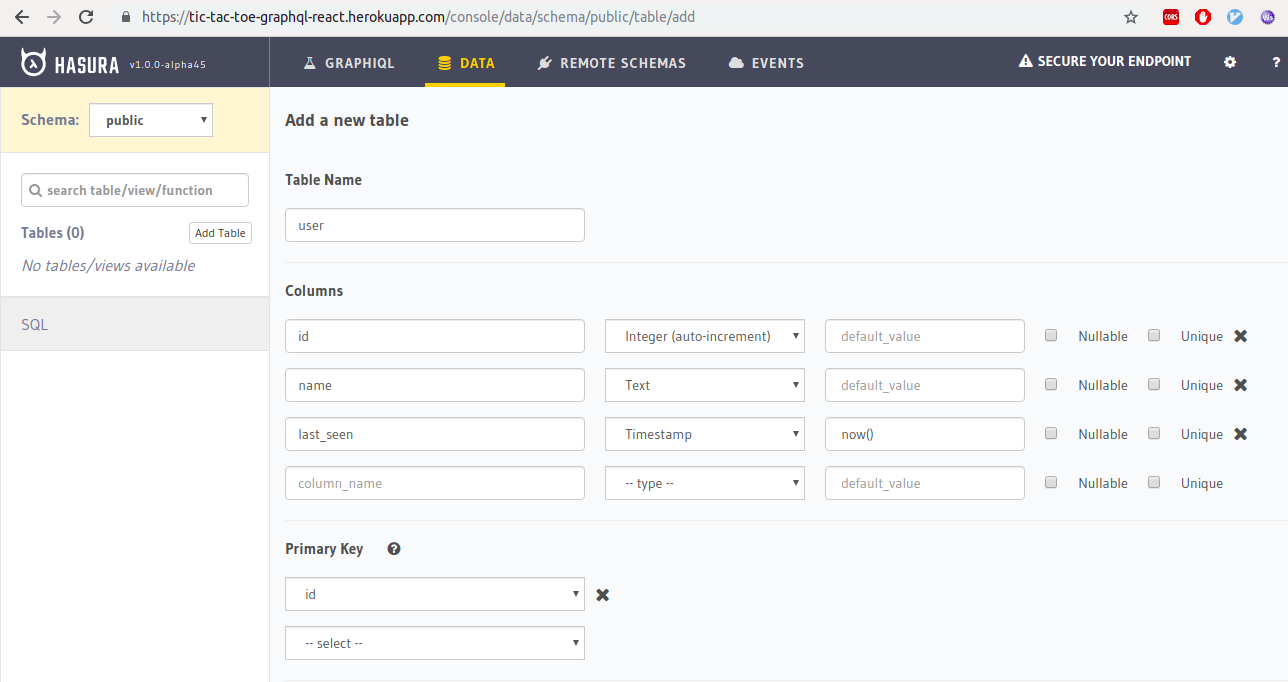
user
A user table will store our users. To create the table, go to the “Data” tab on top and click on the “Create Table” button.
This table has an id column which is the unique identifier of each user and a name column that stores the user’s name.
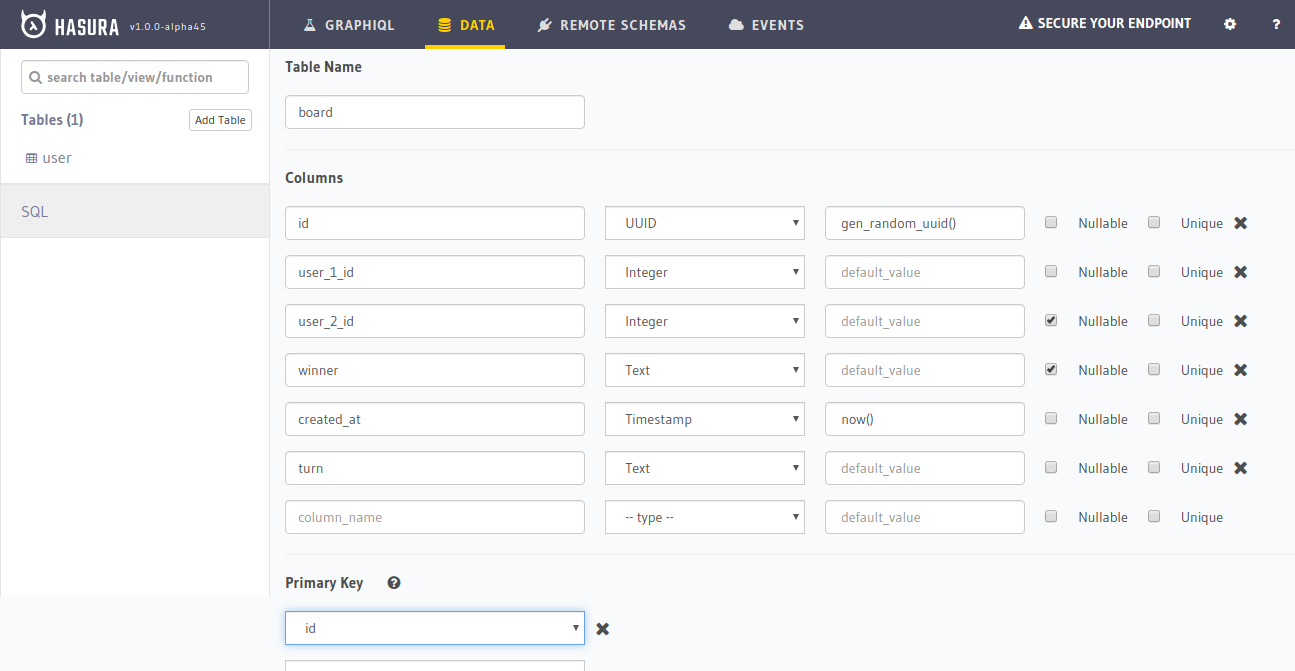
board
The board table will store the game boards where all the action happens. We’ll spin up a new board for each game that starts.
Lets look at the columns of this table:
id: A unique UUID for each board that is auto generated
user_1_id: The user_id of the first user. This user by default plays X in the game
user_2_id: The user_id of the second user. This user by default plays O.
winner: This is a text field that is set to X or O once the winner has been decided.
turn: This is a text field that can be X or O and it stores the current turn. It starts with X.
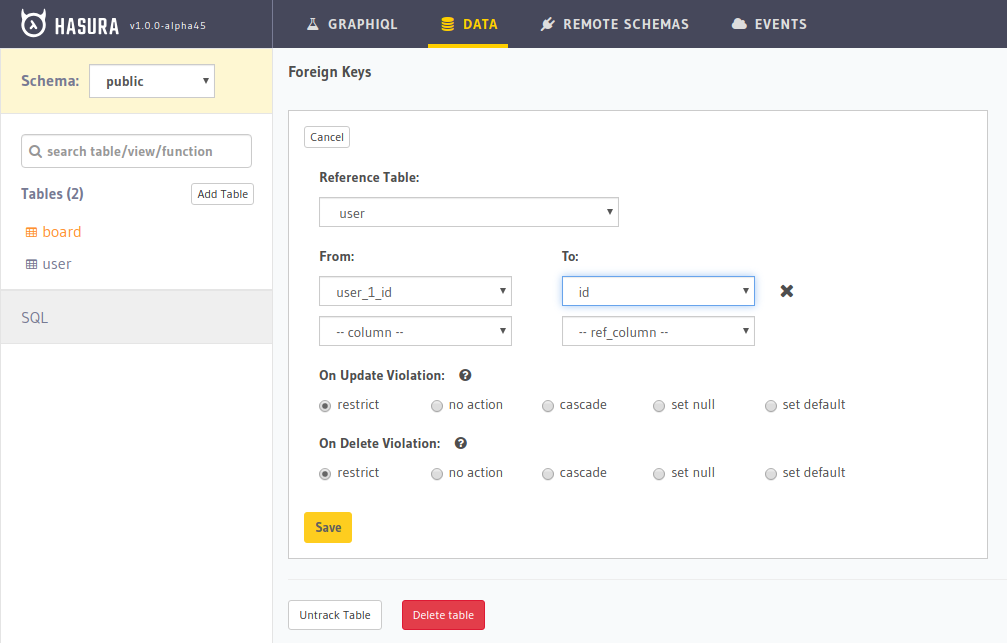
Since user_1_id and user_2_id store the user IDs, let’s add a constraint on the board table that ensures user_1_id and user_2_id to be present in table user.
Go to the “Modify” tab in the Hasura board table and add the foreign keys.
Adding the foreign key on user_1_id. We’ll need to add a new foreign key on user_2_id as well.
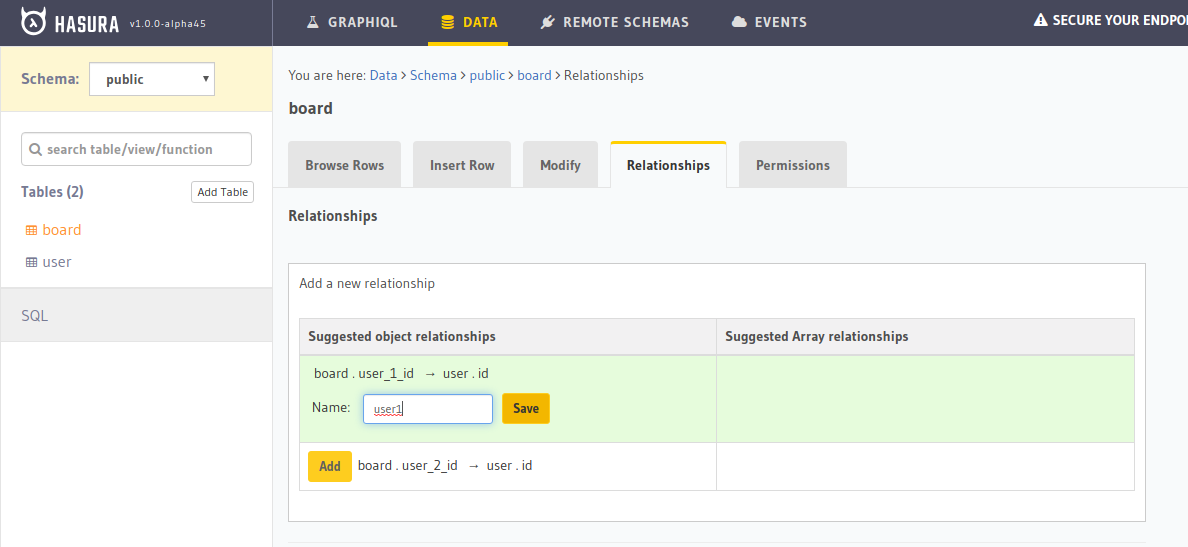
Now, based on these relationships, we need to create a connection between these tables so that we can query the user information while querying the board.
Go to the “Relationships” tab in Hasura and create relationships called user1 and user2 for user_1_id and user_2_id based suggested relations.
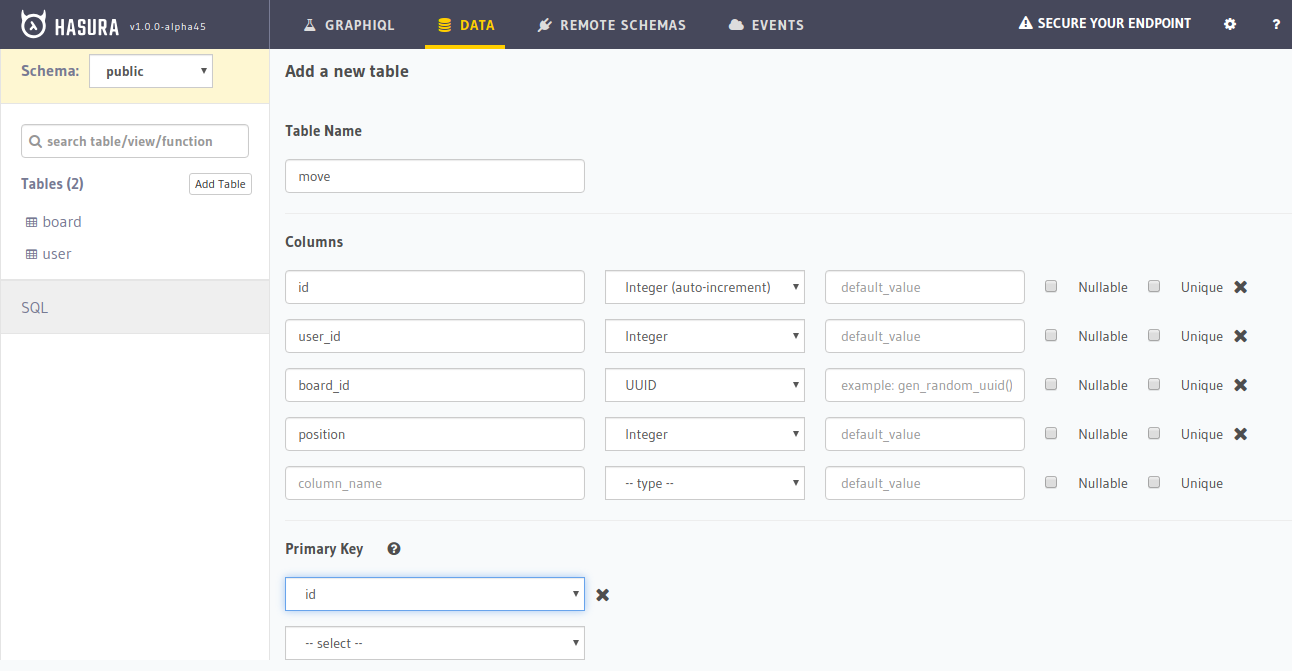
move
Finally, we need a move table that stores the moves made by users on a board.
Let’s look at the columns:
id: The unique identifier of each move that is auto generated
user_id: The ID of the user that made the move
board_id: The ID of the board that the move was made on
position: The position where the move was made (i.e. 1-9)
Since user_id and board_id are foreign keys to user and board table, respectively. We must create these foreign key constraints just like we did above. Next, create the relationships as user for the foreign key on user_id and board for the foreign key on board_id. Then, we’ll go back to the board table’s “Relationship” tab and create the suggested relationship to move table. Call it moves.
We need a custom server
Apart from storing data in the database, we also want to perform custom logic. The logic? Whenever a user makes a move, the move must be validated, made before the turn must is switched.
In order to do that, we must run an SQL transaction on the database. I have written a GraphQL server that does exactly that that I’ve deployed on Glitch.
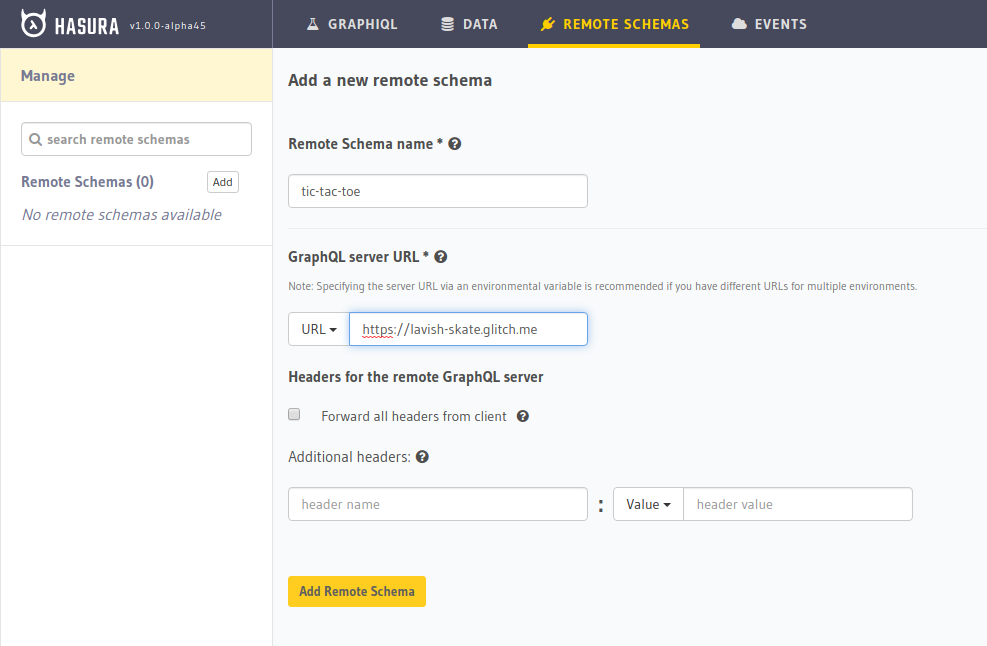
Now we have two GraphQL servers. But GraphQL spec enforces that there must be only one endpoint. For this purpose, Hasura supports remote schemas — i.e. you can provide an external GraphQL endpoint to Hasura and it will merge this GraphQL server with itself and serve the combined schema under a single endpoint. Let’s add this custom GraphQL server to our Hasura Engine instance:
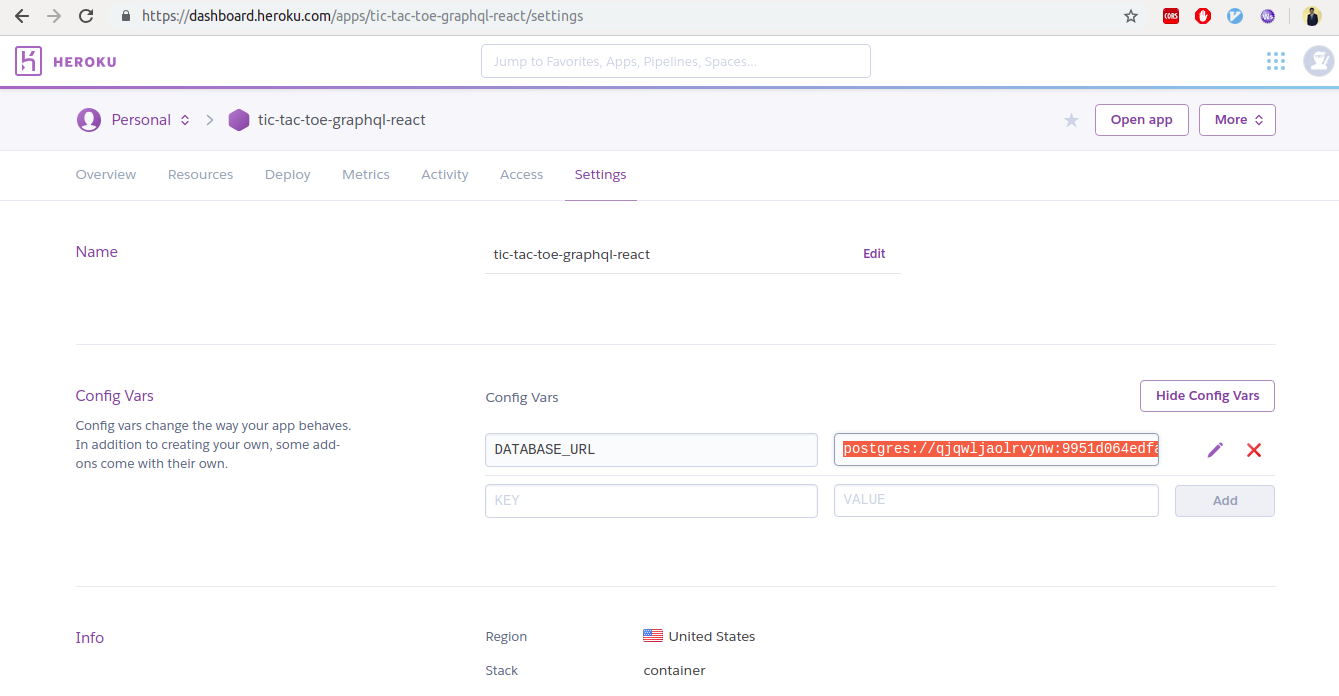
Add an environment variable that is the connection to your Postgres database. To do that, go to https://dashboard.heroku.com, choose your app, go to “Settings” and reveal config vars.
A few more steps from there:
Copy the value for the DATABASE_URL.
Go to the GraphQL server you forked and paste that value in the .env file (POSTGRES_CONNECTION_STRING=).
Click on the “Show Live” button on top and copy the opened URL.
We’ll add this URL to GraphQL engine by adding it as a remote schema. Go to the “Remote Schemas” tab on top and click on the “Add” option.
We are done with setting up our backend!
Let’s work on the front end
I will not be going into the details of front-end implementation since y’all would choose to implement it in the framework of your choice. I’ll go ahead and provide all the required queries and mutations that you would need to build the game. Using these with the front-end framework of your choice will allow you to build a fully functional multiplayer Tic Tac Toe.
Setup
Apollo Client is the go-to library for client-side GraphQL. They have awesome abstractions for React, Vue, Angular, iOS, Android etc. It helps you save a lot of boilerplate and the DX is smooth. You might want to consider using Apollo client over doing everything from scratch.
Let’s discuss the queries and mutations that the client would need for this game.
Insert user
In the app that I built, I generated a random username for each user and inserted this name into the database whenever they open the app. I also stored the name and generated a user ID in local storage so that the same user does not have different usernames. The mutation I used is:
This mutation inserts an entry into the user table and returns the generated id. If you observe the mutation closely, it uses $name. This is called the query variable. When you send this mutation to the server along with the variables { "name": "bazooka"}, the GraphQL server would replace $name from the query variables, which in this case would be “bazooka.”
If you wish, you can implement auth and insert into this table with the username or the nickname.
Load all boards
To load all the boards, we run a GraphQL subscription:
This subscription is a live query that returns the id, user1 along with their id and name (from the relationship), user_2_id, winner and created_at. We have set a where filter which fetches us only the boards without a valid winner and where user_2_id is null which means the board is is open for a player to join. Finally, we order these boards by their created_at timestamp.
Creating a board
Users can create boards for other people to join. To do that, they have to insert an entry into the boards table.
In the above GraphQL mutation, we are setting the user_2_id of a board to a user_id. We have also added additional checks such that this action succeeds only if the joining player is not the creator and the board is not already full. After the mutation, we ask for the number of affected rows.
In my app, after joining a board, I would redirect users to /play?board_id=.
Subscribing to the board
When both users are in game, we need real-time updates about the moves of each player. So we must subscribe to the given board that is being played on and also the moves (through the relationship).
subscription($board_id: uuid!) {
  board: board_by_pk (id: $board_id) {
    id
    moves (order_by: { id: desc}) {
      id
      position
      user {
        id
        name
      }
      user_id
    }
    user1 {
      id
      name
    }
    user2 {
      id
      name
    }
    turn
    winner
  }
}
The above query subscribes the client to the board that is being played. Whenever a new move is played, the client will be updated with it.
Making a move
To make a move, we will be using the make_move mutation from our custom GraphQL server.
This mutation takes a board_id, position and user_id from query variables. It validates the move, makes the move and also switches the turn. In the end, it returns whether this transaction was successful or not.
Tic Tac Whoa!
And now you have a working game of Tic Tac Toe! You can implement any real-time multiplayer game with GraphQL subscriptions using the concepts we covered. Let me know if you have any questions and I would be happy to answer.
Need some inspiration? Take a look at our picks of the top digital marketing influencers to learn from in 2019.
When it comes to digital marketing, things are not as easy as they were before. In 2019, it does take hard work, unique ideas and a fair level of skill to be worthy of people’s attention whether it be online or in the real world. We compiled this list with the intention of inspiring and spreading these successful people’s advice. With that being said, here are our picks of the credible experts in the digital marketing field in alphabetical order.
Here are 15+ digital marketing influencers
Ann Handley
As a real pioneer for digital marketing as we know it, Ann Handley is easily one of the most prominent experts in this industry. She was recognized as one of the 7 people shaping modern marketing by IBM and is the first ever Chief Content Officer. She inspires people to be better content marketers by setting an example at MarketingProfs where she also manages content being written. ClickZ, one of the first digital marketing platforms was also founded by her. Aside from her work at Entrepreneur, Inc., Mashable, American Express and Wall Street Journal as a commentator; she is the Wall Street Journal bestselling author of 2 books on writing amazing content which were translated into more than 15 languages.
As the founder of the Search Engine Roundtable and the news editor at Search Engine Land, Barry Schwartz is the biggest search geek of them all. He founded RustyBrick, won the US Search Engine Personality of the Year Award in 2018 and Outstanding Community Services Award from Search Engine Land in 2019. During his career he has been the advisor for companies including Google, Yahoo! Search, Microsoft and many others. He participates in a number of search marketing conferences and expos like La Red Innova Madrid, Pubcon, Search Engine Strategies, Search Marketing Expo and many more as a moderator, coordinator or speaker. He also hosts the Search Marketing Expo of Israel.
Follow him on Twitter to keep up to date on what’s new in the search engine world.
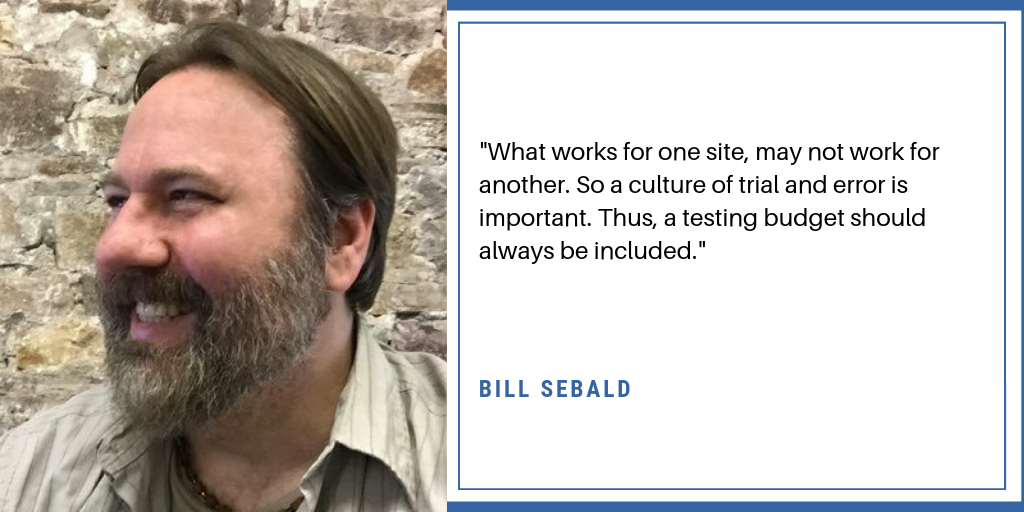
Bill Sebald
Bill started in SEO in 1996 on an eCommerce site. He has since then worked on more than 100 major eCommerce brands. In 2006, he started the SEO channel at GSI Commerce (later bought by eBay) and is the founder and managing partner of Greenlane, an agency that specializes in SEO and PPC consulting and management. He also teaches at Jefferson University and writes all over the place.
He says if he’s unique, it’s because he has experience and has seen quite a bit.
“I would like to see a wider understanding that everything we do in search marketing needs to be considered an experiment. We have limited information from Google, in which most is open for interpretation. But what works for one site, may not work for another. So a culture of trial and error is important. Thus, a testing budget should always be included. I’ve yet to see a company in SEO who has been successful without welcoming the spirit of experimentation.”
David Meerman Scott is a venerable business growth strategist, author, entrepreneur and public speaker. He spotted the real-time marketing revolution in its infancy and wrote five books about it including “The New Rules of Marketing and PR”, which has sold more than 400,000 copies in English and is available in 29 languages from Albanian to Vietnamese.
For 15 years, Fadhila is helping to grow brand awareness to large groups thanks to ultra-personalized support from public figures (executives, leaders, celebrities, and influencers).
Her mission is to accompany them to reveal their voice, to define a territory of singular expression, to re-enchant their social media presence and to harmonize all their speeches. (internal/external, physical and web)
Her activities have a twofold purpose: to spread the personal brand and that of their company or project to feed their respective reputations.
As a personal brander with a systemic approach and expertise in the support of change, she often proposes to her clients to create individualized courses according to the personality of the interested person including the stakeholders of the organization.
With Gareth’s knowledge in digital marketing and chatbots and constantly being innovative, Gareth has generated hundreds of qualified leads (400+) at the cost per acquisition of $1.98 via the use of Facebook Messenger chatbots. His other accomplishments include receiving personal press mentions in publications such as BBC News, Daily Express, The Sun, Daily Mirror, Reader’s Digest, Business Matters Magazine and many more which have skyrocketed social growth, brand presence and sales. He has generated a large following from sharing relevant content in the industry and his travels. With Gareth’s ever-growing knowledge in SEO, he’s grown various sites to thousands of unique users including his recent projects which received thousands of hits within the first months.
Why do you think you’re unique?
“I’d say I’m very ambitious (working on my personal brand and earning money since I was 15) and always looking to improve my knowledge, but rather than just consuming media online such as articles, videos, podcasts – I go a step further and work on side projects to increase my knowledge and skill set. If there’s something I don’t know but think it’ll help me succeed, I’ll go and learn it, as I did with PR – self-teaching the keys to success. It’s worked as I’ve been featured in major publications.
For example, one project I’ve been working on is Revealing Britain – an online magazine that reveals Britain’s hidden gems and shares the latest trending and insightful content about travel, food and drink, entertainment etc within Great Britain. This is a side project to see how fast I can get an online magazine website out there generating a large audience and monetising via ads, partnerships and more. Within the first month, it had just under 1,000 unique users and within the second month, I’ve topped that and also had a successful partnership with Gatorade (Pepsi). I’m always keeping an eye out and looking for new ways to generate a larger audience, more sales and grow successfully.
My personal branding has definitely worked off as I was verified on Twitter 2 years ago when I was 20 which has opened up a lot more opportunities. There’s no stopping me.”
Jason Falls is a leading digital strategist, speaker, author and thinker in the digital and social media marketing industry. His strategies and ideas have touched iconic brands including GE Appliances, AT&T, Valvoline, Buffalo Trace, Humana, Rawlings, Maker’s Mark, Tempur-Pedic, Fireball Whisky, GM and more. Falls has been noted as a top influencer in the social technology and marketing space by Forbes, Entrepreneur, Advertising Age and others. He is the co-author of two books: No Bullshit Social Media: The All-Business, No-Hype Guide To Social Media Marketing, and The Rebel’s Guide To Email Marketing.
Falls is also noted for founding SocialMediaExplorer.com, one of the industry’s most widely read blogs. He is a frequently featured digital marketing keynote speaker and has informed and entertained audiences on three continents and in eight countries. He has been behind national award-winning digital efforts for Jim Beam Bourbon (SAMMY Award) and the National Center for Families Learning (Its Wonderopolis was named one of Time magazine’s top 50 most important websites.) He currently leads digital and social strategy for Cornett, a full-service ad agency in Lexington, Ky. He loves the kick-ass state of Kentucky, sports and bourbon.
What do you think makes you different?
“I’m a practitioner who focuses on driving results for clients all the time. A lot of the people on “top experts” and “top marketers” lists are speakers and authors and don’t really do hands-on work anymore. They’re personalities. And that’s fine. It’s not that they aren’t giving good advice. But I work at an agency. If I don’t deliver, I lose my job. Being a thought leader isn’t how I make my money, so I think that gives me a more practical, informed perspective than many others. That and I cut out a lot of bullshit.”
Jay Baer is one of the Hall of Fame keynote speakers, and motivates his audience like no other. With his current firm Convince & Convert, he offers marketing advice and counsel for some of the biggest companies in the world; since 1994 more than 700 companies consulted to his advisory. He has advised The United Nations, Caterpillar, Nike and 34 of the FORTUNE 500. Jay is also the author of 6 must-read books and has an awesome blog which is a must follow. He is the host of the Social Pros podcast, which had received the title of best marketing podcast in the Content Marketing Awards. Aside from these achievements, up to now, he had five different companies grown from scratch into multi-million dollar businesses.
Joe Pulizzi is the founder of Content Marketing Institute, one of the most renowned marketing education organizations. He’s the author of 6 epic marketing books including Killing Marketing and Content Inc. Joe has countless accomplishments in the industry and has been recognized as such on many occasions like the 2017 Cleveland American Advertising Federation’s Inaugural Industry Impact Award, Most Influential Content Strategist and Content Marketer of the Year by Lavacon, and the 2014 John Caldwell Lifetime Achievement Award. He was the host of 2 podcasts and wrote for Entrepreneur and Inc. Now, he continues to present new speeches at various events also founded the Orange Effect Foundation with his wife, aiming to help kids with speech and communication disorders.
Larry Kim proved himself to be a leading expert in the industry as the founder of WordStream, one of the best tools for digital marketers especially for keyword search. He is also the founder and CEO of MobileMonkey, a tool for Facebook Messenger marketing. While millions read his blogs on marketing on a regular basis, he speaks at various events. Some of the awards he has won include Search Marketer of the Year from PPC Hero, Search Engine Land, and the US Search Awards; and he has been voted the most influential PPC expert multiple times. He is also a columnist for CNBC, Inc. Magazine and Medium where he was ranked the #8 most popular author. An active social media user, he shares quality advice daily.
“What makes me unique is that when it comes to personal brand building, there are a lot of nuances that go along with marketing a person, such as cultural norms, stereotypes and perceptions from people that other experts often overlook when teaching their methods, due to most of them coming from a background of privilege. Being a minority and working with other people who can be considered minorities has helped me see the broader picture of how to integrate successful marketing campaigns where people stick out. Also, by having my clients lead with vulnerability and authenticity as opposed to touting themselves as the best, they are able to stand out and drive deep connections with their audiences.”
Mike Allton has been writing and teaching in the digital marketing space for over ten years, and has established a reputation as a prolific blogger. After serving as CMO for a number of years, he recently joined Agorapulse as their Brand Evangelist where he is responsible for managing relationships with dozens of key influencers and ambassadors.
How are you different as a marketer?
“One thing that’s relatively unique about me is my focus on building relationships. For years I have been generous with my time and have striven to connect with and help other marketers without any preconceived notions or agenda. This has allowed me to create a wonderful network of friends and colleagues who, together, are willing to collaborate and work with me on any number of projects.”
Mike Schiemer is a frugal entrepreneur, digital marketer, social media influencer, and SEO consultant. He has contributed to content marketing and social media campaigns for dozens of multi-billion dollar companies and thousands of small businesses around the world. He has also bootstrapped several 6-figure businesses. He currently owns Bootstrap Business, Frugal Finance, Lean Startup Life, and 7 other profitable websites or blogs. He is the author of 2 books including “The $10 Digital Media Startup” with sales in 12 countries.
What do you think makes you unique?
“I have a lot of actual experience in sales and management outside of the marketing industry. I’ve gotten excellent results for my clients due to my additional experiences working in the retail, non-profit, and fitness industries. That actual real-world experience helps when you are marketing real products and services aside from just software, online subscriptions, and unproven future technologies.
When I am marketing myself or another company I don’t just spend money carelessly. I am a strong believer in moving more cautiously and always maintaining profitability, which doesn’t seem to matter to a lot of marketers or companies these days.”
Neil Patel is the founder of Crazy Egg, KISSmetrics, Hello Bar and QuickSprout, and probably the most visible figure in SEO education. He has been recognized by Barack Obama as one of the top 100 entrepreneurs under the age of 30, and also as one of the top 100 entrepreneurs under the age of 35 by United Nations. He has helped many well-known brands such as Amazon, GM, HP and NBC with growing revenue. On his blog, you’ll find quality content about digital marketing with the motto “SEO made simple”, and he makes it easy for everyone to understand how it works. He also hosts Marketing School the podcast with more than a thousand episodes alongside Eric Siu. He makes videos on YouTube sharing advice about SEO, fully explained in detail with bonus tips.
Social media is Peg’s passion. And her job. She works day-to-day in the trenches of social media, marketing, and blogging with global brands and leaders in the social media sphere. She’s spearheaded successful social-media campaigns for Mercedes, Motorola, Audi, Canva, Google, and Virgin as well as having been a brand ambassador for Random House, Kimpton Hotels, Nestle, and Adobe Spark. Peg co-authored the best-selling book The Art of Social Media: Power Tips for Power Users with Silicon Valley OG Guy Kawasaki. Behind the scenes, Peg runs marketing and social media for a global brand putting all her skills into use while testing the latest strategies. In her spare time, she runs an award-winning social media blog at PegFitzpatrick.com, dreams and plans on Pinterest, and takes way too many photos for Instagram.
How are you unique as a digital marketer?
“I actually manage social media for a brand vs many people who call themselves social media marketers but are really just posting for their own personal brands. There’s a big difference! Also, I work as a brand ambassador for brands like Random House and Kimpton Hotels so I know how the influencer piece of social media works.”
Best known as the co-founder of Moz and founder SparkToro, Rand Fishkin is easily one of the most visible experts in the SEO scene. He quit Moz (one of the most widely used SEO tools on the market), and is now active on SparkToro. Quality SEO advice can be found on his blog, videos and his book “Lost and Founder”. He also frequents marketing conferences and events all around the globe for a big fraction of the year. He has been featured in the Seattle Times, Puget Sound Business Journal’s 40 Under 40, BusinessWeek’s 30 Under 30; and Newsweek, The Next Web, the Inc has recognized him as an expert.
Ramon has started four companies and sold two of them. He’s a best seller author who has written four books, including “Celebrity CEO”, about personal branding for entrepreneurs. Ramon’s not only a global speaker, author and entrepreneur but has also interviewed President Obama in the President’s first live video chat and was with Ivanka Trump in India for the Global Entrepreneurship Summit. As an in-demand thought leader, Ramon’s been quoted or featured in the NY Times, Wall Street Journal, Fox Business, Inc, and dozens of podcasts and radio interviews.
How is Ramon unique?
Ramon’s specialty is that he knows how business owners can start and build their personal brand and become the Celebrity CEO to a niche market. It’s about being well known and having clients and customers wanting to work with you.
Ryan Foland is a communication expert who is recognized by Inc. Magazine and Brand24 as a Top Digital Marketer and has been named a Top Personal Branding Expert by Entrepreneur Magazine. In his keynote speeches, online courses, and his new book Ditch the Act (published by McGraw-Hill), he helps business leaders learn how to market themselves by harnessing the power of vulnerability and authenticity to build better, more relatable, and more profitable personal brands. He is also known for his 3-1-3® Method, a discovery process whereby core marketing messaging begins as three sentences, condenses into one sentence and then boils down to three words. Learn more about Ryan at ryan.online.
How is Ryan unique?
When it comes to digital marketing, Ryan Foland has a unique and slightly different approach, but that is why he showed up on our radar. His approach is based on the simplicity of messaging and of simply being you. A keynote speaker by trade, he has been recognized for his expertise in digital marketing when it comes to marketing people, which is most commonly known as “personal branding.” He believes that there is little difference between the online and offline worlds, arguing the utmost importance of being able to articulate the problem you solve, your solution, and your market, before setting off on any digital campaign. Ryan teaches companies how to empower their employees to learn how to market themselves as the experts they are (both online and offline). As a result, this increases the digital reach of the company through its employee’s social networks, which ultimately drives ROI. His work also spans from the corporate world to higher education. As the Communications Manager at the Office of the Vice Provost for Teaching and Learning at the University of California, Irvine, he is known for his work in successfully advancing the adoption of new forms of digital media across campus.
Sam’s been featured, linked to and/or cited as an influential figure on hundreds of websites including Forbes, Entrepreneur, Inc., and in Fast Company magazine. He’s worked with multiple renowned companies across the globe from the USA to France, and even as far as Israel — plus, Fortune 100 brands (Oracle, IBM) and also Adobe (within the Fortune 500). Sam went from unemployed, to working in marketing, to running his own business in the space of only 5 years; during that time, he progressed his career by obtaining greater positions each and every year before launching OPTIM-EYEZ and achieving the above accolades.
What makes you unique?
“I’ve never advertised any of my services; I’ve always been dedicated to people and I prioritize relationships above all else.”
We hope that the advice and stories of the top players in the digital marketing game will benefit you in your digital marketing journey. We strongly believe that the inspiration from these successful people will give you the necessary boost towards your ultimate goal.
We’d also love to hear your suggestions and pieces of advice for all the others that are in need of some inspiration, feel free to leave your comment below!