Archive

Archive for July, 2020

CMD+Z for Git is Here

July 23rd, 2020 No comments

Version control with Git has become a “commodity” by now: virtually every software project today uses Git, and virtually every developer knows Git to some extent. This explains why I sometimes hear the following question when I talk about what I do for a living: “A desktop client for Git? Why would I need that? I can do that on the command line!

If I’m lucky, I have a computer next to me when that question hits me. And instead of producing a wordy answer, I do a couple of things in Tower, our desktop client for Git.

Anyone who’s ever performed an “Interactive Rebase” is amazed by how easy that is in Tower: you simply drag and drop to combine commits or reorder them. And anyone who hasn’t yet used “Interactive Rebase” – because it was too complicated and clunky to use on the command line – now understands that it’s a very valuable tool.

Or I might make a mistake: accidentally deleting a branch or messing up a merge in a terrible way. And I’ll simply hit CMD+Z, like I would in a text editor, to undo the mess I just made.

People then start to realize that the real question is not: “Can I get by using Git on the command line?” The more important questions are:

  • Can I use all of Git’s power? (Even the advanced features that might be hard to use, but that can be very valuable…)
  • Can I work with Git in a productive way? (Not having to look up parameters, not spending too much time on my workflows…)
  • Can I work with Git in an easy way? (Without having to think about it too much…)

We – a small team of just 9 people – have spent the last 10 years answering those questions by building Tower.

How to Undo Mistakes

One of Git’s greatest features is that it allows you to undo almost anything. However, it requires quite some experience to know how exactly to undo your particular kind of mess: a failed merge has to be cleaned up differently than a deleted branch!

After working on this for a long time, Tower now allows you to undo virtually anything – simply by pressing CMD+Z! (Note: the “Undo” feature is a quite recent addition and first available in the Mac version of Tower. It will soon come to Windows, too).

No matter if you messed up a merge, inadvertently deleted a branch, discarded a valuable local change, published a branch on a remote too soon, or simply committed something that you shouldn’t have – your lifesaver is as simple as “CMD+Z”, and it’s always available.

The Power of Interactive Rebase

Interactive Rebase is a wonderful example of Git’s more powerful features. It allows you to…

  • edit old commits (both their messages as well as their changesets!)
  • combine multiple commits into one
  • reorder commits
  • …and even delete commits you don’t need anymore!

All of these can help a lot to keep a code base clean and structured. But being a very powerful tool, Interactive Rebase is also an example of a Git feature that is quite complicated to use!

Many beginners are scared away by this complexity – meaning that, of course, they will miss out on the benefits of the feature! Many experienced developers know and use Interactive Rebase; but since the feature is hard to use, it costs them a lot of time and/or they make mistakes from time to time.

Knowing this, we had two goals for integrating Interactive Rebase into Tower: on the one hand, we wanted to reduce as much of its complexity as possible. And on the other hand, we wanted to make the feature easily accessible.

The result is that Interactive Rebase is now integrated right into the “Commit History” and accessible via simple drag & drop and menu options:

Countless developers that wouldn’t have used Interactive Rebase at all on the Command Line are now using it on a daily basis in Tower.

Quick Actions

Almost independent of its size, working in a code base means spending a lot of time searching: for example for a certain branch (out of lots of branches) or a certain file (out of lots of files).

Tower allows you to do most of your daily tasks without sifting through data – and even without taking your hands off the keyboard. The “Quick Action” dialog takes almost any input and allows you to simply act on it:

  • Give it a branch name and it will offer to do a checkout.
  • Give it a file name and it will offer to show it in the File History.
  • Give it a commit hash and it will offer to show that commit’s details.

Being able to perform many tasks right from the keyboard, without having to search and sift through loads of data, can make life as a developer a lot easier.

Solving Conflicts with Confidence

Everyone hates that moment when a merge (or rebase) stops and leaves you with a bunch of conflicts ? Multiple questions then quickly enter the poor programmer’s mind:

  • What are my changes? What are someone else’s?
  • What actually happened?
  • Why me?

While, admittedly, Tower cannot answer all of those questions, it offers a special “Conflict Wizard” that helps make the situation much more understandable:

You can easily see where changes came from and can solve the conflict simply by choosing which version to go with (or jump into a dedicated merge tool). It makes things a lot easier when merge conflicts are visualized in this way, instead of being an abstract mess.

Becoming More Productive

When building and improving Tower, we’re always striving to make things easier for our users – and to make them more productive. Let’s take some examples of where this shows in Tower:

  • No More Passwords, Tokens, SSH Keys: You can easily connect your GitHub / GitLab / Bitbucket / Azure DevOps accounts with Tower. Once connected, you never have to wrestle with passwords, authentication, tokens, usernames, and SSH Keys anymore. Cloning and interacting with a remote repository, then, is a matter of just a click.
  • Single-Line Staging & Discarding: There’s a golden rule in version control: when you make a commit, you should only include changes from a single topic (and not mix multiple topics in a commit, thereby making it extremely hard to understand what actually happened). With the ability to stage / unstage / discard individual chunks and lines from your changes, Tower enables you to create granular, precise commits.
  • A New Diff Viewer: In a very recent update, we gave our internal Diff Viewer a complete overhaul. It now highlights inline changes, allows you to show/hide whitespace changes, can display the complete file, and is completely customizable with themes!
  • Automations for the Boring Stuff: Tower takes care of much of the grunt work around Git. To take just two examples: neither do you have to regularly fetch new updates from the remote, nor do you have to remember to stage uncommitted changes before pulling/switching branches/merging… Tower does that automatically for you.

When I think about the favorite applications I use myself, they all have some things in common: they make life easier for me, they make me more productive, and they enable me to do advanced stuff that I’d have a hard time doing without them. I’m glad and grateful that many of our users consider Tower to be one of their favorite apps!

If you want to give Tower a try, just download it from our website and test it 30 days for free. And if you are a student or teacher, you can use Tower for free!


The post CMD+Z for Git is Here appeared first on CSS-Tricks.

You can support CSS-Tricks by being an MVP Supporter.

Categories: Designing, Others Tags:

Guide to Workflow Automation

July 23rd, 2020 No comments

When you’re analyzing workflows, at some point you’ll find places where you can significantly speed up the process if you remove the human element. Workflow automation is one way to do that.

Workflow automation refers to how business processes are designed, executed, and automated based on rules that you set up to route different tasks, data, or files between people or systems.

Workflow Management Software

To automate workflows, companies turn to workflow management software and other IT tools. These products ensure that information is routed in the fastest way possible and that routine tasks are completed without unnecessary delays. In some cases, workflow automation can even generate approvals.

Implementing this type of automation can boost productivity, make your organization more efficient, reduce costs, and reduce the likelihood of human errors. Workflow automation also helps you create audit trails so that you know who completed what task. And by removing rote tasks from an employee’s daily to-do list, you can also increase job satisfaction because they can focus on more interesting, strategic initiatives.

For example, consider a very simple business process, like creating a contract for a new customer. Currently, you have to open up your word processing program, input the customer’s information and any special terms, and then convert the contract into a PDF and attach it to an email, or print it and mail it to the customer to sign.

Workflow automation can remove some of these steps so that all you have to do is fill out a form, and a contract is automatically generated and sent to the customer electronically for signature.

If this sounds like something your organization could benefit from, this guide will help you understand workflow automation and begin setting it up.

Chapter 1: The types of enterprise workflow automation. Different departments, and even different industries, will have different needs for their workflows. This chapter will cover how workflow automation influences various types of organizations or departments.

Chapter 2: The steps of the automation process. This section will delve into the different steps of workflow automation, starting with how to create a visual representation of your workflows and covering everything through the launch and maintenance of a workflow.

Chapter 3: Document automation. Within documents, like Excel spreadsheets and PDFs, you can use workflow automation to be more efficient. This chapter will show you how.

Chapter 4: The top workflow automation software. At this point, you’ll be ready to start automating some of your workflows. This chapter will introduce you to a few of the best workflow automation software platforms that you can use to streamline and automate your workflows.

Workflow automation has a lot of benefits. Let’s get started.

Types of enterprise workflow automation

Workflows are used in a lot of different industries, and they vary by department and by the type of enterprise.

The IT department can benefit from workflow automation — as can sales, finance, legal, human resources, and accounting. But the tasks these departments have to complete are all different, and in some cases, the nature of the industry may mean the workflow for a company selling directly to consumers is very different than a company that sells software to large enterprises.

HR automation

While there are standard workflows, like approvals, that can apply to almost any industry or department, the different functions that each department performs will determine which workflows should be automated. For example, the IT department may have an approval workflow for new user accounts, while legal may use workflow automation to approve new contract requests.

Here are a few different types of enterprise workflow automation and how they can move processes forward.

IT automation

The IT department deals with a lot of processes that are ripe for workflow automation. Things like trouble tickets and support requests, wrangling shadow IT deployments, updating stakeholders on the status of projects, and managing assets are all business processes that can be automated to some extent.

For example, enterprise IT departments can set up incident response workflows for cyberthreats that are triggered by certain events, like an employee plugging a USB drive into their workstation. Workflow automation would route the alert through the appropriate software and to the right person to scan the drive and shut down the USB port. If a true threat is detected, an alert would be sent to the head of cybersecurity, and an emergency response meeting would be scheduled.

Finance automation

Managing the daily flow of expenses across an organization requires an incredible attention to detail, tolerance for stress, and knowledge. But enterprise finance departments can get bogged down in manual tasks. Workflow automation can populate financial forms with standard information from a database, transfer data, route processes like approvals, and set up automatic payments.

One example of a finance workflow automation application is employee expense reimbursement. The employee fills out an expense report form that’s routed to their manager. The manager approves the expense report, and it’s routed to the finance team. Once they provide final approval, the expenses are populated in the accounting system, and the employee’s reimbursement is automatically added to their paycheck.

Sales automation

While it may seem like sales is largely a manual function, it actually requires some workflow automation to make sure leads are nurtured and don’t slip through the cracks. Capturing lead information and routing it to a salesperson, following up on leads, standardizing the list-building process, getting regular reports, and segmenting leads are all tasks that can be automated.

For example, the basic task of creating a lead in the company’s customer relationship management (CRM) system is a workflow that’s fairly easy to automate. You can add a form to your website to capture the lead’s information, possibly offering something in return, like a checklist or e-book. When the prospect fills out the form, it’s automatically entered into the CRM system and assigned to a salesperson for follow-up.

Accounting automation

The accounting department often has to deal with a lot of manual tasks, like generating reports, reconciling accounts, auditing, and purchasing. Workflow automation can make online tax filing easier, reduce the need to manually verify receipts provided by vendors and customers, and create financial forecasts.

One very common accounting function that can benefit from workflow automation is processing payroll. Introducing automation can create a single interface for the accounting department to view salary, vacation, benefits, and reimbursements information and process them automatically.

HR automation

There’s no question that the human resources department handles a lot of business processes. HR can use workflow automation for many different processes, including employee onboarding, employee offboarding (termination), performance reviews, travel requests, leave requests, employee status changes, timesheet approvals, screening and hiring new employees, training, and document requests.

For example, automating the travel request workflow can eliminate the back-and-forth emails between employees, their managers, HR, and finance teams. The employee instead submits their travel request via a form that’s routed to the appropriate people for approval and then recorded in the system.

Legal document automation

While a lot of attorneys like to be very hands-on with business processes, legal workflow automation can actually reduce errors and improve efficiency (and in the case of attorneys working at law firms, increase their billable hours). Even corporate legal departments can use workflow automation so they’re not spending a lot of time creating new documents.

Some of the tasks they can automate include drafting nondisclosure agreements (NDAs), responding to vendor contract requests, writing developer agreements, handling counsel retention requests, tracking trademarks, and taking on new clients.

For example, one function that can be automated is standard contracts, whether it’s a client engagement contract or a corporate NDA. Instead of creating a new document each time, a standard form can be filled out, which then automatically generates the contract and sends it to the appropriate party to be signed. These contracts, once countersigned, can be archived automatically, creating a secure audit trail. Approved contracts can also trigger new automated workflows, like access to content.

Many different departments and industries can benefit from workflow automation. Approvals, payments, document requests, employee onboarding, trouble tickets, and sales processes can all be automated, reclaiming time for the respective departments and allowing employees to focus on more complex tasks instead of routing requests and approvals.

These are just a few of the departments that can use workflow automation to be more efficient. Knowing what workflows can be automated and getting started, however, are two different things. In the next chapter, you’ll learn about the steps of the automation process, including how to measure the success of your workflow.

Steps in the workflow automation process

Once you’ve decided that you need workflow automation, your next challenge is to choose a workflow to automate. Begin with a fairly straightforward process, one that’s not mission-critical. This will help you learn what to expect from the process and give you wiggle room in case it takes a few tries to get it right.

There are several steps in the automation process once you choose a workflow:

  1. Create a visual representation of your workflow.
  2. Incorporate the needs of those who will regularly use the workflow.
  3. Choose software to help you automate processes.
  4. Set key performance indicators (KPIs) to measure performance.
  5. Test your workflow.
  6. Launch and monitor the automated workflow.

These steps help ensure your automated workflows actually make your business more efficient and reduce the time spent on redundant tasks.

Create a visual representation of the process

Before you start the automation process, create a visual representation of the workflow you want to automate. This representation can provide transparency in the workflow and help you see where gaps might exist or where processes can be streamlined, like if you’re missing an alert that needs to be sent to someone when a process requires a manual decision.

Create a visual representation of the process

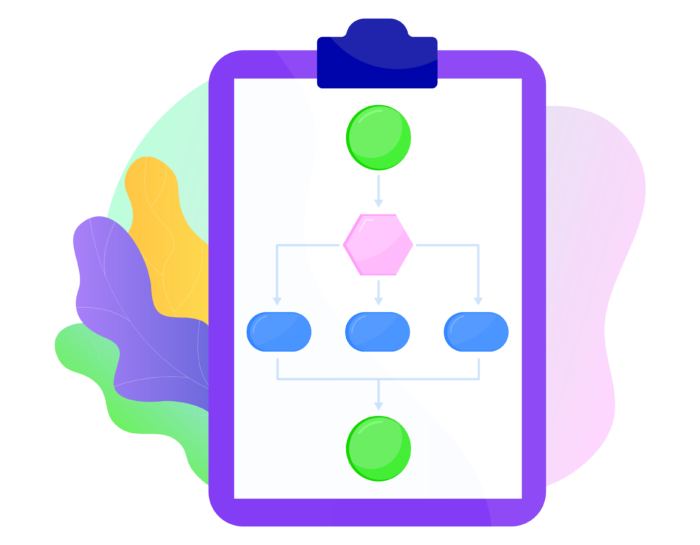
Visual representations are usually in the form of workflow maps, also known as flowcharts or workflow charts. Workflow maps are diagrams of your workflow that use standard workflow symbols:

  • Rectangles for a process or action that needs to be carried out
  • Ovals for the start or beginning of a process
  • Diamonds for when decisions need to be made
  • Arrows to connect the workflow steps

Workflow automation software helps create these diagrams.

Determine user needs

As you map the workflow to be automated, you’ll want to check with the users who will be a part of the workflow. For example, if you’re automating a content creation request, you’ll get input from the marketing team and the sales team, the two departments that will likely use the workflow the most.

There are several ways you can go about this, but the easiest is to create a form that users can fill out to request steps or provide input on the workflow. If you use JotForm, you can create forms with dropdown menus, checkboxes, and radio buttons, as well as free-text fields.

Choose an automation solution

There’s no shortage of workflow automation solutions to choose from, and these solutions can be used from the point you first start workflow automation to deployment and beyond. Zapier, monday.com, Asana, Trello, and Airtable are all popular choices for workflow automation.

JotForm has integrations with a lot of these tools, so if the workflow you’re automating requires you to collect data with a form and import it into a system, you’ll be able to do that automatically too.

Pipedrive and HubSpot are also good workflow automation solutions. You’ll learn more about workflow automation software in Chapter 5 of this guide.

Set workflow KPIs

As with anything you implement in your business, you want to know if it’s successful. Workflow automation is no different, so it’s important to identify and establish relevant automation KPIs to measure progress. Some of the workflow goals you can set up include

  • The percentage of processes that run to completion
  • The average time it takes to run a process
  • The error rate of a process

As with determining user needs, this is a good time to ask users what kind of performance they want from automated workflows. You can set up forms to collect goal information from various stakeholders.

For example, the accounting department may want invoices to be approved at a faster rate, while the sales team may want to decrease the time it takes to qualify a sales lead. These are all solid workflow objectives that you can find ways to measure.

Testing the automation process

Before you deploy your newly automated workflow, test it to make sure there aren’t any issues. A lot of organizations create what they think are airtight workflows, like a contract creation workflow, only to find that they’ve left out a key step or person in the process. This is why automation testing is so critical.

Ask those who will be using the workflow to test it. They’re in the trenches daily and are better situated to spot potential problems, like if general counsel isn’t alerted to unusual terms in a contract. The last thing any organization needs is to deploy an automated workflow, even on a process that isn’t mission-critical, only to have it stall out.

Launch and monitor your workflow

Once you’ve designed your workflow, collected input from users, chosen a workflow automation solution, set KPIs, and tested your process, you’re ready to launch the automation. Train users on the workflow make sure they understand how things will work.

The automation process doesn’t end at launch. The KPIs you set earlier will be crucial for monitoring how the workflow performs.

You may discover that the workflow doesn’t perform as well as you’d hoped, and you’ll need to tweak it to get the results you wanted. For example, you might find a step in the workflow that can be handled by a machine rather than a person, like creating a weekly sales report and alerting the sales managers that the report is ready to view.

After you’ve automated a few of the simpler, less-critical processes, you’ll be ready to tackle important business processes and customer-facing workflows. Getting practice on smaller processes, or even parts of a process, can help you refine how you handle workflow automation and help you discover the best ways to collect user input, run tests, and set KPIs.

Document automation

Generating documents is a process that companies often choose to automate. They develop workflows that automate the process of creating electronic documents, using systems that collect information from users and templates to generate and assemble the document. You can use document automation and document generation to create contracts, letters of engagement, statements of work, intake forms, and more.

When you begin document automation, you generally set up a template for the document you’re going to create, like a standard contract you use with vendors. Then, you create a way to input basic information like the vendor’s name and contact information, the amount of money the contract is for, and what services or goods are being provided.

You’ll need some time to set up the templates you use for document creation, but if you’re generating these contracts often, you’ll more than make up for it in the time you save. If you’re automating something like a nondisclosure agreement, you can almost completely eliminate the need for the legal department to review each and every document, saving them a lot of time.

Document automation

Document automation also helps reduce human error; instead of having to create new documents from scratch or copy and paste, the standard document is already written and just needs a little information from users.

There are several document formats you can automate. In this chapter, we’ll cover four: Excel, Word, email, and PDF.

Excel automation

Excel automation involves using macros within a spreadsheet to automate tasks. For example, you might create a lot of reports with your Excel data — a task that can become very tedious. Automating this helps save time and prevent boredom.

Microsoft Excel already has a tool built in to create macros. Just go to the Developer tab and record a macro — this is ideal if you’re using the macro to generate a report and export the data. It’s very straightforward: Name your macro, choose a keyboard shortcut for it, and then perform the steps you want to automate.

For more complex Excel automation, you might need to program macros with VBA code or another programming language like Python. There are code libraries you can use that have macros already created and coded. All you have to do is copy and paste the code into your Excel software to create macros, with little to no need for programming knowledge.

Word document automation

Since so many business documents are first created in Microsoft Word, Word automation can help improve your workflow and save you time creating new contracts, letters of engagement, intake forms, or just about any other document in your business.

If you create standard Word templates that can be populated with data, you won’t need to create these documents from scratch. In some cases, you may even be able to automatically generate Word documents.

As with Excel automation, you can use macros for Word automation, which you set up just as you do in Excel, from the Developer tab.

You can also create custom fields in Microsoft Word that can be filled out manually; the only content in the document that’s different from the template is what’s in the custom fields.

For example, you might send out a quote to a prospective client. Using custom fields, which are available in the Properties tab, under Advanced Properties, you can create a quote template with the terms and conditions that are standard to every project, then add custom fields for the prospect’s name, contact information, the project’s scope, and the cost.

Email automation

If you’ve ever sent an email newsletter with a program like Mailchimp or Constant Contact, you’ve done a form of email automation. But there’s a lot you can do beyond newsletters. For instance, you can set up your email automation programs to send emails at specific times or when a customer or subscriber completes a particular action, like signing up to receive a downloadable e-book.

Other examples of automated emails are welcome emails, reminders that a customer hasn’t finished checking out after they’ve put items in their shopping carts, or a “drip” campaign that sends emails at specific intervals to keep a prospect thinking about your company.

The challenge is in populating the emails with data. One way to make email automation easier is to use tools that pull in data from existing customer and prospect databases, like your customer relationship management (CRM) system. You can also use forms to collect contact information and have the information routed to your email provider automatically.

PDF automation

Organizations use PDFs for several different tasks: to send documents to clients, display data in a format that can’t be easily tampered with, or turn information collected online into a professional-looking document. If you use PDF automation, you can remove repetitive steps and manual intervention — and save a lot of time.

As with Word automation, you can create PDF templates that will be populated with information automatically. For example, you might want to create a template that displays the results of an online survey. When you collect that information, you automatically send it into the template to create a new document.

Tools like JotForm’s PDF Editor offer ready-made PDF form templates and allow you to easily create your own. When someone fills out the form, a PDF is automatically generated. This is particularly useful for frequently requested documents, like standard agreements.

Document automation can save you a lot of time if you’re creating many of the same types of documents or running the same functions in them. You’ll need to invest some time creating the macros and the templates you’ll use, but it will pay off when you don’t have to spend time creating documents manually.

Top workflow automation software

This guide has covered a lot about workflow automation, everything from the different types of automation to how to automate documents. The final piece in all this is workflow automation software.

With workflow automation software, you can reduce the time you spend on these repetitive processes and manual tasks, and instead let software handle it. This will help you get more done, manage your workload, and reduce manual errors and the likelihood that something will slip through the cracks.

Top workflow automation software

The software you choose should be easy to use, cost-effective, and have the features you need to reach your business objectives. There are a lot of automation programs to choose from. You’ll need to evaluate them against your organization’s needs.

Here are five of the top workflow automation apps, along with tips on how you can integrate JotForm into your workflow.

monday.com

monday.com is known as a visual collaboration tool that helps teams work together. It pulls everything into a single hub and lets you create workflows to automate routine tasks. It offers templates for a variety of use cases, and the visual interface uses blocks to represent parts of the workflow.

The main component of monday.com models are actions. When you set up actions, you trigger something to happen when an event completes. For example, an action could be to notify someone in human resources when a potential candidate fills out a job application and submits it online.

Zapier automation

Another workflow automation app is Zapier, which moves information between web apps automatically to improve workflow. With Zapier, you can integrate different apps, like your customer relationship management (CRM) platform and lead capture forms on your website.

Zapier’s automated workflows are called “zaps.” Triggers start the workflow and an action completes the zap.

For example, you might set up a zap to download any attachments that are sent to your Gmail account into your Dropbox account. The trigger is when the email is received, and the action is the file being downloaded to Dropbox.

Asana automation

Project management is an area that can greatly benefit from automation. And one of the most popular project management apps is Asana. With Asana, you can organize, track, and manage projects. You can set up automated routines, rules, and custom templates for projects, which can help you better manage what you’re working on.

One project might be to conduct competitor research. You can create projects in Asana for each of your competitors, then use a tool like Zapier to pull information from Google alerts into Asana.

Trello automation

Trello is another project management tool that lets you set up boards for different projects. These boards use the Kanban framework to help you visualize the project, and they can be as simple or as complicated as you need them to be.

Each task is a card that you can assign to different team members and attach files to. The cards also have a checklist in each, which you can use for repeatable processes like formatting documents.

The checklists can include all the steps to complete the task and can be reused for different cards. Trello automation lets you create cards through different apps, including Slack, Zapier, and JotForm.

Trello also uses rule-based triggers to help automate tasks. For example, you can schedule actions to happen when certain conditions are met, like if a task is due in five days, the Trello card can be assigned a red label.

Airtable automation

While it looks like a spreadsheet, Airtable is actually a collaboration platform with the power of a database. It lets you define data with “bases” and “tables.” Bases are the foundations of projects, and tables are project specifics laid out in cells, rows, and columns.

You can customize your data with color coding, link records to one another, and create charts and maps. You might use Airtable to create a base for each department, like sales and HR.

Airtable automation lets you integrate with different apps and services to automate data transfer. For example, you could set up Airtable automation for your HR base to pull in employee vacation requests from forms on the company intranet.

Integrating JotForm into workflows

Since so much of what businesses do involves entering data into their systems, it makes sense to integrate JotForm as part of your workflows to capture and automatically import submission data.

JotForm can become your marketing automation tool. If someone fills out a form on your website to get more information, you can set up your form to send automatic, personalized message to the visitor.

You can also integrate JotForm with your CRM system to pull in lead generation information from your web forms. This is especially useful if you have several downloads available on your website. You can assign the leads to the sales team member who specializes in that particular product, or you can use the data you collect to generate reports.

The ultimate goal of any workflow automation software is to make your organization run more efficiently and eliminate a lot of routine manual tasks. The software should be easy enough to use so that you can create automations within the software, without needing to know a lot of code (if any). You also need the ability to create reports — ideally automatically — to measure and monitor how your workflows perform.

Some other considerations are whether or not you want to use a cloud-based or on-premises tool, as well as what you’ll be integrating the software with. For example, you don’t want to pick automation software that requires you to build a custom connector to the CRM system you use. Keep these factors in mind as you evaluate the solutions above and others.

Conclusion

Workflow automation is critical for enterprises that want to streamline their business processes and be more efficient. Automating routine, manual tasks frees up time to focus on more challenging projects, reduces the likelihood of errors, and makes it harder for things to be forgotten.

With workflow automation software, you can connect different applications to do things like populate systems with information, create documents, approve expenses, and follow up with leads automatically.

Chapter 2 of this guide covered the different types of workflow automation, which extends to a lot of departments across the enterprise. IT, finance, sales, accounting, HR, and legal teams can all benefit from workflow automation and can create workflows for a variety of tasks in each of their departments.

Easy to use workflow automation software

To do that, though, they need to set up the automation process. Chapter 3 went through the steps of setting up workflow automation, from creating a visual representation to launching the workflow. In between these steps, you’ll need to determine what your organization actually needs from automation and what solutions will work best for you.

Creating documents is incredibly common in an organization — and incredibly time-intensive if it’s done manually. That’s why Chapter 4 covered document automation, including how to automate frequently used programs like Word and Excel along with email and PDFs.

Since software ties workflow automation together, Chapter 5 examined some of the better-known workflow automation software programs, including Monday.com, Zapier, Asana, Trello, and Airtable. We also discussed how to use JotForm for workflow automation.

You’re now ready to start automating workflows, which will help you work more efficiently and remove a lot of manual, repetitive tasks from your day.

Categories: Others Tags:

Case Study: 8 Design Tips That Increased My Ecommerce Conversions By 42% 

July 23rd, 2020 No comments

When it comes to increasing sales for your ecommerce store, there are 3 levers you can pull: You can increase your average order value; You can increase the amount of traffic to your site; You can increase your conversion rate.

While all of the above are important, the cheapest, most effective way to grow your sales is by improving your conversion rate.

For most online stores, low conversion rates are typically the result of a poor design or a bad user experience. Your visitors may not resonate with the look and feel of your website or they may have problems finding the information they need in order to make a purchase.

In this post, I will walk you through the exact steps I took to increase my desktop conversion rate by 46% and my mobile conversion rate by 39% with my last site redesign. I will also show you how you can apply these same design principles to optimize the conversion rate for your own online store.

Even if your ecommerce business is already performing well, this post will help you achieve even better results.

What Is Considered A Good Ecommerce Conversion Rate?

Monitoring your conversion rate is crucial to building a profitable ecommerce business. And most analytics tools can help you measure this data out of the box.

Your conversion rate is calculated by simply dividing the number of desired actions by the number of website visitors in a given period. For example, if your website is getting 50 conversions for every 5,000 visitors, your conversion rate is 1%.

Depending on the specific type of online business you run, your conversions may include online sales, email signups, add to carts, or any other KPI you wish to measure. But in the case of an ecommerce store, your primary focus should be your purchase conversion rate.

On average, ecommerce stores have a purchase conversion rate of 1% – 2%. What’s more, experts say a good conversion rate is anywhere from 2% to 5%. This should be your baseline as you measure your online store’s success.

The Conversion Results of My Last Site Redesign

Before we dive into the nitty gritty details of how I improved my conversion rate, here are my overall results and exactly how I conducted my experiment.

First off, I run Bumblebee Linens, an ecommerce store that sells handkerchiefs online.

Because my site gets a ton of traffic from content pages that do not directly convert to sales, I measured my conversion rate based on my most predictable traffic sources.

As a result, all of my conversion data was taken from targeted PPC ad traffic sources like Google Shopping and Google Adwords. After all, my Google ads traffic is very steady and always converts at a consistent percentage.

Before I redesigned my site, the conversion rate for my ecommerce store hovered at around 3% which is above average. But the look and feel of the site was dated and desperately needed a refresh. Overall, the entire redesign took approximately 7 weeks and cost me roughly $1840.

Here are the conversion results from my updated design compared to the original:

  • Desktop conversion rates increased by 46%
  • Mobile conversion rates increased by 26%
  • Tablet conversion rates increased by 32%

The remainder of this post will highlight the specific elements of the redesign that contributed to these increases. (Note: I made all of my redesign changes live simultaneously so it’s difficult to determine which specific optimization contributed the most gains.)

8 Ecommerce Design Tips To Optimize Your Conversion Rate

If your ecommerce store is not performing as well as it should, there are many aspects of the user experience that could be negatively impacting sales. Even a seemingly innocuous design choice like your font size or the color of your buttons can have a significant impact on your overall conversion rate.

If you want to systematically improve the conversion rate for your ecommerce store, you should follow these 8 design steps.

1. Use A Consistent and Complementary Color Scheme

Use color.adobe.com to choose complementary colors when redesigning your website.

A well chosen color scheme can instantly attract a customer’s attention, evoke emotion, and drive users to take action. After all, how a customer feels about your website can be the deciding factor between completing checkout or bouncing from your shop.

A well designed ecommerce store should utilize at least 3 complementary colors that are consistently applied across every page of your website.

If you don’t have a good eye for color, you can use a free tool like color.adobe.com which will help you mix and match different colors that go well together.

For my site redesign, I wanted a modern feel so I chose teal, hot pink, and yellow for my color palette.

I also assigned each color a specific purpose on my site:

  • Teal was applied to give the site a bright, overall color for a young and hip feel;
  • Yellow was used to draw attention to marketing elements like free shipping and special offers;
  • Hot Pink was used for all action buttons on the site.

Overall, every single page of your ecommerce store should have 1 main call to action (using a bright color like hot pink) that guides a customer closer towards checkout.

For example on my front page, the hot pink button “Shop Our Personalized Collection” pops out of the page and catches a user’s attention right away. We want visitors to shop our personalized collection because our personalized products are the highest margin products in our store.

2. Simplify Your Navigation

Is your menu too complicated? Is your navbar taking up too much screen real estate?

A good rule of thumb for an ecommerce store is to minimize the number of clicks for a customer to add to cart. As a result, you should avoid nesting your product categories in more than 1 level of hierarchy.

If you have too many categories in your shop to display all at once, choose your best selling categories for your main menu and lump your less trafficked categories in a separate tab.

For my store, I decided to use a top-level, hover style drop-down menu as shown in the photo below.

Top-level navigation is one way to organize and display your product categories.

My old design utilized left hand style navigation which took up too much screen real estate. And freeing up the extra space allowed me to blow up my category and product images by 300%. With my new navigation menu, every visitor can add to cart in just three clicks: One click to find a product category; One click to view the product description; One click to add to cart.

Once you’ve designed your menu, pretend that you are a customer and try to shop on your site. Is the content easy to read? Do the important elements pop out? Can you find the information you need right away? Analyzing your site from a customer’s perspective will help you improve your users’ shopping experience.

3. Display Trust Factors On Every Page

Free shipping, easy returns, and trust are crucial to driving conversions.

Trust is the most important value you must establish with your customer.

Unless you’re Amazon or a big box store, people have likely never heard of your brand and you have to reassure them that it’s safe to buy from your store.

Due to Amazon’s influence in the ecommerce space, most customers look for 3 things when shopping at an online boutique for the first time:

  • Fast and free shipping;
  • Easy returns;
  • A way to reach customer support.

Displaying your phone number and email address is very important! Adding your store hours also helps to make your site look legit to new visitors. If you don’t have a recognizable brand, customers will want to know that they can reach a real human in case of problems or questions.

In the above image, you’ll notice that I placed my trust factors in the header, so they can be seen above the fold on every single page. We’ve also been featured on the Today show and a bunch of magazines. So I made sure to display this social proof on the bottom of every page.

Don’t hesitate to flaunt your achievements to reinforce trust.

In addition, customer testimonials provide social proof and credibility to your website. As a result, it’s important to regularly reach out to happy customers for testimonials and endorsements. On our redesigned site, you’ll find the testimonials section right below our press mentions.

Testimonials lend social proof and credibility to your website.

Remember, to generate conversions as an unknown store or brand, you first have to gain your customers’ trust. Make it easy for them to contact you or get a full refund if anything goes wrong with their purchase. By showing a genuine concern for customer satisfaction, you’ll be able to build a solid reputation over time.

4. Emphasize Your Unique Value Proposition

Users spend an average of 5.59 seconds looking at your website’s written content. And in those 5.59 seconds, you must capture their interest or else they’ll bounce from your page. Right off the bat, you must convey to a user exactly what you sell and why they should buy from your store over a competitor.

What’s more, every single page on your site should communicate your unique value proposition. A unique value proposition is a concise statement that describes what makes your business special and outlines what your store does better than anyone else. The best way to show off your unique value proposition is to use an eye-catching image alongside compelling copy.

For example, here’s the first thing a user sees on my home page above the fold:

Right away, a user is shown a large image of one of our best selling personalized handkerchiefs. And right beside that image is a clear and concise value proposition, followed by a call to action to shop in our store.

Displaying your value proposition should not be limited to your home page. We also include our unique value proposition on every category page as well. Overall, you should include your value proposition on every landing page on your website.

5. Optimize The Visual Hierarchy Of Your Product Pages

Every page on your site should have a single objective. And for your product pages, your goal is to get a customer to add to cart.

When designing a product page, you must apply a logical visual hierarchy to your design. A visual hierarchy is the order in which a user processes information on a page and in the case of a product page, there must be a clear path to your add to cart button with as few distractions as possible.

Here’s a screenshot of my old product page:

As you can see, my old product page is overwhelming. All of the design elements try to grab your attention at the same time and there are many different calls to action that blend together. To improve my product descriptions, I freshened up the color scheme and enlarged my product image by 266%. I also changed the placement of the buttons in a more logical flow.

Here’s what the redesigned product page looks like today:

By adjusting the size, color, contrast, and alignment of the page elements, I now force the customer to process my product information in a set path that leads directly to my primary call to action. For example, the hot pink color draws attention to the “Add to Cart” button over the “Reviews” button. Also, by applying a blue text color and teal background, I reassure customers that shopping with us is safe and risk free.

Overall, rearranging the design elements this way nearly doubled my add to cart percentage.

6. Simplify Your Checkout Process

With our old site design, we would regularly receive feedback from confused customers who weren’t sure if they needed an account to purchase our products.

Here’s what our old checkout page looked like:

As you can see, there are too many choices. After all, a customer doesn’t need 3 ways to checkout and the choices are a little overwhelming.

Here’s what the checkout page looks like now:

Instead of offering 3 separate options for checkout, I consolidated them all into one and added a separate Paypal option (more on this later). First off, less than 6% of customers create an account so there was no reason to offer account creation as a separate option. Furthermore, displaying a login form was causing more headaches than it was worth because the majority of customers don’t even have an account. As a result, I decided to hide the form altogether by default.

Overall, when you are designing your checkout process, keep these optimization principles in mind.

Principle #1: Remove all unnecessary elements from the page. Don’t make the customer think and hide all elements that are not frequently used.

Principle #2: Display trust logos to assure customers of a secure checkout. In the image above, you’ll find trust logos on the right-hand side of the checkout page.

7. Optimize The Checkout Process For Mobile Users

4 out of 10 mobile users abandon their carts if they have a hard time entering their personal information. People don’t like entering their contact and credit card information using a tiny keyboard. What’s more, small buttons and too many form fields drive away mobile users. 79% of smartphone users shop online with their mobile devices, which is why you should optimize for mobile.

These days, a responsive design is par for the course but you can still screw things up if you are not careful. Here’s what my checkout process looks like on a desktop:

And here’s how the checkout page looks on a mobile device:

On mobile, the user’s cart contents are collapsed so it doesn’t occupy the entire screen. Overall, here were the mobile optimizations I made to checkout:

Optimization #1: Keep Your Checkout Form Short And Sweet

A mobile user should be able to tap buttons on your checkout page without accidentally hitting another option. Also, the buttons should be large enough to tap on a mobile device.

Given the smaller screen size of a mobile phone, keep your checkout form short and sweet with no extraneous options. Also, make sure you turn off autocorrect for your form fields. Otherwise, your phone’s autocorrect feature may frustrate users when they try to enter their address. In fact, we once had a customer get so frustrated trying to type in their city on their iPhone that they called us up and complained in frustration.

To fix this, you simply need to add the following tag to all of your text input fields.

<input type="text" name="name" autocorrect="off">

And to reduce frustration, you should also turn off auto-capitalization and auto-complete by adding auto-capitalization=”off” and auto-complete=”off” to all of your forms as well:

<input type="text" name="name" autocorrect="off" auto-capitalization="off" auto-complete="off">

In addition, for phone number entry, you should always display a numeric keypad as opposed to a regular keyboard:

Optimization #2: Automatically Import Your Customer Data If Possible

The less information mobile users have to enter in, the better. Payment options like Paypal Express and Amazon Payments can simplify the checkout process. These third-party payment processors automatically fill out a customer’s billing and shipping information which reduces typing and increases conversion rates.

To offer a more convenient checkout, I implemented PayPal One Touch, which alone increased my mobile conversion rates by 31%.

Here’s a quick tip when implementing Paypal: Make sure you display the Paypal button early in the checkout process before a user has entered in their information. Otherwise, it defeats the purpose of importing their information! In the first step of my checkout process, I explain each payment option in depth.

These simple changes made a huge difference in my conversion rate. And the number of PayPal users on my site nearly doubled from 13% to 23%!

8. Add A Sense Of Urgency

Most customers like to window shop and the best way to get a visitor to take action is to create a sense of urgency.

Whenever I run a sale, a big yellow countdown timer is displayed on every page of the website.

Note: It’s important to note that we only utilize this timer when there is actually a sale going on. Otherwise, you risk desensitizing your customers or losing trust.

In addition, I also display a countdown timer on the checkout page to create a sense of urgency to complete the payment process:

These extra design elements force a customer to take action sooner rather than later.

Final thoughts

Optimizing your conversion rate is an ongoing process. And testing your results is the only way to track your improvement.

Never go with your gut and always listen to the data. After all, sometimes an ugly site can out-convert a beautiful one.

Regardless, the design tips I demonstrated above will give you a solid foundation to start with. From there, you can further improve your website and optimize your conversion rate through repeated testing and tweaks. Good luck!

Source

Categories: Designing, Others Tags:

Three Reasons Why Template Kits Will Change How We Look At WordPress

July 23rd, 2020 No comments

Dumbledore once remarked to Harry Potter that “…it is our choices that show what we truly are, far more than our abilities.”

It’s a statement that probably rings true in a number of domains, not least of which is the world of web design. Whether it’s using a website builder or getting started in WordPress, downloading plugins, testing out page builders, tinkering with Elementor templates or trying your hand at the new template kits (more on this later!), it can be an adventure as daunting as the Chamber of Secrets to work out what you should use and why.

The Word On WordPress

Among those choices is obviously WordPress, now powering more than 37% of all websites, with more than 500 sites a day being built on the world’s most popular content management system. But despite its (still growing) popularity, for many aspiring website owners, WordPress is not their first choice, as increasingly time-poor business owners and side-hustlers turn to the likes of Wix and Squarespace to get their website dreams up and running. No, the art of web development is not dead, though the renaissance in web design has led to a mini-revolution on WordPress in the form of block-based themes and builders.

New Building Blocks

Released as part of WordPress 5.0, the Gutenberg editor replaced the default ‘Classic’ editor which – alongside the rise of page builder plugins like Elementor, Beaver and Divvi – has helped usher in a new breed of WordPress web design that’s sleek, modern, creative and eye-catching.

It is in this arena that Template Kits have arrived; a bold new approach to harnessing the power of block editors and lowering the barrier to entry for aspiring WordPress web designers in the process. It’s a shakeup long expected by many in the industry that will see block-based themes and template kits continue to rise in popularity, especially with the rapid growth of the no-code/low-code movement.

Here are three key ways these kits stand out in a crowded theme marketplace:

  1. Code Free
    Template Kits bring the power of the WordPress theme design community to your site without you needing to have high-level UI or coding knowledge. The new Template Kits let you literally drag and drop your favourite pre-designed content blocks and pages straight onto your site, letting you spend more time focussing on what matters most – the content. Sure, you can still roll your sleeves up and get deep into your website’s back end, but you won’t need to worry about manually coding its aesthetic anytime soon.
  2. Endless Customisation
    Each Template Kit contains all the designs and visual elements required to get a fully functioning website up and running, with a suite of multi-page designs and content blocks allowing for endless customisation in Elementor to help designers get their dream site live quicker than ever before. Looking to put forward your best face with a glossy, on-trend portfolio site? Template Kits let you do that. Want to build the perfect yoga studio website? You can do that too. But you don’t need to stop there, as you can take any number of elements from the available kits and combine them to bring your website idea to life, or even just upgrade your existing Elementor-compatible website.
  3. Strong Foundations
    The current crop of Template Kits is well supported, with each high quality and professional design created by the Envato author community who have made ThemeForest one of the world’s number one destinations for WordPress themes and templates. Each kit is also built from the ground up to be compatible with Elementor, the leading WordPress page builder in the industry currently with more than five million active installs. And with more page builders set to be supported soon, you will soon be spoilt for choice for how to…?

A Template for Success

Having a world-class web design is now easier than ever. If nothing else, the arrival of Template Kits provides aspiring website builders and seasoned professionals with another set of tools to experiment and build with. A new golden age of web design is just beginning!


Photo by Edu Lauton on Unsplash

Categories: Others Tags:

How To Use Styled-Components In React

July 23rd, 2020 No comments
Smashing Editorial

How To Use Styled-Components In React

How To Use Styled-Components In React

Adebiyi Adedotun

2020-07-23T10:30:00+00:00
2020-07-23T19:34:23+00:00

Styled components are a CSS-in-JS tool that bridges the gap between components and styling, offering numerous features to get you up and running in styling components in a functional and reusable way. In this article, you’ll learn the basics of styled components and how to properly apply them to your React applications. You should have worked on React previously before going through this tutorial. If you’re looking for various options in styling React components, you can check out our previous post on the subject.

At the core of CSS is the capability to target any HTML element — globally — no matter its position in the DOM tree. This can be a hindrance when used with components, because components demand, to a reasonable extent, colocation (i.e. keeping assets such as states and styling) closer to where they’re used (known as localization).

In React’s own words, styled components are “visual primitives for components”, and their goal is to give us a flexible way to style components. The result is a tight coupling between components and their styles.

Note: Styled components are available both for React and React Native, and while you should definitely check out the React Native guide, our focus here will be on styled components for React.

Why Styled Components?

Apart from helping you to scope styles, styled components include the following features:

  • Automatic vendor prefixing
    You can use standard CSS properties, and styled components will add vendor prefixes should they be needed.
  • Unique class names
    Styled components are independent of each other, and you do not have to worry about their names because the library handles that for you.
  • Elimination of dead styles
    Styled components remove unused styles, even if they’re declared in your code.
  • and many more.

Installation

Installing styled components is easy. You can do it through a CDN or with a package manager such as Yarn…

yarn add styled-components

… or npm:

npm i styled-components

Our demo uses create-react-app.

Starting Out

Perhaps the first thing you’ll notice about styled components is their syntax, which can be daunting if you don’t understand the magic behind styled components. To put it briefly, styled components use JavaScript’s template literals to bridge the gap between components and styles. So, when you create a styled component, what you’re actually creating is a React component with styles. It looks like this:

import styled from "styled-components";

// Styled component named StyledButton
const StyledButton = styled.button`
  background-color: black;
  font-size: 32px;
  color: white;
`;

function Component() {
  // Use it like any other component.
  return <StyledButton> Login </StyledButton>;
}

Here, StyledButton is the styled component, and it will be rendered as an HTML button with the contained styles. styled is an internal utility method that transforms the styling from JavaScript into actual CSS.

In raw HTML and CSS, we would have this:

button {
  background-color: black;
  font-size: 32px;
  color: white;
}

<button> Login </button>

If styled components are React components, can we use props? Yes, we can.

Adapting Based on Props

Styled components are functional, so we can easily style elements dynamically. Let’s assume we have two types of buttons on our page, one with a black background, and the other blue. We do not have to create two styled components for them; we can adapt their styling based on their props.

import styled from "styled-components";

const StyledButton = styled.button`
  min-width: 200px;
  border: none;
  font-size: 18px;
  padding: 7px 10px;
  /* The resulting background color will be based on the bg props. */
  background-color: ${props => props.bg === "black" ? "black" : "blue";
`;

function Profile() {
  return (
    <div>
      <StyledButton bg="black">Button A</StyledButton>
      <StyledButton bg="blue">Button B</StyledButton>
    </div>
  )
}

Because StyledButton is a React component that accepts props, we can assign a different background color based on the existence or value of the bg prop.

You’ll notice, though, that we haven’t given our button a type. Let’s do that:

function Profile() {
  return (
    <>
      <StyledButton bg="black" type="button">
        Button A
      </StyledButton>
      <StyledButton bg="blue" type="submit" onClick={() => alert("clicked")}>
        Button B
      </StyledButton>
    </>
  );
}

Styled components can differentiate between the types of props they receive. They know that type is an HTML attribute, so they actually render , while using the bg prop in their own processing. Notice how we attached an event handler, too?

Speaking of attributes, an extended syntax lets us manage props using the attrs constructor. Check this out:

const StyledContainer = styled.section.attrs((props) => ({
  width: props.width || "100%",
  hasPadding: props.hasPadding || false,
}))`
  --container-padding: 20px;
  width: ${(props) => props.width}; // Falls back to 100%
  padding: ${(props) =>
    (props.hasPadding && "var(--container-padding)") || "none"};
`;

Notice how we don’t need a ternary when setting the width? That’s because we’ve already set a default for it with width: props.width || "100%",. Also, we used CSS custom properties because we can!

Note: If styled components are React components, and we can pass props, then can we also use states? The library’s GitHub account has an issue addressing this very matter.

Extending Styles

Let’s say you’re working on a landing page, and you’ve set your container to a certain max-width to keep things centered. You have a StyledContainer for that:

const StyledContainer = styled.section`
  max-width: 1024px;
  padding: 0 20px;
  margin: 0 auto;
`;

Then, you discover that you need a smaller container, with padding of 10 pixels on both sides, instead of 20 pixels. Your first thought might be to create another styled component, and you’d be right, but it wouldn’t take any time before you realize that you are duplicating styles.

const StyledContainer = styled.section`
  max-width: 1024px;
  padding: 0 20px;
  margin: 0 auto;
`;

const StyledSmallContainer = styled.section`
  max-width: 1024px;
  padding: 0 10px;
  margin: 0 auto;
`;

Before you go ahead and create StyledSmallContainer, like in the snippet above, let’s learn the way to reuse and inherit styles. It’s more or less like how the spread operator works:

const StyledContainer = styled.section`
  max-width: 1024px;
  padding: 0 20px;
  margin: 0 auto;
`;

// Inherit StyledContainer in StyledSmallConatiner
const StyledSmallContainer = styled(StyledContainer)`
  padding: 0 10px;
`;

function Home() {
  return (
    <StyledContainer>
      <h1>The secret is to be happy</h1>
    </StyledContainer>
  );
}

function Contact() {
  return (
    <StyledSmallContainer>
      <h1>The road goes on and on</h1>
    </StyledSmallContainer>
  );
}

In your StyledSmallContainer, you’ll get all of the styles from StyledContainer, but the padding will be overridden. Keep in mind that, ordinarily, you’ll get a section element rendered for StyledSmallContainer, because that’s what StyledContainer renders. But that doesn’t mean it’s carved in stone or unchangeable.

The “as” Polymorphic Prop

With the as polymorphic prop, you can swap the end element that gets rendered. One use case is when you inherit styles (as in the last example). If, for example, you’d prefer a div to a section for StyledSmallContainer, you can pass the as prop to your styled component with the value of your preferred element, like so:

function Home() {
  return (
    <StyledContainer>
      <h1>It's business, not personal</h1>
    </StyledContainer>
  );
}

function Contact() {
  return (
    <StyledSmallContainer as="div">
      <h1>Never dribble when you can pass</h1>
    </StyledSmallContainer>
  );
}

Now, StyledSmallContainer will be rendered as a div. You could even have a custom component as your value:

function Home() {
  return (
    <StyledContainer>
      <h1>It's business, not personal</h1>
    </StyledContainer>
  );
}

function Contact() {
  return (
    <StyledSmallContainer as={StyledContainer}>
      <h1>Never dribble when you can pass</h1>
    </StyledSmallContainer>
  );
}

Don’t take it for granted.

SCSS-Like Syntax

The CSS preprocessor Stylis enables styled components to support SCSS-like syntax, such as nesting:

const StyledProfileCard = styled.div`
  border: 1px solid black;

  > .username {
    font-size: 20px;
    color: black;
    transition: 0.2s;

    &:hover {
      color: red;
    }

    + .dob {
      color: grey;
    }
  }
`;

function ProfileCard() {
  return (
    <StyledProfileCard>
      <h1 className="username">John Doe</h1>
      <p className="dob">
        Date: <span>12th October, 2013</span>
      </p>
      <p className="gender">Male</p>
    </StyledProfileCard>
  );
}

Animation

Styled components have a keyframes helper that assists with constructing (reusable) animation keyframes. The advantage here is that the keyframes will be detached from the styled components and can be exported and reused wherever needed.

import styled, {keyframes} from "styled-components";

const slideIn = keyframes`
  from {
    opacity: 0;
  }

  to {
    opacity: 1;
  }
`;

const Toast = styled.div`
  animation: ${slideIn} 0.5s cubic-bezier(0.4, 0, 0.2, 1) both;
  border-radius: 5px;
  padding: 20px;
  position: fixed;
`;

Global Styling

While the original goal of CSS-in-JS and, by extension, styled components is scoping of styles, we can also leverage styled components’ global styling. Because we’re mostly working with scoped styles, you might think that’s an invariable factory setting, but you’d be wrong. Think about it: What really is scoping? It’s technically possible for us — in the name of global styling — to do something similar to this:

ReactDOM.render(
  <StyledApp>
    <App />
  </StyledApp>,
  document.getElementById("root")
);

But we already have a helper function — createGlobalStyle — whose sole reason for existence is global styling. So, why deny it its responsibility?

One thing we can use createGlobalStyle for is to normalize the CSS:

import {createGlobalStyle} from "styled-components";

const GlobalStyle = createGlobalStyle`
    /* Your css reset here */
`;

// Use your GlobalStyle
function App() {
  return (
    <div>
      <GlobalStyle />
      <Routes />
    </div>
  );
}

Note: Styles created with createGlobalStyle do not accept any children. Learn more in the documentation.

At this point, you might be wondering why we should bother using createGlobalStlye at all. Here are a few reasons:

  • We can’t target anything outside of the root render without it (for example, html, body, etc.).
  • createGlobalStyle injects styles but does not render any actual elements. If you look at the last example closely, you’ll notice we didn’t specify any HTML element to render. This is cool because we might not actually need the element. After all, we’re concerned with global styles. We are targeting selectors at large, not specific elements.
  • createGlobalStyle is not scoped and can be rendered anywhere in our app and will be applicable as long as it’s in the DOM. Think about the concept, not the structure.
import {createGlobalStyle} from "styled-components";

const GlobalStyle = createGlobalStyle`
  /* Your css reset here */

  .app-title {
    font-size: 40px;
  }
`;

const StyledNav = styled.nav`
    /* Your styles here */
`;

function Nav({children}) {
  return (
    <StyledNav>
      <GlobalStyle />
      {children}
    </StyledNav>
  );
}

function App() {
  return (
    <div>
      <Nav>
        <h1 className="app-title">STYLED COMPONENTS</h1>
      </Nav>
      <Main />
      <Footer />
    </div>
  );
}

If you think about the structure, then app-title should not be styled as set in GlobalStyle. But it doesn’t work that way. Wherever you choose to render your GlobalStyle, it will be injected when your component is rendered.

Be careful: createGlobalStyles will only be rendered if and when it’s in the DOM.

CSS Helper

Already we’ve seen how to adapt styles based on props. What if we wanted to go a little further? The CSS helper function helps to achieve this. Let’s assume we have two text-input fields with states: empty and active, each with a different color. We can do this:

const StyledTextField = styled.input`
  color: ${(props) => (props.isEmpty ? "none" : "black")};
`;

All’s well. Subsequently, if we need to add another state of filled, we’d have to modify our styles:

const StyledTextField = styled.input`
  color: ${(props) =>
    props.isEmpty ? "none" : props.active ? "purple" : "blue"};
`;

Now the ternary operation is growing in complexity. What if we add another state to our text-input fields later on? Or what if we want to give each state additional styles, other than color? Can you imagine cramping the styles into the ternary operation? The css helper comes in handy.

const StyledTextField = styled.input`
  width: 100%;
  height: 40px;

  ${(props) =>
    (props.empty &&
      css`
        color: none;
        backgroundcolor: white;
      `) ||
    (props.active &&
      css`
        color: black;
        backgroundcolor: whitesmoke;
      `)}
`;

What we’ve done is sort of expanded our ternary syntax to accommodate more styles, and with a more understandable and organized syntax. If the previous statement seems wrong, it’s because the code is trying to do too much. So, let’s step back and refine:

const StyledTextField = styled.input`
width: 100%;
height: 40px;

// 1. Empty state
${(props) =>
  props.empty &&
  css`
    color: none;
    backgroundcolor: white;
  `}

// 2. Active state
${(props) =>
  props.active &&
  css`
    color: black;
    backgroundcolor: whitesmoke;
  `}

// 3. Filled state
${(props) =>
  props.filled &&
  css`
    color: black;
    backgroundcolor: white;
    border: 1px solid green;
  `}
`;

Our refinement splits the styling into three different manageable and easy-to-understand chunks. It’s a win.

StyleSheetManager

Like the CSS helper, StyleSheetManager is a helper method for modifying how styles are processed. It takes certain props — like disableVendorPrefixes (you can check out the full list) — that help you opt out of vendor prefixes from its subtree.

import styled, {StyleSheetManager} from "styled-components";

const StyledCard = styled.div`
  width: 200px;
  backgroundcolor: white;
`;

const StyledNav = styled.div`
  width: calc(100% - var(--side-nav-width));
`;

function Profile() {
  return (
    <div>
      <StyledNav />
      <StyleSheetManager disableVendorPrefixes>
        <StyledCard> This is a card </StyledCard>
      </StyleSheetManager>
    </div>
  );
}

disableVendorPrefixes is passed as a prop to . So, the styled components wrapped by would be disabled, but not the ones in .

Easier Debugging

When introducing styled components to one of my colleagues, one of their complaints was that it’s hard to locate a rendered element in the DOM — or in React Developer Tools, for that matter. This is one of the drawbacks of styled components: In trying to provide unique class names, it assigns unique hashes to elements, which happen to be cryptic, but it makes the displayName readable for easier debugging.

import React from "react";
import styled from "styled-components";
import "./App.css";

const LoginButton = styled.button`
  background-color: white;
  color: black;
  border: 1px solid red;
`;

function App() {
  return (
    <div className="App">
      <LoginButton>Login</LoginButton>
    </div>
  );
}

By default, styled components render LoginButton as in the DOM, and as LoginButton in React Developer Tools, which makes debugging easier. We can toggle the displayName boolean if we don’t want this behavior. This requires a Babel configuration.

Note: In the documentation, the package babel-plugin-styled-components is specified, as well as a .babelrc configuration file. The issue with this is that, because we’re using create-react-app, we can’t configure a lot of things unless we eject. This is where Babel macros come in.

We’ll need to install babel-plugin-macros with npm or Yarn, and then create a babel-plugin-macros.config.js at the root of our application, with the content:

module.exports = {
  styledComponents: {
    displayName: true,
    fileName: false,
  },
};

With the fileName value inverted, the displayName will be prefixed with the file name for even more unique precision.

We also now need to import from the macro:

// Before
import styled from "styled-components";

// After
import styled from "styled-components/macro";

Conclusion

Now that you can programmatically compose your CSS, do not abuse the freedom. For what it’s worth, do your very best to maintain sanity in your styled components. Don’t try to compose heavy conditionals, nor suppose that every thing should be a styled component. Also, do not over-abstract by creating nascent styled components for use cases that you are only guessing are somewhere around the corner.

Further Resources

  1. Documentation, Styled Components
  2. Building a Reusable Component System with React.js and styled-components”, Lukas Gisder-Dubé
  3. Usage with Next.js
  4. Usage with Gatsby

(ks, ra, yk, al, il)

Categories: Others Tags:

How Telecom Brands Can Connect Digital Marketing with Consumers

July 23rd, 2020 No comments

In the hypercompetitive telecom industry that is constantly changing, companies are fighting for the attention of each prospective customer. While traditional marketing campaigns, tariff wars, and affordable deals still drive impressive results, many companies in the telecommunications sector have started investing heavily in their digital presence.

However, advertising your plans and promotions is not enough to grab users’ attention and build relationships with them in the long-run. To turn your target audience into an engaged fan base and loyal customers.

Here are a few tips on how to build a customer-centric digital marketing strategy for a telecom brand.

Provide Multichannel Customer Support

Exceptional customer support is critical for any telecom company. Today’s customers are tech-savvy and their expectations are constantly growing. Microsoft backs me up on that, claiming that 54% of customers globally have higher customer support expectations than they did last year.

They now use multiple online channels to communicate with brands. Therefore, they do not want to waste time listening to your “hold” music and waiting for your customer support representatives to answer. To raise customers’ satisfaction, you need to meet their needs, irrespective of the channel they use.

Start with your website.

When wanting to inform themselves about your plans and services, most customers will land on your website. This is where they should find all the details about your plans. Above all, you should let your visitors ask questions and get immediate answers without having to leave your website.

Having a detailed FAQ page is immensely important, given that 40% of consumers prefer self-service over human contact? This is exactly what Vodafone, an Australian telecommunications company, does. Namely, they provide detailed explanations about the mobile phone plans they offer and provide clear CTA buttons to guide customers towards converting. If a customer has any additional questions, there is an FAQ section at the bottom of the page, where they include customers’ most common questions and straightforward answers to them.

Including live chat on your website is also important. Do not force your customers to leave your site to connect with your customer service representatives via email. This will only discourage them from purchasing from you. Instead, let them seek help directly on your website. This is where live chat shines. It is fast, intuitive, and more personalized, providing users with better experiences.

Leverage Artificial Intelligence

When communicating with brands online, customers expect them to provide fast, relevant answers in real-time. But, what happens when your customer service representatives clock off? Well, this is exactly where chatbots step in.

Their major benefit lies in the fact that you can use them on your website, social networking channels, and apps. They will provide holistic user experiences, irrespective of the channel a customer uses.

A chatbot can help telecom companies in multiple ways and here are some of them:

  • Connecting customers with the right department. For example, a chatbot will know whether the question requires a technical consultation, a service failure, a general question about pricing plan and, based on that, find a person at your company that can help them solve that problem.
  • Responding to repetitive questions, such as ones related to pricing plans, tariff adjustments, some general setup procedures, and so forth.
  • Providing assistance with simple matters. Chatbots can provide guidance and tips for customers on how to solve some most common questions.
  • Engaging users. Chatting is easier and more pleasant than calling customer support. Chatbots engage customers through pleasant and relaxed interactions.

Collect Customers’ Feedback

In an ultra-competitive telecommunications landscape, it is important to show that you care about customers’ experiences. Precisely because of that, you should ask them for feedback and, above all, act on it.

Why is this important? Well, statistics say that 96% of dissatisfied customers will not complain to you. However, they will not buy from you either. Namely, the majority of those customers will never come back to you. Instead, they will share their negative experiences with your telecom brand both online and offline. Once negative word-of-mouth starts spreading like wildfire, you will not be able to put it out easily.

Fortunately, there are many ways to collect customer feedback.

Listen to them on social networks.

For telecom brands working with tens of thousands of customers, staying on top of your brand mentions manually is not possible. This is where social media monitoring tools like Social Mention, Mention, or Hootsuite can help you. With their help, you can track your most significant keywords and hashtags and receive notifications in real-time when someone uses them. This is one of the simplest ways to measure brand sentiment and understand what your social media followers think about you.

Take advantage of email marketing.

For instance, when a customer registers on your telecom company’s website and browses through your plans, you could send them a responder email consisting of a simple question. For example, you could ask them about the features they would like to add to your plans, what offers and deals they expect to see on your website, what their major problem with your services they have experienced so far, etc. The question should always be to-the-point and easy to understand. If you ask multiple questions, group them based on their relevance.

Act on customers’ feedback.

If customers complain that your customer support is poor, that your internet connections are slow, or that your pricing plans are too expensive for average customers, put yourself in their shoes and try to boost their experiences by addressing the problem fast. This is the only way to prove that you are listening to them and that their opinions really matter.

Use Social Proof to Build Trust

In psychology, social proof is a theory that individuals often conform to the opinions and activities of the masses. This approach plays a fundamental role in the online landscape, where customers trust online reviews and recommendations as much as their friends and families’ ones. For a telecommunications company, social proof is an amazing way to build trust with their target audiences and set themselves apart from their competitors.

There are many social proof tactics to apply.

Show real-time customer data

There are many social proof tools that will inform your customers about your recent leads and purchases. These notifications are often shown in a tiny popup at the bottom of the page and can be customized according to your brand’s specific needs and personality. Knowing how many people are already using your telecom services, customers will trust you more and be more likely to convert faster.

Encourage customer reviews

Register on all major business review platforms and get your customers to review and rate your services. You could also encourage them to review your telecom brand on your social media channels. To encourage customers to review your services, you can always consider rewarding them.

Show customer testimonials

Customer testimonials are more personal than reviews. You could show them on your website, specific landing pages promoting your plans, or on your social networks. To make them trustworthy, always include customers’ photos. Apart from traditional, textual testimonials, consider creating video ones that are more engaging and interactive.

Write case studies

Case studies explain what problems your customers faced and how you helped them solve them. Say that one of your corporate clients had struggled with employees using multiple telecom providers and covering the costs of their business-related calls before switching all accounts to your company. Your goal is to use actionable statistics and data to show how you helped them reduce costs and improve employee productivity.

Use user-generated content

Most telecom companies invest heavily in effective, emotional, and engaging visual content. However, apart from branded photos and videos, you should also encourage the creation of user-generated content and share it with your audiences. For example, you could encourage customers that purchase from you to create amazing unboxing videos and share it on their social media channels, along with your hashtag. Stackla says that almost 80% of customers purchase products because of UGC.

Create Valuable and Engaging Content across All Channels

Digital marketing should never boil down to bragging yourself about how great you are. Instead, you need to create and promote highly engaging and valuable content that will help you build and nurture strong relationships with your audiences.

For example, those could be comprehensive guides on how to choose the right mobile service provider, devices, or internet packages. Or, you could create an infographic explaining different telecom services. Interactive content types will help you gamify user experiences. For example, you could create a quiz that would ask a user about their specific needs and preferences and, based on them, recommend the right products and plans to them.

The same goes for your social networks. Promoting your plans and deals is important, but your social media marketing strategy should go far beyond that. Share valuable online content, both from your website and from relevant sites in the industry, to educate audiences and position yourself as an industry leader. Social media management tools automate the process of curating and sharing content, improve your online constancy, and save you lots of time.

Content marketing is indeed the backbone of your digital marketing campaign, so use it strategically to gain a competitive advantage.

Over to You

The telecom landscape is highly competitive. To gain a competitive advantage you need to invest heavily in a customer-oriented digital marketing strategy. Only this way will you be able to convert more customers, build relationships with them, and inspire their loyalty.


Photo by You X Ventures on Unsplash

Categories: Others Tags:

Hiring Software Developers Using Conversational Assessments

July 23rd, 2020 No comments

Identifying, attracting, and retaining great software engineering talent is a struggle that every organization faces during their recruitment process. According to the Harvard Business Review, 80% of employee turnover is a result of bad hiring decisions.

The cost of a bad hire can cost organizations at least $25,000 in monetary damages apart from the almost irrecoverable decrease in productivity and performance of teams.

Why Traditional Methods of Hiring Are Bad for Your Recruitment Process?

Traditional methods of hiring also contribute heavily to the degrading quality of hire of software engineering talents. Interviewing techniques such as administering coding tests are viewed in a negative light by the majority of job-seeking developers.

“Most engineers today hate the idea of completing a coding test, and more than 50% of the candidates straight out refuse to do status quo assessments”, says Deepti Chopra, co-founder of Adaface, in her article, Why Engineers Won’t Do Your Coding Test.

She holds the following reasons responsible for engineers to be reluctant to do traditional coding tests:

  • Testing for tricky algorithmic skills rather than on-the-job skills.
  • A candidate-unfriendly environment and a weak employer brand.
  • Coding tests are time-consuming.

Most job-seeking developers irrespective of their level of experience have voiced their concerns with coding tests, and most of their criticisms are well-founded.

By leveraging the latest technologies in artificial intelligence in tandem with developer-first hiring practices, organizations in-turn can use their developer assessment tools for a competitive advantage.

How AI-Powered Solutions Are Changing the Candidate-Screening Market?

Automated artificial intelligence systems are transforming how recruiting managers and their teams can apply an equitable hiring process throughout the recruitment funnel while reducing the time needed to hire the best talent. One of the ways in which AI-powered solutions are effective is for the screening of potential candidates. This can be done in the following ways:

  • Automated Resume Screening
    AI screening solutions can filter through resumes and CVs faster than a human can and flag the potential applicants that might be of interest. Such tools use keyword analysis to determine the best applicants from the talent pool based on the content of their resume and are usually coupled with applicant tracking systems for easier use.
  • Automated Skills Screening
    Developers aren’t necessarily good at selling their skills on CVs and resumes. Automated screening based on skills, screen candidates for the required on-the-job skills using quizzes and tasks. Skill-based screening assessments have been proven to be more accurate considering other methods, with the highest success rate of finding the right candidate-job fit.
  • Video Screening
    AI video screening platforms filter candidates by analyzing their answers and choice of words to interview questions. Physical cues such as eye movements, facial expressions, and other traits are also recorded and analyzed, which helps companies identify the best candidate for a job.

Benefits of using AI for screening candidates include:

  • Reduction in hiring costs.
  • Efficient interviews.
  • Finding the best right person-job fit.

What Are Conversational Assessments?

Consider a student working with a teacher for the first time. To better understand the boundaries of the student’s knowledge, the teacher may put forward problems to solve and then review the student’s answer. If the submitted answer is incomplete, or unsatisfactory, or completely irrelevant to the question itself, the teacher may follow-up with additional questions or hints. These additional follow up questions and hints can reveal the degree of understanding of concepts by the student. Such open-ended interactive conversations reveal more diagnostic information on the student’s domain of knowledge and the ability to apply the skills.

This is the governing idea behind Conversational Assessments or Conversation-based Assessments (CBA) wherein the interaction takes place between a candidate and an AI system. Interacting with candidates using conversations as a method to accurately assess the applicant’s knowledge and skills in order to provide an adaptive response to their input. Human-to-computer and vice versa conversations are already being used in gamified educational learning and intelligent tutoring systems.

An automated conversational assessment system can be used for skill-based screening of a pool of applicants by integrating the measurement of multiple skills within a single, customizable assessment. Traditional hiring assessment platforms have a test completion rate of almost 50% due to low interactivity, whereas conversational assessments see a completion rate of almost 86% because of a higher level of interactivity with the candidates in a candidate-friendly environment. Questions and hints for CBAs are carefully designed to provide opportunities for candidates to showcase their knowledge and skills.

CBAs are powered by AI-based conversational bots or chatbot which function by gathering candidate user data, answering their queries, providing hints during the assessment as well as testing and scoring them on relevant skills. This allows HR teams to achieve a 100% screening coverage, which if done manually is unachievable.

Key benefits of using Conversational Assessments over traditional hiring assessments include:

  • Reduction in the time required for hiring.
  • Increase in test completion rates.
  • Testing for on-the-job skills.
  • Identification of the best talent.
  • A positive increase in employer brand awareness.

Hiring Developers Using Conversational Assessments

41% of recruiting managers use some kind of talent assessment platform when it comes to hiring Software engineers. Choosing the right kind of pre-employment assessment platform can either make or break your hiring funnel.

It is shamefully true that software developers in general are bad at selling their talent and skills. AI-based conversational assessments help in engaging both active and passive candidates with the help of natural and dynamic conversations. Candidates are more open to CBAs because they are faster and feel like an interview with a Senior developer rather than just another test.

Through open-ended natural conversations, CBAs assess developers on programming skills with customizable questions of all difficulty levels. This allows recruiters to screen prospective candidates for on-the-job core technical skills (for example the SQL online test for SQL developers and Backend developers), basic skills (for example the excel test for assessing excel skills for all business-related roles) as well as soft skills. Conversational AI-based assessments along with machine learning and natural language processing abilities, have the capacity to assess candidates based on their conversation and can provide a pass or fail recommendations to the recruiters.

Such systems are also helpful for recruiting teams to gather extensive candidate insights along with a positive candidate engagement. Implementing CBAs also provides additional benefits of losing fewer potential candidates along the recruiting pipeline, making the entire hiring process more efficient.

Using Conversational Assessments for Remote Hiring

As more and more organizations are moving towards remote hiring practices, it is important for recruitment technologies to accommodate the same. Remote hiring practices include hiring remote employees (which further increases the talent pool) and/or hiring employees from the same location but completely or at least partially digitalizing the recruitment process.

Every conversational assessment — skill-based or behavioral — is conducted online. This means that candidates can now attempt hiring assessments from their preferred time zone at their own pace. Features such as online remote proctoring ensure the authenticity and validity of the assessment results.

Conclusion

AI-powered conversational assessment platforms have the potential to disrupt the HR marketplace and revolutionize the hiring process. All organizations can benefit from AI-powered solutions, provided they make the effort to maximize the pros and limit the cons.


Photo by ThisisEngineering RAEng on Unsplash

Categories: Others Tags:

Position Vertical Scrollbars on Opposite Side with CSS

July 22nd, 2020 No comments

Fair warning: I can’t say I recommend this in general because it breaks a very strong expectation of where scrollbars are, which are useful for a lots of folks, not to mention, a core accessibility feature for many.

But it is a fascinating CSS trick and the web is a big place with an unknowable magnitude of situations where sometimes weird solutions are needed.

Technique #1: Directional Trickery

The trick here is to have the scrolling parent element use direction: rtl (or the opposite of whatever your primary direction is), and have the inside of the scrolling element switch back to whatever your normal is.

CodePen Embed Fallback

Technique #2: Rotational Trickery

Messing with text direction for non text-direction purposes always feels a little scary to me, so this trick feels less hacky. The trick is to rotate the parent 180deg, and then the child back another 180deg so it’s upright again.

Because of the first rotation, the scrollbar ends up on the opposite side.

CodePen Embed Fallback

This one is especially awkward for two reasons:

  1. The scrolling element is scrolled to the bottom by default
  2. The scroll direction feels reversed with a scroll wheel. The scrollbar itself should behave somewhat as expected, but a trackpad or mouse scrollwheel will feel like the scroll direction has been reversed in that element.

More like an April Fool’s joke than something you’d really use. A viral tweet called it cursed, which, yes.


The post Position Vertical Scrollbars on Opposite Side with CSS appeared first on CSS-Tricks.

You can support CSS-Tricks by being an MVP Supporter.

Categories: Designing, Others Tags:

WordPress-Powered Landing Pages on a Totally Different Site via Cloudflare Workers

July 22nd, 2020 No comments

What if you have some content on one site and want to display that content on another site? We can do this in the browser no problem. We can fetch it, and plunk it onto the page.

Ajax, right? Ugh. Now we’re in client-side rendered site territory, which isn’t great for performance, speed, or resiliency.

What if we could fetch that content and stitch it into the main page on the server side? Server side isn’t the right word for it though. What if we could do it at the global CDN level? Do it at the edge, as they say. That’s what we’ve been doing at CodePen, so we can build pages with the lovely WordPress block editor but serve them on our main site.

Direct Link to ArticlePermalink


The post WordPress-Powered Landing Pages on a Totally Different Site via Cloudflare Workers appeared first on CSS-Tricks.

You can support CSS-Tricks by being an MVP Supporter.

Categories: Designing, Others Tags:

Reactive jQuery for Spaghetti-fied Legacy Codebases (or When You Can’t Have Nice Things)

July 22nd, 2020 No comments

I can hear you crying out now: “Why on Earth would you want to use jQuery when there are much better tools available? Madness! What sort of maniac are you?” These are reasonable questions, and I’ll answer them with a little bit of context.

In my current job, I am responsible for the care and feeding of a legacy website. It’s old. The front-end relies on jQuery, and like most old legacy systems, it’s not in the best shape. That alone isn’t the worst, but I’m working with additional constraints. For example, we’re working on a full rewrite of the system, so massive refactoring work isn’t being approved, and I’m also not permitted to add new dependencies to the existing system without a full security review, which historically can take up to a year. Effectively, jQuery is the only JavaScript library I can use, since it’s already there.

My company has only recently come to realize that front-end developers might have important skills to contribute, so the entire front end of the app was written by developers unaware of best practices, and often contemptuous of their assignment. As a result, the code quality is wildly uneven and quite poor and unidiomatic overall.

Yeah, I work in that legacy codebase: quintessential jQuery spaghetti.

Someone has to do it, and since there will always be more legacy code in the world than greenfield projects, there will always be lots of us. I don’t want your sympathy, either. Dealing with this stuff, learning to cope with front-end spaghetti on such a massive scale has made me a better, if crankier, developer.

So how do you know if you’ve got spaghetti jQuery on your hands? One reliable code smell I’ve found is a lack of the venerable old .toggle(). If you’ve managed to successfully not think about jQuery for a while, it is a library that smooths cross-browser compatibility issues while also making DOM queries and mutations incredibly easy. There’s nothing inherently wrong with that, but direct DOM manipulation can be very hard to scale if you’re not careful. The more DOM-manipulation you write, the more defensive against DOM mutation you become. Eventually, you can find yourself with an entire codebase written that way and, combined with less-than-ideal scope management, you are essentially working in an app where all of the state is in the DOM and you can never trust what state the DOM will be in when you need to make changes; changes could swoop in from anywhere in your app whether you like it or not. Your code gets more procedural, bloating things up with more explicit instructions, trying to pull all the data you need from the DOM itself and force it into the state you need it to be in.

This is why .toggle() is often the first thing to go: if you can’t be sure whether an element is visible or not, you have to use .show() and .hide() instead. I’m not saying .show() and .hide() should be Considered Harmful™, but I’ve found they’re a good indication that there might be bigger problems afoot.

What can you do to combat this? One solution my coworkers and I have found takes a hint directly from the reactive frameworks we’d rather be using: observables and state management. We’ve all found that hand-rolling state objects and event-driven update functions while treating our DOM like a one-way dataflow template leads to more predictable results that are easier to change over time.

We each approach the problem a little differently. My take on reactive jQuery is distinctly flavored like Vue drop-in and takes advantage of some “advanced” CSS.

CodePen Embed Fallback

If you check out the script, you’ll see there are two different things happening. First, we have a State object that holds all of the values for our page, and we have a big mess of events.

var State = {
  num: 0,
  firstName: "",
  lastName: "",
  titleColor: "black",
  updateState: function(key, value){
    this[key] = value;
        
    $("[data-text]").each(function(index, elem){
      var tag = $(elem).attr("data-tag");
      $(elem).text(State[tag]);
    });
    
    $("[data-color]").each(function(index, elem){
      var tag = $(elem).attr("data-tag");
      $(elem).attr("data-color", State[tag]);
    });
  }
};

I’ll admit it, I love custom HTML attributes, and I’ve applied them liberally throughout my solution. I’ve never liked how HTML classes often do double-duty as CSS hooks and JavaScript hooks, and how if you use a class for both purposes at once, you’ve introduced brittleness into your script. This problem goes away completely with HTML attributes. Classes become classes again, and the attributes become whatever metadata or styling hook I need.

If you look at the HTML, you’ll find that every element in the DOM that needs to display data has a data-tag attribute with a value that corresponds to a property in the State object that contains the data to be displayed, and an attribute with no value that describes the sort of transformation that needs to happen to the element it’s applied to. This example has two different sorts of transformations, text and color.

<h1 data-tag="titleColor" data-color>jDux is super cool!</h1>

On to the events. Every change we want to make to our data is fired by an event. In the script, you’ll find every event we’re concerned about listed with its own .on() method. Every event triggers an update method and sends two pieces of information: which property in the State object that needs to be updated, and the new value it should be set to.

$("#inc").on("click", function(){
  State.updateState("num", State.num + 1)
});

$("#dec").on("click", function(){
  State.updateState("num", State.num - 1)
});

$("#firstNameInput").on("input", function(){
  State.updateState("firstName", $(this).val() )
});

$("#lastNameInput").on("input", function(){
  State.updateState("lastName", $(this).val() )
});

$('[class^=button]').on("click", function(e) {
  State.updateState('titleColor', e.target.innerText);
});

This brings us to State.updateState(), the update function that keeps your page in sync with your state object. Every time it runs, it updates all the tagged values on the page. It’s not the most efficient thing to redo everything on the page every time, but it’s a lot simpler, and as I hope I’ve already made clear, this is an imperfect solution for an imperfect codebase.

$(document).ready(function(){
  State.updateState();
});

The first thing the update function does is update the value according to the property it receives. Then it runs the two transformations I mentioned. For text elements, it makes a list of all data-text nodes, grabs their data-tag value, and sets the text to whatever is in the tagged property. Color works a little differently, setting the data-color attribute to the value of the tagged property, and then relies on the CSS, which styles the data-color properties to show the correct style.

I’ve also added a document.ready, so we can run the update function on load and display our default values. You can pull default values from the DOM, or an AJAX call, or just load the State object with them already entered as I’ve done here.

And that’s it! All we do is keep the state in the JavaScript, observe our events, and react to changes as they happen. Simple, right?

What’s the benefit here? Working with a pattern like this maintains a single source of truth in your state object that you control, you can trust and you can enforce. If you ever lose trust that your DOM is correct, all you need to do is re-run the update function with no arguments and your values become consistent with the state object again.

Is this kind of hokey and primitive? Absolutely. Would you want to build an entire system out of this? Certainly not. If you have better tools available to you, you should use them. But if you’re in a highly restrictive legacy codebase like I am, try writing your next feature with Reactive jQuery and see if it makes your code, and your life, simpler.


The post Reactive jQuery for Spaghetti-fied Legacy Codebases (or When You Can’t Have Nice Things) appeared first on CSS-Tricks.

You can support CSS-Tricks by being an MVP Supporter.

Categories: Designing, Others Tags: