Matt Hobbs says you should hire a front-end developer because…
“A front-end developer is the best person to champion accessibility best practices in product teams.”
“80-90% of the end-user response time is spent on the front end.”
“A front-end developer takes pressure off interaction designers.”
“If you do not have a front-end developer there is a high risk that the good work the rest of the team does will not be presented to users in the best way.”
I’ve been intrigued by the morphing effect ever since I was a little kid. There’s something about a shape-shifting animation that always captures my attention. The first time I saw morphing left me wondering? “?Wow, how did they do that?” Since then, I’ve created demos and written an article about the effect.
There are a lot of options when it comes to different animation libraries that support morphing. Many of them are good and provide numerous features. Lately, I’ve been absorbed by react-spring. React-spring is a nifty physics-enabled animation library built on React. Adam Rackis recently posted a nice overview of it. The library comes with many features including, among a lot of others, SVG morphing. In fact, the beauty of react-spring lies in how it supports morphing. It allows you to do so directly in the markup where you define your SVG paths descriptors. This is good from a bookkeeping perspective. The SVG path descriptors are where you typically would expect them to be.
Here’s a video of what we’re looking into in this article:
It’s a morphing effect in an onboarding sequence. Here, it’s used as a background effect. It’s meant to complement the foreground animation; to make it stand out a bit more rather than taking over the scene.
Creating the SVG document
The first thing we want to do is to create the underlying model. Usually, once I have a clear picture of what I want to do, I create some kind of design. Most of my explorations start with a model and end with a demo. In most cases, it means creating an SVG document in my vector editor. I use Inkscape to draw my SVGs.
When I create SVG documents, I use the exact proportions. I find that it’s better to be precise. For me, it helps my perception of what I want to create when I use the same coordinate system in the vector editor as in the browser and the code editor. For example, let’s say you’re about to create a 24px ? 30px SVG icon, including padding. The best approach is to use the exact same size — an SVG document that is 24 pixels wide by 30 pixels tall. Should the proportions turn out to be wrong, then they can always be adjusted later on. SVG is forgiving in that sense. It’s scalable, no matter what you do.
The SVG document we’re creating is 256 pixels wide and 464 pixels high.
Drawing the models
When creating models, we need to think about where we place the nodes and how many nodes to use. This is important. This is where we lay the groundwork for the animation. Modeling is what morphing is all about. We have one set of nodes that transforms into another. These collections of nodes need to have the exact same number of nodes. Secondly, these sets should somehow correlate.
If the relation between the vector shapes is not carefully thought through, the animation won’t be perfect. Each and every node will affect the animation. Their position and the curvature need to be just right. For more detailed information on how nodes in SVG paths are constructed, refer to the explanation of Bézier curves on MDN.
Secondly, we need to take both shapes into account. One of the vectors may contain parts, which cannot be found in the other. Or, there may be other differences between the two models. For these cases, it can be a good idea to insert extra nodes in certain places. The best is to form strategies. Like, this corner goes there, this straight line bulges into a curve and so on.
I’ve put together a pen to illustrate what it looks like when sets correlate bad versus when accurately designed. In the below example, in the morphing effect on the left, nodes are randomly placed. The nodes that make up the number one and two have no relation. In the right example, the placement of the nodes is more carefully planned. This leads to a more coherent experience.
CodePen Embed Fallback
The first model
The line tool is what we use to draw the first vector shape. As the model we’re creating is more abstract, it’s slightly more forgiving. We still need to think about the placement and the curvature, but it allows for more sloppiness.
As for vectors and sizing, the same goes for creating the models for morphing. It’s an iterative process. If it’s not right the first time, we can always go back and adjust. It usually requires an iteration or two to make the animation shine. Here’s what the model looks like when completed.
The result is a smooth abstract SVG shape with eight nodes.
The second and third models
Once the first model is complete, it’s time to draw the second model (which we can also think of as a state). This is the shape the first set will morph into. This could be the end state, i.e., a single morphing effect. Or it could be a step on the way, like a keyframe. In the case we’re looking at, there are three steps. Again, each model must correlate to the previous one. One way to make sure the models match up is to create the second vector as a duplicate of the first. This way, we know the models have the same numbers of nodes and the same look and feel.
Be careful with the editor. Vector editors typically optimize for file size and format. It might very well make the models incompatible when saving changes. I’ve made a habit of inspecting the SVG code after saving the file. It also helps if you’re familiar with the path descriptor format. It is a bit cryptic if you’re not used to it. It could also be a good idea to disable optimization in the vector editor’s preferences.
Repeat the above process for the third shape. Copy, relocate all of the nodes, and set the third color.
Lights, camera… action!
Once the models are created, we’ve done most of the work. Now it’s time to look at the animation part. React-spring comes with a set of hooks that we can use for animation and morphing. useSpring is a perfect candidate for the effect in this example. It’s meant to be used for single animations like the one we’re creating. Here’s how to initiate animations with the useSpring hook.
The above gives us an animation property, x, to build our morphing effect around. A great thing about these animation properties is that we can alter them to create almost any kind of animation. If the value is off, we can change it through interpolation.
The second parameter, the set function, allows us to trigger updates. Below is a snippet of code showing its use. It updates the animation value x with a gesture handler useDrag from the react-use-gesture library. There are many ways in which we can trigger animations in react-spring.
We now have everything set up to combine our models, the path descriptors, with the markup. By adding the animated keyword to the JSX code, we activate react-spring’s animation system. With the interpolation call to, previously named interpolate, we convert drag distances to morphed shapes. The output array contains the models already discussed. To get them in place, we simply copy the path descriptors from the SVG file into the markup. Three different descriptors, d, from three different path elements copied from three different SVG files are now combined into one. Here’s what the JSX node looks like when powered with a react-spring animation.
Let’s look at the differences between a standard JSX path element and what we currently have. To get the morphing animation in place, we have:
added the animated keyword to make the JSX path element animate with React spring,
changed the descriptor d from a string to a React spring interpolation, and
converted the distance x to a keyframe animation between three path descriptors.
Development environment
I have yet to find the perfect development environment for working with SVG. Currently, I go back and forth between the vector editor, the IDE, and the browser. There’s a bit of copying and some redundancy involved. It’s not perfect, but it works. I have experimented a bit, in the past, with scripts that parse SVGs. I have still not found something that I can apply to all scenarios. Maybe it’s just me who got it wrong. If not, it would be great if web development with SVGs could be a bit more seamless.
But in that short amount of time, Chrome has a few new tricks up its sleeve. One of the features Umar covered was the ability to emulate certain browsing conditions including, among many, vision deficiencies like blurred vision.
Chrome 86 introduces new emulators!
Emulate missing local fonts (great for testing when a user’s device does not have an installed font)
Emulate prefers-reduced-data (to complement Chrome support for this new feature!)
Emulate inactive users (yay, no more multiple browser windows with different user accounts!)
If you wish to know about your website users in detail, cookies are the easiest way to collect users’ information.
But the privacy laws all over the world today ask every website to take consent of a user before sending any cookie. They also require you to have a well-defined cookie policy. This means you must make it clear to your visitors that you use cookies through a cookie consent notification bar. But, how to create that? This is where a WordPress cookie consent plugin comes into the picture. It helps you to make your site compliant with various cookie laws. Here, we have brought a list of the 10 most popular WordPress cookie consent plugins of the year. You can easily create a WordPress Cookie notice with these plugins.
What is a cookie?
A cookie is a small text file that a computer receives from a website through its browser and then sends it back after an interval without making any change on it. It tracks some identifiable information which the sender of the cookie may use later to remember some details about some specific users.
What is EU Cookie law and why should you follow the directive?
EU ePrivacy Directive or EU cookie law, as it is popularly known, is a European legal framework that governs the data privacy of EU residents. It came into force on 26th May 2012. It mandates all websites that deal with EU people to take permission from the users before deploying any cookies.
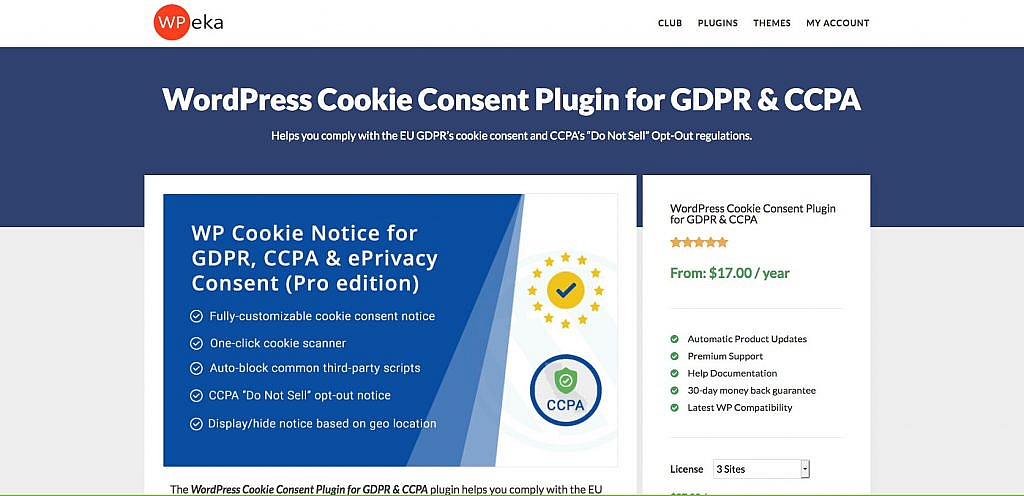
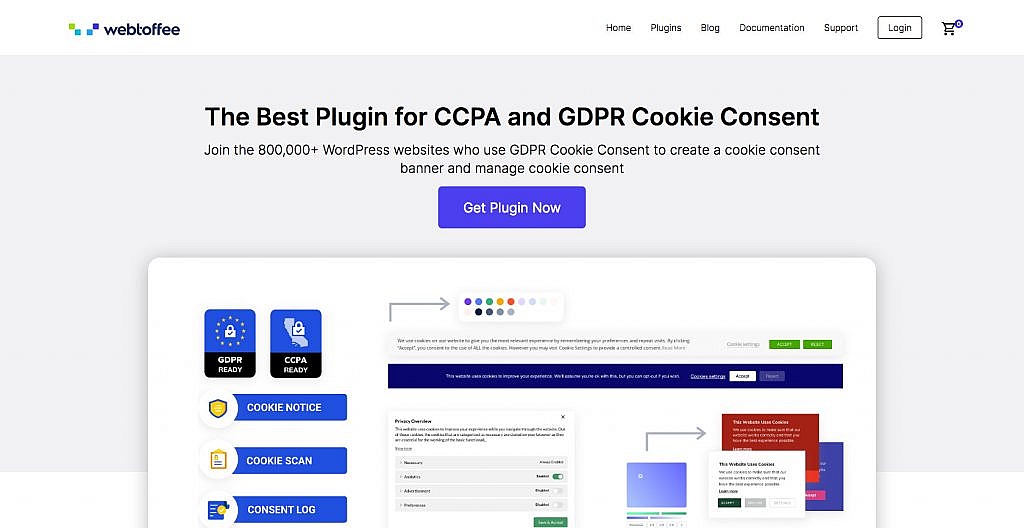
WP Legal Pages is a powerful WordPress tool to make your site compliant with EU GDPR cookie law and CCPA “Do not sell ” opt-out regulation. With this, you can generate a cookie notice bar with just a few clicks and edit cookie details manually. Users may change their consent anytime. The geo-targeting option allows you to show or hide cookie notices based on geographical regions.
Cookie Notice is a modern yet simple WordPress cookie law plugin. It allows you to manually set cookie duration, choose the message position, and block or revoke cookies. The users get the option to accept cookies when they scroll down. It is open-source and equally good for commercial and personal use.
GDPR Cookie Consent Banner is an advanced cookie plugin for WordPress to create responsive cookies. It offers you tons of customization options. You can inherit theme styles wherever you want and set the cookie duration manually. There are features to translate the cookies into five different languages.
Lucky WP Cookie Notice is a user-friendly WordPress plugin to generate cookies on your site. It comes with hundreds of rich features like cookie duration setting, show again links and caching plugin support. The plugin has “Accept” or “Reject” cookie options, unlike the other plugins that come with just “Accept Cookies” options. The plugin is well documented.
GDPR Cookie Consent is an elegant WordPress plugin to make your site compliant with EU GDPR cookie laws. It has an “Accept” or “Reject” cookie option, shortcodes to display cookies, and auto block cookies features. There are features to import or export information and cookie policy generators. You can preview your banner in the admin backend.
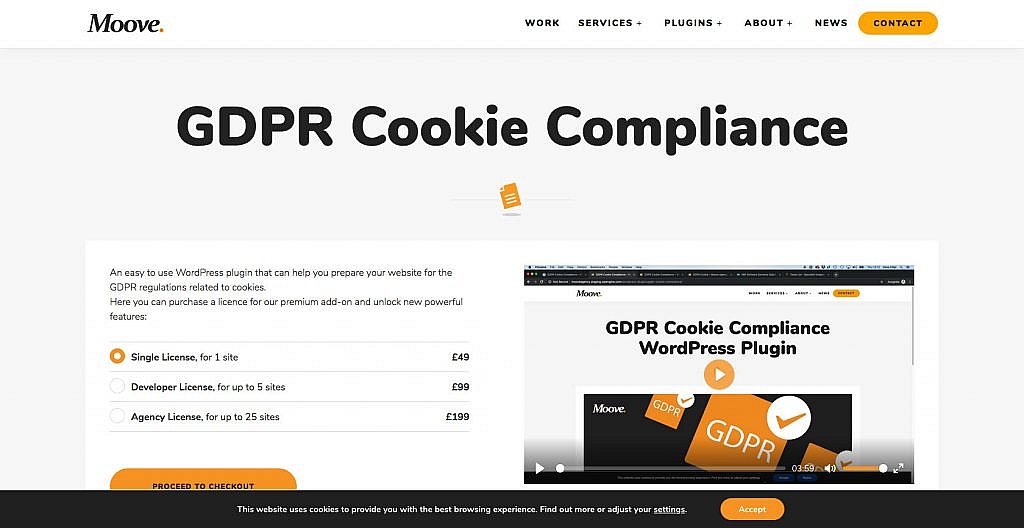
GDPR Cookie Compliance is a flexible WordPress plugin to make your website comply with GDPR, CCPA, or other privacy policy regulations in the world. It comes with a simple user interface. You can customize every single element of the cookies. There are two unique layouts and CDN based URL support. The plugin supports 11 different languages. It is available in both free and pro versions.
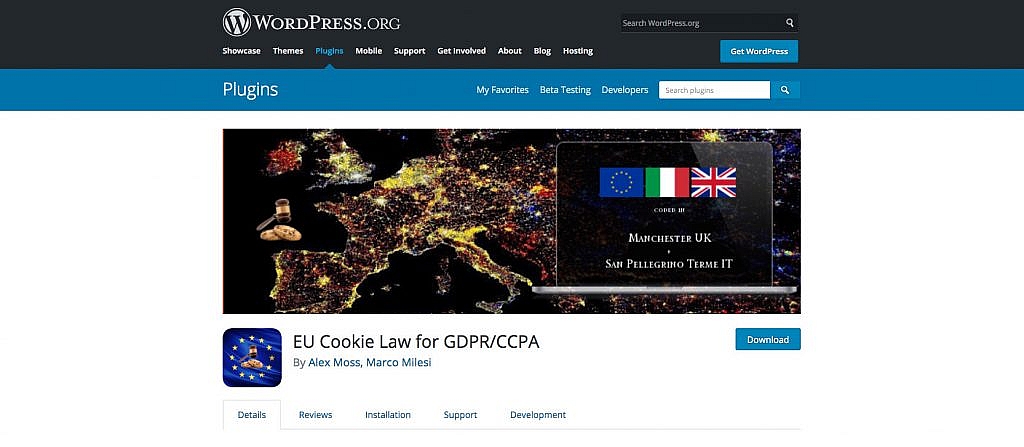
EU Cookie Law for GDPR / CCPA is a light and simple cookie plugin for WordPress. It comes with a set of shortcodes, PHP filters, and functions. You can block scripts, objects, and iFrames before cookies with overlay alert. You can set your popup, page, or custom URL for policy. The plugin is compatible with Disques and Jetpack Infinite Scrolls.
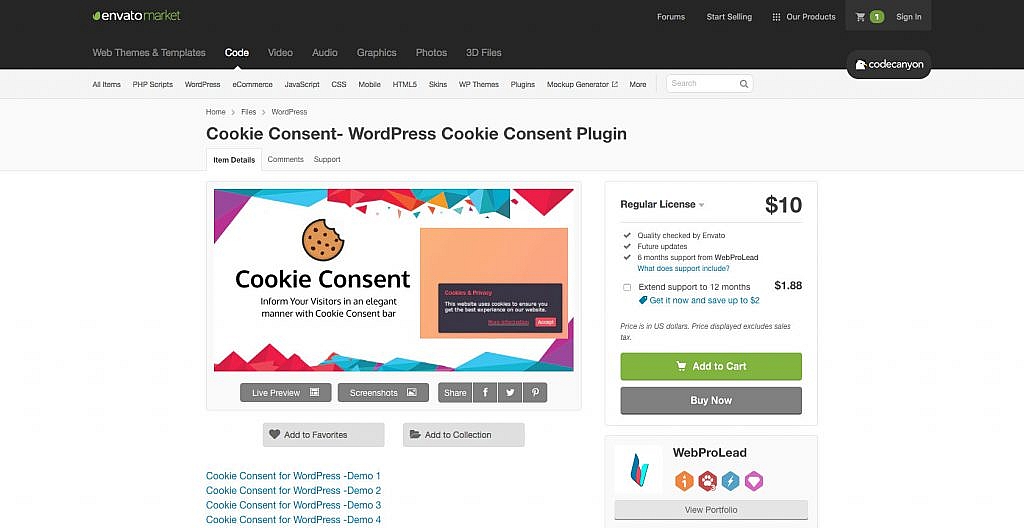
Cookie Consent is one of the most popular plugins available in the Envato market. It lets you generate cookie notices that are compatible with any WordPress theme. You can customize the look of your notices the way you want and place them either on the top or the bottom of your website. You can decide how long you will store the cookies for the visitors who give their consent. The plugin is easy to install and customize.
Cookiebot is a powerful WordPress plugin that helps you to create fully customizable and responsive cookie banners. It automatically scans and blocks all cookies on your website until your users give their consent. The plugin supports 45 languages. It is available in both free and premium versions.
Italy Cookie Choices is a simple WordPress plugin. It lets you comply with various cookie laws showing cookie notices to them only the first time they enter your site. You can block third-party scripts and add customizable button texts to your site. The plugin is compatible with W3TC and WP Super Check Fix. It is fully customizable.
Features
Customizable cookie banner
Multiple display options
Acceptance on mouse scroll
Acceptance on the second view
Translation ready
Price – It is a free plugin
Conclusion
Once you find a WordPress cookie consent plugin that matches your needs, within minutes you can make your site compliant with various privacy laws. All you need to do is to install and activate the plugin and configure it to fit your purpose. All the above-mentioned plugins are user friendly and well documented. You can pick up any of them and get started. There is no need to take help from any technical person. The exclusive documentation will guide you in the right direction.
If you liked the article, please share it on Twitter and Facebook. Leave your comment in the comment section below. Your feedback is valuable to us. If there is any query, never hesitate to let us know. We will get back to you soon.
State management is an integral part of developing JavaScript applications especially React and React Native applications. In this tutorial, we are going to learn how to use the MobX library for state management; understand the core concepts, some use cases and build a simple example.
Note:Basic knowledge of Javascript and React Native will be of great benefit as you work through this tutorial.
Using MobX In React Applications
State is the data that your component(s) is working with — it holds the data that a component requires and it dictates what a component renders. State management is the process of managing how the state gets updated and passed from one component to another. Monitoring and working with data in an application can be difficult and that’s the need for state management libraries. Handling all the data for your application can be a little daunting especially when your application grows in size and complexity, building your own state management tool is not just time-consuming but difficult, This is why you might want to use a state management library.
However, it is important to know that state isn’t the only data that a component renders, components can also render props passed down to it.
Although these state managers each have their advantages and disadvantages, I personally recommend MobX because of its simplicity, minimal boilerplate code — it doesn’t require you change your code, this is because in its core, MobX is and looks like JavaScript; you don’t need a change of architecture to support it (unlike Redux and to a lesser extent Context).
In fact it’s such an invisible abstraction that in many cases if you take out all of the MobX code — the @observable, @computed, @action and observer decorators, your code will work exactly the same (though it’ll have some performance issues) and it’s not limited to a global state. These are some reasons to go forward with MobX as a state manager of choice for your React Native applications.
Although it’s also important to note some issues with using MobX as a state manager, some of which include its avoidance of rules on how to implement it and MobX can be difficult to debug especially when you change state directly in a component without using the @actions parameter.
What Is MobX?
According to the official documentation, MobX is a battle-tested library that makes state management simple and scalable by transparently applying functional reactive programming. MobX treats your application like a spreadsheet. The logic is that Anything that can be derived from the application state, should be done automatically.
MobX differentiates itself from other state managers with the following concepts.
1. State
State is the data your application holds — it’s roughly the entire contents of its memory. This also applies to your components.
2. Derivations
In MobX, anything that can be derived from the state without interactions is a derivation. Examples of derivations include:
User interface,
Backend add-ons such as changes to a server.
MobX has two mains types of derivations:
Computed values
Computed values are mostly values that can be derived from a current state using pure functions.
Reactions
Reactions in derivations are side effects that happen as a results of changes in your application state. They are similar to a computed value, but instead of producing a new value, a reaction produces a side effect for things like printing to the console, making network requests, incrementally updating the React component tree to patch the DOM, and so on.
A golden rule when using MobX is that when creating a value based on the current state, use a computed value.
3. Actions
Unlike derivations, actions are code that cause changes to an application state — code that changes the state. They are anything that modifies the state. With MobX you can make it explicit in your code, Actions are mostly user events such as inputs, backend data pushes or even scheduled events.
To better understand Actions, let’s look at an example from the MobX documentation.
class Ticker {
    @observable tick = 0

    @action
    increment() {
        this.tick++ // 'this' will always be correct
    }
}

const ticker = new Ticker()
setInterval(ticker.increment, 1000)
Here, we set an @observable tick with an initial value of 0. Next, we created a function increment that is also an action that updates the initial value once a tick is made every second.
Observables In MobX
Observables or observable values in MobX are mostly JavaScript primitives, plain objects, classes, arrays and maps. They’re mostly used by first declaring an observable and adding a value to it and then calling it by adding an @observable as shown below:
  observable(value)
 @observable classProperty = value
Store Architecture Approach In MobX
MobX principal architecture includes parts and ideas such as services, store, view models and containers — some of which are explained below.
Service
This is usually a function called from a container; they can be used to get data from APIs and be added to the store.
Store
As the name implies, this is the central place of the state used by an application. Usually in MobX, these include the observables, variables, actions and computed properties.
Container
This calls service and puts data from View Model to View Component as React props (should be marked with @observer decorator).
MobX In React And Native Applications
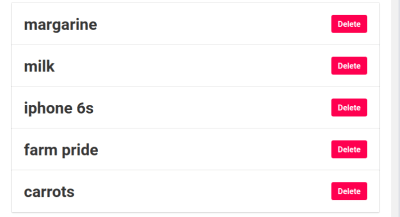
For learning purposes, in this tutorial, we are going to build a simple list app that will allow a user to add, view, and delete list items. We will be using MobX as a state manager in this application to add lists, update and delete them from the app state. However, it’s important to note that you already understand the basic concepts of JavaScript and React.
Without further ado, let’s start!
Setting Up Your Environment
Now that we know how what MobX is and how it works, let me walk you through setting up your project.
First, let’s create a project with the following, write the following code on your terminal to initialise a project:
npx create-react-app listapp
The above code will create a bare React application using the create-react-app package. Move into the project directory:
cd listapp
For this app, we will need three components:
TitleInput
This will contain the title for our project and an input form for adding lists.
List
This will be an input form that would allow a user to add a list. It will have an add button to add our list items.
ListsDisplay
This component will display all of the user list items and also a delete button that’s automatically generated when a user adds a list item.
We will use a Store.js to contain the app state and methods to modify it similar to Redux. Let’s outline what they will be used for.
mobx
This is the state manager we will be using for this project.
mobx-react
This is the official React bindings for MobX.
bootstrap
We will be using bootstrap version 4.5 to style our project.
uuid
This is used to automatically create keys for deleting lists.
Having done that, let’s go ahead and install these packages. I will be installing them with an npm alternative done in yarn:
yarn add mobx mobx-react bootstrap@4.5.0 uuid
Once the packages are installed, we will start our app in development mode by running the code below in our terminal:
yarn start
Setting Up Our App Store
Let’s create a store for our project. First, create a file in the root directory of our project called ListStore, this will be the central location of our app state.
For this app, we will need to create a ListStore in order not to repeat ourselves when we use it in other app components.
/*** src/Store.js ***/

import { observable, action, computed } from "mobx";
import { v4 } from "uuid";

export class List {
  @observable value
  @observable done

  constructor (value) {
    this.id = v4()
    this.value = value
  }
}

export class ListStore {
  @observable lists = []
  @observable filter = ""
  @action addList = (value) => {
    this.lists.push(new List(value))
  }

  @action deleteList = (list) => {
    this.lists = this.lists.filter(t => t !== list)
  }
  @computed get filteredLists () {
    const matchCase = new RegExp(this.filter, "i")
    return this.lists.filter(list=> !this.filter || matchCase.test(list.value))
  }
}
In the code above, we imported three functions from mobx.
observable
This holds a variable which can be updated in the event of a change in state.
action
Used to modify the application state.
computed
Values that can be derived from the existing state or other computed values, it changes after a state gets modified.
The class List has two object values which are done and value which will hold the initial state of the app and the modification in the case of changes.
We want our new list to automatically create a key so that we can automatically get a delete button once a list is created, Here uuid is used to automatically create keys in our application.
Next, we added an addList function that will add lists when clicked by using the .push() method to push the list in the array we already created in the @observable lists array.
The deleteList function accepts List as a property which is supposed to be the item the user wants to remove. Then we set the value of this.Lists to a new array after we have removed the selected item.
Both addLists and deleteList are actions because they modify the state of our app when changes are made.
Initializing The MobX Store
Next on our list is to import our store in our App.js and use it in our project.
import React from 'react';
import Navbar from "./components/navbar";
import ListDisplay from "./components/ListDisplay";
import {ListStore} from './ListStore';
function App() {
  const store = new ListStore()
  return (
    <div>
      <Navbar store={store}/>
      <ListDisplay store={store}/>
    </div>
  );
}
export default App;
Here we imported the TitleInput and ListDisplay components. Then we initialized the store in our App.js in order to be able to pass it as props to the TitleInput and ListDisplay components.
Normally this will throw an error because we’ve not worked on the other components, so let’s do that. Let’s build out the ListDisplay component.
ListDisplay
This component displays all of our added lists and also automatically generates a delete button once a new list is added.
import React from 'react'

import List from "./List";
import { observer } from 'mobx-react';

function ListDisplay(props) {
  const { deleteList, filteredLists } = props.store

  return (
    <div>
        <div className="container">
          {filteredLists.map(list => (
            <List key={list.id}
              list={list}
                deleteList={deleteList}
            />
          ))}
        </div>
    </div>
  )
}
export default observer(ListDisplay)
For this component, we created a function ListDisplay and made it an observer, we also destructure the list and deletelist functions from the store, by doing this, we made it easier to pass then as object props.
Next, we map through filteredLists to return the lists, which we then use in building the individual list by passing the returned item as props to the List component.
Once done, our component should look like this with lists added:
Lists displayed by `ListDisplay` component. (Large preview)
Next is to add a List and TitleInput components.
List Component
Just like our other components, our List component will export the list as an observer in order to help the store watch it for changes.
I used the bootstrap to create cards in the first set of divs and also align the delete icon to move towards the right-hand side of the app. First, we created a card component to handle our list and then we created a button tag for the delete button that will accept two objects of this and pass a prop to the list, this will on click, will remove the selected list item from the lists in the page.
A single list component with the delete button. (Large preview)
Next is to our TitleInput which will contain our input form for adding lists and the title for the project.
TitleInput
Similar to our other projects, we will be adding an @observer function so that the component will be able to accept props from the app Store.
First, we initialized an initial state. Using React Hooks, we added an initial state called values which we set to an empty string. We use this to hold the value of what is entered in the input field. To know more about React Hooks, you can check out this article by David Abiodun.
Then we called an object for adding lists to the store addList and passed it as props from the app store.
Next we created a function preparedAddList to accept an event object for the input forms, we also added a button for adding the lists manually on click.
Almost done, we need to restart our project server by running:
We are now done with all of our app components, so let’s assemble it in our App.js. To do that, we need to import our components titleInput and ListDisplay. We also need to import our store from the Store component.
In order for MobX to work in our App, we need to pass the MobX store as props in our App and individual components so that they get the properties and functions in the store.
import React from 'react';
import Navbar from "./components/navbar";
import ListDisplay from "./components/ListDisplay";
import {ListStore} from './ListStore';
function App() {
  const store = new ListStore()
  return (
    <div>
      <Navbar store={store}/>
      <ListDisplay store={store}/>
    </div>
  );
}
export default App;
MobX is a great state manager especially for React-based applications, building our list app, we’ve learned the basic concepts of MobX, state, derivations, and actions. A working version of this app can be found here:
You can take this further by using MobX in the next application you build that involves the management of state. I’d love to see what new things you come up with. You can read more on MobX and state management applications in the references below.
It’s no secret that having a custom domain name is an essential piece of any company’s branding strategy. While there are a myriad of hosting plans available that offer domains like your company.webhost.com, making the shift from one of those to simply yourcompany.com is an important step.
However, your domain branding strategy need not end there. Domain mapping offers an opportunity for web developers and online business owners the ability to improve their marketing campaigns, protect their brands from competitors, cut down on costs, and develop a more efficient workflow.
What is Domain Mapping?
Domain mapping refers to how visitors to your website are directed to different domains and subdomains and what URLs will be displayed in the visitors’ browsers.
When you first set up your online business, one of the very first things that you do is register a domain name for your company website. But depending on the business, it could be wiser to actually register multiple domain names at once. This is because you will want to lease the primary domain name you plan on using in addition to all related TLDs. This way, cybersquatters will not be able to hold your domain name hostage, especially once you have grown into a more established brand.
For example, if you register the name yourcompany.com, you might also want to register yourcompany.net and yourcompany.org. Then you might set up a URL redirect so that visitors to the latter two sites will be redirected to yourcompany.com. However, with a domain redirect, visitors to yourcompany.net and yourcompany.org will be redirected to yourcompany.com, meaning the URL in their browser will appear as yourcompany.com no matter what they typed.
With domain mapping, this isn’t the case. A visitor to yourcompany.net will still see that URL in their browser even if the content is actually being hosted on yourcompany.com.
Benefits of Domain Mapping
Although domain mapping may seem a bit esoteric and complex at first, it serves several purposes and offers many benefits:
1. Make Web Addresses Easier to Remember
Imagine that your restaurant chain, Larry’s Lunches, just opened a new chain on 116th Street in New York City. Your first instinct may be to direct customers to larryslunches.com/116thstnyc, but that domain is a bit long and hard to remember. Instead, you might want to register the domain larrys116th.com for customers for that specific store.
With domain mapping, you can serve up the content from your main domain, larryslunches.com, while still having your visitors see larrys116th.com. This makes it easier to brand your sites without having to manage several different sites.
2. Boost Your Web Development Career
If you are a web developer yourself but are not admittedly well-acquainted with domain mapping already, you would do well to change that.
One of the easiest ways would be to look at online web development programs that one can take to read through documentation to get caught up to speed on how domain mapping can help their efforts and how to implement it. These kinds of programs can be more comprehensive than university courses and offer an impressive 88% job success rate for those who successfully complete the programs.
3. Shield Your Brand from Competitors
Remember, it’s a good idea to purchase several different related domains in anticipation of competitors snatching them up from you. Choosing the right domain names is essential to protecting your brand.
For example, Larry’s Lunches might want to snag larrysnyclunches.com and larrysfamouslunches.com as well. However, simply leaving those domains parked can be a bit of a waste, and managing multiple domains can be a pain in and of itself.
But with domain mapping, you can manage those domains just as easily as if they were your primary site, so you no longer need to leave them empty.
4. Save Time and Lower Development Expenses
Development isn’t cheap, and time is money. While the maintenance costs for a website are already high enough, adding in separate domains can sometimes break the bank due to the increased complexity of managing so many different moving pieces.
Domain mapping can lower expenses and save time by keeping everything tidy and in one place. By managing everything from a single WordPress installation, for example, you can push updates to all your subdomains at once, saving you from the tedium of going through each domain and making the same updates.
5. Manage Client Sites from One Place
If you’re a freelance developer or run an agency, using domain mapping for some of your clients’ sites can save you time as well. For example, if several clients want blogs, and you use the same infrastructure for them, you can easily push updates and changes to all of them at the same time. In short, domain mapping can make maintaining sites much easier and quicker.
How to Implement Domain Mapping
If you’re sold on the benefits of domain mapping, here’s a quick primer on the steps you’ll need to take to get started:
Choose a domain registrar: The ideal registrar you choose should come with a number of important features including adequate hosting for keeping your website visitor friendly, SSL certification to ensure security, 24/7 customer support, comprehensive packages that make it easy to operate your online business.
Register the domains you’re interested in: These can either be domain misspells (otherwise known as typosquatting), like youcompany.com, yourcmpany.com, etc, or related domains like yournewproduct.com, yournewlocation.com, etc. Whatever you decide to go with, you’ll need to have it registered before you can get started.
Install WordPress Multisite: WordPress is one of the easiest ways to develop websites, and that holds true for domain mapped sites as well. Plus, considering WordPress sites account for over a third of the entire internet, you can’t go wrong with the famed CMS. All you need to do is install WordPress and, once that’s installed, open wp-config.php and add define(‘WP_ALLOW_MULTISITE’, true) above the /*.
Configure your DNS settings: Next, you’ll need to point all your name servers to your hosting account. These changes can take up to 72 hours to go into effect.
Add domains to your hosting plan: From your hosting platform, you’ll need to link your custom domains. You can usually do this from your cPanel.
Map subsites to your custom domains: Once you have your domains set up, you’ll need to link them through WordPress. To do so, simply login and navigate to Sites -> Add New. After you assign them a subdomain or subdirectory name, you can click Edit and add your custom domain. Then just hit Save Changes, and you’re good to go.
Take note that domain mapping is not necessary for transferring a domain name. When you map a domain, you’re simply telling your domain where it can find your website on the internet through having your name servers updated. When you change your name, it only affects where the domain has been resolved.
The Bottom Line
While domain mapping isn’t necessary for all websites, it can still be a major timesaver. By utilizing it properly, you can greatly improve the standing of your online business by saving time and money, making website management easier, and improving the branding of your sites.
Largely thanks to social media, video content has surged in popularity over the last few years with 85% of all internet users in the United States watching online video content on a regular basis.
With audiences watching more video content than ever before, video is taking the place of traditional marketing tactics we’ve become accustomed to. Video has emerged to be an effective and powerful way to inform, entertain, and engage customers regardless of your business, industry, or audience.
That said, video is now must-have content for any marketing strategy — including affiliate marketing.
In this article, we’ll explain how to use video for affiliate marketing. This includes the benefits of using video, the different types of video content, where to promote this content, and tips for getting started.
What is affiliate marketing?
Affiliate marketing is a marketing strategy involving individuals promoting your business and referring potential customers in exchange for a commission.
There are two sides to affiliate marketing: affiliates and the brands.
Affiliates
Affiliates can be existing customers, bloggers, influencers, industry experts, etc. They will promote your business using referral links and discount codes to send traffic to your site. They earn a commission if their referrals become paying customers.
Brands
Brands will use affiliate marketing to promote their products and services. This includes managing their affiliate program, providing affiliates with tracking links to their site, and paying commissions.
Let’s use the beauty industry as an example of how affiliate marketing works:
A brand selling makeup starts an affiliate program to promote their products. They partner with beauty bloggers and Instagram influencers to become affiliates for their brand.
These affiliates create video content featuring makeup routines and different looks using the brand’s products, then they will include a link to the site where audiences can purchase everything used in their video. Whenever someone uses this link and completes a purchase, the affiliate earns a commission of the sale.
This is a win-win for both the affiliates and brands.
Affiliates are able to earn money from their content creation and promoting products they love. Brands are able to reach targeted audiences using unique, authentic content to promote their products. On top of that, the pay-for-performance model makes it a risk-free, cost-effective marketing strategy.
Benefits of Using Video for Affiliate Marketing
As we said before, video is growing in popularity and is now one of the most effective ways for businesses to reach their target audiences.
With video becoming the content of choice, there’s plenty of advantages to using video for affiliate marketing efforts. Here’s some of the key benefits:
Expand your Audience
With the growing popularity of video, it’s predicted that 82% of internet traffic will come from video streaming in just a few years. This means that without video your business would miss out on reaching large audiences.
On top of that, people are twice as likely to share video content with their friends than any other type of content which provides another opportunity to reach new audiences.
Create More Engaging Content
Video gives affiliates the opportunity to showcase products and services in a way that text and images cannot. It can show a product in action, tell a story, and entertain audiences. And this type of engaging content is exactly what consumers are looking for, with 96% saying they’ve watched an explainer video to learn more about a product or service.
Improve SEO Efforts
Having video content will help with SEO in a few ways, including: building quality backlinks, increasing click-through rates, and boosting your credibility to search engines.
Next to that, YouTube is the second largest search engine (after Google, it’s parent company) with over 2 billion users.
Reach a Growing Number of Mobile Users
Of all minutes watched on YouTube, 40% is on smartphones. Mobile-friendly video content is an effective way to target the growing number of mobile users, particularly those in the 18-34 year old demographic. Moreover, watching videos on mobile devices is found to have less distractions than watching videos on TV so audiences can zone in on your promotion.
Types of Video Content
Not constrained by text limits or ad space, video content offers a new way to showcase products and services. This could be everything from 10-second viral sensations on TikTok, to million-subscriber videos on YouTube, or even a branded video included in a blog post.
Here are common types of video content that can be used for affiliate promotions.
Promotional Videos
Promotional videos give an overview of the brand — sharing with audiences who they are, what they sell, and how their business can help customers. These videos can include anything from short 2-minute explainer videos, all the way to long-form branded videos that tell the story of the business, their mission, and their values.
Generally, these videos will be created by the brands themselves and shared with the affiliates they’ve partnered with to be used in their promotions.
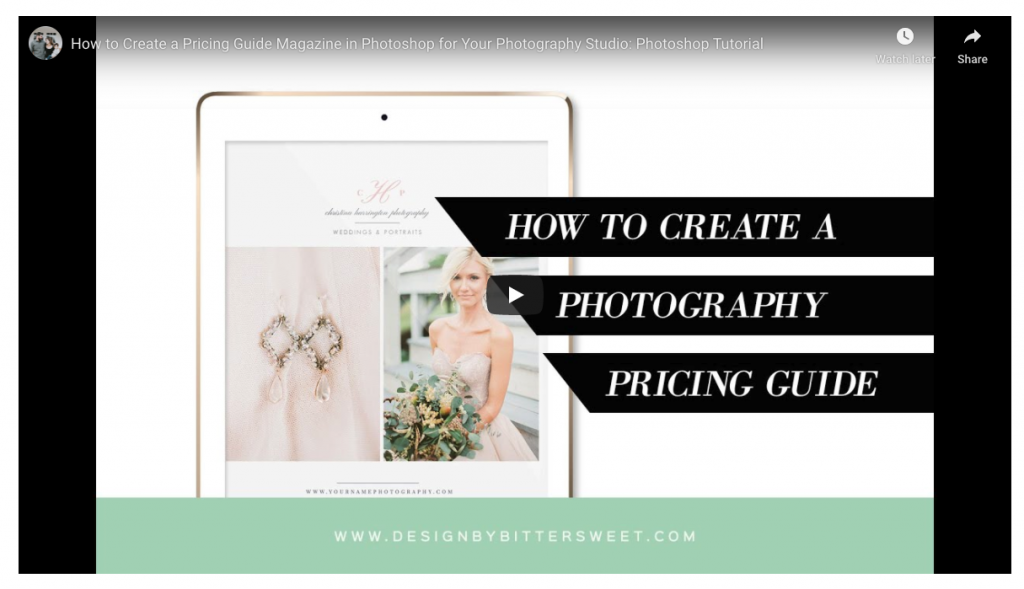
Tutorials and “How-To”
Tutorial videos show the product in action for audiences to see firsthand. These videos are particularly useful as 90% of people say that product videos are helpful in the buying process.
You’ll typically see these videos titled “How To.”. For example, an affiliate for Adobe could create a video “How to Use Adobe Photoshop” with content that takes audiences step-by-step through the basics of the software.
“How-to” videos are key to standing out, in fact, these videos earn the most attention of any content category on YouTube.
Shopping Haul and Unboxing Videos
Popular on YouTube and among younger generations, these types of videos are excellent promotions for e-commerce brands.
The videos focus around affiliates showing off their new purchase — whether that be by unboxing what arrived in the mail or emptying their bags from a shopping trip. It’s a way to share thoughts and feelings about what they just bought, as if they were talking to a friend or having a fashion show in the living room.
This content can also include information about pricing, discounts, favorability, ease-of-use, etc.
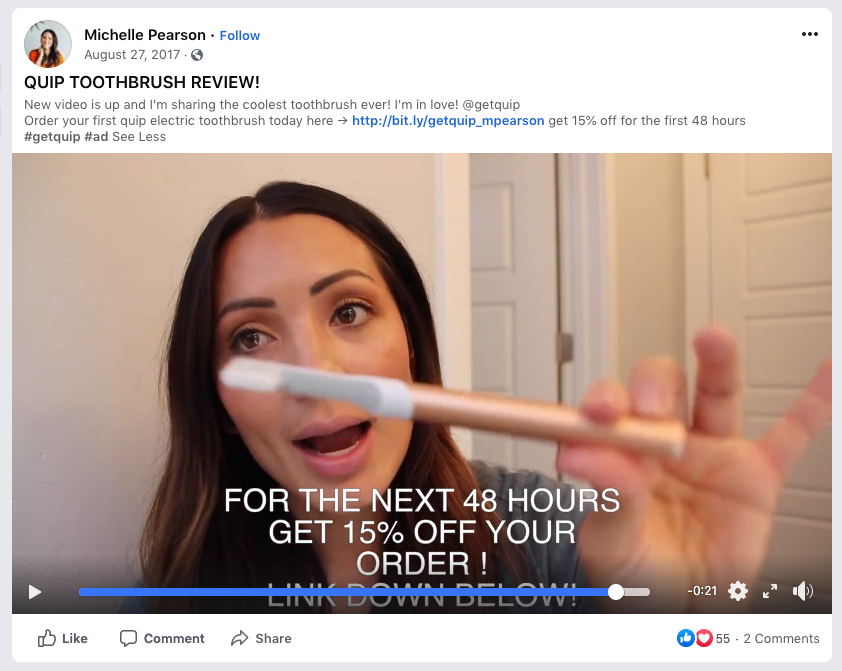
Product Reviews
Affiliates share their experience with a product, giving an in-depth analysis and telling audiences what they loved about it. Like tutorials, these videos are extremely helpful in the buying process. So much so, that 97% of consumers say online reviews impact their purchasing decisions.
This can also include “Best Of” videos where the product is displayed alongside competitors and showcasing the product as one of the best on the market.
Testimonials
Much like product reviews, what your customers have to say matters. Testimonials go a step further, providing insight to not only the product but the overall customer experience.
These videos can cover topics such as:
Why did you need this product?
Why did you choose our product over others?
What results or outcomes did you see?
How have you benefited?
Why have you chosen to stay a customer?
Events
Showcase the brand beyond just their products or services. These videos can give insight into the company culture, initiatives, and FOMO-worthy events including:
New Product launches
Live-streamed events
Behind-the-scenes vlogs
Q&A Sessions
A great example of this comes from the fashion retailer Revolve. Every year, Revolve hosts the insta-worthy event of the year that combines fashion, influencers, and social media. The event is live-streamed and shared across multiple platforms, giving audiences a look into the lifestyle that comes with the Revolve brand.
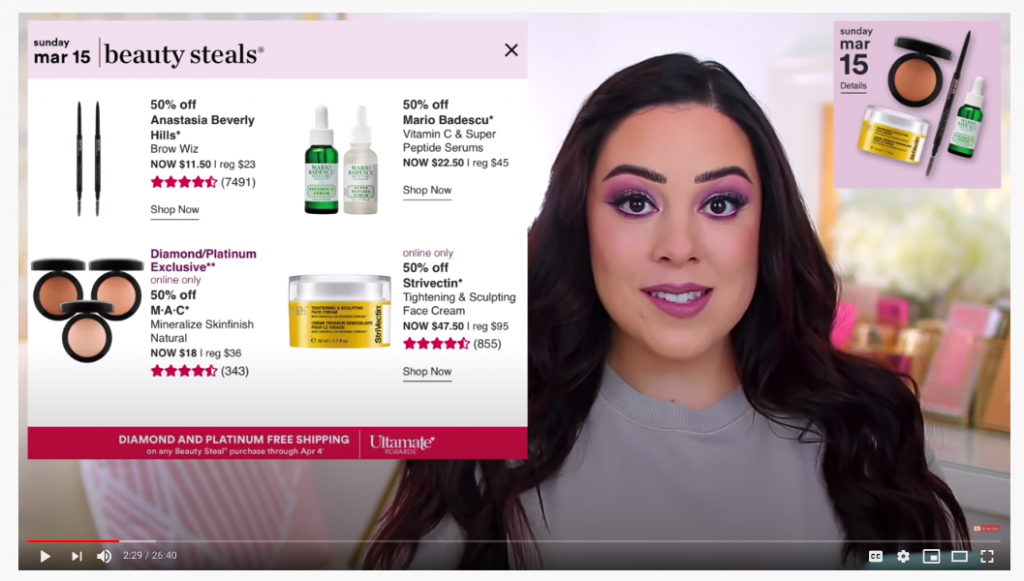
Holidays and Sales
Highlight specific holiday sales and promotional events. These videos are a great way to generate interest and excitement around the time, and spread awareness on social media.
Popular videos for this include gift guides, wish lists, or what to buy content. For example, beauty bloggers often promote cosmetic retailer Ulta’s 21-Days of Beauty with videos covering what to buy, reviews, and links to the products.
Where to Promote
You’ll want to make sure your video content reaches your target audiences. Much like the versatile types of video content, there’s plenty of places to promote video content.
YouTube
Start with the social channels, primarily YouTube.
As we mentioned before, YouTube’s massive audience makes the platform an ideal starting point. And YouTube is a fitting platform for virtually any type of video content that we listed above.
Along with the video, affiliates can use the platform’s description feature to optimize their promotions — this includes a brief introduction about the video’s content and places the affiliate referral link within the first three lines above the “show more” tab. Additionally, the description should include more in-depth text that strategically uses keywords for SEO.
Additional Social Channels
From there, also consider social sites like Facebook, Vimeo, Twitter, Instagram, and Tik-Tok.
Facebook is a great way for videos to be shared and re-shared, especially among niche groups. Also, take advantage of Facebook Live to actively engage with audiences on a more regular basis. Going live is great for event videos such as behind-the-scenes or Q&A content.
Instagram and Tik-Tok can be used for shorter video content, particularly aimed at younger audiences. On Instagram, video can be used several ways including in the main content feed, on IGTV, on stories (including the Swipe Up feature), on Instagram Live, and now through Reels. Tik-Tok can also be used for similar short content, and given their advanced algorithm affiliates will be able to better reach niche audiences.
Blogs and Websites
In addition to the social channels, video is great content for blogs and websites.
For affiliates, video can accompany a blog post or be standalone content. For example, a food blogger could create a recipe video using select kitchen appliances. Then, in their blog they can highlight each of the appliances they used in the video and include affiliate links for where to buy the products.
For brands, video can be a powerful way to convert traffic into paying customers. One study found that nearly eight out of every ten users purchased a piece of software or app after having watched the brand’s video. That said, video can be used in referral landing pages and on homepages.
Getting Started
Whether you’re an affiliate or a brand, now is the time to start using video.
As an affiliate, you can get started by adding video to your existing content. This can include starting a YouTube channel, mastering video editing skills, or simply recording an Instagram story. Then, you can begin partnering with brands as an affiliate and promoting their products.
Then for brands, seek out affiliate partners that specialize in video and have the skills to create worthwhile, compelling content. Prepare a branding kit that will help affiliates during content creation, or even consider making your own videos to add to your affiliate marketing assets.
Keep in mind that there’s a lot of work that goes into creating great video content, so be diligent and proactive as you get started.
The video game Doom famously would flash the screen red when you were hit. Chris Johnson not only took that idea, but incorporated a bunch of the UI from Doom into this tounge-in-cheek JavaScript library called Doom Scroller. Get it? Like, doom scrolling, but like, Doom scrolling. It’s funny, trust me.
I extracted bits from Chris’ cool project to focus on the damage animation itself. The red flash is done in HTML and CSS. First, we create a full screen overlay:
Note that it’s not display: none. It’s much harder to animate that as we have to wait until the animation is completed to apply it. That’s because display isn’t animatable. It’s doable, just annoying.
To flash it, we’ll apply a class that does it, but only temporarily.
The next bit calls the function that does the damage flash. Essentially it tracks the current scroll position, and if it’s past the nextDamagePosition, it will red flash and reset the next nextDamagePostition one full screen height length away.
If you want to see all that, I’ve abstracted it into this Pen:
Google Analytics works by putting a client-side bit of JavaScript on your site. Netlify Analytics works by parsing server logs server-side. They are not exactly apples to apples, feature-wise. Google Analytics is, I think it’s fair to say, far more robust. You can do things like track custom events which might be very important analytics data to a site. But they both have the basics. They both want to tell you how many pageviews your homepage got, for instance.
There are two huge things that affect these numbers:
Client-side JavaScript is blockable and tons of people use content blockers, particularly for third-party scripts from Google. Server-side logs are not blockable.
Netlify doesn’t filter things out of that log, meaning bots are counted in addition to regular people visiting.
So I’d say: Netlify probably has more accurate numbers, but a bit inflated from the bots.
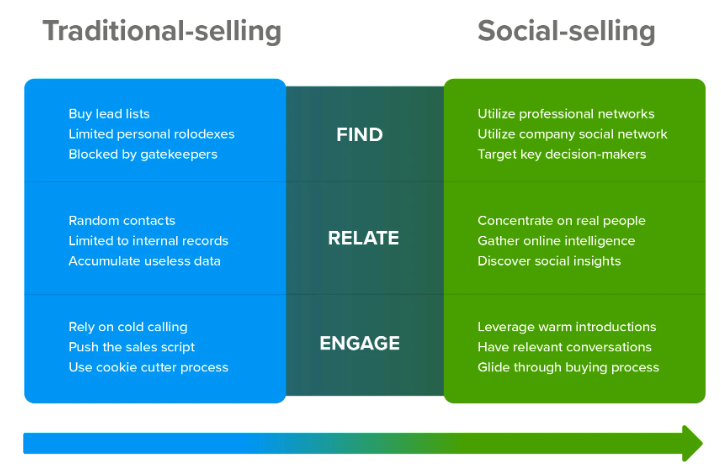
The transition from the traditional method of selling to the modern (digital) method has been incredible. Social-selling has overcome all the shortcomings of the traditional set-up. There are three aspects where traditional selling fell short;
Generating leads
Usually, the primitive selling included fetching information of their leads from exhaustive Rolodex and buying them from multiple sources. Contrary to that, the social-selling set-up has an endless list of clients that you can approach without shelling out extra money.
Personalized Prospecting
Gone are the days of cold-calling and mass e-mailing. Today, your prospects won’t attend a sales call unless you’re very persuasive. Social-selling overcomes this problem by giving the sales professionals a chance to perform enough groundwork before approaching their leads. You have an added advantage of striking a conversation with something mutual and interesting.
Sky’s The Limit
When it comes to social selling, there are no shackles that can hold you behind anymore. You have access to abundant information about each of your prospects, you have plenty of time to perform research, and you can create long-lasting connections.
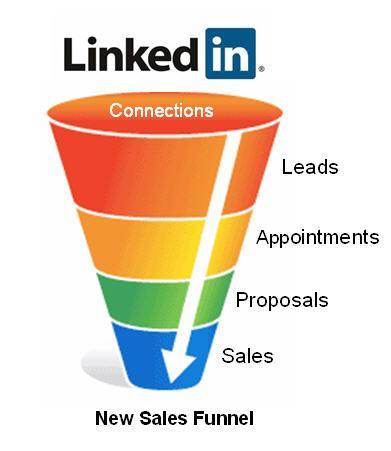
You can now infer what Social selling stands for! It is the art of pitching your product or services via multiple social media channels. It is different from marketing in various aspects and requires a personal effort to reach out to the various leads and guide them through the conversion process. Just like marketing has a funnel to define a customer’s journey, sales have a funnel too. The difference is that in marketing you motivate people, in sales you pretty-much guide your prospect to buy your products by perfectly times sales follow-ups and constant touch.
So, the what and why part of the question is clear, now let’s look at the How part of it!
Social selling happens via multiple social media channels. Be it Facebook or LinkedIn or others. As a marketer, you must understand the benefit of each social media platform for each segment, i.e., B2B, B2C, or C2C. LinkedIn is the most desirable platform for B2B sales due to its efficiency and accuracy.
With a large nexus of professional connections, LinkedIn allows you to make further connections based on multiple filters. So for sales professionals, LinkedIn lead generation is a blessing in disguise. As mentioned earlier, Social selling works on the shortcomings of the traditional set-up. The most challenging part of it was finding prospects and maintaining contact with them as a part of your customer retention process. LinkedIn simplifies this process by allowing you easy access to a plethora of people at once.
After understanding the basic questions about social selling, let’s look at how LinkedIn has transformed this new form of selling in its style.
How Has LinkedIn Simplified Social Selling?
1. A Wide Professional Nexus and Easy Outreach
From fresh graduates to professionals at the peak of their career, everybody is on LinkedIn. You will find clear segments of the people on LinkedIn, and as sales professionals, you must make a judgment call about which segment to target?
Another thing that has changed from the traditional set-up is the ease of outreaching your prospects. Sales professionals will agree that the digital set-up has allowed them to reach multiple prospects in a given time-frame, hassle-free!
But let’s talk about how LinkedIn has simplified the process?
In comparison to other social media platforms, LinkedIn allows you to scan through a plethora of prospects. It does so by categorizing leads into 1st, 2nd, and 3rd of your connections; this way, most lead profiles that you come across, on LinkedIn, are somehow related to your current connections. And this gives you an added advantage of mutual connections!
2. Lead Information
Each LinkedIn profile is an information haven for any sales professional. Remember when cold-calling was the way of selling?
Remember the many unanswered calls, abruptly hung-up calls, and banters about the call. The shift from traditional to digital sales has eliminated all of that and has given sales professionals a chance to prospect with abundant information.
Whenever you navigate to a lead’s profile, you’ll see a few sections which have information about their interests, achievements, and skills. Such information allows you to create a plan-of-action with the leads with similar interests and skills, and LinkedIn lead generation service is a great way to find leads that might show interest in your product.
3. Easy Mapping Of Customer Journey
Very similar to marketing, sales professionals can map a customer’s journey via a sales funnel. LinkedIn selling helps you understand the preferences of your leads and their interests, and with that, you can curate a sales funnel for similar leads.
It is safe to say that LinkedIn selling is a data-driven version of selling, which will account for higher sales. According to stats derived by LinkedIn, the platform has the potential to generate 45% more sales opportunities in comparison to the traditional method.
It was challenging to keep in touch with each of your customers and prospects in the traditional method of selling. Not to mention, long hours of calling and rehearsing the same script over again was also very tedious. Social selling deals with these challenges in a very modern fashion. It allows you to keep your customers in the loop about your company’s products or services, new offers or discounts, and other important information. All you have to do is post them on multiple social media channels, and Voila!
On the same lines, customers are also at the liberty of reaching out to you in case of any query. The query could be post-sales or pre-sales. So when you eliminate the long waiting hours and listening to the same recorded message over the customer care helpline, you ensure two things;
You don’t lose out on an existing customer or a potential customer, and
You don’t have to shell out too much money on post-sales processes.
Clear Your Remaining Doubts With Facts!
According to LinkedIn, there are four elements of social selling, and each of these elements is responsible for driving sales into your company. Let’s understand how it has simplified the process by looking at a few stats by Oberlo;
There are over 30 Million companies listed on LinkedIn
52% of the buyers state that they consider LinkedIn as the most influential channel for researching a product.
57% of LinkedIn traffic comes from mobile users. So sales professionals do not need a brick and mortar set-up to drive more sales.
It is the second-most popular social media platform among all the B2B marketers
LinkedIn stands as one of the most prominent platforms for Social-selling. So If you’re a sales professional, you know where to generate promising leads.